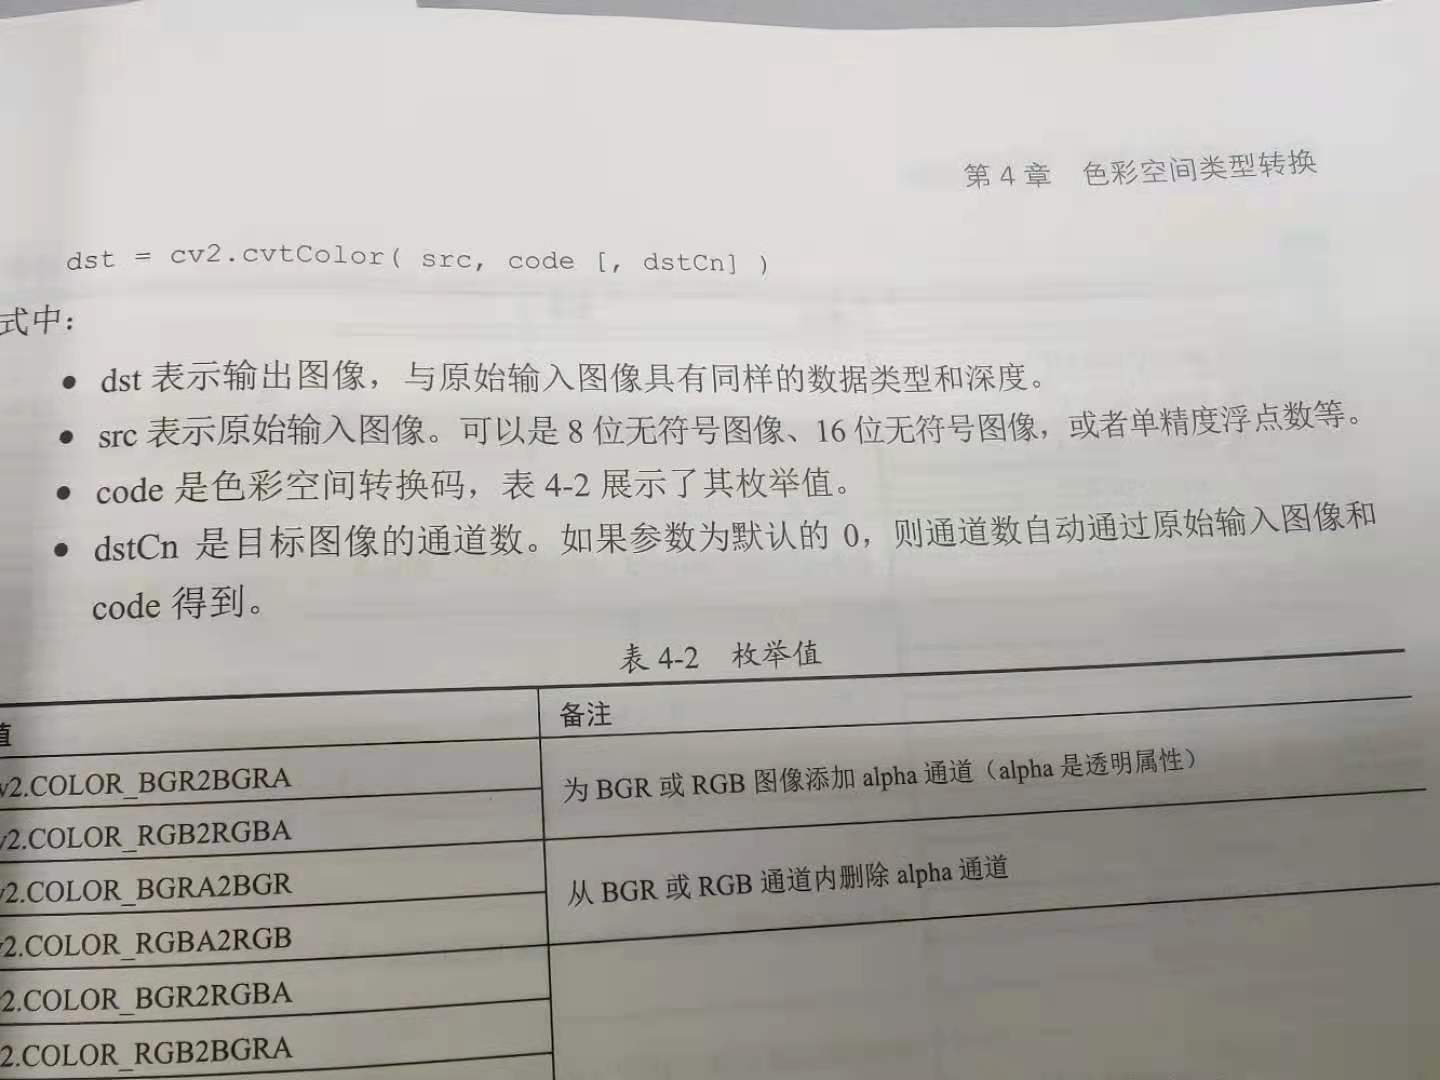
© Fu Xianjun. All Rights Reserved. Today, Xiao Zhao took you into the third part of openCV, image color is used for geometric transformation. The case still passed our little Fu teacher, a man who works day and night for us!
preface
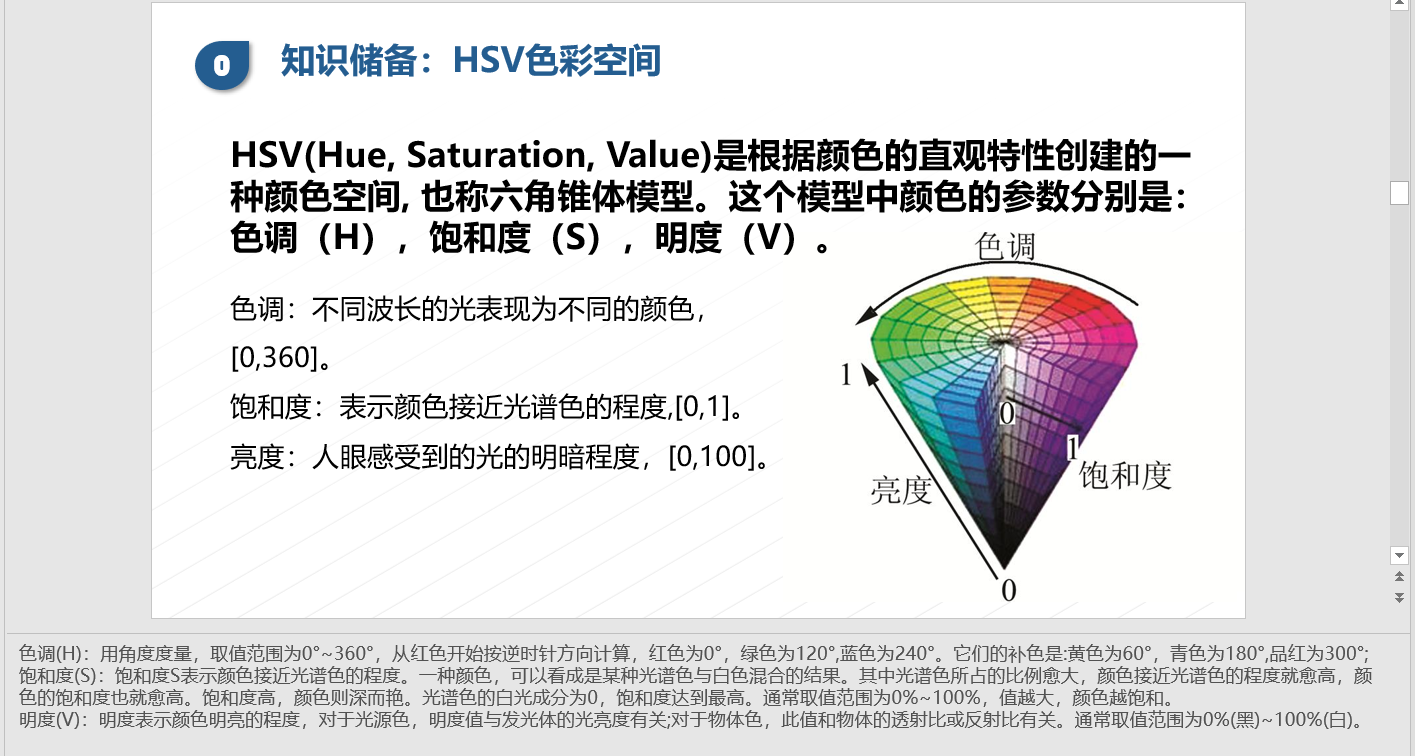
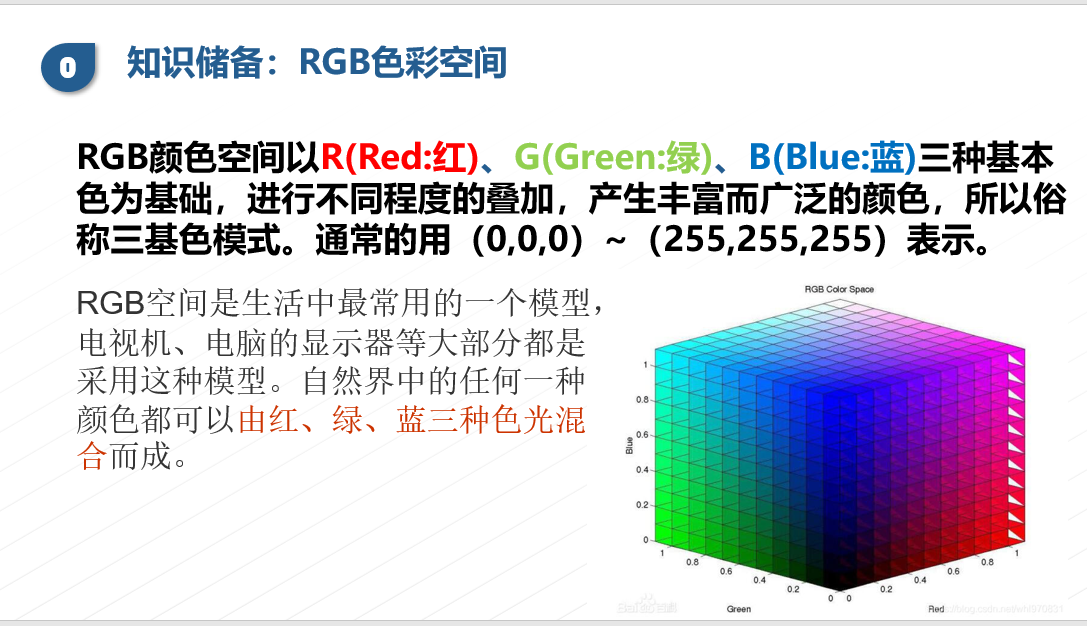
Common color spaces can include GRAY color space, XYZ color space, HVS color space, etc. next, I will take you into color type conversion.
Tip: the following is the main content of this article. The following cases can be used for reference
1, Why convert image colors?
Because for computers, image type conversion is often required when image processing, which provides necessary conditions for realizing a specific processing. Let's explain several common color types.
2, Several common type conversions
1. Import into warehouse (code directly without much talk)
The code is as follows (example):
import cv2
import numpy as np
2. Read in data
The code is as follows (example):
#---------Read picture--------#
img=cv2.imread('pig.jpg')
#-------Color conversion----------#
rgb=cv2.cvtColor(img,cv2.COLOR_BGR2RGB)
bgr=cv2.cvtColor(rgb,cv2.COLOR_RGB2BGR)
gray=cv2.cvtColor(rgb,cv2.COLOR_RGB2GRAY)
graybian=cv2.cvtColor(gray,cv2.COLOR_GRAY2BGR)
g2h=cv2.cvtColor(img,cv2.COLOR_BGR2HSV)
#--------display picture----------#
cv2.imshow('yuantu',img)
# cv2.imshow('RGB',rgb)
# cv2.imshow('bgr',bgr)
# cv2.imshow('gray',gray)
# cv2.imshow('graybian',graybian)
cv2.imshow('g2h',g2h)

cv2.waitKey(0)
cv2.destroyAllWindows()
The code effect is shown below
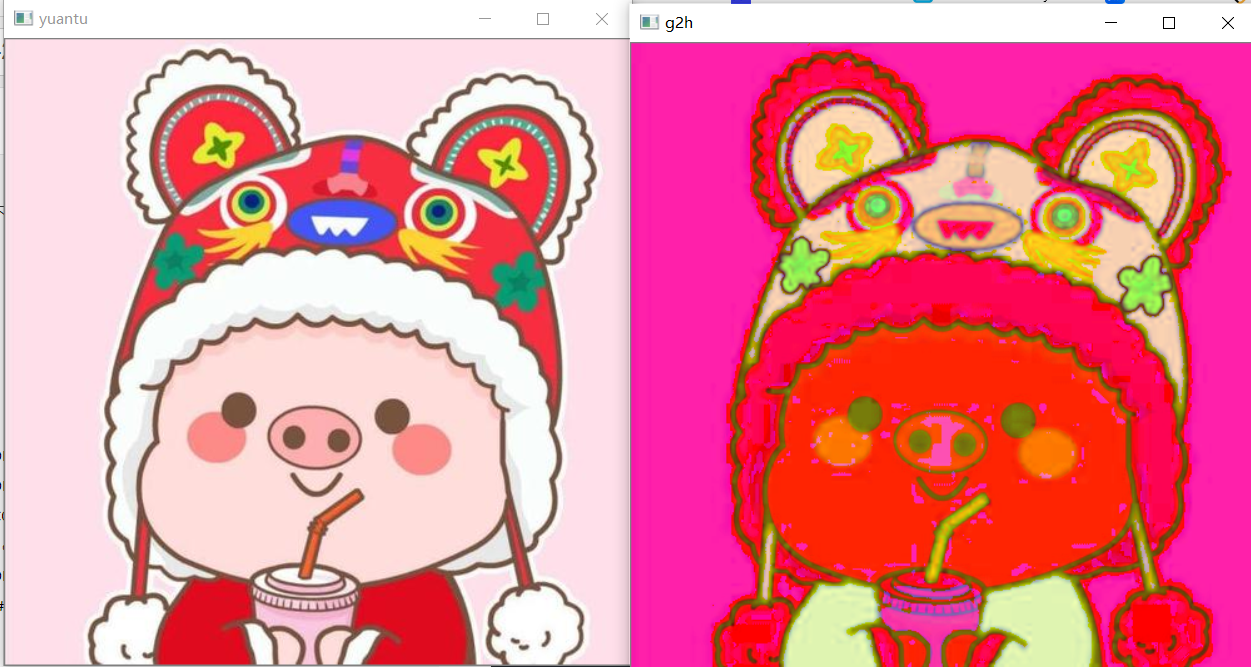
Warm tip: the main transformation format is the returned name = CV2 Cvtcolor (original image, color conversion code)
3. An example of image type HSV (many can be seen on the HSV table)
The code is shown below
import cv2
import numpy as np
jianzhi=cv2.imread('jz.jpg')
cv2.imshow('jianzhi',jianzhi)
hsv=cv2.cvtColor(jianzhi,cv2.COLOR_BGR2HSV)
cv2.imshow('hsv',hsv)

lowerb_hsv=np.array([0,43,46])
upperb_hsv=np.array([10,255,255])
mask=cv2.inRange(hsv,lowerb_hsv,upperb_hsv)
r1=cv2.bitwise_and(jianzhi,jianzhi,mask=mask)


lowerb_hsv=np.array([156,43,46])
upperb_hsv=np.array([180,255,255])
mask=cv2.inRange(hsv,lowerb_hsv,upperb_hsv)
r2=cv2.bitwise_and(jianzhi,jianzhi,mask=mask)

r3=r1+r2
cv2.imshow('red1',r1)
cv2.imshow('red2',r2)
cv2.imshow('red3',r3)
cv2.waitKey(0)
cv2.destroyAllWindows()
The code effect is shown below

Warm tip: in fact, the size of hsv parameters is adjusted here to display the visible image within that hsv range after computer processing
3, Some common geometric transformations (flip, scale, affine and perspective)
3.1 flip and zoom
The flip zoom code is shown below
import cv2
import numpy as np
img=cv2.imread('pig.jpg')
h,w,c=img.shape
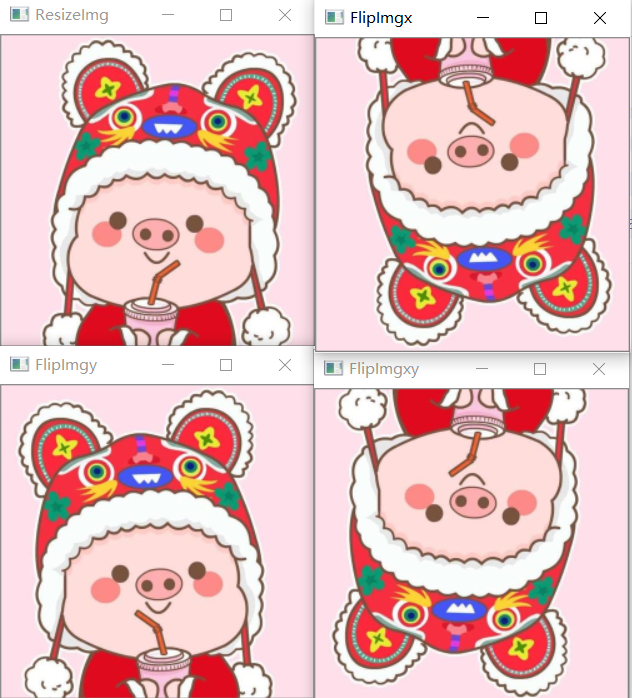
ResizeImg=cv2.resize(img,(w//2. H / / 2)) #resize is to change the size of the displayed picture. Here, it is reduced to half of the original in the same scale
FlipImgx=cv2.flip(ResizeImg,0) #The last bit of the flip function is the image change mode (0 is along the x axis)
FlipImgy=cv2.flip(ResizeImg,1) # Along the y axis
FlipImgxy=cv2.flip(ResizeImg,-1) #xy flip at the same time
# cv2.imshow('yuantu',img)
cv2.imshow('ResizeImg',ResizeImg)
cv2.imshow('FlipImgx',FlipImgx)
cv2.imshow('FlipImgy',FlipImgy)
cv2.imshow('FlipImgxy',FlipImgxy)
cv2.waitKey(0)
cv2.destroyAllWindows()
The code effect is shown below
3.2 affine and Perspective
The affine code is shown below
import cv2
import numpy as np
img=cv2.imread('pig.jpg')
h,w,c=img.shape
x=100
y=200
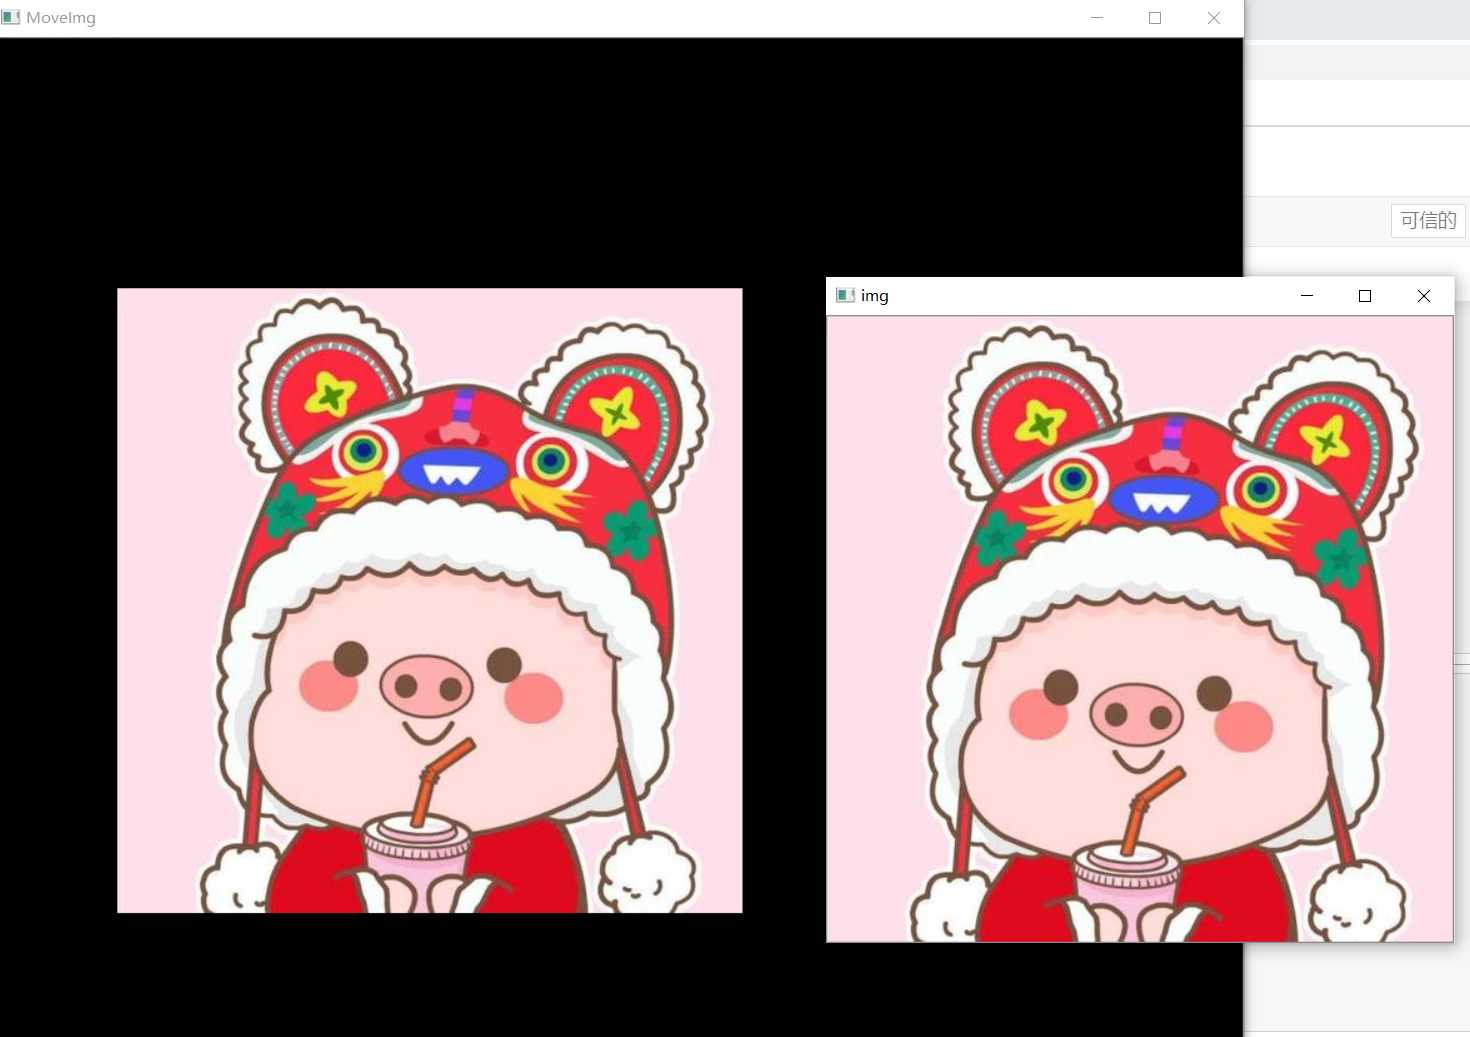
M=np.float32([[1,0,x],[0,1,y]]) # M represents a transformation matrix created with the numpy function
MoveImg=cv2.warpAffine(img,M,(w*2,h*2)) #Affine position is x=100, y=200 in a rectangle whose size is twice the length and twice the width of the original graph
cv2.imshow('img',img)
cv2.imshow('MoveImg',MoveImg)
cv2.waitKey(0)
cv2.destroyAllWindows()
The code effect is shown below
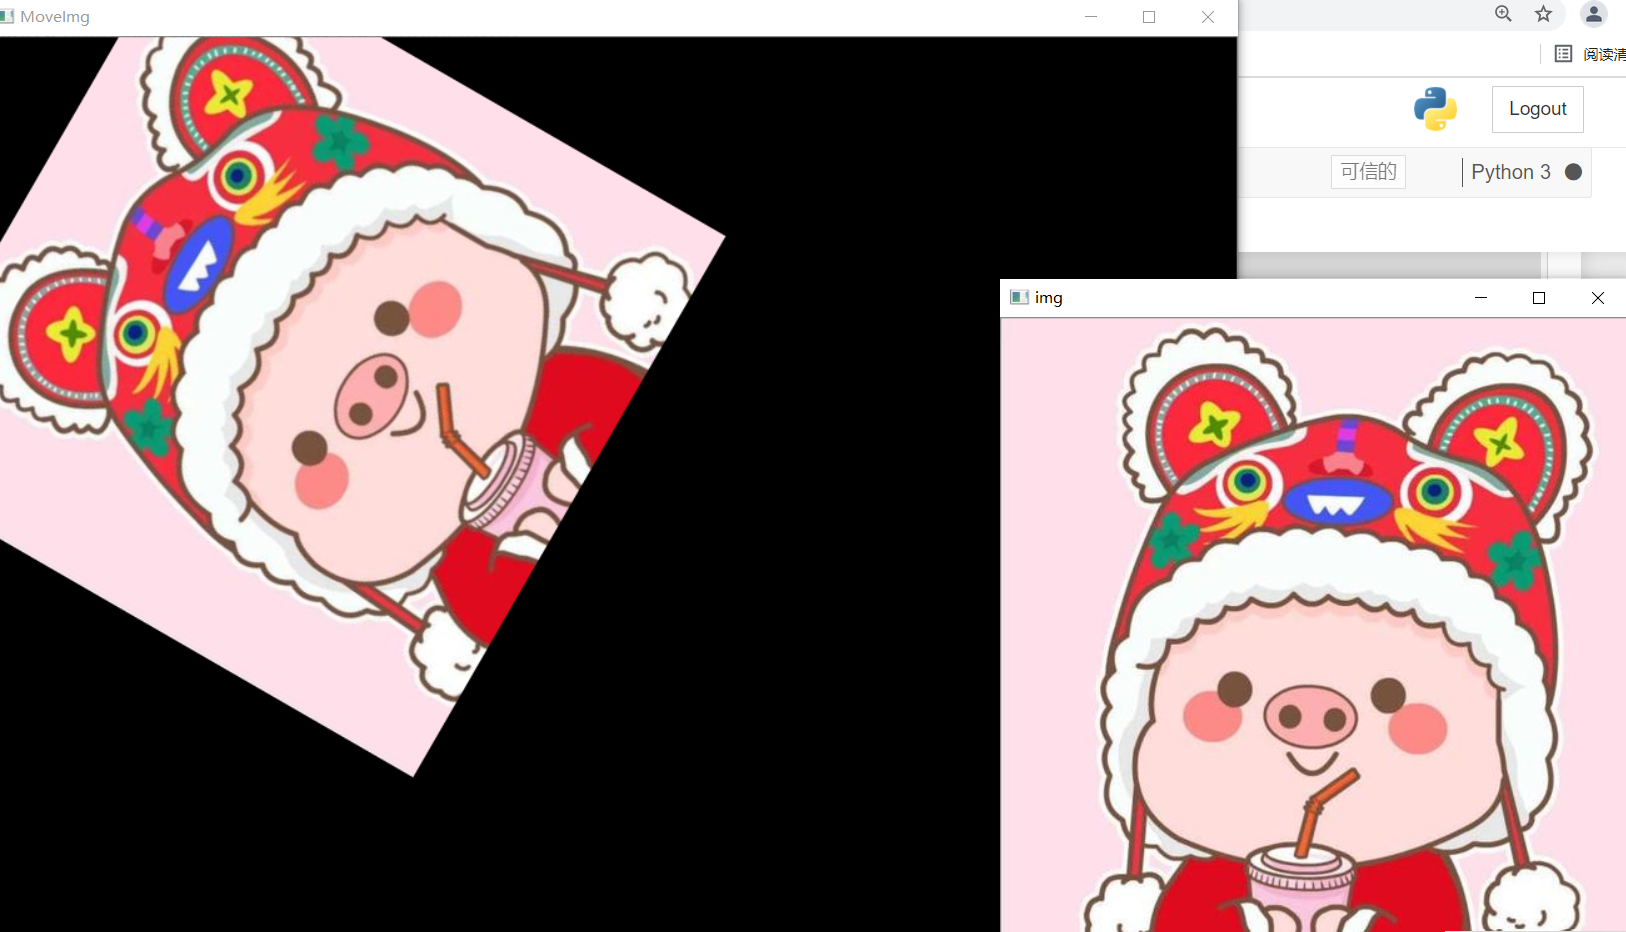
The perspective code is shown below
import cv2
import numpy as np

img=cv2.imread('pig.jpg')
h,w,c=img.shape

M=cv2.getRotationMatrix2D((w/2,h/2),60,1)
RotateImg=cv2.warpAffine(img,M,(w*2,h*2))

cv2.imshow('img',img)
cv2.imshow('MoveImg',RotateImg)
cv2.waitKey(0)
cv2.destroyAllWindows()
The code effect is shown below
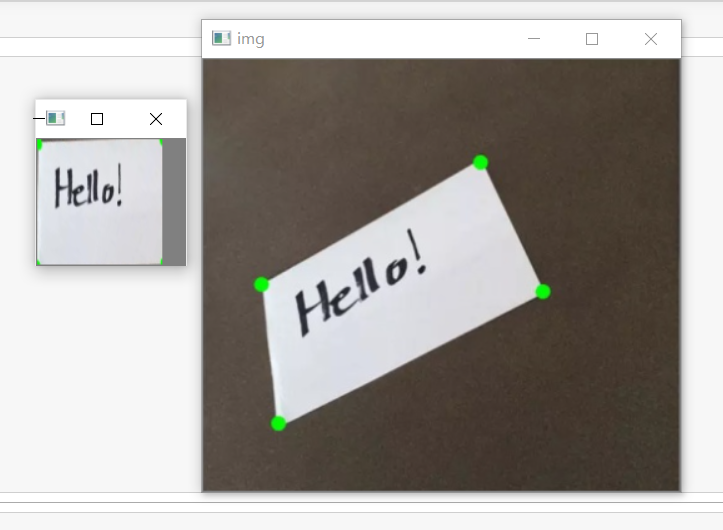
3.3 small tirck straightened and skewed image
The code is shown below
import cv2
import numpy as np

img=cv2.imread('lianxi.png')
h,w,c=img.shape

pst_o=np.float32([[46,178],[222,83],[61,290],[271,188]]) # Here we use an IrfanView to find the positions of the four tops of the crooked picture
pst_d=np.float32([[0,0],[100,0],[0,100],[100,100]])

M=cv2.getPerspectiveTransform(pst_o,pst_d)
dst=cv2.warpPerspective(img,M,(100,100))

cv2.imshow('img',img)
cv2.imshow('dst',dst)
cv2.waitKey(0)
cv2.destroyAllWindows()
The code effect is shown below