Preface
Hi, the little buddy who likes to practice every day must know the Button in the last article. So today we bring you the ImageView control. What kind of sparks can this control collide with Button? Don't say much. Let's start learning as soon as possible.~
brief introduction
Structure of ImageView
public class ImageView
extends View
java.lang.Object
↳ android.view.View
↳ android.widget.ImageView
Known direct subclasses:
ImageButton, QuickContactBadge
Known indirect subclasses:
ZoomButton
ImageView (Image View), directly inherited from the View class, its main function is to display pictures, in fact, it can not only be used to display pictures, any Drawable object can use ImageView to display. ImageView can be applied to any layout, and Android provides some operations for scaling and shading.
I. Simple Use
Let's briefly introduce the use of ImageView (in this example, you need to use an ic_luffy.png image and put it in the drawable folder under the res folder):
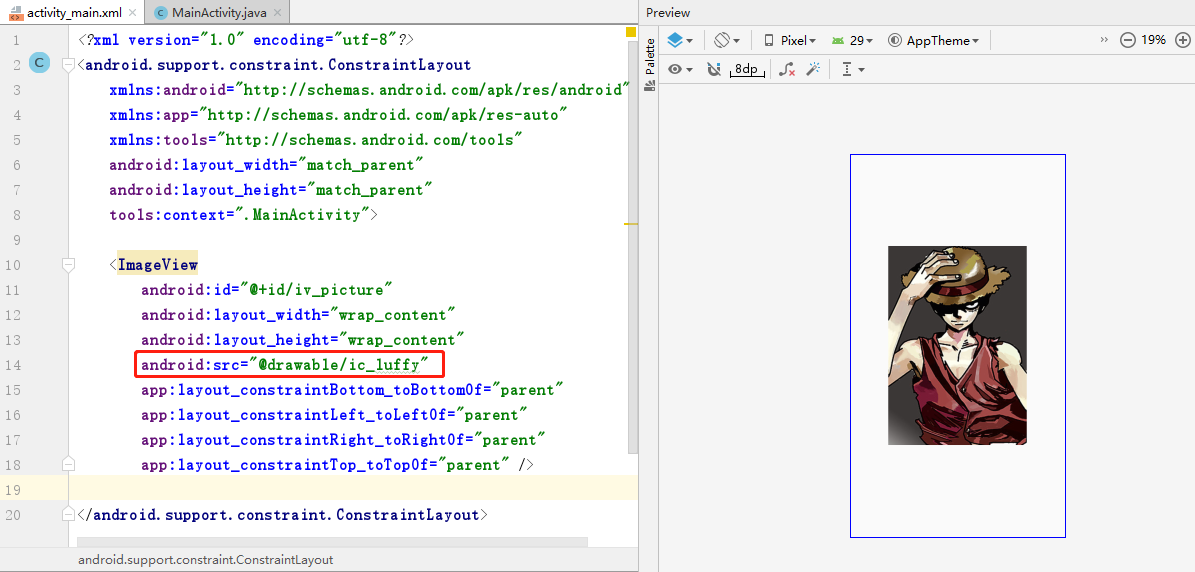
- android:src: Set the ID of the Drawable object displayed by ImageView.
And we can also set the image through the code, and the result after running is the same as in the above:
/**
 * @author: Look at flowers at the bottom
 * date: 2019 16 August 2000
 * description: ImageView Use
 */
public class MainActivity extends AppCompatActivity {

    @Override
    protected void onCreate(Bundle savedInstanceState) {
        super.onCreate(savedInstanceState);
        setContentView(R.layout.activity_main);
        ImageView ivPic = findViewById(R.id.iv_picture);
        ivPic.setImageResource(R.drawable.ic_luffy);
    }
}
Some of my little friends may be a little curious after reading it. I just write a Layout and set an android: backgroundattribute to display the picture. Why use ImageView specifically? So I have to talk about the difference between android:src attribute and android: backgrounds:
In the API document, we found that ImageView has two properties that can set images (any control inherited from View contains backgroundproperty). They are: src and background.
Common sense:
(1) android:background usually refers to the background, while android:src refers to the content!!
(2) When filling in an image with android:src, the image is filled directly according to the size of the image, without stretching.
Filling in an image with android: backgroundwill stretch according to the width given by ImageView
Let's look at an example:
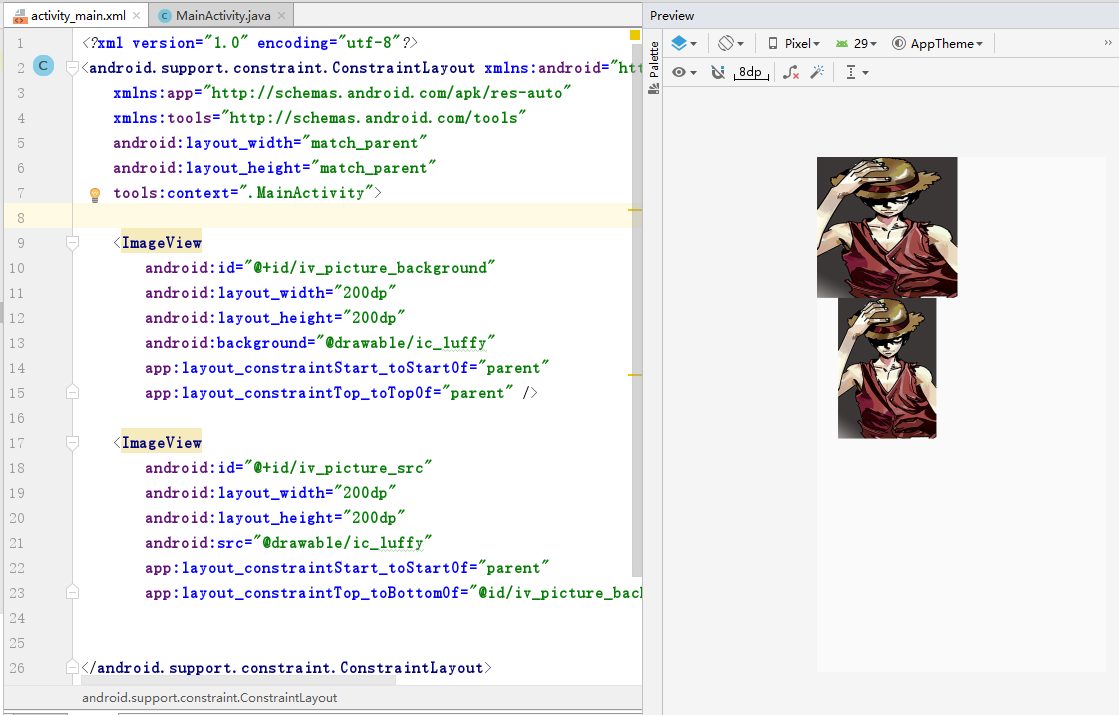
We set the width attribute of the picture to a fixed value and add the background attribute to the picture. We can intuitively find that the first picture has obvious stretching, while the second picture has not changed, which verifies the correctness of the above conclusion.
ImageView also has many interesting attributes:
- android:maxHeight: Set the maximum height of ImageView;
- android:maxWidth: Set the maximum width of ImageView;
- Android: Adjust View Bounds: Setting whether ImageView adjusts its boundaries to maintain the aspect ratio of the displayed image requires the combination of android:maxWidth, android:maxHeight or it will not work if used alone, and setting layout_width and layout_height as wrap_content;
- android:scaleType: Sets how the displayed image scales or moves to fit the size of the ImageView.
For the android:scaleType attribute, because of the effect of the image in the ImageView, the following attribute values can be selected:
- Matrix: Scale in matrix mode.
- fitXY: Scale horizontally and vertically independently to fit the Image View;
- Fit Start: Scale the image in aspect ratio and place the image in the upper left corner of ImageView.
- Fit Center: Keep the aspect ratio of the zoom image and place the image in the center of the ImageView after zooming.
- Fit End: Keep the aspect ratio of the zoom image and place the image in the lower right corner of ImageView after zoom is completed.
- Center: Place the image in the center of the Image View, but don't zoom in or out.
- Center Crop: Keep the aspect ratio of the image zoomed so that the image can completely cover the ImageView.
- Center Inside: Keep the aspect ratio of the image zoomed so that ImageView can fully display the image;
The above several attributes of the small edition will not give you a specific demonstration, I hope you can try it independently.
II. Loading pictures in SD cards
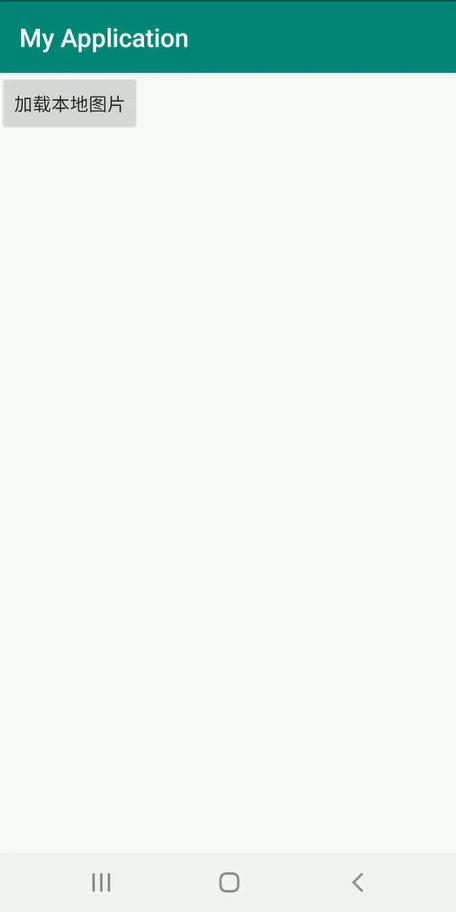
In the above, just a brief introduction to loading the image in the resource file and some basic properties of ImageView. Next, we will show you how to load the image in SD card, and we consider that some of our small partners are interested in Android, but they are using their own mobile phones to debug, so how to make it work? Photos from your mobile phone are displayed in the actual project, so keep looking down!
First of all, we developers need to know that from Android 6.0(API 23), the system permissions have changed a lot. Before users installed APP, they just listed the permissions they needed to use to inform users (just declare them in Android Manifest. xml). These permissions can be accessed after the installation of APP. Starting with 6.0, some sensitive permissions (permissions are mainly divided into four levels: normal, dangerous, signature and signatureOrSystem. Normally, we only need to know the first two, namely normal permissions and dangerous permissions). It needs to apply dynamically when it is used, and users can choose to deny authorization access to these privileges, which have been granted, and users can also go to the APP settings page to close the authorization. This improves the security of users and prevents some applications from accessing user data maliciously, but it also increases a lot of work for development. Without adapting this piece, APP will easily crash when accessing permissions.
package com.xmkh.imagetest;

import android.Manifest;
import android.content.pm.PackageManager;
import android.net.Uri;
import android.os.Build;
import android.os.Bundle;
import android.os.Environment;
import android.support.annotation.NonNull;
import android.support.v4.app.ActivityCompat;
import android.support.v4.content.ContextCompat;
import android.support.v7.app.AppCompatActivity;
import android.view.View;
import android.widget.Button;
import android.widget.ImageView;

import java.io.File;

/**
 * @author: Look at flowers at the bottom
 * date: 2019 16 August 2000
 * description: ImageView Use
 */
public class MainActivity extends AppCompatActivity {

    /**
     * Used for request value usage
     */
    private final int PERMISSION_REQUEST = 100;

    /**
     * ImageView for loading pictures
     */
    private ImageView ivPic;

    /**
     * Click to load the picture
     */
    private Button btnLoad;

    @Override
    protected void onCreate(Bundle savedInstanceState) {
        super.onCreate(savedInstanceState);
        setContentView(R.layout.activity_main);
        //Because Xiaobian uses mobile phones with Android version 6.0 or more, it needs to apply for permission dynamically.
        //Mobile phones under Android 6.0 only need to write permissions in Android Manifest. xml.
        if (Build.VERSION.SDK_INT >= 23) {
            //Array of permissions applied
            String[] mPermissionList = new String[]{
                    //SD Card Write Permission
                    Manifest.permission.WRITE_EXTERNAL_STORAGE,
                    //SD Card Read Permission
                    Manifest.permission.READ_EXTERNAL_STORAGE,
                    //Access phone status
                    Manifest.permission.READ_PHONE_STATE,
                    //Access to Camera Rights
                    Manifest.permission.CAMERA
            };
            //The following int values are all returned values after applying for permission, 0 indicates consent (PackageManager.PERMISSION_GRANTED) and - 1 indicates rejection (PERMISSION_DENIED)
            //In order to read the data from the SD card, we need a point of agreement.
            int checkSPermission = ContextCompat.checkSelfPermission(this,
                    Manifest.permission.WRITE_EXTERNAL_STORAGE);
            int checkSPermission2 = ContextCompat.checkSelfPermission(this,
                    Manifest.permission.READ_EXTERNAL_STORAGE);
            int checkSPermission3 = ContextCompat.checkSelfPermission(this,
                    Manifest.permission.READ_PHONE_STATE);
            int checkSPermissionCAMERA = ContextCompat.checkSelfPermission(this,
                    Manifest.permission.CAMERA);

            //Determine whether the user has allowed us the permissions we need
            if ((checkSPermission != PackageManager.PERMISSION_GRANTED)
                    || (checkSPermission2 != PackageManager.PERMISSION_GRANTED)
                    || (checkSPermission3 != PackageManager.PERMISSION_GRANTED)
                    || (checkSPermissionCAMERA != PackageManager.PERMISSION_GRANTED)) {
                ActivityCompat.requestPermissions(this, mPermissionList, PERMISSION_REQUEST);
            }
        }

        ivPic = findViewById(R.id.iv_picture);
        btnLoad = findViewById(R.id.btn_load);
        btnLoad.setOnClickListener(new View.OnClickListener() {

            /**
             * Before clicking, you should decide again whether the user is authorized or not.
             * But in order to avoid repeating the above code, we omitted the small edition, but the small partner must write in the actual development!!!!
             * @param view
             */
            @Override
            public void onClick(View view) {
                //Environment. getExternal Storage Directory (). getAbsolutePath () method is the absolute path to obtain a mobile SD card
                //The absolute path is the top folder of your SD card (like a C D that has not been double-clicked).
                //And / xmkh denotes the name of a folder (equivalent to a folder on a C disk).
                //And / xmkh.png represents the local map you are loading (equivalent to a picture in the xmkh folder on the C disk)
                String path = Environment.getExternalStorageDirectory().getAbsolutePath() + "/xmkh/xmkh.png";
                //Uri, as we mentioned in our previous article ContentProvider, forgotten buddies can review it~
                Uri uri = Uri.fromFile(new File(path));
                //Set paths through setImage URI
                ivPic.setImageURI(uri);
            }
        });
    }

    /**
     * Request permission callback method (interested partners can try to write something in this method for themselves, do not understand can leave us a message oh ~)
     *
     * @param requestCode  Request value (PERMISSION_REQUEST)
     * @param permissions  Corresponding to the mPermissionList we wrote above
     * @param grantResults An array of results returned by requesting permissions in the corresponding mPermissionList
     *                     (The length of the array is the same as that of the mPermissionList. The contents of the array are PERMISSION_GRANTED or PERMISSION_DENIED and indicate whether the corresponding permissions are opened or not.
     */
    @Override
    public void onRequestPermissionsResult(int requestCode, @NonNull String[] permissions, @NonNull int[] grantResults) {
        super.onRequestPermissionsResult(requestCode, permissions, grantResults);
    }

}
The results are as follows:

3. Open the album and load the pictures
Looking at a demo display above, some of my friends said it was too troublesome. Do I have to find the path of each picture before I can load it? And some of our friends can use their mobile phones, albums do not know which folder, it doesn't matter, then we will teach you how to select photos from the album and load them through ImageView!!
btnLoad.setOnClickListener(new View.OnClickListener() {

            /**
             * Do remember to judge authority again!!
             * @param view
             */
            @Override
            public void onClick(View view) {
                //Call the gallery to get all local pictures
                Intent intent = new Intent(Intent.ACTION_GET_CONTENT);
                //The first parameter is Uri, which is to find all the pictures in the SD card according to Uri by ContentProvider, the four components we mentioned earlier.
                //It's just that the system encapsulates a method that we don't need to write by ourselves.
                intent.setDataAndType(MediaStore.Images.Media.EXTERNAL_CONTENT_URI,
                        "image/*");
                //INTENT_MEDIA_REQUEST_CODE is the identification code we need in the onActivityResult method to identify whether the data returned from the album is the same as PERMISSION_REQUEST.
                startActivityForResult(intent, INTENT_MEDIA_REQUEST_CODE);
            }
        });
/**
     * @param requestCode We use the second parameter in startActivityForResult to distinguish which Intent returns
     * @param resultCode  Commonly used return values are RESULT_OK (success) and RESULT_CANCELED (cancellation or failure)
     * @param data        Return data
     */
    @Override
    protected void onActivityResult(int requestCode, int resultCode, Intent data) {
        super.onActivityResult(requestCode, resultCode, data);
        if (resultCode == RESULT_OK) {
            switch (requestCode) {
                case INTENT_MEDIA_REQUEST_CODE:
                    if (data != null) {
                        //Display the picture according to the Uri returned
                        ivPic.setImageURI(data.getData());
                    }
                    break;
                default:
                    break;
            }
        }
    }
For the sake of efficiency, we show the main code, the other parts of the code are still unchanged, the small partners can safely try, the effect is as follows:
In fact, ImageView has many attributes and methods:
Setting Transparency
There are several ways to set transparency in ImageView:
- android:alpha // 0f~1f
- setAlpha(float alpha); // 0f~1f
- SetAlpha (int alpha); // 0-255, obsolete
- setImageAlpha(int alpha); // API>=16
Setting Pictures
- setlmageBitmap(Bitmap bm): Use the Bitmap bitmap to set the image displayed by the Image View.
- setlmageDrawable(Drawable drawable): Use the Drawable object to set the image displayed by the ImageView.
epilogue
Other attributes will depend on you to explore, or join our deduction group, you want to know the content will be answered, which is all the important content we want to explain today, the next chapter is more exciting, good title oh, today is just the first chapter of ImageView.~
PS: If there are any unknown partners, please join our QQ technology exchange group: 892271582. There are all kinds of gods answering the questions that the small partners encounter. Our Wechat group will also meet you soon. I hope you will join us enthusiastically at that time.~~