Original: Click to visit
Now more and more software has begun to use the immersion status bar. Here are two ways to use the immersion status bar.
Be careful! Immersive status bar only supports Android Version 4.4 and above
Status Bar: Gradient color on 4.4, transparent on 5.0. This simulator demonstrates 4.4.
Effect map: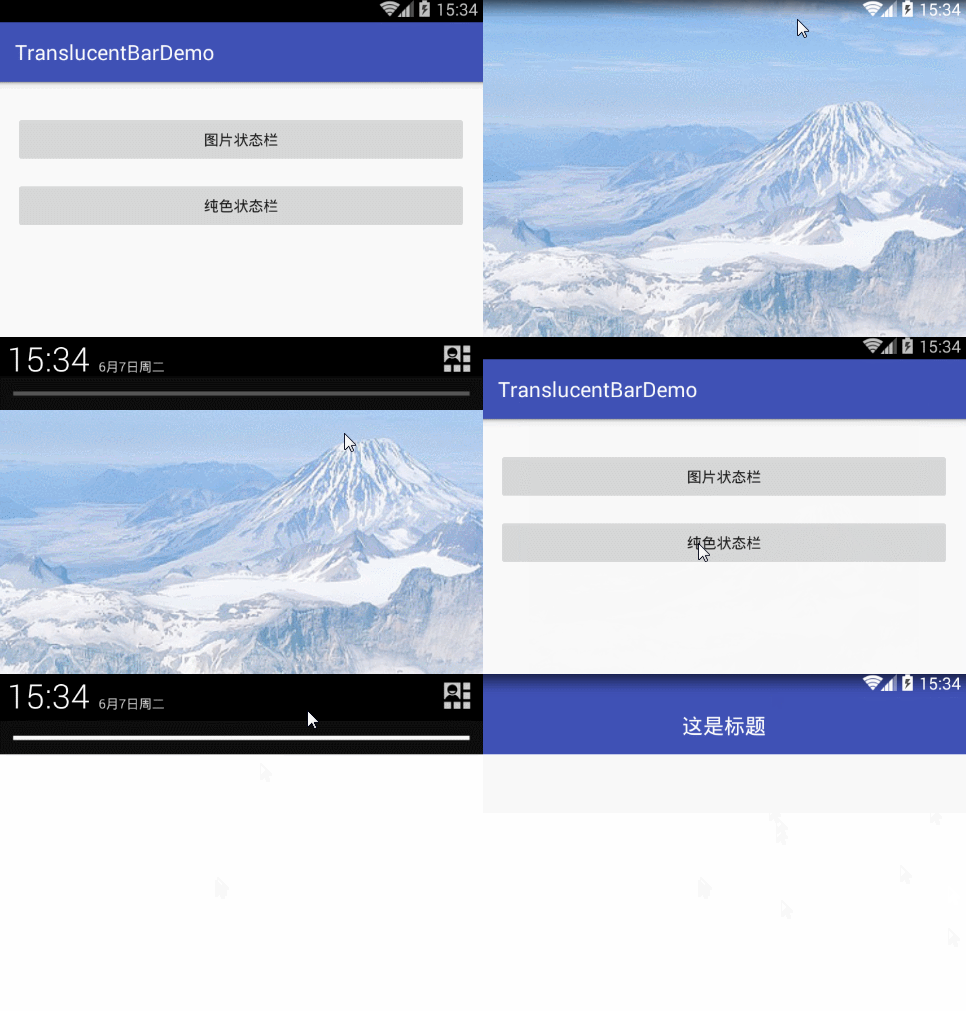
Be careful! The difference between the two methods is as follows:
First, it is easy to use the color of the background of the current activity layout file for the top bar, but there is also a problem that if there is a virtual navigation key at the bottom, the background of the navigation key is the same as the color at the top, for example:
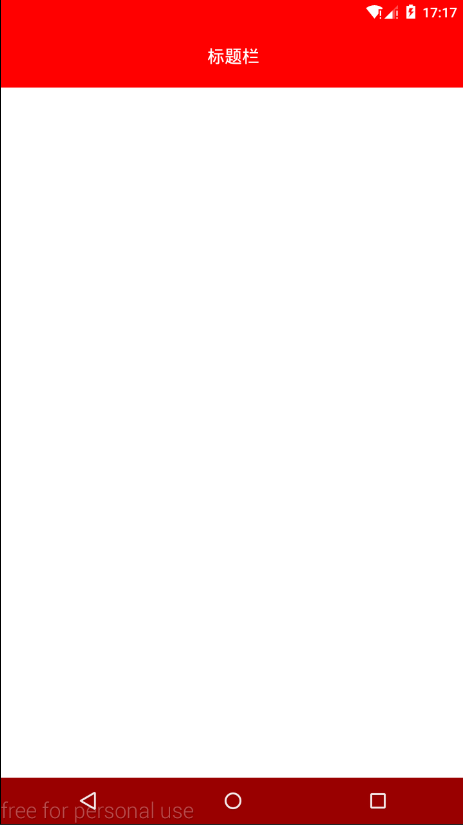
The second one is to display by setting the color of the top column, which can solve the shortcomings of the first one, such as:

The first method of use is:
First, under the values, values-v19, values-v21 folders, styles.xml sets up a Translucent System Bar-style Theme, as follows:
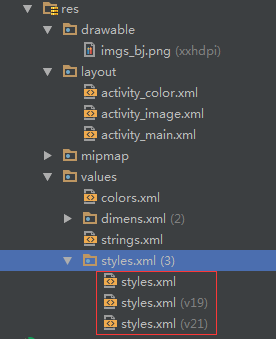
values/style.xml:
<style name="TranslucentTheme" parent="AppTheme">
    <! - Run on Android 4.4 and follow the theme of the system directly.
</style>- 1
- 2
- 3
- 1
- 2
- 3
values-v19/style.xml:
<style name="TranslucentTheme" parent="Theme.AppCompat.Light.DarkActionBar">
    <item name="android:windowTranslucentStatus">true</item>
    <item name="android:windowTranslucentNavigation">true</item>
</style>- 1
- 2
- 3
- 4
- 1
- 2
- 3
- 4
values-v21/style.xml:
<style name="TranslucentTheme" parent="Theme.AppCompat.Light.DarkActionBar">
    <item name="android:windowTranslucentStatus">false</item>
    <item name="android:windowTranslucentNavigation">true</item>
    <! - Android 5.x needs to be transparent at first, otherwise the navigation bar will show the default light gray color of the system - > Android 5.x needs to be transparent at first.
    <item name="android:statusBarColor">@android:color/transparent</item>
</style>- 1
- 2
- 3
- 4
- 5
- 6
- 1
- 2
- 3
- 4
- 5
- 6
Second, to configure the activity of the immersive status bar in the manifest file to add theme
<activity android:name=".ImageActivity" android:theme="@style/TranslucentTheme" />
<activity android:name=".ColorActivity" android:theme="@style/TranslucentTheme" />- 1
- 2
- 1
- 2
Third, add "android:fitsSystemWindows=" true"to the layout file of Activity, but we need to distinguish whether the background is an image or a solid color:
1. When the background is a picture, the layout can be written as follows:
<?xml version="1.0" encoding="utf-8"?>
<RelativeLayout xmlns:android="http://schemas.android.com/apk/res/android"
    android:layout_width="match_parent"
    android:layout_height="match_parent"
    android:background="@drawable/imgs_bj"
    android:fitsSystemWindows="true">

</RelativeLayout>- 1
- 2
- 3
- 4
- 5
- 6
- 7
- 8
- 1
- 2
- 3
- 4
- 5
- 6
- 7
- 8
Effect:
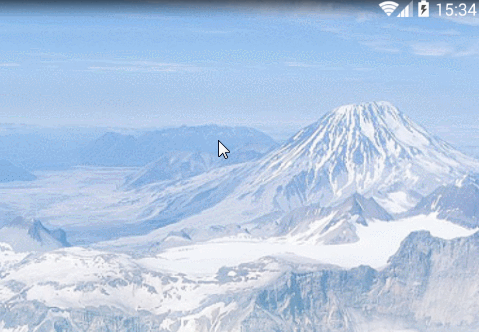
2. When the background is pure color, we need to divide the layout into two parts: heading layout and content layout. First, we set the background of the root layout as the background of the heading layout, then the background color of the heading layout can be used directly without setting the background color of the root layout, and finally the background color of the content layout is set to white.
<?xml version="1.0" encoding="utf-8"?>
<LinearLayout xmlns:android="http://schemas.android.com/apk/res/android"
    android:layout_width="match_parent"
    android:layout_height="match_parent"
    android:background="@color/colorPrimary"  //Set the background of the root layout to the desired color of "Title Layout"
    android:fitsSystemWindows="true"
    android:orientation="vertical">

    <!--Title layout-->
    <RelativeLayout
        android:layout_width="match_parent"
        android:layout_height="55dp"
        android:background="@color/color_31c27c">

        <TextView
            android:layout_width="wrap_content"
            android:layout_height="wrap_content"
            android:layout_centerInParent="true"
            android:text="This is the title."
            android:textColor="@android:color/white"
            android:textSize="20sp" />

    </RelativeLayout>

    <!--Content Layout-->
    <LinearLayout
        android:layout_width="match_parent"
        android:layout_height="match_parent"
        android:background="@android:color/white"  //Set the background of the content area to white
        android:gravity="center"
        android:orientation="vertical">

        <Button
            android:layout_marginTop="120dp"
            android:layout_width="wrap_content"
            android:layout_height="wrap_content"
            android:padding="8dp"
            android:text="display information"
            android:onClick="showMsg"
            />
    </LinearLayout>

</LinearLayout>- 1
- 2
- 3
- 4
- 5
- 6
- 7
- 8
- 9
- 10
- 11
- 12
- 13
- 14
- 15
- 16
- 17
- 18
- 19
- 20
- 21
- 22
- 23
- 24
- 25
- 26
- 27
- 28
- 29
- 30
- 31
- 32
- 33
- 34
- 35
- 36
- 37
- 38
- 39
- 40
- 41
- 42
- 43
- 1
- 2
- 3
- 4
- 5
- 6
- 7
- 8
- 9
- 10
- 11
- 12
- 13
- 14
- 15
- 16
- 17
- 18
- 19
- 20
- 21
- 22
- 23
- 24
- 25
- 26
- 27
- 28
- 29
- 30
- 31
- 32
- 33
- 34
- 35
- 36
- 37
- 38
- 39
- 40
- 41
- 42
- 43
Design sketch:

Okay, that's the whole process of the implementation of the immersive status bar, but it's also worth noting that if we have more activities, every page will be added. Android Fits System Windows= "true" is troublesome, we need to change it:
Write a base class, BaseColorActivity.class, code as follows:
public abstract class BaseColorActivity extends AppCompatActivity {

    @Override
    protected void onCreate(Bundle savedInstanceState) {
        super.onCreate(savedInstanceState);
        //Attention in this line! Look at the final description of this article!!!
        supportRequestWindowFeature(Window.FEATURE_NO_TITLE);

        setContentView(getLayoutResId());//Hand over the operation of setting layout files to inherited subclasses

        ViewGroup contentFrameLayout = (ViewGroup) findViewById(Window.ID_ANDROID_CONTENT);
        View parentView = contentFrameLayout.getChildAt(0);
        if (parentView != null && Build.VERSION.SDK_INT >= 14) {
            parentView.setFitsSystemWindows(true);
        }
    }

    /**
     * Returns the id of the current Activity layout file
     *
     * @return
     */
    abstract protected int getLayoutResId();

}- 1
- 2
- 3
- 4
- 5
- 6
- 7
- 8
- 9
- 10
- 11
- 12
- 13
- 14
- 15
- 16
- 17
- 18
- 19
- 20
- 21
- 22
- 23
- 24
- 25
- 1
- 2
- 3
- 4
- 5
- 6
- 7
- 8
- 9
- 10
- 11
- 12
- 13
- 14
- 15
- 16
- 17
- 18
- 19
- 20
- 21
- 22
- 23
- 24
- 25
Then you need to inherit the base class from the activity of the immersion status bar:
public class ColorActivity extends BaseColorActivity {

    @Override
    protected void onCreate(Bundle savedInstanceState) {
        super.onCreate(savedInstanceState);
        //There is no need to write setContentView()!
    }

    @Override
    protected int getLayoutResId() {
        //The onCreate method does not need to write setContentView(), just return the current activity layout file here!
        return R.layout.activity_color;
    }
}- 1
- 2
- 3
- 4
- 5
- 6
- 7
- 8
- 9
- 10
- 11
- 12
- 13
- 14
- 1
- 2
- 3
- 4
- 5
- 6
- 7
- 8
- 9
- 10
- 11
- 12
- 13
- 14
Then you need to immerse in the activity layout file of the status bar to omit the line android:fitsSystemWindows="true"!
The second method of use (not finished):

Write a tool class StatusBarCompat.class:
public class StatusBarCompat {

    private static final int INVALID_VAL = -1;
    private static final int COLOR_DEFAULT = Color.parseColor("#20000000");

    @TargetApi(Build.VERSION_CODES.LOLLIPOP)
    public static void compat(Activity activity, int statusColor)
    {

        //Current mobile version is 5.0 and above
        if (Build.VERSION.SDK_INT >= Build.VERSION_CODES.LOLLIPOP)
        {
            if (statusColor != INVALID_VAL)
            {
                activity.getWindow().setStatusBarColor(statusColor);
            }
            return;
        }

        //The current mobile version is 4.4
        if (Build.VERSION.SDK_INT >= Build.VERSION_CODES.KITKAT && Build.VERSION.SDK_INT < Build.VERSION_CODES.LOLLIPOP)
        {
            int color = COLOR_DEFAULT;
            ViewGroup contentView = (ViewGroup) activity.findViewById(android.R.id.content);
            if (statusColor != INVALID_VAL)
            {
                color = statusColor;
            }
            View statusBarView = new View(activity);
            ViewGroup.LayoutParams lp = new ViewGroup.LayoutParams(ViewGroup.LayoutParams.MATCH_PARENT,
                    getStatusBarHeight(activity));
            statusBarView.setBackgroundColor(color);
            contentView.addView(statusBarView, lp);
        }

    }

    public static void compat(Activity activity)
    {
        compat(activity, INVALID_VAL);
    }


    public static int getStatusBarHeight(Context context)
    {
        int result = 0;
        int resourceId = context.getResources().getIdentifier("status_bar_height", "dimen", "android");
        if (resourceId > 0)
        {
            result = context.getResources().getDimensionPixelSize(resourceId);
        }
        return result;
    }

}- 1
- 2
- 3
- 4
- 5
- 6
- 7
- 8
- 9
- 10
- 11
- 12
- 13
- 14
- 15
- 16
- 17
- 18
- 19
- 20
- 21
- 22
- 23
- 24
- 25
- 26
- 27
- 28
- 29
- 30
- 31
- 32
- 33
- 34
- 35
- 36
- 37
- 38
- 39
- 40
- 41
- 42
- 43
- 44
- 45
- 46
- 47
- 48
- 49
- 50
- 51
- 52
- 53
- 54
- 55
- 1
- 2
- 3
- 4
- 5
- 6
- 7
- 8
- 9
- 10
- 11
- 12
- 13
- 14
- 15
- 16
- 17
- 18
- 19
- 20
- 21
- 22
- 23
- 24
- 25
- 26
- 27
- 28
- 29
- 30
- 31
- 32
- 33
- 34
- 35
- 36
- 37
- 38
- 39
- 40
- 41
- 42
- 43
- 44
- 45
- 46
- 47
- 48
- 49
- 50
- 51
- 52
- 53
- 54
- 55
Usage:
In the current activity onCreate, call the method StatusBarCompat.compat:
//The second parameter is the color you want to set.
StatusBarCompat.compat(this, Color.RED);- 1
- 2
- 3
- 1
- 2
- 3
If it's a bit cumbersome to write every activity, write a base class to do this:
public class BaseActivity extends AppCompatActivity {

    @Override
    protected void onCreate(Bundle savedInstanceState) {
        supportRequestWindowFeature(Window.FEATURE_NO_TITLE);
        super.onCreate(savedInstanceState);

        StatusBarCompat.compat(this, Color.RED);
    }
}- 1
- 2
- 3
- 4
- 5
- 6
- 7
- 8
- 9
- 10
- 1
- 2
- 3
- 4
- 5
- 6
- 7
- 8
- 9
- 10
Then each activity page inherits the BaseActivity.
To be continued...
A description of the place to be noted in the code above:
Hidden system title pays attention to two points:
-
When inheriting AppCompatActivity, use:
supportRequestWindowFeature(Window.FEATURENOTITLE) -
When inheriting activity, use:
requestWindowFeature(Window.FEATURENOTITLE)