1, Download of parity
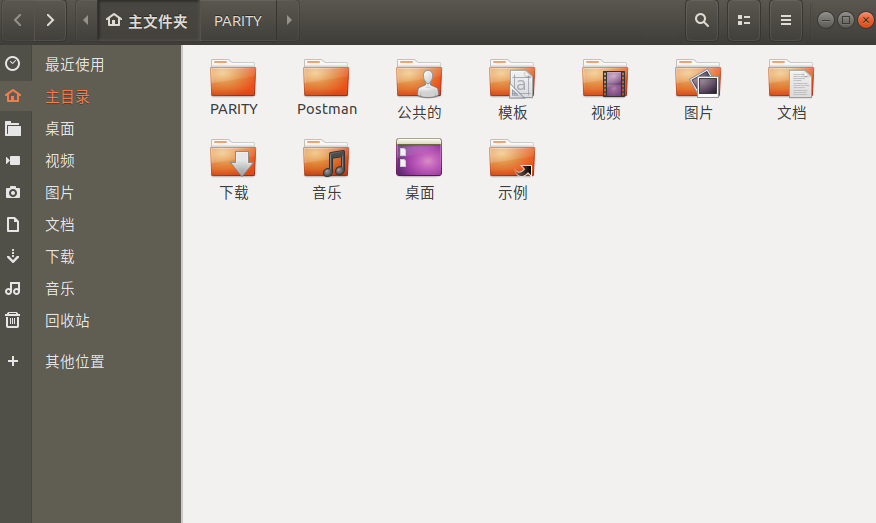
1. Open our Linux virtual machine in advance. Then open our folder and create a parity file. Of course, it can also be named after other names, preferably parity.
2. Then enter the PARITY folder, open it in the terminal, and enter the following under the authority of administrator:
wget https://releases.parity.io/ethereum/v1.9.7/x86_64-unknown-linux-gnu/parity
After downloading, enter
chmod 775 parity Modify executable
Then enter:
./parity -v If no error is reported, prompt parity Version is downloaded successfully.
3. This step is to configure some information about parity.
1) the first is the configuration of Chuangshi block. By command
vim demo-spec.json
As shown in the figure, add the following code:
{
  "name": "DemoPoA",
  "engine": {
    "authorityRound": {
      "params": {
        "stepDuration": "5",
        "validators": {
          "list": [

          ]
        }
      }
    }
  },
  "params": {
    "gasLimitBoundDivisor": "0x0400",
    "maximumExtraDataSize": "0x20",
    "minGasLimit": "0x1388",
    "networkID": "0x2323"
  },
  "genesis": {
    "seal": {
      "authorityRound": {
        "step": "0x0",
        "signature": "0x0000000000000000000000000000000000000000000000000000000000000000000000000000000000000000000000000000000000000000000000000000000000"
      }
    },
    "difficulty": "0x20000",
    "gasLimit": "0x5B8D80"
  },
  "accounts": {
    "0x0000000000000000000000000000000000000001": {
      "balance": "1",
      "builtin": {
        "name": "ecrecover",
        "pricing": {
          "linear": {
            "base": 3000,
            "word": 0
          }
        }
      }
    },
    "0x0000000000000000000000000000000000000002": {
      "balance": "1",
      "builtin": {
        "name": "sha256",
        "pricing": {
          "linear": {
            "base": 60,
            "word": 12
          }
        }
      }
    },
    "0x0000000000000000000000000000000000000003": {
      "balance": "1",
      "builtin": {
        "name": "ripemd160",
        "pricing": {
          "linear": {
            "base": 600,
            "word": 120
          }
        }
      }
    },
    "0x0000000000000000000000000000000000000004": {
      "balance": "1",
      "builtin": {
        "name": "identity",
        "pricing": {
          "linear": {
            "base": 15,
            "word": 3
          }
        }
      }
    }
  }
}
Next, configure node information, node0 and node1.
vim node0.toml
Input:
[parity]
chain = "demo-spec.json"
base_path = "parity0"
[network]
port = 30300
[rpc]
port = 8540
apis = ["web3", "eth", "net", "personal", "parity", "parity_set", "traces", "rpc", "parity_accounts"]
cors = ["*"]
[ui]
port = 8180
[websockets]
port = 8456
Then enter:
vim node1.toml
Input:
[parity]
chain = "demo-spec.json"
base_path = "parity1"
[network]
port = 30301
[rpc]
port = 8541
apis = ["web3", "eth", "net", "personal", "parity", "parity_set", "traces", "rpc", "parity_accounts"]
cors = ["*"]
[ui]
port = 8181
[websockets]
port = 8457
2, parity UI interface configuration
1. First input at the terminal just now/ parity --config node0.toml start node 0. Open web page http://localhost:8180 , follow the steps to create a user account.
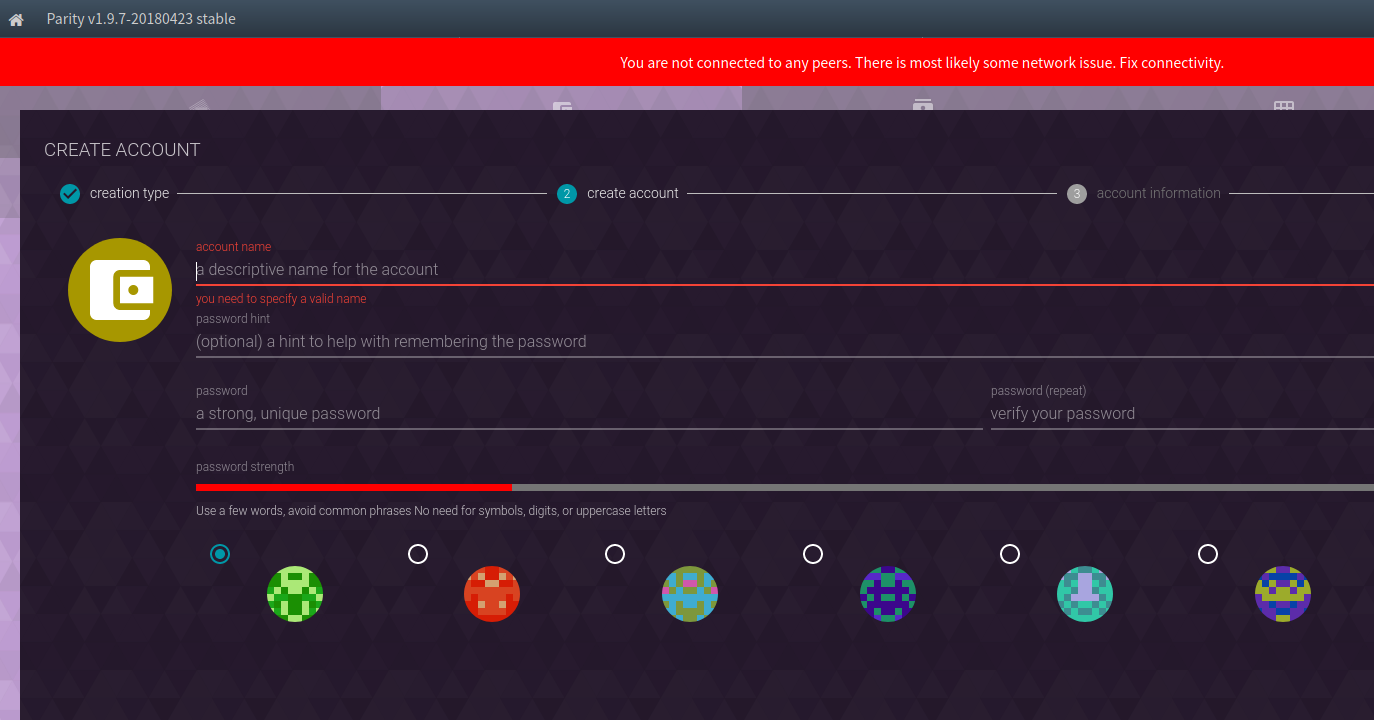 Create user and node0 accounts with passwords of 123456 for easy operation. After successful creation, the following interface appears. Mine has been transferred.
 At this point, the creation is successful.
2. Then input at the terminal/ parity --config node1.toml starts node 1. Open web page http://localhost:818 1. Create a user account according to the steps. The steps are similar to step 1. In this step, there is no need to create a user account. The creation success is as follows:
 .
.
3. After the creation is completed, we save the address information of these nodes and make records. After completion, we add the address to the json file just now. The complete code is as follows (replace my address information):
{
  "name": "DemoPoA",
  "engine": {
    "authorityRound": {
      "params": {
        "stepDuration": "5",
        "validators": {
          "list": [
            "0x00F9B30838ca40c8A53c672840acbDec6fCDb180",
            "0x00Bd138aBD70e2F00903268F3Db08f2D25677C9e"
          ]
        }
      }
    }
  },
  "params": {
    "gasLimitBoundDivisor": "0x0400",
    "maximumExtraDataSize": "0x20",
    "minGasLimit": "0x1388",
    "networkID": "0x2323"
  },
  "genesis": {
    "seal": {
      "authorityRound": {
        "step": "0x0",
        "signature": "0x0000000000000000000000000000000000000000000000000000000000000000000000000000000000000000000000000000000000000000000000000000000000"
      }
    },
    "difficulty": "0x20000",
    "gasLimit": "0x5B8D80"
  },
  "accounts": {
    "0x0000000000000000000000000000000000000001": {
      "balance": "1",
      "builtin": {
        "name": "ecrecover",
        "pricing": {
          "linear": {
            "base": 3000,
            "word": 0
          }
        }
      }
    },
    "0x0000000000000000000000000000000000000002": {
      "balance": "1",
      "builtin": {
        "name": "sha256",
        "pricing": {
          "linear": {
            "base": 60,
            "word": 12
          }
        }
      }
    },
    "0x0000000000000000000000000000000000000003": {
      "balance": "1",
      "builtin": {
        "name": "ripemd160",
        "pricing": {
          "linear": {
            "base": 600,
            "word": 120
          }
        }
      }
    },
    "0x0064B0999c0142eE99aB0ceC054BAb53fe0a3EcC": {
      "balance": "10000000000000000000000"
    },
    "0x0000000000000000000000000000000000000004": {
      "balance": "1",
      "builtin": {
        "name": "identity",
        "pricing": {
          "linear": {
            "base": 15,
            "word": 3
          }
        }
      }
    }
  }
}
3, Start Authority node
In order to start the Authority node to generate blocks, we must set the signer responsible for generating blocks, which are # node0 # and # node1 account respectively.
1. The first step is to create a node PWDs file, write the password of node0 and node1, and the content is as follows:
vim node.pwds Then enter two 123456s vertically
2. The second step, in node0 Add [account] and [mining] settings to the toml file, as follows:
[parity]
chain = "demo-spec.json"
base_path = "parity0"
[network]
port = 30300
[rpc]
port = 8540
apis = ["web3", "eth", "net", "personal", "parity", "parity_set", "traces", "rpc", "parity_accounts"]
cors = ["*"]
[ui]
port = 8180
/*/The following is the new information
[account]
password = ["node.pwds"]
[mining]
engine_signer = "0x00Bd138aBD70e2F00903268F3Db08f2D25677C9e"  //Address of node0
reseal_on_txs = "none"
3. The third step is in node1 Add [account] and [mining] settings to the toml file, as follows:
[parity]
chain = "demo-spec.json"
base_path = "parity1"
[network]
port = 30301
[rpc]
port = 8541
apis = ["web3", "eth", "net", "personal", "parity", "parity_set", "traces", "rpc", "parity_accounts"]
cors = ["*"]
[ui]
port = 8181
[websockets]
port = 8457
/*/The following is the new information
[account]
password = ["node.pwds"]
[mining]
engine_signer = "0x00F9B30838ca40c8A53c672840acbDec6fCDb180"   //Address of node1
reseal_on_txs = "none"
4. Step 4: start two node s respectively in step 4
./parity --config node0.toml
./parity --config node1.toml
4, Connection node
Use Postman to test through JSON RPC.
1. Download postman and find the installation package on the official website to download and install. Copy the installation package to the specified directory of Ubuntu, open the Ubuntu terminal, and enter the command to unzip the installation package.
sudo tar -xzf Postman-linux-x64-7.2.2.tar.gz
# tar -xzf is the decompression command
2. Enter the unzipped Postman folder and start Postman.
./Postman/Postman
3. After startup, click file and request to create a new request.
1) Post the following JSON data to http://localhost:8540 To get enode data of node0
{
 "jsonrpc":"2.0",
 "method":"parity_enode",
 "params":[],
 "id":0
}
The data obtained are as follows:
{
    "jsonrpc": "2.0",
    "result": "enode://cfb3af513da3a7a8138450f0dc01fa38cb2ac837744dc645038940287f4dce3f416f0e7e17fd10619a263c360d9324fd2dcd8753c4500fcc54cf84e076b39cd6@192.168.56.130:30300",
    "id": 0
}
" enode://cfb3af513da3a7a8138450f0dc01fa38cb2ac837744dc645038940287f4dce3f416f0e7e17fd10619a263c360d9324fd2dcd8753c4500fcc54cf84e076b39cd6@192.168.56.1302:30300 "is the identity of node0. In the next step, we will add it to node1 to realize the connection between the two nodes
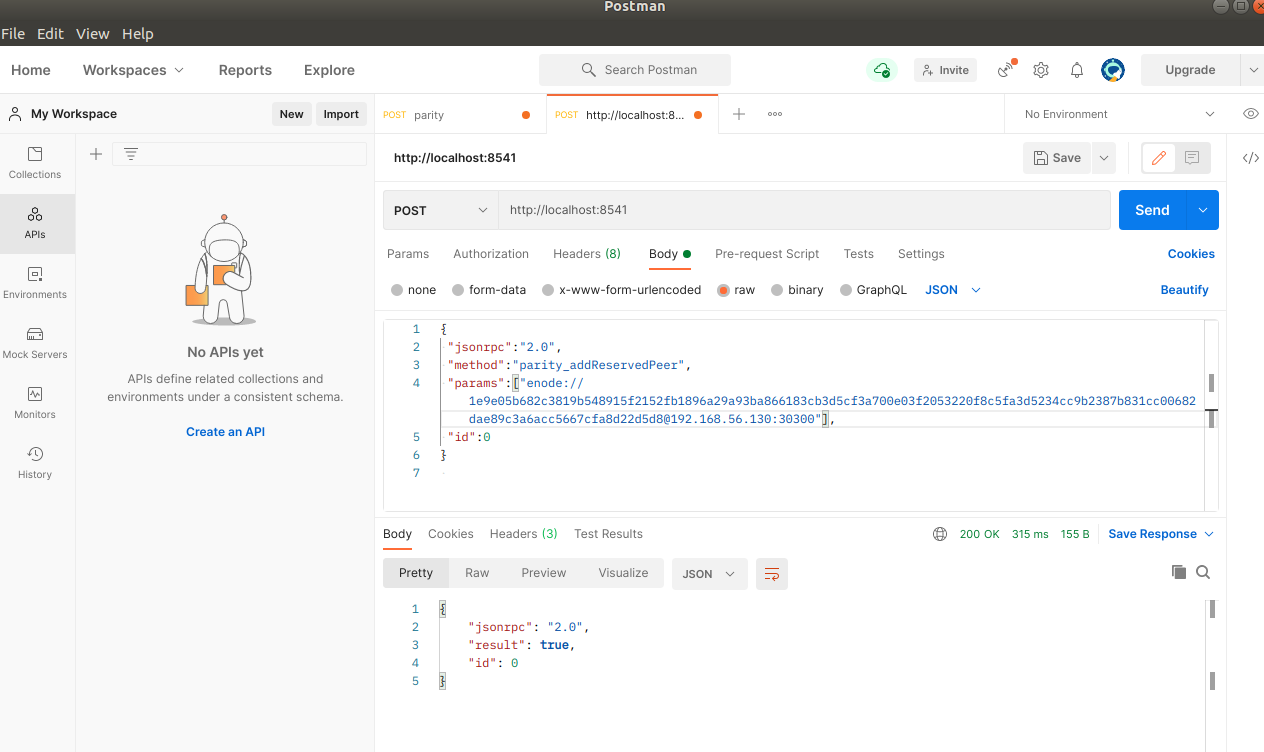
2) Add the enode of node0 to node1, and Post the following JSONs data to node1( http://localhost:8541 )
{
 "jsonrpc":"2.0",
 "method":"parity_addReservedPeer",
 "params":["enode://cfb3af513da3a7a8138450f0dc01fa38cb2ac837744dc645038940287f4dce3f416f0e7e17fd10619a263c360d9324fd2dcd8753c4500fcc54cf84e076b39cd6@192.168.56.130:30300"],
 "id":0
}
The returned data is as follows. If the result is true, the connection is successful:
{
    "jsonrpc": "2.0",
    "result": true,
    "id": 0
}
Position as shown in the figure:
Then switch to the node1 terminal and you will see the following data:
1/25 peers 13 KiB chain 11 KiB db 0 bytes queue 10 KiB sync RPC: 0 conn, 0 req/s, 24 µs. Then the connection is successful.
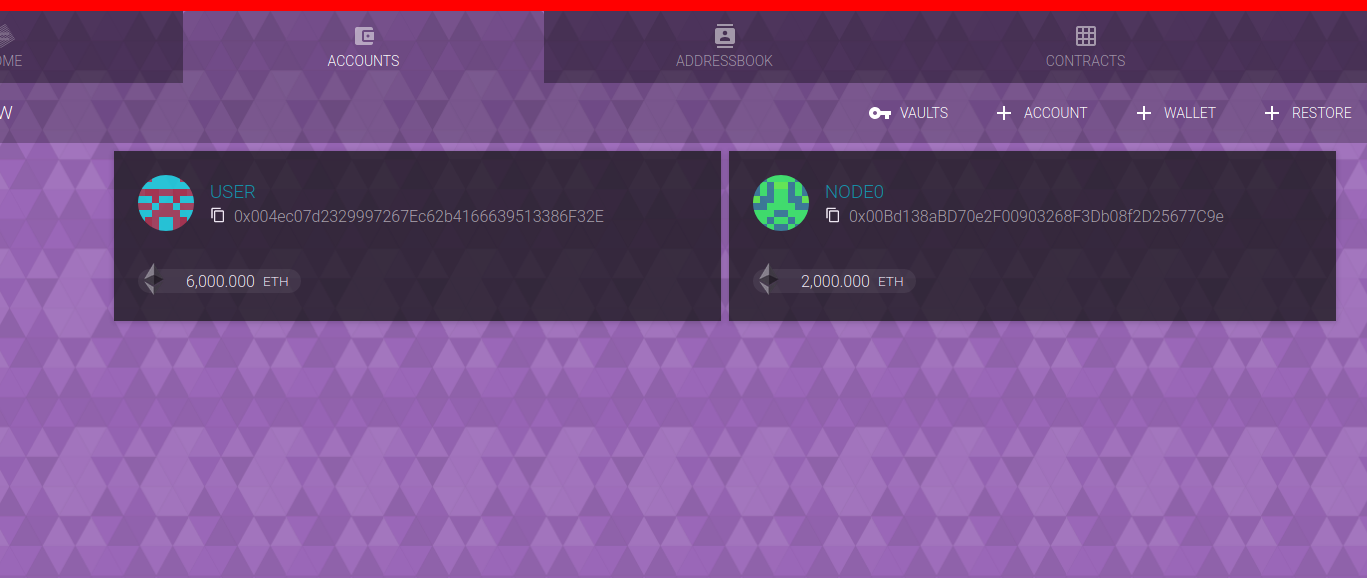
4. Send transaction
We created three accounts, one user account and two POA accounts. At the beginning, we initialized 10000 ETH for the user account. As shown in the figure below, accounts can be transferred to each other.
5, Share with other nodes
During development, the node is usually run on the server so that others can connect to it through JSON RPC port. At this time, just add the [interface] setting in the config file.
Assuming that the server ip is 192.168.53.110, set {node0 Toml # amend as follows:
[parity]
chain = "demo-spec.json"
base_path = "parity0"
[network]
port = 30300
[rpc]
port = 8540
apis = ["web3", "eth", "net", "personal", "parity", "parity_set", "traces", "rpc", "parity_accounts"]
interface = "192.168.53.110"  /*/New content here
[ui]
port = 8180
[account]
password = ["node.pwds"]
[mining]
engine_signer = "0x00Bd138aBD70e2F00903268F3Db08f2D25677C9e"
reseal_on_txs = "none"
node1.toml is modified as follows:
[parity]
chain = "demo-spec.json"
base_path = "parity1"
[network]
port = 30301
[rpc]
port = 8541
apis = ["web3", "eth", "net", "personal", "parity", "parity_set", "traces", "rpc", "parity_accounts"]
interface = "192.168.1.5"  /*/ New content here
[ui]
port = 8181
[websockets]
port = 8457
[account]
password = ["node.pwds"]
[mining]
engine_signer = "0x00F9B30838ca40c8A53c672840acbDec6fCDb180"
reseal_on_txs = "none"
The above is the whole process of building poa for parity. If you have any doubt, please send me a private letter.