1, Introduction to micro front end
Micro front end is an architecture similar to micro services. It applies the concept of micro services to the browser, that is, the Web application changes from a single single application to an application in which multiple small front-end applications are aggregated into one. Each front-end application can run, develop and deploy independently.
Benefits of micro front end
- Application autonomy. It only needs to follow the unified interface specification or framework to facilitate the system integration, and there is no dependency between them.
- Single responsibility. Each front-end application can only focus on the functions it needs to complete.
- Technology stack independent. You can use both React and Vue while using Angular.
Disadvantages of micro front end
- The split infrastructure of applications depends on the construction of infrastructure. Once a large number of applications depend on the same infrastructure, maintenance becomes a challenge.
- The smaller the granularity of splitting, it means that the architecture becomes complex and the maintenance cost becomes higher.
- Once the technology stack is diversified, it means that the technology stack is chaotic
What modules does the micro front end consist of
At present, the micro front-end mainly adopts the combined application routing scheme. The core of the scheme is the "master-slave" idea, that is, it includes a MainApp application and several micro app applications. Most of the base applications are a front-end SPA project, which is mainly responsible for application registration, routing mapping, message distribution, etc., while the micro application is an independent front-end project, These projects are not limited to the development of React, Vue, Angular or JQuery. Each micro application is registered in the base application and managed by the base. However, if it is separated from the base, it can be accessed separately. The basic process is shown in the figure below

Do you want to use the micro front end
The best use scenarios of the micro front-end are some B-end management systems, which can be compatible with the integrated historical system or integrate new systems without affecting the original interactive experience
2, Actual combat of micro front end

The existing landing schemes of micro front end can be divided into three categories: self-organizing mode, base mode and module loading mode
2.1 SingleSpa actual combat
Official website https://zh-hans.single-spa.js...
Applicable scenario: the project is huge, and multiple sub projects are integrated into a large project. Even if the technology stacks used in the subprojects are different, for example, Vue, react and angular have corresponding single spa wheels, which can be integrated
1. Build sub applications
First, create a vue sub application and export the necessary life cycle through single spa vue
vue create spa-vue
npm install single-spa-vue
// main.js

import singleSpaVue from 'single-spa-vue';

const appOptions = {
   el: '#vue',
   router,
   render: h => h(App)
}

// Mount applications normally in non child applications
if(!window.singleSpaNavigate){
 delete appOptions.el;
 new Vue(appOptions).$mount('#app');
}

const vueLifeCycle = singleSpaVue({
   Vue,
   appOptions
});


// The sub application must export the following life cycles: bootstrap, mount, unmount
export const bootstrap = vueLifeCycle.bootstrap;
export const mount = vueLifeCycle.mount;
export const unmount = vueLifeCycle.unmount;
export default vueLifeCycle;
// router.js
// Configure sub routing base path
const router = new VueRouter({
mode: 'history',
base: '/vue', //Change path configuration
routes
})
2. Package sub modules into class libraries
//vue.config.js
module.exports = {
    configureWebpack: {
    // Mount the attribute above the window and the parent application will call window singleVue. bootstrap/mount/unmount
        output: {
            library: 'singleVue',
            libraryTarget: 'umd'
        },
        devServer:{
            port:10000
        }
    }
}
3. Main application setup
<div id="nav">
    <router-link to="/vue">vue project<router-link>

    <!--Mount subapplication to id="vue"In label-->
    <div id="vue">div>
div>
import Vue from 'vue'
import App from './App.vue'
import router from './router'
import {registerApplication,start} from 'single-spa'
Vue.config.productionTip = false
async function loadScript(url) {
return new Promise((resolve,reject)=>{
let script = document.createElement('script')
script.src = url
script.onload = resolve
script.onerror = reject
document.head.appendChild(script)
})
}
// Register application
registerApplication('myVueApp',
async ()=>{
console.info('load')
// Single spa problem
// You need to build your own script tag to load the file, but you don't know how many files the application has
// Styles are not isolated
// There is no js sandbox mechanism for global objects. For example, different applications are loaded, and each application uses the same environment
// Load public first
await loadScript('http://localhost:10000/js/chunk-vendors.js')
await loadScript('http://localhost:10000/js/app.js')
return window.singleVue // bootstrap mount unmount
},
// When the user switches to / vue, we need to load the sub application just defined
location=>location.pathname.startsWith('/vue'),
)
start()
new Vue({
router,
render: h => h(App)
}).$mount('#app')4. Dynamically set the publicPath of the sub application
if(window.singleSpaNavigate){
  __webpack_public_path__ = 'http://localhost:10000/'
}
2.2 qiankun actual combat
file https://qiankun.umijs.org/zh/...
- qiankun is a micro front-end implementation library based on single spa, which aims to help you build a production usable micro front-end architecture system more simply and painlessly.
- qiankun incubated the unified access platform of cloud products based on micro front-end architecture of ant financial technology. After a number of online applications have been fully tested and polished, we extracted its micro front-end kernel and opened it to the public. We hope to help the community's systems with similar needs to build their own micro front-end systems more conveniently, At the same time, I also hope to polish qiankun more mature and perfect with the help of the community.
- At present, qiankun has served more than 200 + online applications in ant. It is absolutely trustworthy in terms of ease of use and completeness.
1. Main application setup
<template>
  <!--Be careful not to write here app Otherwise, it conflicts with the loading of sub applications
  <div id="app">-->
  <div>
    <el-menu :router="true" mode="horizontal">
      <!-- You can put your own route in the base -->
      <el-menu-item index="/">Home</el-menu-item>

      <!-- Reference other subapplications -->
      <el-menu-item index="/vue">vue application</el-menu-item>
      <el-menu-item index="/react">react application</el-menu-item>
    </el-menu>
    <router-view />

    <!-- Mount nodes of other sub applications -->
    <div id="vue" />
    <div id="react" />
  </div>
</template>
2. Register sub applications
import { registerMicroApps,start } from 'qiankun'
// Pedestal writing
const apps = [
  {
    name: 'vueApp', // name
    // The HTML will be loaded by default, and the js in the parsing will be executed dynamically (the sub application must support cross domain)
    entry: '//localhost:10000',
    container: '#vue ', / / container
    activeRule: '/vue', // Activate path access / Vue to mount the application to #vue
    props: { // Pass attributes to subapplication to receive
      a: 1,
    }
  },
  {
    name: 'reactApp',
    // The HTML will be loaded by default, and the js in the parsing will be executed dynamically (the sub application must support cross domain)
    entry: '//localhost:20000',
    container: '#react',
    activeRule: '/react' // Access / react to mount the application to #react
  },
]

// register
registerMicroApps(apps)
// open
start({
  prefetch: false // Cancel preload
})
3. Subvue application
// src/router.js

const router = new VueRouter({
  mode: 'history',
  // Keep consistent with those registered in the main application in the base
  base: '/vue',
  routes
})
Don't forget to apply the hook export.
// main.js

import Vue from 'vue'
import App from './App.vue'
import router from './router'

Vue.config.productionTip = false

let instance = null
function render() {
  instance = new Vue({
    router,
    render: h => h(App)
  }).$mount('#app ') / / this is where you mount your HTML. The base will get the mounted HTML and insert it
}

// Running micro applications independently
// https://qiankun.umijs.org/zh/faq#%E5%A6%82%E4%BD%95%E7%8B%AC%E7%AB%8B%E8%BF%90%E8%A1%8C%E5%BE%AE%E5%BA%94%E7%94%A8%EF%BC%9F
if(!window.__POWERED_BY_QIANKUN__) {
  render()
}

// If used by qiankun, the path will be dynamically injected
if(window.__POWERED_BY_QIANKUN__) {
  // qiankun will inject a runtime publicPath variable before the micro application bootstrap. What you need to do is to add the following code at the top of the micro application entry js:
  __webpack_public_path__ = window.__INJECTED_PUBLIC_PATH_BY_QIANKUN__;
}

// The protocol export of the child application for the parent application to call must export promise
export async function bootstrap(props) {} // You can start without writing the export method
export async function mount(props) {
  render()
}
export async function unmount(props) {
  instance.$destroy()
}
4. Configure Vue config. js
// vue.config.js

module.exports = {
    devServer:{
        port:10000,
        headers:{
            'Access-Control-Allow-Origin':'*' //Allow access across domains
        }
    },
    configureWebpack:{
        // Pack umd bags
        output:{
            library:'vueApp',
            libraryTarget:'umd'
        }
    }
}
5. Sub React application
Use react as a subapplication
// app.js

import logo from './logo.svg';
import './App.css';
import {BrowserRouter,Route,Link} from 'react-router-dom'

function App() {
  return (
    // /react is consistent with the main application configuration
    <BrowserRouter basename="/react">
      <Link to="/">home page</Link>
      <Link to="/about">about</Link>

      <Route path="/" exact render={()=>(
        <div className="App">
          <header className="App-header">
            <img src={logo} className="App-logo" alt="logo" />
            <p>
              Edit <code>src/App.js</code> and save to reload.
            </p>
            <a
              className="App-link"
              href="https://reactjs.org"
              target="_blank"
              rel="noopener noreferrer"
            >
              Learn React
            </a>
          </header>
        </div>
      )} />

      <Route path="/about" exact render={()=>(
        <h1>About Page</h1>
      )}></Route>
    </BrowserRouter>
  );
}

export default App;
// index.js
import React from 'react';
import ReactDOM from 'react-dom';
import './index.css';
import App from './App';
import reportWebVitals from './reportWebVitals';
function render() {
ReactDOM.render(
<React.StrictMode>
<App />
</React.StrictMode>,
document.getElementById('root')
);
}
// If you want to start measuring performance in your app, pass a function
// to log results (for example: reportWebVitals(console.log))
// or send to an analytics endpoint. Learn more: https://bit.ly/CRA-vitals
reportWebVitals();
// Independent operation
if(!window.__POWERED_BY_QIANKUN__){
render()
}
// Sub application protocol
export async function bootstrap() {}
export async function mount() {
render()
}
export async function unmount() {
ReactDOM.unmountComponentAtNode(document.getElementById("root"));
}Rewrite the webpack configuration file (config overrides. JS) in react
yarn add react-app-rewired --save-dev
Modify package JSON file
// Change react scripts to react app rewired
"scripts": {
    "start": "react-app-rewired start",
    "build": "react-app-rewired build",
    "test": "react-app-rewired test",
    "eject": "react-app-rewired eject"
  },
Create a new profile in the root directory
// Profile override
touch config-overrides.js
// config-overrides.js

module.exports = {
  webpack: (config) => {
    // The name is the same as the base configuration
    config.output.library = 'reactApp';
    config.output.libraryTarget = "umd";
    config.output.publicPath = 'http://localhost:20000/'
    return config
  },
  devServer: function (configFunction) {
    return function (proxy, allowedHost) {
      const config = configFunction(proxy, allowedHost);

      // Configure cross domain
      config.headers = {
        "Access-Control-Allow-Origin": "*",
      };
      return config;
    };
  },
};
to configure. env file
New root directory env
PORT=30000
# socket send port
WDS_SOCKET_PORT=30000
Routing configuration
import { BrowserRouter, Route, Link } from "react-router-dom"

const BASE_NAME = window.__POWERED_BY_QIANKUN__ ? "/react" : "";

function App() {
  return (
    <BrowserRouter basename={BASE_NAME}><Link to="/">home page Link><Link to="/about">about Link><Route path="/" exact render={() => <h1>hello homeh1>}>Route><Route path="/about" render={() => <h1>hello abouth1>}>Route>BrowserRouter>
  );
}
2.3 actual combat of flying ice micro front end
Official access guide https://micro-frontends.ice.w...
- ICESTAR is a micro front-end solution for large-scale systems, which is applicable to the following business scenarios:
- The background is scattered and the experience varies greatly, because frequent jumps lead to low operation efficiency. I hope it can be unified in a system
- Single page applications are very large, multi person collaboration costs are high, development / construction time is long, and the cost of relying on upgrading and regression is high
- The system requires two-party / three-party access
On the basis of ensuring the operating experience of a system, ICESTAR realizes the independent development and release of each micro application. The main application manages the registration and rendering of micro applications through ICESTAR, which completely decouples the whole system.
1. Write react main application
$ npm init ice icestark-layout @icedesign/stark-layout-scaffold
$ cd icestark-layout
$ npm install
$ npm start
// src/app. Add in JSX

const appConfig: IAppConfig = {

  ...

  icestark: {
    type: 'framework',
    Layout: FrameworkLayout,
    getApps: async () => {
      const apps = [
      {
        path: '/vue',
        title: 'vue Micro application test',
        sandbox: false,
        url: [
          // testing environment
          // Request the service under the sub application port and the Vue of the sub application config. JS needs to configure headers cross domain request headers
          "http://localhost:3001/js/chunk-vendors.js",
          "http://localhost:3001/js/app.js",
        ],
      },
      {
        path: '/react',
        title: 'react Micro application test',
        sandbox: true,
        url: [
          // testing environment
          // Request the service under the sub application port, and the webpackdevserver of the sub application config. JS needs to configure headers cross domain request headers
          "http://localhost:3000/static/js/bundle.js",
        ],
      }
    ];
      return apps;
    },
    appRouter: {
      LoadingComponent: PageLoading,
    },
  },
};
// Sidebar menu
// src/layouts/menuConfig.ts transformation
const asideMenuConfig = [
{
name: 'vue Micro application test',
icon: 'set',
path: '/vue'
},
{
name: 'React Micro application test',
icon: 'set',
path: '/react'
},
]2. vue sub application access
# Create a sub application
vue create vue-child
// Modify Vue config. js

module.exports = {
  devServer: {
    open: true, // Set the browser to automatically open the project
    port: 3001, // Set port
    // Support cross domain to facilitate the main application to request sub application resources
    headers: {
      'Access-Control-Allow-Origin' : '*',
      'Access-Control-Allow-Methods': 'GET, POST, PUT, DELETE, PATCH, OPTIONS',
      'Access-Control-Allow-Headers': 'X-Requested-With, content-type, Authorization',
    }
  },
  configureWebpack: {
    // Package into lib package umd format
    output: {
      library: 'icestark-vue',
      libraryTarget: 'umd',
    },
  }
}
src/main.js transformation
import { createApp } from 'vue'
import App from './App.vue'
import router from './router'
import store from './store'
import {
isInIcestark,
getMountNode,
registerAppEnter,
registerAppLeave,
setLibraryName
} from '@ice/stark-app'
let vue = createApp(App)
vue.use(store)
vue.use(router)
// Note: the input parameter of 'setLibraryName' needs to be consistent with the output configured by the webpack project Library consistency
// Important without effect and Vue config. JS
setLibraryName('icestark-vue')
export function mount({ container }) {
// 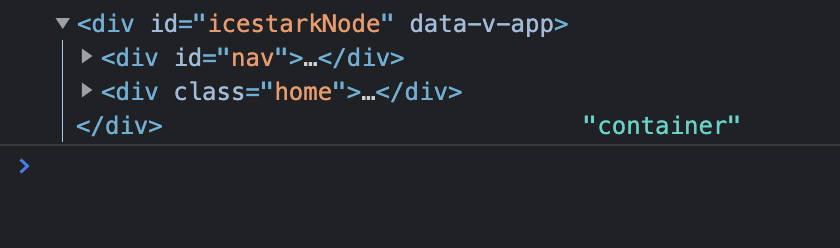
console.log(container,'container')
vue.mount(container);
}
export function unmount() {
vue.unmount();
}
if (!isInIcestark()) {
vue.mount('#app')
}router transformation
import { getBasename } from '@ice/stark-app';


const router = createRouter({
  // Important benchmark routing in main application
  base: getBasename(),
  routes
})

export default router
3. react sub application access
create-react-app react-child
// src/app.js

import { isInIcestark, getMountNode, registerAppEnter, registerAppLeave } from '@ice/stark-app';

export function mount(props) {
  ReactDOM.render(<App />, props.container);
}

export function unmount(props) {
  ReactDOM.unmountComponentAtNode(props.container);
}

if (!isInIcestark()) {
  ReactDOM.render(<App />, document.getElementById('root'));
}

if (isInIcestark()) {
  registerAppEnter(() => {
    ReactDOM.render(<App />, getMountNode());
  })
  registerAppLeave(() => {
    ReactDOM.unmountComponentAtNode(getMountNode());
  })
} else {
  ReactDOM.render(<App />, document.getElementById('root'));
}
After npm run eject, modify config / webpackdevserver config. js
hot: '',
port: '',
...

// Support cross domain
headers: {
  'Access-Control-Allow-Origin' : '*',
  'Access-Control-Allow-Methods': 'GET, POST, PUT, DELETE, PATCH, OPTIONS',
  'Access-Control-Allow-Headers': 'X-Requested-With, content-type, Authorization',
},
Micro front end deployment
Summary of micro front end deployment practice
More dry cargo sharing in the official account of "front-end journey"