
Apache apisid is a dynamic, real-time and high-performance API gateway based on OpenResty and Etcd. At present, it is already a top-level project of Apache. It provides rich traffic management functions, such as load balancing, dynamic routing, dynamic upstream, A/B testing, Canary release, speed limit, fuse, defense against malicious attacks, authentication, monitoring indicators, service observability, service governance, etc. APIs IX can be used to handle traditional north-south traffic and east-west traffic between services.
Compared with the traditional API gateway, APISIX has the functions of dynamic routing and hot loading plug-ins, avoiding the reload operation after configuration. At the same time, APISIX supports more protocols such as HTTP(S), HTTP2, Dubbo, QUIC, MQTT, TCP/UDP and so on. It also has a built-in Dashboard to provide a powerful and flexible interface. It also provides rich plug-in support functions, and allows users to customize plug-ins.
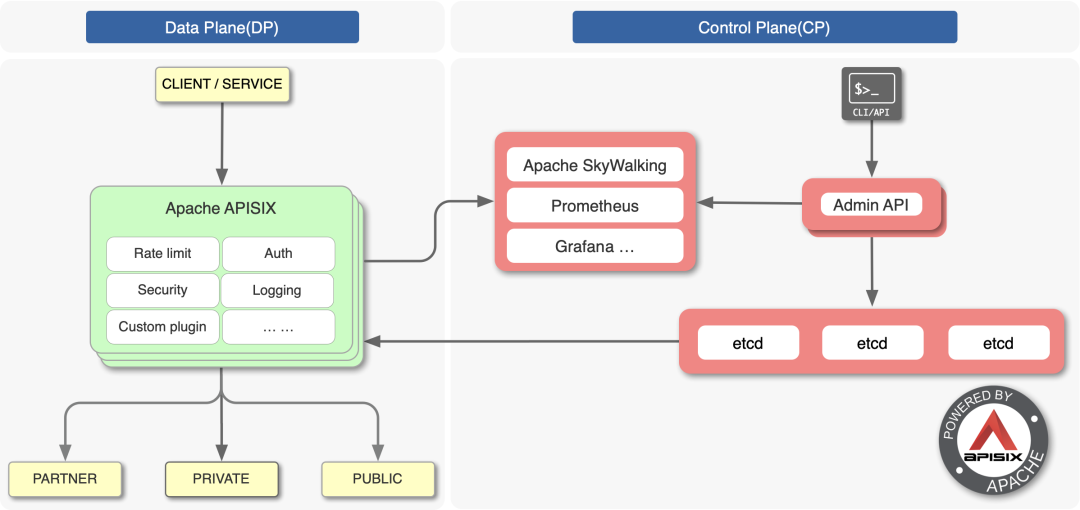
The above figure is the architecture diagram of APISIX, which is divided into two parts: data plane and control plane. The control plane is used to manage routing, mainly through etcd to realize the configuration center, and the data plane is used to process client requests, which is realized through APISIX itself, and will constantly watch the route, upstream and other data in etcd.
APISIX Ingress
Similarly, as an API gateway, APISIX also supports the use as an Ingress controller of Kubernetes. APISIX Ingress is divided into two parts in architecture. One part is APISIX Ingress Controller, which will complete configuration management and distribution as the control surface. The other part, apisik (agent), is responsible for carrying business traffic.

When the Client initiates a request and reaches Apache APISIX, it will directly transmit the corresponding business traffic to the back end (such as Service Pod), so as to complete the forwarding process. This process does not need to go through the progress controller, which can ensure that once a problem occurs, or changes, expansion or migration, it will not affect users and business traffic.
At the same time, on the configuration side, users can create resources through kubectl apply to apply custom CRD configuration to K8s cluster, and the Ingress Controller will continuously watch these resource changes to apply the corresponding configuration to Apache APIs IX (through admin api).
As can be seen from the above figure, apisik ingress adopts the architecture of separating the data plane from the control plane, so users can choose to deploy the data face inside or outside the K8s cluster. However, Ingress Nginx puts the control surface and data surface in the same Pod. If there is a mistake in the Pod or control surface, the whole Pod will hang up, which will affect the business flow. This architecture separation provides users with more convenient deployment options. At the same time, it is also convenient for the migration and use of relevant data in the business architecture adjustment scenario.
The core features currently supported by apisik ingress controller include:
- It is fully dynamic and supports advanced routing matching rules. It can be extended with more than 50 official plug-ins of Apache APIs IX & customer defined plug-ins
- Support CRD, easier to understand declarative configuration
- Compatible with native Ingress resource objects
- Support traffic segmentation
- Automatic service registration and discovery, no fear of expansion and contraction
- More flexible load balancing strategy with health check function
- Support gRPC and TCP layer 4 proxy
install
Here we use APIs IX in Kubernetes cluster, which can be installed through Helm Chart. First, add the officially provided Helm Chart warehouse:
➜ helm repo add apisix https://charts.apiseven.com
➜ helm repo update
Since the Chart package of APISIX contains the dependencies of dashboard and inress controller, we only need to enable it in values to install the inress controller:
➜ helm fetch apisix/apisix
➜ tar -xvf apisix-0.7.2.tgz
➜ mkdir -p apisix/ci
Create a new values file for installation in the apifix / CI directory. The contents are as follows:
# ci/prod.yaml
apisix:
  enabled: true

  nodeSelector:  # Fixed on node2 node
    kubernetes.io/hostname: node2

gateway:
  type: NodePort
  externalTrafficPolicy: Cluster
  http:
    enabled: true
    servicePort: 80
    containerPort: 9080

etcd:
  enabled: true  # An etcd cluster of 3 nodes is automatically created
  replicaCount: 1  # If you need to modify the template for multiple copies, run an etcd pod for the time being

dashboard:
  enabled: true

ingress-controller:
  enabled: true
  config:
    apisix:
      serviceName: apisix-admin
      serviceNamespace: apisix  # Specify the namespace. If it is not ingress apifix, you need to specify it again
After testing, the official Helm Chart package does not support etcd multi node clusters very well. There will be problems in running three nodes in my test, and the template should be modified to be compatible. In addition, it is not compatible with external etcd tls clusters. For example, Chart of dashboard needs to modify the template to support tls, so here we test to change it into a copy of etcd cluster.
Apisik needs to rely on etcd. By default, Helm Chart will automatically install a 3-copy etcd cluster and need to provide a default StorageClass. If you already have a default storage class, you can ignore the following steps. Here we install an nfs provider and use the following command to install a default StorageClass:
➜ helm repo add nfs-subdir-external-provisioner https://kubernetes-sigs.github.io/nfs-subdir-external-provisioner/
➜ helm upgrade --install nfs-subdir-external-provisioner nfs-subdir-external-provisioner/nfs-subdir-external-provisioner \
--set nfs.server=192.168.31.31 \  # Specify nfs address
--set nfs.path=/var/lib/k8s/data \  # nfs path
--set image.repository=cnych/nfs-subdir-external-provisioner \
--set storageClass.defaultClass=true -n kube-system
After installation, a StorageClass will be automatically created:
➜ kubectl get sc
NAME                   PROVISIONER                                     RECLAIMPOLICY   VOLUMEBINDINGMODE      ALLOWVOLUMEEXPANSION   AGE
nfs-client (default)   cluster.local/nfs-subdir-external-provisioner   Delete          Immediate              true                   35s
Then directly execute the following command for one click installation:
➜ helm upgrade --install apisix ./apisix -f ./apisix/ci/prod.yaml -n apisix
Release "apisix" does not exist. Installing it now.
NAME: apisix
LAST DEPLOYED: Thu Dec 30 16:28:38 2021
NAMESPACE: apisix
STATUS: deployed
REVISION: 1
NOTES:
1. Get the application URL by running these commands:
  export NODE_PORT=$(kubectl get --namespace apisix -o jsonpath="{.spec.ports[0].nodePort}" services apisix-gateway)
  export NODE_IP=$(kubectl get nodes --namespace apisix -o jsonpath="{.items[0].status.addresses[0].address}")
  echo http://$NODE_IP:$NODE_PORT
APIs IX can be successfully deployed normally:
➜ kubectl get pods -n apisix
NAME                                         READY   STATUS    RESTARTS   AGE
apisix-dashboard-b69d5c768-r6tqk             1/1     Running   0          85m
apisix-etcd-0                                1/1     Running   0          90m
apisix-fb8cdb569-wz9gq                       1/1     Running   0          87m
apisix-ingress-controller-7d5bbf5dd5-r6khq   1/1     Running   0          85m
➜ kubectl get svc -n apisix
NAME                        TYPE        CLUSTER-IP       EXTERNAL-IP   PORT(S)             AGE
apisix-admin                ClusterIP   10.97.108.252    <none>        9180/TCP            3h
apisix-dashboard            NodePort    10.108.202.136   <none>        80:31756/TCP        3h
apisix-etcd                 ClusterIP   10.107.150.100   <none>        2379/TCP,2380/TCP   3h
apisix-etcd-headless        ClusterIP   None             <none>        2379/TCP,2380/TCP   3h
apisix-gateway              NodePort    10.97.214.188    <none>        80:32200/TCP        3h
apisix-ingress-controller   ClusterIP   10.103.176.26    <none>        80/TCP              3h
test
Now we can create a routing rule for Dashboard and create an ApisixRoute resource object as follows:
apiVersion: apisix.apache.org/v2beta2
kind: ApisixRoute
metadata:
  name: dashboard
  namespace: apisix
spec:
  http:
    - name: root
      match:
        hosts:
          - apisix.qikqiak.com
        paths:
          - "/*"
      backends:
      - serviceName: apisix-dashboard
        servicePort: 80
After creation, APISIX ingress controller will map the above resource objects to the configuration in APISIX through admin api:
➜ kubectl get apisixroute -n apisix
NAME        HOSTS                    URIS     AGE
dashboard   ["apisix.qikqiak.com"]   ["/*"]   75m
In fact, our access portal is APISIX, and APISIX ingress controller is just a tool for listening to crds and translating crds into APISIX configuration. Now you can access our dashboard through the NodePort port of APISIX gateway:
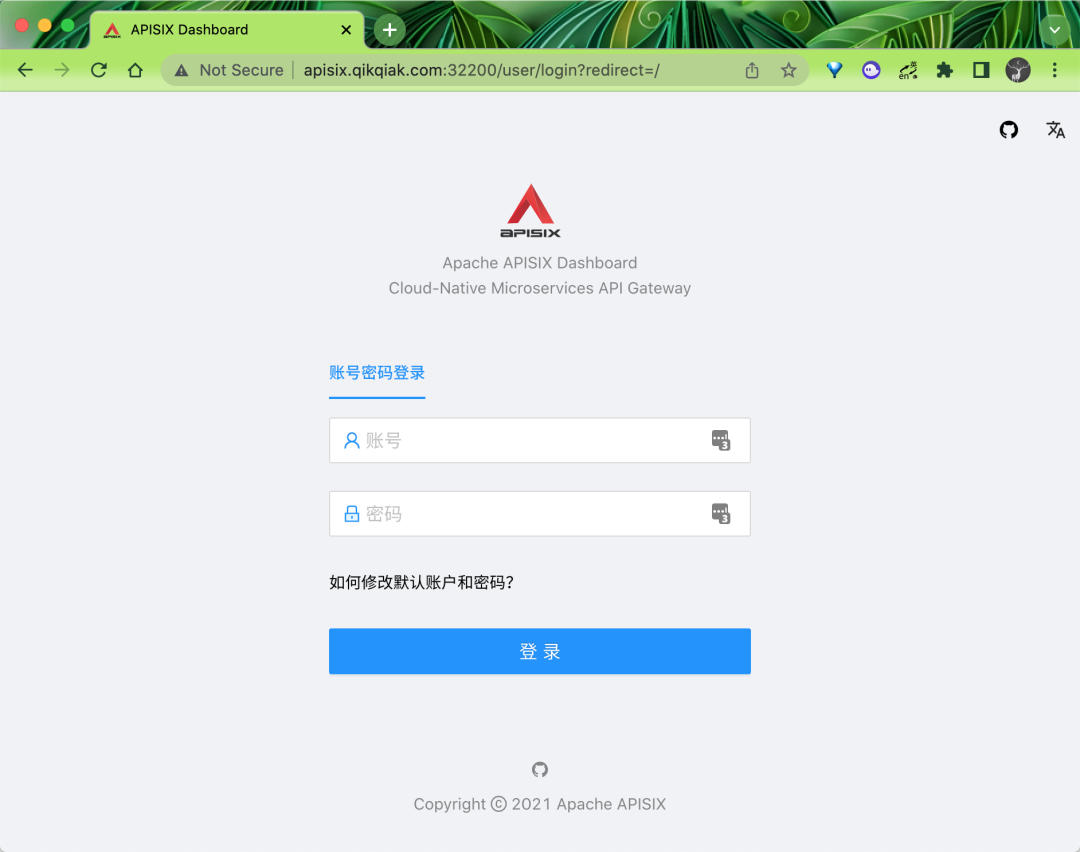
The default login user name and password are admin. After login, you can normally see the routing information of the dashboard we created above under the routing menu:
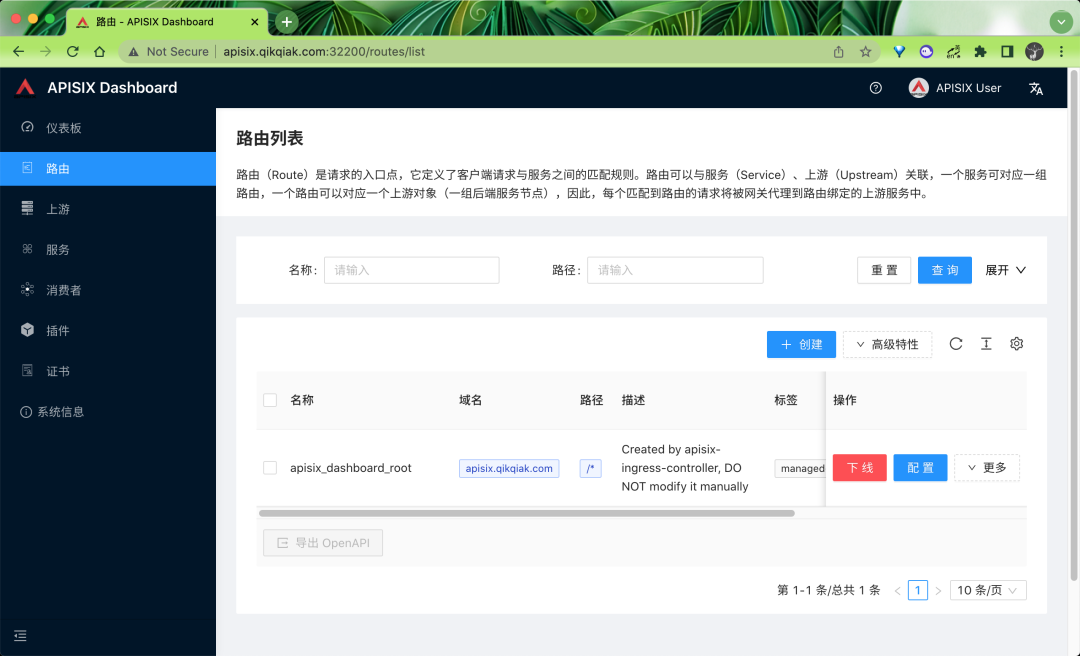
Click more to see the real routing configuration information under APISIX:

Therefore, when we use apisid, we must also understand the concept of route. Route is the entry point of request. It defines the matching rules between client requests and services. Routes can be associated with services and Upstream. A Service can correspond to a group of routes, A route can correspond to an Upstream object (a group of back-end Service nodes). Therefore, each request matching the route will be proxied by the gateway to the Upstream Service bound by the route.
After understanding the routing, we naturally know that we also need an Upstream upstream for association. This concept is basically consistent with the Upstream in Nginx. The Upstream services corresponding to the dashboard we created above can be seen under the Upstream menu:
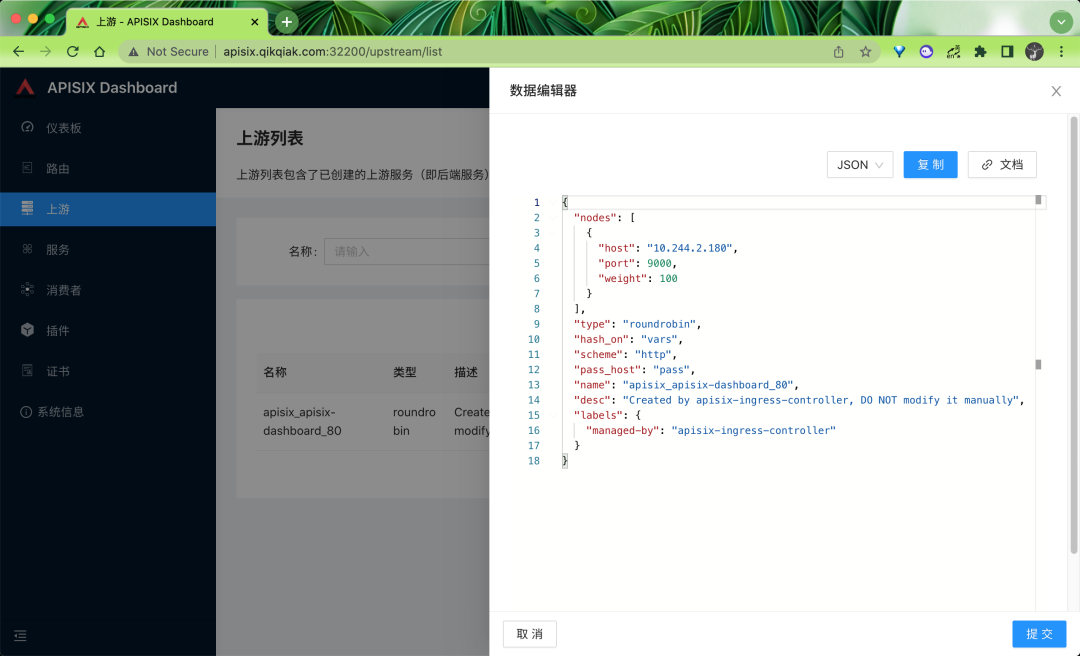
In fact, it is to map the Endpoints in Kubernetes to the Upstream in Apis IX, and then we can load on APIs IX by ourselves.
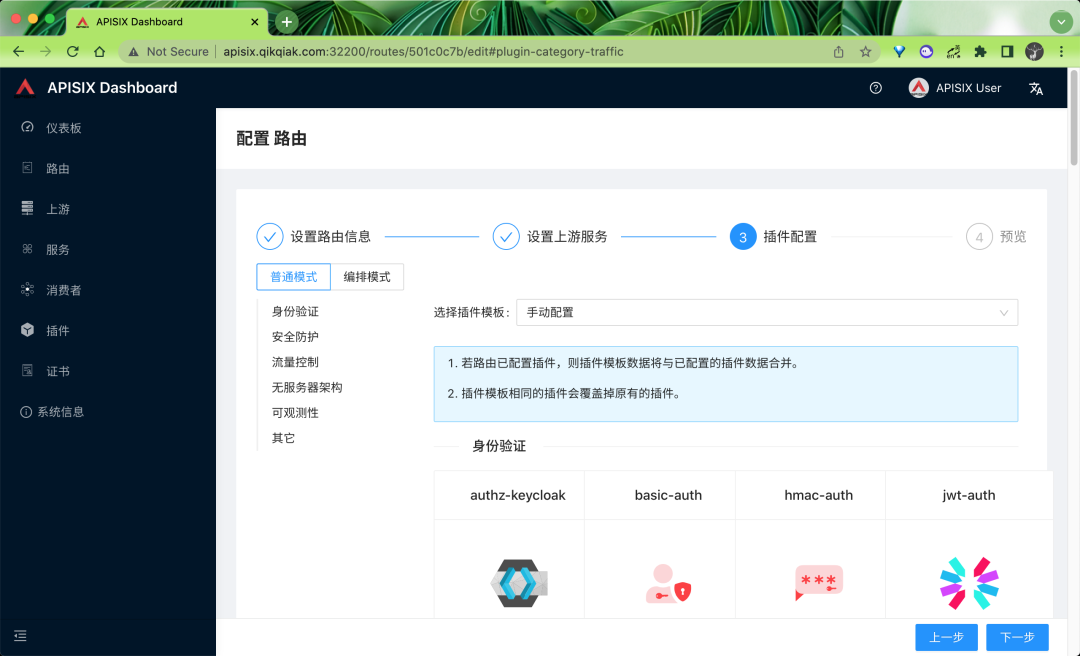
The Dashboard function provided by APISIX is very comprehensive. We can even directly configure all the configurations on the page, including plug-ins, which is very convenient.
Of course, there are many other advanced functions, such as traffic segmentation, request authentication, etc. these advanced functions are more convenient to use in crds. Of course, they also support the native progress resource object. More advanced usage of apisik will be described later.