Experiments show that:
To get started with Linux, you will generally encounter the following problems:
- Where do I get the LInux image?
- How to install Linux system through mirror file?
- Install a physical machine or a virtual machine?
- How to configure the network after installing the system?
- How is the network configuration of virtual machines different from that of physical machines?
In that chapter, we will give a detailed explanation of network initialization.
The experimental environment:
- Host system: Windows 10 1803
- VMware Version: VMware Workstation Pro 14
-
Virtual Machine Configuration: System: CentOS 7.2 1511
Network: NET mode (VMnet8) 192.168.18.0
The experimental steps are as follows:
Part I: Configuring and Understanding the Virtual Network of VMware Workstation on Host
-
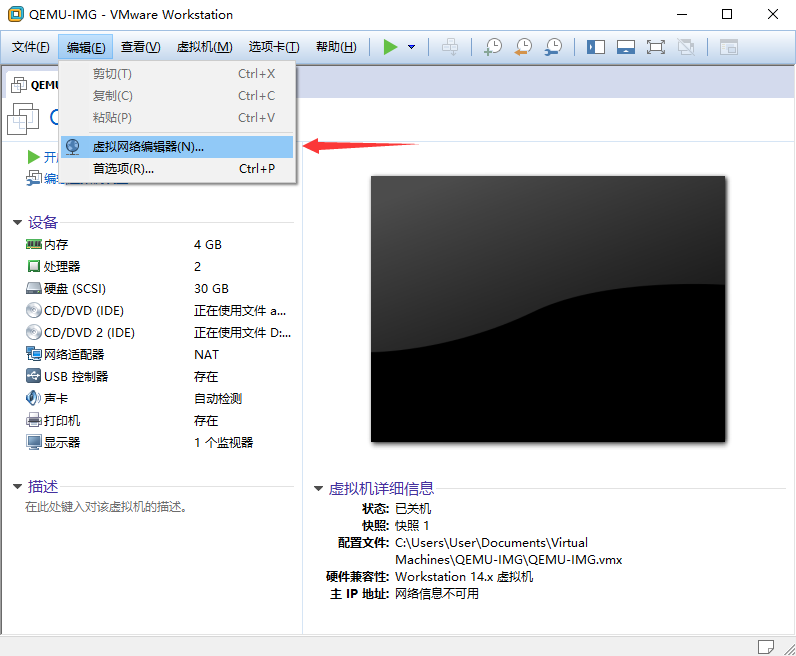
Open VMware Workstation, select the editor on the menu bar, and enter the virtual network editor.
-
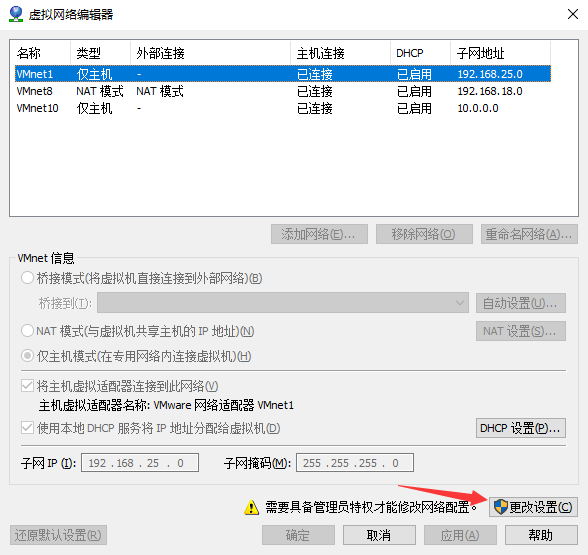
Click Change Settings to Get Administrator Rights
-
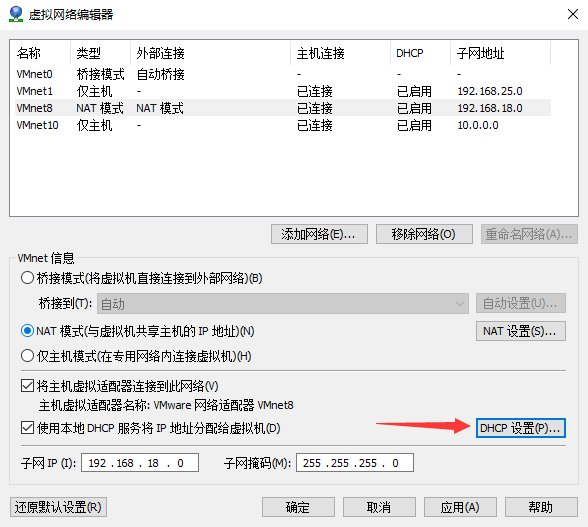
Select NET mode (VMnet8) and click DHCP settings
-
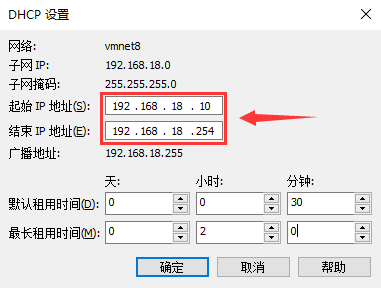
Remember the starting and ending IP addresses of DHCP, for example: Figures 192.168.18.10-254
-
Select NET mode (VMnet8) and click NAT settings
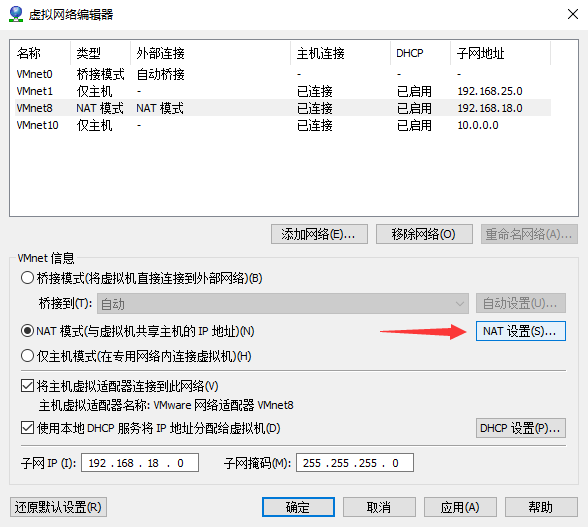
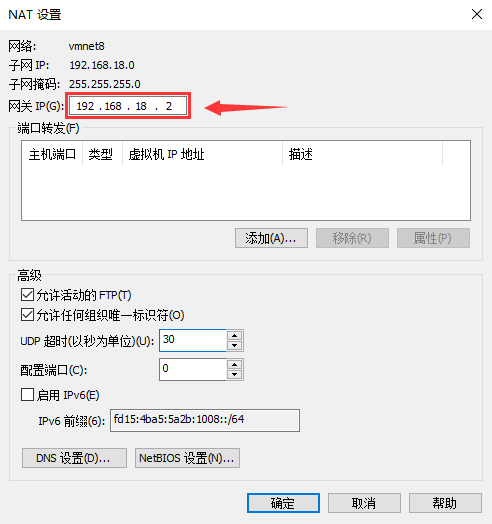
-
Remember the gateway IP, for example: Figure 192.168.18.2
-
Many small partners will find that the gateway here is 192.168.18.2. Why not set it to 192.168.18.1?
-
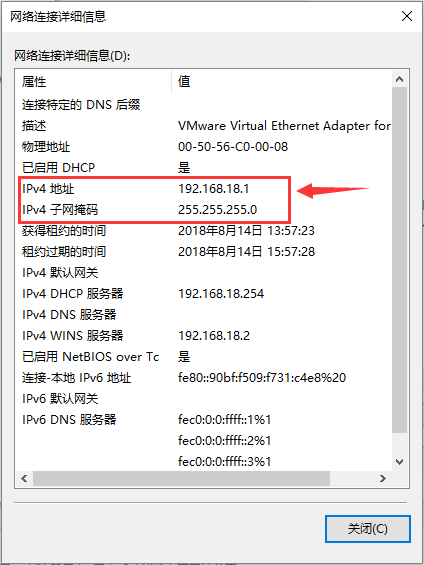
Enter the network connection panel of the system, find the VMware Network Adapter VMnet8, right-click on the selection status
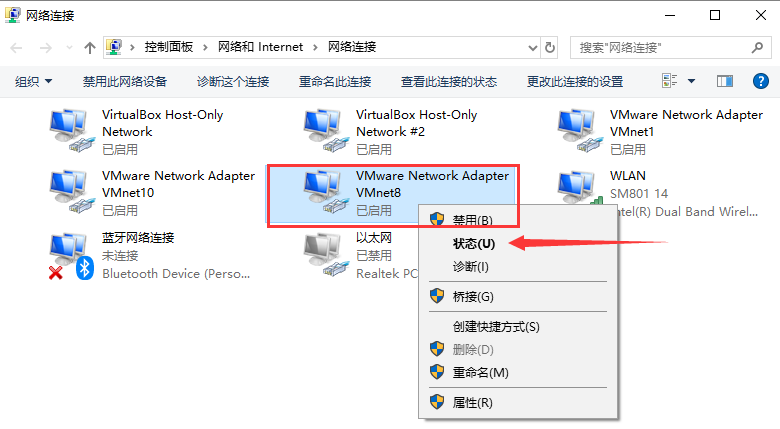
-
Click on the details to see the IPv4 address. You can see 192.168.18.1.
From some point of view, it can be understood that VMware creates a virtual router in the computer. The virtual machine connects to the router, and then the router as a virtual network and the host physical network connection, the router must have an address, that is, IP, so it will be 192.168.18.1.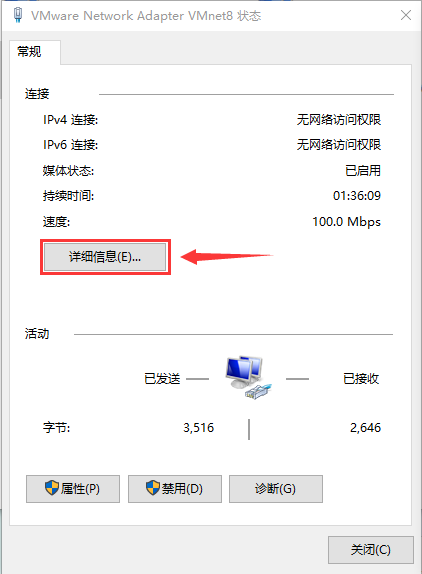
PS1: Some friends will ask why not bridge or Host-Only?
- First of all, Host-Only does not support networking. The virtual machine of Host-Only network can only communicate with the host, but can not connect with the outside world.
- Secondly, the NET model can be understood as the ost-Only model that can be networked.
- Thirdly, the NEt model can explain the problems often encountered in network configuration. The most common one is the gateway setup, and the next one is the starting and ending IP address after DHCP is turned on.
- Compared with the above two modes, bridging mode will be much simpler, but there will be many problems. For the experimental environment, static IP is indispensable, but once the host network is switched, our virtual machine needs to reset the static network.
- So we recommend using NET mode.
- The second step will apply to the static and DHCP modes of the three networks.
Part 2: Configuring CentOS 7 Virtual Machine
Before starting the following steps, make sure that you are connected to a NET-mode network or a bridged network
-
Display the running status of network equipment
1 [root@sxy ~]$ ip link -
Display network parameters of network interface
1 [root@sxy ~]$ ip addr -
Modifying Network Card Information - ONBOOT
1 [root@sxy ~]$ vi /etc/sysconfig/network-scripts/ifcfg-exxxxxx
2 ##Find the ONBOOT parameter and change no to yes, that is, set the network card to boot automatically.
3 ONBOOT=yes
-
service network restart
1 [root@sxy ~]$ systemctl restart network -
Detecting Network Connectivity
1 [root@sxy ~]$ ping 114.114.114.114 -c 3
2 PING 114.114.114.114 (114.114.114.114) 56(84) bytes of data.
3 64 bytes from 114.114.114.114: icmp_seq=1 ttl=67 time=1.55 ms
4 64 bytes from 114.114.114.114: icmp_seq=2 ttl=70 time=1.47 ms
5 64 bytes from 114.114.114.114: icmp_seq=3 ttl=65 time=1.54 ms
6
7 --- 114.114.114.114 ping statistics ---
8 3 packets transmitted, 3 received, 0% packet loss, time 2003ms
9 rtt min/avg/max/mdev = 1.472/1.522/1.554/0.057 ms
-
So far, DHCP has been used to distribute IP networking successfully. The following steps describe how to configure static static static IP
-
Display Network Parameters of Network Interface - View Current IP
1 ##Record ip addresses allocated by existing DHCP
2 [root@sxy ~]$ ip addr
-
Modifying Network Card Information - IP
1 [root@sxy ~]$ vi /etc/sysconfig/network-scripts/ifcfg-exxxxxxx
2
3 BOOTPROTO=static to change dhcp to static
 4 IPADDR=XXX.XXX.XXX.XXX. XXX Fill in the IP address under the corresponding network card in the previous step
5 NETMASK=255.255.255.0
 6 GATEWAY=XXX.XXX.XXX.XXX.XXX Fill in the Gateway Address of the Virtual Network before
-
service network restart
1 [root@sxy ~]$ systemctl restart network -
Detecting Network Connectivity Again
 1 [root@sxy ~]$ ping 114.114.114.114 -c 3
 2 ## As long as you can ping 114.114.114.114, it means online.
 3 PING 114.114.114.114 (114.114.114.114) 56(84) bytes of data.
 4 64 bytes from 114.114.114.114: icmp_seq=1 ttl=67 time=1.55 ms
 5 64 bytes from 114.114.114.114: icmp_seq=2 ttl=70 time=1.47 ms
 6 64 bytes from 114.114.114.114: icmp_seq=3 ttl=65 time=1.54 ms
 7
 8 --- 114.114.114.114 ping statistics ---
 9 3 packets transmitted, 3 received, 0% packet loss, time 2003ms
10 rtt min/avg/max/mdev = 1.472/1.522/1.554/0.057 ms
-
Detecting domain name resolution
1 [root@sxy ~]$ ping baidu.com
2 ping: unknown host baidu.com
-
Configuration domain name resolution
1 [root@sxy ~]$ vi /etc/resolv.conf
2
3 nameserver 114.114.114.114
4 nameserver 8.8.8.8
perhaps
1 [root@sxy ~]$ vi /etc/sysconfig/network-scripts/ifcfg-exxxxxxx
2
3 ##Add the next two lines.
4 DNS1=114.114.114.114
5 DNS2=8.8.8.8
-
Detecting domain name resolution again
 1 [root@sxy ~]$ ping baidu.com -c 3
 2
 3 PING 114.114.114.114 (114.114.114.114) 56(84) bytes of data.
 4 64 bytes from 114.114.114.114: icmp_seq=1 ttl=67 time=1.55 ms
 5 64 bytes from 114.114.114.114: icmp_seq=2 ttl=70 time=1.47 ms
 6 64 bytes from 114.114.114.114: icmp_seq=3 ttl=65 time=1.54 ms
 7
 8 --- 114.114.114.114 ping statistics ---
 9 3 packets transmitted, 3 received, 0% packet loss, time 2003ms
10 rtt min/avg/max/mdev = 1.472/1.522/1.554/0.057 ms
-
Above all, the whole process from basic configuration to system setup has been completed.
-
Bridging steps are identical, but you need to know that gateways are generally X.X.X.1
-
Complete!!!