Bowen catalog
1. Introduction to Compose
2. Install Docker
1. Install version 19.03.9 Docker
2. Configure Mirror Acceleration
3. Install and use Docker Compose
1. Github Download Docker Compose
2. Docker Compose Download by Dow Cloud
IV. Writing.yml Files
1..yml file to build simple Nginx services
2. Compoose+dockerfile to build a mirror
3. Use.yml file to build blog platform
1. Introduction to Compose
Compose is a tool for defining and running multi-container Docker applications.With Compose, you can configure the services of your application using YAML files.Then, with one command, you can create and start all services from the configuration.
Docker-Compose is a container organization tool.Using a.yml or.yaml file, write the deployment method, file mapping, container port mapping of all containers in one configuration file, and execute the docker-compose up command like a script, install and deploy containers one by one.
Basic syntax for YAML files:
-
Case sensitive;
-
Use indentation to represent hierarchical relationships;
-
Indentation does not allow tab s, only spaces;
-
The number of indented spaces is not important as long as the elements of the same level are left-aligned.
- "#" denotes a comment;
Dockerfile allows users to manage a single application container; Compose allows users to define a set of associated application containers in a template (in YAML format), such as a Web service container plus a back-end database service container, as follows: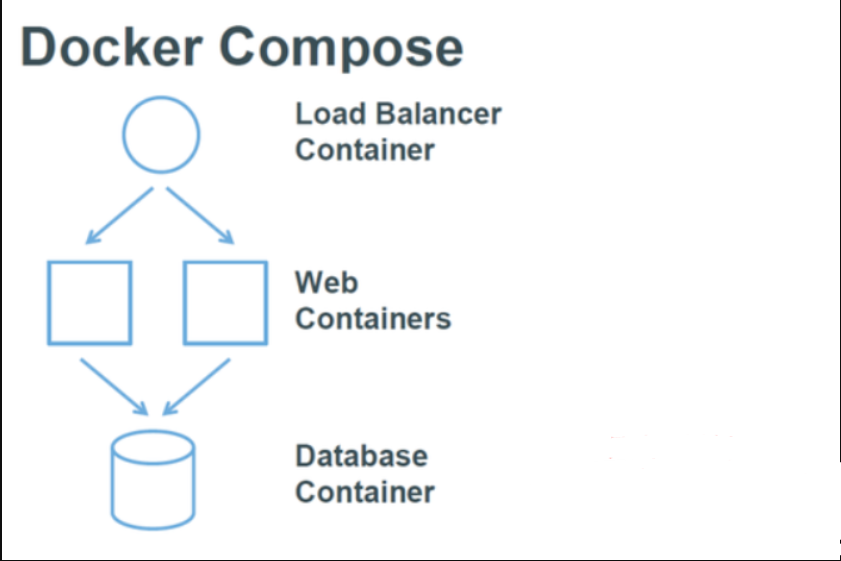
Docker Compose divides managed containers into three layers:
-
project;
-
service;
- Containers;
All yml files in the docker compose runtime directory make up a project, a project that contains multiple services, each of which defines the mirror, parameters, and dependencies for container operations.A service can include multiple container instances.
docker-compose is the docker container organization tool, which mainly solves the management of multiple containers that depend on each other.
2. Install Docker
Server is CentOS7.4; Docker version is 19.03.9
1. Install version 19.03.9 Docker
[root@centos01 ~]# cd /etc/yum.repos.d/
[root@centos01 yum.repos.d]# wget -O /etc/yum.repos.d/CentOS-Base.repo https://mirrors.aliyun.com/repo/Centos-7.repo
     <!--download Centos7 source-->
[root@centos01 yum.repos.d]# curl https://download.docker.com/linux/centos/docker-ce.repo -o /etc/yum.repos.d/docker.ce.repo
       <!--Download the latest version docker source-->
[root@centos01 ~]# yum -y install docker-ce yum-utils device-mapper-persitent-data lvm2
 <!--install docker and docker-ce Dependent Programs-->
[root@centos01 ~]# Docker version <!--View docker version-->
Client: Docker Engine - Community
 Version:           19.03.9
 API version:       1.40
 Go version:        go1.13.10
 Git commit:        9d988398e7
 Built:             Fri May 15 00:25:27 2020
 OS/Arch:           linux/amd64
 Experimental:      false

Server: Docker Engine - Community
 Engine:
  Version:          19.03.9
  API version:      1.40 (minimum version 1.12)
  Go version:       go1.13.10
  Git commit:       9d988398e7
  Built:            Fri May 15 00:24:05 2020
  OS/Arch:          linux/amd64
[root@centos01 ~]# Systemctl start docker <!--Start docker service-->
[root@centos01 ~]# Systemctl enable docker <!--Set startup autostart-->
2. Configure Mirror Acceleration
Next, enable the download mirror acceleration provided by Dow Cloud (which is also provided by Ali, and I'll write about Dow Cloud here).
Dow Cloud Accelerator URL: https://www.daocloud.io/
The process is as follows:
1) Visit the official website of Dow Yun;
2) Register the user and log in;
After the first two steps are completed, see the picture operation:
When you see the following interface, drag down the page: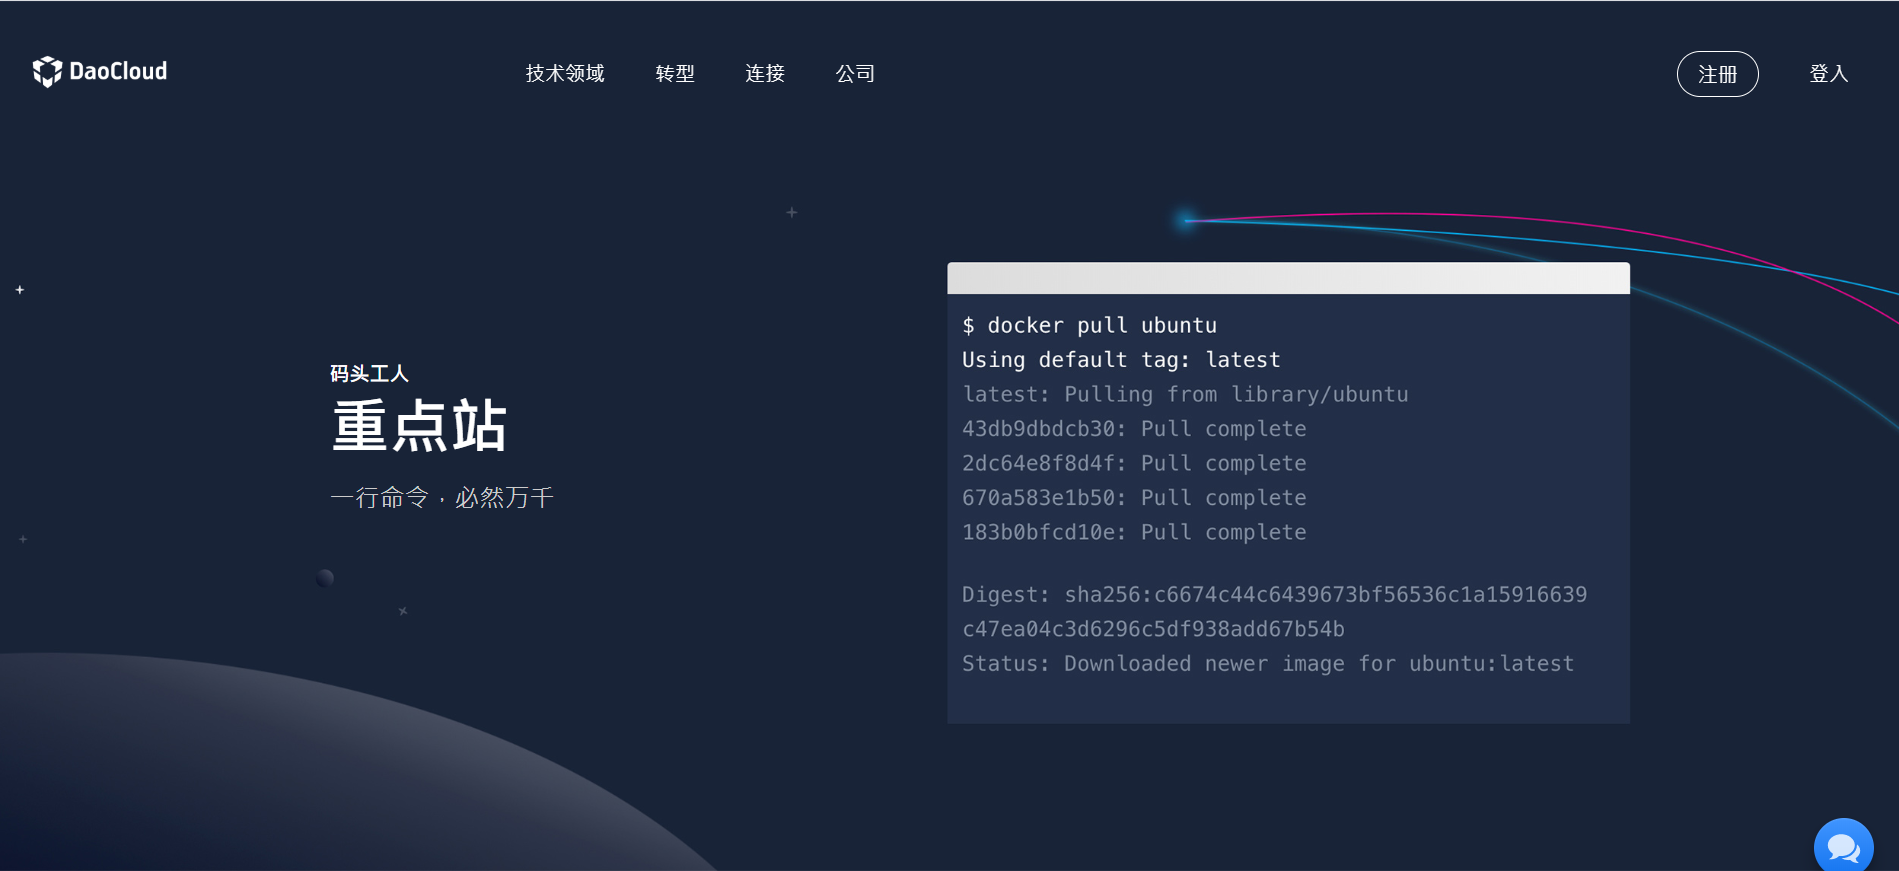
Drag here to copy the command according to your system version (copy the following line based on the Linux server):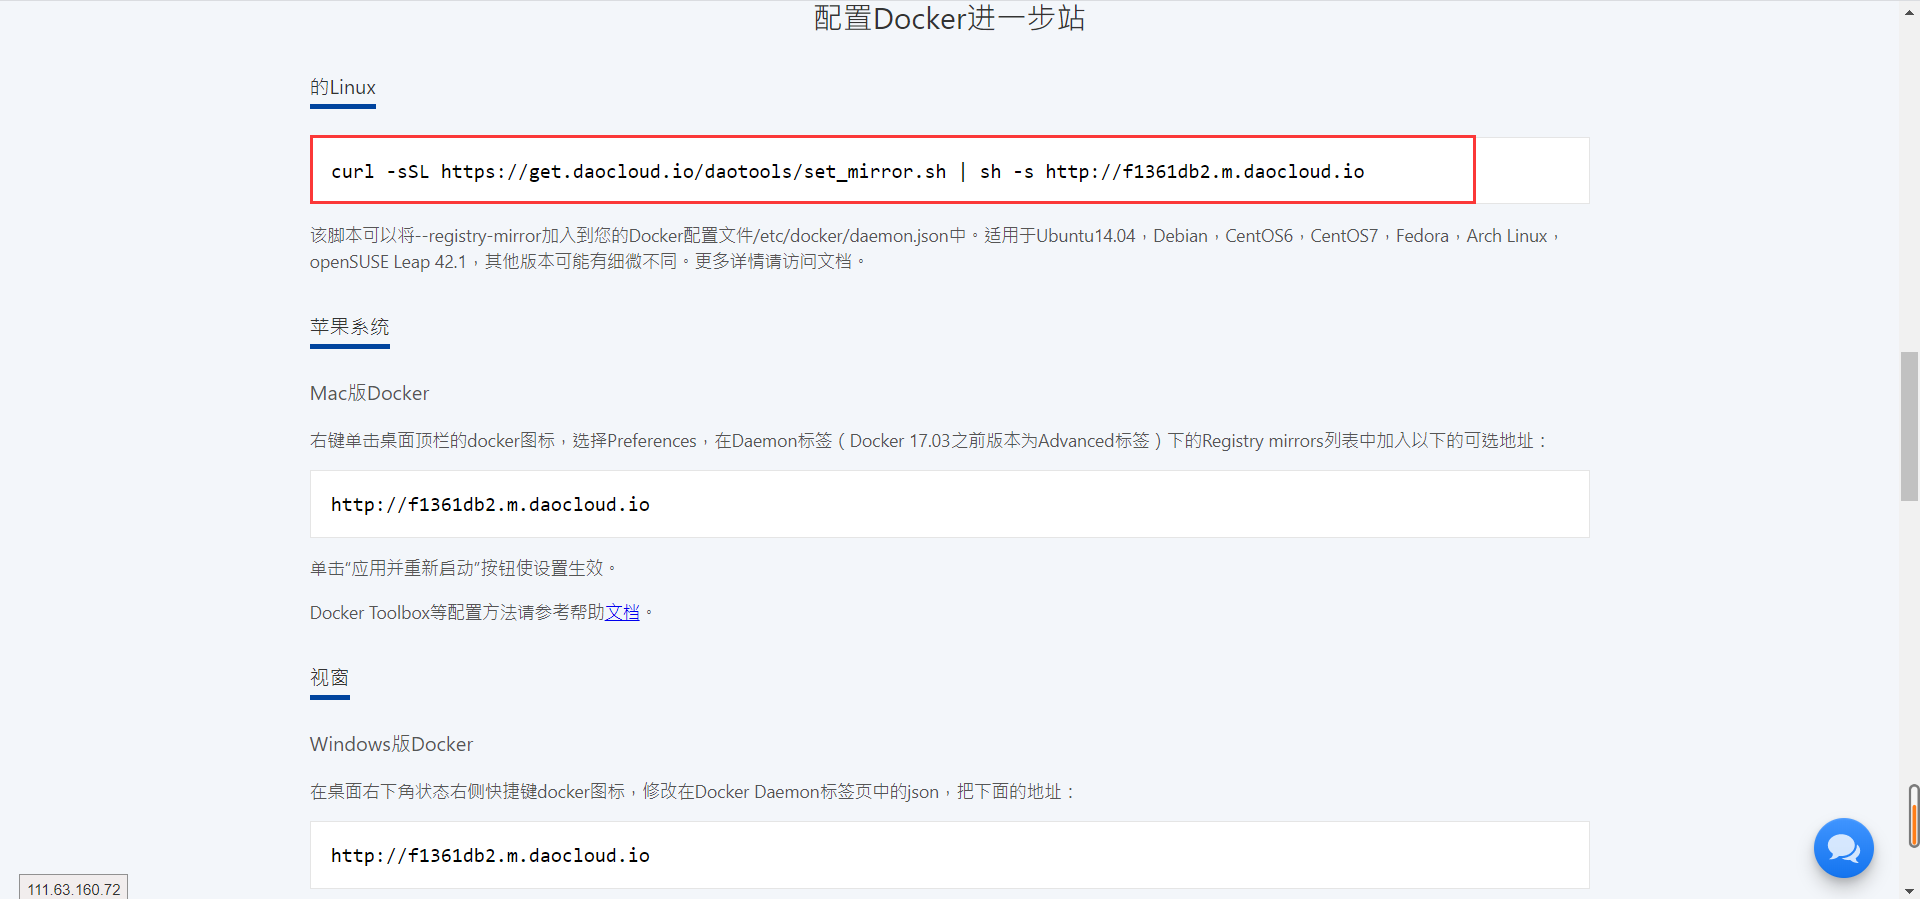
[root@centos01 ~]# Curl-sSLHttps://get.daocloud.io/daotools/set_Mirror.sh| sh-sHttp://f1361db2.m.daocloud.io<!--Paste the command you just copied-->
docker version >= 1.12
{"registry-mirrors": ["http://f1361db2.m.daocloud.io"]}
Success.
You need to restart docker to take effect: sudo systemctl restart docker
[root@centos01 ~]# Cat/etc/docker/Daemon.json<!--Check to see if acceleration was successfully configured-->
{"registry-mirrors": ["http://f1361db2.m.daocloud.io"]}
[root@centos01 ~]# Systemctl restart docker <!--Restart docker service-->
3. Install and use Docker Compose
1. Github Download Docker Compose
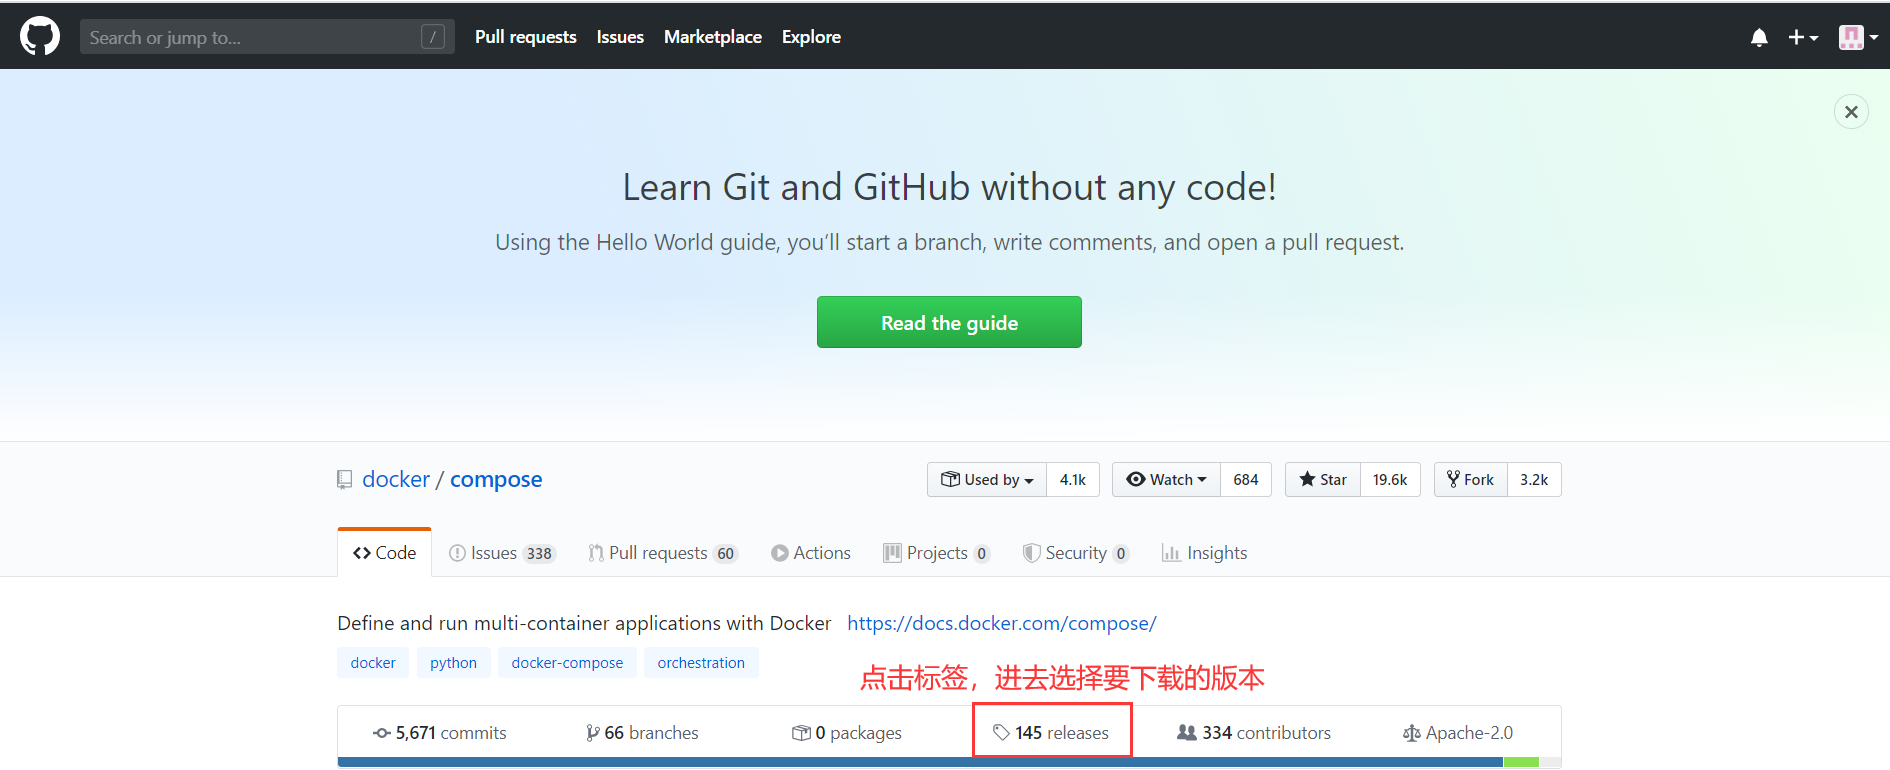
If you want to use compose as a container orchestration tool, you must use the docker-based service, then download the docker-compose command, and we can go Official github website Search for "docker Compose" as follows: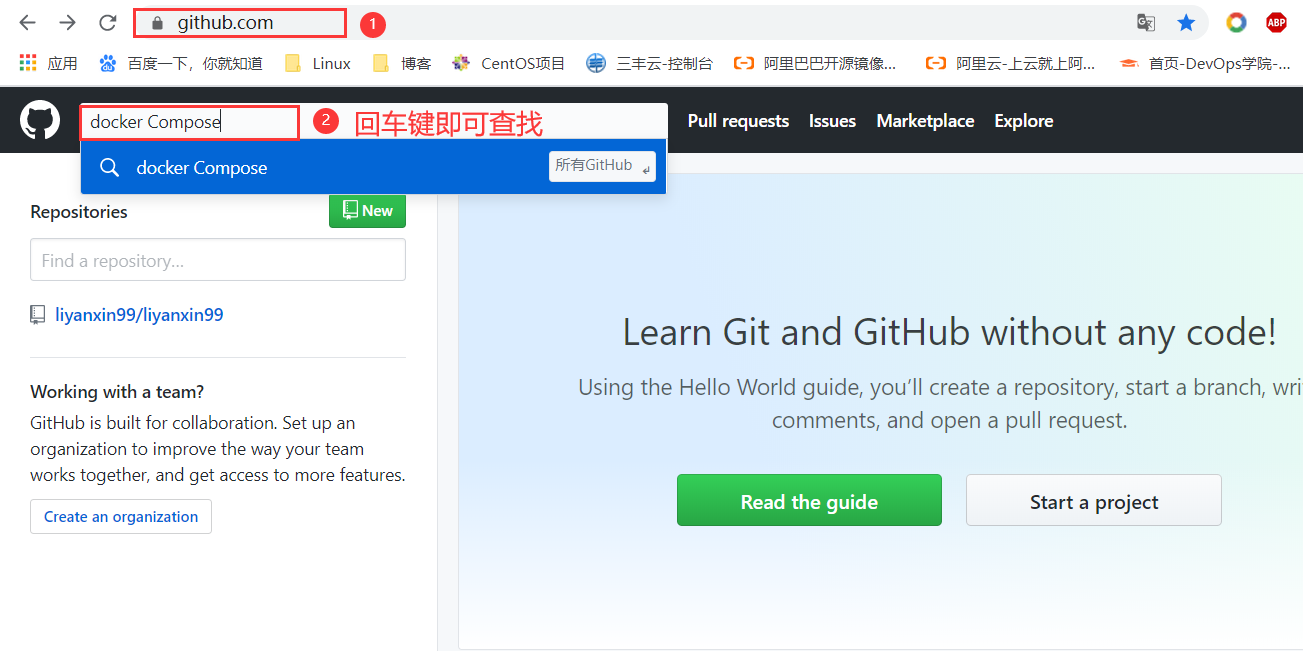

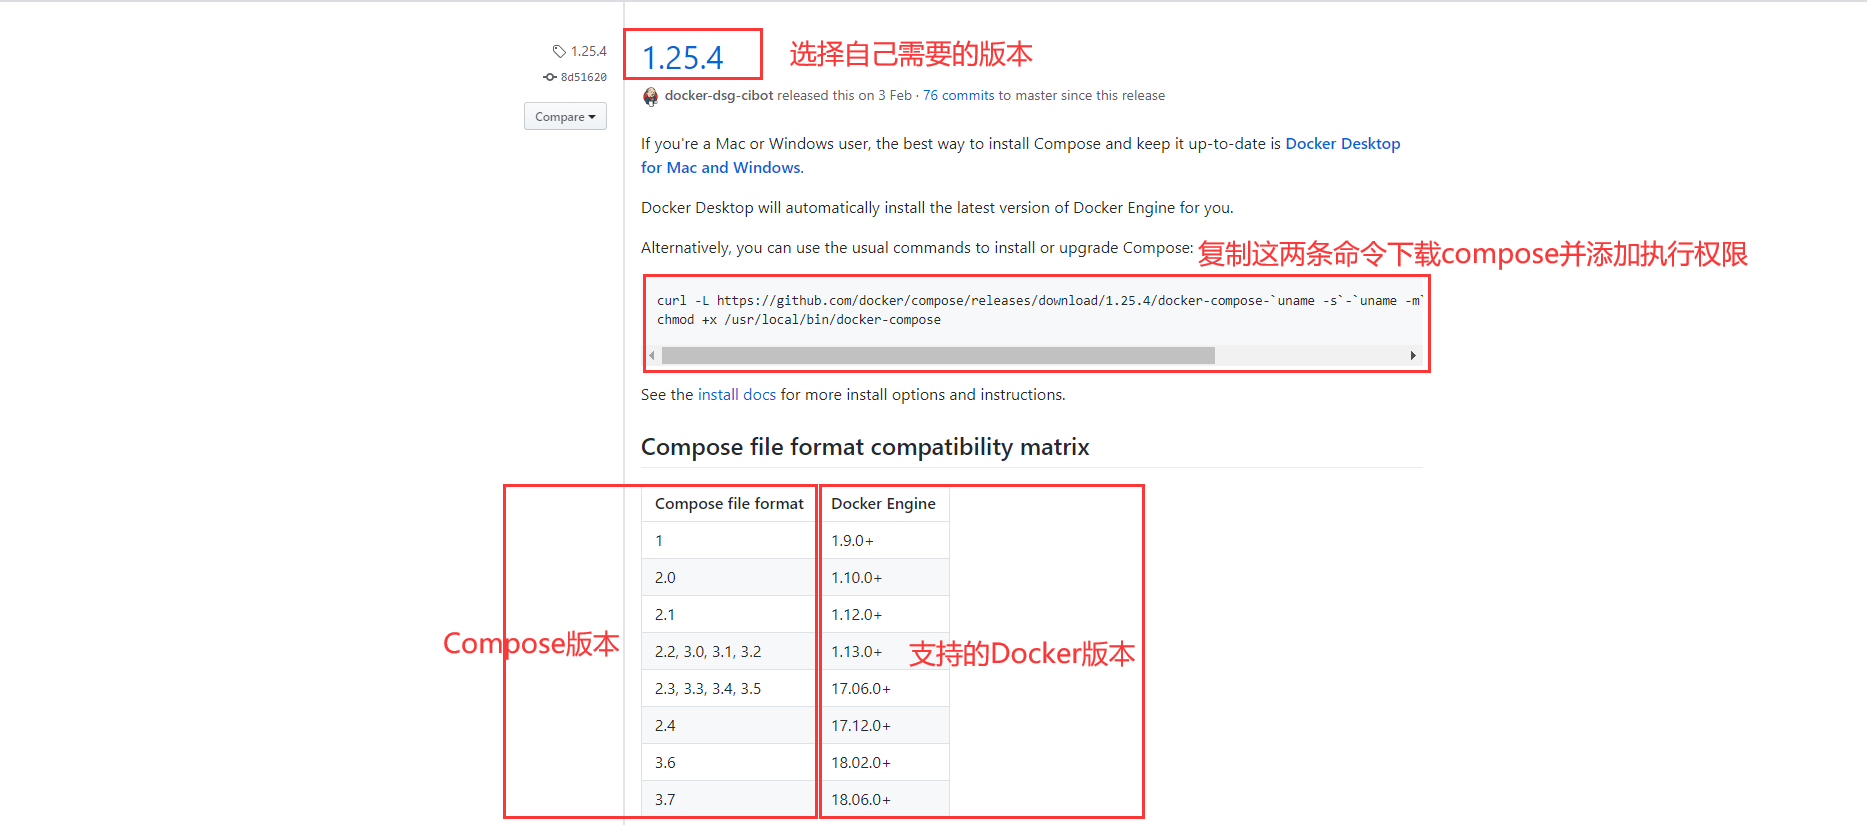
When downloading the compose tool, first check the docker version on your machine!
[root@centos01 ~]# docker -v
Docker version 19.03.9, build 9d988398e7
If the docker version is too low, you can look for other versions of the docker-compose tool yourself.After selecting the appropriate version, execute the commands found on the github website.
[root@centos01 ~]#curl -L https://github.com/docker/compose/releases/download/1.25.4/docker-compose-`uname -s`-`uname -m` -o /usr/local/bin/docker-compose
[root@centos01 ~]#chmod +x /usr/local/bin/docker-compose
2. Docker Compose Download by Dow Cloud
If the download fails due to poor network speed, you can choose one download method: (Personally, I recommend one)
First we visit Dow Cloud Official Website Download it from Dao Yun's official website as follows: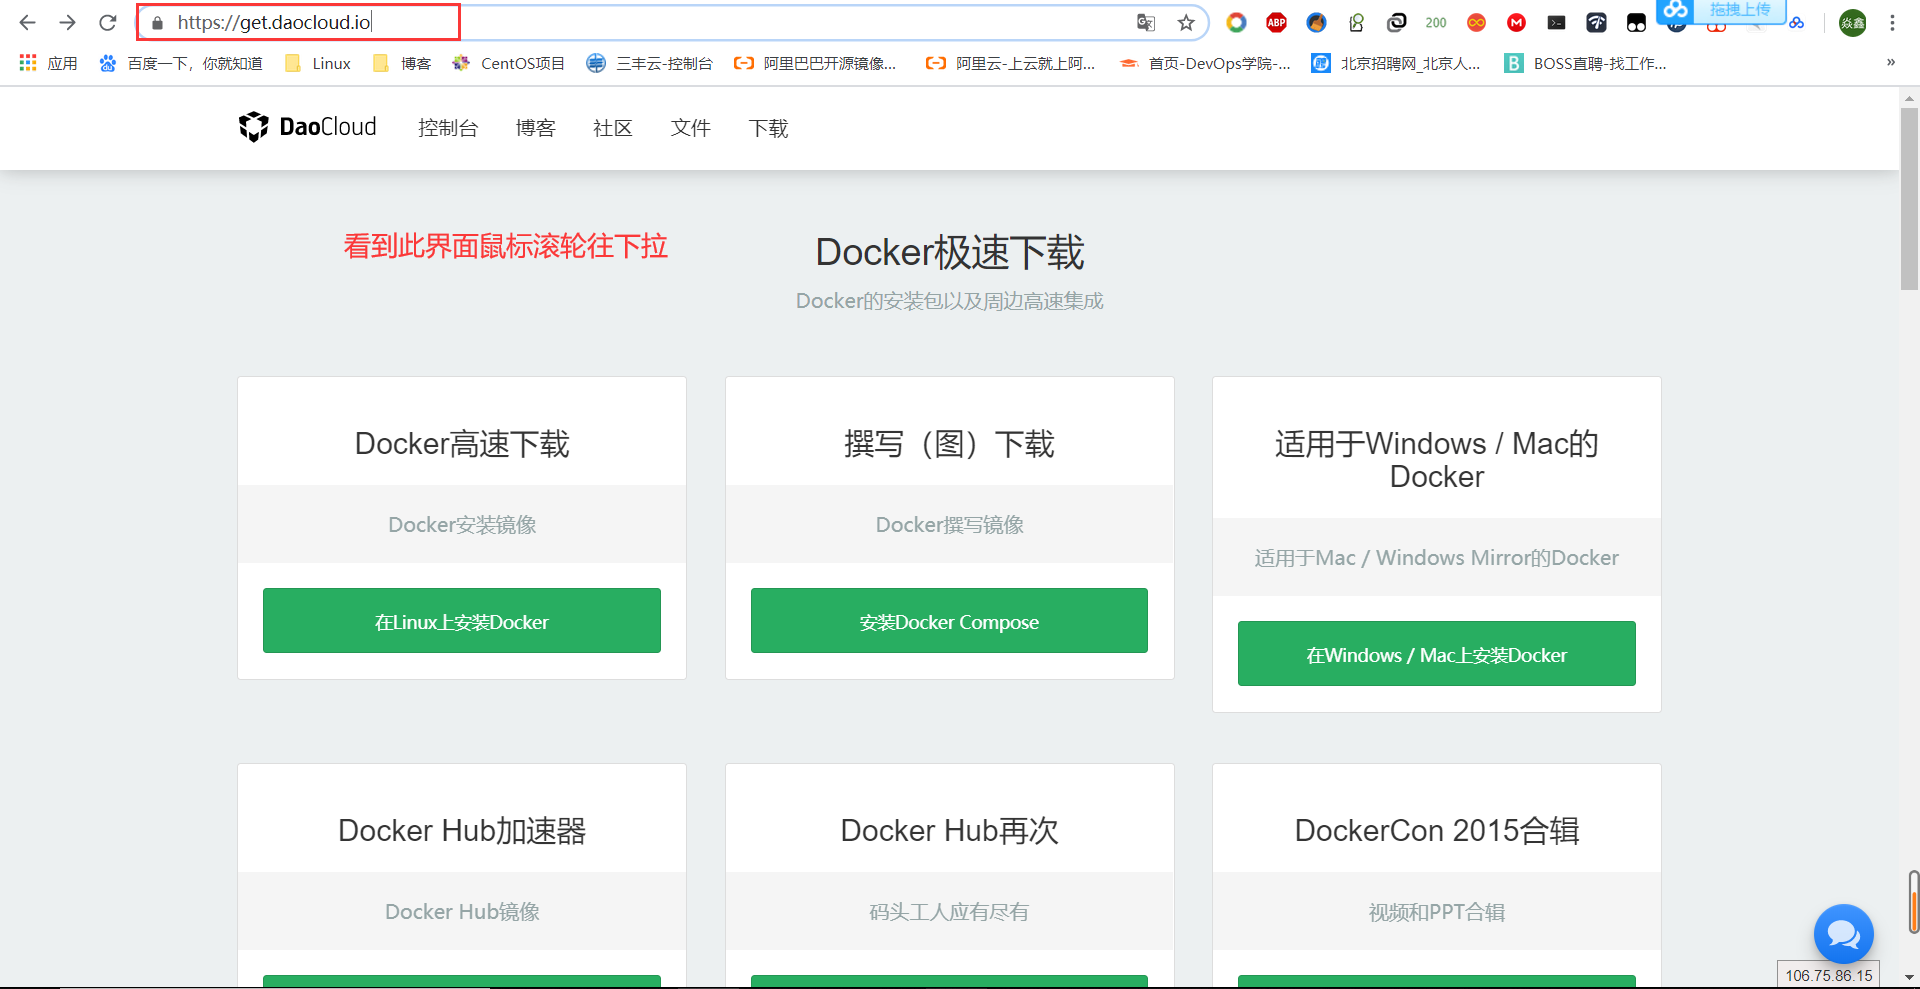
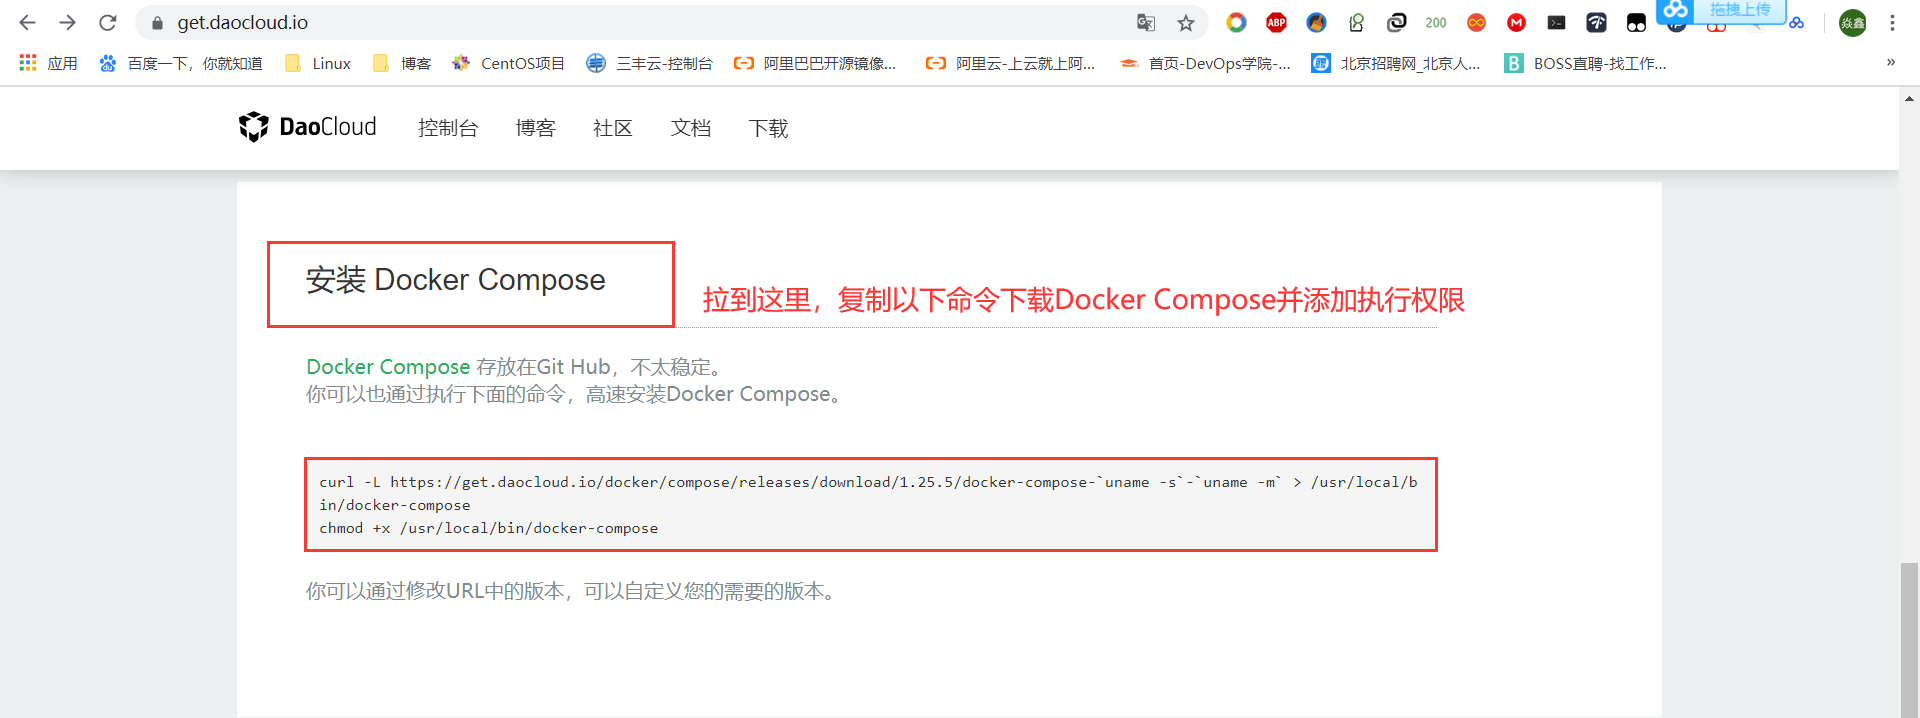
[root@centos01 ~]# curl -L https://get.daocloud.io/docker/compose/releases/download/1.25.5/docker-compose-`uname -s`-`uname -m` > /usr/local/bin/docker-compose
          <!--Paste the command you just copied to download Docker Compose-->
[root@centos01 ~]# Docker-compose-v <!--View Docker Compose Version-->
docker-compose version 1.25.5, build 8a1c60f6
You can customize the version you want by modifying the version in the URL.After executing the above two commands, we can use the docker-compose orchestration tool.
IV. Writing.yml Files
1..yml file to build simple Nginx services
[root@centos01 ~]# vim /root/.vimrc
set tabstop=2
[root@centos01 ~]# source /root/.vimrc
<!--Because tab The key is used more, so one is set up beforehand tab Key represents two spaces-->
[root@centos01 ~]# mkdir docker_compose
        <!--Create a test directory to store docker-compose.yml file-->
[root@centos01 ~]# CD docker_Compose/ <!--Enter the directory you just saw-->
<!--Suggest only one directory docker-compose.yml file-->
[root@centos01 docker_compose]# vim docker-compose.yml
    <!--Write a docker-compose.yml file-->
version: "3"                           <!--compose Version of-->
services:                              <!--Define Services-->
  nginx:
    container_name: nginx           <!--Running Container Name-->
    image: nginx:latest                                  <!--Mirror used-->
    restart: always                                <!--along with docker Start with service-->
    ports:
      - 80:80                                         <!--Mapped Port-->
    volumes:
      - /root/compose_test/webserver:/usr/share/nginx/html
           <!--Directories mounted locally and containers-->
<!--Write a file with indentation in mind-->
[root@centos01 docker_compose]# docker-compose up -d
<!--Use the current directory docker-compose.yml File Generation Corresponding Container-->
<!--"-d"Option to run in the background, if not specified, run in the foreground by default, which occupies the terminal-->
[root@centos01 docker_compose]# Docker PS <!--View running containers-->
CONTAINER ID        IMAGE               COMMAND                  CREATED             STATUS              PORTS                NAMES
a4d71936dd12        nginx:latest        "nginx -g 'daemon of..."   46 seconds ago      Up 45 seconds       0.0.0.0:80->80/tcp   nginx
[root@centos01 docker_compose]# echo "www.docker-compose.com" > webserver/index.html
       <!--Create Test Page-->
[root@centos01 docker_compose]# CurlHttp://192.168.100.10<!--Access Test-->
www.docker-compose.com
[root@centos01 docker_compose]# Docker-compose stop <!--Stops the container specified in the file through the.yml file-->
Stopping nginx ... done
[root@centos01 docker_compose]# Docker PS <!--Check to see if the container stops-->
CONTAINER ID        IMAGE               COMMAND             CREATED             STATUS              PORTS               NAMES
[root@centos01 ~]# docker-compose -f docker_compose/docker-compose.yml up -d
<!--You can use "-f"Options to specify yml Container defined in file startup file-->
2. Compoose+dockerfile to build a mirror
[root@centos01 ~]# MKDIR compose & & CD compose <!--Create a test directory and enter -->
[root@centos01 compose]# VIM Dockerfile <!--Create dockerfile-->
FROM nginx:latest          <!--base image-->
ADD html /usr/share/nginx/html
[root@centos01 compose]# VIM docker-Compose.yml<!--Write YML file-->
version: '3'
services:
  nginx:
    build: .              <!--Specify here dockerfile Path, you can write relative or absolute paths-->
    container_name: nginx001   <!--Generated container name-->
    image: nginx001           <!--Use dockerfile Generated Mirror Name-->
    restart: always           <!--along with docker Start with service-->
    ports:
      - 8080:80             <!--Mapped Port-->
[root@centos01 compose]# MKDIR HTML <!--Create site root directory-->
[root@centos01 compose]# Echo "Www.nginx.8080.com"> html/Index.html<!--Write home page test content-->
[root@centos01 compose]# Docker-compose up-d <!--Generate container-->
[root@centos01 compose]# Docker PS <!--View container-->
CONTAINER ID        IMAGE               COMMAND                  CREATED              STATUS              PORTS                  NAMES
1428cd1ab7de        nginx001            "nginx -g 'daemon of..."   About a minute ago   Up About a minute   0.0.0.0:8080->80/tcp   nginx001
a4d71936dd12        nginx:latest        "nginx -g 'daemon of..."   18 minutes ago       Up 15 minutes       0.0.0.0:80->80/tcp     nginx
[root@centos01 compose]# Docker images <!--View mirror-->
REPOSITORY          TAG                 IMAGE ID            CREATED              SIZE
nginx001            latest              55b8bd0a4a59        About a minute ago   127MB
nginx               latest              9beeba249f3e        5 days ago           127MB
[root@centos01 compose]# CurlHttp://192.168.100.10: 8080 <!--Access Test-->
www.nginx.8080.com
[root@centos01 compose]# Docker-compose stop <!--Stop container-->
Stopping nginx001 ... done
[root@centos01 ~]# docker-compose -f compose/docker-compose.yml up -d
            <!--adopt-f Appoint.yml File to run container-->
Starting nginx001 ... done
3. Use.yml file to build blog platform
[root@centos01 ~]# MKDIR WordPress && CD WordPress <!--Create test directory-->
[root@centos01 wordpress]# VIM docker-Compose.yml<!--Write YML file-->
version: '3.1'
services:
  wordpress:
    image: wordpress           <!--Specify the mirror to use-->
    restart: always
    ports:
      - 1111:80        <!--Specify mapped ports-->
    environment:             <!--Modify environment variables inside containers-->
      WORDPRESS_DB_HOST: mysql
      WORDPRESS_DB_USER: wordpress
      WORDPRESS_DB_PASSWORD: pwd@123
      WORDPRESS_DB_NAME: wordpress
  mysql:
    image: mysql:5.6
    restart: always
    command: --character-set-server=utf8   <!--Support Chinese-->
    environment:
      MYSQL_ROOT_PASSWORD: pwd@123  <!--root Access database password-->
      MYSQL_DATABASE: wordpress         <!--Establish wordpress data base-->
      MYSQL_USER: wordpress            <!--User Name-->
      MYSQL_PASSWORD: pwd@123         <!--User Access Password-->
[root@centos01 wordpress]# Docker-compose up-d <!--Generate the appropriate container and run in the background-->
[root@centos01 wordpress]# Docker PS <!--View running containers-->
CONTAINER ID        IMAGE               COMMAND                  CREATED             STATUS              PORTS                  NAMES
a93858ade399        wordpress           "docker-entrypoint.s..."   28 seconds ago      Up 27 seconds       0.0.0.0:1111->80/tcp   wordpress_wordpress_1
cec94e3bd0ee        mysql:5.6           "docker-entrypoint.s..."   28 seconds ago      Up 27 seconds       3306/tcp               wordpress_mysql_1
[root@centos01 wordpress]# Docker images <!--View mirror-->
REPOSITORY          TAG                 IMAGE ID            CREATED             SIZE
mysql               5.6                 9e4a20b3bbbc        10 hours ago        302MB
wordpress           latest              675af3ca3193        5 days ago          540MB
[root@centos01 wordpress]# Netstat-anptu | grep 1111 <!--Make sure port 1111 is listening-->
tcp6       0      0 :::1111                 :::*                    LISTEN      119795/docker-proxy
[root@centos01 wordpress]# echo "net.ipv4.ip_forward = 1" >> /etc/sysctl.conf
            <!--Turn on Routing-->
[root@centos01 wordpress]# Sysctl-p <!--Refresh Configuration-->
net.ipv4.ip_forward = 1
Client AccessHttp://192.168.100.10: 1111
Set up basic information: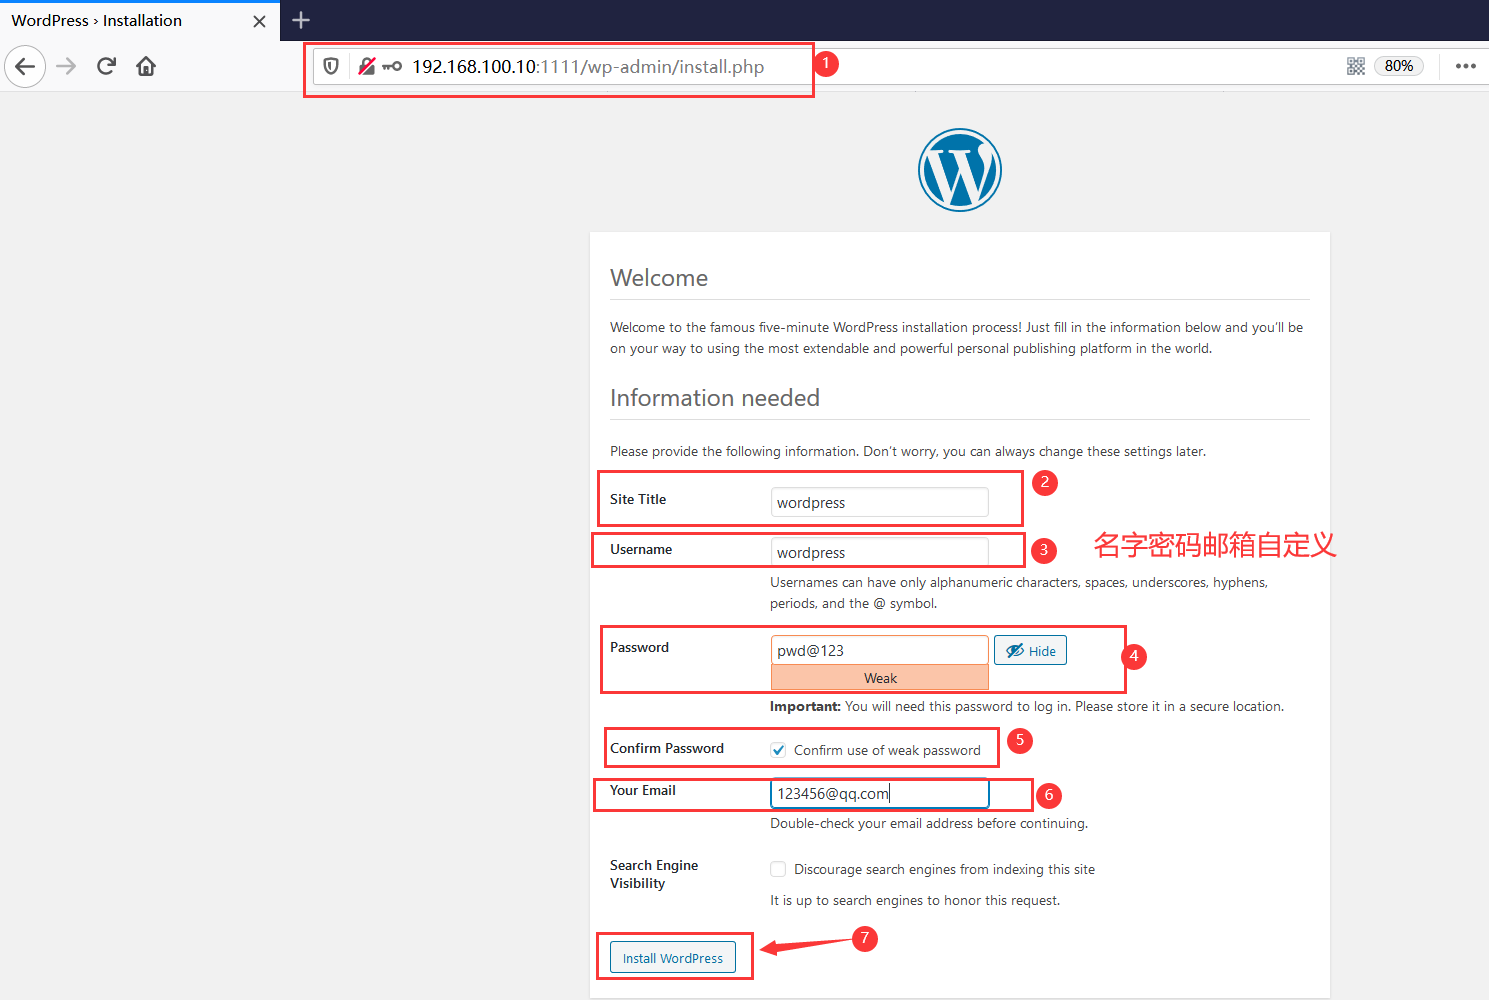
Installation complete, login: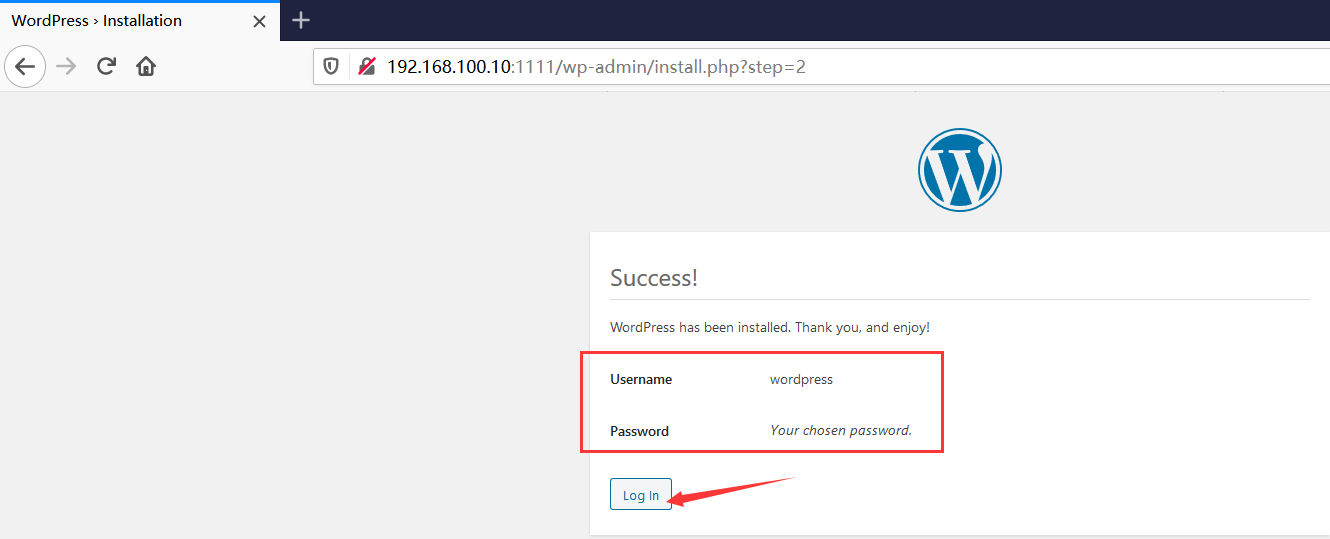
Enter username password: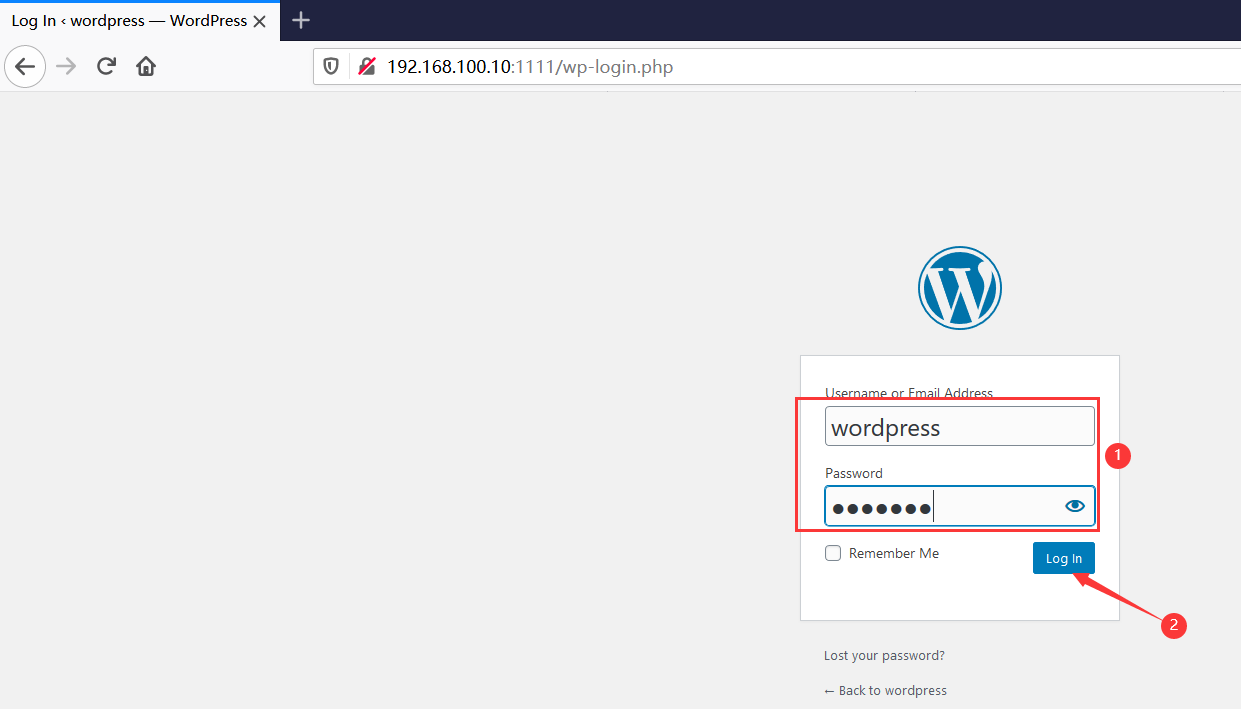
Modify the font to Simplified Chinese: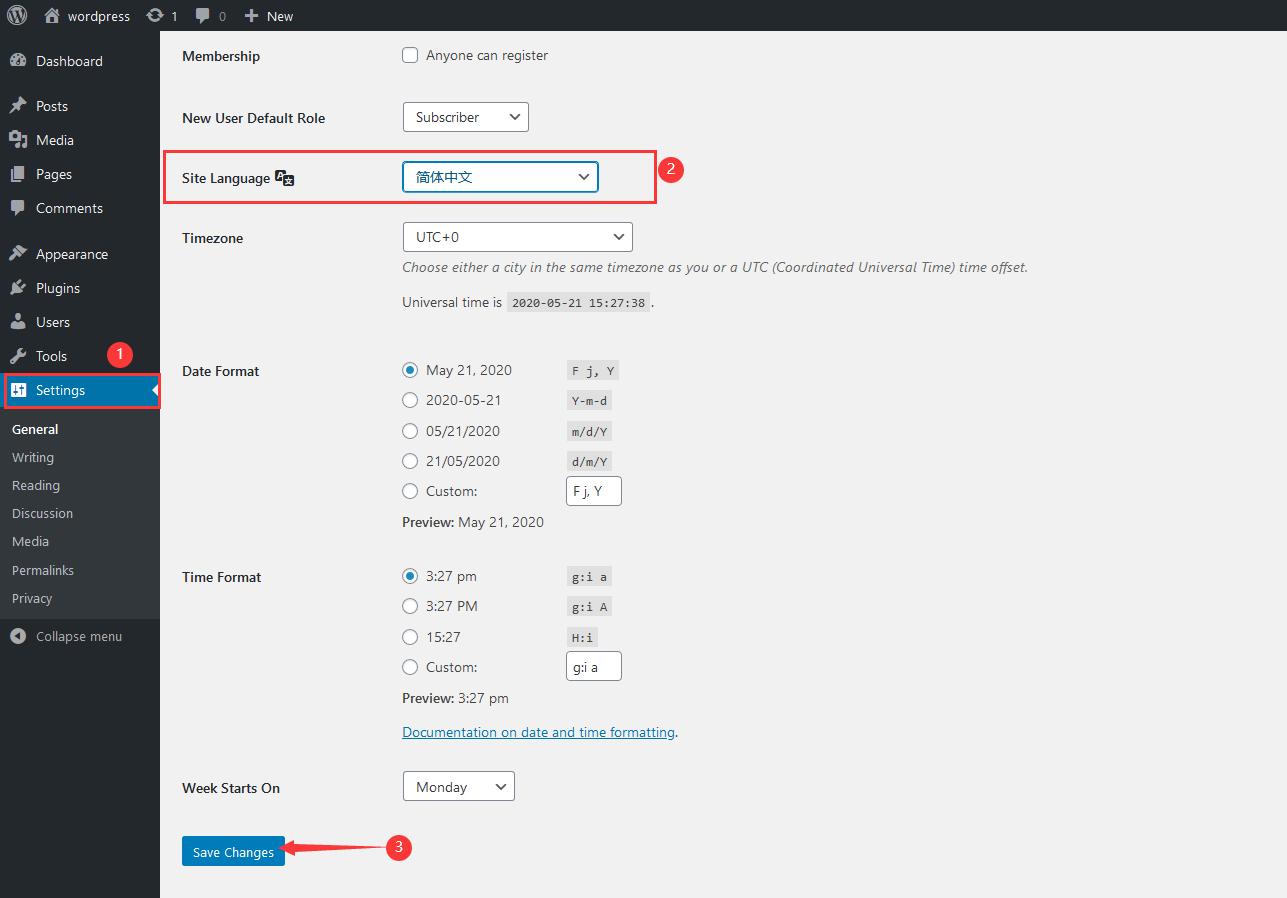
__________