After many m1 installation lessons, a truth is summarized
Be sure to see what m1 downloaded matches that version, otherwise there will always be various problems in the installation!
1). My linux system version is
aarch64

2). Therefore, you must download the corresponding version when downloading mysql, otherwise you will make various errors and fail to install it in the end
Download MySQL (add group to resources, baby)

3) this article is suitable for the above version and the solutions to the problems that may arise.
---------------------------------------Start---------------------------------------------
1. Download the corresponding mysql version above
2. Upload to linux using mac's own terminal
scp /Users/chenbiao/Downloads/mysql-5.7.27-aarch64.tar.gz root@10.211.xx.xx:/usr/local
3. Unzip under linux
tar -xvf mysql-5.7.27-aarch64.tar.gz
4. Rename
mv mysql-5.7.27-aarch64.tar.gz /usr/local/mysql
5. Create mysql user groups and users and modify permissions
groupadd mysql
useradd -r -g mysql mysql
6. Create a data directory and grant permissions
mkdir -p  /data/mysql              #Create directory
chown mysql:mysql -R /data/mysql   #Grant authority
7. Configure my cnf
vim /etc/my.cnf
The pit here is: socket configuration, that is, configure mysql The path of the sock file should be / dev / SHM / MySQL sock
socket=/dev/shm/mysql.sock
If you configure other paths, this error will occur when logging in to msql

As for where I know this path, I also refer to the default configuration given by the system
cd /usr/local/mysql/
cat my.cnf
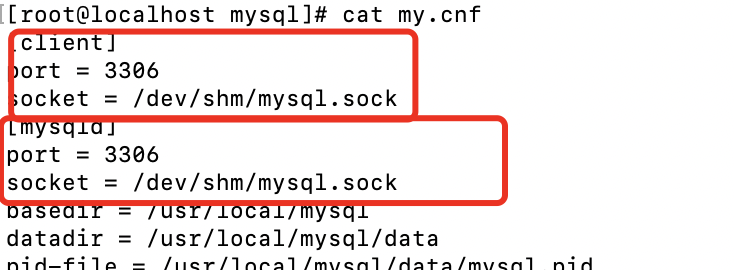
8. Configuration content my cnf
[mysqld]
bind-address=0.0.0.0
port=3306
user=mysql
basedir=/usr/local/mysql
datadir=/data/mysql
socket=/dev/shm/mysql.sock
log-error=/data/mysql/mysql.err
pid-file=/data/mysql/mysql.pid
#character config
character_set_server=utf8mb4
symbolic-links=0
explicit_defaults_for_timestamp=true
[client]
port=3306
socket=/dev/shm/mysql.sock
For the Save command, press and hold the esc key, and then add: enter wq
9. Enter the bin directory of mysql
cd /usr/local/mysql/bin
10. Initialization
./mysqld --defaults-file=/etc/my.cnf --basedir=/usr/local/mysql/ --datadir=/data/mysql/ --user=mysql --initialize
Problems may occur here, as shown in the figure below (because you have previously installed mysql and have a legacy configuration of datadir=/data/mysql), so you just need to change the original name or back up

cd /data
mv mysql mysql_bak

Then return to / usr/local/mysql/bin to execute the initialization command
11. View password
cat /data/mysql/mysql.err

12. Start mysql and change the root password
First mysql Place the server in / etc / init In D / MySQL
cp /usr/local/mysql/support-files/mysql.server /etc/init.d/mysql
13. Execute the command (there may be a problem here)
service mysql start
ps -ef|grep mysql

There is no such file. You need to create one and give mysql permission

Execute five commands
cd /usr/local/mysql/
mkdir -p /usr/local/mysql/logs
chown mysql:mysql -R /usr/local/mysql/logs
echo ""> mysql-error.log
chown -R mysql:mysql mysql-error.log
Then execute
service mysql start

14. Login to mysql
./mysql -u root -p #/usr/local/mysql/bin directory
There may be a problem here because libncurses is missing so. 5 shared library. So just get a soft connection in the existing
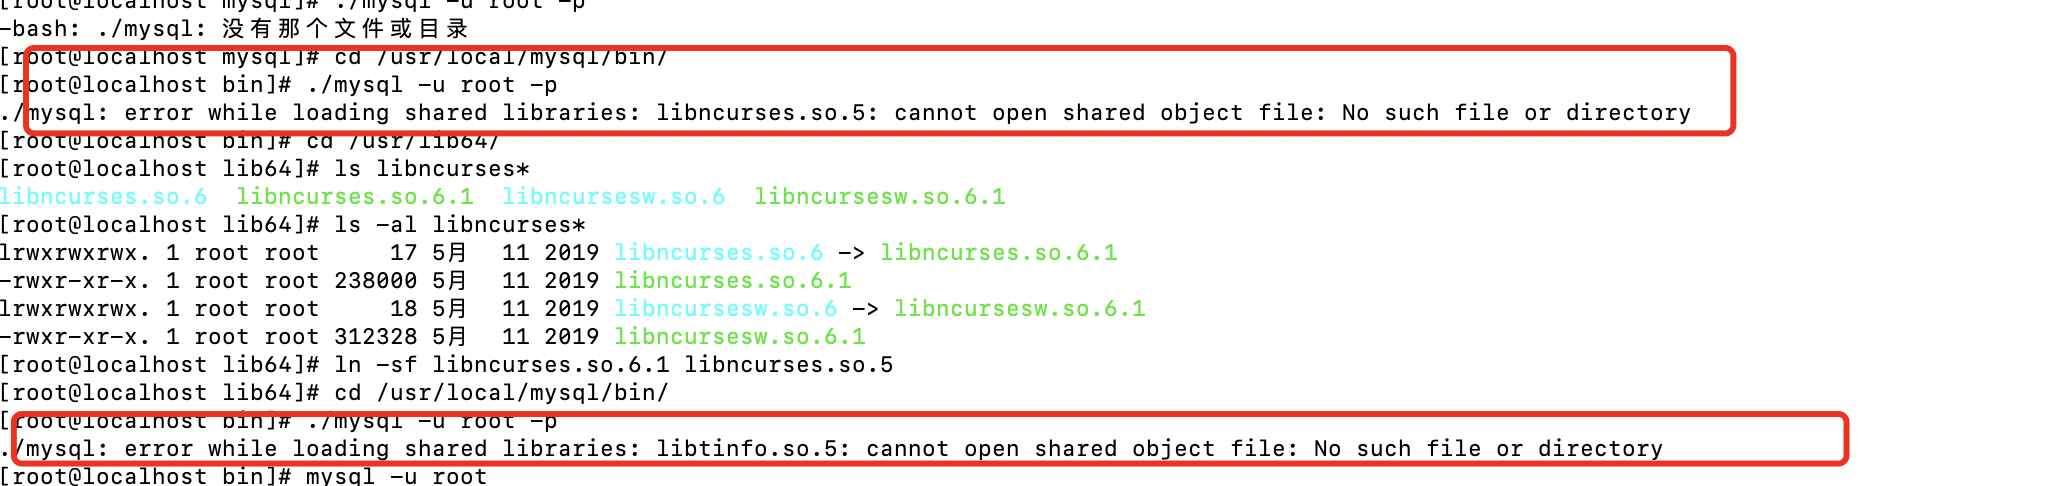
Execute the following command
cd /usr/lib64/
ls libncurses*
ln -sf libncurses.so.6.1 libncurses.so.5
ln -sf libtinfo.so.6.1 libtinfo.so.5
./mysql -u root -p #/usr/local/mysql/bin directory
Execute again
./mysql -u root -p #/usr/local/mysql/bin directory
If the following error occurs
 Follow steps 7 and 8 to configure the corresponding my cnf
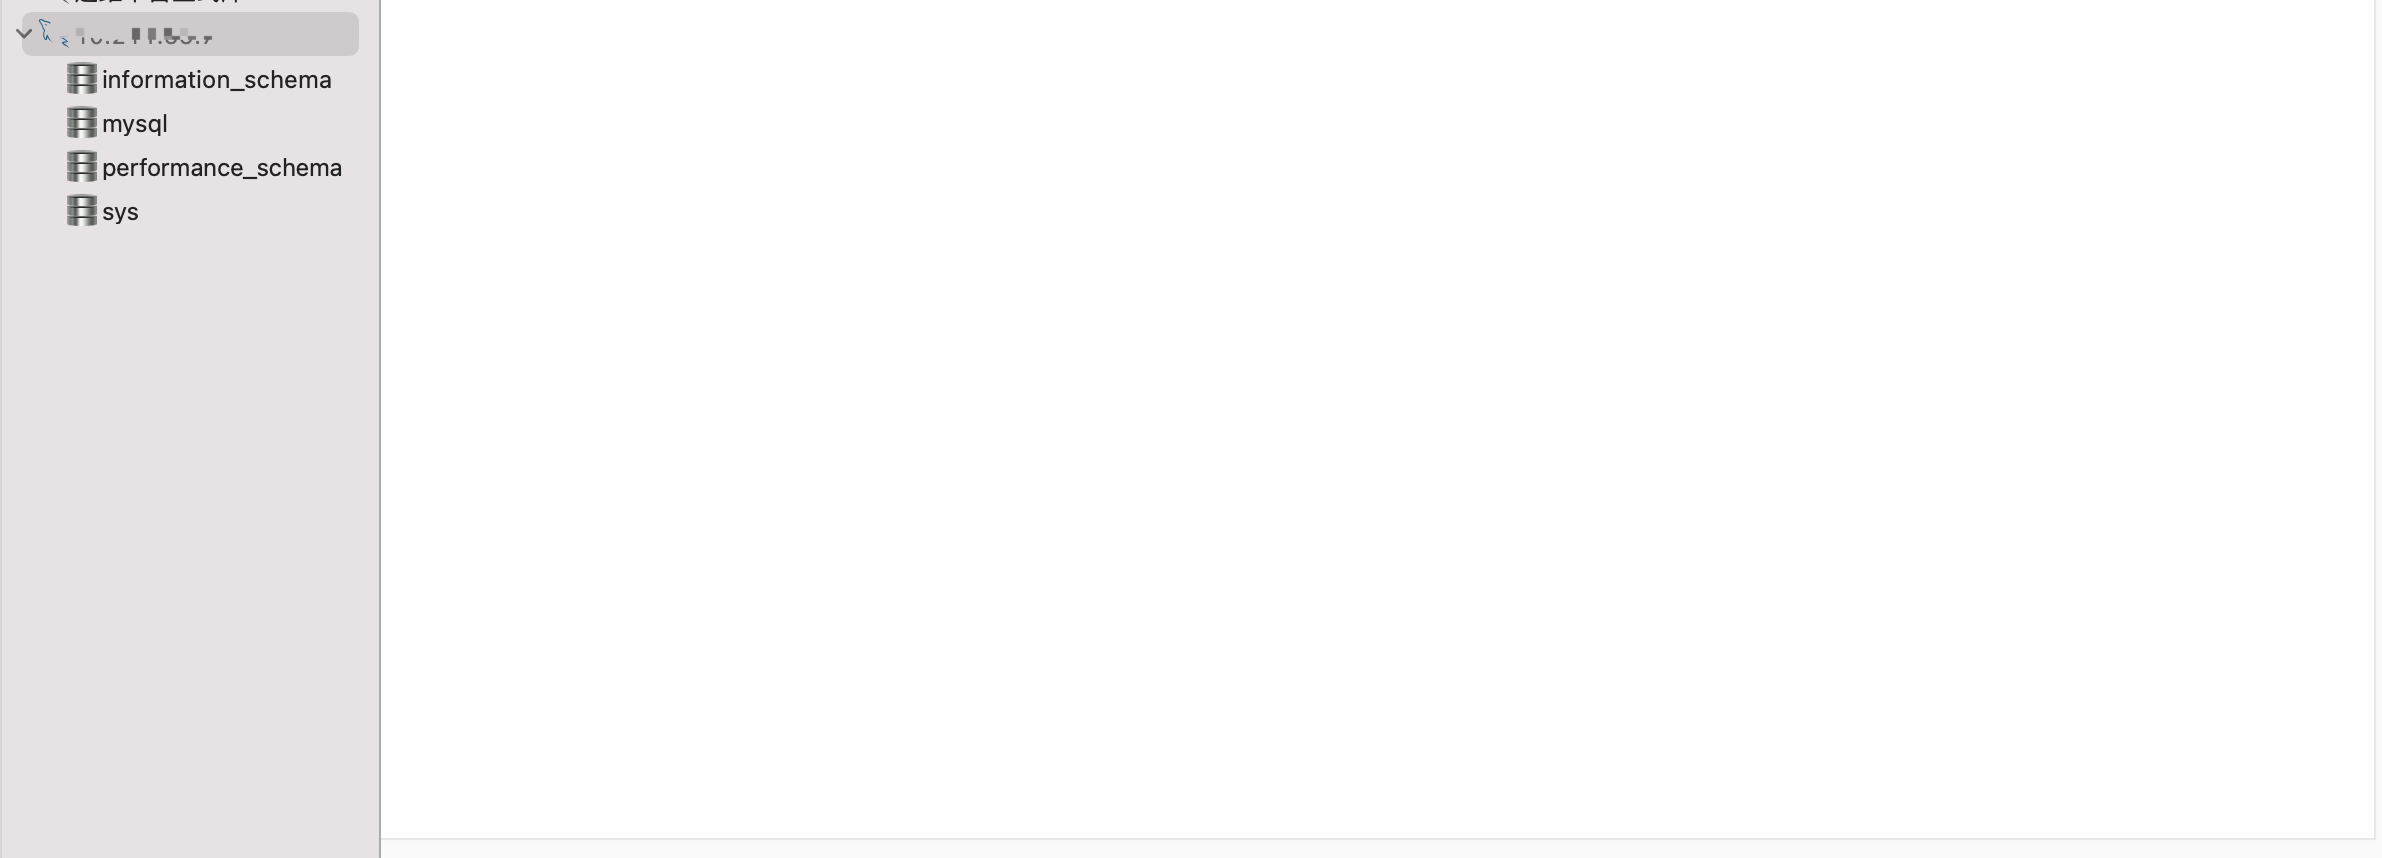
15. Enter password
 The password here is the one shown in step 11. After input, the following figure is displayed, which means success

16. After entering msql, you need to enter
SET PASSWORD = PASSWORD('123456');
ALTER USER 'root'@'localhost' PASSWORD EXPIRE NEVER;
FLUSH PRIVILEGES;
However, there is still a problem when connecting remotely. You need to enter the following three steps
use mysql                                            #Accessing mysql Library
update user set host = '%' where user = 'root';      #Enable root to access any host
FLUSH PRIVILEGES;                                    #Refresh
17. Finally succeeded
Summary: be sure to find the corresponding version
Lazy students can add groups to pull resources, and there are many small partners to solve problems together! (qq group 527413340)