Install rockrmq and rockrmq console in docker environment
1. Download the image of rocketmq
docker pull apacherocketmq/rocketmq
2. Start NameServer
docker run --name rmqnamesrv -p 9876:9876 \
-v /Users/liqi/docker-compose/rocketmq/data/namesrv/logs:/home/rocketmq/logs \
-d apacherocketmq/rocketmq sh mqnamesrv
The above instructions are not explained. They are very simple instructions
3. Start broker
docker run --name rmqbroker \
-p 10909:10909 \
-p 10911:10911 \
-p 10912:10912 \
-v /Users/liqi/docker-compose/rocketmq/data/broker/logs:/home/rocketmq/logs \
-v /Users/liqi/docker-compose/rocketmq/data/broker/store:/home/rocketmq/store \
-v /Users/liqi/docker-compose/rocketmq/data/broker/broker.conf:/home/rocketmq/rocketmq-4.6.0/conf/broker.conf \
-d apacherocketmq/rocketmq \
sh mqbroker -n 10.192.53.197:9876 -c /home/rocketmq/rocketmq-4.6.0/conf/broker.conf
explain:
Contents or documents attached;
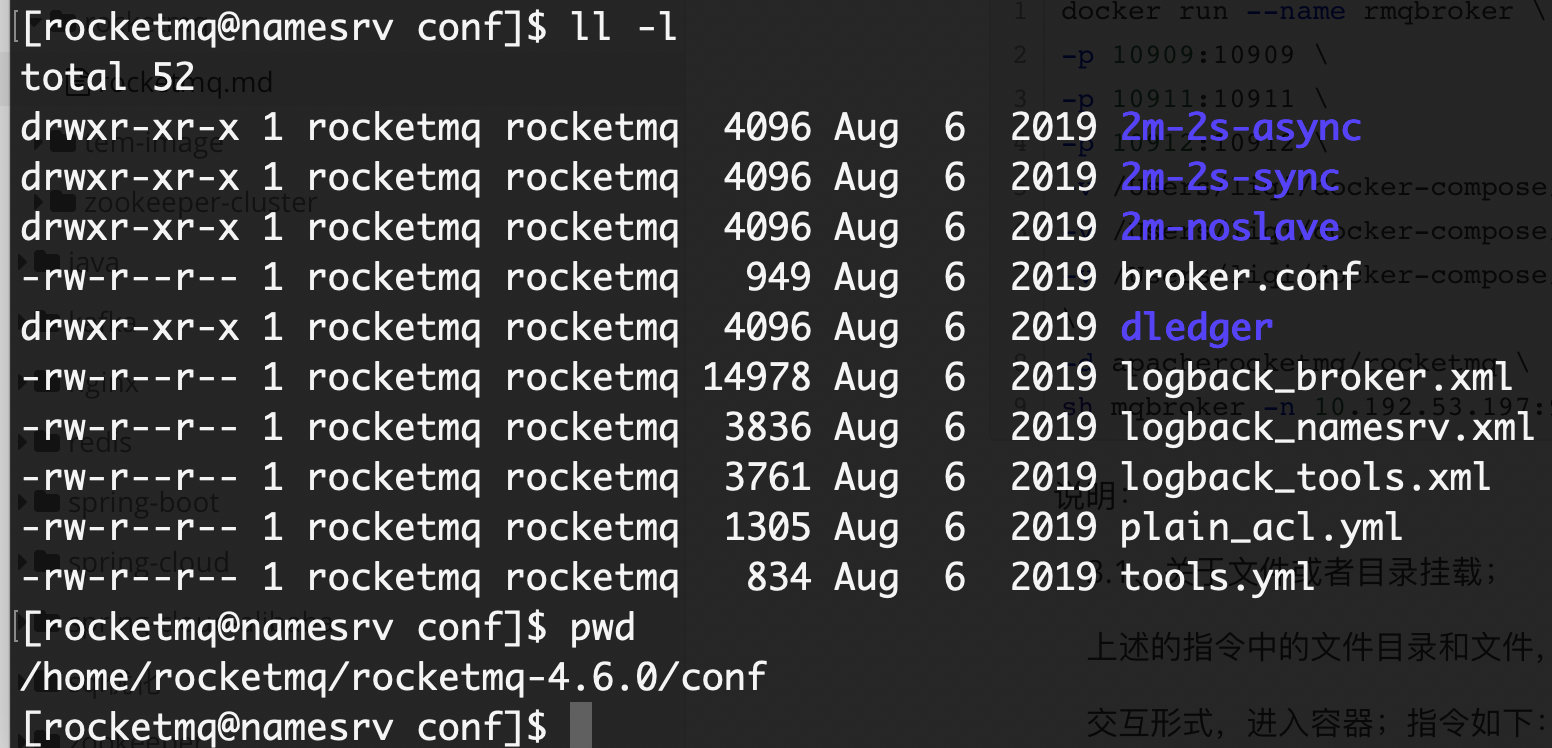
The file directories and files in the above instructions are the ones I create a mirrored instance. After I succeed, I go to the instance container to view the specific directory, and then do the mapping;
Interactive form, enter the container; The instructions are as follows: rmqbroker is the instance name or id of the image created above;
docker exec -it rmqbroker /bin/bash

You can see that my current version of Apache rocketmq / rocketmq: last is version 4.6.0, and the directory of the configuration file also contains version 4.6, which should be noted;
Log file storage directory, you can view logback_broker.xml or logback_namesrv.xml, which mainly depends on whether you start the broker service or NameServer service;
3.2. It should be noted that the broker in the container The content of conf can be copied to the corresponding directory of the physical machine, or a new one can be created in the corresponding directory of the physical machine;
Copy instruction of docker: rmqbroker is the instance name or id of the image created above
docker cp rmqbroker:/home/rocketmq/rocketmq-4.6.0/conf/broker.conf /Users/liqi/docker-compose/rocketmq/data/broker
3.3. Modify the broker of the physical machine Conf content, add brokerIP1=10.192.53.197 and specify it as the IP of the physical machine;
brokerClusterName = DefaultCluster
brokerName = broker-a
brokerId = 0
deleteWhen = 04
fileReservedTime = 48
brokerRole = ASYNC_MASTER
flushDiskType = ASYNC_FLUSH
brokerIP1=10.192.53.197 #Add the brokerIP1 configuration and specify it as the IP of the physical machine
This is mainly because when starting up, the default broker IP1 takes the local IP and the broker runs in the docker container. Then the default is the IP of the container, which will lead to connection timeout when using.
3.4. The last line of the above instruction
sh mqbroker -n 10.192.53.197:9876 -c /home/rocketmq/rocketmq-4.6.0/conf/broker.conf
-n: Indicates the IP and port of the specified NameServer. Note that the IP of the physical machine should be used, otherwise the NameServer and broker cannot communicate; It mainly refers to the direct run instruction of docker, running two containers and two container instances to communicate with each other, which should be a problem; This has something to do with docker's network model; Docker has three network modes: bridge, host and none. When it is created, it is not specified - network is bridge by default.
-c: Is the path of the specified configuration file. Note that it is the path in the started broker instance, not the path attached to the physical machine;
4. Download the console program of rockermq console
4.1. Download Image
docker pull styletang/rocketmq-console-ng
4.2 instruction
docker run -p 8080:8080 --name rocketmq-console -d \
-e "JAVA_OPTS=-Drocketmq.namesrv.addr=10.192.53.197:9876 -Dcom.rocketmq.sendMessageWithVIPChannel=false" \
styletang/rocketmq-console-ng
The main note is that the IP in the instruction needs to specify the IP and port of the physical machine;
5,docker-compose. The YML script is as follows:
version: '3'
services:
  namesrv:
    image: apacherocketmq/rocketmq
    container_name: namesrv
    ports:
    - 9876:9876
    volumes:
    - ./data/namesrv/logs:/home/rocketmq/logs
    command: sh mqnamesrv
  broker:
    image: apacherocketmq/rocketmq
    container_name: rmqbroker
    ports:
    - 10909:10909
    - 10911:10911
    - 10912:10912
    volumes:
    - ./data/broker/logs:/home/rocketmq/logs
    - ./data/broker/store:/home/rocketmq/store
    - ./data/broker/broker.conf:/home/rocketmq/rocketmq-4.6.0/conf/broker.conf
    command: sh mqbroker -n namesrv:9876 -c ../conf/broker.conf
    depends_on:
    - namesrv
  rmqconsole:
    image: styletang/rocketmq-console-ng
    container_name: rmqconsole
    ports:
    - 8080:8080
    environment:
      JAVA_OPTS: -Drocketmq.namesrv.addr=namesrv:9876 -Dcom.rocketmq.sendMessageWithVIPChannel=false
    depends_on:
    - namesrv
The operation results are as follows:

Using the default java test case, the test is also normal
 public static void main(String[] args) throws Exception {
        // Instantiate message Producer
        DefaultMQProducer producer = new DefaultMQProducer("test_group_name");
        // Set the address of NameServer
        producer.setNamesrvAddr("localhost:9876");
        // Start Producer instance
        producer.start();
        for (int i = 0; i < 100; i++) {
            // Create a message and specify Topic, Tag and message body
            Message msg = new Message("test_topic" /* Topic */, "TagA" /* Tag */,
                    ("Hello RocketMQ " + i).getBytes(RemotingHelper.DEFAULT_CHARSET) /* Message body */
            );
            // Send messages to a Broker
            SendResult sendResult = producer.send(msg);
            // Whether the message is successfully delivered is returned through sendResult
            System.out.printf("%s%n", sendResult);
        }
        // If you no longer send messages, close the Producer instance.
        producer.shutdown();
    }
Case reference details https://github.com/apache/rocketmq/blob/master/docs/cn/RocketMQ_Example.md
docker deployment, refer to https://github.com/apache/rocketmq-docker