reference material
Main references: Hadoop cluster installation and configuration tutorial_ Hadoop2.6.0_Ubuntu/CentOS
Hadoop installation tutorial_ Stand alone / pseudo distributed configuration_ Hadoop2.6.0(2.7.1)/Ubuntu14.04(16.04)
Installation and configuration of hadoop under Ubuntu
Main references: ubuntu14.04 build Hadoop 2 9.0 cluster (distributed) environment
Detailed steps for installation and configuration of Apache Hadoop distributed cluster environment
Experimental environment
Two virtual machines Ubuntu
Hadoop
Java
SSH
Main steps
Select a machine as the Master
Configure hadoop users, install SSH server, and install Java environment on the Master node
Install Hadoop on the Master node and complete the configuration
Configure hadoop users, install SSH server, and install Java environment on other Slave nodes
Copy the / usr/local/hadoop directory on the Master node to other Slave nodes
Start Hadoop on the Master node
Preparation steps
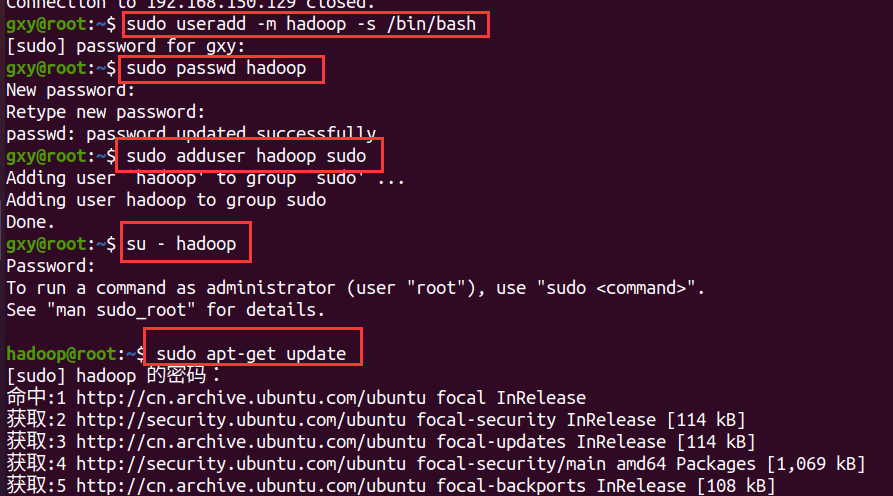
Configuring hadoop users
sudo useradd -m hadoop -s /bin/bash  #Create a hadoop user and use / bin/bash as the shell
sudo passwd hadoop                   #After setting the password for hadoop users, you need to enter the password twice in a row
sudo adduser hadoop sudo             #Add administrator privileges for hadoop users
su - hadoop                          #Switch the current user to hadoop
sudo apt-get update                  #Update the apt of hadoop users to facilitate subsequent installation
Install SSH server
sudo apt-get install openssh-server   #Install SSH server
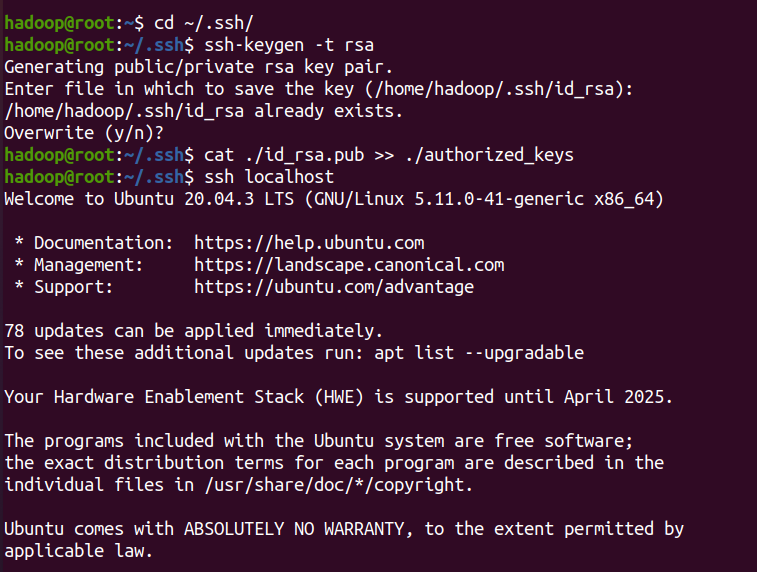
ssh localhost                         #Log in to SSH and enter yes for the first time
exit                                  #Log out of ssh localhost
cd ~/.ssh/                            #If you cannot enter the directory, execute ssh localhost once
ssh-keygen -t rsa
Installing the Java environment
The first method is manual installation
The second way
sudo apt-get install openjdk-8-jdk  # install
vim ~/.bashrc # Configure environment variables
 Add code at the beginning of the file
export JAVA_HOME=/usr/lib/jvm/java-8-openjdk-amd64
export JRE_HOME=$JAVA_HOME/jre
export CLASSPATH=$JAVA_HOME/lib:$JRE_HOME/lib:$CLASSPATH
export PATH=$JAVA_HOME/bin:$JRE_HOME/bin:$PATH
 Save and exit
source ~/.bashrc # Make configuration effective
 use java -version Check whether the installation is successful


Download the wrong delete instruction sudo apt get remove openjdk*
Install Hadoop
cd /usr/local/
sudo wget https://mirrors.cnnic.cn/apache/hadoop/common/stable2/hadoop-2.10.1.tar.gz
sudo tar -xvf hadoop-2.10.1.tar.gz
sudo mv ./hadoop-2.10.1/ ./hadoop            # Change the folder name to hadoop
sudo chown -R hadoop ./hadoop       # Modify file permissions
cd /usr/local/hadoop
./bin/hadoop version   # If successful, the hadoop version number will be displayed


Configure environment variables for hadoop and add the following code to the bashrc file:
export HADOOP_HOME=/usr/local/hadoop
export CLASSPATH=$($HADOOP_HOME/bin/hadoop classpath):$CLASSPATH
export HADOOP_COMMON_LIB_NATIVE_DIR=$HADOOP_HOME/lib/native
export PATH=$PATH:$HADOOP_HOME/bin:$HADOOP_HOME/sbin

Make configuration effective source ~ / bashrc
Check whether the installation is successful

The above four steps are also performed on another virtual machine
Build Hadoop cluster environment
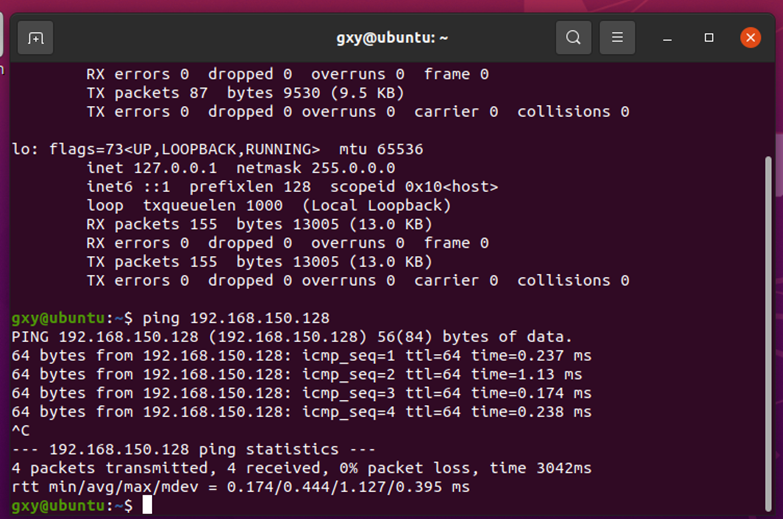
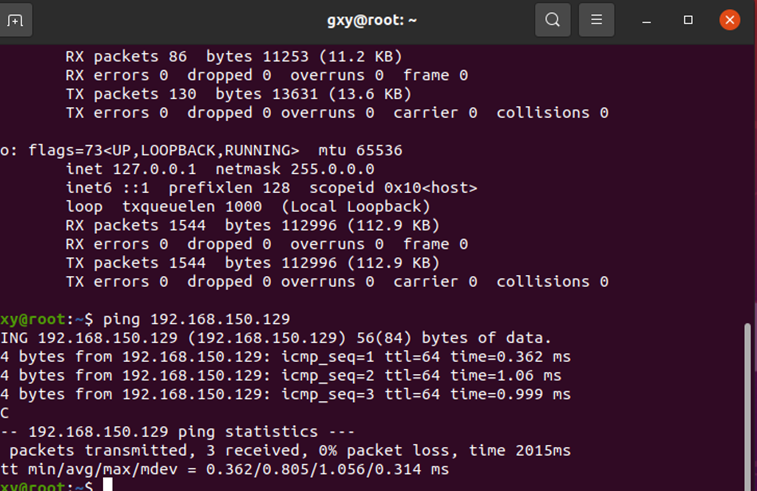
Two virtual machines ping each other
https://blog.csdn.net/sinat_41880528/article/details/80259590
Configure two virtual machines
Set bridge mode
Turn off firewall sudo ufw disable
Two virtual machines are respectively set to automatically obtain ip addresses
vim /etc/network/interfaces
 Add code
source /etc/network/interfaces.d/*

auto lo
iface lo inet loopback

auto eth0
iface eth0 inet dhcp
ifconfig view ip address
Restart and ping each other
Open ssh on the virtual machine. Both virtual machines should open port 22. Use exit to exit ssh
sudo apt-get install openssh-server
sudo apt-get install ufw
sudo ufw enable
sudo ufw allow 22
Complete the preparations on the Master node
Modify host name
sudo vim /etc/hostname
Modify the mapping of all node names and IP addresses
sudo vim /etc/hosts
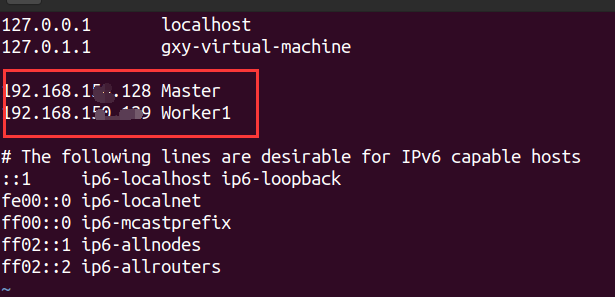
Restart after modification
These changes are made on all nodes
The following operations need to be performed on Master or Worker1.
ping on each node
ping Master on Worker1

ping Worker1 on the Master

SSH password less login node (Master)
This enables the Master node to log in to each Worker node without a password
Execute at the Master node terminal
cd ~/.ssh               # If you do not have this directory, first execute ssh localhost
rm ./id_rsa*            # Delete the previously generated public key (if any)
ssh-keygen -t rsa       # Just press enter all the time
Let Master log in to this machine without password SSH
cat ./id_rsa.pub >> ./authorized_keys
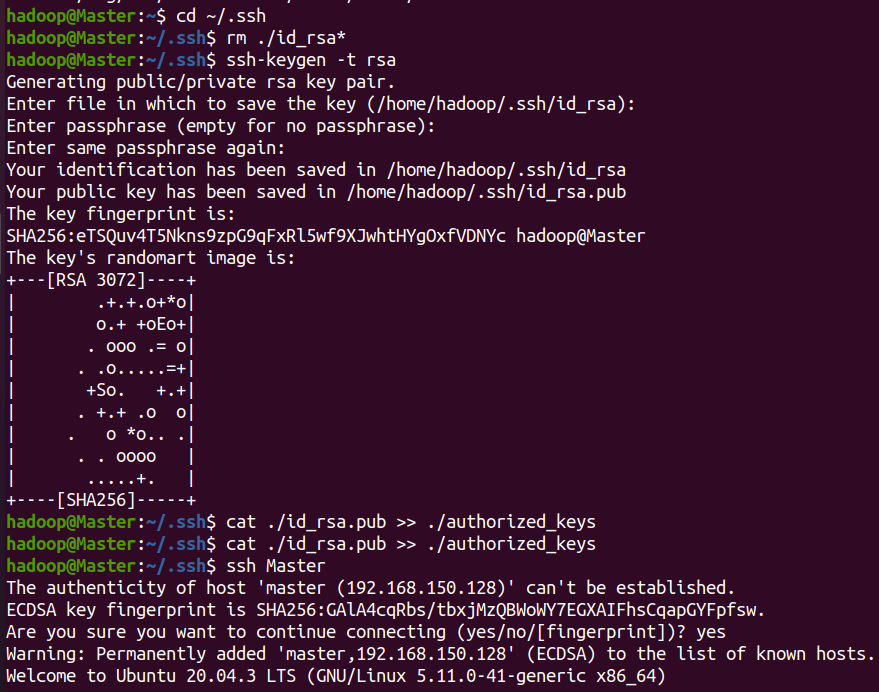
After completion, you can execute ssh Master to verify (you may need to enter yes. After success, execute exit to return to the original terminal). Then, transfer the public key on the Master node to the slave 1 node:
scp ~/.ssh/id_rsa.pub hadoop@Worker1:/home/hadoop/

On the Worker1 node, add the ssh public key to the authorization
mkdir ~/.ssh       # If the folder does not exist, you need to create it first. If it already exists, it will be ignored
cat ~/id_rsa.pub >> ~/.ssh/authorized_keys
rm ~/id_rsa.pub    # You can delete it after you use it
Check whether you can log in without password on the Master node
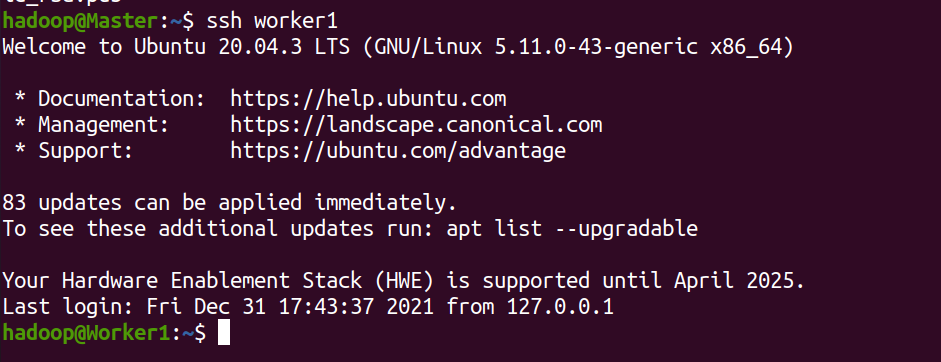
Master node distributed environment
For cluster / distributed mode, you need to modify five configuration files in / usr/local/hadoop/etc/hadoop. For more settings, click to view the official instructions. Here, only the settings necessary for normal startup are set: slaves and core site xml,hdfs-site.xml,mapred-site.xml,yarn-site.xml .
The configuration file is in the directory / usr/local/hadoop/etc/hadoop /
cd /usr/local/hadoop/etc/hadoop/
vim slaves
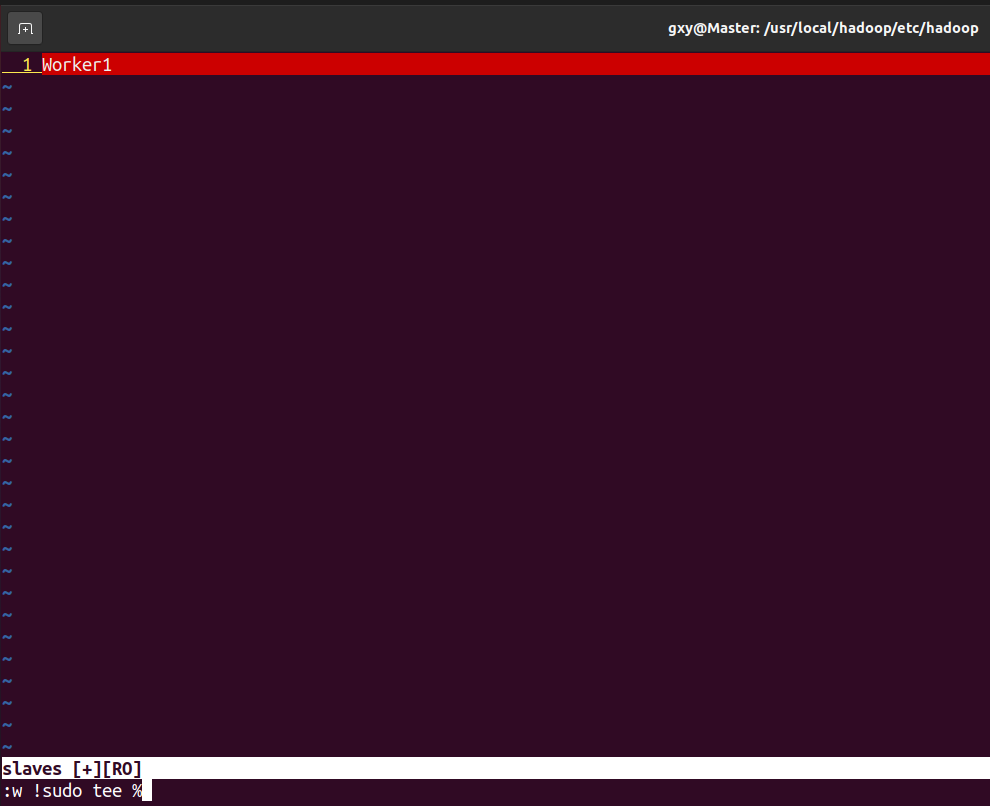

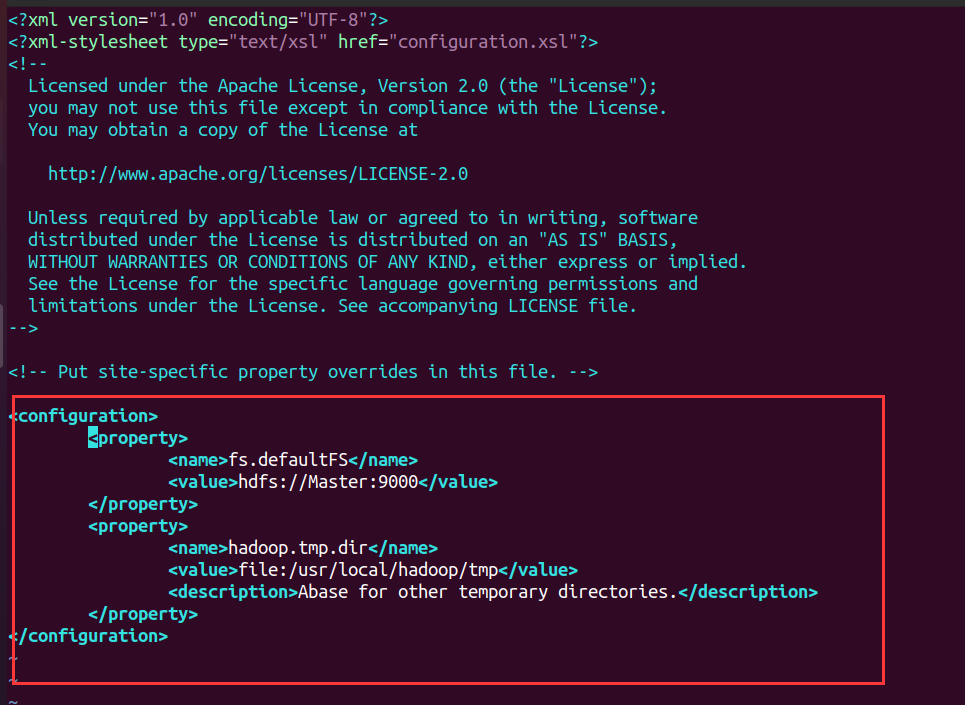
- Configure core site XML file
<configuration>
        <property>
                <name>fs.defaultFS</name>
                <value>hdfs://Master:9000</value>
        </property>
        <property>
                <name>hadoop.tmp.dir</name>
                <value>file:/usr/local/hadoop/tmp</value>
                <description>Abase for other temporary directories.</description>
        </property>
</configuration>
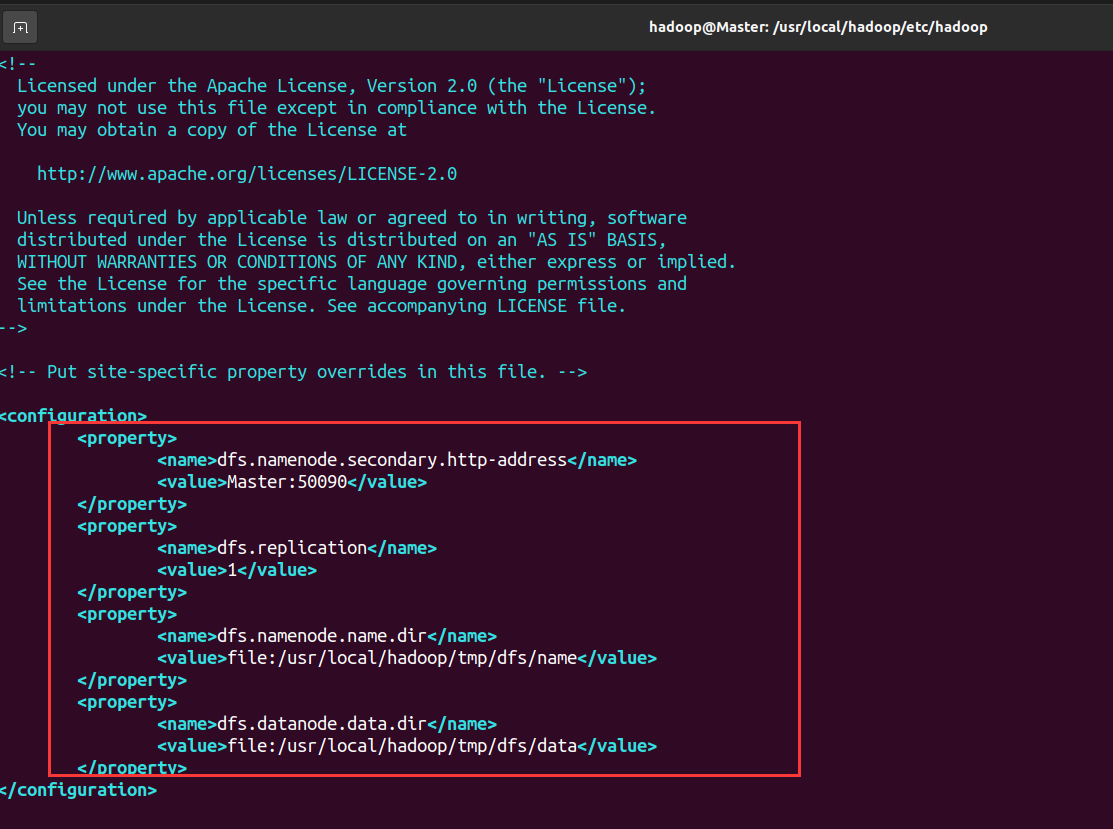
- Configure HDFS site XML file, DFS Replication is generally set to 3, but we only have one Slave node, so DFS The value of replication is still set to 1
<configuration>
        <property>
                <name>dfs.namenode.secondary.http-address</name>
                <value>Master:50090</value>
        </property>
        <property>
                <name>dfs.replication</name>
                <value>1</value>
        </property>
        <property>
                <name>dfs.namenode.name.dir</name>
                <value>file:/usr/local/hadoop/tmp/dfs/name</value>
        </property>
        <property>
                <name>dfs.datanode.data.dir</name>
                <value>file:/usr/local/hadoop/tmp/dfs/data</value>
        </property>
</configuration>
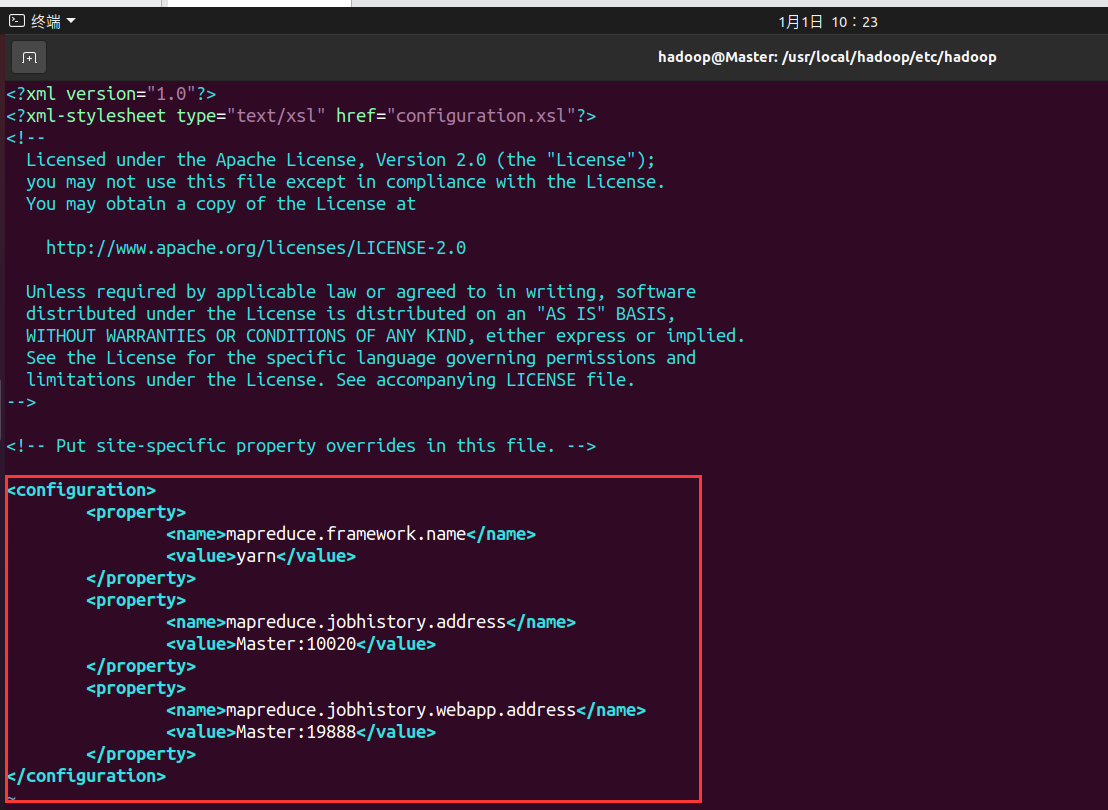
- Configure mapred site XML file, (you may need to rename it first, and the default file name is mapred-site.xml.template), and then modify the configuration as follows:
Rename MV mapred site xml. template mapred-site. xml
<configuration>
        <property>
                <name>mapreduce.framework.name</name>
                <value>yarn</value>
        </property>
        <property>
                <name>mapreduce.jobhistory.address</name>
                <value>Master:10020</value>
        </property>
        <property>
                <name>mapreduce.jobhistory.webapp.address</name>
                <value>Master:19888</value>
        </property>
</configuration>
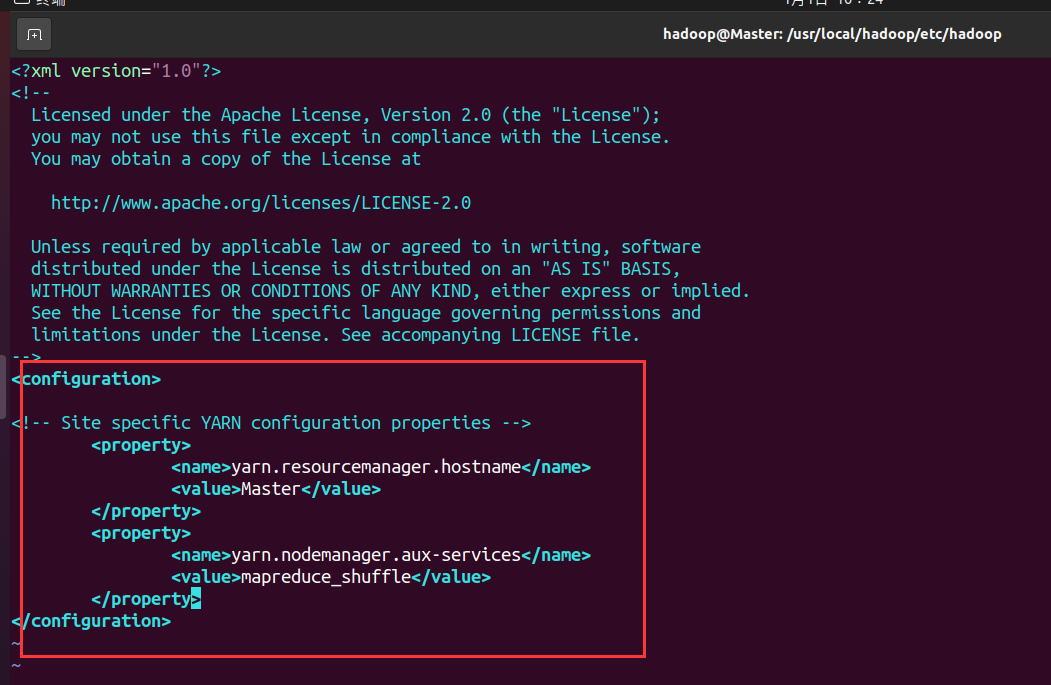
- Configure yarn site XML file
<configuration>
        <property>
                <name>yarn.resourcemanager.hostname</name>
                <value>Master</value>
        </property>
        <property>
                <name>yarn.nodemanager.aux-services</name>
                <value>mapreduce_shuffle</value>
        </property>
</configuration>
- After configuration, copy the / usr/local/Hadoop folder on the Master to each node. Execute on the Master node
cd /usr/local
sudo rm -r ./hadoop/tmp     # Delete the Hadoop temporary file. Without this file, there is no need to operate
sudo rm -r ./hadoop/logs/*   # Delete the log file. No operation is needed without this file
tar -zcf ~/hadoop.master.tar.gz ./hadoop   # Compress before copy
cd ~
scp ./hadoop.master.tar.gz Worker1:/home/hadoop  # If there are other nodes, they are also transmitted to other nodes
rm ~/hadoop.master.tar.gz # Delete compressed files


- Operate on Worker1 node
sudo rm -r /usr/local/hadoop    # Delete old (if any)
sudo tar -zxf ~/hadoop.master.tar.gz -C /usr/local
sudo chown -R hadoop /usr/local/hadoop
rm ~/hadoop.master.tar.gz  # Delete compressed package

Start Hadoop
- Execute on the Master node
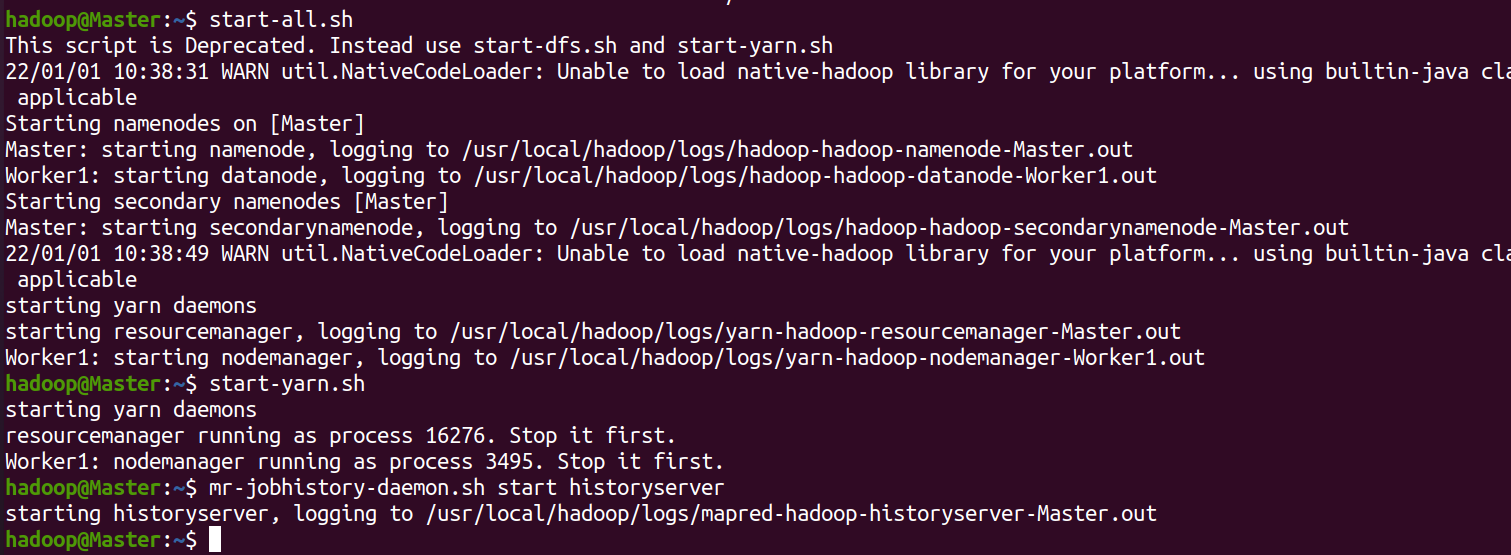
For the first startup, you need to format the NameNode on the Master node: hdfs namenode -format
start-dfs.sh
start-yarn.sh
mr-jobhistory-daemon.sh start historyserver
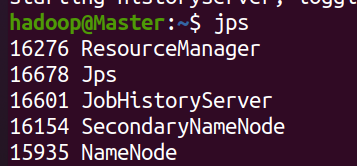
You can view the processes started by each node through the jps command. If correct, the NameNode, ResourceManager, SecondrryNameNode and JobHistoryServer processes can be seen on the Master node, as shown in the following figure:
- Worker node
In the Worker node, you can see the DataNode and NodeManager processes, as shown in the following figure:

- Closing the Hadoop cluster is also performed on the Master node
stop-yarn.sh
stop-dfs.sh
mr-jobhistory-daemon.sh stop historyserver
Run the word counting routine
Create test txt
vim test.txt
 Content:
Hello world
Hello world
Hello world
Hello world
Hello world
Hadoop creation
hdfs dfs -mkdir -p /user/hadoop # Create user directory in HDFS
hdfs dfs -mkdir input # Create input directory
hdfs dfs -put ~/test.txt input # Upload local files to input
hdfs dfs -ls /user/hadoop/input # Check whether the upload is successful
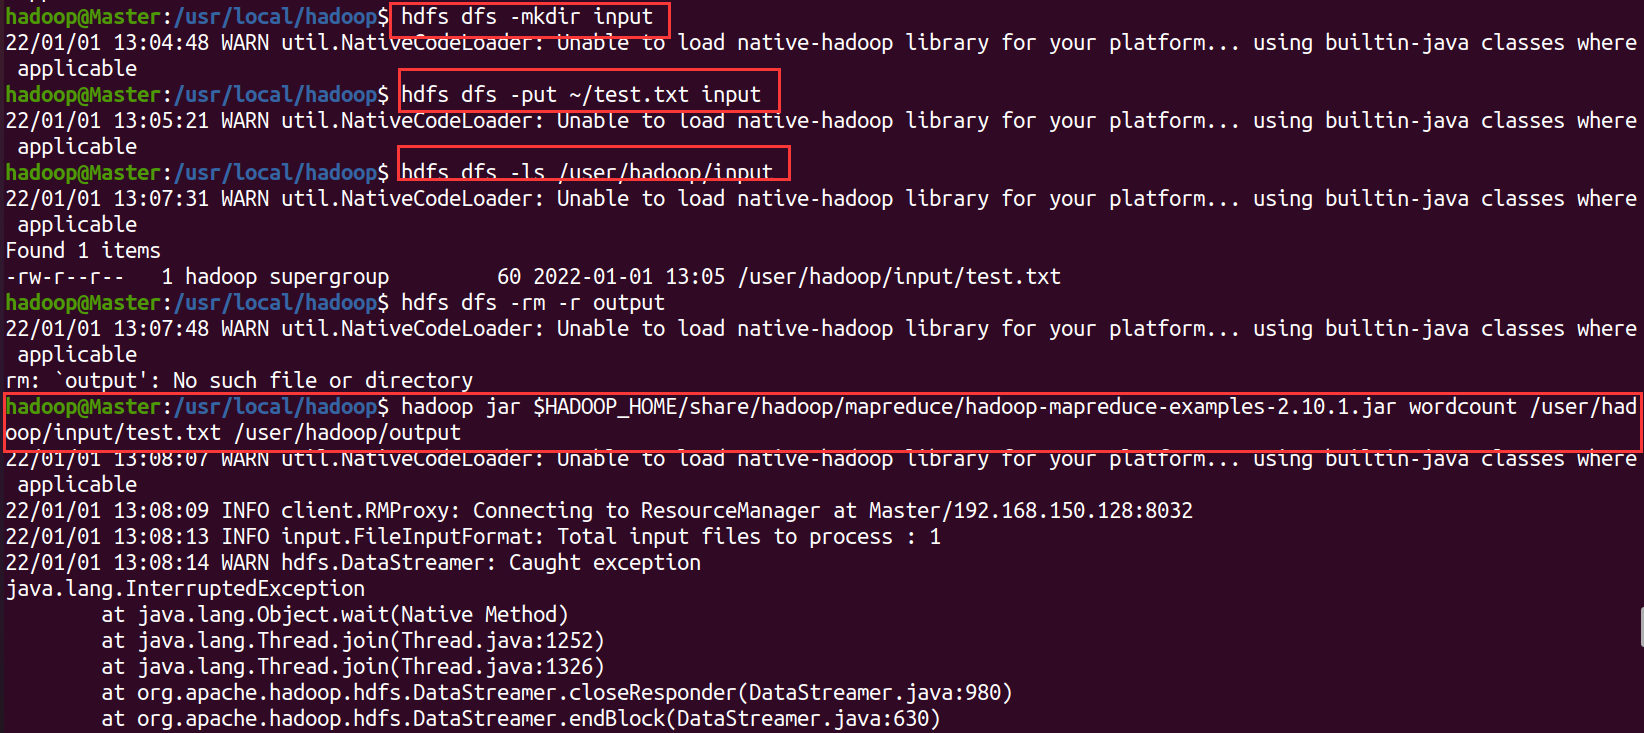
These four step commands may make mistakes. For specific problems, Baidu can ignore warning
Statistical word frequency
hdfs dfs -rm -r output #When Hadoop runs the program, the output directory cannot exist, otherwise an error will be prompted. If it does not exist, you do not need to delete it
hadoop jar $HADOOP_HOME/share/hadoop/mapreduce/hadoop-mapreduce-examples-2.10.1.jar wordcount /user/hadoop/input/test.txt /user/hadoop/output
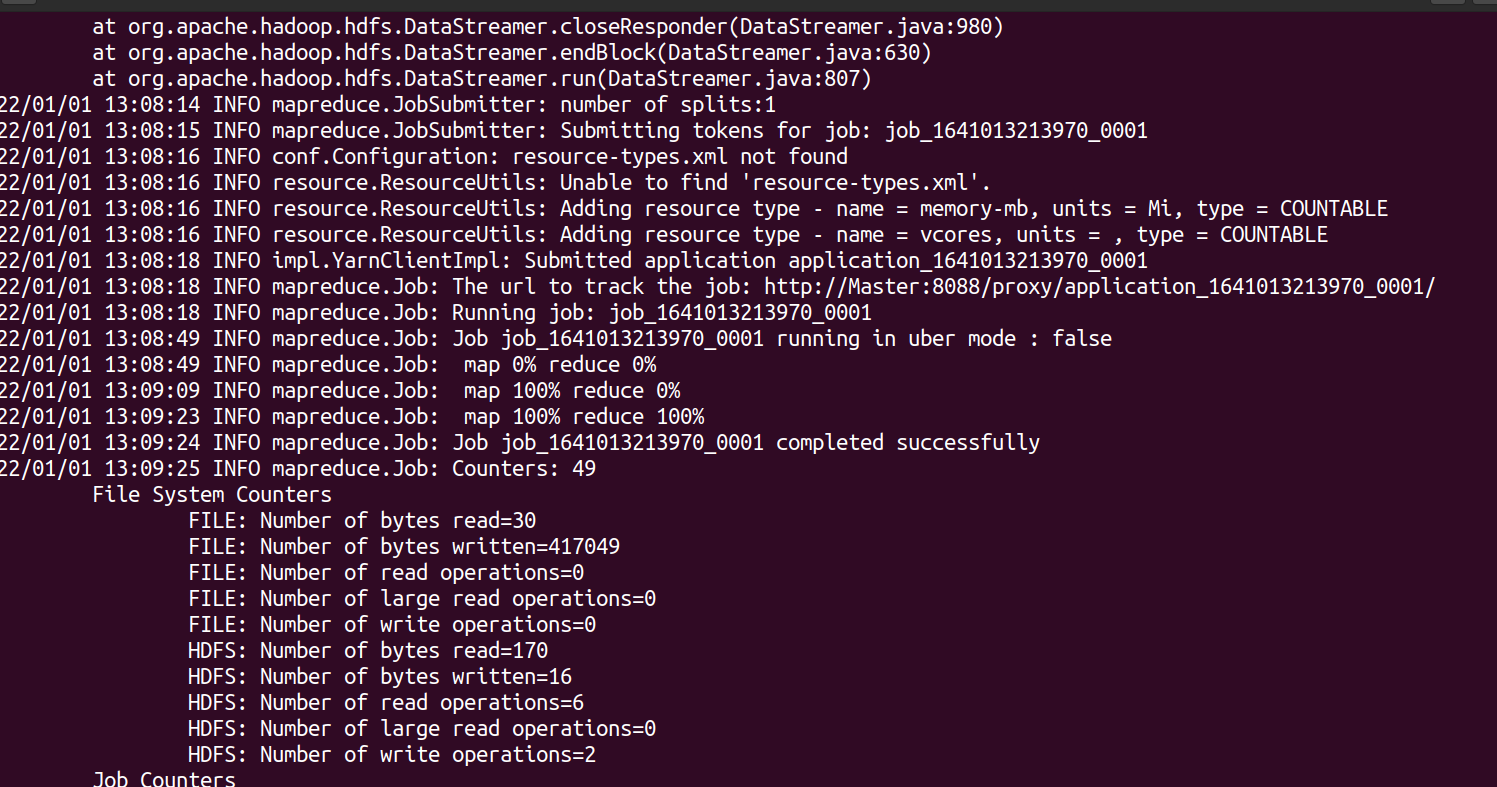
View run results
hdfs dfs -cat output/*

Save results locally
rm -r ./output #If the output directory exists locally, it will not be deleted if it does not exist
hdfs dfs -get output ./output
cat ./output/*

Delete output directory
hdfs dfs -rm -r output
rm -r ./output
If the configuration file is modified, repeat the steps of configuring the Master node distributed environment, starting Hadoop, and creating a user directory in HDFS
Problems encountered
Hadoop upload file error: file / user / cookie / input / WC input. COPYING could only be replicated to 0 nodes instead
Start hide times: call from HADOOP / 192.168.1.128 to HADOOP: one of the reasons why 9000 failed on connection HADOOP starts without NAMENOD
Hadoop upload file error org apache. hadoop. ipc. RemoteException(java.io.IOException)