Reference article: Installing mysql on linux_ Stupid food first fly blog - CSDN blog_ Installing mysql on linux
Modify password reference article: What if mysql forgets the password under linux - big no - blog Garden
To install Mysql: centos7 MySQL installation (full version)_ Programmer's advanced road - CSDN blog_ Installing MySQL in CentOS 7
Several common ways to install software on Linux:
- Source code compilation
- Decompress the compressed package (generally tar.gz)
- Compiled installation packages (RPM, DPKG, etc.)
- Online installation (YUM, APT, etc.)
The convenience of the above methods increases in turn, but the versatility decreases in turn. For example, downloading compressed packages directly for decompression generally requires some additional configuration work. However, as long as you master the method, each platform is basically applicable. YUM is simple, but the platform is limited and the network is limited. If necessary, you need to add some specific YUM sources.
It is best to master several installation methods. In principle, you can use simple ones: Yum > RPM > tar. GZ > source code
Install using yum or up2date
Check whether mysql has been installed
[root@localhost ~]# rpm -qa|grep mysql #No output description not installed
- Open web address: MySQL Yum repository : MySQL :: Download MySQL Yum Repository
- Find the corresponding linux version to download
View your version:
[root@localhost ~]# cat /etc/redhat-release
CentOS Linux release 7.8.2003 (Core)
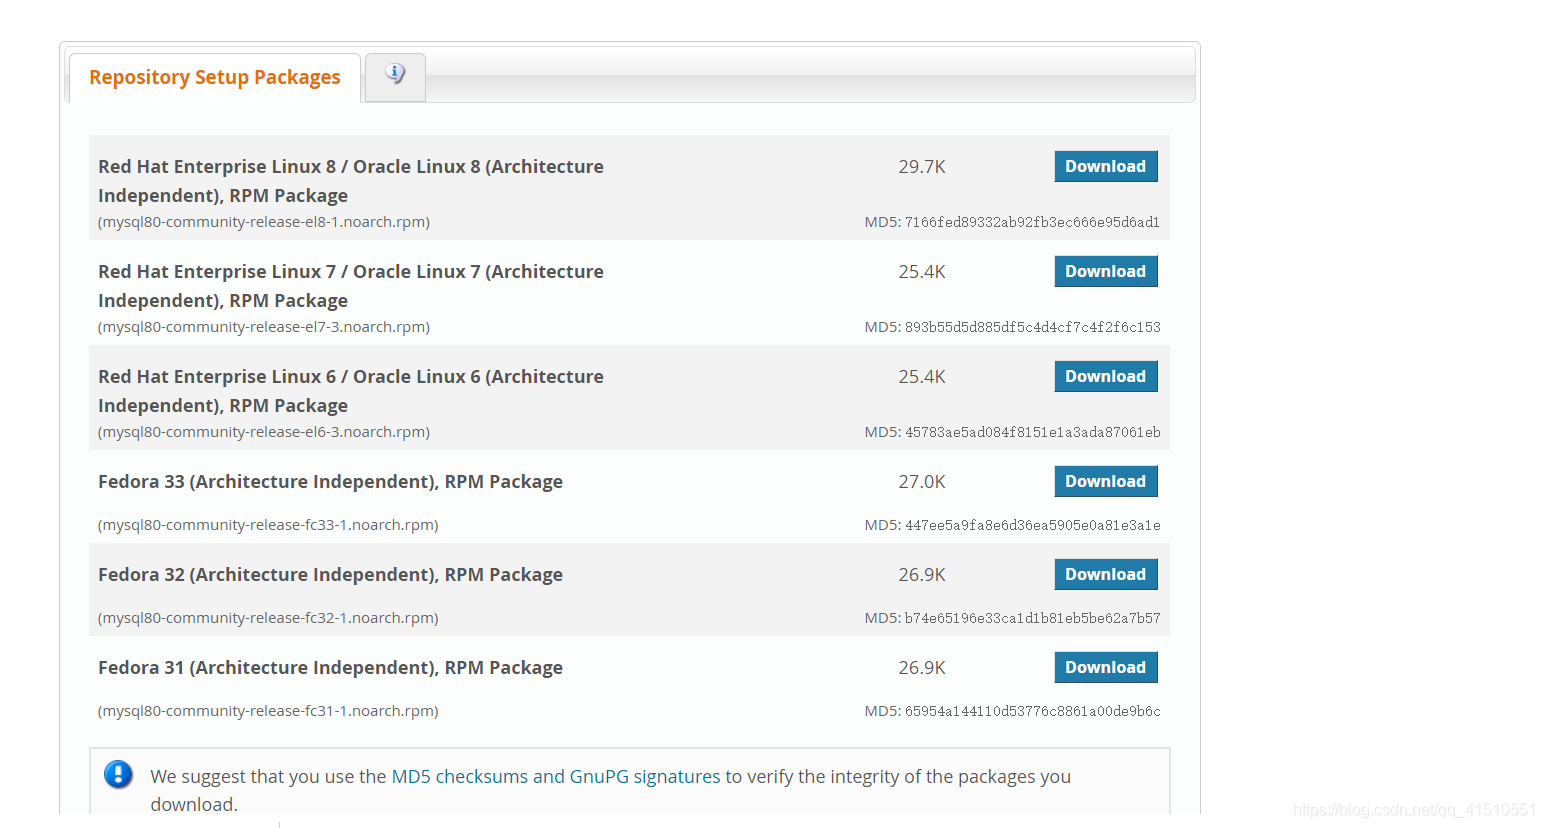
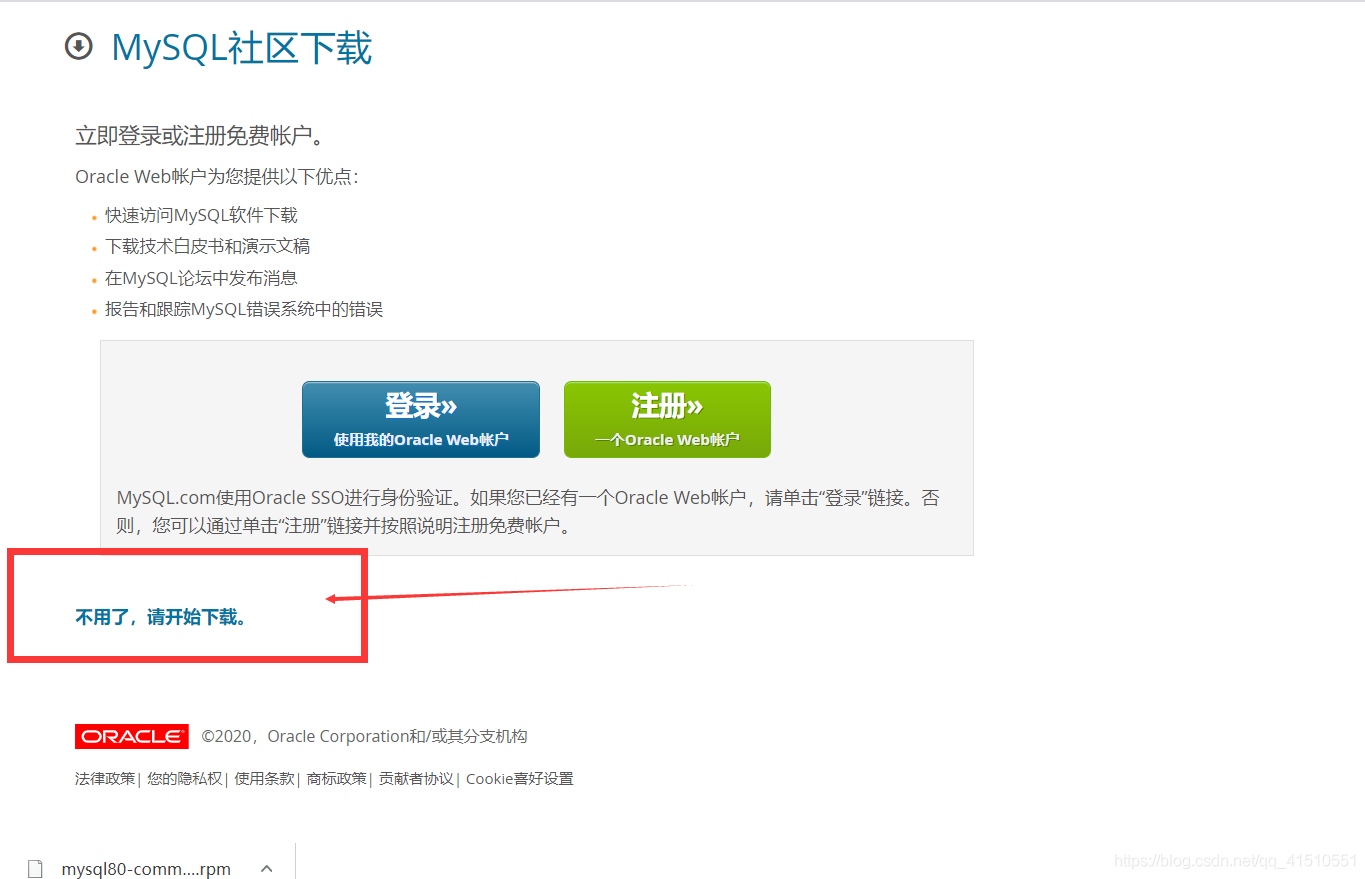
3. Click as shown in the red box below
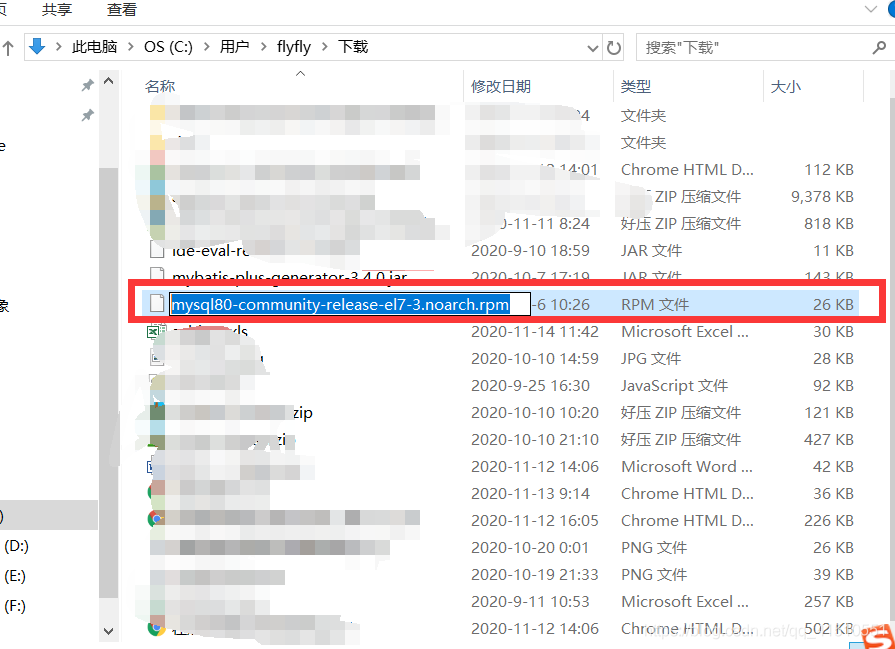
4. Copy the full name of the downloaded file: mysql80-community-release-el7-3.noarch.rpm
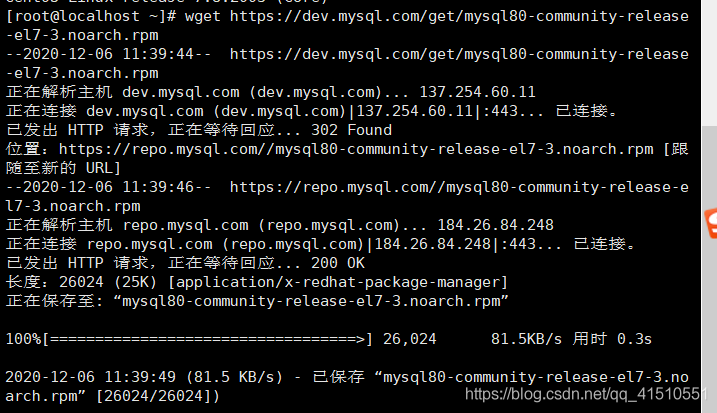
Start installation here
[root@localhost ~]# wget https://dev.mysql.com/get/mysql80-community-release-el7-3.noarch.rpm
If wget command is not found, you need to install wget first:
yum -y install wget
Then execute the above command again
- Install mysql source
[root@localhost ~]# sudo rpm -Uvh mysql80-community-release-el7-3.noarch.rpm
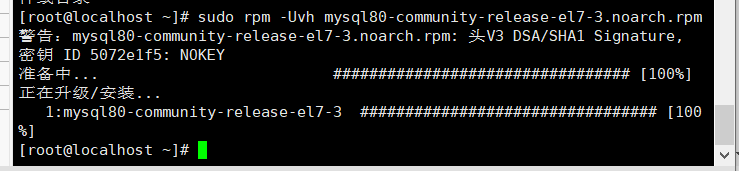
Check for successful installation:
After successful execution, two repo files mysql-community.repo and mysql-community-source.repo will be generated in / etc/yum.repos.d /
[root@localhost ~]# cd /etc/yum.repos.d/
[root@localhost yum.repos.d]# ls -l
 Total consumption 12
-rw-r--r--. 1 root root 2523 6 June 16, 2018 CentOS-Base.repo
-rw-r--r--. 1 root root 2076 4 May 25, 2019 mysql-community.repo
-rw-r--r--. 1 root root 2108 4 May 25, 2019 mysql-community-source.repo
[root@localhost yum.repos.d]#
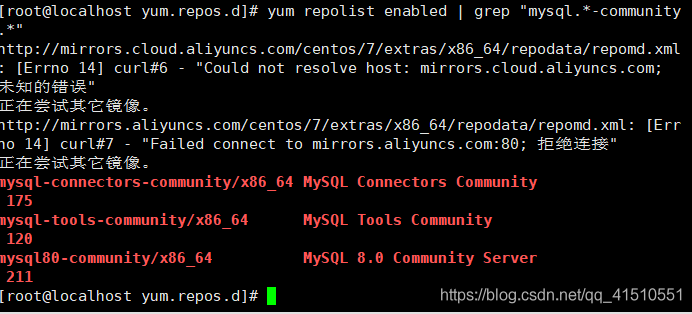
View mysql related resources
yum repolist enabled | grep "mysql.*-community.*"
- Select masql version
When installing MySQL using MySQL Yum Repository, the latest stable version will be selected by default
- Use the command: yum repolist all | grep mysql to view all the current versions of yum repolist
- Switch version
[root@localhost ~] sudo yum-config-manager --disable mysql80-community
[root@localhost ~] sudo yum-config-manager --enable mysql57-community
Install mysql
[root@localhost ~]# sudo yum install mysql-community-server
This command will install MySQL community server and its required dependencies and related components, including MySQL community client, MySQL community common, MySQL community LIBS, etc. The installation time will be long
- start-up
[root@localhost ~]# systemctl start mysqld.service
[root@localhost ~]# systemctl status mysqld.service
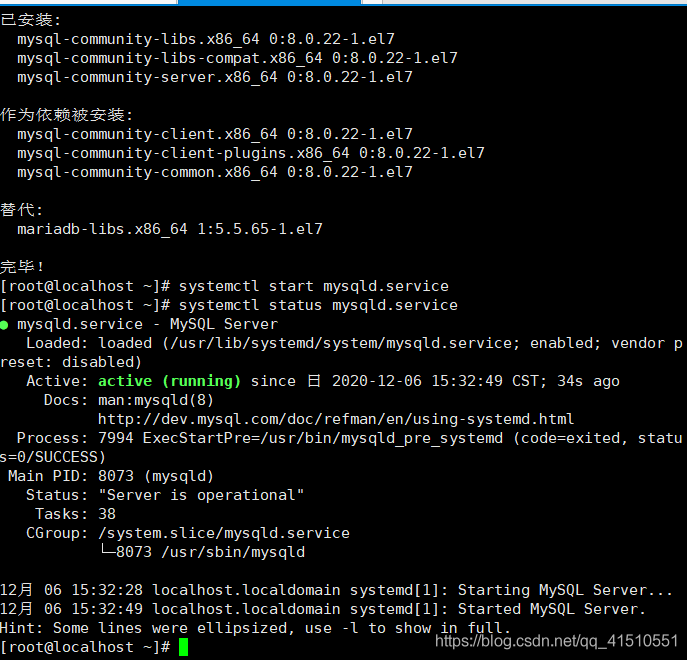
Start successful
- stop it
[root@localhost ~]# systemctl stop mysqld.service
2. Restart
[root@localhost ~]# systemctl restart mysqld.service