1, Install Spark
Introduction to Spark 2.4.0: installation and use of Spark
Blog address: http://dblab.xmu.edu.cn/blog/1307-2/
1.1 basic environment
1.1.1 before installing Spark:
Linux system
Java environment (Java8 or JDK1.8 or above)
Hadoop environment
Hadoop installation tutorial address: http://dblab.xmu.edu.cn/blog/install-hadoop/
Follow this tutorial to complete the installation of JDK and Hadoop
1.1.2 install JDK and Hadoop platform image files:
Download virtual machine image file
Oracle VM VirtualBox
Administration
Import virtual computer
The image file that has been downloaded to the local can be imported to generate the Ubuntu virtual machine
When entering the Ubuntu system, the login user name is hadoop and the password is 123456
The password corresponding to the root user of the MySQL database installed inside is also hadoop
1.1.3 environmental preparation inspection

1.2 download installation files
Spark installation package download address: http://spark.apache.org/downloads.html
Log in to Linux, open Firefox and visit the official website
After entering the download page, click the "Download Spark" button on the right side of the home page to enter the download page
Item 1 Spark release generally selects the latest release version by default
The second package type is "pre build with user provided Hadoop [can use with most Hadoop distributions]", which is applicable to most Hadoop versions
After selecting, click the link given in Item 3 to download Spark
Windows -- > linux file transfer:
Download or copy from windows network disk
Transfer from Windows to Linux
Start installation:
Unzip the installation package spark-2.4.0-bin-without-hadoop Tgz to path / usr/local/ Note that the download path or file name is different, and the corresponding place of the command is different.
Change file name
Modify folder permissions
$ cd ~/download
$ sudo tar -zxf ~/download/spark-2.4.0-bin-without-hadoop.tgz -C /usr/local/  #decompression
$ cd /usr/local
$ sudo mv ./spark-2.4.0-bin-without-hadoop/ ./spark   # Change folder name
$ sudo chown -R hadoop ./spark          # Modify folder permissions. Here, hadoop is the system user name


1.3 configuration related documents
Configure the classpath of Spark
$ cd /usr/local/spark
$ cp ./conf/spark-env.sh.template ./conf/spark-env.sh   #Copy profile

Edit the configuration file and add the following line at the end of the file:
export SPARK_DIST_CLASSPATH=$(/usr/local/hadoop/bin/hadoop classpath)

After saving the configuration file, you can start and run Spark
If you need to use files in HDFS, you need to start Hadoop before using Spark
start-dfs.sh
1.4 configuring environment variables
gedit ~/.bashrc

export SPARK_HOME=/usr/local/spark
export PYTHONPATH=$SPARK_HOME/python:$SPARK_HOME/python/lib/py4j-0.10.9-src.zip:PYTHONPATH
export PYSPARK_PYTHON=python3
export PATH=$PATH:$SPARK_HOME/bin

source ~/.bashrc

View configuration results

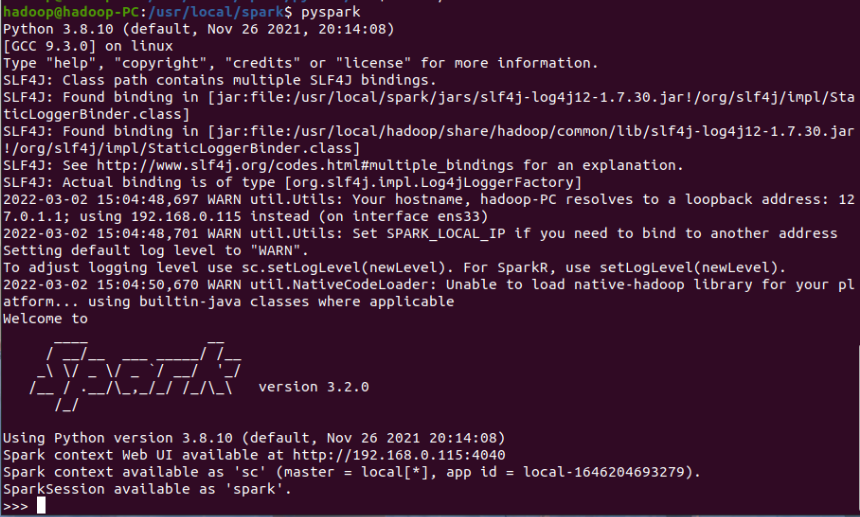
1.5 running pyspark
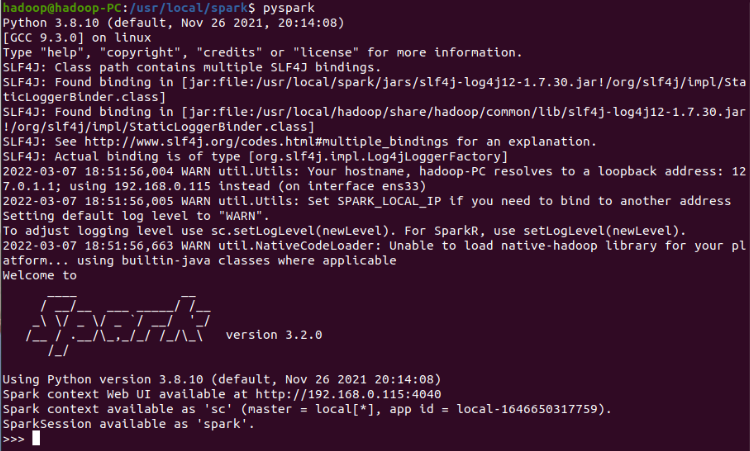
Execute the following command to start pyspark (no parameters, local [*] mode by default):
$ cd /usr/local/spark
$ ./bin/pyspark
(after starting pyspark successfully, you can see the command prompt of "> > >" at the end of the output message)
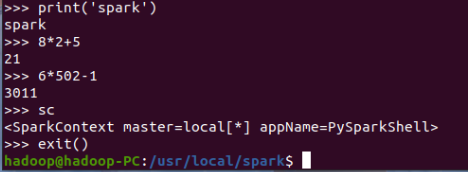
1 run code in pyspark
You can enter python code to test:
>>> print('spark')
>>> 8*2+5
>>> 6*502-1
>>> sc
You can exit pyspark with the command "exit()":
>>> exit()
Spark task execution process
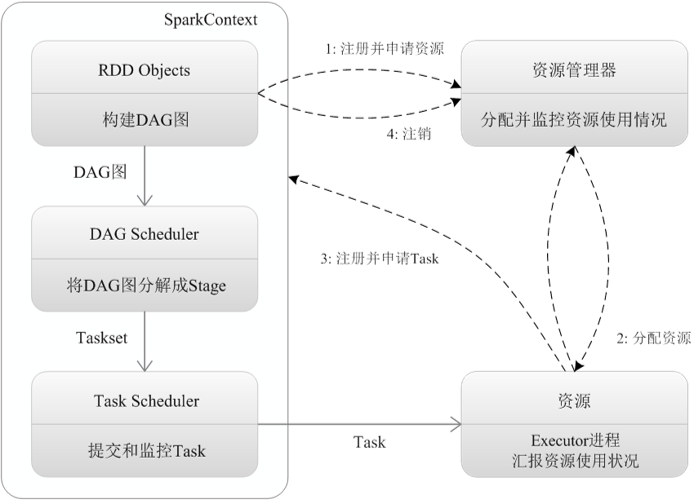
Four steps
1. Build DAG (directed acyclic graph) (call the method on RDD)
2.DAGScheduler divides DAG into stages (based on Shuffle), and sends tasks generated in stages to TaskScheduler in the form of TaskSet
3. Task scheduler schedules tasks (schedules tasks to corresponding executors according to resources)
4. The executor receives the Task and then drops the Task into the thread pool for execution
2, Python programming practice: word frequency statistics of English text
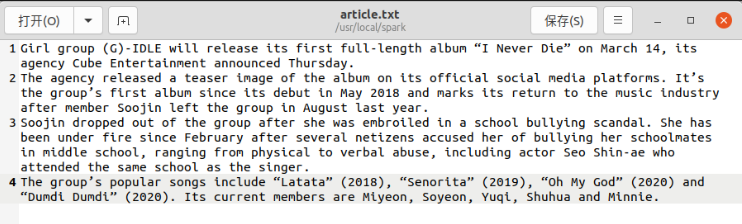
2.1 prepare text files (create and edit the English text required for the experiment)

$ gedit article.txt
2.2 realize word frequency statistics of English text
2.2.1 method 1: run py files using python3
(1) Write py file

$ gedit wordcount.py

# wordcount.py
# read file
file = open("/usr/local/spark/article.txt","r",encoding='UTF-8').read()
# Preprocessing (case, punctuation)
file = file.lower() # Replace with lowercase
for str in '.?!,:;-_()[]{}"`!@#$%^&*+=*/\<|>':
file = file.replace(str, " ") # Replace punctuation with space
# participle
words = file.split()
# Count the number of occurrences of each word
wordcount = {}
for word in words:
wordcount[word] = wordcount.get(word,0)+1
wclist = list(wordcount.items()) # List statistics
# Sort by word frequency -- descending
wclist.sort(key=lambda x:x[1], reverse=True)
# Print list
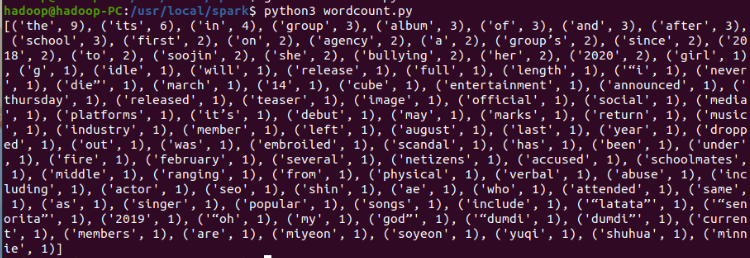
print(wclist)
(2) Run wordcount. Com using Python 3 py
$ python3 wordcount.py
Operation results
2.2.2 method 2: use shell command to realize word frequency statistics in pyspark
(1) Start spark shell
$ pyspark
# Guide Package
>>> import os
>>> import shutil

# read file
>>> textFile = sc.textFile("file:///usr/local/spark/article.txt")
>>> textFile.first()
Note: first() is an Action type operation, which will start the real calculation process, load the data from the file into the variable textFile, and take out the first line of text. In addition, because Spark adopts an inert mechanism, when performing the conversion operation, pyspark will not immediately report an error even if we enter the wrong statement, Instead, wait until the "Action" type statement is executed to start the real calculation, and then the error in the "conversion" operation statement will be displayed: reject the connection!

# Word segmentation (the instruction "flattens" the contents of the document into words, and then cuts them according to the style of "" (space))
>>> word = textFile.flatMap(lambda line:line.split(" "))

# Count the number of occurrences of each word -- convert it into key value pairs and count, and encapsulate the contents in the document in the way of (key, value), where value is 1; The instruction adds the value value under the same key in the encapsulated map
>>> count = word.map(lambda word:(word,1)).reduceByKey(lambda a, b:a + b)

# The encapsulated map is sorted in descending order according to the size of the key (sortBy() is in ascending order by default, and if the parameter is passed in False, it is in descending order)
>>> count = count.sortBy(lambda x:x[1],False)

# Query the style of the generated Rdd content
>>> count.collect()

# Delete output directory (not required)
>>> if os.path.exists("file:///usr/local/spark/output_wordcount"):
...   shutil.rmtree("file:///usr/local/spark/output_wordcount", True)

# Write the statistical results to the result file
>>> count.saveAsTextFile("file:///usr/local/spark/output_wordcount")
View results
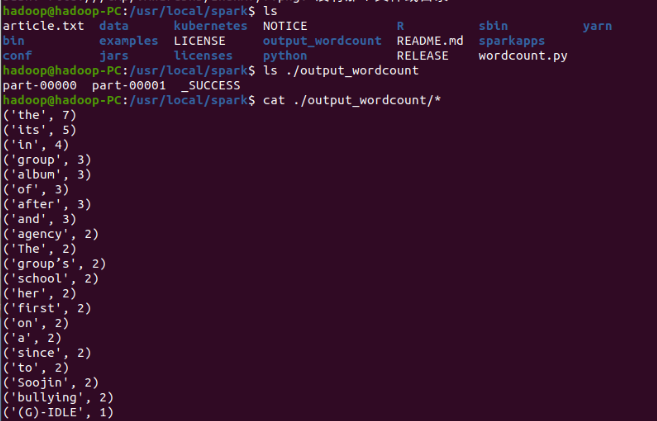
Note: the results of method 1 and method 2 are slightly different because method 2 is not pretreated.
3, Build a programming environment according to your programming habits
PyCharm is used here as the Python programming environment
Ubuntu 16.04 + PyCharm + spark running environment configuration
1. Check the JAVA configuration environment
You can use the command java -version or javac -version to see if your environment has been configured

The version number indicates that the JDK environment configuration is successful
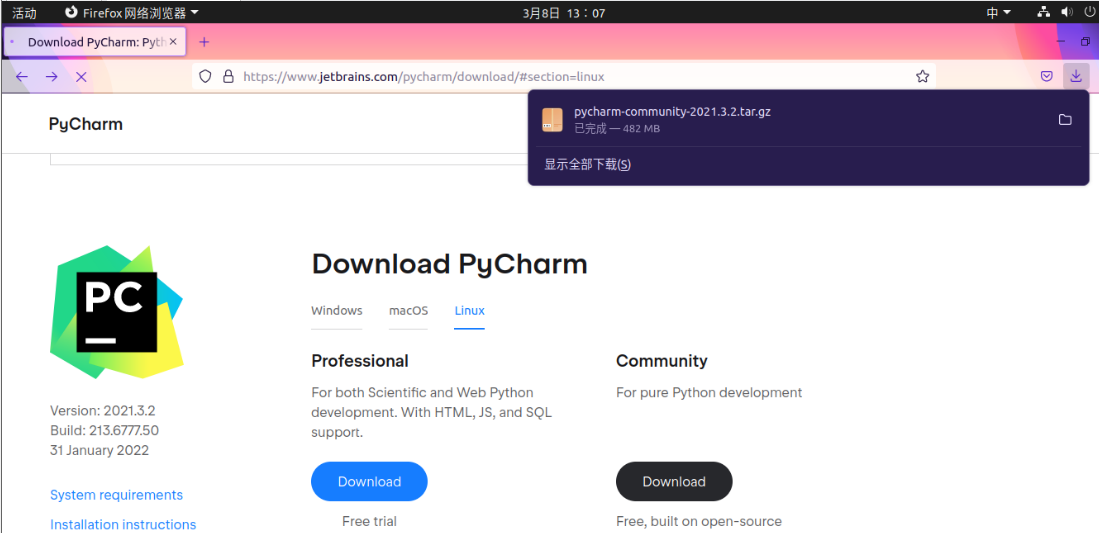
2. Official website download address: http://www.jetbrains.com/pycharm/ , select Linux as the platform
PyCharm is divided into community version and professional version. The professional version has more complete functions but needs to be charged. Here we download the community version
3. Jump to your download directory with cd command in the terminal, copy the name of the PyCharm compressed package you downloaded, and then execute the following command to decompress
$ sudo tar -zxvf ~/download/pycharm-community-2021.3.2.tar.gz -C /usr/local/   # decompression
$ sudo mv /usr/local/pycharm-community-2021.3.2 /usr/local/PyCharm   # Rename
$ sudo chown -R hadoop /usr/local/PyCharm    # to grant authorization
$ /usr/local/PyCharm/bin/pycharm.sh    # start-up


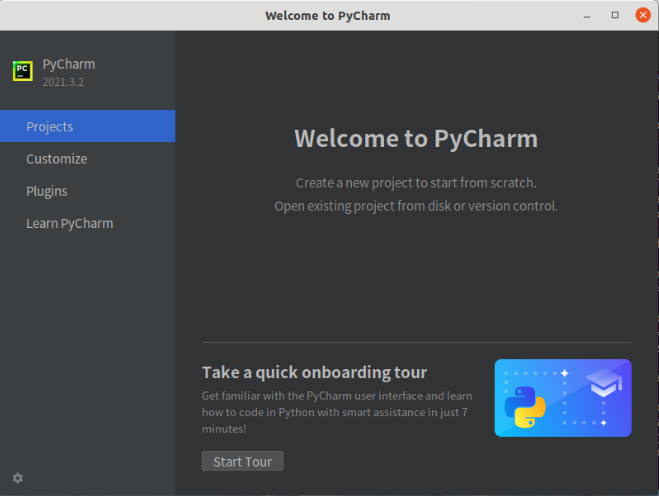
4. PyCharm startup interface
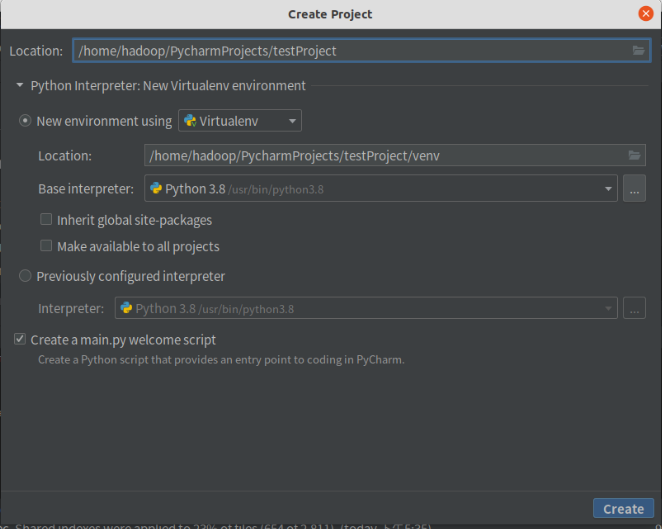
5. Create a new project test run environment
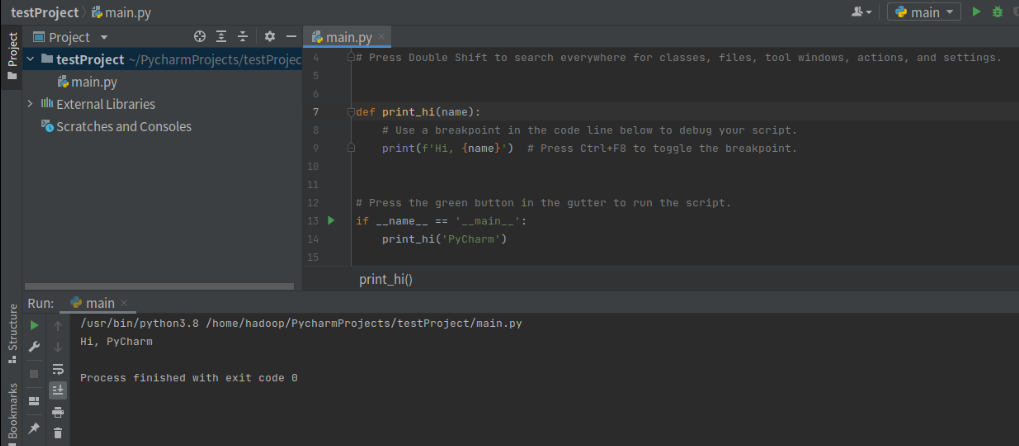
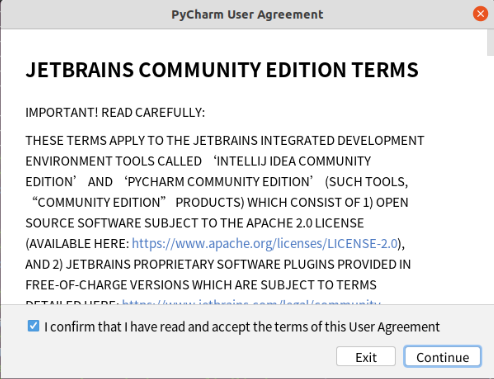
Configuration completed!