
premise
Last time I wrote an article, Integrated Use of SpringBoot Kafka And read a lot, so think about integrating several other MQ s with SpringBoot.
Here are four popular MQ s:
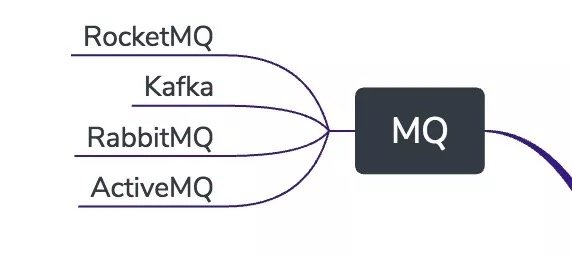
Write an integrated article with SpringBoot later.
Install RabbitMQ
Some environments are built directly in Mac because of a Mac change, but installing RabbitMQ can mess up your computer system too much, so you can install it in Docker. This time, RabbitMQ is also installed directly in Docker.
Start Docker for Mac, if not already installed, see my previous article: http://www.54tianzhisheng.cn/...
You can also start installing RabbitMQ on your own Linux server or virtual machine.
Docker installation is easy, because RabbitMQ has officially provided its own Docker container, requiring only one line of command: (you can move right to see the full code)
docker run -d -p 15672:15672 -p 5672:5672 -e RABBITMQ_DEFAULT_USER=admin -e RABBITMQ_DEFAULT_PASS=admin --name rabbitmq rabbitmq:3-managementThe mirror has a web-based console and Http API.The Http API can see how to use it at the address: http://localhost:15672/api/
Explain the above command line:
- 15672: Represents the RabbitMQ console port number, which allows you to perform RabbitMQ-related operations in your browser through the console.
- 5672: Represents the TCP port number that RabbitMQ listens on, through which applications can establish a TCP connection to RabbitMQ and complete subsequent asynchronous message communication
- RABBITMQDEFAULTUSER: User name used to set the login console, where I set admin
- RABBITMQDEFAULTPASS: Used to set the password for the login console, where I set admin
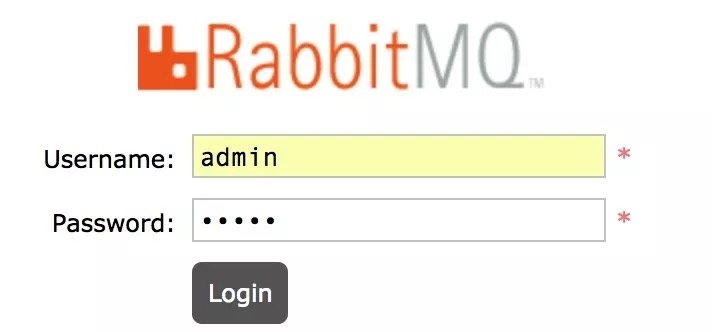
After the container starts successfully, you can enter an address in the browser: http://localhost : 15672/Access Console
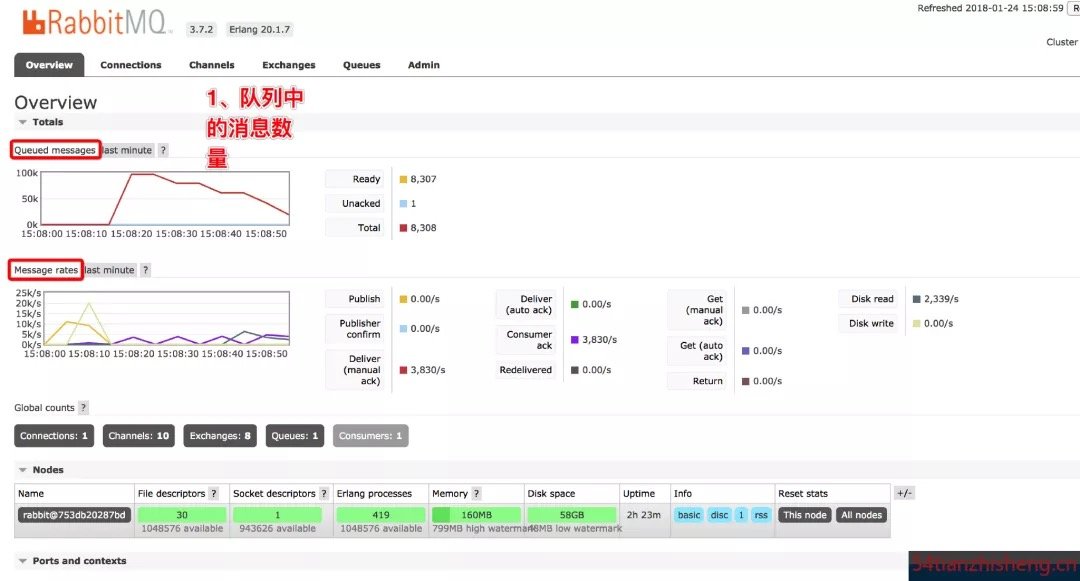
After landing:
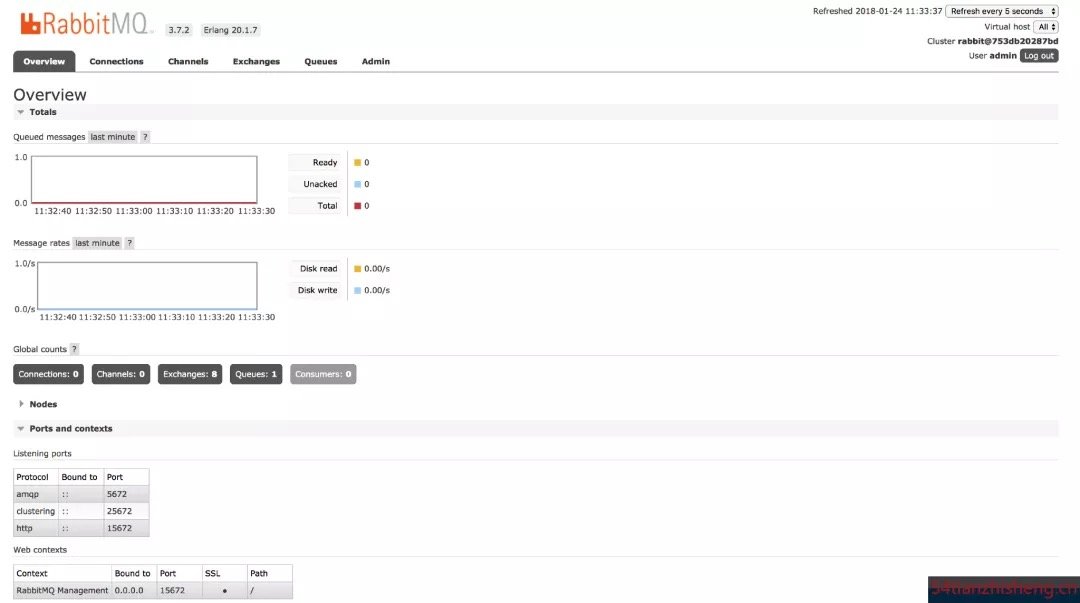
Simply describe what the list of consoles in the diagram above does:
- Overview: Some basic information used to view RabbitMQ (message queue, message rate, node, port, context information, etc.)
- Connections: Used to view connection information for RabbitMQ clients
- Channels: Users view channel information for RabbitMQ
- Exchange: Used to view RabbitMQ switches
- Queues: Queues for viewing RabbitMQ
- Admin: Used to manage users, to increase users
Create Project
Create a SpringBoot project structure in IDEA:
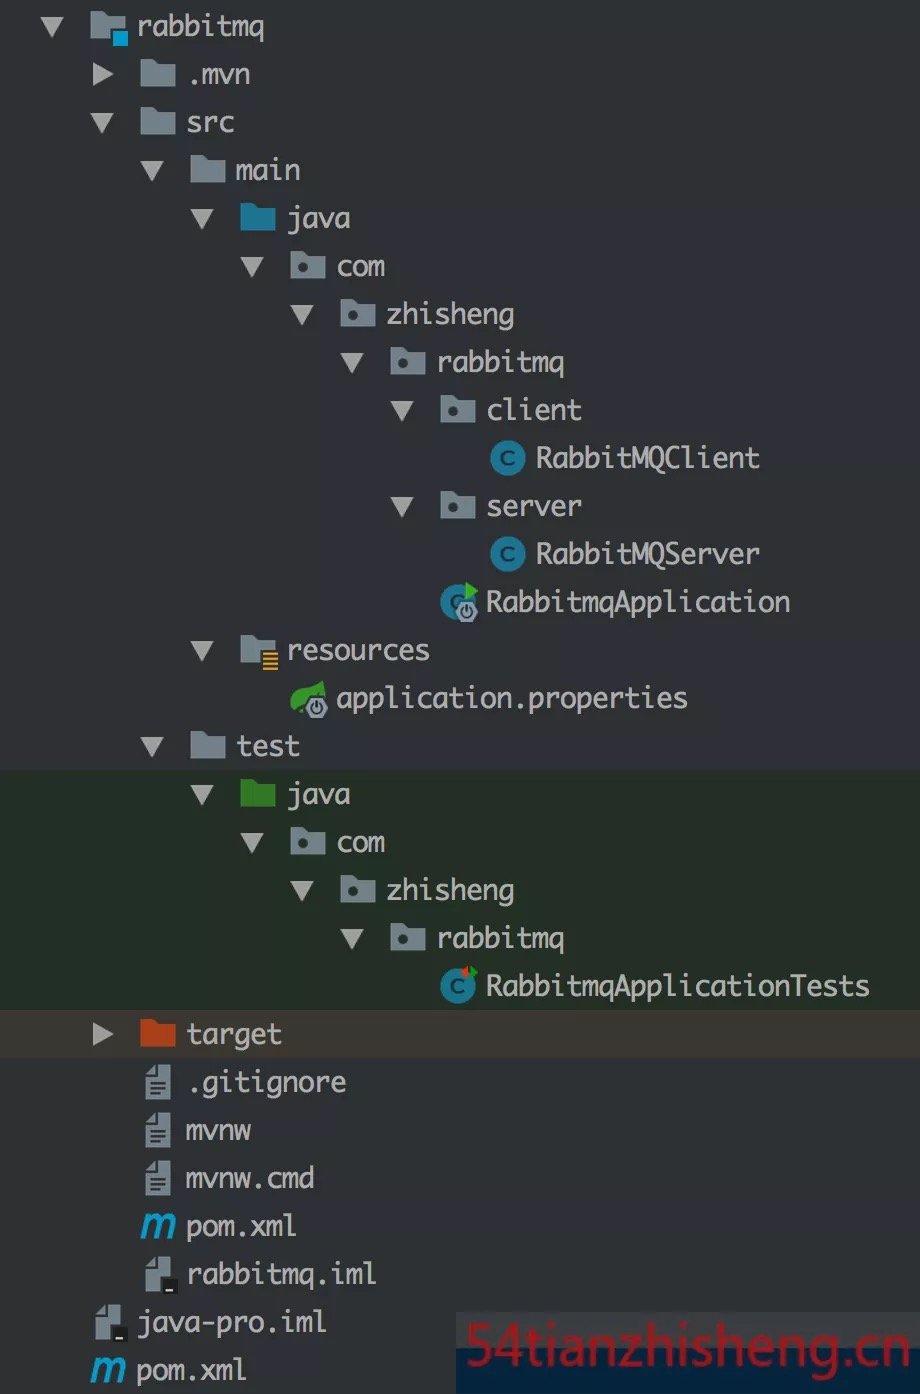
RabbitMQ support is already built into the SpringBoot framework. If you've seen the official documentation, you can see that we need to introduce a dependency on spring-boot-starter-amqp.
1. After introducing dependencies, pom.xml follows:
<?xml version="1.0" encoding="UTF-8"?>
<project xmlns="http://maven.apache.org/POM/4.0.0" xmlns:xsi="http://www.w3.org/2001/XMLSchema-instance"
         xsi:schemaLocation="http://maven.apache.org/POM/4.0.0 http://maven.apache.org/xsd/maven-4.0.0.xsd">
    <modelVersion>4.0.0</modelVersion>
    <groupId>com.zhisheng</groupId>
    <artifactId>rabbitmq</artifactId>
    <version>0.0.1-SNAPSHOT</version>
    <packaging>jar</packaging>
    <name>rabbitmq</name>
    <description>Demo project for Spring Boot RabbitMQ</description>
    <parent>
        <groupId>org.springframework.boot</groupId>
        <artifactId>spring-boot-starter-parent</artifactId>
        <version>1.5.9.RELEASE</version>
        <relativePath/> <!-- lookup parent from repository -->
    </parent>
    <properties>
        <project.build.sourceEncoding>UTF-8</project.build.sourceEncoding>
        <project.reporting.outputEncoding>UTF-8</project.reporting.outputEncoding>
        <java.version>1.8</java.version>
    </properties>
    <dependencies>
        <dependency>
            <groupId>org.springframework.boot</groupId>
            <artifactId>spring-boot-starter-web</artifactId>
        </dependency>
        <dependency>
            <groupId>org.springframework.boot</groupId>
            <artifactId>spring-boot-starter-test</artifactId>
            <scope>test</scope>
        </dependency>
        <dependency>
            <groupId>org.springframework.boot</groupId>
            <artifactId>spring-boot-starter-amqp</artifactId>
        </dependency>
    </dependencies>
    <build>
        <plugins>
            <plugin>
                <groupId>org.springframework.boot</groupId>
                <artifactId>spring-boot-maven-plugin</artifactId>
            </plugin>
        </plugins>
    </build>
</project>
2. The application.properties configuration is modified as follows:
spring.rabbitmq.addresses=localhost:5672
spring.rabbitmq.username=admin
spring.rabbitmq.password=admin
3. Message Sending Class RabbitMQClient.java
package com.zhisheng.rabbitmq.client;

import org.springframework.amqp.rabbit.core.RabbitTemplate;
import org.springframework.beans.factory.annotation.Autowired;
import org.springframework.stereotype.Component;

/** * Created by zhisheng_tian on 2018/1/23 */
@Componentpublic
class RabbitMQClient {
    @Autowired
    private RabbitTemplate rabbitTemplate;

    public void send(String message) { rabbitTemplate.convertAndSend("zhisheng", message); }
}
In this way, the sending message code is implemented.
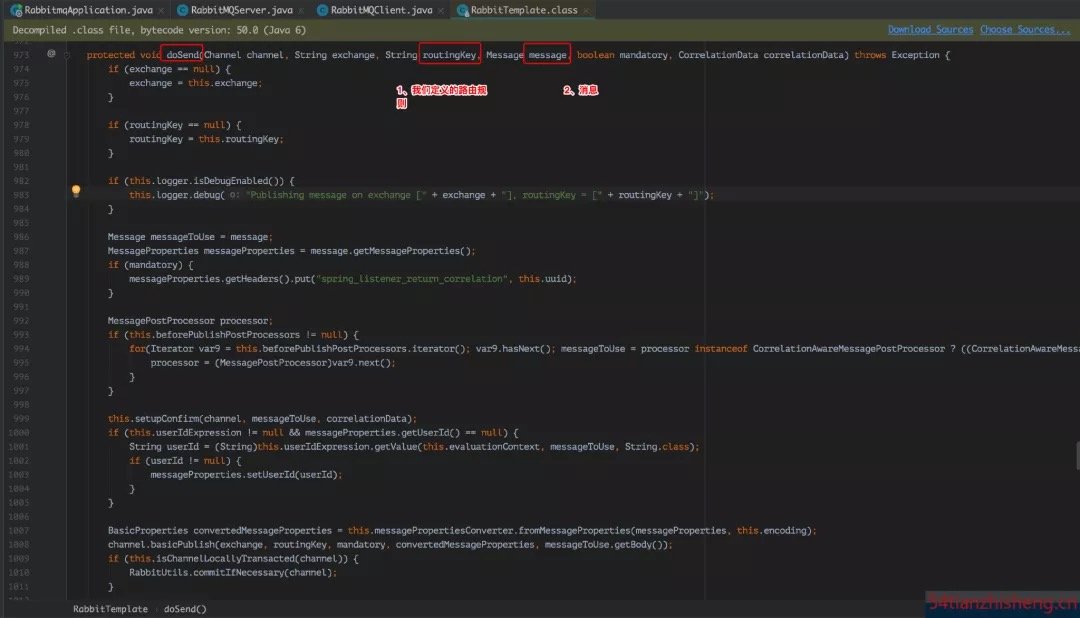
The key code here is the rabbitTemplate.convertAndSend() method, zhisheng, which is a routing key. Its value indicates that the message is sent to the specified queue zhisheng. Following the source code, it is found that the last method invoked by the convertAndSend() method is actually a doSend() method.
4. Message Receiving Class
package com.zhisheng.rabbitmq.server;

import org.springframework.amqp.rabbit.annotation.RabbitListener;
import org.springframework.stereotype.Component;

/** * Created by zhisheng_tian on 2018/1/23 */
@Componentpublic
class RabbitMQServer {
    @RabbitListener(queues = "zhisheng")
    public void receive(String message) { System.out.println("Received message Yes:" + message); }
}
Look, here's a RabbitListener listening on the queue zhisheng.
This queue, of course, has to be created by ourselves in the application. It won't look like the one I wrote earlier. Integrated Use of SpringBoot Kafka Like Kafka in, Kafka is created dynamically when a queue is used and does not need to be created beforehand.
So how do you create a queue in RabbitMQ?

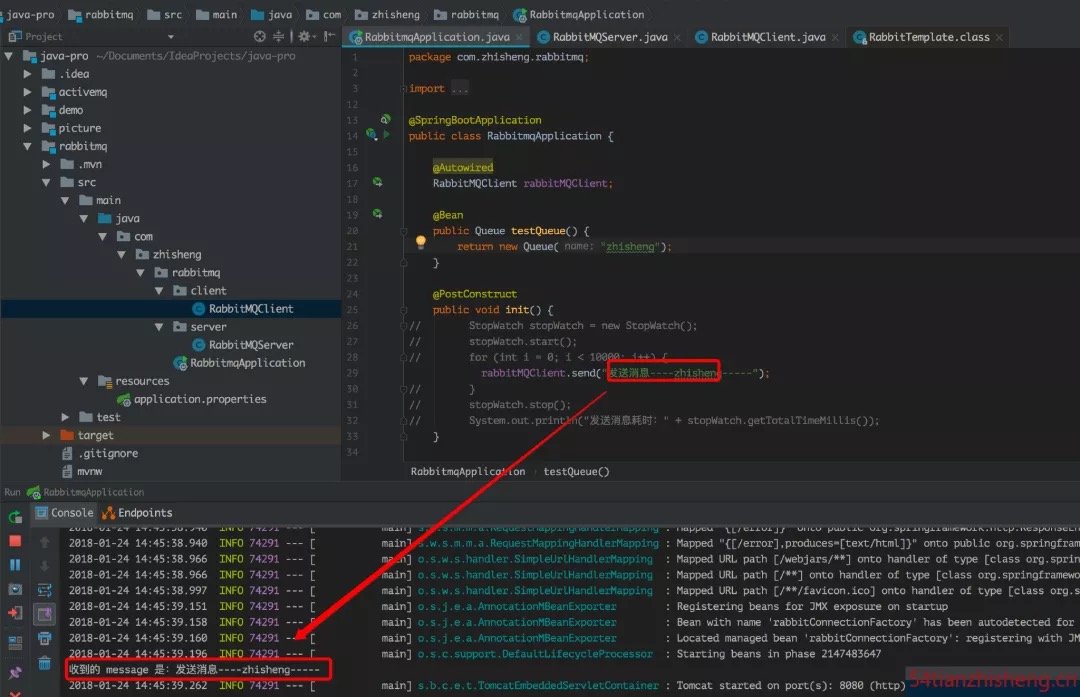
As shown in the figure above, a queue of Zhisheng is created, and when the program starts running, the message receiving class continuously listens for upcoming messages in the queue zhisheng.
5. Running projects
The class that sends the message needs to be injected into the startup class, and an init method is provided that calls the send() method of the sending message class in the init method
@PostConstructpublic
void init() { rabbitMQClient.send("send message----zhisheng-----"); }
It is important to note that the init() method has the @PostConstruct annotation, and methods modified by @PostConstruct are executed after the constructor.
Start the project to discover that the console has received a message.
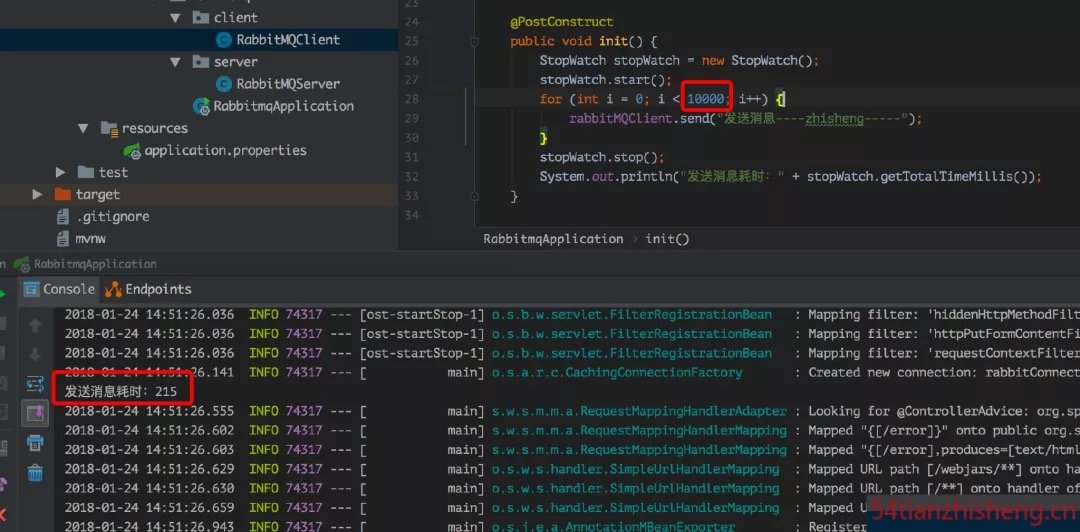
6. Single Thread Test Performance
See the code commented out in the picture above?That's to test the performance of messaging. I'll send 10,000 messages to see how long it takes in total.
10,000 messages take time to send: 215ms.This is a single-threaded environment where you can test performance next time compared to other MQ tests and in a multi-threaded environment.
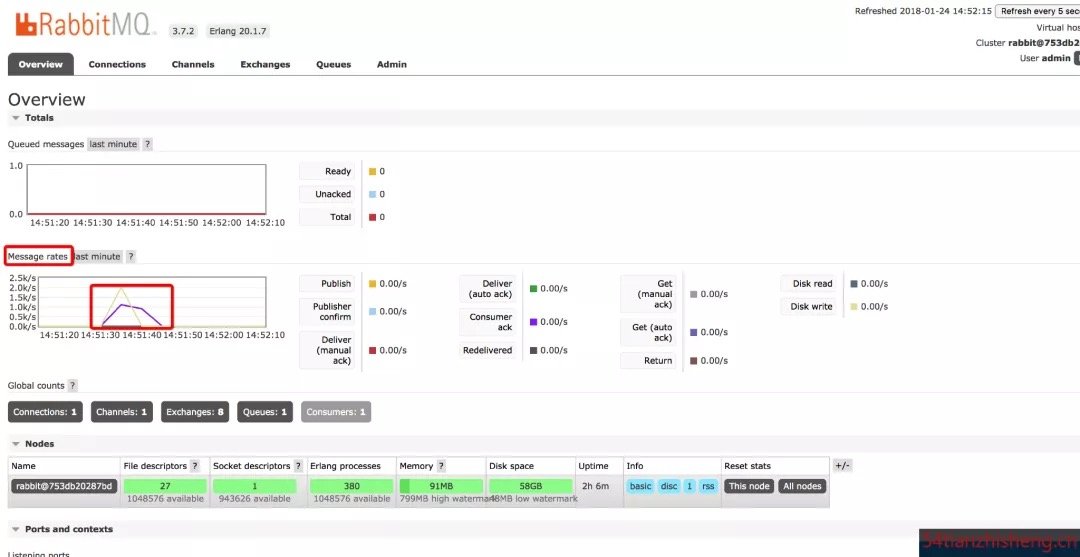
You can also see the rate of sending from the console:
7. Multi-threaded test performance
Ten threads were opened, sending 10,000 messages per thread.
The init method code is as follows:
@PostConstruct
public void init() {
    StopWatch stopWatch = new StopWatch(); stopWatch.start();
    int threads = 10; ExecutorService executorService = Executors.newFixedThreadPool(threads);
    final CountDownLatch start = new CountDownLatch(1); final CountDownLatch end = new CountDownLatch(threads);
    for (int i = 0; i < threads; i++) {
        executorService.execute(( ) -> {
        try {
            start.await(); for (int i1 = 0; i1 < 10000; i1++) {
                rabbitMQClient.send("send message----zhisheng-----");
            }
        } catch (InterruptedException e) {
            e.printStackTrace();
        } finally {
            end.countDown();
        }
    } );
    }
    start.countDown(); try {
        end.await();
    } catch (InterruptedException e) {
        e.printStackTrace();
    } finally {
        executorService.shutdown();
    }

    stopWatch.stop(); System.out.println("Sending messages takes time:" + stopWatch.getTotalTimeMillis());
}
Time consuming: 4063ms
The console displays the following image:
8. Attention
Here you can test the message sent directly as a String type, or you can test the Bean class, which requires attention to serialization.
Recommended reading:
Reading Notes for Deep Understanding the Java Memory Model
Spring Boot 2.0 Migration Guide
SpringBoot uses Docker for rapid deployment projects
Why choose Spring as the Java framework?
Integrated use and monitoring of SpringBoot RocketMQ
Ten Questions for the Spring Boot Interview
Top 10 common errors when using the Spring Framework
Guide to using SpringBoot Admin
Last good article:
Integrated use of SpringBoot Kafka
