Spring boot provides us with Thymeleaf automatic configuration solution, so it is very convenient for us to use Thymeleaf in spring boot
1, Introduction
Thymeleaf is a popular template engine. The template engine is developed in Java language. Template engine is a technical term and a cross domain and cross platform concept. There are template engines in Java language system and in C#, PHP language system. In addition to thymeleaf, there are Velocity, FreeMarker and other template engines with similar functions.
The main goal of thymeleaf is to provide a well formed template creation method that can be correctly displayed by the browser, so it can also be used as static modeling. You can use it to create validated XML and HTML templates. The HTML template created by thymeleaf can be opened directly in the browser (displaying static data), which is conducive to the separation of front and back ends. It should be noted that thymeleaf is not under spring.
2, Integration
1. Introduce thymeleaf in POM Add to the XML file:
<!-- Thymeleaf template engine -- >
<dependency>
<groupId>org.springframework.boot</groupId>
<artifactId>spring-boot-starter-thymeleaf</artifactId>
</dependency>
<!-- Web Development -- >
<dependency>
<groupId>org.springframework.boot</groupId>
<artifactId>spring-boot-starter-web</artifactId>
</dependency>
Because SpringBoot provides a complete set of automatic configuration scheme for thymeleaf, we can use it directly without making any changes
2. Default configuration of thymeleaf in SpringBoot
@ConfigurationProperties(prefix = "spring.thymeleaf")
public class ThymeleafProperties {
	private static final Charset DEFAULT_ENCODING = StandardCharsets.UTF_8;
	public static final String DEFAULT_PREFIX = "classpath:/templates/";
	public static final String DEFAULT_SUFFIX = ".html";
	/**
	 * Whether to check that the template exists before rendering it.
	 */
	private boolean checkTemplate = true;
	/**
	 * Whether to check that the templates location exists.
	 */
	private boolean checkTemplateLocation = true;
	/**
	 * Prefix that gets prepended to view names when building a URL.
	 */
	private String prefix = DEFAULT_PREFIX;
	/**
	 * Suffix that gets appended to view names when building a URL.
	 */
	private String suffix = DEFAULT_SUFFIX;
	/**
	 * Template mode to be applied to templates. See also Thymeleaf's TemplateMode enum.
	 */
	private String mode = "HTML";
	...
}
Via org springframework. boot. autoconfigure. thymeleaf. Thymeleaf properties find the default configuration of thymeleaf in SpringBoot, which is not difficult for us to see
Default encoding format: UTF-8
Default path: classpath:/templates /, which are all placed in the templates directory under the root directory
Default suffix: html and thymeleaf are html files
Check template: enabled by default
Check template position: on by default
...
From the above source code, we can see that our thymeleaf template file is placed in the resources/templates directory by default, and the default suffix is html
Of course, we don't want to use the default configuration. We can also use it in application In the TML file, spring Thymeleaf starts personalized configuration
For example:
spring:
	# thymeleaf template engine configuration
  	thymeleaf:
	    # cache
	    cache: false
	    # Coding format
	    encoding: UTF-8
During our development, we may be hit by the cache many times. We can turn off the cache in thymeleaf and keep it updated in real time
3, Develop
1. Create control layer indexcontroller java
@Controller
public class IndexController {

    /**
     * Request index page
     * @return
     */
     @GetMapping("index")
    public ModelAndView index() {
        ModelAndView mav = new ModelAndView("index");
        mav.addObject("title", "home page");
        List<UserInfo> list = new ArrayList<>();
        UserInfo user = null;
        for (int i = 0; i < 10; i++) {
            user = new UserInfo();
            user.setId(i + 1);
            user.setNickName("user" + i);
            user.setSignature("SpringBoot It smells good,+" + (i + 1));
            list.add(user);
        }
        mav.addObject("users", list);
        return mav;
    }
}
We created IndexController and requested index to return index HTML page,
2. Create thymeleaf template index html
Next, let's create index in the resources/templates directory html
<!DOCTYPE html>
<html xmlns="http://www.w3.org/1999/xhtml" xmlns:th="http://www.thymeleaf.org">
<head>
    <meta charset="UTF-8">
    <title th:text="${title}"></title>
</head>
<body>
<table border="1">
    <tr>
        <td>User number</td>
        <td>User nickname</td>
        <td>Personal signature</td>
    </tr>
    <tr th:each="item : ${list}">
        <td th:text="${item.id}"></td>
        <td th:text="${item.nickName}"></td>
        <td th:text="${item.signature}"></td>
    </tr>
</table>
</body>
</html>
be careful:
xmlns=“ http://www.w3.org/1999/xhtml ” xmlns:th=“ http://www.thymeleaf.org ”, which must be written in the html tag
xmlns is the abbreviation of xml namespace, that is, xml namespace
The xmlns attribute can define one or more alternative namespaces in the document
This attribute can be placed in the start tag of any element in the document
The value of this attribute is similar to a URL. It defines a namespace that the browser will use for all content in the element where the attribute is located
We passed in the Title Parameter in ModelAndView, and used th:text="${title}" to assign a value to the title tag, which is similar to the way JSTL is used. The effect is as follows:

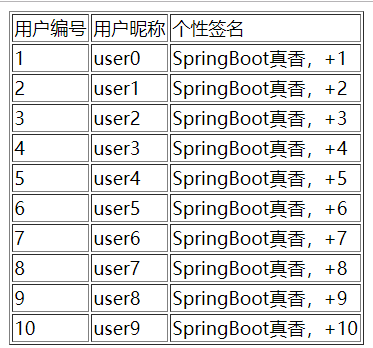
We also rendered a user table through th:each = "item: ${list}", as shown in the figure:
3. Splice URL
< a th: href = "@ {/ user / info (id = ${user. ID})}" > parameter splicing</a>
< a th: href = "@ {/ user / info (id = ${user. ID}, phone = ${user. Phone})}" > multi parameter splicing</a>
< a th: href = "@ {/ user / Info / {uid} (uid = ${user. ID})}" > restful style</a>
< a th: href = "@ {/ user / Info / {uid} / ABC (uid = ${user. ID})}" > restful style</a>
IV. application skills
Using skills of thymeleaf in JavaScript
1. Develop foreplay
<script type="text/javascript" th:inline="javascript">...</script>
We need to write th:inline = "javascript" in the script tag to indicate the inline method using thymeleaf
2. Ajax path problem
url: /*[[@{/user/saveUser}]]*/,
data: {
'user': user
}
type: 'post',
dataType: 'json',
We use / [[@ {/ * *}]] / to get the context path of the project and access the project
3. Get the data in the model
<script type="text/javascript" th:inline="javascript">
var userName = [[${user.name}]];
</script>
4. Use iframe pop-up window of front-end frame, such as layui
function showUserInfo() {
layer.open({
type: 2,
title: 'user information',
shade: 0.2,
area: ['600px', '450px'],
offset: '100px',
shadeClose: false,
content: /*[[@{/user/getUserInfo}]]*/
});
}
Required parameters:
layer.open({
type: 2,
title: 'user information',
shade: 0.2,
area: ['600px', '450px'],
offset: '100px',
shadeClose: false,
content: [[@{/user/getUserInfo}]]+'?id='+id
});
We passed in the user id in the path
5. Time formatting
< span th: text = "${#dates. Format (data. Createtime, 'yyyy MM dd')}" ></span>
<span th:text="${#dates.format(data.createTime, 'yyyy-MM-dd HH:mm:ss')}"></span>
6. Parsing HTML content
<div th:utext="${data.content}"></div>
7. Dynamic setting background picture
<body th:style="'background: url('+@{/pages/login/backgroud.jpg}+') no-repeat center'"></body>
5, Manual rendering
When we send mail, we need to use the mail template. We can choose to render it manually
- 1. Create a new email template email html
<!DOCTYPE html>
<html xmlns="http://www.w3.org/1999/xhtml" xmlns:th="http://www.thymeleaf.org">
<head>
    <meta charset="UTF-8">
    <title>Welcome to join us</title>
</head>
<body>
<h1 style="text-align: center">Welcome to work</h1>
<p><span th:text="${user.name}"></span>: Hello!!! Welcome to join us XXX Company, your entry information is as follows:</p>
<p>Position:<span th:text="${user.job}"></span></p>
<p>a monthly salary:<span th:text="${user.wages}"></span></p>
</body>
</html>
- 2. Send mail test
@Autowired
TemplateEngine templateEngine;

@Test
public void test1() throws MessagingException {
    Context context = new Context();
    context.setVariable("name", "Zhang San");
    context.setVariable("job", "Java Engineer Development");
    context.setVariable("wages", 7800);
    String mail = templateEngine.process("email", context);
    emailUtils.sendHtmlMail("xxxxxxxxx@qq.com", "Induction notice", mail);
}
For a tutorial on sending mail in SpringBoot, see: Send mail in SpringBoot
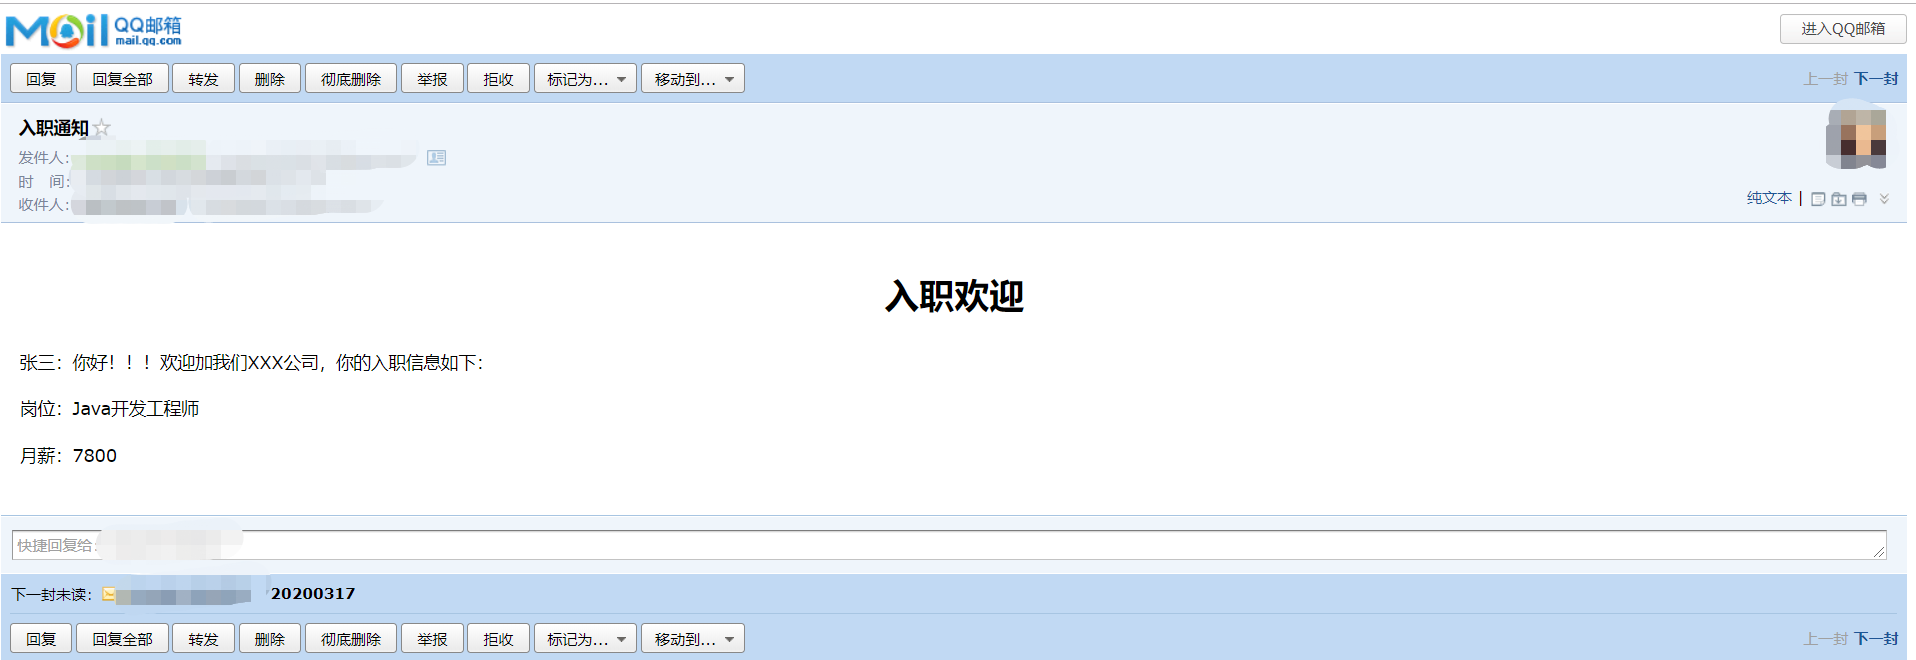
- 3. Effect display
Finally, we received the following email: