1. First, use steps of components:
Using nano id s to generate unique IDs is lighter than UUIDs
1. Create components vue file, component name name (initial capital)
2. import Student from "./components/Student.vue" (under the script tab)
3. Register component: the name attribute of the current component is equal to the date attribute, and components registers the local component {Student}
4. Use component: use the < student > component tag in the current component
const comp=Vue. Extensions ({create component})
2. Use ref attribute: used to register reference information (id substitutes) for elements or subcomponents
// 2. The application obtains the real DOM element on the html tag, and the application on the component tag is the component instance object (vc)
// 3. Usage:
// 1. Marking: ` ` < H1 ref = "XXX" ></ H1 > ` ` ` or ` ` ` < school ref = "XXX" > < / School >```
// 2. Get: ` ` ` this$ refs. XXX ` ` ` get instance and get data
3. Pass value from parent to child: use the user-defined attribute props to pass parameters
Customize the attribute on the sub component label. Sub component props:['xxx','sss']
4. Transfer value from child to parent:
1. Pass props of function type from parent component to child component: (extension)
	//Code in parent component
	<School :getSchoolName="getSchoolName"/>
	methods: {
			getSchoolName(name){
				console.log('App Received school name:',name)
			}
		}

     //Code in subcomponent
		props:['getSchoolName'],
     //Call the function in the function in a method
	  this.getSchoolName(this.name)
2. Bind a user-defined event to the child component through the parent component: (the first way is to use @ or v-on)
//The code in the parent component customizes atguigu events for child components
<Student @atguigu="getStudentName" />
//Define time in methods
	getStudentName(name,...params){
	console.log('App Received Student Name:',name,params)
	this.studentName = name
			},

//Through this. In the subcomponent$ emit('atguigu',this.name)
	sendStudentlName(){
				//Trigger the atguigu event on the Student component instance
				this.$emit('atguigu',this.name,666,888,900)
				// this.$emit('demo')
				// this.$emit('click')
			},
3. Bind a user-defined event to the child component through the parent component: (the second way is to use ref)
This. In parent component$ refs. student.$ On ('custom event name ', function)
//The parent component marks the child component with ref to define custom events 	 this.$refs.student.$on('atguigu',function)
	<Student ref="student"/>
	mounted() {
			this.$refs.student.$on('atguigu',this.getStudentName) //Binding custom events
// this.$refs.student.$once('atguigu',this.getStudentName) / / bind custom events (one-time)
		},

        getStudentName(name,...params){
				console.log('App Received Student Name:',name,params)
				this.studentName = name
			},


//Trigger the custom event this on the component in the sub component$ emit('atguigu',this.name)
Unbind user-defined event: unbind this. Event inside the subcomponent$ off('atguigu')
Destroy the current component instance: this$ destroy()
	unbind(){
    this.$off('atguigu') //Unbind a custom event
	// this.$off(['atguigu','demo']) / / unbind multiple custom events
	// this.$off() / / unbind all custom events
			},
	death(){
	this.$destroy() //The instance of the current Student component is destroyed. After destruction, the custom events of all Student instances are ineffective.
			}
5.sessionstorage/localStorage: only strings can be stored
localStorage.setItem('token',JSON.Stringfy()) JSON.parse(localStorage.getItem('token'))
6. Global event bus parameters (Vue.prototype.$bus=this) / / components can access $bus
//Install global event bus
import Vue from "vue"
import App from "./App.vue"

Vue.config.productionTip=false

new Vue({
	el:'#app',
	render:h=>h(App),
	beforeCreate(){
		Vue.prototype.$bus=this//Install global event bus
	}
})

//Send data party component this$ bus.$ emit('aiguigu',this.name)

	methods:{
			sendStudentName(){
				this.$bus.$emit('hello',this.name)
			}
		}

//Receiving data party component this$ bus.$ On ('Hello ', (data) = > {received event data / / custom event callback})
	mounted() {
			// console.log('School',this)
			this.$bus.$on('hello',(data)=>{
				console.log('I am School Component, received data',data)
			})
		},
//It is best to unbind custom events before destroying components
		beforeDestroy() {
			this.$bus.$off('hello')
		},
	}
7. Publish and subscribe to PubSub JS
The following is the detailed usage
 https://www.cnblogs.com/z-qinfeng/p/12387268.html
2.import pubsub form "pubsub-js"
3. Subscribe to message PubSub Subscribe ('channel ', (data) = > {/ / callback}) (pubsub.unsubscribe(pubId) in beforeDestroy) see the following example
	mounted() {
			// console.log('School',this)
			/* this.$bus.$on('hello',(data)=>{
				console.log('I am the School component and received the data ', data)
			}) */
			this.pubId = pubsub.subscribe('hello',(msgName,data)=>{
				console.log(this)
				// console.log('someone posted the hello message, and the callback of the hello message was executed ', msgName,data)
			})
		},
		beforeDestroy() {
			// this.$bus.$off('hello')
			pubsub.unsubscribe(this.pubId)
		},
4. Publish news PubSub Publish ('channel ', data)
8. Open the proxy server Vue config. js
Configuration reference | Vue CLI https://cli.vuejs.org/zh/config/#devserver-proxy
//Start proxy server (mode 1)
	/* devServer: {
    proxy: 'http://localhost:5000'
  }, */
	//Start the proxy server (mode 2)
	devServer: {
    proxy: {
      '/atguigu': {
        target: 'http://localhost:5000',
				pathRewrite:{'^/atguigu':''},
        // ws: true, / / used to support websocket
        // changeOrigin: true / / used to control the host value in the request header
      },
      '/demo': {
        target: 'http://localhost:5001',
				pathRewrite:{'^/demo':''},
        // ws: true, / / used to support websocket
        // changeOrigin: true / / used to control the host value in the request header
      }
    }
  }
9. Vue resource initiates a request (the same function as axios)
10. Use of slots
1. Slot: the < slot > tag can be used to occupy the space in the component, and a hole can be dug to keep it. When using the component tag, double tags can be used to fill in the content, so as to achieve the effect that the components can be diversified
2. Named slot:
//The code in the component has two slots, so give the name attribute to distinguish the slots
<div class="category">
		<h3>{{title}}classification</h3>
		<!-- Define a slot (dig a hole and wait for the user of the component to fill it) -->
		<slot name="center">I am some default values. When the user does not pass the specific structure, I will appear 1</slot>
		<slot name="footer">I am some default values. When the user does not pass the specific structure, I will appear 2</slot>
	</div>


//Where components are used, you can use the template tag - + v-slot: footer
<Category title="film">
<video slot="center" controls src="http://clips.vorwaerts-gmbh.de/big_buck_bunny.mp4"></video>
			<template v-slot:footer>
				<div class="foot">
					<a href="http://www.atguigu. Com "> Classic</a>
					<a href="http://www.atguigu. Com "> Hot</a>
					<a href="http://www.atguigu. Com "> recommended</a>
				</div>
				<h4>Welcome to the movie</h4>
			</template>
		</Category>

//Or slot="footer" is directly equal to the corresponding slot tag name
<Category title="game" >
			<ul slot="center">
				<li v-for="(g,index) in games" :key="index">{{g}}</li>
			</ul>
			<div class="foot" slot="footer">
				<a href="http://www.atguigu. Com "> stand alone games</a>
				<a href="http://www.atguigu. Com "> online games</a>
			</div>
		</Category>
3. Scope slot: the data is also in the component, not on the user. When the user needs to get the data in the component, he can pass the value to the user by adding a user-defined attribute to the < slot > tag. In the parent component, < template scope = "{user defined attribute}" > he can get the data by deconstructing the assigned value
//Transfer value of custom attribute of slot tag in subcomponent
<template>
	<div>
		<slot :games="games" msg="hello">I'm some default content</slot>
	</div>
</template>

<script>
export default {
	name:'Category',
	props:['title'],
	date(){
		return {
		games:['Red Alert','Cross Fire','Audition','Super Marie'],
		}
	}
}
</script>
//Scope = "{games}" or slot scope = "{games}" on the template label in the parent component

		<Category title="game">
			<template scope="atguigu">
				<ul>
					<li v-for="(g,index) in atguigu.games" :key="index">{{g}}</li>
				</ul>
			</template>
		</Category>

//slot-scope="{games}"
		<Category title="game">
			<template slot-scope="{games}">
				<h4 v-for="(g,index) in games" :key="index">{{g}}</h4>
			</template>
		</Category>
11.vuex: state management framework
VueX is a special for vue The state management framework designed by JS application uniformly manages and maintains the changeable state of various vue components (you can understand it as some data in vue components).
Vuex has five core concepts:
state, getters, mutations, actions, modules.
1. state: the basic data of vuex, which is used to store variables
2. geeter: data derived from basic data (state), which is equivalent to the calculated attribute of state
3. mutation: the method of submitting updated data must be synchronous (use action asynchronously if necessary). Each mutation has a string event type and a callback function.
The callback function is where we actually change the state, and it will accept state as the first parameter and submit load as the second parameter.
4. action: its function is roughly the same as that of mutation, except that = = "1 The action submits the mutation instead of directly changing the state. 2. Action can contain any asynchronous operation.
5. modules: modular vuex, which allows each module to have its own state, mutation, action and getters, making the structure very clear and convenient for management.
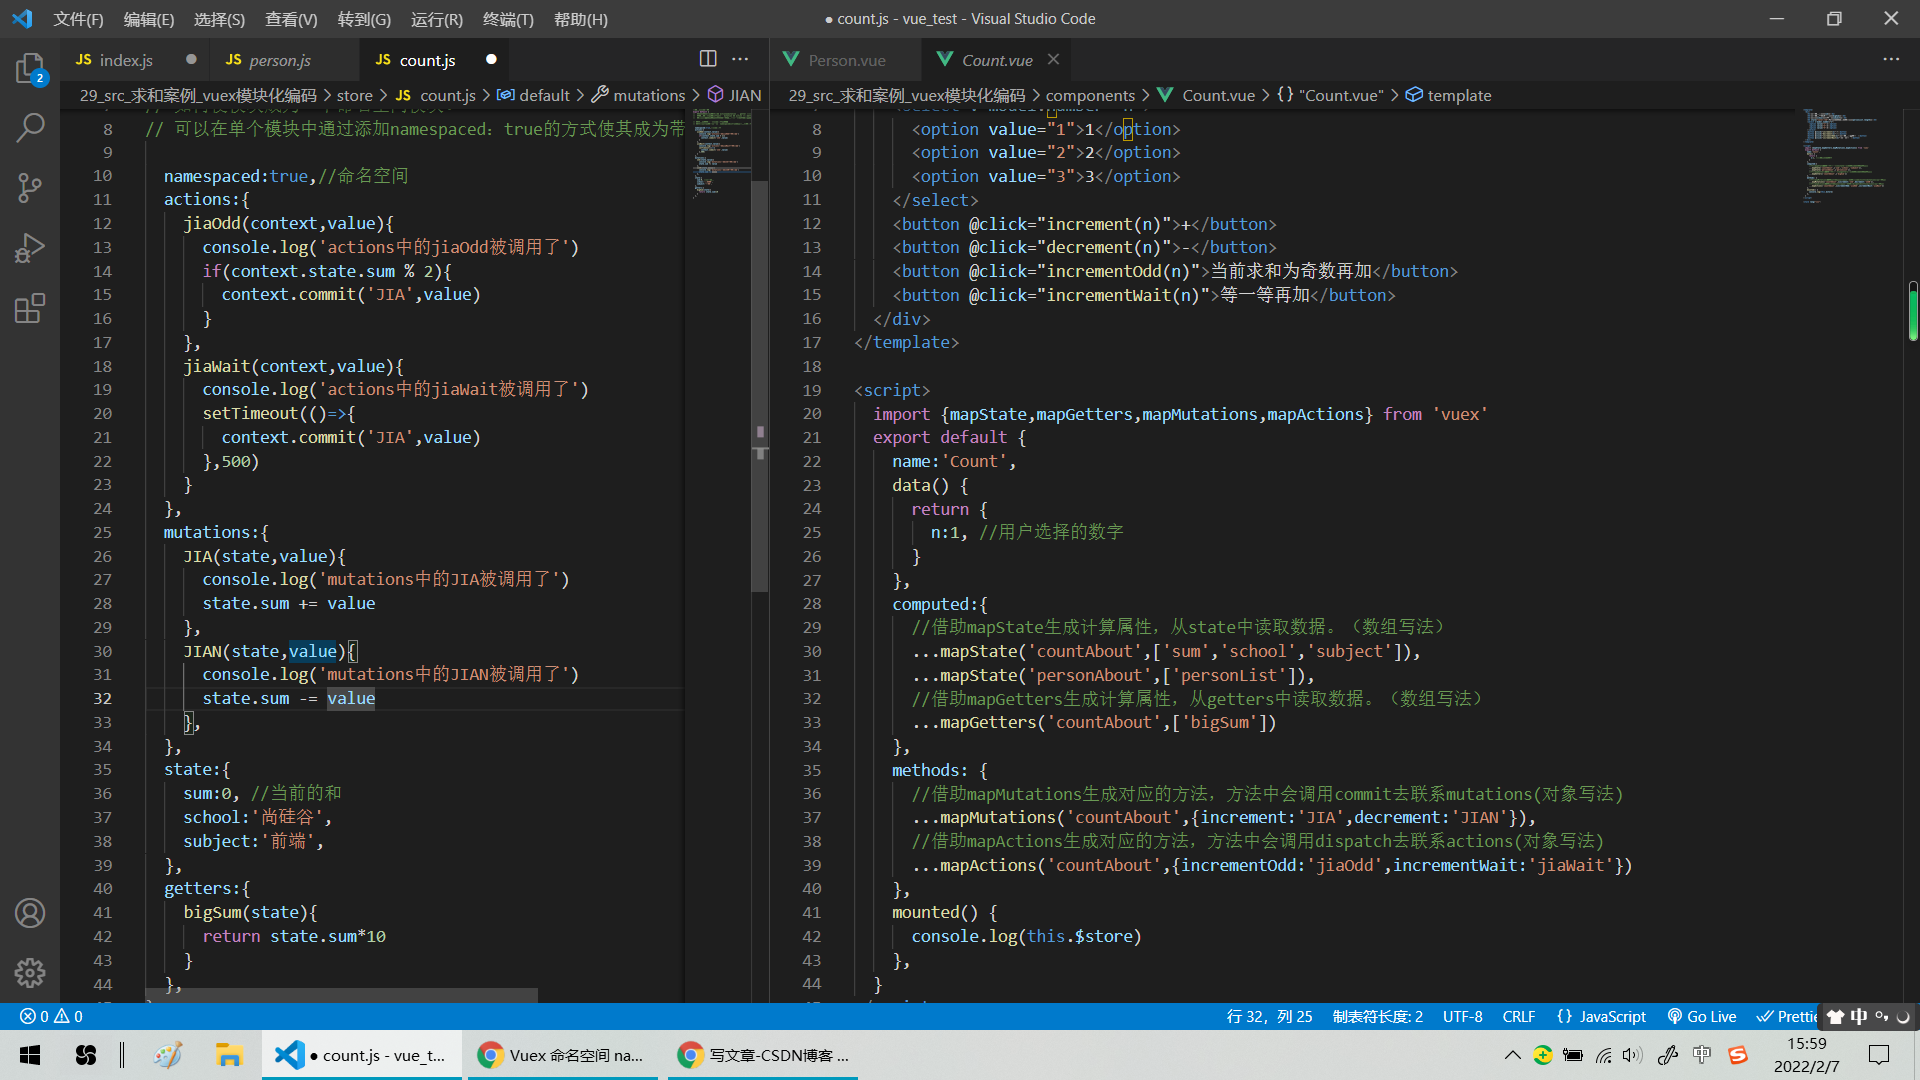
Modularization: Method 1 uses mapState, etc
import {mapState,mapGetters,mapMutations,mapActions} from 'vuex'
export default {
name:'Count',
data() {
return {
n:1, //User selected number
}
},
computed:{
//Generate calculation properties with mapState and read data from state. (array writing)
...mapState('countAbout',['sum','school','subject']),
...mapState('personAbout',['personList']),
//Generate calculation properties with mapGetters and read data from getters. (array writing)
...mapGetters('countAbout',['bigSum'])
},
methods: {
//Generate the corresponding method with mapMutations, in which commit will be called to contact mutations (object writing method)
...mapMutations('countAbout',{increment:'JIA',decrement:'JIAN'}),
//Generate corresponding methods with mapActions, in which dispatch will be called to contact actions (object writing method)
...mapActions('countAbout',{incrementOdd:'jiaOdd',incrementWait:'jiaWait'})
},
mounted() {
console.log(this.$store)
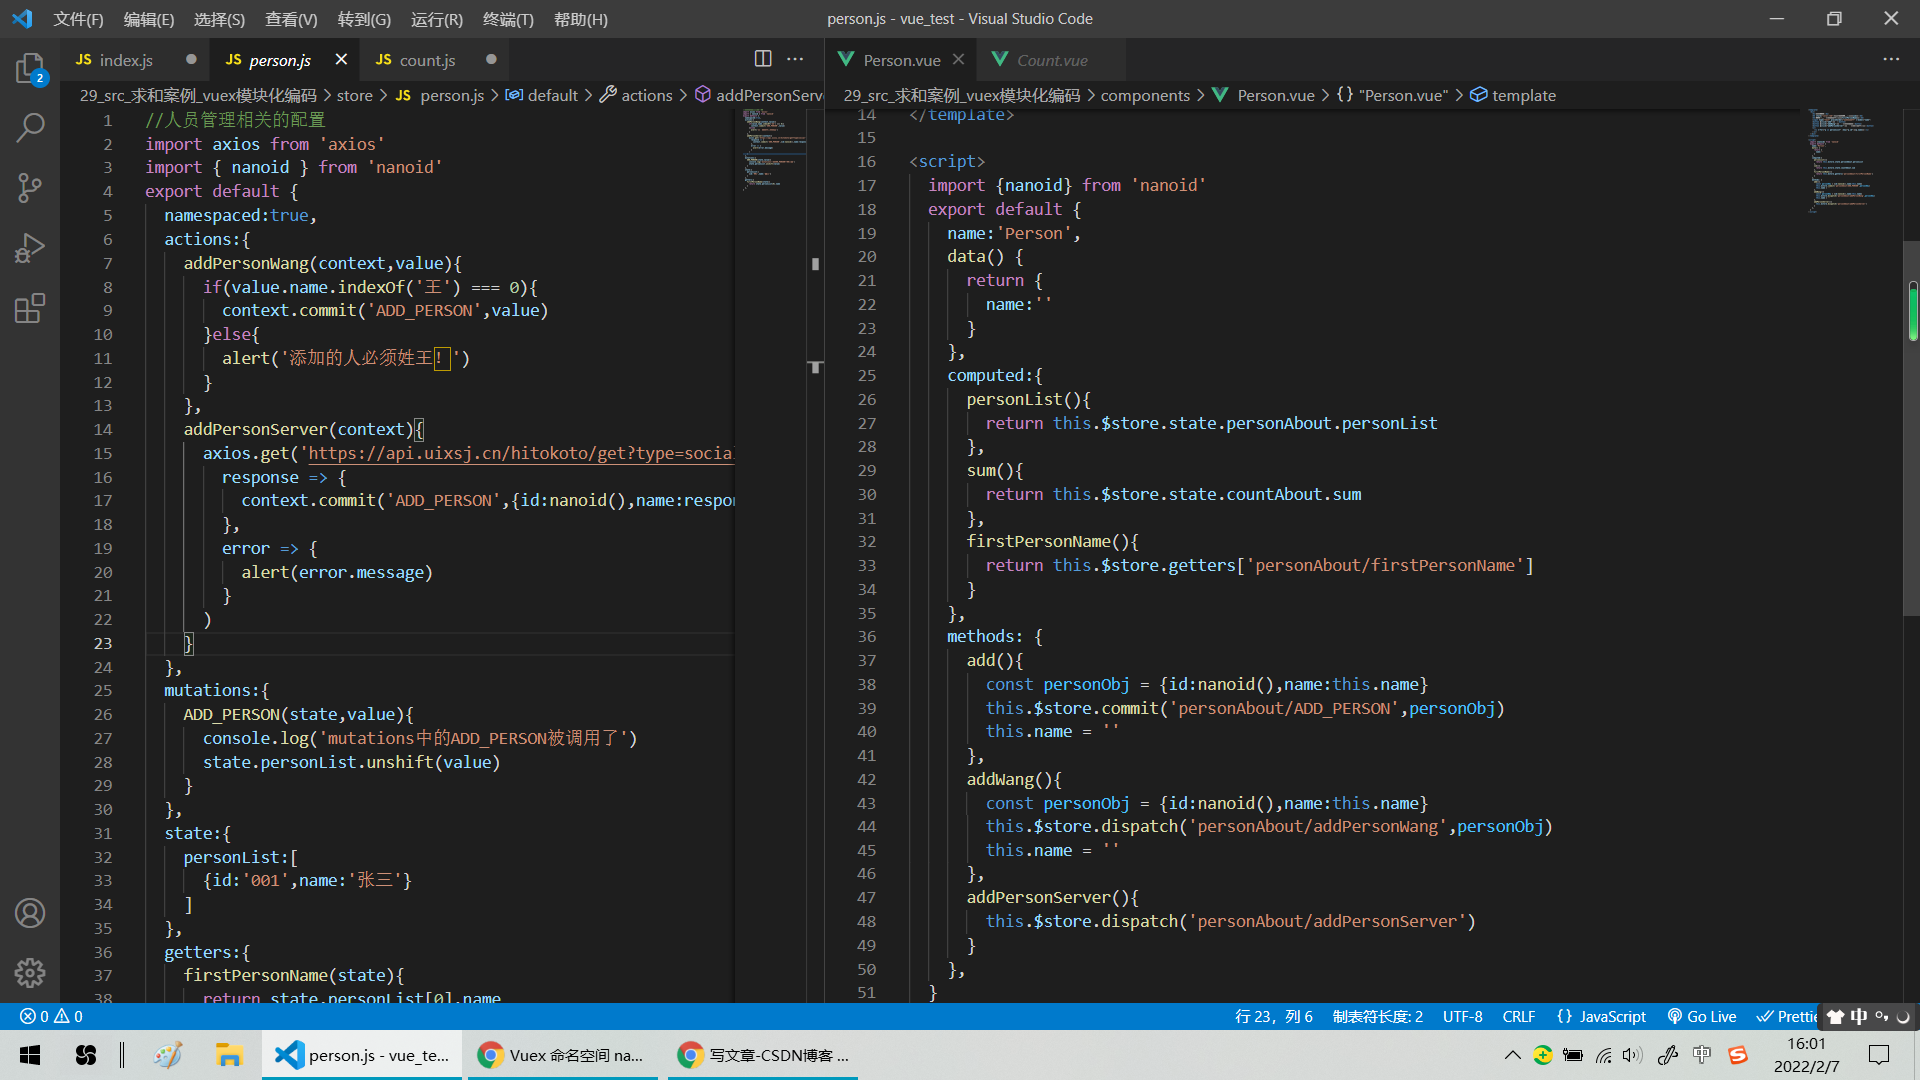
},Modularization: Method 2 (use this.$store)
12. Route on demand loading: three methods
 https://blog.csdn.net/weixin_43953710/article/details/103027683?spm=1001.2101.3001.6650.1&utm_medium=distribute.pc_relevant.none-task-blog-2~default~BlogCommendFromBaidu~Rate-1.pc_relevant_aa&depth_1-utm_source=distribute.pc_relevant.none-task-blog-2~default~BlogCommendFromBaidu~Rate-1.pc_relevant_aa&utm_relevant_index=2