

As a mobile development engineer, when I first came into contact with Flutter, I must have such a question: what is the life cycle of Flutter? How is the lifecycle handled? Where is my onCreate()[Android]? What about viewDidLoad()[iOS]? Where should my business logic be handled? What about initialization data? I hope I can help you a little after reading this article.
Android
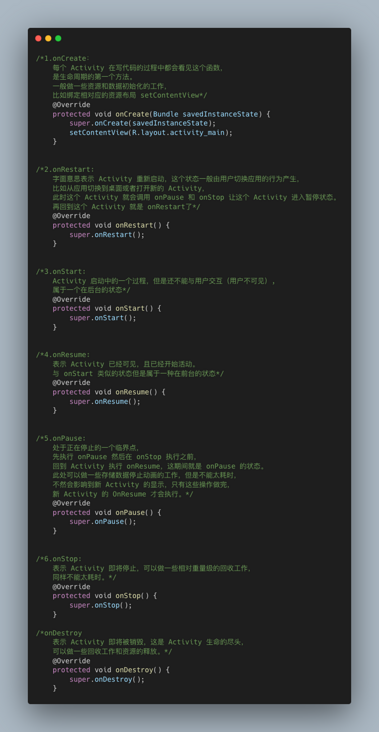
If you are an Android Development Engineer, you are no stranger to the Activity lifecycle
- onCreate
- onStart
- onResume
- onPause
- onStop
- onDestroy
iOS
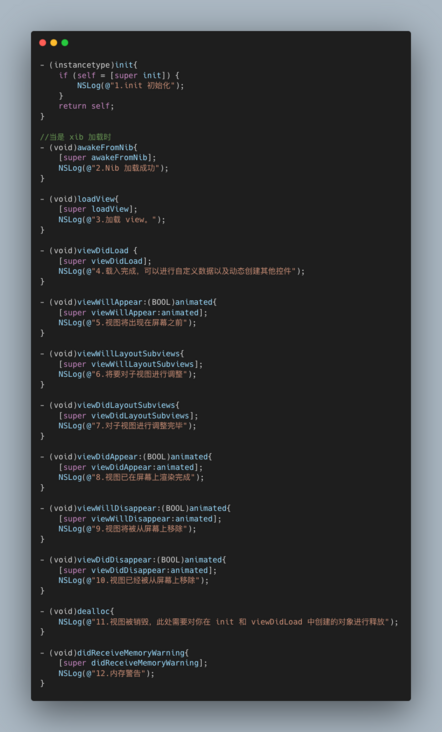
If you are an iOS development engineer, you must already know the life cycle of UIViewController.
- viewDidLoad
- viewWillAppear
- viewDidAppear
- viewWillDisappear
- viewDidDisappear
- viewDidUnload
Flutter
Knowing the life cycle of Android and iOS, what about Flutter? Is there a lifecycle function corresponding to the mobile terminal? If you know a little bit about Flutter before, you will find that there are two main widgets in Flutter: stateless Widget and stateful Widget. In this article, we mainly introduce stateful Widget, because it has a similar life cycle to Android and iOS.
StatelessWidget
Stateless components are immutable, which means that their properties cannot change, and all values are final. It can be understood that the external incoming data will be transformed into the content displayed on the interface, and will only be rendered once.
For the stateless component life cycle, the only process is build. The construction method of stateless components is usually called only in three cases: the first time a widget is inserted into the tree, the parent component of the widget changes its configuration, and the InheritedWidget it depends on changes.
StatefulWidget
The state held by stateful components may change in the Widget life cycle, which is to define interaction logic and business logic. It can be understood that it has a dynamic and interactive content interface, which will render multiple times according to the changes of data. Implementing a StatefulWidget requires at least two classes:
- One is the StatefulWidget class.
- The other is the Sate class. The StatefulWidget class itself is immutable, but the State class always exists in the Widget life cycle. StatefulWidget stores its variable State in the State object created by the createState method or in the object subscribed to by the State.
StatefulWidget lifecycle
- createState: this function is the method to create a State in the StatefulWidget. When the StatefulWidget is created, createState will be executed immediately. After the createState function is executed, it indicates that the current component is already in the Widget tree. At this time, a very important attribute mounted is set to true.
- initState: this function is called for State initialization. It will only be called once. Therefore, it will usually do some one-time operations in the callback, such as executing initial assignment of State variables, event notification of subscriber subtree, interacting with server side, obtaining server data and adjusting setState to set State.
- didChangeDependencies: this function will be called when the dependent state of the component changes. The State mentioned here is a global state, such as system language Locale or application theme. The fluent framework will notify the widget to call this callback. It is similar to the state stored by the front-end Redux. After the method is called, the state of the component changes to dirty, and the build method is called immediately.
- Build: it mainly returns the Widget to be rendered. Since build will be called many times, only the logic related to returning the Widget can be done in this function to avoid abnormal state due to multiple executions.
- reassemble: it is mainly used in the development phase. In the debug mode, this function will be called for each hot overload. Therefore, some debug code can be added during the debug phase to check code problems. This callback will never be called in release mode.
- didUpdateWidget: this function is mainly used to call the method of the child component only when the component is rebuilt, such as hot overload and the parent component is built. Secondly, the build method in this component will be called after the method is called.
- deactivate: it will be called after the component is removed from the node. If the component is removed from the node and not inserted into other nodes, it will continue to call dispose to permanently remove it.
- Dispose: permanently remove components and release component resources. After calling dispose, the mounted property is set to false, which also represents the end of the component life cycle.
Several concepts that are not life cycle but are very important
The following are not part of the life cycle, but play a very important role in the life cycle.
- Mounted: it is an important attribute in the State, which is equivalent to an identifier, and is used to indicate whether the current component is in the tree. After createState and before initState, mounted will be set to true, indicating that the current component is already in the tree. When dispose is called, mounted is set to false, indicating that the current component is not in the tree.
- Dirty: indicates that the current component is dirty. In the next frame, the build function will be executed. After calling the setState method or executing the didUpdateWidget method, the state of the component is dirty.
- Clean: corresponding to dirty, clean means that the current state of the component is clean. In the clean state, the component will not execute the build function.

The above figure shows the flow chart of the life cycle of the shuttle
It is roughly divided into four stages
- The initialization phase includes two life cycle functions createState and initState;
- Component creation phase, including didChangeDependencies and build;
- Trigger the component to build multiple times. At this stage, it may be the component rebuild caused by didChangeDependencies, setState or didUpdateWidget. It will be triggered multiple times during the operation of the component, which is also a point that needs to be paid attention to in the optimization process;
- Finally, the component destruction phase, deactivate and dispose.
Component first load execution process
First, let's implement the following code (similar to flutter's own counter project). Whether Kangkang component is created for the first time in the order in the above flowchart.
- Create a shuttle project;
- Create count_ widget. Add the following code to dart;
import 'package:flutter/material.dart';

class CountWidget extends StatefulWidget {
  CountWidget({Key key}) : super(key: key);

  @override
  _CountWidgetState createState() {
    print('count createState');
    return _CountWidgetState();
  }
}

class _CountWidgetState extends State<CountWidget> {
  int _count = 0;
  void _incrementCounter() {
    setState(() {
      print('count setState');
      _count++;
    });
  }

  @override
  void initState() {
    print('count initState');
    super.initState();
  }

  @override
  void didChangeDependencies() {
    print('count didChangeDependencies');
    super.didChangeDependencies();
  }

  @override
  void didUpdateWidget(CountWidget oldWidget) {
    print('count didUpdateWidget');
    super.didUpdateWidget(oldWidget);
  }

  @override
  void deactivate() {
    print('count deactivate');
    super.deactivate();
  }

  @override
  void dispose() {
    print('count dispose');
    super.dispose();
  }

  @override
  void reassemble() {
    print('count reassemble');
    super.reassemble();
  }

  @override
  Widget build(BuildContext context) {
    print('count build');
    return Center(
      child: Column(
        mainAxisAlignment: MainAxisAlignment.center,
        children: <Widget>[
          Text(
            '$_count',
            style: Theme.of(context).textTheme.headline4,
          ),
          Padding(
            padding: EdgeInsets.only(top: 100),
            child: IconButton(
              icon: Icon(
                Icons.add,
                size: 30,
              ),
              onPressed: _incrementCounter,
            ),
          ),
        ],
      ),
    );
  }
}
The above code rewrites some life cycles of StatefulWidget, and prints identification during execution, so as to see the execution order of functions.
- In main Load the component in dart. The code is as follows:
import 'package:flutter/material.dart';

import './pages/count_widget.dart';

class MyApp extends StatelessWidget {
  @override
  Widget build(BuildContext context) {
    return MaterialApp(
      title: 'Flutter Demo',
      theme: ThemeData(
        primarySwatch: Colors.blue,
        visualDensity: VisualDensity.adaptivePlatformDensity,
      ),
      home: MyHomePage(title: 'Flutter Demo Home Page'),
    );
  }
}

class MyHomePage extends StatefulWidget {
  MyHomePage({Key key, this.title}) : super(key: key);

  final String title;

  @override
  _MyHomePageState createState() {
    return _MyHomePageState();
  }
}

class _MyHomePageState extends State<MyHomePage> {
  @override
  Widget build(BuildContext context) {
    return Scaffold(
      appBar: AppBar(
        title: Text(widget.title),
      ),
      body: CountWidget(),
    );
  }
}
At this time, CountWidget is used as a sub component of MyHomePage. We turn on the simulator and start running. The following log can be seen on the console. It can be seen that StatefulWidget calls the following four functions when it is first created.
flutter: count createState
flutter: count initState
flutter: count didChangeDependencies
flutter: count build
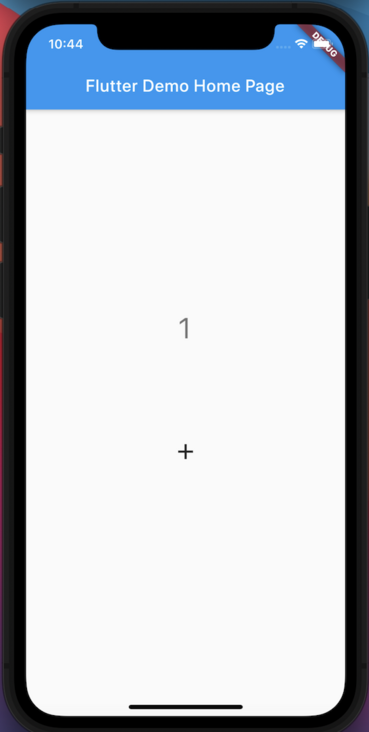
Click on the screen ➕ Button_ count increases by 1, and the number on the simulator changes from 0 to 1. The log is as follows. That is, when the state changes, the setState and build functions will be called.
flutter: count setState
flutter: count build
After command + s is hot overloaded, the log is as follows:
flutter: count reassemble
flutter: count didUpdateWidget
flutter: count build
Comment out main After the CountWidget and command + s in dart are hot overloaded, the CountWidget disappears on the simulator. The log is as follows:
class _MyHomePageState extends State<MyHomePage> {
  @override
  Widget build(BuildContext context) {
    return Scaffold(
      appBar: AppBar(
        title: Text(widget.title),
      ),
      // body: CountWidget(),
    );
  }
}
flutter: count reassemble flutter: count deactivate flutter: count dispose
After the above series of operations, through log printing and life cycle flow chart, we can clearly see the role of each life cycle function and understand several stages of the life cycle.
I believe many careful students have found a detail, that is, the build method is called in different operations. Let's introduce what circumstances will trigger the component to build again.
Trigger the component to build again
There are three ways to trigger the component to build again: setState, didChangeDependencies and didUpdateWidget.
1.setState is well understood. As long as the component state changes, the component build will be triggered. During the above operation, click ➕ Button_ count will add 1, and the result is shown in the figure below:
2.didChangeDependencies. When the global state on which the component depends changes, build will also be called. For example, system language, theme color, etc.
3.didUpdateWidget, let's take the following code as an example. In main In dart, the same life cycle function is rewritten and printed. Outsource a layer of Column in the CountWidget, and create a RaisedButton of the same level as the counter in the parent Widget.
class MyHomePage extends StatefulWidget {
  MyHomePage({Key key, this.title}) : super(key: key);

  final String title;

  @override
  _MyHomePageState createState() {
    print('main createState');
    return _MyHomePageState();
  }
}

class _MyHomePageState extends State<MyHomePage> {
  int mainCount = 0;

  void _changeMainCount() {
    setState(() {
      print('main setState');
      mainCount++;
    });
  }

  @override
  void initState() {
    print('main initState');
    super.initState();
  }

  @override
  void didChangeDependencies() {
    print('main didChangeDependencies');
    super.didChangeDependencies();
  }

  @override
  void didUpdateWidget(MyHomePage oldWidget) {
    print('main didUpdateWidget');
    super.didUpdateWidget(oldWidget);
  }

  @override
  void deactivate() {
    print('main deactivate');
    super.deactivate();
  }

  @override
  void dispose() {
    print('main dispose');
    super.dispose();
  }

  @override
  void reassemble() {
    print('main reassemble');
    super.reassemble();
  }

  @override
  Widget build(BuildContext context) {
    print('main build');
    return Scaffold(
      appBar: AppBar(
        title: Text(widget.title),
      ),
      body: Column(
        children: <Widget>[
          RaisedButton(
            onPressed: () => _changeMainCount(),
            child: Text('mainCount = $mainCount'),
          ),
          CountWidget(),
        ],
      ),
    );
  }
}
Reload the app and you can see the print log as follows:
flutter: main createState
flutter: main initState
flutter: main didChangeDependencies
flutter: main build
flutter: count createState
flutter: count initState
flutter: count didChangeDependencies
flutter: count build
It can be found that:
- The parent component also goes through four processes: createState, initState, didChangeDependencies and build.
- And the parent component will not create the child component until it is built.
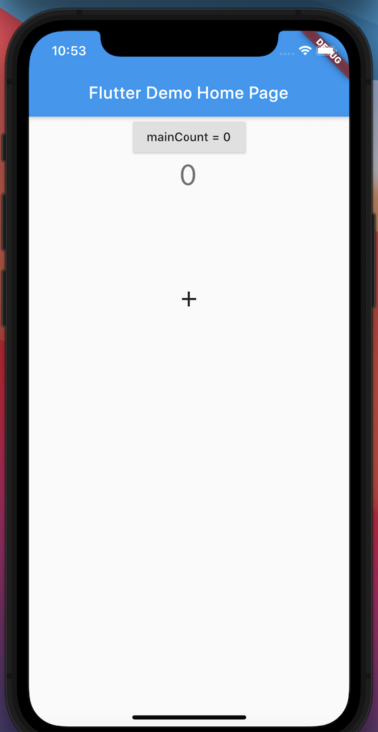
Click the mainCount button of MyHomePage (parent component) to print as follows:
flutter: main setState
flutter: main build
flutter: count didUpdateWidget
flutter: count build
Click CountWidget ➕ Button, print as follows:
flutter: count setState
flutter: count build
It can be explained that the State change of the parent component will cause the didUpdateWidget and build of the child component, and the State change of the child component will not cause the State change of the parent component.
Component destruction
We repeat the above operation, add a sub component CountSubWidget for CountWidget, and print the log with count sub prefix. Reload the app.
Comment out the CountSubWidget in the CountWidget and print the log as follows:
flutter: main reassemble
flutter: count reassemble
flutter: count sub reassemble
flutter: main didUpdateWidget
flutter: main build
flutter: count didUpdateWidget
flutter: count build
flutter: count sub deactivate
flutter: count sub dispose
Before returning to the comment, comment out the CountWidget in MyHomePage and print as follows:
flutter: main reassemble
flutter: count reassemble
flutter: count sub reassemble
flutter: main didUpdateWidget
flutter: main build
flutter: count deactivate
flutter: count sub deactivate
flutter: count sub dispose
flutter: count dispose
Because it is a hot overload, it will call reassemble, didUpdateWidget and build. We can ignore the print log with these functions. It can be concluded that:
When the parent component is removed, the node will be removed first, then the child component will remove the node, the child component will be permanently removed, and finally the parent component will be permanently removed.
Flutter App Lifecycle
The life cycle we introduced above is mainly the life cycle of StatefulWidget components. Let's briefly introduce the life cycle related to the app platform, such as exiting to the background.
We create apps_ lifecycle_ state. Dart file and create AppLifecycle. It is a StatefulWidget, but it should inherit WidgetsBindingObserver.
import 'package:flutter/material.dart';

class AppLifecycle extends StatefulWidget {
  AppLifecycle({Key key}) : super(key: key);

  @override
  _AppLifecycleState createState() {
    print('sub createState');
    return _AppLifecycleState();
  }
}

class _AppLifecycleState extends State<AppLifecycle>
    with WidgetsBindingObserver {
  @override
  void initState() {
    super.initState();
    WidgetsBinding.instance.addObserver(this);
    print('sub initState');
  }

  @override
  void didChangeAppLifecycleState(AppLifecycleState state) {
    // TODO: implement didChangeAppLifecycleState
    super.didChangeAppLifecycleState(state);
    print('didChangeAppLifecycleState');
    if (state == AppLifecycleState.resumed) {
      print('resumed: ');
    } else if (state == AppLifecycleState.inactive) {
      print('inactive');
    } else if (state == AppLifecycleState.paused) {
      print('paused');
    } else if (state == AppLifecycleState.detached) {
      print('detached');
    }
  }

  @override
  Widget build(BuildContext context) {
    print('sub build');
    return Container(
      child: Text('data'),
    );
  }
}
The didChangeAppLifecycleState method is the key point. The statuses in AppLifecycleState include: resumed, inactive, paused and detached.
The didChangeAppLifecycleState method relies on system notifications. Under normal circumstances, App can receive these notifications, but it cannot receive notifications in some cases, such as user shutdown. Its four life cycle state enumeration source code has a detailed introduction and description. The source code and simple translation instructions are attached below.
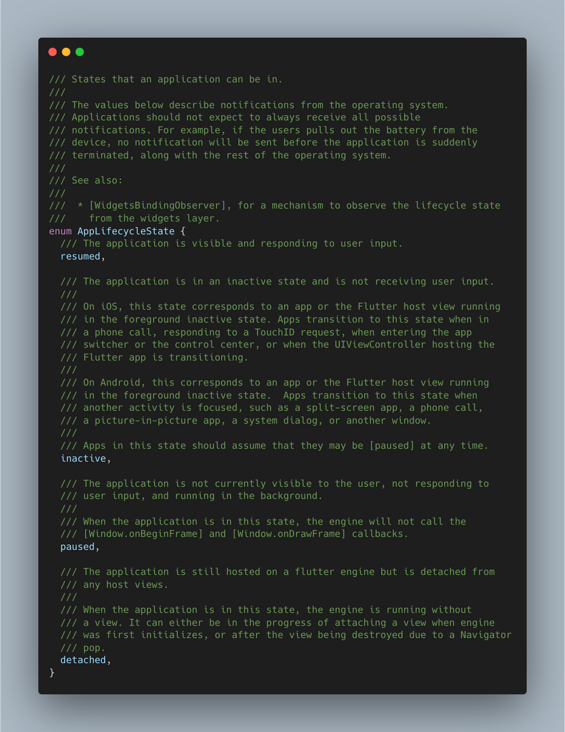
- resumed: the application is visible and responds to user input. That is, the application enters the foreground.
- Inactive: the application is inactive and does not receive user input. On iOS, this state corresponds to the application or the Flutter host view running in the foreground inactive state. When in a phone call, responding to a TouchID request, entering an application switcher or control center, or when the Flutter application hosted by UIViewController is transitioning. On Android, this is equivalent to the application or the Flutter host view running in the foreground inactive state. When another activity is concerned, such as split screen application, telephone call, picture in picture application, system dialog box or other windows, the application will transition to this state. That is, the application enters the background.
- pause: the application is currently invisible to the user, does not respond to the user's input, and runs in the background. When the application is in this state, the engine will not call. That is, the application enters an inactive state.
- detached: the application is still hosted on the shuttle engine, but separated from any host view. When it is in this state: the engine is first loaded into the process of attaching to a platform view, or the view is destroyed due to the execution of Navigator pop.
In addition to the methods of app life cycle, fluent has other methods that do not belong to the life cycle, but will also be observed at some special times, such as didchangeaccessibility features (callback of some access activities changed by the current system), didHaveMemoryPressure (low memory callback) didChangeLocales (called when the user's local settings change, such as the system language change), didChangeTextScaleFactor (text coefficient change), etc. if you are interested, you can have a try.
summary
This article mainly introduces the life cycle of StatefulWidget in Widget and the life cycle related to fluent app. But remember, stateful widgets are good, but don't use them all. If you can use StatelessWidget, you should try to use StatelessWidget (think about it carefully, why?). Well, after reading this article, you are the junior development engineer of Flutter. You can go for an interview (dog head saves your life).
last
People who really stick to the end often rely not on short-term passion, but on just the right love and investment. You are so young that you can be anything you want to be!