Preface:
k8s is the abbreviation of Kubernetes. Because there are eight letters between K and S, it is called k8s.
k8s was originally used within Google for more than 10 years. Its predecessor was Borg, and it was not donated as an open source project by Google until 2015.
If we have contacted OpenStack before, we should know that OpenStack can be used to manage VM virtual machine resources. So what is the open source platform corresponding to the management container? K8s is one of them. Before k8s, there are many container management platforms, including docker swarm of docker itself, and also the Mesos launched by apache. In comparison, although the k8s was launched later than others, it didn't affect its popularity at all. Besides its powerful function, it also has a good father.
For a more detailed introduction of k8s, you can move to k8s Chinese document perhaps k8s official website For more information.
Next, install and deploy k8s.
Blog Outline:
I. environmental preparation
II. Preparation before deployment
- 1. Check the docker version, turn off the firewall and Selinux, clear the iptables rules, and disable the Swap partition
- 2. Configure ssh password free login, host name resolution and yum source
- 3. Turn on iptables bridging function and route forwarding
III. configure k8s cluster - 1. Installation and deployment of k8s related tools
- 2. Initialize k8s cluster
- 3. Configure the master node status
- 4. Configure node01 and node02 to join the master cluster
- 5. Optimized configuration after deployment
I. environmental preparation
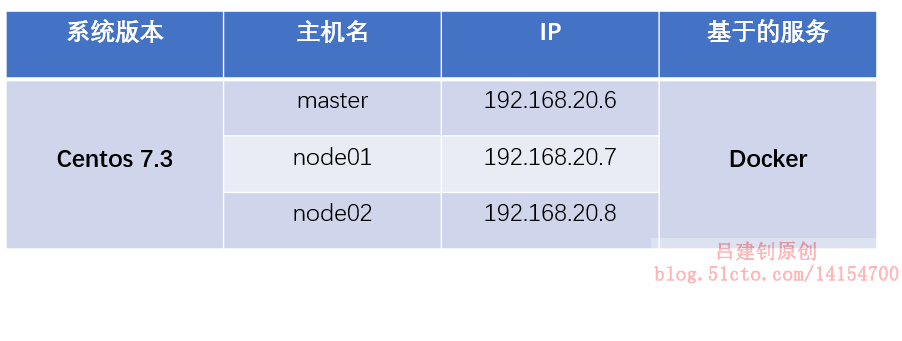
Note: the above three centos 7.3 servers all run docker service. If it is a test environment, the memory is at least 2G, and the CPU is at least dual core. The version of docker service is not recommended to be too high, preferably 18.09 and below.
To deploy docker service, please refer to the blog: Detailed configuration of Docker installation
II. Preparation before deployment
1. Check the docker version, turn off the firewall and Selinux, clear the iptables rules, and disable the Swap partition
Note: the following operations need to be configured on three docker hosts respectively. Even in the production environment, the following operations need to be performed, because k8s has its own security policy.
[root@master ~]# docker -v       #Confirm docker version
Docker version 18.09.0, build 4d60db4
#Turn off firewall
[root@master ~]# systemctl stop firewalld
[root@master ~]# systemctl disable firewalld
#Turn off Selinux
[root@master ~]# setenforce 0
[root@master ~]# vim /etc/sysconfig/selinux
SELINUX=disabled          #Change this to disabled
[root@master ~]# iptables -F    #Clear iptables rule
#Restart docker service
[root@master ~]# systemctl daemon-reload
[root@master ~]# systemctl restart docker
#Disable swap swap partition
[root@master ~]# swapoff -a   #Temporarily disable swap
[root@master ~]# vim /etc/fstab     #Open the auto mount configuration file and comment out the swap configuration item
#/dev/mapper/cl-swap     swap                    swap    defaults        0 0
#Just comment out the line above
[root@node02 ~]# mount -a    #Reload the attached profile
[root@node02 ~]# free -h     #Verify that the output swap lines are as follows (all 0):
Swap:            0B          0B          0B
2. Configure ssh password free login, host name resolution and yum source
Note: the following operations without special instructions can be performed on the master
[root@master ~]# tail -3 /etc/hosts        #Add the resolution of three hosts in this file
192.168.20.6 master
192.168.20.7 node01
192.168.20.8 node02
#Configure ssh password free login (for the convenience of copying configuration files between hosts, it is unnecessary to do so)
[root@master ~]# ssh-keygen -t rsa
[root@master ~]# ssh-copy-id node01
[root@master ~]# ssh-copy-id node02
#Send the changed hosts file to node01 and node02
[root@master ~]# scp /etc/hosts node01:/etc/
[root@master ~]# scp /etc/hosts node02:/etc/
#Next, configure the yum source
[root@master ~]# vim /etc/yum.repos.d/kubernetes.repo  #Edit yum file
[kubernetes]
name=kubneters
baseurl=https://mirrors.aliyun.com/kubernetes/yum/repos/kubernetes-el7-x86_64/
enabled=1
gpgcheck=0
#The above url is Alibaba open source image station, which can be copied and viewed by yourself
[root@master yum.repos.d]# yum repolist    #Check if there are any available packages in the yum source you just configured
kubernetes               kubneters                      421  #The row returned cannot be 0
[root@master yum.repos.d]# yum makecache    #Create yum metadata cache
#Copy the configuration file of yum source to the other two node hosts
[root@master ~]# scp /etc/yum.repos.d/kubernetes.repo node01:/etc/yum.repos.d/
[root@master ~]# scp /etc/yum.repos.d/kubernetes.repo node02:/etc/yum.repos.d/
#On the other two hosts, you need to execute the following two commands
[root@node01 ~]# yum repolist
kubernetes               kubneters                      421  #The row returned cannot be 0
[root@node01 ~]# yum makecache
3. Turn on iptables bridging function and route forwarding
Similarly, the configuration without special instructions can be configured on the master.
#Turn on iptables bridging
[root@master ~]# vim /etc/sysctl.d/k8s.conf    #Write the following configuration
net.bridge.bridge-nf-call-iptables = 1
net.bridge.bridge-nf-call-ip6tables = 1
[root@master ~]# sysctl -p /etc/sysctl.d/k8s.conf   #Refresh configuration
net.bridge.bridge-nf-call-iptables = 1
net.bridge.bridge-nf-call-ip6tables = 1
# PS: if the error "file not found" is reported, you need to execute the following command to load a module.
[root@master ~]# modprobe br_netfilter    #Load the br ﹣ Netfiler module
#Copy the configured k8s.conf file to the other two nodes
#After copying the configuration file to the other two nodes, you need to refresh it by executing the following commands on node01 and 02 respectively
[root@node02 ~]# sysctl -p /etc/sysctl.d/k8s.conf     #Refresh profile
#Next, turn on route forwarding (the following operations are required on all three docker hosts)
[root@master ~]# echo "net.ipv4.ip_forward = 1" >> /etc/sysctl.conf
#Turn on route forwarding
[root@master ~]# sysctl -p    #Refresh configuration
net.ipv4.ip_forward = 1
The configuration is now complete before deployment.
Before the next operation, you need to download The image I provided.
III. configure k8s cluster
1. Installation and deployment of k8s related tools
Note: the following operations are performed on the master computer
[root@master ~]# yum -y install kubelet-1.15.0-0 kubeadm-1.15.0-0 kubectl-1.15.0-0
#Components required to install k8s master
[root@master ~]# systemctl enable kubelet
#Add kubelet to start-up, but do not start it now
[root@master ~]# mkdir images
[root@master ~]# cd images/
[root@master images]# rz   #Upload all the image packages I provided, 8 in total
[root@master images]# ls   #Confirm the uploaded image package
coredns-1-3-1.tar         kube-proxy-1-15.tar
etcd-3-3-10.tar           kube-scheduler-1-15.tar
kube-apiserver-1-15.tar   myflannel-11-0.tar
kube-controller-1-15.tar  pause-3-1.tar
#Next, import the uploaded image package to the docker image
[root@master images]# docker load < coredns-1-3-1.tar
[root@master images]# docker load < etcd-3-3-10.tar
[root@master images]# docker load < kube-apiserver-1-15.tar
[root@master images]# docker load < kube-controller-1-15.tar
[root@master images]# docker load < kube-proxy-1-15.tar
[root@master images]# docker load < kube-scheduler-1-15.tar
[root@master images]# docker load < pause-3-1.tar
[root@master images]# docker load < myflannel-11-0.tar
2. Initialize k8s cluster
[root@master images]# kubeadm init --kubernetes-version=v1.15.0 --pod-network-cidr=10.224.0.0/16 --service-cidr=10.96.0.0/12 --ignore-preflight-errors=Swap
<!--
The version specified here must be the same as the previous version of yum. The two designated networks are officially recommended
If the CPU related error information is returned after the above command is executed, the number of cores of the CPU needs to be increased
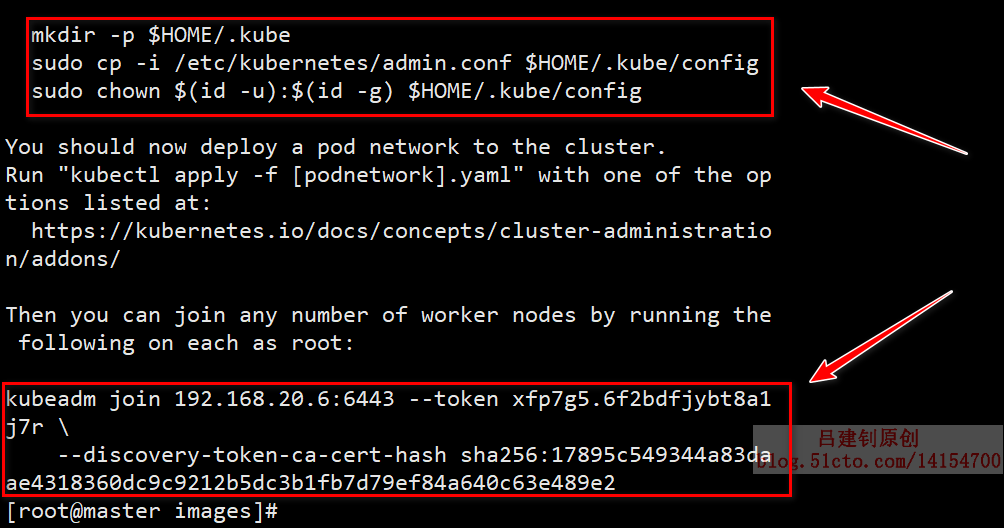
After successful initialization, first copy the command returned below and save it properly
-->
kubeadm join 192.168.20.6:6443 --token xfp7g5.6f2bdfjybt8a1j7r \
--discovery-token-ca-cert-hash sha256:17895c549344a83daae4318360dc9c9212b5dc3b1fb7d79ef84a640c63e489e2
<!--
The above command is used to add other nodes to the current k8s cluster
Once lost, it is very troublesome, and only valid for 24 hours. It will produce different results every time the cluster is initialized
-->
<!--
Next, execute the other returned instructions in turn, as follows (since I am the root user, the sudo instruction is omitted):
-->
[root@master images]# mkdir -p $HOME/.kube
[root@master images]# cp -i /etc/kubernetes/admin.conf $HOME/.kube/config
[root@master images]# chown $(id -u):$(id -g) $HOME/.kube/configThe screenshot of the returned information is as follows for reference:
3. Configure the master node status
[root@master images]# kubectl get nodes    #View cluster node information
NAME     STATUS     ROLES    AGE   VERSION
master   NotReady   master   14m   v1.15.0
#You can see that the current status of master is not prepared
You can go next github official website Do the following to view the appropriate command:
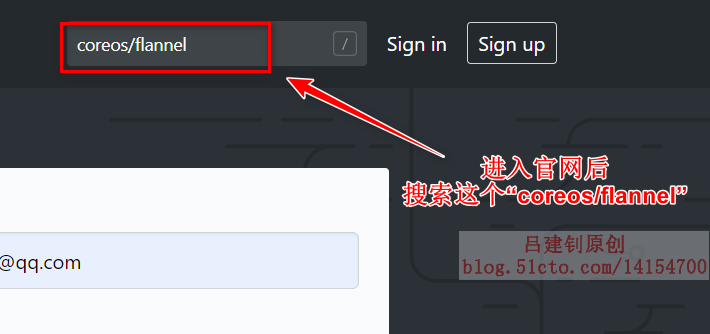
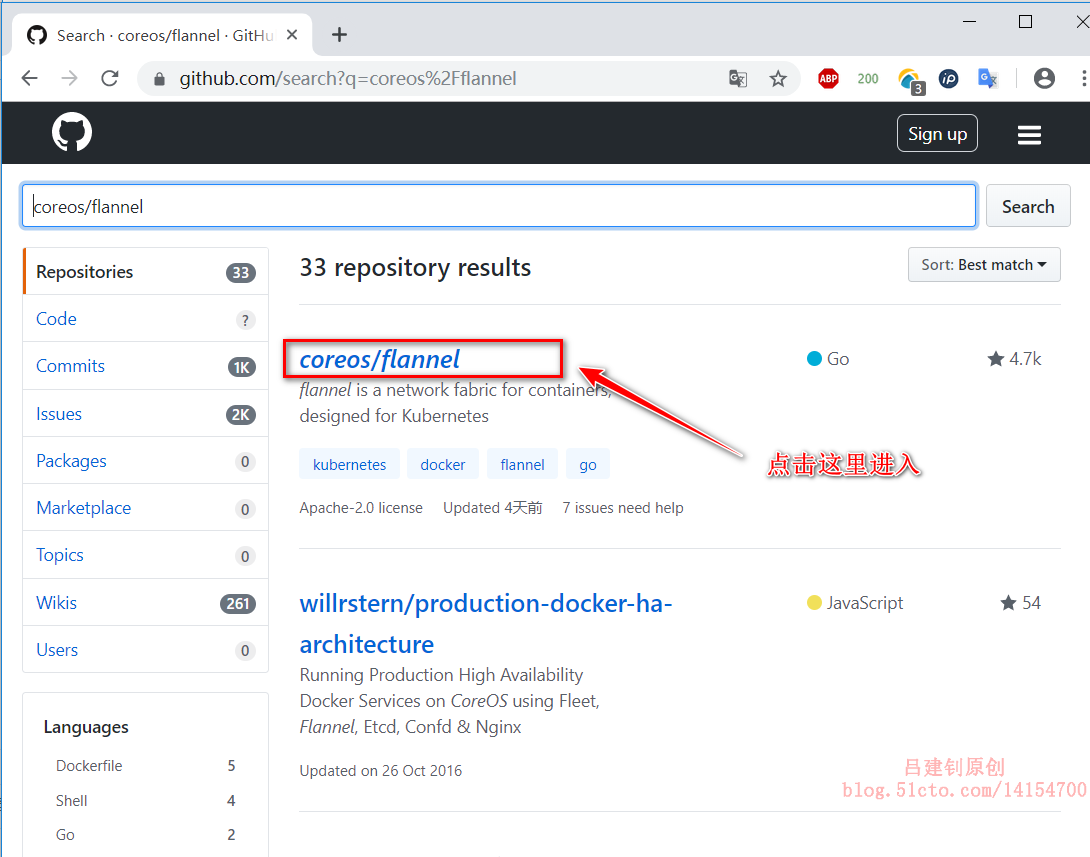
Click to enter, pull down the page to the following location, and copy the specified command to the master node for execution: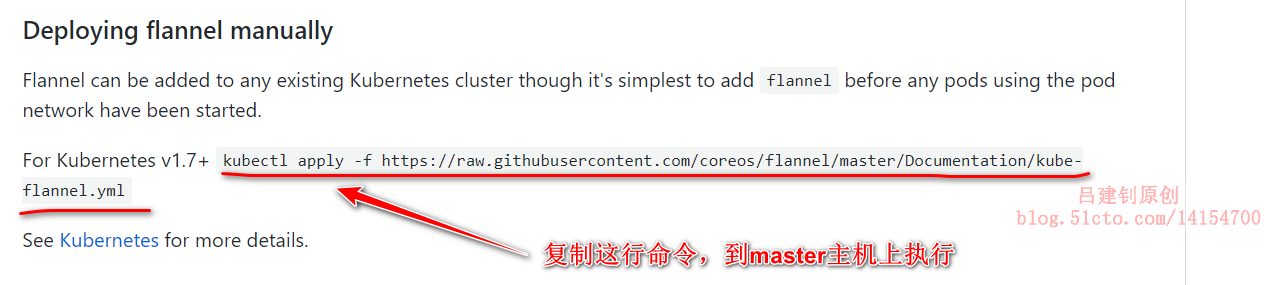
[root@master images]# kubectl apply -f https://raw.githubusercontent.com/coreos/flannel/master/Documentation/kube-flannel.yml
#Execute the command copied on github official website
The above method is only one of the ways. It is recommended to use the above method when the network is in good condition (call the remote file for execution). If the network speed is poor, the following method is recommended:
[root@master images]# wget https://raw.githubusercontent.com/coreos/flannel/master/Documentation/kube-flannel.yml
#Download the. yml configuration file specified on github official website to local
[root@master images]# ls | grep flannel.yml   #Make sure to download to the current directory
kube-flannel.yml
[root@master images]# kubectl apply -f kube-flannel.yml  #Specify the downloaded. yml file to execute the corresponding command
One of the above methods can be configured.
[root@master images]# kubectl get nodes   #Check the master status again and find that it has become "Ready"
NAME     STATUS   ROLES    AGE   VERSION
master   Ready    master   30m   v1.15.0
[root@master images]# ls /etc/kubernetes/    #Profile directory for k8s
[root@master images]# ls /etc/kubernetes/manifests/   #k8s. yaml file storage directory
4. Configure node01 and node02 to join the master cluster
The following operations need to be performed once in node01 and node02 respectively
[root@node01 ~]# yum -y install kubelet-1.15.0-0 kubeadm-1.15.0-0
#Install k8s related components
[root@node01 ~]# systemctl enable kubelet.service    #Set to start automatically
[root@node01 ~]# mkdir images
[root@node01 ~]# cd images/
[root@node01 images]# rz   #Upload the three image files provided by me, which are viewed by the following ls command

[root@node01 images]# ls    #The image files to be uploaded are as follows
kube-proxy-1-15.tar  myflannel-11-0.tar  pause-3-1.tar
[root@node01 images]# docker load < kube-proxy-1-15.tar
[root@node01 images]# docker load < myflannel-11-0.tar
[root@node01 images]# docker load < pause-3-1.tar
[root@node01 images]# kubeadm join 192.168.20.6:6443 --token xfp7g5.6f2bdfjybt8a1j7r --discovery-token-ca-cert-hash sha256:17895c549344a83daae4318360dc9c9212b5dc3b1fb7d79ef84a640c63e489e2
#Execute the command returned when the master initializes the cluster to join the master's cluster
If you return the following information, you will be successful in joining:
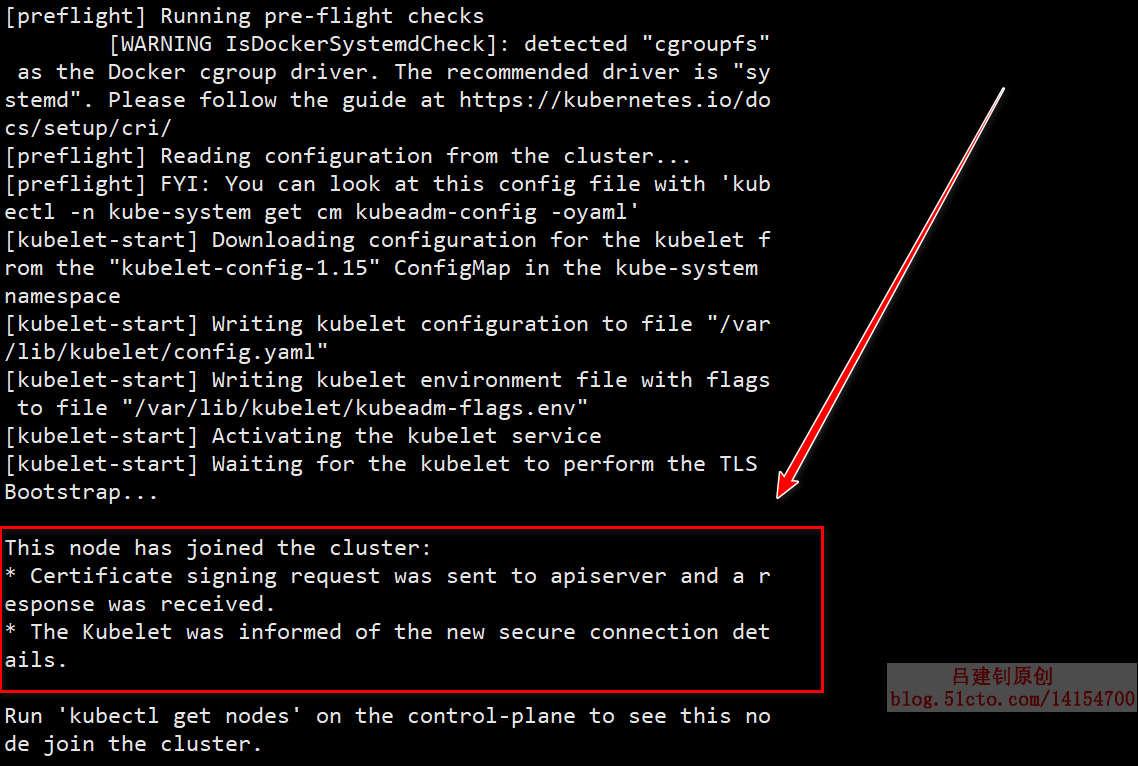
You can configure the above configuration on the node02 host once
After node01 and node02 are configured in turn, you can view the node status on the master as follows:
[root@master images]# kubectl get nodes    #View the node information on the master as "Ready"
NAME     STATUS   ROLES    AGE     VERSION
master   Ready    master   51m     v1.15.0
node01   Ready    <none>   4m19s   v1.15.0
node02   Ready    <none>   4m13s   v1.15.0
5. Optimized configuration after deployment
In fact, k8s has been configured so far, but in order to use k8s more conveniently in the future, it is recommended to optimize the following items:
- Set the default spacing of the table key;
- Set the kubectl command to complete automatically;
- Optimize the boot configuration.
1) set the table default spacing (this optimization only needs to be configured on the master, because it is often necessary to write. yml files, so the table spacing needs to be changed)
[root@master images]# cd           #Switch to Host Directory
[root@master ~]# echo "set tabstop=2" >> .vimrc   #Write this parameter to the. vimrc file
[root@master ~]# bash    #Switch shell environment for changes to take effect
2) set the kubectl command to complete automatically (both the master and node nodes can be configured)
[root@master ~]# yum -y install bash-completion
[root@master ~]# source /usr/share/bash-completion/bash_completion
[root@master ~]# source <(kubectl completion bash)
[root@master ~]# echo "source <(kubectl completion bash)" >> ~/.bashrc
3) confirm that the k8s cluster has no problem, and set it to power on and start automatically
The master operation is as follows:
[root@master ~]# kubectl get pod -n kube-system
#Check the pod resource, similar to the container in docker, and make sure that the returned information is running
#"- n Kube system": is the namespace of k8s
The information returned by the above command is as follows: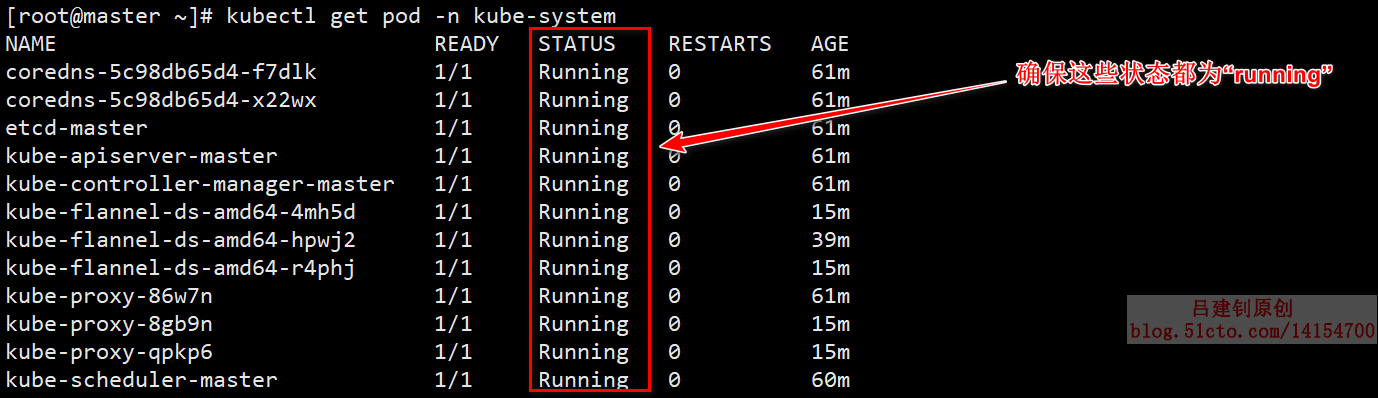
The following operations need to be performed on both the master and node nodes in order to be set to power on and start automatically:
[root@master ~]# systemctl enable kubelet
[root@master ~]# systemctl enable docker
The configuration of k8s cluster is basically completed after it is set to power on and self start. Now you can restart these three servers. If you execute the following command after the restart, the status is still running, which means there is absolutely no problem.
[root@master ~]# kubectl get pod -n kube-system #Verify whether the status is still running after restart
————————Thank you for reading————————