1 Introduction to gitlab
GitLab is developed by GitLab Inc Develop and use MIT licensed web-based Git warehouse management tool with wiki and issue tracking functions. Use Git as a code management tool, and build a LAN based web service on this basis.
GitLab was developed by Ukrainian programmers Dmitry zaporozhets and Valery Sizov. It is written in Ruby language. Later, some parts were rewritten in Go language. As of May 2018, the company has about 290 team members and more than 2000 open source contributors. GitLab is used by IBM, Sony, J ü Lich Research Center, NASA, Alibaba, Invincea, O'ReillyMedia, Leibniz rechenzentrum (LRZ), CERN, SpaceX and other organizations.
2 GitLab official website
Official website address: https://about.gitlab.com/
Installation instructions: https://about.gitlab.com/installation/
3 GitLab installation
3.1 server preparation
Prepare a server with CentOS 7 and above, which requires 4G memory and 50G disk. Close the firewall and configure the host name and IP to ensure that the server can access the Internet. This tutorial uses virtual machine: hostname: gitlab server, IP address: 192.168.6.200
3.2 preparation of installation package
When installing gitlab CE online, Yum needs to download hundreds of megabytes of installation files, which is very time-consuming. Therefore, it is best to download the required RPM package locally in advance, and then install it by using offline rpm. The installation package Baidu network disk link is as follows. The link is a data compression package. After downloading and decompressing, there is a gitlab installation package inside.
Link: https://pan.baidu.com/s/1WnLwOSORcmcKXsO9uuQmIg
Extraction code: z5xs
After downloading the installation package locally, upload the package to the server / opt/module directory.
3.3 writing installation script
The steps of installing gitlab are cumbersome, so you can refer to the official website to write the gitlab installation script, as shown below:
[root@gitlab-server module]# vim gitlab-install.sh
sudo rpm -ivh /opt/module/gitlab-ce-13.10.2-ce.0.el7.x86_64.rpm
sudo yum install -y curl policycoreutils-python openssh-server cronie
sudo lokkit -s http -s ssh
sudo yum install -y postfix
sudo service postfix start
sudo chkconfig postfix on
curl https://packages.gitlab.com/install/repositories/gitlab/gitlab-ce/script.rpm.sh | sudo bash
sudo EXTERNAL_URL="http://gitlab.example.com" yum -y install gitlab-ce
Add execution permission to the script
[root@gitlab-server module]# chmod +x gitlab-install.sh
[root@gitlab-server module]# ll
 Total consumption 403104
-rw-r--r--. 1 root root 412774002 4 month	7 15:47 gitlab-ce-13.10.2-ce.0.el7.x86_64.rpm
-rwxr-xr-x. 1 root root	416 4 month	7 15:49 gitlab-install.sh
Then execute the script and start installing gitlab CE. Pay attention to ensure that the server can access the Internet.
[root@gitlab-server module]# ./gitlab-install.sh
 Warning:/opt/module/gitlab-ce-13.10.2-ce.0.el7.x86_64.rpm: head V4 RSA/SHA1 Signature, secret key ID f27eab47: NOKEY
 In preparation...	################################# [100%]
Upgrading/install...
1:gitlab-ce-13.10.2-ce.0.el7
################################# [100%]
o .  .  .  .  .
3.4 initialize GitLab service
Execute the following command to initialize gitlab service. The process takes about a few minutes. Wait patiently
[root@gitlab-server module]# gitlab-ctl reconfigure

o .  .  .  .  .
Running  handlers:
Running handlers complete
Chef Client finished, 425/608 resources updated in 03 minutes 08 seconds
gitlab Reconfigured!
3.5 start GitLab service
Execute the following command to start GitLab service. To stop, execute GitLab CTL stop
[root@gitlab-server module]# gitlab-ctl start
ok: run: alertmanager: (pid 6812) 134s
ok: run: gitaly: (pid 6740) 135s
ok: run: gitlab-monitor: (pid 6765) 135s
ok: run: gitlab-workhorse: (pid 6722) 136s
ok: run: logrotate: (pid 5994) 197s
ok: run: nginx: (pid 5930) 203s
ok: run: node-exporter: (pid 6234) 185s
ok: run: postgres-exporter: (pid 6834) 133s
ok: run: postgresql: (pid 5456) 257s
ok: run: prometheus: (pid 6777) 134s
ok: run: redis: (pid 5327) 263s
ok: run: redis-exporter: (pid 6391) 173s
ok: run: sidekiq: (pid 5797) 215s
ok: run: unicorn: (pid 5728) 221s
3.6 accessing GitLab with browser
You can access GitLab service by using the host name or IP address, but you need to configure the hosts file of windows in advance. The location of the host file is as follows:
C:\Windows\System32\drivers\etc\hosts
Add a row:

Start accessing with your browser,
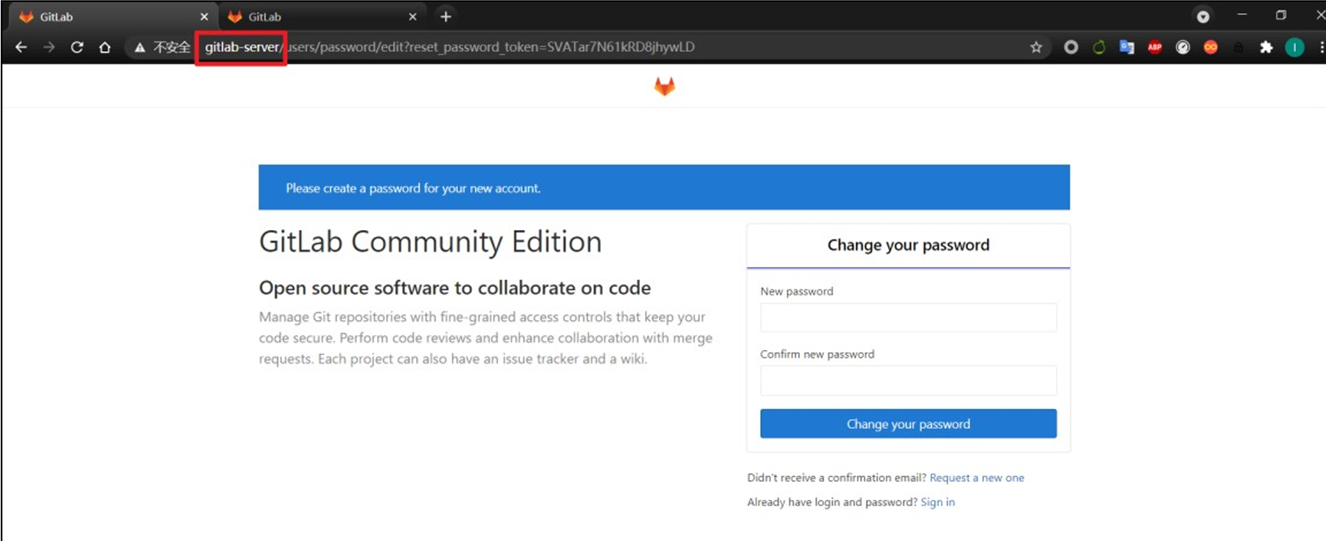
Access method 1: host name
Access mode 2: IP address
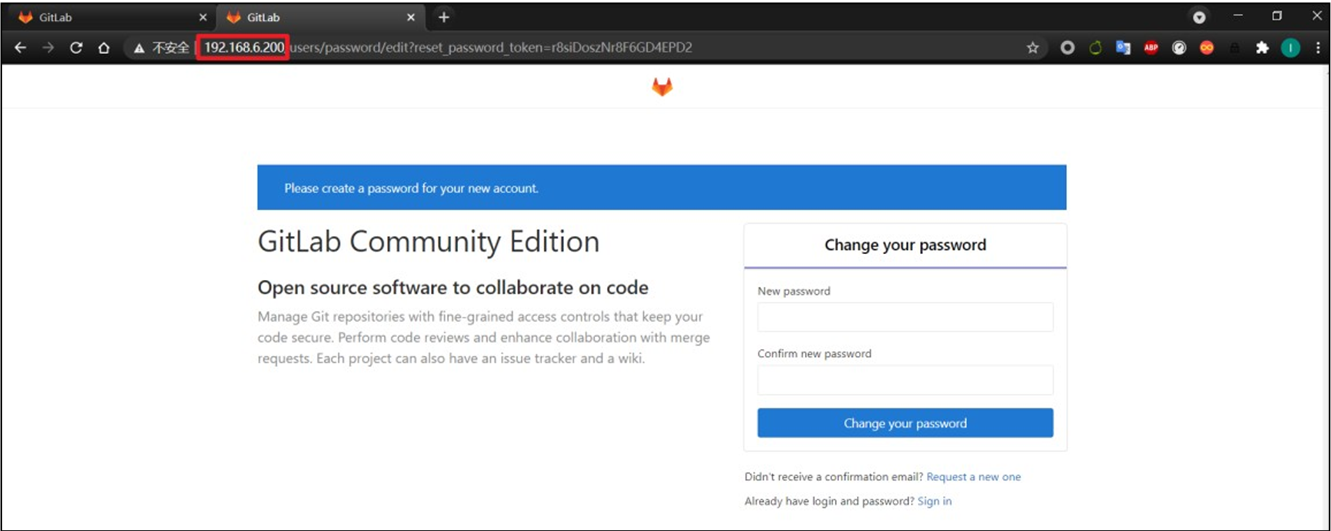
Note: before logging in for the first time, you need to modify the password of the root account provided by GitLab. It requires more than 8 digits, including upper and lower case children and special symbols.
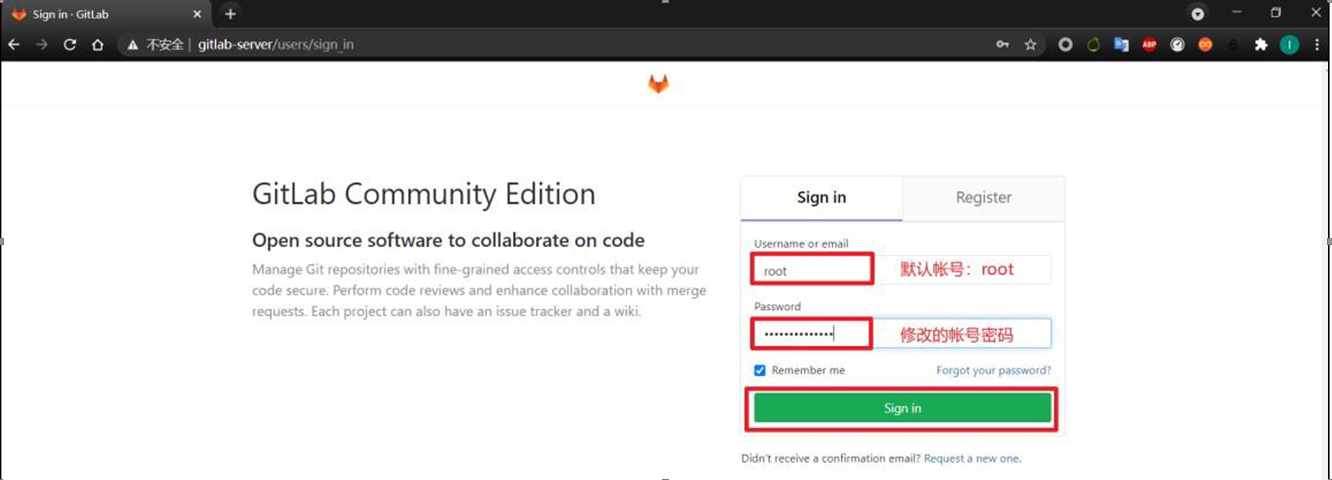
Then log in to GitLab with the modified password,
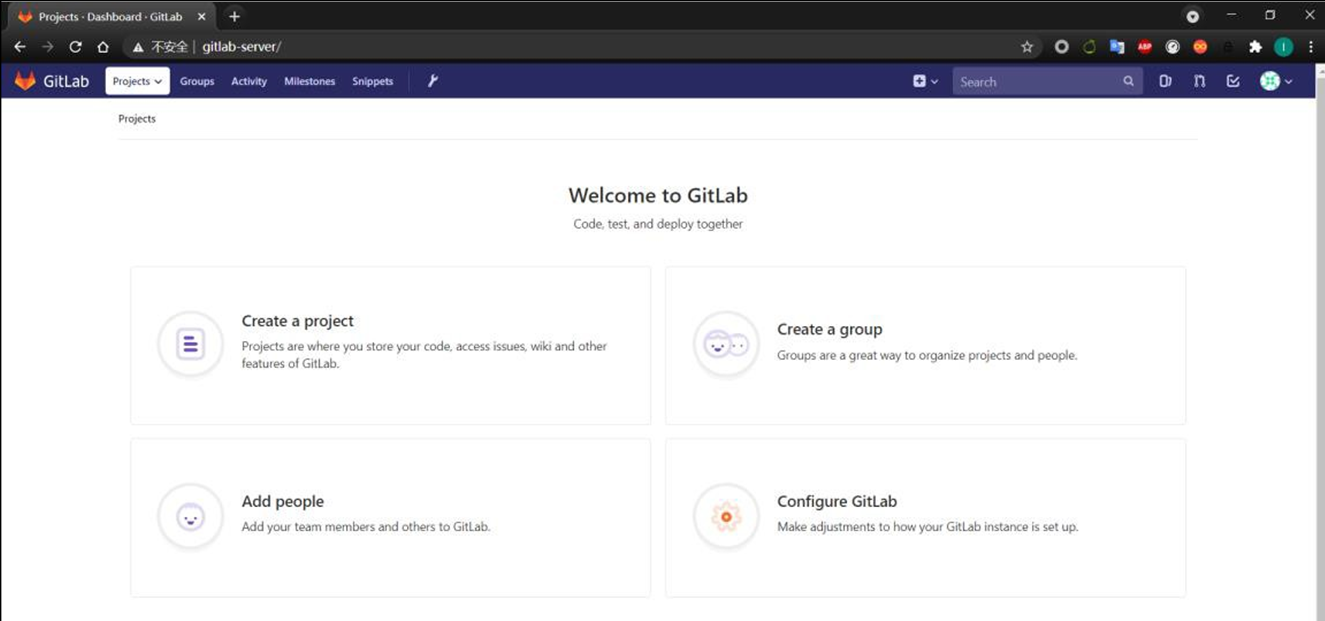
GitLab login succeeded:
3.7 GitLab create remote library
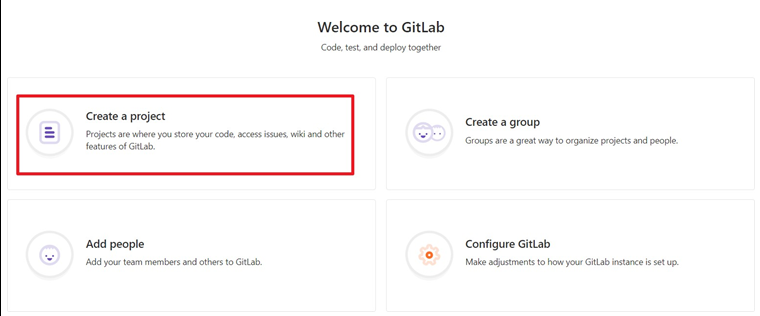
Click Create a project,
The following page appears, select blank project, enter the user name root, set Project name, and select public library, which are similar to GitHub and Gitee,
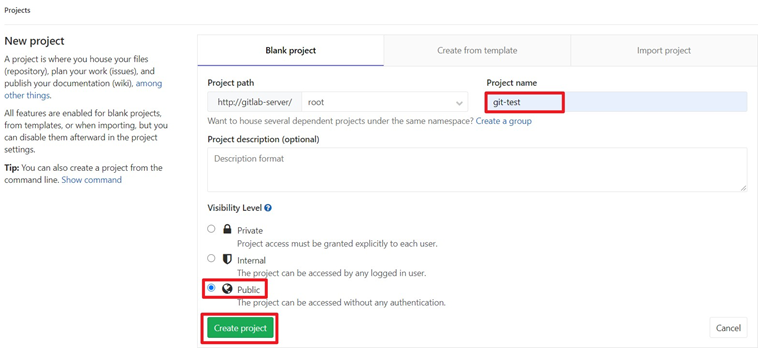
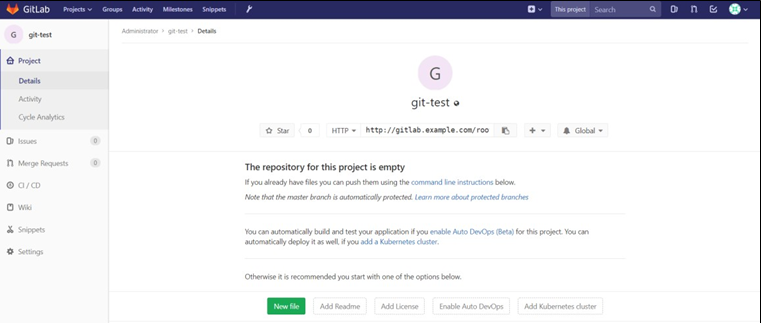
Finally, click Create project to see that an empty project has been created,
3.8 IDEA integration GitLab
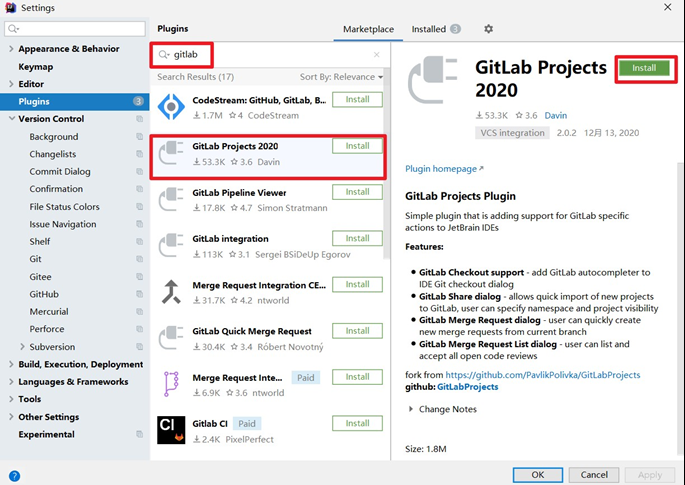
3.8.1 installing GitLab plug-in
3.8.2 setting GitLab plug-in
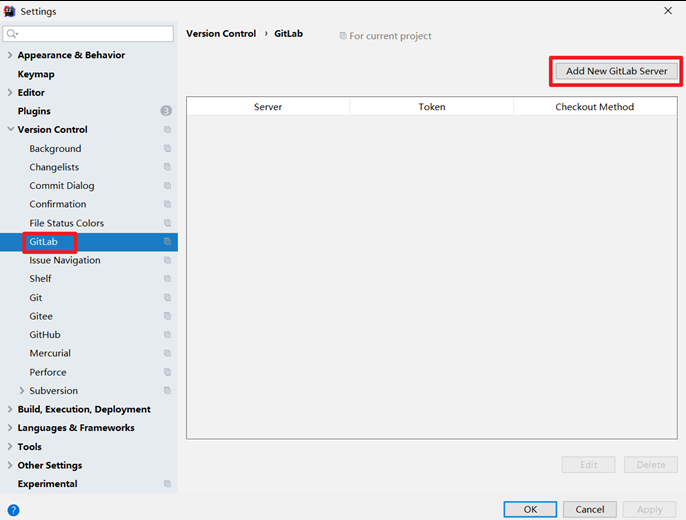
You can see that the GitLab plug-in already exists in the IDEA. Click Add New GitLab Server on the right,
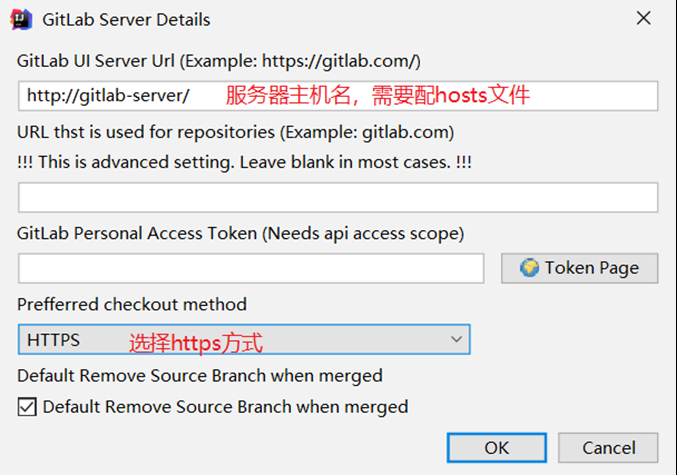
Fill in relevant information in the following dialog box. Since GitLab is based on LAN, you can select https protocol,
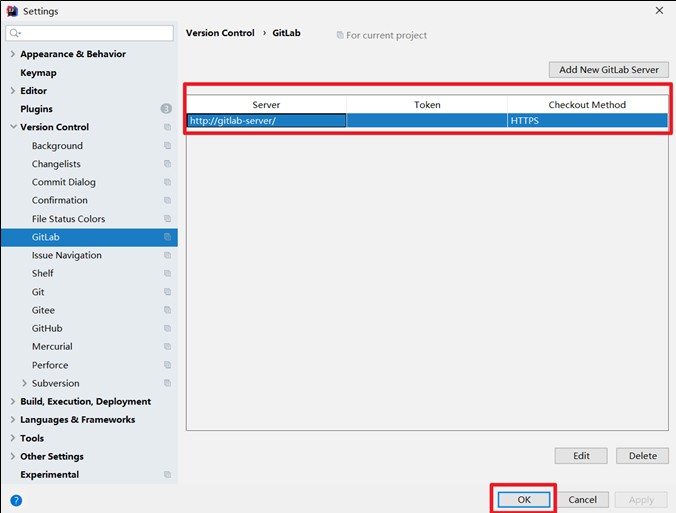
In this way, you can see that the GitLab plug-in is configured,
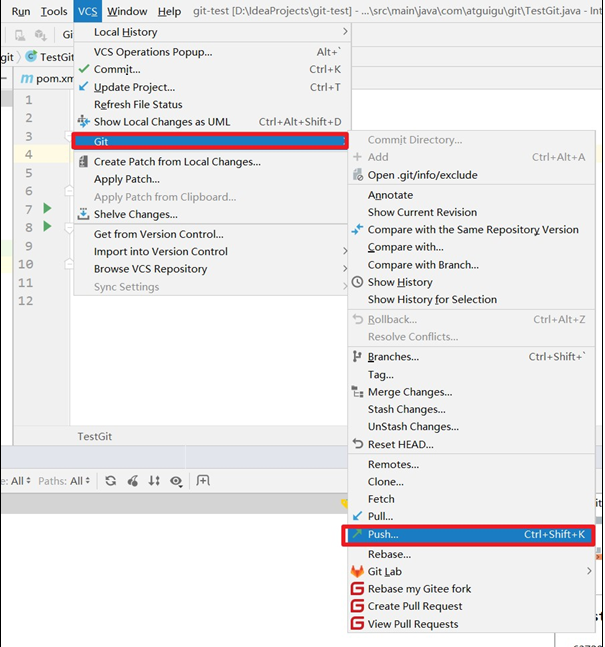
3.8.3 push local code to GitLab remote library
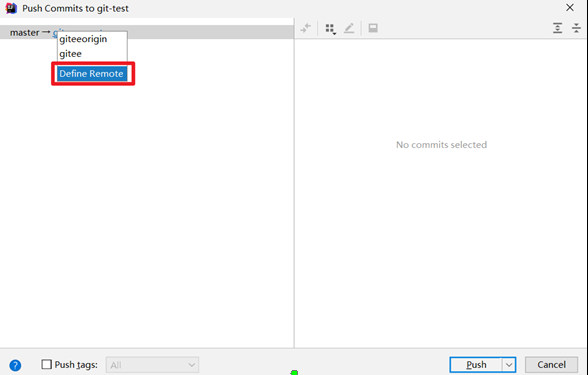
The operation is almost the same as that of GitHub and Gitee. First, follow the following figure,
At this time, to customize the remote connection (the connection is gitlab address), click Define Remote,
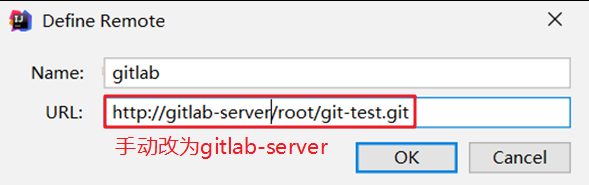
Then fill in the relevant information. Here, the remote library alias is set to gitlab, and the URL is copied from the gitlab web page. However, it should be noted that the connection copied from the gitlab web page is: http://gitlab.example.com/root/git-test.git , which needs to be manually modified as: http://gitlab-server/root/git-test.git
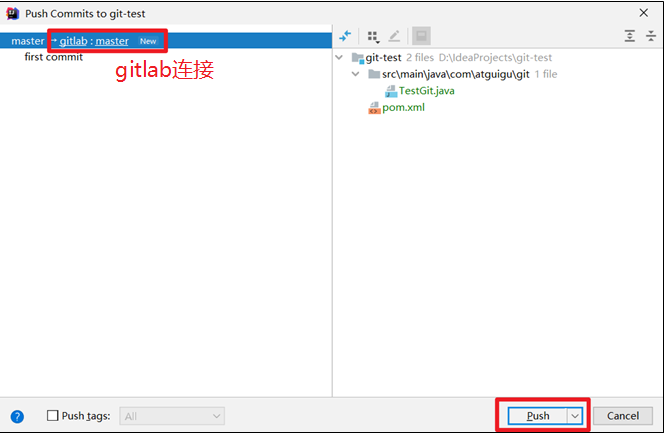
Click OK, finally select gitlab connection and click push, as shown in the following figure:
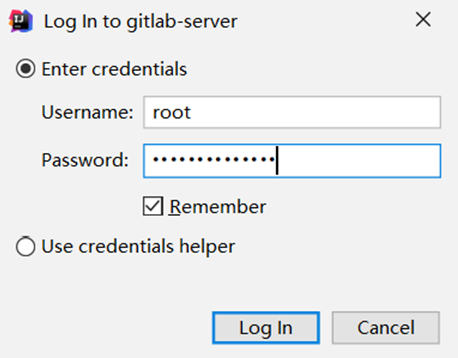
Note: when connecting to gitlab for the first time, you need to log in with your account and password. You can log in with your root account and modified password,
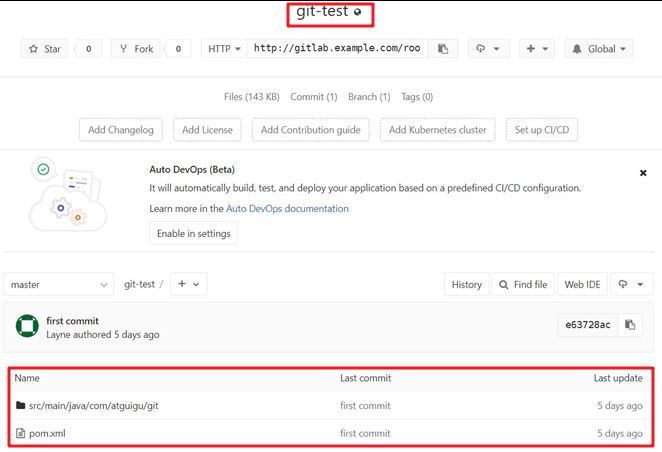
The code push is successful. The code is already in the gitlab remote library, as shown in the figure below,
Finally: as long as the remote library connection of GitLab is defined, the operations such as pull and clone of GitLab remote library are consistent with Github and Gitee. It will not be demonstrated here.
Conclusion: if this blog is helpful to you, please like, collect or pay attention to it (all concerned friends will return). Your encouragement is the driving force for the blogger's progress. Thank you for your support and common progress.