1. Now the developer platform applies for an account, downloads jar, and remembers to save the AppID and AppKey projects to use
https://dev.mi.com/console/appservice/push.htmlTwo. Put jar in the project and start reading official documents
https://dev.mi.com/doc/?p=544- Configure the AndroidManifest.xml file
1) The minimum Android version supported by the Millet Push Service SDK is 2.2.
<uses-sdk android:minSdkVersion="8"/>2) List of permissions required by push service
<uses-permission android:name="android.permission.INTERNET" />
<uses-permission android:name="android.permission.ACCESS_NETWORK_STATE" />
<uses-permission android:name="android.permission.ACCESS_WIFI_STATE" />
<uses-permission android:name="android.permission.READ_PHONE_STATE" />
<uses-permission android:name="android.permission.GET_TASKS" />
<uses-permission android:name="android.permission.VIBRATE"/>
<permission android:name="com.xiaomi.mipushdemo.permission.MIPUSH_RECEIVE" android:protectionLevel="signature" />
<!--Here com.xiaomi.mipushdemo Change to app The name of the package-->
<uses-permission android:name="com.xiaomi.mipushdemo.permission.MIPUSH_RECEIVE" />
<!--Here com.xiaomi.mipushdemo Change to app The name of the package-->
3) Service and receiver to be configured for push service
<service
  android:enabled="true"
  android:process=":pushservice"
  android:name="com.xiaomi.push.service.XMPushService"/>
<service
  android:name="com.xiaomi.push.service.XMJobService"
  android:enabled="true"
  android:exported="false"
  android:permission="android.permission.BIND_JOB_SERVICE"
  android:process=":pushservice" />
<!--Note: service Must be in 3.0.1 After version (including 3).0.1 Version) Added-->
<service
  android:enabled="true"
  android:exported="true"
  android:name="com.xiaomi.mipush.sdk.PushMessageHandler" />
<service android:enabled="true"
  android:name="com.xiaomi.mipush.sdk.MessageHandleService" />
<!--Note: service Must be in 2.2.5 After version (including 2).2.5 Version) Added-->
<receiver
  android:exported="true"
  android:name="com.xiaomi.push.service.receivers.NetworkStatusReceiver" >
  <intent-filter>
    <action android:name="android.net.conn.CONNECTIVITY_CHANGE" />
    <category android:name="android.intent.category.DEFAULT" />
  </intent-filter>
</receiver>
<receiver
  android:exported="false"
  android:process=":pushservice"
  android:name="com.xiaomi.push.service.receivers.PingReceiver" >
  <intent-filter>
    <action android:name="com.xiaomi.push.PING_TIMER" />
  </intent-filter>
</receiver>
Here, XMPushService and PingReceiver are defined in the pushservice process, and you can configure it to run in any process. If the android:process attribute is not configured, they will run in the main process of the application.
Starting with version 3.1, we will automatically detect Android Manifest. XML when debuggable is true (that is, it will not affect release version), and if Android Manifest. XML does not conform to the above configuration, Illegal Manifest Exception will be thrown at startup.
2 Customize a Broadcast Receiver class
To receive messages, you need to customize a BroadcastReceiver inherited from the PushMessageReceiver class to implement onReceivePassThroughMessage, onNotification Message Clicked, onNotification Message Arrived, onCommandResult and onReceiveRegisterResult methods, and then register the receiver in the AndroidManifest.xml file. OnReceivePassThroughMessage is used to receive the through message sent by the server, onNotification Message Clicked to receive the notification bar message sent by the server (triggered when the user clicks the notification bar), onNotification Message Arrived to receive the notification bar message sent by the server (triggered when the message arrives at the client, and can receive the notification that does not pop up when the application is in the foreground). Notification message), onCommand Result is used to receive the response returned by the client after sending the command message to the server, and onReceive Register Result is used to receive the response returned by the client after sending the registration command message to the server.
For example:
Customized Broadcast Receiver
public class DemoMessageReceiver extends PushMessageReceiver {
    private String mRegId;
    private long mResultCode = -1;
    private String mReason;
    private String mCommand;
    private String mMessage;
    private String mTopic;
    private String mAlias;
    private String mUserAccount;
    private String mStartTime;
    private String mEndTime;
    @Override
    public void onReceivePassThroughMessage(Context context, MiPushMessage message) {
        mMessage = message.getContent();
        if(!TextUtils.isEmpty(message.getTopic())) {
            mTopic=message.getTopic();
        } else if(!TextUtils.isEmpty(message.getAlias())) {
            mAlias=message.getAlias();
        } else if(!TextUtils.isEmpty(message.getUserAccount())) {
            mUserAccount=message.getUserAccount();
        }
    }
    @Override
    public void onNotificationMessageClicked(Context context, MiPushMessage message) {
        mMessage = message.getContent();
        if(!TextUtils.isEmpty(message.getTopic())) {
            mTopic=message.getTopic();
        } else if(!TextUtils.isEmpty(message.getAlias())) {
            mAlias=message.getAlias();
        } else if(!TextUtils.isEmpty(message.getUserAccount())) {
            mUserAccount=message.getUserAccount();
        }
    }
    @Override
    public void onNotificationMessageArrived(Context context, MiPushMessage message) {
        mMessage = message.getContent();
        if(!TextUtils.isEmpty(message.getTopic())) {
            mTopic=message.getTopic();
        } else if(!TextUtils.isEmpty(message.getAlias())) {
            mAlias=message.getAlias();
        } else if(!TextUtils.isEmpty(message.getUserAccount())) {
            mUserAccount=message.getUserAccount();
        }
    }
    @Override
    public void onCommandResult(Context context, MiPushCommandMessage message) {
        String command = message.getCommand();
        List<String> arguments = message.getCommandArguments();
        String cmdArg1 = ((arguments != null && arguments.size() > 0) ? arguments.get(0) : null);
        String cmdArg2 = ((arguments != null && arguments.size() > 1) ? arguments.get(1) : null);
        if (MiPushClient.COMMAND_REGISTER.equals(command)) {
            if (message.getResultCode() == ErrorCode.SUCCESS) {
                mRegId = cmdArg1;
            }
        } else if (MiPushClient.COMMAND_SET_ALIAS.equals(command)) {
            if (message.getResultCode() == ErrorCode.SUCCESS) {
                mAlias = cmdArg1;
            }
        } else if (MiPushClient.COMMAND_UNSET_ALIAS.equals(command)) {
            if (message.getResultCode() == ErrorCode.SUCCESS) {
                mAlias = cmdArg1;
            }
        } else if (MiPushClient.COMMAND_SUBSCRIBE_TOPIC.equals(command)) {
            if (message.getResultCode() == ErrorCode.SUCCESS) {
                mTopic = cmdArg1;
            }
        } else if (MiPushClient.COMMAND_UNSUBSCRIBE_TOPIC.equals(command)) {
            if (message.getResultCode() == ErrorCode.SUCCESS) {
                mTopic = cmdArg1;
            }
        } else if (MiPushClient.COMMAND_SET_ACCEPT_TIME.equals(command)) {
            if (message.getResultCode() == ErrorCode.SUCCESS) {
                mStartTime = cmdArg1;
                mEndTime = cmdArg2;
            }
        }
    }
    @Override
    public void onReceiveRegisterResult(Context context, MiPushCommandMessage message) {
        String command = message.getCommand();
        List<String> arguments = message.getCommandArguments();
        String cmdArg1 = ((arguments != null && arguments.size() > 0) ? arguments.get(0) : null);
        String cmdArg2 = ((arguments != null && arguments.size() > 1) ? arguments.get(1) : null);
        if (MiPushClient.COMMAND_REGISTER.equals(command)) {
            if (message.getResultCode() == ErrorCode.SUCCESS) {
                mRegId = cmdArg1;
            }
        }
    }
}
The main modification is that the onNotification Message Clicked handles the click event that pushes the message in.
Register the custom Broadcast Receiver into the Android Manifest. XML file
<receiver
  android:exported="true"
  android:name="com.xiaomi.mipushdemo.DemoMessageReceiver">
          <!--Here com.xiaomi.mipushdemo.DemoMessageRreceiver Change to app Complete class name defined in-->
  <intent-filter>
    <action android:name="com.xiaomi.mipush.RECEIVE_MESSAGE" />
  </intent-filter>
    <intent-filter>
    <action android:name="com.xiaomi.mipush.MESSAGE_ARRIVED" />
  </intent-filter>
  <intent-filter>
    <action android:name="com.xiaomi.mipush.ERROR" />
  </intent-filter>
</receiver>
3. Debugging log
LoggerInterface newLogger = new LoggerInterface() {
     @Override
     public void setTag(String tag) {
         // ignore
     }
     @Override
     public void log(String content, Throwable t) {
         Log.d(TAG, content, t);
     }
     @Override
     public void log(String content) {
         Log.d(TAG, content);
     }
};
Logger.setLogger(this, newLogger);
Write a DemoApplication to start the push service
public class DemoApplication extends Application {

    public static final String APP_ID = "your appid";
    public static final String APP_KEY = "your appkey";
    public static final String TAG = "your packagename";

    @Override
    public void onCreate() {
        super.onCreate();
        //Initialize push push push service
        if(shouldInit()) {
            MiPushClient.registerPush(this, APP_ID, APP_KEY);
        }
        //Open Log
        LoggerInterface newLogger = new LoggerInterface() {

            @Override
            public void setTag(String tag) {
                // ignore
            }

            @Override
            public void log(String content, Throwable t) {
                Log.d(TAG, content, t);
            }

            @Override
            public void log(String content) {
                Log.d(TAG, content);
            }
        };
        Logger.setLogger(this, newLogger);
    }

    private boolean shouldInit() {
        ActivityManager am = ((ActivityManager) getSystemService(Context.ACTIVITY_SERVICE));
        List<RunningAppProcessInfo> processInfos = am.getRunningAppProcesses();
        String mainProcessName = getPackageName();
        int myPid = Process.myPid();
        for (RunningAppProcessInfo info : processInfos) {
            if (info.pid == myPid && mainProcessName.equals(info.processName)) {
                return true;
            }
        }
        return false;
    }
}
In this way, the integration is successful. We deal with the click processing of push-down information. We hope to get the information from the page and then proceed to the next step to modify the broadcasting.
onNotificationMessageClicked
@Override
    public void onNotificationMessageClicked(Context context, MiPushMessage message) {
        mMessage = message.getContent();
        if(!TextUtils.isEmpty(message.getTopic())) {
            mTopic=message.getTopic();
        } else if(!TextUtils.isEmpty(message.getAlias())) {
            mAlias=message.getAlias();
        } else if(!TextUtils.isEmpty(message.getUserAccount())) {
            mUserAccount=message.getUserAccount();
        }
        Log.i("123123",message.getContent().toString());
        String webTest=message.getContent().toString();
        Intent intent=new Intent(context.getApplicationContext(),WebActivity.class);
        intent.putExtra("key",webTest);
        intent.setFlags(Intent.FLAG_ACTIVITY_NEW_TASK);
        context.getApplicationContext().startActivity(intent);
    }
Write a webview, accept the intent, and show it.
public class WebActivity extends AppCompatActivity {
    private WebView mWebView;
    @Override
    protected void onCreate(Bundle savedInstanceState) {
        super.onCreate(savedInstanceState);
        setContentView(R.layout.activity_web);
        mWebView=(WebView)findViewById(R.id.web);
        WebSettings webSettings = mWebView.getSettings();
        webSettings.setJavaScriptEnabled(true);
        Intent intent=getIntent();
        String  webTest=intent.getStringExtra("key");
        Log.i("TEMP",webTest);
        mWebView.loadUrl(webTest);

    }
}
That's all for the code. Let's try it next.
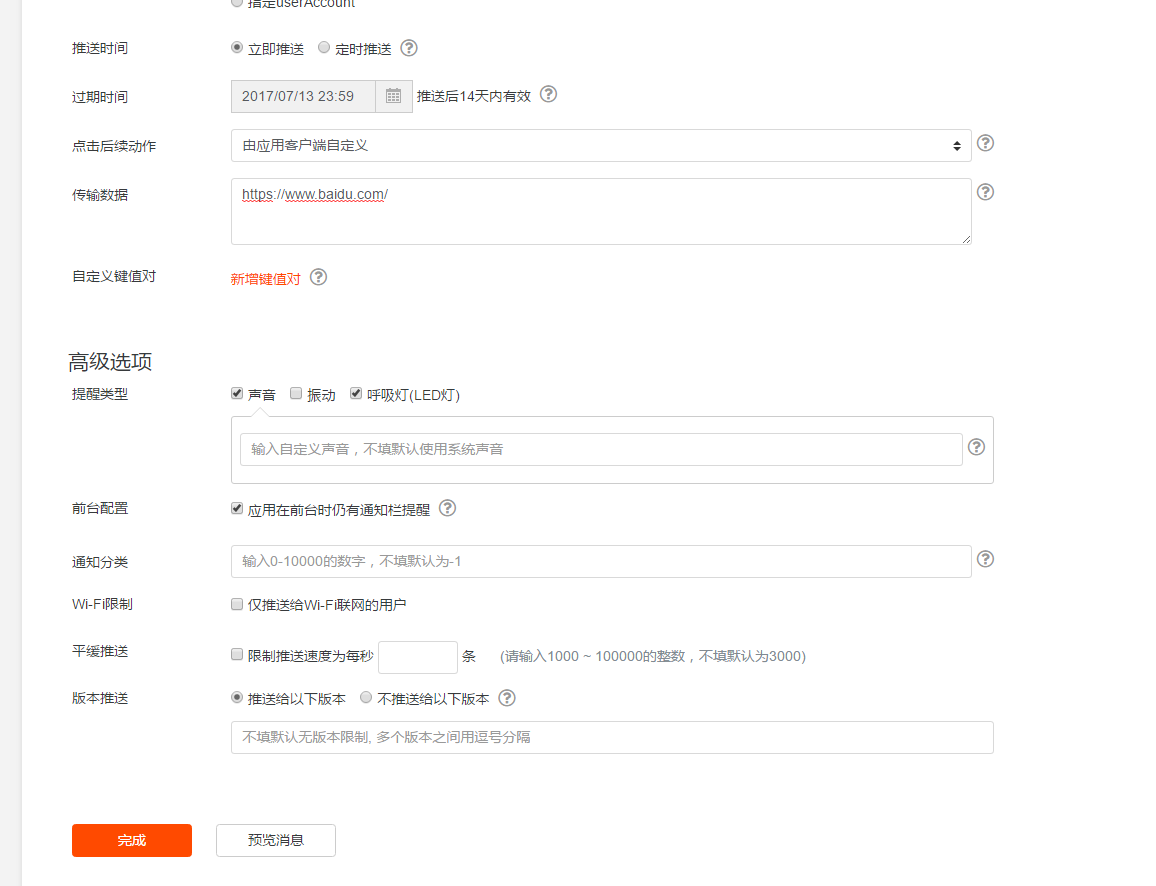
Editing Information on the Web 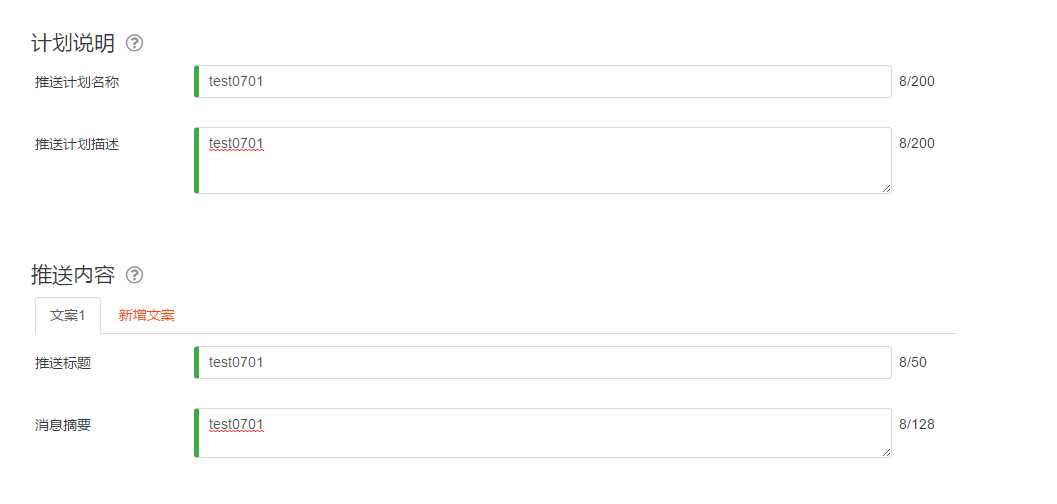
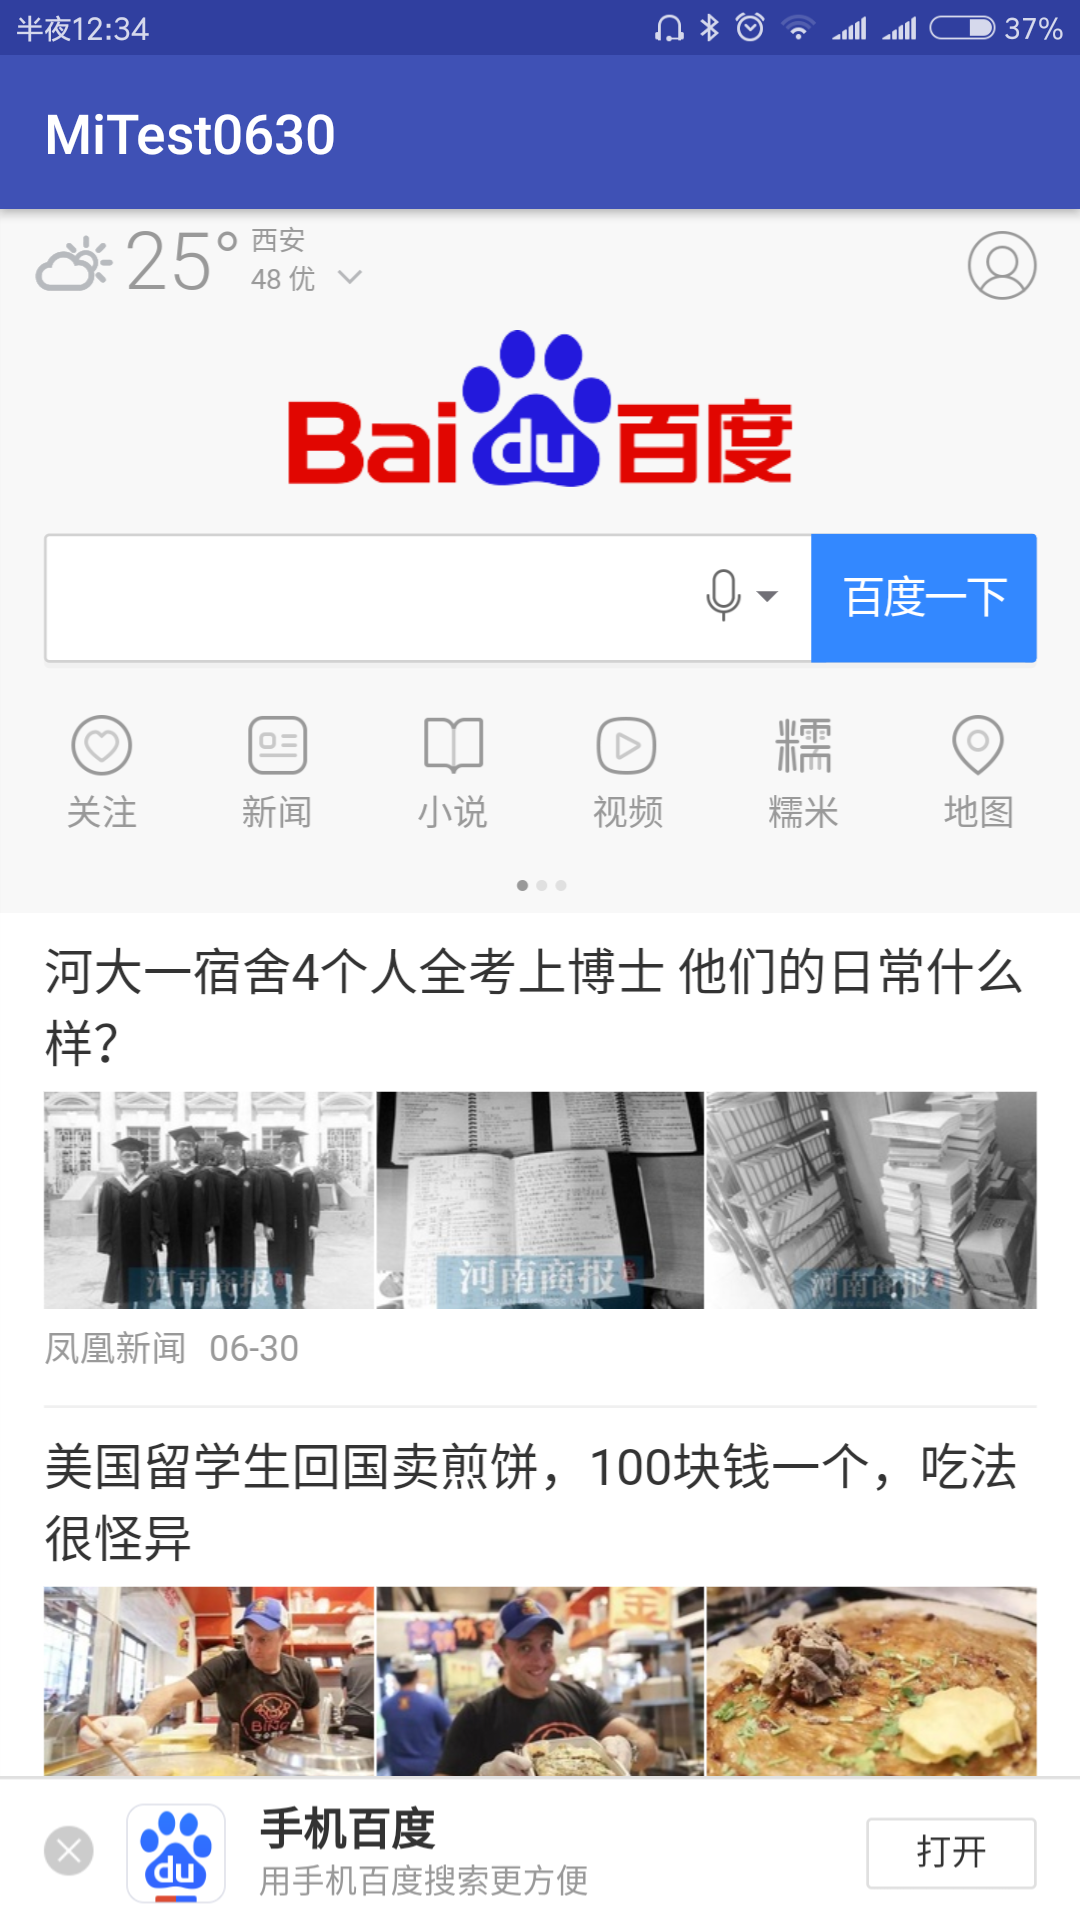
You can receive messages on your mobile phone and click and jump. 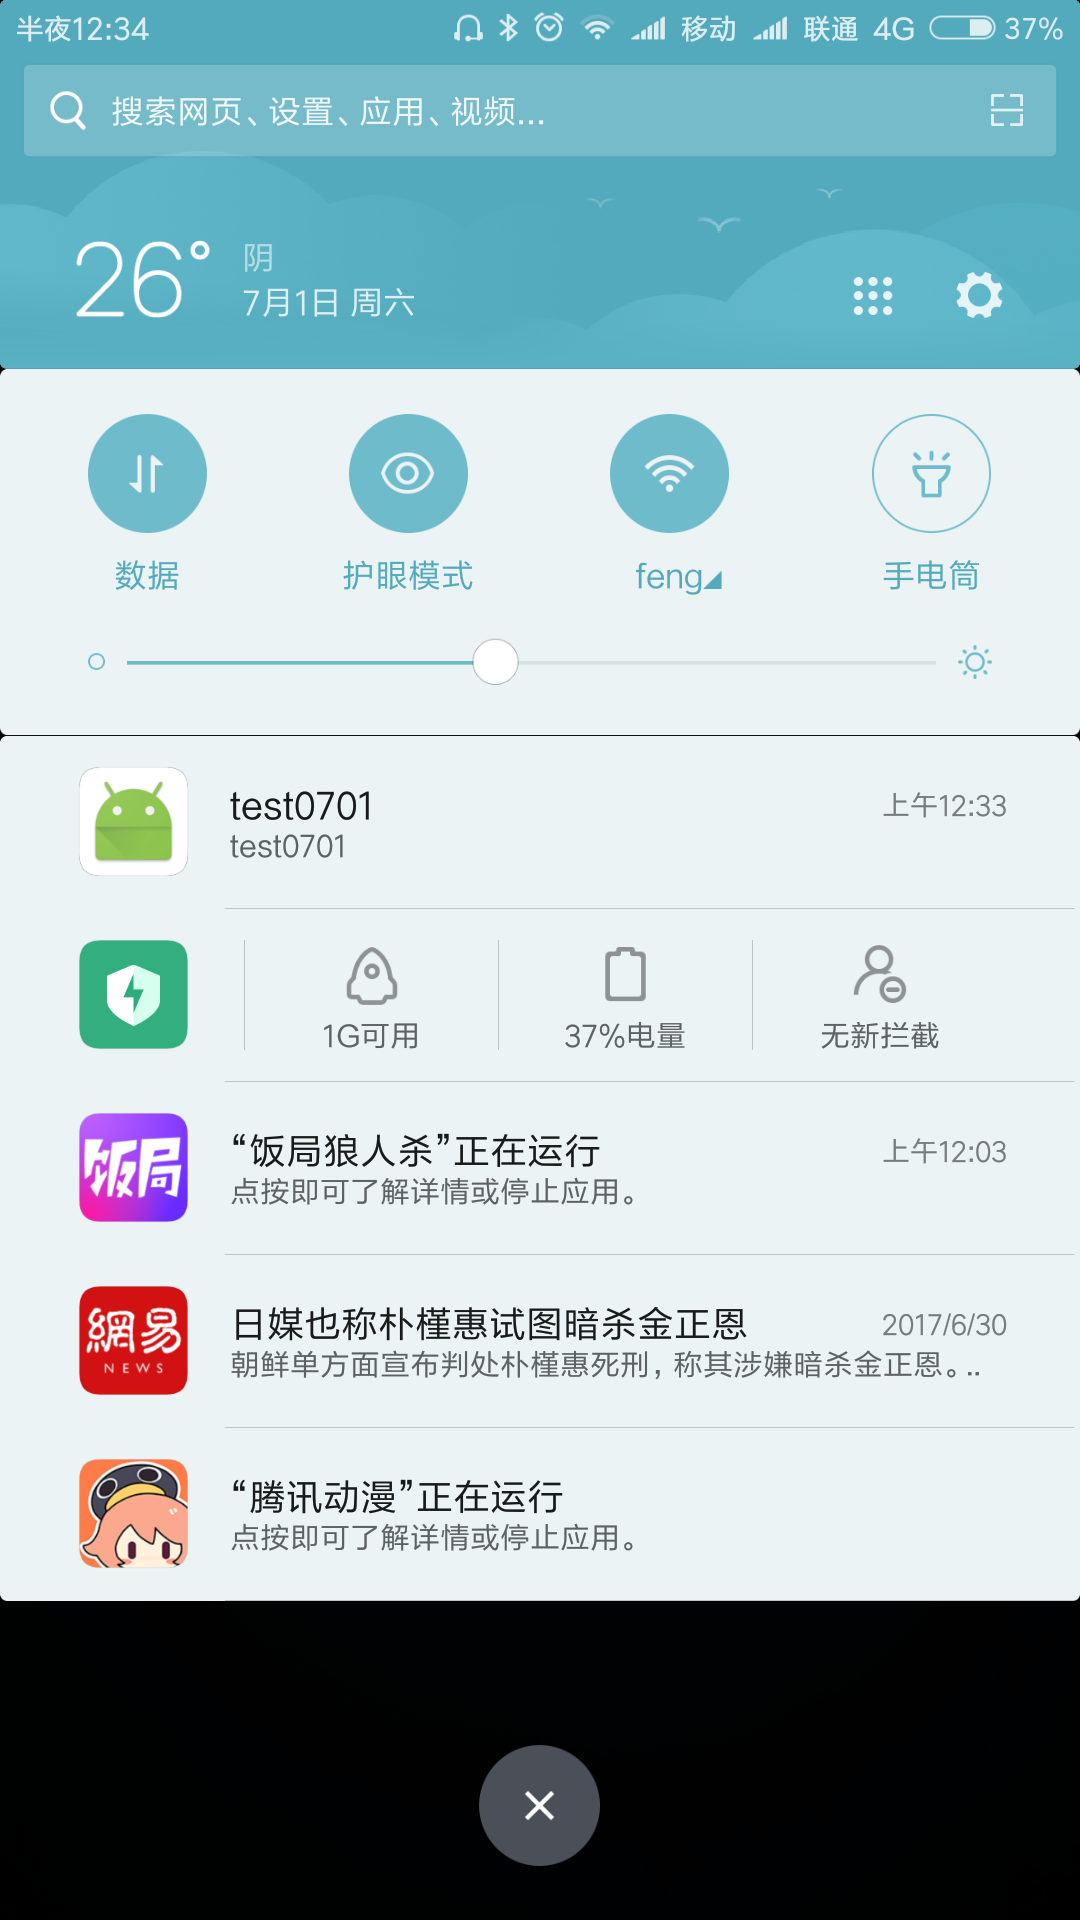
Millet push, which is system-level on the millet mobile phone, will keep the system alive, so even if the app is killed, it can receive the push message.