Reference: Shengxin skill tree
★https://www.bilibili.com/video/BV1ds411g7eg?p=5"
variable
The so-called variable is the symbol used to record a value (not necessarily a numerical value, but also a character or string) in the computer, and these symbols will be used in different operation processing. Usually, the relationship between variable and value is one-to-one.
There are also restrictions on the use of variables, called scope. The scope of a variable is the effective range of the variable (such as a function, a source file or a global range). There can only be one variable with the same name within this range. Once it leaves, the variable is invalid, as if it does not exist.
You can declare a variable through declare.
Assign a value to the variable by = value.
It should be noted that for the assignment operation in the Shell, no spaces can be entered on both sides of =, otherwise an error will be reported.
★ like other programming languages, variables in the shell can only be English letters, numbers or underscores, and cannot start with numbers. "
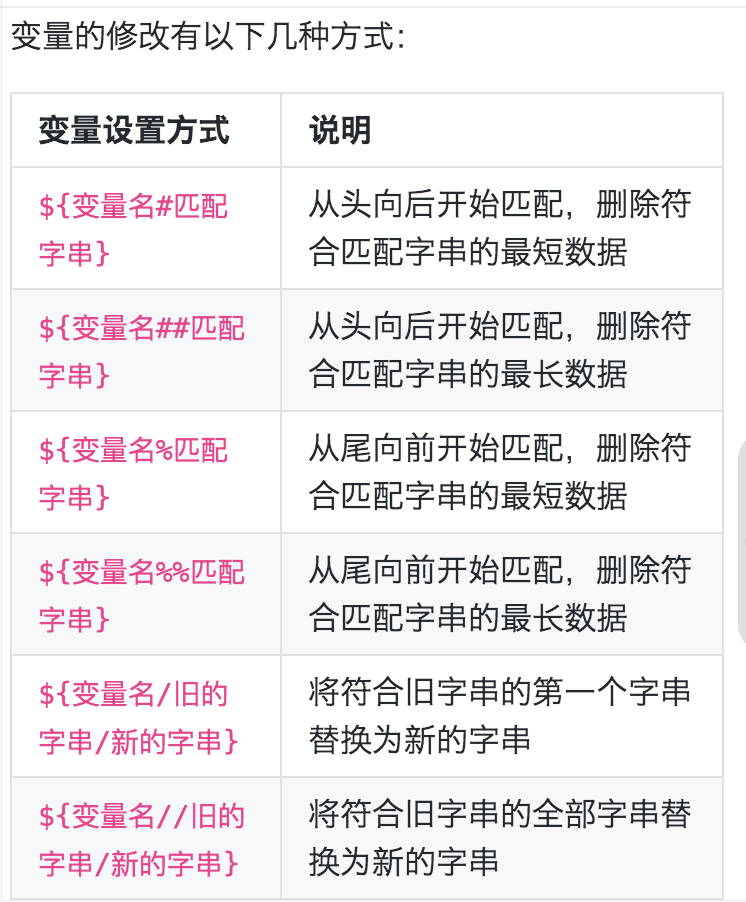
image.png
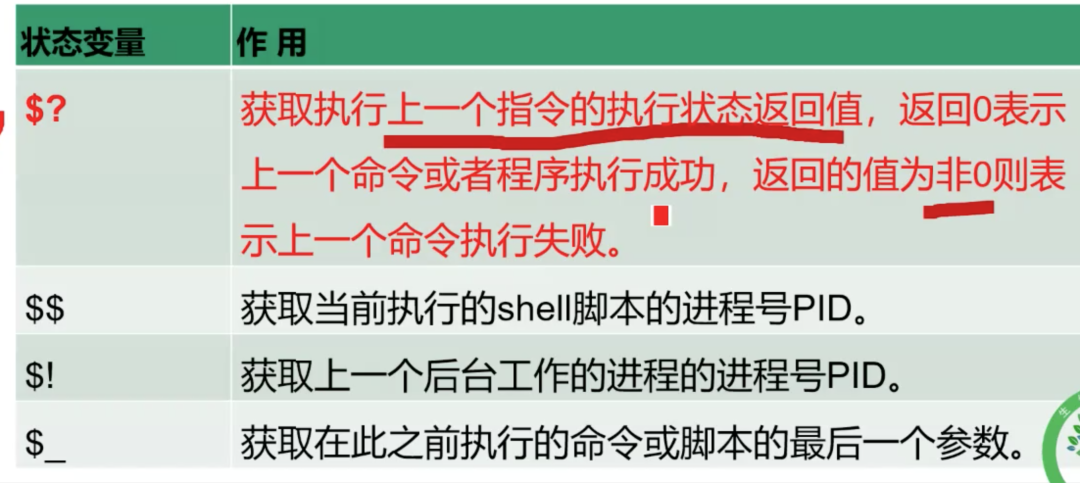
state variable
Record the running results of the command.
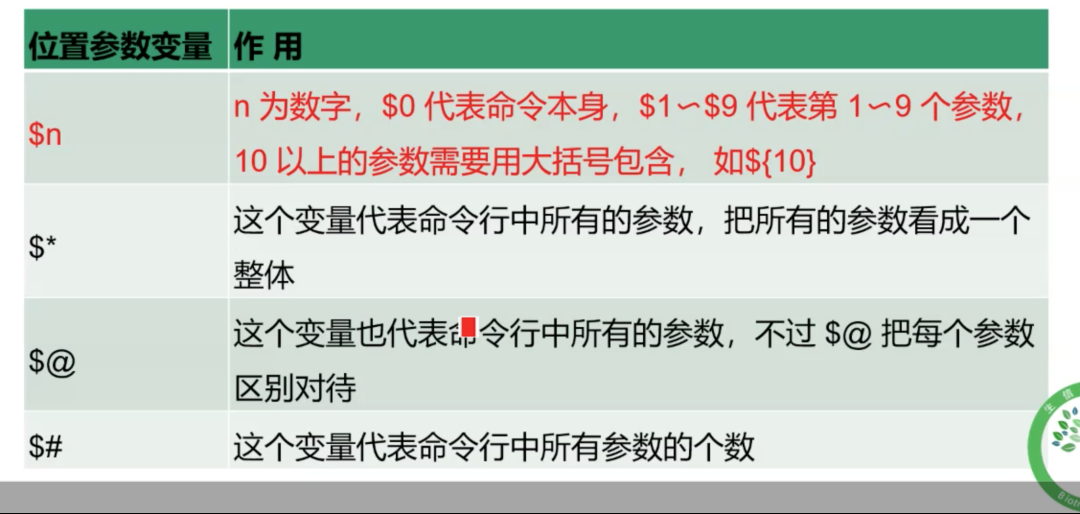
Position parameter variable
Used to pass information to a command or program script.
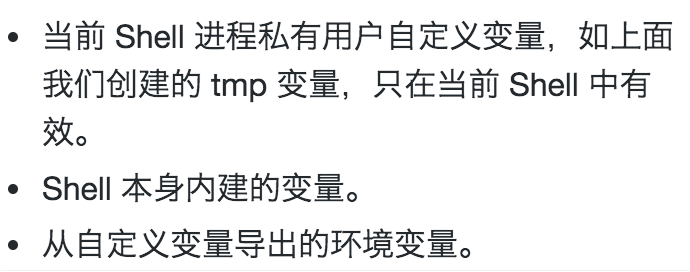
Custom variable
Set by the user.
It should be noted that special symbols in single quotation marks will not be interpreted, while special symbols in double quotation marks will be interpreted.
environment variable
There are three environment variables in the shell:
There are three commands related to environment variables:

View environment variables
echo can be used to print content
$ echo $PATH
The result is the environment variable
But it's not good-looking, so we can modify the output result by using the pipeline (transmitting the result), tr operation and newline character.
echo $PATH|tr ':' '\n'
Print the results, because I have java and minicoda installed, so there are some other paths.
/root/miniconda3/envs/wes/bin
/root/miniconda3/condabin
/usr/local/sbin
/usr/local/bin
/usr/sbin
/usr/bin
/usr/local/java/jdk1.8.0_251/bin
/root/bin
By the way, using the pipeline, we can also view some other things with the help of environment variables. ls can list all the current contents. The option l represents multi line output, h can display its details, and xargs is a filter for passing parameters to other commands, which is equivalent to echo by default. You can list files in all environments
echo $PATH|tr ':' '\n'|xargs ls -lh
In addition, we can also view file information in a certain environment
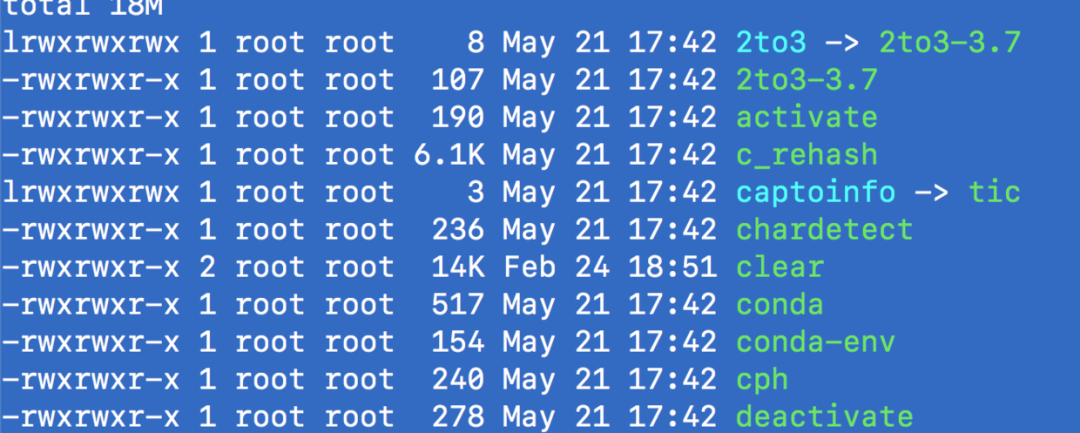
ls -lh /root/miniconda3/bin
The green ones are executable files
Common environment variables
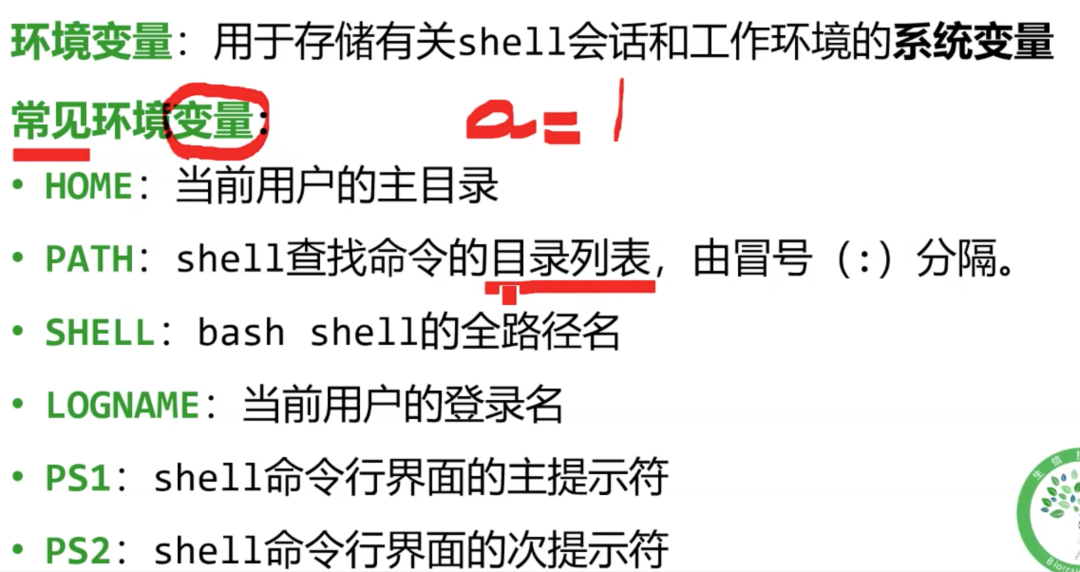
image.png
Delete environment variable
unset can help us delete environment variables. But remember to be careful not to delete important environment variables, such as PATH, or you will not be able to use many commands directly.
Methods of adding environment variables
We can add new content to the PATH environment variable.
First kind
PATH=$PATH:Absolute path of the environment

PATH=$PATH:${pwd}
# If you have entered the directory to be added, you can use pwd to steal a lazy.
This method is relatively easy, and one line of code can solve the problem. However, the above PATH will fail after the connection is closed.
Second
The second method changes the environment by modifying / etc/profile.
vim /etc/profile # Enter the file through the vim editor
export PATH="$PATH:Absolute path of the environment" # Specify the environment and add to the end of the file
:wq # Save and exit vim
Activate the environment through source /etc/profile and succeed without error.
source can also be written as.
~/.profile & /etc/profile
The environment variables configured in the profile under the working directory only take effect for the current user.
PS1 settings
PS1 is the command prompt variable of the system terminal.
echo $PS1 # View current environment
[\u@\h \W] # Returned content
So what do these command prompt variables mean?
Reference here: https://www.cnblogs.com/feiyun126/p/6125608.html
\d : Represents the date in the format weekday month date,For example: Wed Dec 12
\H : Full host name. For example: hostname yes debian.linux
\h : Only take the first name of the host, as in the above example; otherwise debian,.linux Is omitted
\t : The display time is in 24-hour format, such as: HH: MM: SS
\T : The display time is in 12 hour format
\A : The display time is in 24-hour format: HH: MM
\u : The account name of the current user, such as: root
\v : BASH Version information of:3.2
\w : Full working directory name. Home directory will be ~Replace as shown/etc/default/
\W : utilize basename Get the name of the working directory, so only the last directory will be listed, as shown in the above example default
\# : which order was issued
\$ : Prompt character, if yes root When, the prompt is:# , ordinary users are:$
And mine root@VM_0_3_centos ~The corresponding command prompt variable is [\ u@\h \W]
- You can also modify the color of various types of prompts by modifying the content of PS1.
Generally, the prompt color format is \ [\ e[F;Bm\] F represents the font color and B represents the background color. For example, I set PS1 = "\ [\ 033] 2; \ H: \ u \ w \ 007 \ 033 [33; 1m \] \ u \ 033 [35; 1m \ t \ 033 [0m \ [\ 033 [36; 1m \] \ w \ [\ 033 [0m \] \ n \ [\ E [32; 1m \] $\ [\ E [0m \]" for reference: https://www.jianshu.com/p/0ad354929baf
You can enter by cat > > or vim bashrc file. Add at the end of the file. Remember to source ~ / bashrc activates the new configuration
After activation
. bashrc and profile differences
Bashrc and profile are Shell startup setting files, which can initialize environment variables. However, profile will not run until the user logs in, while bashrc will run as soon as the system starts.
On the other hand, bashrc belongs to a non login shell and can run in non interactive mode, that is, it does not interact through the shell (for example, you enter cd, ls, etc. through ssh connection), but reads and executes the commands stored in the file. The shell does not terminate until it is read to the end of the file.
profile is an interactive login shell, which is the opposite of bashrc.
In addition, / etc/bashrc (some Linux do not have this file) and / etc/profile store shell variables and environment variables respectively.
Environment in conda
conda is a good thing to manage linux packages. You can install it through the following code
wget https://repo.anaconda.com/miniconda/Miniconda3-latest-Linux-x86_64.sh # install the software to the server directory
bash Miniconda3-latest-Linux-x86_64.sh # Run the script with bash
source ~/.bashrc # Activate conda
After installing conda, due to the relationship of domestic qiang, we can add some images to the download source of conda to speed up our download speed.
conda config --add channels https://mirrors.tuna.tsinghua.edu.cn/anaconda/pkgs/free
conda config --add channels https://mirrors.tuna.tsinghua.edu.cn/anaconda/cloud/conda-forge
conda config --add channels https://mirrors.tuna.tsinghua.edu.cn/anaconda/cloud/bioconda
conda config --set show_channel_urls yes
The great thing about conda is that it provides a function to create an environment.
Some common conda instructions are provided below.
conda --version # View conda version
conda create -n xxx python=2 # Create the environment of xxx, which depends on py2 0
conda info --envs # View current environment
conda info -e # You can also view the environment
conda env remove -n env_name # Delete an environment
source active xxx # Activate environment
source deactivate # Exit the current environment
conda remove package_name # Delete a package
conda create -n new_env_name old_env_name # Copy an environment directly
conda install package_name # Install a package
conda search package_name # Search the conda software library for a package
conda update package_name # Update a package
conda list # View the content installed in the current environment