1, Build a simple website hellospprinboot
1. Create hellospringboot project file
1) Select Spring Initializr
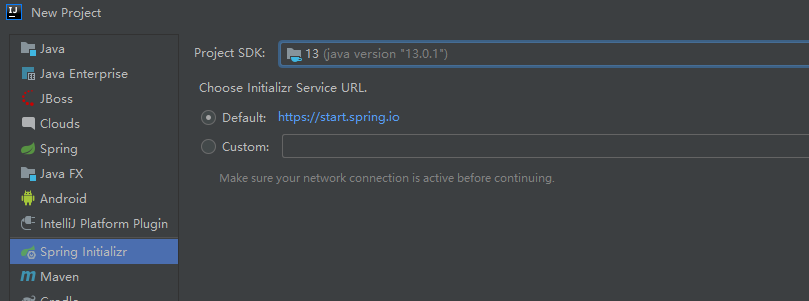
2) Fill in Group and Artifact, and select Java version as 8

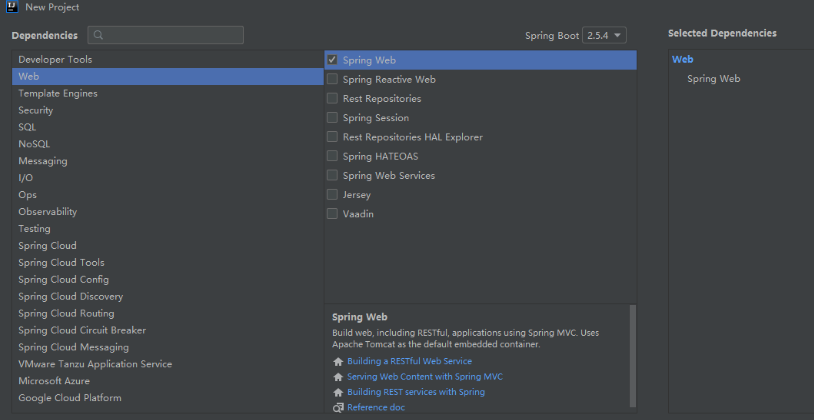
3) Select Web – > spring we
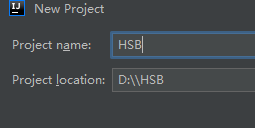
4) Create a name and project save location for the project
- The following is the project file structure after creation
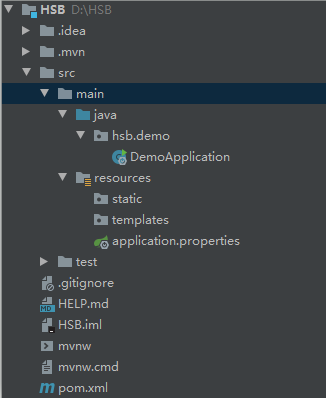
The first time you use springboot to create a configuration file, it may take a long time to load. Just wait patiently
2. Write Demo Application code
The code is as follows:
import org.springframework.boot.SpringApplication;
import org.springframework.boot.autoconfigure.SpringBootApplication;
import org.springframework.web.bind.annotation.RequestMapping;
import org.springframework.web.bind.annotation.RequestMethod;
import org.springframework.web.bind.annotation.RestController;


@RestController
@SpringBootApplication
public class DemoApplication {

    @RequestMapping(value = "/hello",method = RequestMethod.GET)
    public String hello(){
        return  "helloword Spring Boot!This is a Spring Boot Developed website.";
    }

    public static void main(String[] args) {

        SpringApplication.run(DemoApplication.class, args);
    }

}
3. Run Demo Application

The website port is 8080
Browser input http://localhost:8080/hello
View run results

Run successfully. Note that if the window is occupied, it cannot succeed
resolvent
View the occupied port number:
netstat -ano | findstr 8080

Kill occupied port number
taskkill /pid 14188 /f

II Web services with RESTful interfaces
1, What is the HTTP protocol?
HTTP (Hyper Text Transfer Protocol) is a transfer protocol used to transfer hypertext from the world wide web (WWW:World Wide Web) server to the local browser. It is an application layer protocol.
1. Working principle of HTTP
The HTTP protocol defines how the Web client requests a Web page from the Web server and how the server transmits the Web page to the client. HTTP protocol adopts * * request / response * * model. The client sends a request message to the server, which contains the requested method, URL, protocol version, request header and request data. The server responds with a status line, which includes the protocol version, success or error code, server information, response header and response data.
2.HTTP request process
1) First, the domain name is resolved through DNS
2) The browser establishes a connection with the server through three TCP handshakes.
3) The browser initiates an HTTP request.
4) The server responds to HTTP requests.
5) The browser parses the HTML code and requests the resources in the HTML code (CSS/JS/Image).
6) The browser renders and displays the page content.
7)TCP waved off the connection four times.
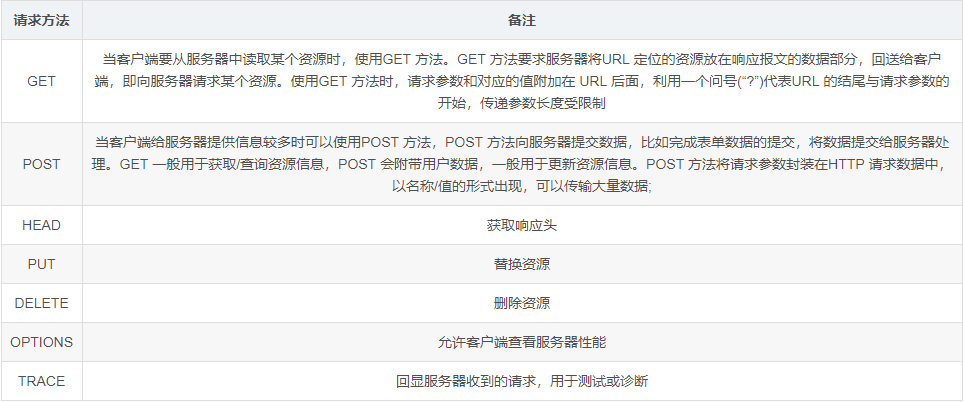
3. Method of HTTP request
2, Web services for the RESTful interface of the SpringBoot project
1. Create project
New SpringBoot project

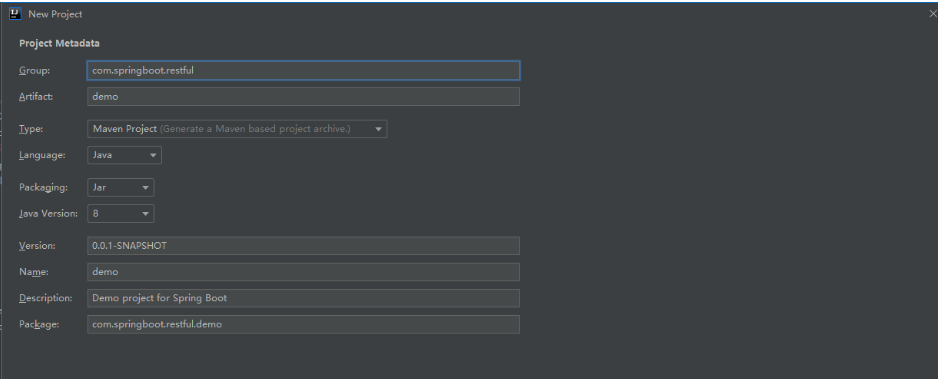
Fill in information
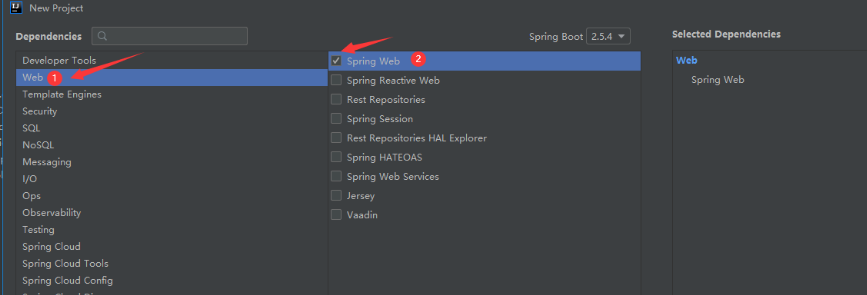
3) Select Web – > spring Web
2. Source code preparation
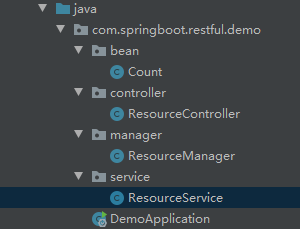
The document structure is as follows:
2) Various source codes
The code is as follows:
Count:

package com.springboot.restful.demo.bean;

public class Count {
     private int count;

     public int getCount() {
         return count;
           }
           public void setCount(int count) {
                this.count = count;
           }
}
ResourceController:
package com.springboot.restful.demo.controller;

import com.springboot.restful.demo.bean.Count;
import com.springboot.restful.demo.service.ResourceService;
import org.springframework.beans.factory.annotation.Autowired;
import org.springframework.web.bind.annotation.*;

@RestController
public class ResourceController {

    @Autowired
    ResourceService resourceService;

    @RequestMapping(value = "/me/count", method = RequestMethod.PUT)
    @ResponseBody
    public void initCount(@RequestBody Count count){
        resourceService.initCount(count);
    }

    @RequestMapping(value = "/me/count", method = RequestMethod.POST)
    @ResponseBody
    public void modifyCount(@RequestBody Count count){
        resourceService.addCount(count);
    }

    @RequestMapping(value = "/me/count", method = RequestMethod.GET)
    @ResponseBody
    public  Count getCount()
    {
        return resourceService.getCount();
    }
}
ResourceManager:
package com.springboot.restful.demo.manager;

public class ResourceManager {
    private int count = 0;

    private static ResourceManager instance = new ResourceManager();

    private ResourceManager(){}

    public static ResourceManager getInstance(){
        return instance;
    }

    public synchronized void addCount(int i){
        count = count + i;
    }

    public synchronized  void minusCount(int i){
        count = count -i;
    }

    public int getCount(){
        return count;
    }

    public void initCount(int i){
        count = i;
    }
}
ResourceService:
package com.springboot.restful.demo.service;

import com.springboot.restful.demo.bean.Count;
import com.springboot.restful.demo.manager.ResourceManager;
import org.springframework.stereotype.Service;

@Service
public class ResourceService {
    public void addCount(Count count){
        if (count != null){
            ResourceManager.getInstance().addCount(count.getCount());
        }
    }

    public void minusCount(Count count){
        if (count != null) {
            ResourceManager.getInstance().minusCount(count.getCount());
        }
    }

    public Count getCount()
    {
        Count count = new Count();
        count.setCount(ResourceManager.getInstance().getCount());
        return count;
    }

    public void initCount(Count count){
        if (count != null) {
            ResourceManager.getInstance().initCount(count.getCount());
        }
    }
}
DemoApplication:
package com.springboot.restful.demo;

import org.springframework.boot.SpringApplication;
import org.springframework.boot.autoconfigure.SpringBootApplication;

@SpringBootApplication
public class DemoApplication {

    public static void main(String[] args) {
        SpringApplication.run(DemoApplication.class, args);
    }

}
2. Test
1) Start program
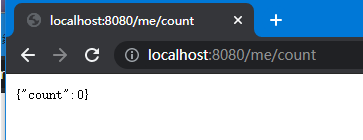
2) Use Postman test
The query is as follows:
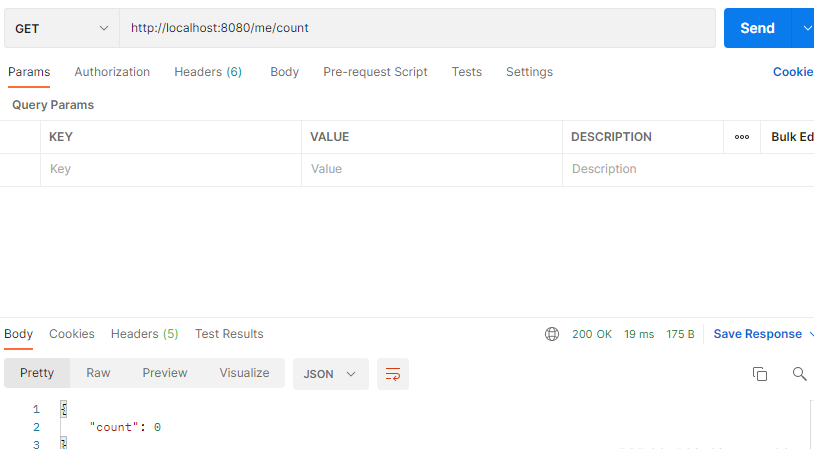
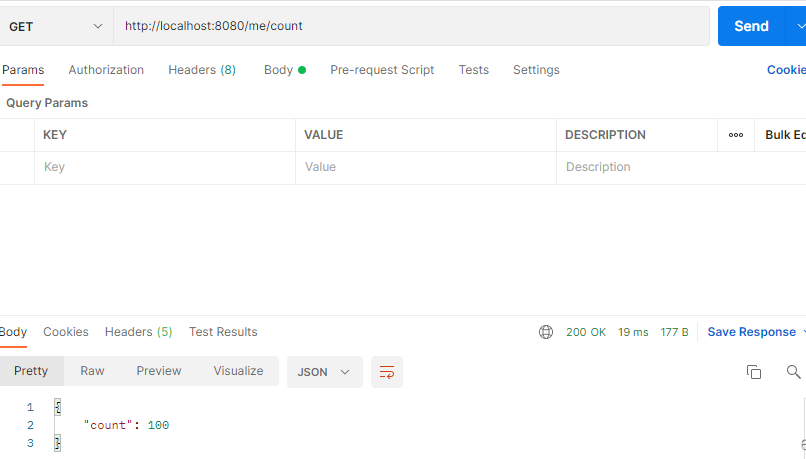
initialization:

Query again:
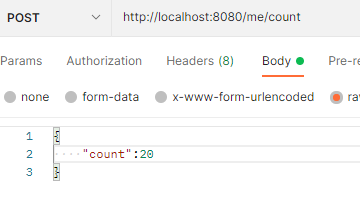
Modify interface
Query after modification:
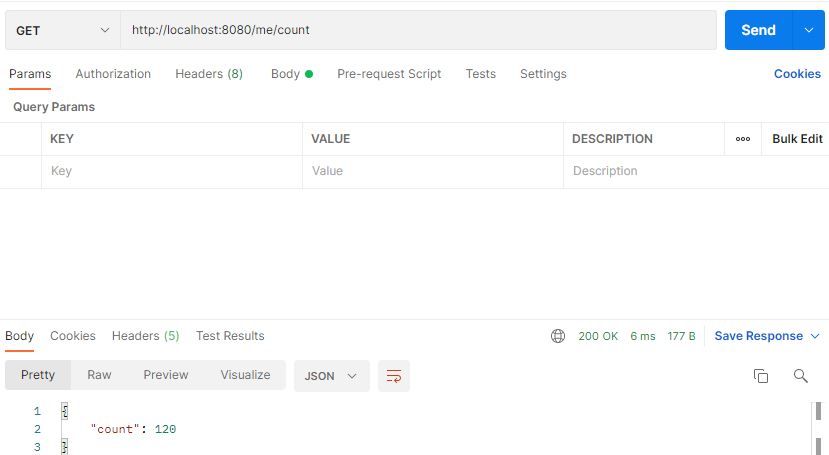
Test successful