
Qinz
This article is from a brief book with the original address: http://www.jianshu.com/p/bb6e9bf2bcc1
There are many scenarios in some app s, and the principle is relatively simple to implement. Here we will start to encapsulate a more commonly used time axis. The specific effect is shown in the following figure:
Qinz
- 1. First, we create a UIView, put a tableView on it, declare a method and pass two parameters. The first parameter is which view the timeline needs to be placed on. The second parameter is to transfer the data source, under the header file:
#import <UIKit/UIKit.h>

@interface QinzTimeLine : UIView

@property (nonatomic, strong) NSArray *titleArr;

-(void)setSuperView:(UIView*)superView DataArr:(NSMutableArray*)dataArr;

@end- 2. Let's look at the. m file, which is the simplest tableView application. Here's a [self. tableView cell HeightForIndexPath: indexPath model: model keyPath:@ "model" cellClass: [TimeLineCell class] contentViewWidth: self. frame. size. width] method that uses the SDAutoLayout library to automatically calculate cell height.
#import "QinzTimeLine.h"
#import "SDAutoLayout.h"
#import "TimeLineCell.h"

@interface QinzTimeLine ()<UITableViewDelegate,UITableViewDataSource>

@property (nonatomic, strong) UITableView *tableView;
@property (nonatomic, strong) NSMutableArray *dataArr;

@end

@implementation QinzTimeLine

-(void)setSuperView:(UIView *)superView DataArr:(NSMutableArray *)dataArr{

    self.frame = superView.bounds;
    [superView addSubview:self];

    [self setUp];
    self.dataArr = dataArr;
}
-(void)setUp{

    self.tableView = [[UITableView alloc]init];
    self.tableView.delegate = self;
    self.tableView.dataSource = self;
    self.tableView.separatorStyle = UITableViewCellSeparatorStyleNone;

    [self addSubview:self.tableView];

    self.tableView.sd_layout.topEqualToView(self).leftEqualToView(self).bottomEqualToView(self).rightEqualToView(self);
}

#Proxy Method of pragma mark-tableView
#pragma mark -- how many groups are returned
- (NSInteger)numberOfSectionsInTableView:(UITableView *)tableView
{
    return 1;
}
#pragma mark -- how many returns per group
- (NSInteger)tableView:(UITableView *)tableView numberOfRowsInSection:(NSInteger)section
{
    return self.dataArr.count;
}
#pragma mark -- the height of each cell
- (CGFloat)tableView:(UITableView *)tableView heightForRowAtIndexPath:(NSIndexPath *)indexPath
{

    TimeLineModel*model = self.dataArr[indexPath.row];

    return [self.tableView cellHeightForIndexPath:indexPath model:model keyPath:@"model" cellClass:[TimeLineCell class] contentViewWidth:self.frame.size.width];
}
#pragma mark -- the content displayed by each cell
- (UITableViewCell *)tableView:(UITableView *)tableView cellForRowAtIndexPath:(NSIndexPath *)indexPath
{
    TimeLineCell*cell = [TimeLineCell timeLineCell:tableView];

    if (indexPath.row == 0) {
        cell.lineView.sd_layout.topSpaceToView(cell.pointView, 0);
        cell.lineView.backgroundColor = [UIColor grayColor];
        cell.pointView.backgroundColor = [UIColor redColor];
    }else{
        cell.lineView.sd_layout.topSpaceToView(cell.contentView, 0);
        cell.pointView.backgroundColor = [UIColor grayColor];
        cell.lineView.backgroundColor = [UIColor grayColor];
    }
    cell.model = self.dataArr[indexPath.row];

    cell.selectionStyle = UITableViewCellSelectionStyleNone;
    return cell;
}
#pragma mark -- Select the operations performed by each cell
- (void)tableView:(UITableView *)tableView didSelectRowAtIndexPath:(NSIndexPath *)indexPath{

    [tableView deselectRowAtIndexPath:indexPath animated:NO];
}- 3. The key is the tableViewCell layout, which uses Xib to facilitate the style setting. The layout still uses SDAutoLayout library.
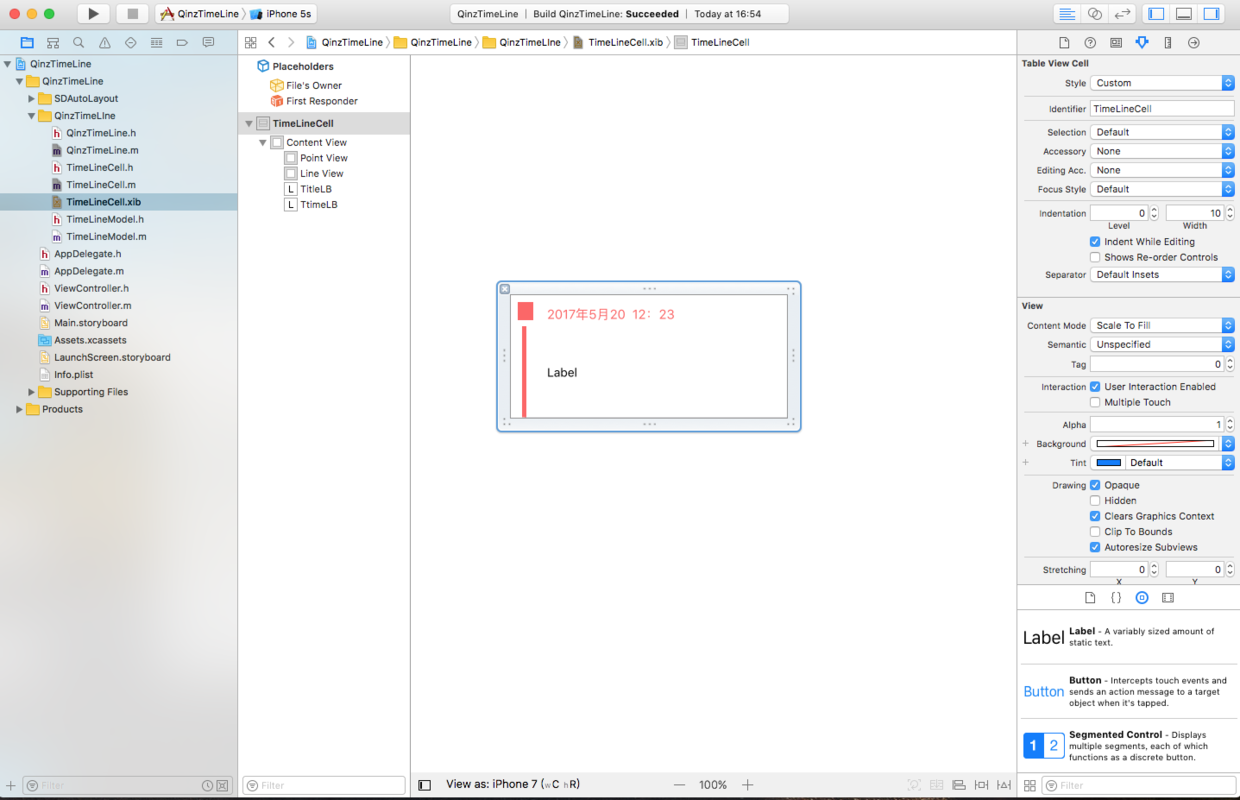
Pictures. png
- 4. Look at the layout code. It's convenient to do a highly adaptive layout for titleLB and set autoHeightRatio to 0. Then we call [self-set up AutoHeightWithBottomView: self. titleLB bottomMargin: 0] in the setup model to automatically complete a highly adaptive layout.
- (void)awakeFromNib {
    [super awakeFromNib];

    self.pointView.sd_layout.topSpaceToView(self.contentView, 20).leftSpaceToView(self.contentView, 5).widthIs(8).heightEqualToWidth();
    self.pointView.sd_cornerRadius = @(4);

    self.lineView.sd_layout.topEqualToView(self.contentView).centerXEqualToView(self.pointView).widthIs(1).bottomSpaceToView(self.contentView, 0);

    self.ttimeLB.sd_layout.centerYEqualToView(self.pointView).leftSpaceToView(self.pointView, 10).rightSpaceToView(self.contentView, 10).heightIs(20);
    self.titleLB.sd_layout.topSpaceToView(self.ttimeLB, 15).leftEqualToView(self.ttimeLB).rightSpaceToView(self.contentView, 10).autoHeightRatio(0);
}

-(void)setModel:(TimeLineModel *)model{

    _model = model;
    self.titleLB.text=  model.title;
    self.ttimeLB.text = model.time;

    [self setupAutoHeightWithBottomView:self.titleLB bottomMargin:0];
}- 5. At this point, the encapsulation is finished. Finally, let's look at the controller call code.
- (void)viewDidLoad {
    [super viewDidLoad];

    self.automaticallyAdjustsScrollViewInsets = YES;

    self.timeLine = [[QinzTimeLine alloc]init];
    [self setData];

    [self.timeLine setSuperView:self.view DataArr:self.dataArr];

}
Summary: tableView is used to layout the whole system, and then the cell is highly adaptive. What we need to pay attention to is that the lines in the cell's time axis need to be consistent, so we need to judge the first cell, so that the lines just connect with the original point.
Finally, demo is attached for reference: http://git.oschina.net/Qinz_323/qinztimeline