Write your first fluent app
This is a guide to creating your first fluent application. If you are familiar with object-oriented and basic programming concepts (such as variables, loops, and conditional control), you can complete this tutorial without knowing Dart or having experience in mobile development.
- Step 1: create a fluent app
- Step 2: use an external package
- Step 3: add a Stateful widget
- Step 4: create an infinite scrolling ListView
- Step 5: add interaction
- Step 6: navigate to a new page
- Step 7: change UI using theme
- Well done!
Step 1: create a fluent app
Create a simple template based fluent application, as follows Create your first fluent app And then name the project startup_namer (not myapp). Next, you will modify the application to complete the final APP.
In this example, you will mainly edit the} lib / main. Where the dart code is located Dart file,
Tip: indents may deform when you paste code into an application. You can use the fluent tool to automatically fix this problem:
- VS Code: right click and select Format Document
-
Replace lib / main dart.
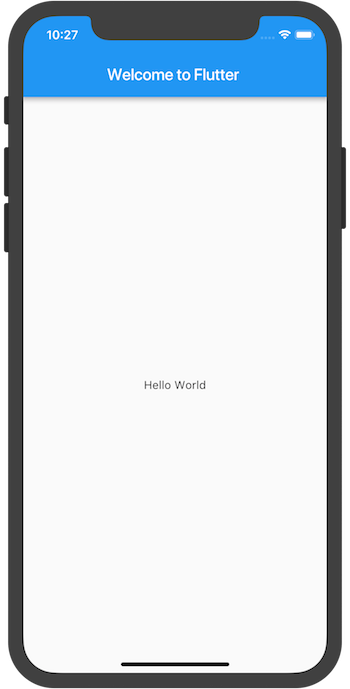
Delete lib / main All the code in dart, and then replace it with the following code, which will display "Hello World" in the center of the screenimport 'package:flutter/material.dart';//Similar to pouring header files void main() => runApp(new MyApp());//Program call entry class MyApp extends StatelessWidget {//Method call @override //I don't know what to do for the time being Widget build(BuildContext context) { return new MaterialApp( title: 'Welcome to Flutter',//The modification of this place is invalid. I don't know what to do home: new Scaffold( appBar: new AppBar( title: new Text('Welcome to Flutter'),//Content of the title ), body: new Center( child: new Text('Hello World'),//Text title ), ), ); } } -
Running the application, you should see the following interface
analysis
-
This example creates a Material APP. Material It is a standard visual design language for mobile terminal and web terminal. Fluent provides a rich set of Material widgets.
-
The main function uses the (= >) symbol, which is short for a single line function or method in Dart.
-
The application inherits the StatelessWidget, which will make the application itself a widget. In fluent, most things are widgets, including alignment, padding, and layout
-
Scaffold is a widget provided in the Material library. It provides the default navigation bar, title and body attribute containing the main screen widget tree. Widget trees can be complex.
-
The main work of widgets is to provide a build() method to describe how to display yourself according to other lower level widgets.
-
The widget tree of the body in this example contains a Center widget, which in turn contains a Text subwidget. The Center widget can align its child widget tree to the center of the screen.
Follow yourself first. Success or failure depends on your nature. Ha ha
Step 2: use an external package
In this step, you will begin to use a program called English_ Word open source software package, which contains thousands of the most commonly used English words and some practical functions
You can pub.dartlang.org Found on english_words Software packages and many other open source software packages
-
The pubspec file manages the assets (resources, such as pictures, package s, etc.) of the fluent application. In pubspec Yaml, english_words (version 3.1.0 or later) is added to the dependency list, as highlighted below:
dependencies: flutter: sdk: flutter cupertino_icons: ^0.1.0//In pubspec Add the corresponding code in yaml, that is, under SDK: fluent. Watch this place. Don't write it in dev_ dependencies:flutter_ Under test: SDK: fluent english_words: ^4.0.0 //Knock on the blackboard. Don't use 3.1 on the official website. 0, because an exception Cannot run with sound null safety will be reported, use 4.0 0 is no problem. It's a security problem. It also makes you return the version. I don't think it's necessary. The development must have a new version -
When viewing pubspec in the editor view of Android Studio, click Packages get in the upper right corner, which will install dependent packages into your project. You can see the following in the console: (Android is not used for the time being)
flutter packages get
Running "flutter packages get" in startup_namer...
Process finished with exit code 0
-
In lib / main In dart , introduce , english_words, as shown in the highlighted line:
import 'package:flutter/material.dart';
import 'package:english_words/english_words.dart';
When you enter, Android Studio will provide you with suggestions on Library import. It then renders a gray import string to let you know that the imported library is not yet used (so far)
-
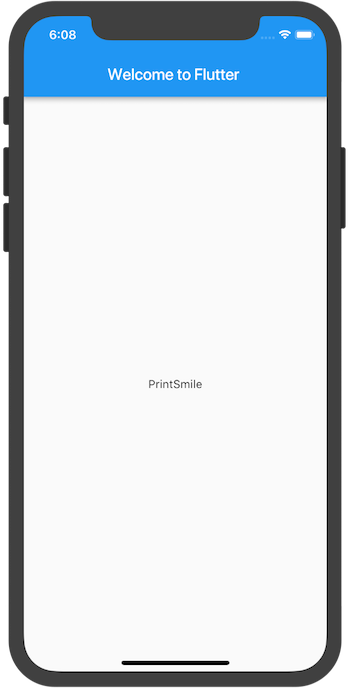
Use the English words package to generate text to replace the string "Hello World"
Tip: "Hump nomenclature" (called "upper camel case" or "Pascal case") means that every word in the string (including the first word) starts with a capital letter. Therefore, "uppercamel case" becomes "uppercamel case"
Make the following changes, as highlighted:
import 'package:flutter/material.dart'; import 'package:english_words/english_words.dart'; void main() => runApp(new MyApp()); class MyApp extends StatelessWidget { @override Widget build(BuildContext context) { final wordPair = new WordPair.random();//WordPair can only be two words return new MaterialApp( title: 'Welcome to Flutter', home: new Scaffold( appBar: new AppBar( title: new Text('Welcome to Flutter'), ), body: new Center( //child: new Text('Hello World'), child: new Text(wordPair.asPascalCase), ), ), ); } } -
If the application is running, use the hot reload button (small lightning) to update the running application. Each time you click hot reload or save a project, different word pairs are randomly selected in the running application. This is because word pairs are generated inside the build method. Build runs every time MaterialApp needs to render or when switching platforms in the fluent inspector
Problems?
If your application is not working properly, look for spelling errors. If necessary, use the code in the link below to compare the corrections.
- pubspec.yaml (The pubspec.yaml file won't change again.)
- lib/main.dart
Click the little lightning in this place to continue running the program, and green is similar to recompiling. (when WordPair.random is changed to WordPair(), it will change randomly when you click the small lightning, and it will switch to your WordPair() when you click the green rotation). Anyway, it looks like this. Continue to explore later
Step 3: add a Stateful widget
Stateless widgets are immutable, which means that their properties cannot be changed - all values are final// All of the things we touched earlier were stateless widgets
Stateful widgets hold states that may change during the widget life cycle Implementing a stateful widget requires at least two classes:
- A StatefulWidget class.
- A State class. The StatefulWidget class itself is unchanged, but the State class always exists in the widget life cycle
In this step, you will add a stateful widget randomwords, which creates its State class RandomWordsState. The State class will eventually maintain recommended and favorite word pairs for the widget.
-
Add a stateful RandomWords widget to main dart. It can also be used anywhere in a file other than MyApp, but this example puts it at the bottom of the file. The RandomWords widget has almost nothing but the creation of a State class
class RandomWords extends StatefulWidget { @override createState() => new RandomWordsState(); } -
Add the RandomWordsState class Most of the code for the application is in this class, which holds the state of the RandomWords widget. This class will store the generated word pairs and favorite word pairs that grow infinitely as the user scrolls. The user clicks the heart repeatedly ❤️ Icon to add or remove them from the list.
You will build this class step by step. First, create a minimal class by adding highlighted code
class RandomWordsState extends State<RandomWords> { } -
After adding a state class, the IDE will prompt that the class is missing the build method. Next, you'll add a basic build method that generates word pairs by moving the code that generates word pairs from MyApp to RandomWordsState.
Add the build method to RandomWordState, as shown in the highlighted code below
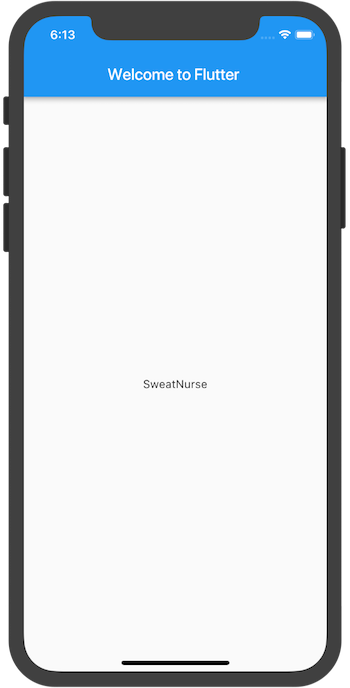
class RandomWordsState extends State<RandomWords> { @override Widget build(BuildContext context) { final wordPair = new WordPair.random(); return new Text(wordPair.asPascalCase); } } -
Move the code that generates word pairs from MyApp to RandomWordsState through the highlighted code below
class MyApp extends StatelessWidget {
  @override
  Widget build(BuildContext context) {
    final wordPair = new WordPair.random();  // Delete this row

    return new MaterialApp(
      title: 'Welcome to Flutter',
      home: new Scaffold(
        appBar: new AppBar(
          title: new Text('Welcome to Flutter'),
        ),
        body: new Center(
          //child: new Text(wordPair.asPascalCase),
          child: new RandomWords(),
        ),
      ),
    );
  }
}
Restart the application. If you try a hot reload, you may see a warning:
Reloading...
Not all changed program elements ran during view reassembly; consider
restarting.
This may be a false positive, but considering restart can ensure that your changes take effect in the application interface.
The application should run as before, with a word pair displayed each time the application is hot reloaded or saved.
Problems?
If your application is not working properly, you can use the code in the link below to compare the corrections.