A long time ago, it was said that a wave of Kubernetes clusters would be installed on the virtual machine, but it reported an error once before. Later, it has not been reinstalled. Taking advantage of the holiday and rest these days, another wave was reinstalled, which can be regarded as done. This article will share with you the precautions for installation and the installation process, so that you can avoid stepping on the pit.
This article is for kubedm installation only.
preparation in advance
Kubernetes cluster installation requires relatively high hardware. Generally, the minimum requirement is 3 sets of 2-core 4G. Here, our linux version also selects the commonly used CentOS 7.6.
Generally, if we want to build a learning environment, we must first have a template virtual machine, that is, a linux virtual host with OK hardware, operating system, network, basic commands, firewall, etc. in the future, we need to expand the cluster. We only need to copy the template machine and modify the host name and static IP address.
Here is how to set the template machine. I have issued documents before, which you can refer to Template virtual machine installation document .
The general operation steps are:
- One high configuration host that can support opening multiple virtual machines (8-core, 16G, 300G free storage)
- Install virtual machine software, create a new virtual machine, and set virtual machine hardware
- To install the operating system, prepare the version of the operating system to be installed in advance
- The host is equipped with XShell, XFtp and other remote connection tools (easier to operate)
- Common commands for installing Linux
- Set up network and configure static IP
- Turn off the firewall
- After the template mechanism is built, the template copying machine (modify the host name and static IP address) can be used
Kubernetes installation precautions
-
Hardware allocation must not be too stingy (2-core 4G)
-
The Docker version must correspond to the Kubernetes version. If it doesn't, subsequent installation will make mistakes. I'll roll over here
Docker version selection Click the version of K8s you want to install to view which versions of Docker support
Tip: how to go back if the version is installed incorrectly?
# 1. Wrong docker version # 1.1 stop docker service systemctl stop docker.service # 1.2 download the correct docker Version (the version number must be written correctly) yum downgrade --setopt=obsoletes=0 -y docker-ce-18.09.5-3.el7 docker-ce-cli-18.09.5-3.el7 containerd.io # 1.3 start docker service systemctl start docker.service # 2 kubernetes version error # 2.1 reset kubedm kubeadm reset # 2.2 unloading yum erase -y kubelet kubectl kubeadm kubernetes-cni # 2.3 reinstallation yum install -y kubelet-1.15.1 kubeadm-1.15.1 kubectl-1.15.1 # View version kubectl version
Kubedm installation K8s
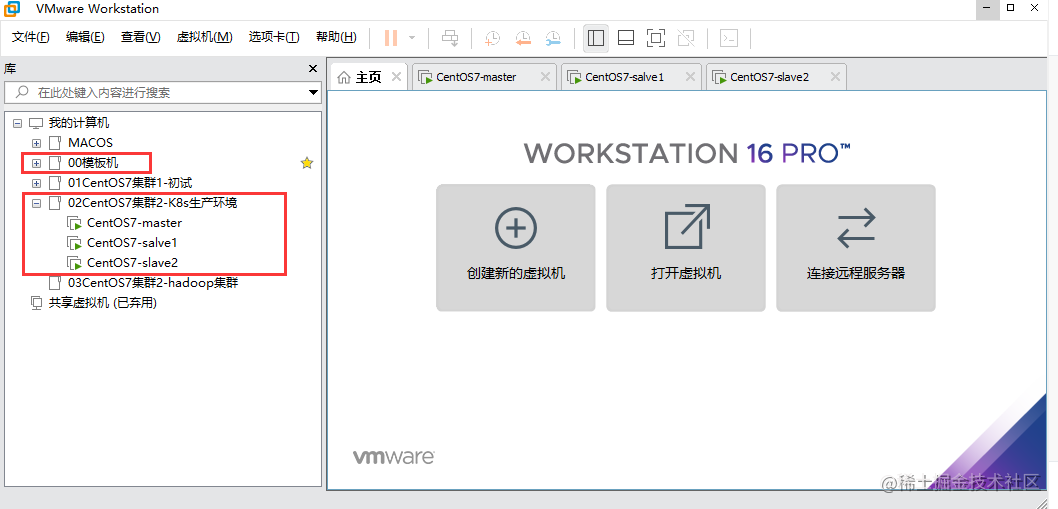
Clone three machines, one master node and two slave nodes. Here we build a simple cluster (non high availability cluster)
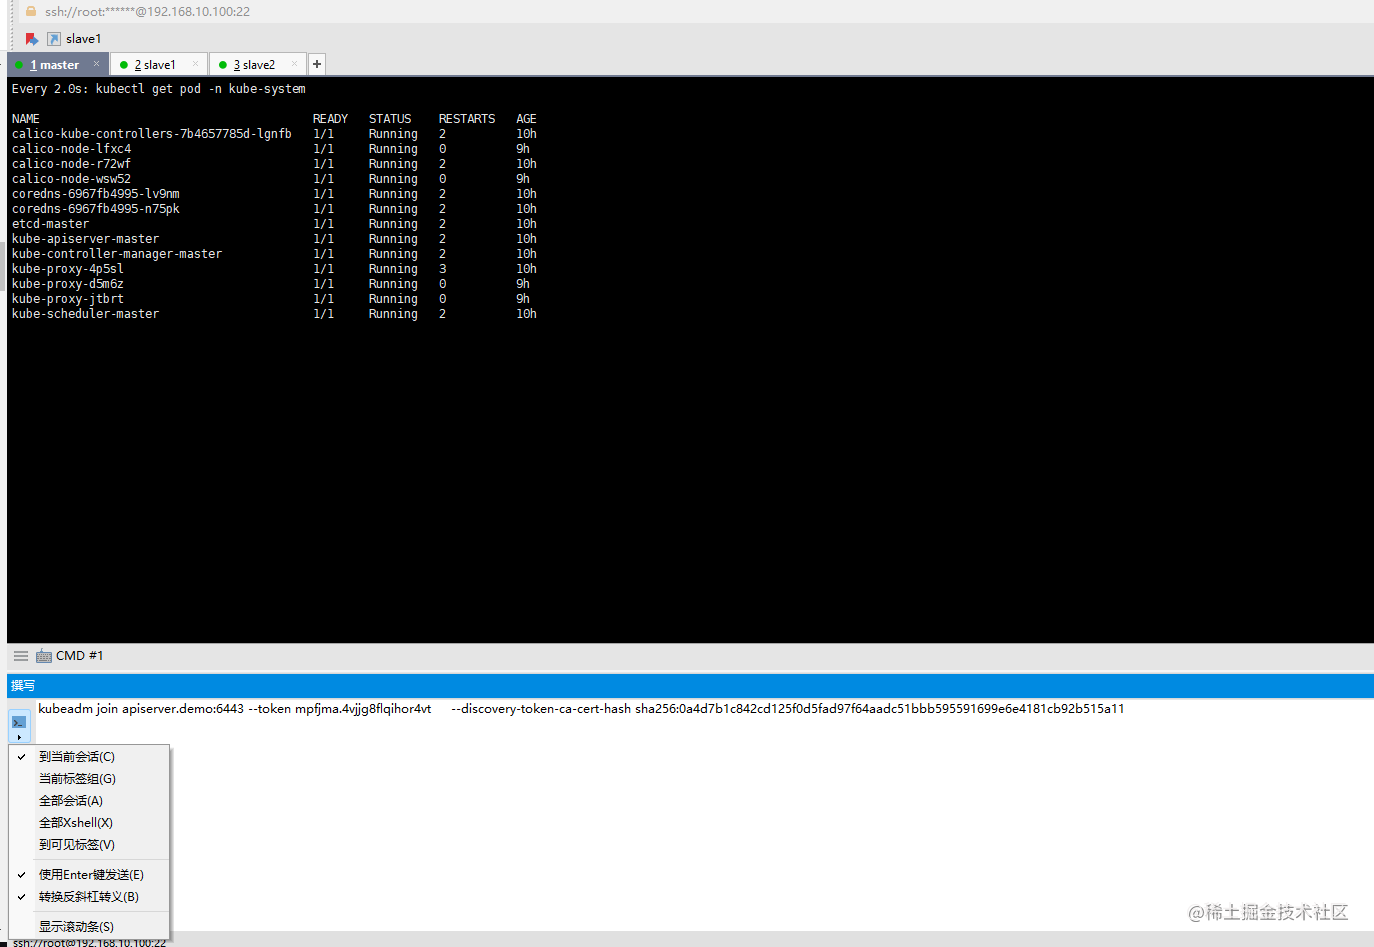
Small knowledge: use the Xshell tool to execute commands in batches (commands that need to be executed by three machines at the same time)
As shown in the following figure, we can select the application scope of the command in the command editing window, and press enter to execute to the corresponding window
Docker installation
Uninstall old version of docker
# Both the master node and the slave node need to be executed
sudo yum remove -y docker \
docker-client \
docker-client-latest \
docker-common \
docker-latest \
docker-latest-logrotate \
docker-logrotate \
docker-selinux \
docker-engine-selinux \
docker-engine
Set docker image source
# Both the master node and the slave node need to be executed
sudo yum install -y yum-utils \
device-mapper-persistent-data \
lvm2
sudo yum-config-manager \
--add-repo \
https://download.docker.com/linux/centos/docker-ce.repo
Install and start docker
# Both the master node and the slave node need to be executed
sudo yum install -y docker-ce-18.09.7 docker-ce-cli-18.09.7 containerd.io
# Auto start
sudo systemctl enable docker
sudo systemctl start docker
# Check doker version
docker version
Install NFS utils
# Both the master node and the slave node need to be executed
sudo yum install -y nfs-utils
nfs utils must be installed before nfs networked storage can be mounted
K8S basic configuration
Configure yum source for K8S
# Both the master node and the slave node need to be executed
cat <<EOF > /etc/yum.repos.d/kubernetes.repo
[kubernetes]
name=Kubernetes
baseurl=http://mirrors.aliyun.com/kubernetes/yum/repos/kubernetes-el7-x86_64
enabled=1
gpgcheck=0
repo_gpgcheck=0
gpgkey=http://mirrors.aliyun.com/kubernetes/yum/doc/yum-key.gpg
       http://mirrors.aliyun.com/kubernetes/yum/doc/rpm-package-key.gpg
EOF
Turn off firewall, SeLinux, swap
# Both the master node and the slave node need to be executed systemctl stop firewalld systemctl disable firewalld setenforce 0 sed -i "s/SELINUX=enforcing/SELINUX=disabled/g" /etc/selinux/config swapoff -a yes | cp /etc/fstab /etc/fstab_bak cat /etc/fstab_bak |grep -v swap > /etc/fstab
Modify / etc / sysctl conf
# Both the master node and the slave node need to be executed
vim /etc/sysctl.conf
Add (append to the end)
net.ipv4.ip_forward = 1
net.bridge.bridge-nf-call-ip6tables = 1
net.bridge.bridge-nf-call-iptables = 1
Execute commands to apply
# Both the master node and the slave node need to be executed
sysctl -p
Install kubelet, kubedm, kubectl
# Both the master node and the slave node need to be executed
yum install -y kubelet-1.15.1 kubeadm-1.15.1 kubectl-1.15.1
Modify the docker Cgroup Driver to systemd. If you do not modify the subsequent, joining the cluster from the node will make an error
# Both the master node and the slave node need to be executed
vim /usr/lib/systemd/system/docker.service
# Set -- exec opt native Cgroupdriver = SYSTEMd added in
# ExecStart=/usr/bin/dockerd -H fd:// --containerd=/run/containerd/containerd. Behind the sock
ExecStart=/usr/bin/dockerd -H fd:// --containerd=/run/containerd/containerd.sock --exec-opt native.cgroupdriver=systemd
Set docker image
Execute the following command to use docker domestic image to improve the download speed and stability of docker image
# Both the master node and the slave node need to be executed
curl -sSL https://get.daocloud.io/daotools/set_mirror.sh | sh -s http://f1361db2.m.daocloud.io
Restart docker and start kubelet
# Both the master node and the slave node need to be executed
systemctl daemon-reload
systemctl restart docker
Launch kubelet
# Both the master node and the slave node need to be executed
systemctl enable kubelet
systemctl start kubelet
Initialize master node
Set the domain name in / etc/hosts
Here, we can set the corresponding domain name for the three hosts for easy access (write the corresponding static IP of each host at x.x.x.x)
# Both the master node and the slave node need to be executed
echo "x.x.x.x  master" >> /etc/hosts
echo "x.x.x.x  slave1" >> /etc/hosts
echo "x.x.x.x  slave2" >> /etc/hosts
Create/ kubeadm-config.yaml
Initialization can only be performed on the master node
# Execute only on the master node
cat <<EOF > ./kubeadm-config.yaml
apiVersion: kubeadm.k8s.io/v1beta1
kind: ClusterConfiguration
kubernetesVersion: v1.15.1
imageRepository: registry.cn-hangzhou.aliyuncs.com/google_containers
controlPlaneEndpoint: "master:6443"
networking:
  podSubnet: "10.100.0.1/20"
EOF
Note: the network segment used by podSubnet cannot overlap with the network segment where the node is located
Initialize apiserver
# Execute only on the master node
kubeadm init --config=kubeadm-config.yaml --upload-certs
Here is the most error prone point. Don't panic when running wrong. Just translate the error and solve it accordingly (the port may be occupied, the version may not correspond, and some steps above may be configured incorrectly)
If there is no mistake, it will be slower here. Wait a few minutes
Your kubernetes control plane has initialized successfully will be output normally! Then balabalabala a pile of content, pay attention
Your Kubernetes control-plane has initialized successfully!
To start using your cluster, you need to run the following as a regular user:
mkdir -p $HOME/.kube
sudo cp -i /etc/kubernetes/admin.conf $HOME/.kube/config
sudo chown $(id -u):$(id -g) $HOME/.kube/config
You should now deploy a pod network to the cluster.
Run "kubectl apply -f [podnetwork].yaml" with one of the options listed at:
https://kubernetes.io/docs/concepts/cluster-administration/addons/
You can now join any number of the control-plane node running the following command on each as root:
kubeadm join master:6443 --token hdlzr4.xit38cbhscw2uyii \
--discovery-token-ca-cert-hash sha256:0a4d7b1c842cd125f0d5fad97f64aadc51bbb595591699e6e4181cb92b515a11 \
--control-plane --certificate-key 58d2c5f895097bfde0124955f7c1355f633f51bd0317b9b5bfcf6f3df0272189
Please note that the certificate-key gives access to cluster sensitive data, keep it secret!
As a safeguard, uploaded-certs will be deleted in two hours; If necessary, you can use
"kubeadm init phase upload-certs --upload-certs" to reload certs afterward.
Then you can join any number of worker nodes by running the following on each as root:
kubeadm join master:6443 --token hdlzr4.xit38cbhscw2uyii \
--discovery-token-ca-cert-hash sha256:0a4d7b1c842cd125f0d5fad97f64aadc51bbb595591699e6e4181cb92b515a11
Initialize kubectl configuration for root user
# Execute only on the master node
rm -rf /root/.kube/
mkdir /root/.kube/
cp -i /etc/kubernetes/admin.conf /root/.kube/config
Installing calico
# Execute only on the master node
kubectl apply -f https://docs.projectcalico.org/v3.6/getting-started/kubernetes/installation/hosted/kubernetes-datastore/calico-networking/1.7/calico.yaml
When calico is installed, execute the following command and wait for 3-10 minutes until all container groups are in Running state
# Execute only on the master node
watch kubectl get pod -n kube-system
Check the initialization result of the master
# Execute only on the master node
kubectl get nodes
In this way, we have installed the master node
Initialize slave node
Get join command parameters
# Execute only on the master node
kubeadm token create --print-join-command
Here we will get a token. Note that the token expires
Use the join command on the slave node. Careful students will find that this command has been printed on the screen after the master node is initialized successfully
# Execute only on the slave node
kubeadm join master:6443 --token hdlzr4.xit38cbhscw2uyii \
    --discovery-token-ca-cert-hash sha256:0a4d7b1c842cd125f0d5fad97f64aadc51bbb595591699e6e4181cb92b515a11
Check initialization results
All slave nodes join in, and the cluster is initialized successfully
# Execute only on the master node
[root@master ~]# kubectl get nodes
NAME     STATUS   ROLES    AGE   VERSION
master   Ready    master   10h   v1.15.1
slave1   Ready    <none>   10h   v1.15.1
slave2   Ready    <none>   10h   v1.15.1
Remove worker node
Installation error, or you want to exit the cluster
# Execute only on the slave node
kubeadm reset
# Only after node is executed on the master node is the node name. kubectl get nodes knows the node name
kubectl delete node slave1
Installing Ingress Controller
# Execute only on the master node
kubectl apply -f https://raw.githubusercontent.com/eip-work/eip-monitor-repository/master/dashboard/nginx-ingress.yaml
Configure domain name resolution
Add domain name * com resolves to the IP address z.z.z.z of slave1 (or the address y.y.y.y of slave2)
Verify: access *. In browser com, you will get 404 NotFound error page
Due to the need to apply for domain names, the process will be cumbersome. There are two alternatives:
- Set hosts on your client machine;
- Temporarily abandon the configuration of domain name and temporarily use NodePort or kubectl port forward to access the web application deployed on K8S
The installation of the real production environment will be more complex and more problems need to be considered. The cluster built in this paper can be used for learning. After Kubernetes is installed, the corresponding graphical interface needs to be installed to operate K8s for ease of use.