The previous blogs have talked about Spring in succession. Today we will talk about Spring MVC in our blog. Spring MVC currently occupies a place in Java EE development and is relatively easy to use. Low coupling, high cohesion, using some annotations and Java configuration classes can achieve good decoupling. Today we'll look at how to configure Spring MVC using Maven and then use it in our Web project.
This blog is a continuation of the previous blog. In the last blog, we described in detail the configuration of Java environment, Eclipse installation of Java EE version, Maven installation and configuration, Tomcat installation and configuration. And we installed M2Eclipse and STS plug-ins for our Eclipse. And create and run a Web App managed by Maven. This blog is based on the Web App project created by the previous blog. For the details of the previous blog, please move on to< Eclipse-based environment construction for JavaEE development and Maven Web App creation>.
Preparations for introducing Spring MVC
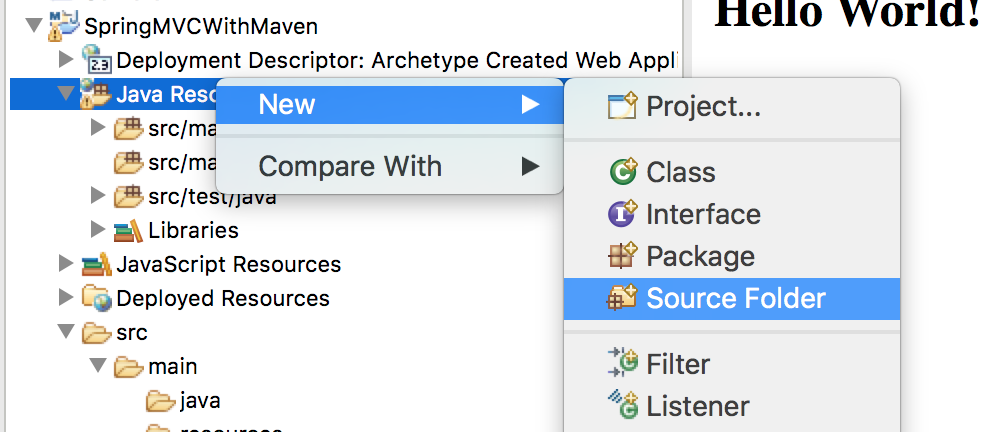
In the last blog we created Maven-managed Web App, and below is our Spring MVC stuff. There is one less directory in the project we created. There is also a src/test/resources directory in Spring MVC, which is not available in the project we just created, so we have to create this directory by right-clicking Java Resources - > New - > Source Folder. As follows:
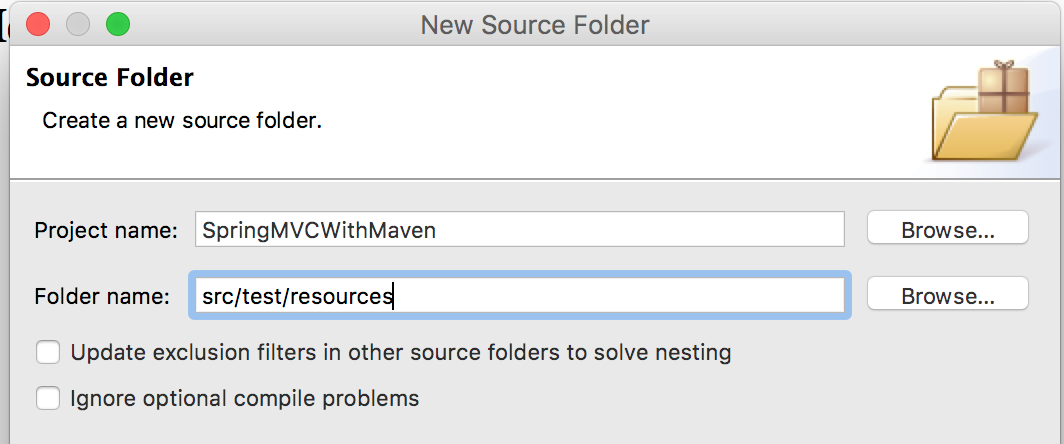
Then select our project and enter our Folder name, as shown below.
After adding the directory, we need to edit the Output folder of the directory created above. Let's first look at the Output folder in the src/test/java directory, taget/test-classes. Our newly added src/test/resources also needs to be set to target/test-classes. We need to select the entry and edit it, as shown below.
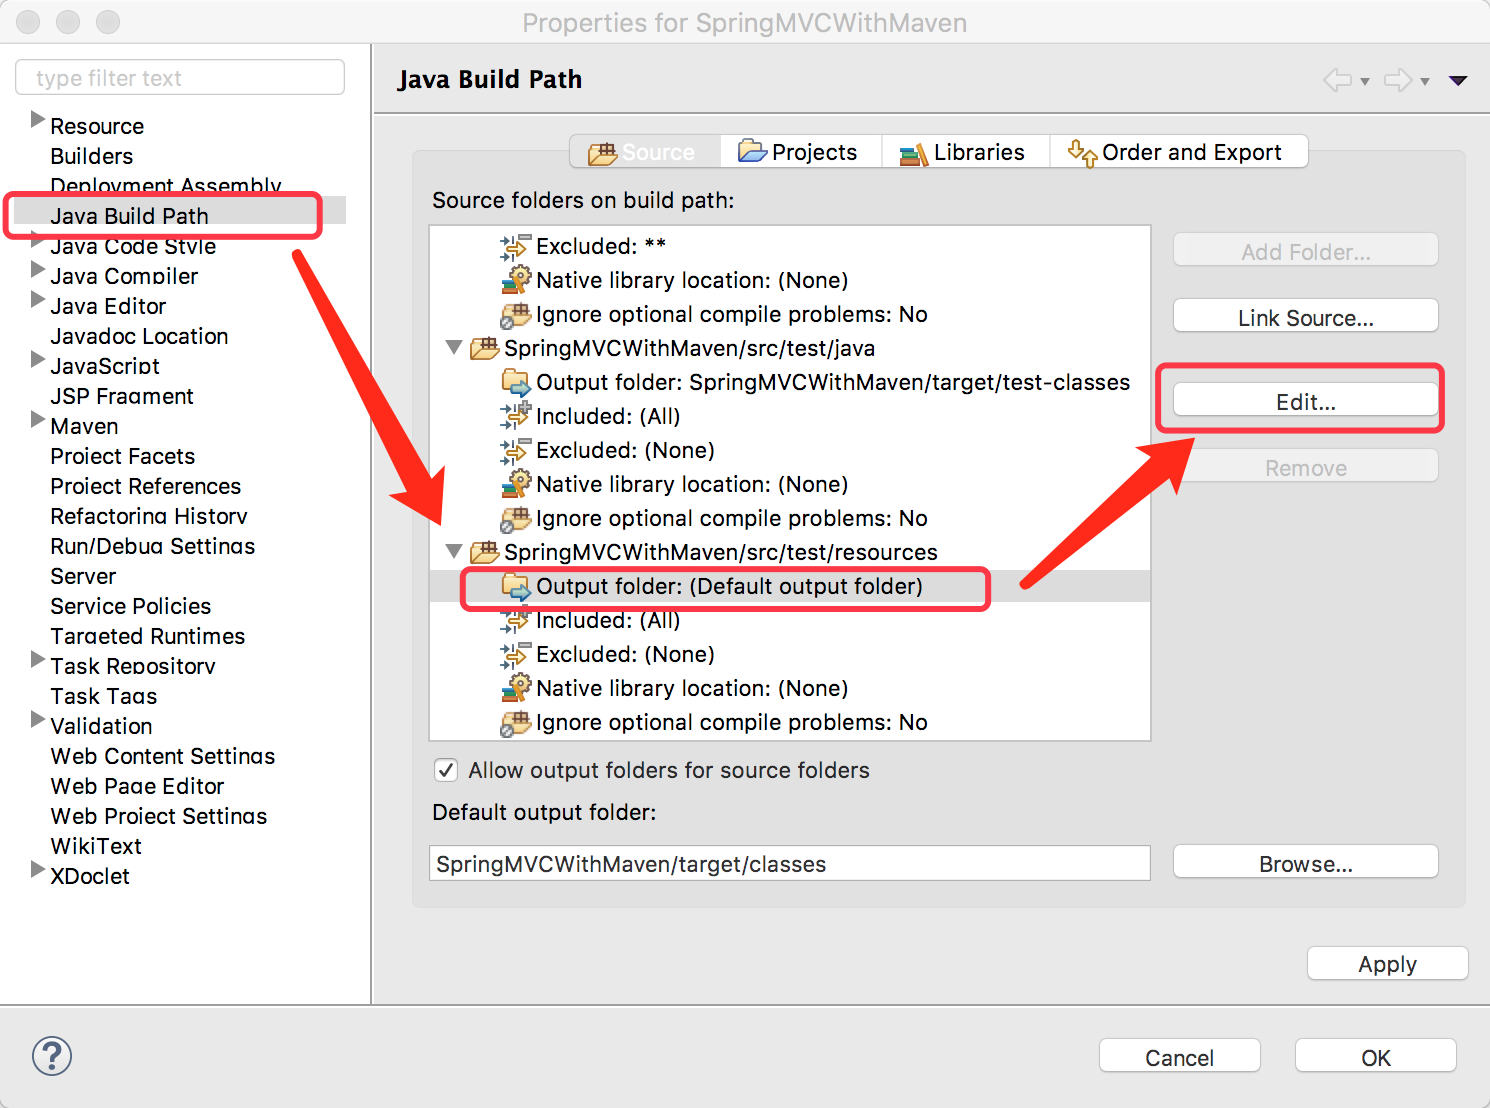
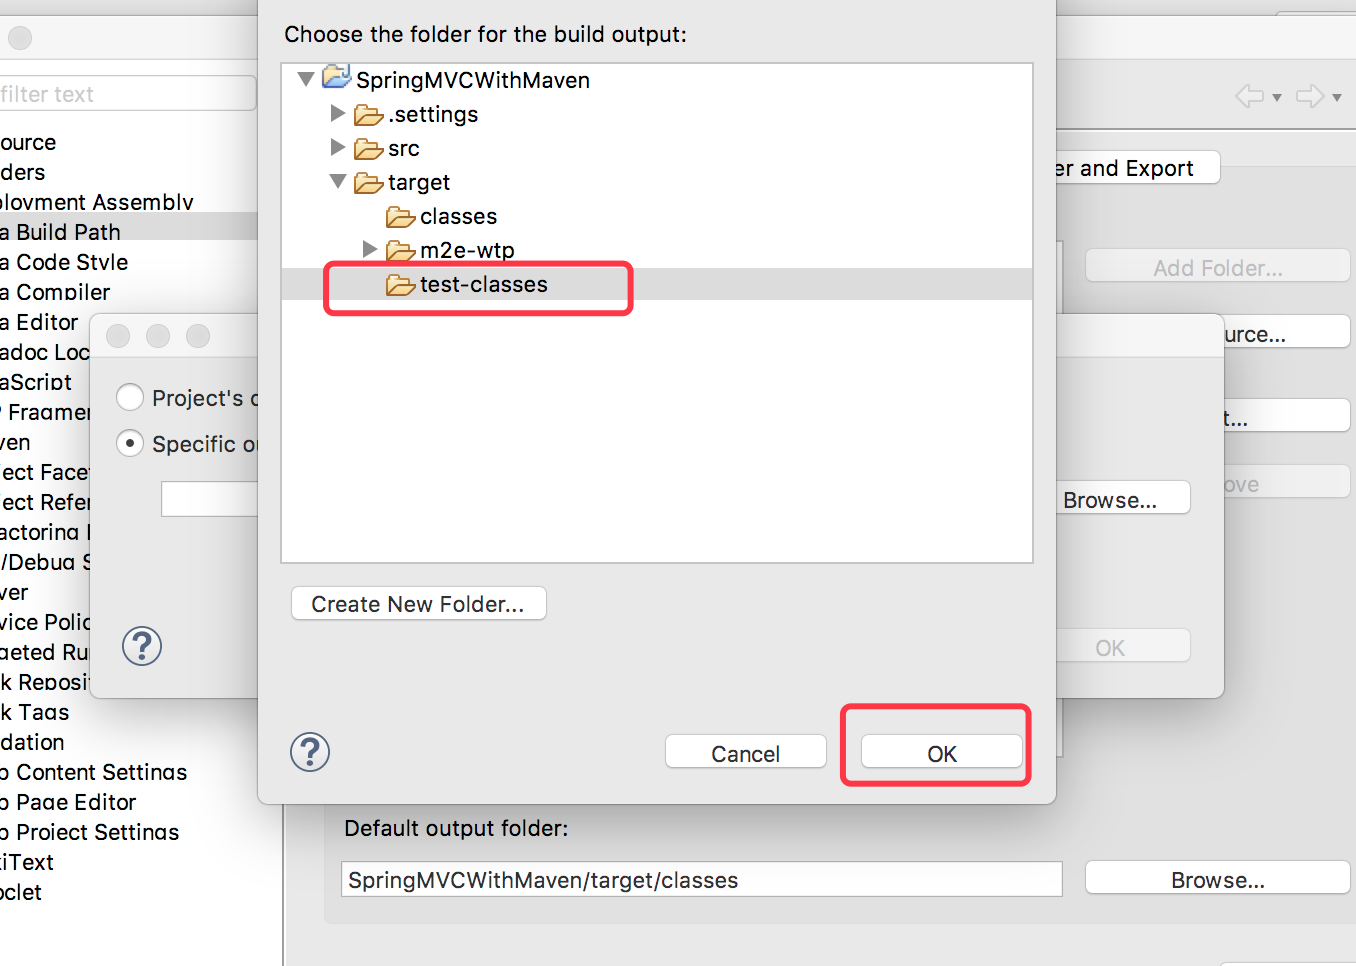
Select test-classes when editing, then click OK to complete the settings, as follows:
2. Configuring Spring MVC through Maven
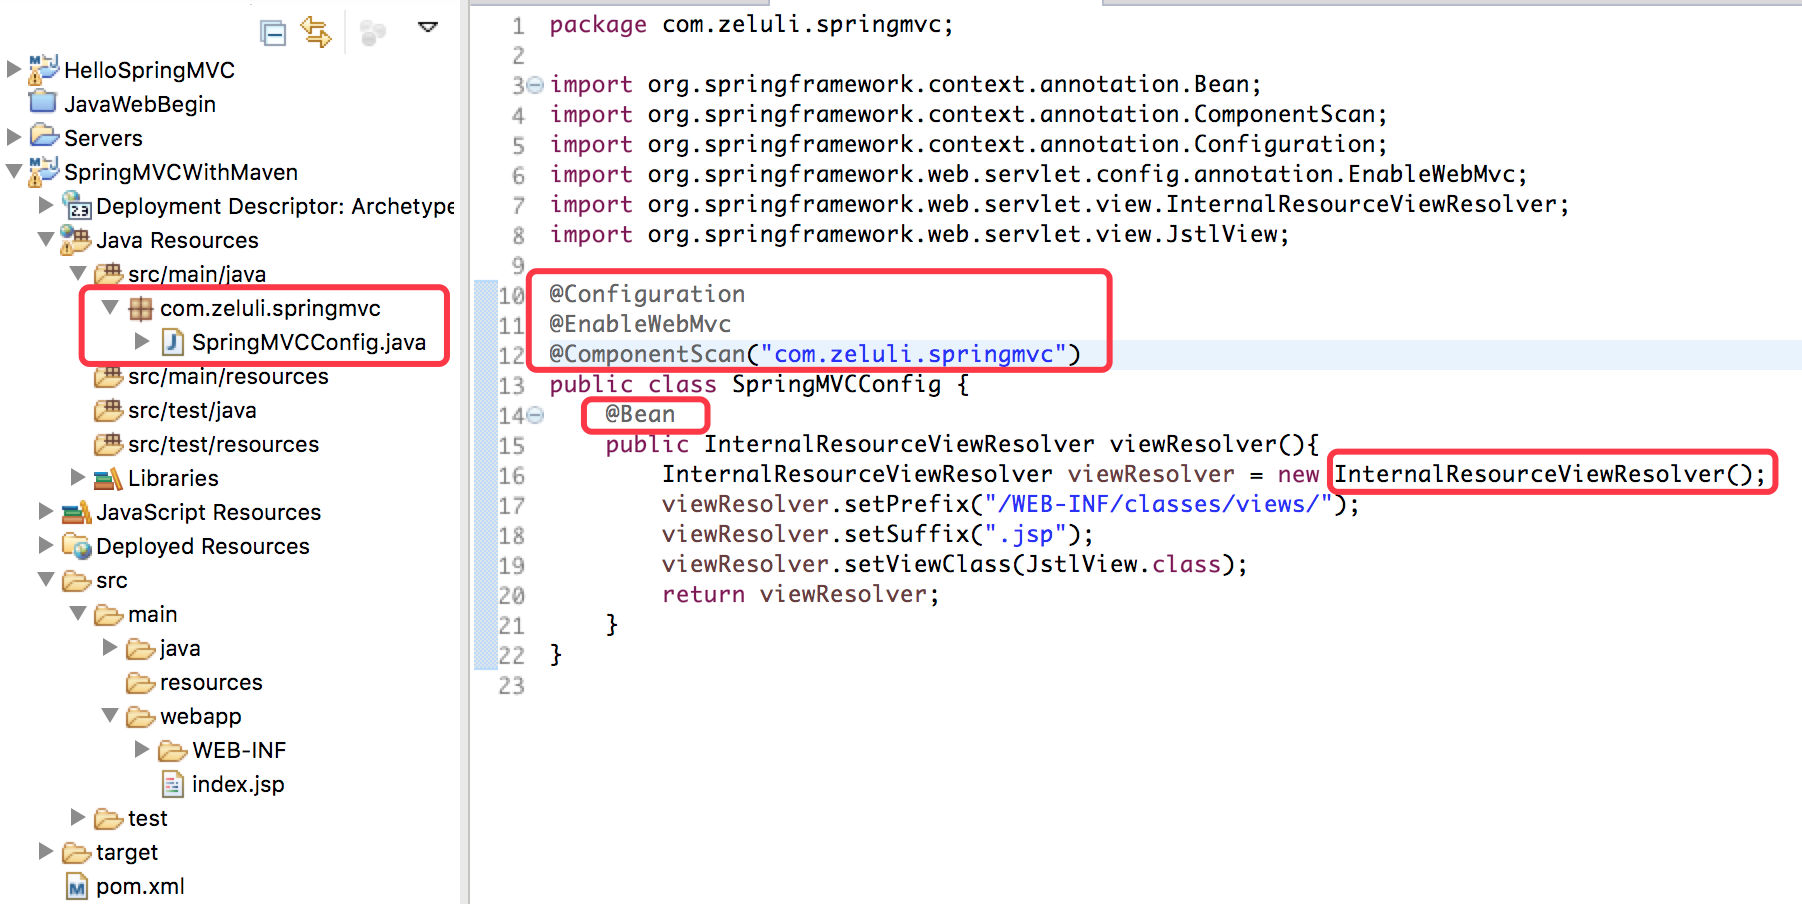
Now that we're ready, it's time to configure our Spring MVC using Maven. In this section, we will add Spring MVC and its dependent libraries in pom.xml. Then we will introduce our Spring MVC related things in the form of Java configuration. Finally, we will give a simple example.
1. Configure dependency libraries in pom.xml
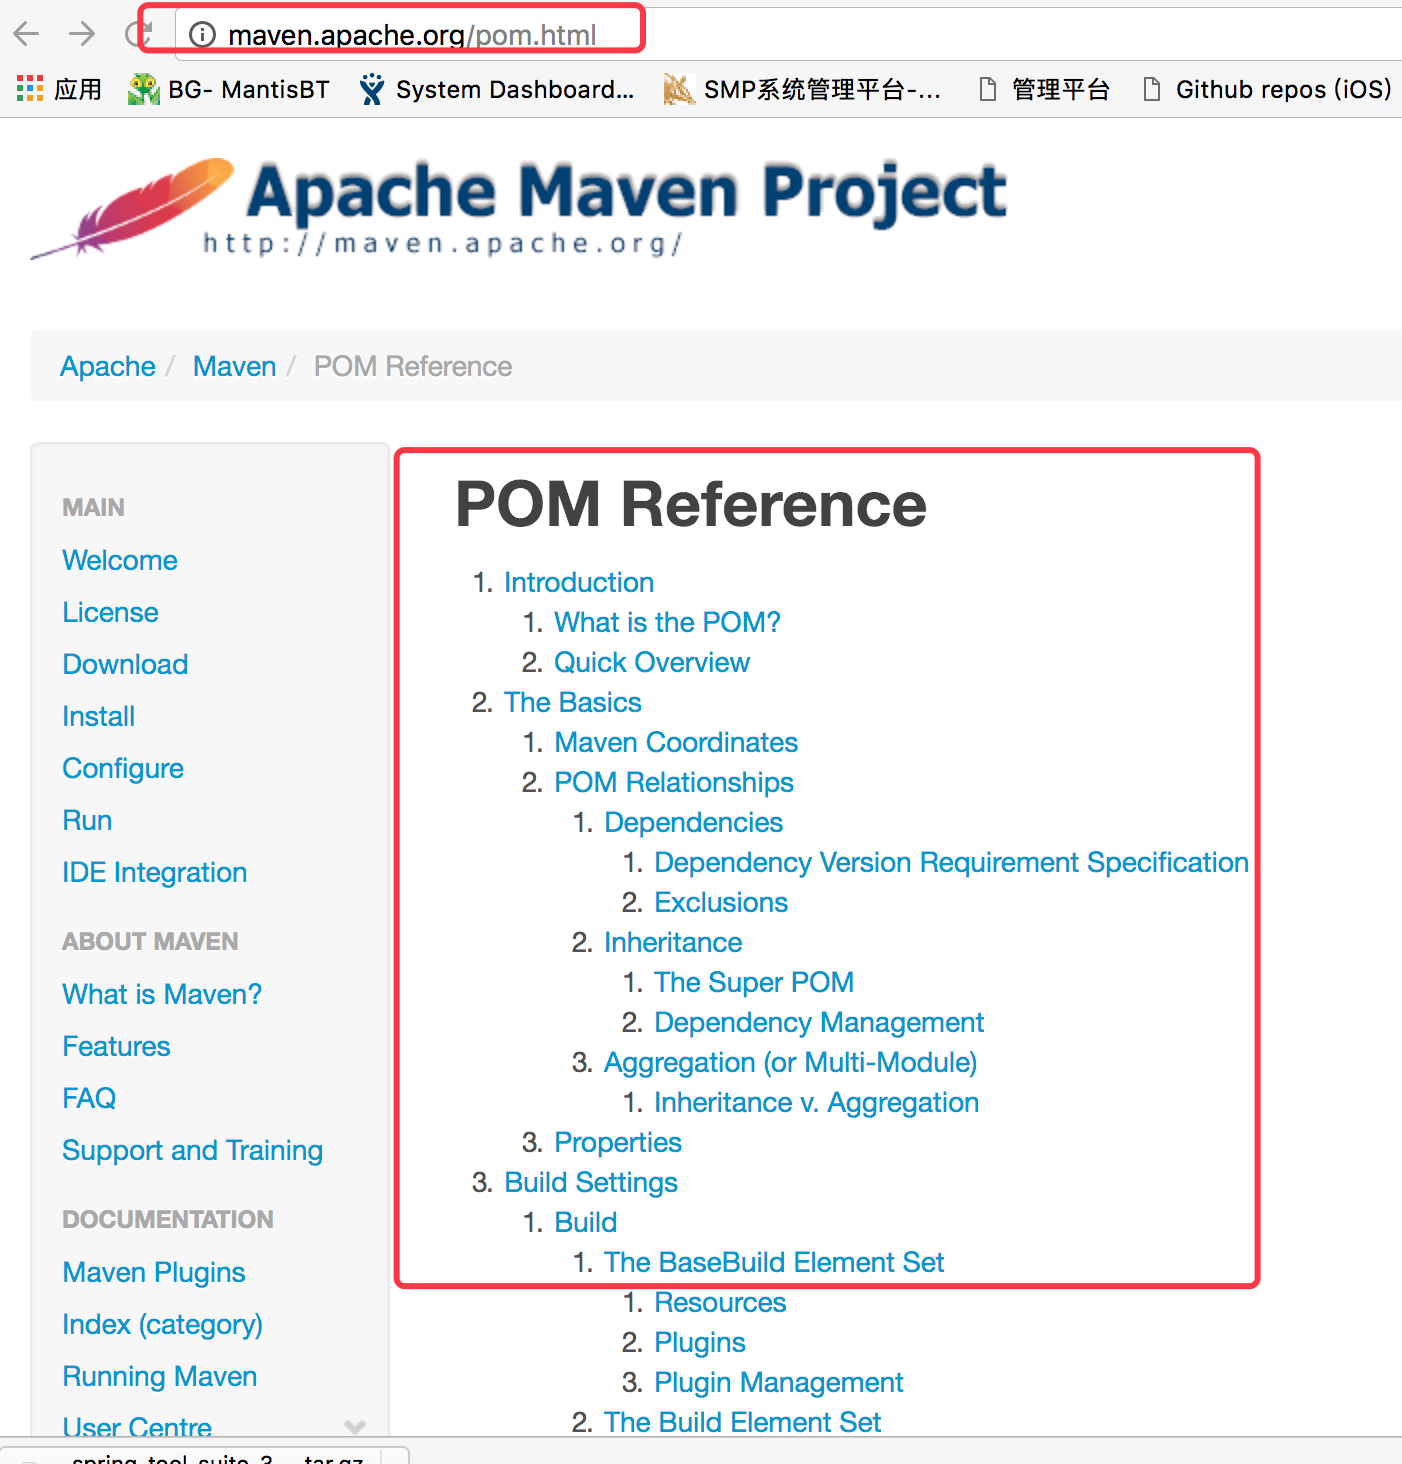
The configuration of Maven's pom.xml is not discussed here, Maven's official website( http://maven.apache.org/ ) There are detailed examples. Among them, POM Reference provides a specific solution for Pom configuration, especially complete. That won't go anywhere, so the configuration of pom.xml in this blog will not go into much detail. For more details, please go to the official website.
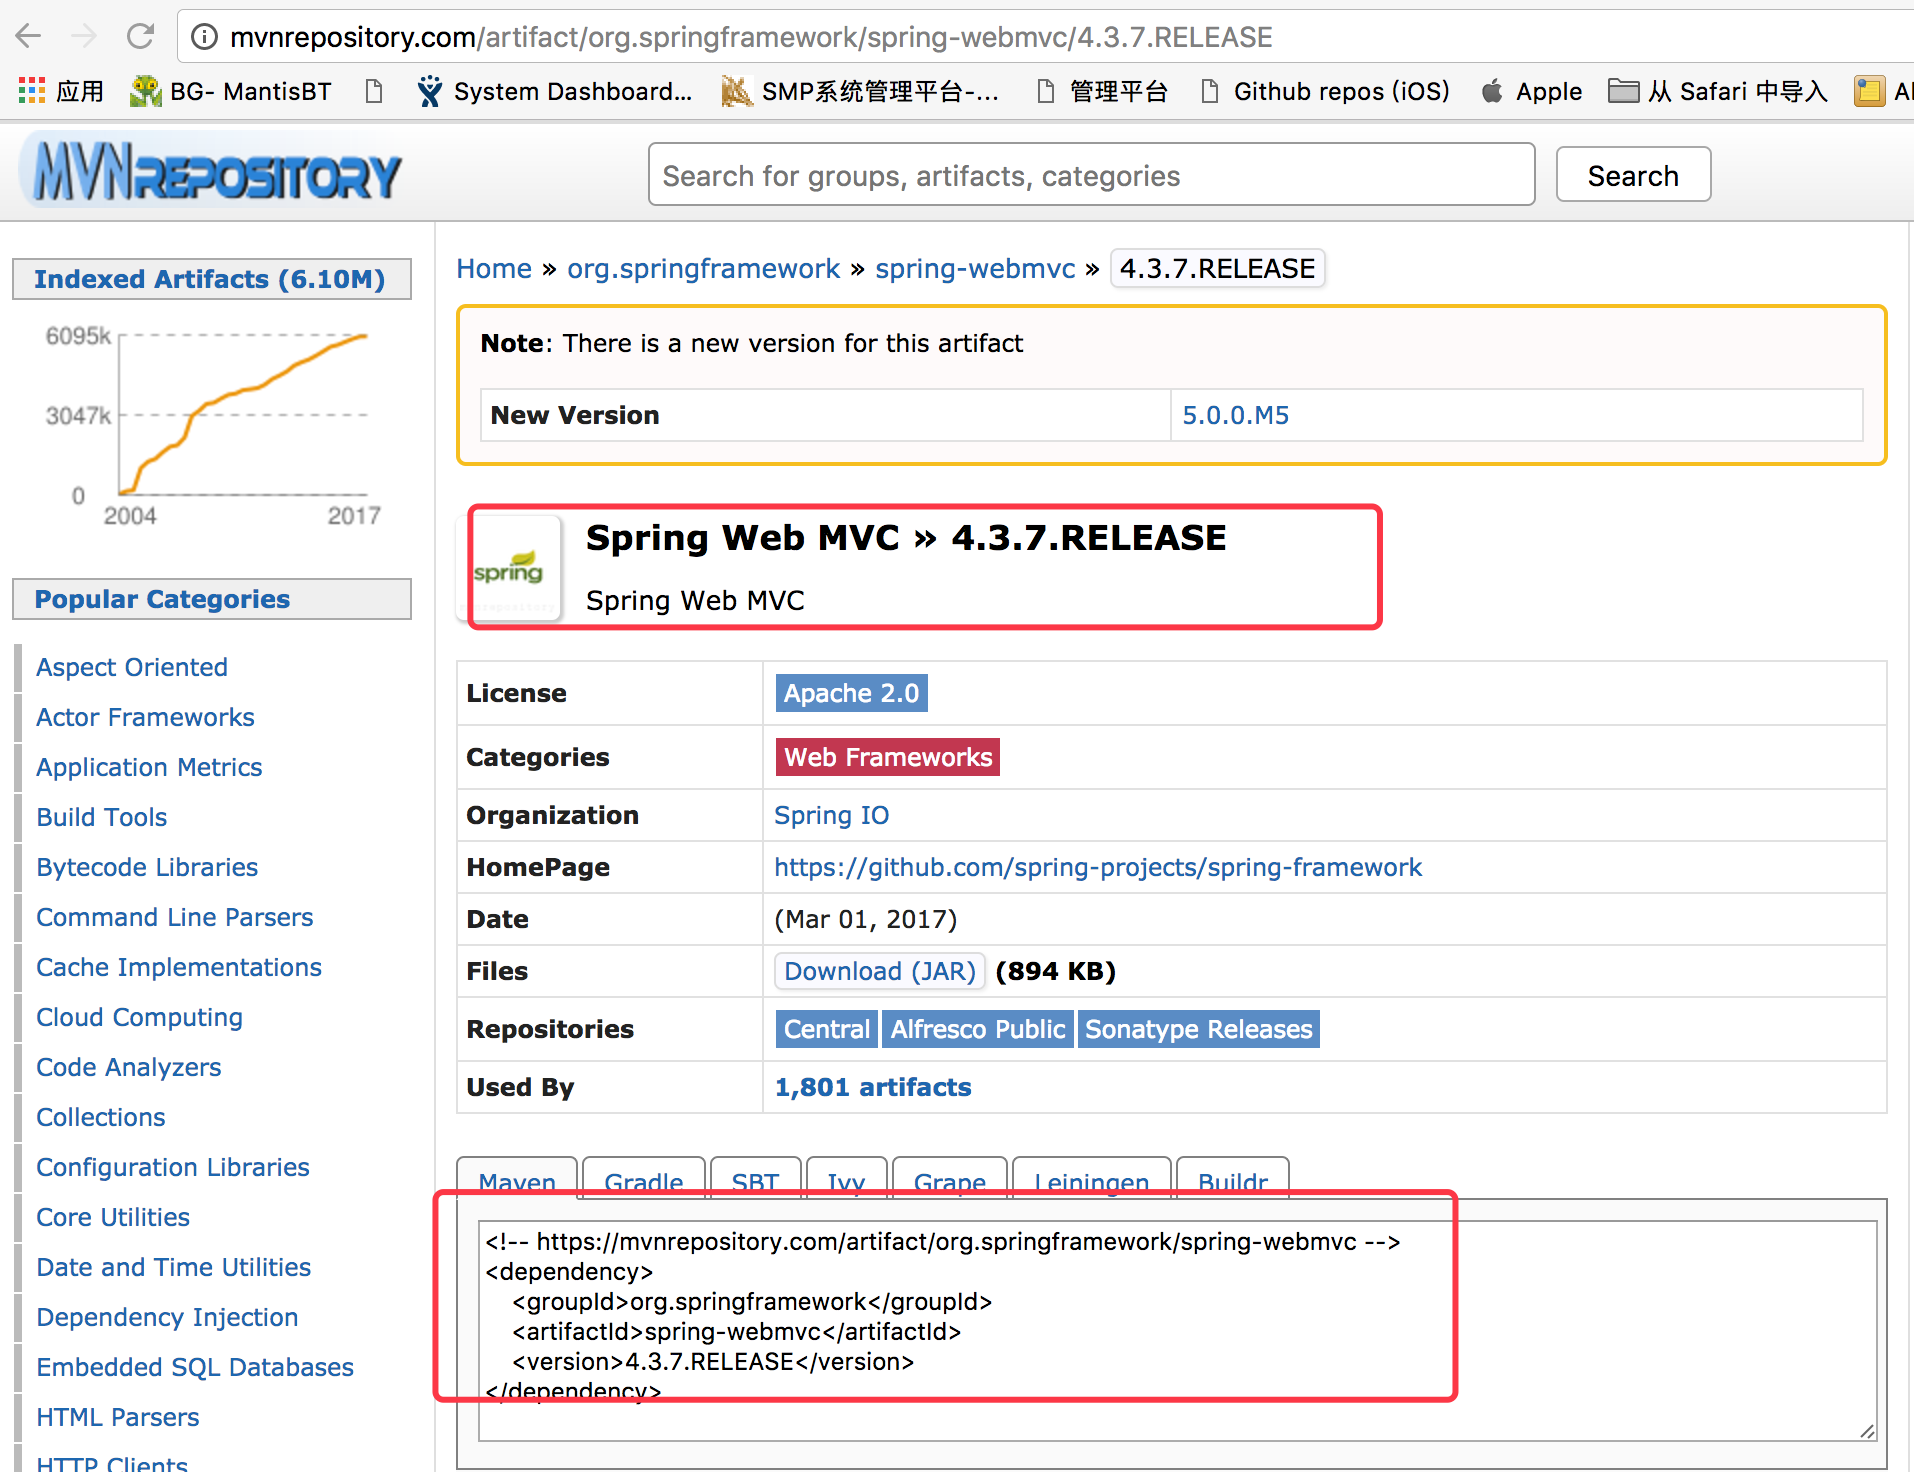
The third-party libraries supported by Maven are available in http://mvnrepository.com/ As you can see, you can search the library you want in the search bar and get the corresponding version. As follows:
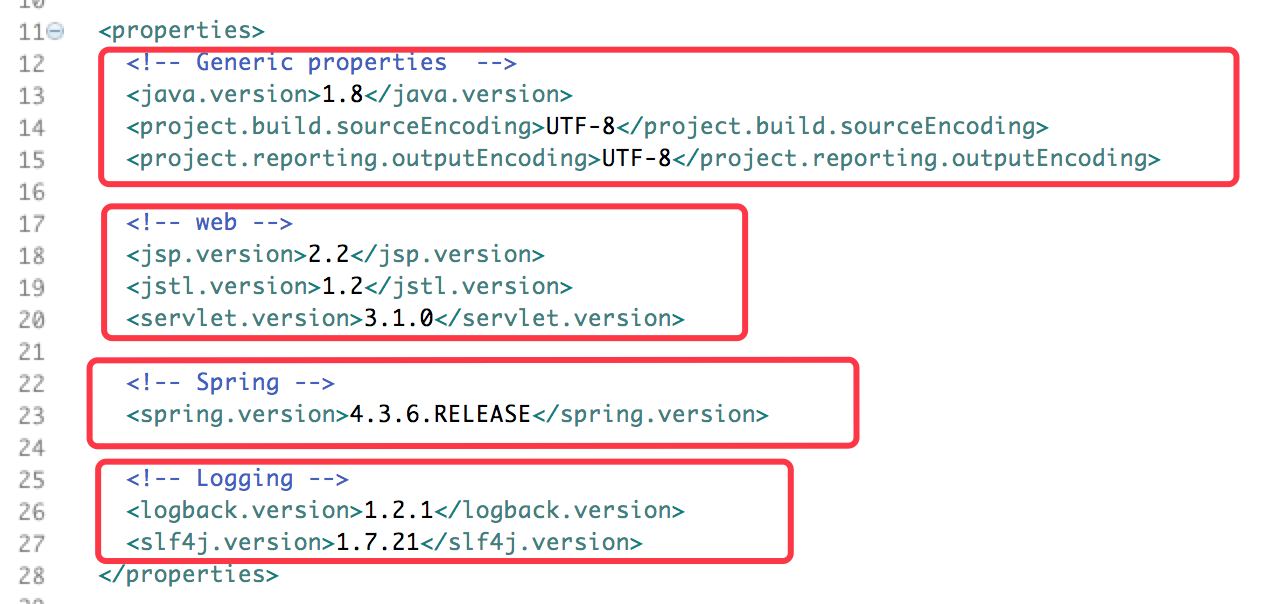
First, add some attributes to pom.xml, which will be used when configuring dependency libraries, most of which are versions of dependency libraries. These attributes act like macro definitions, making it easier for us to change later versions. Below are all the attributes of the project covered in this blog, as follows:
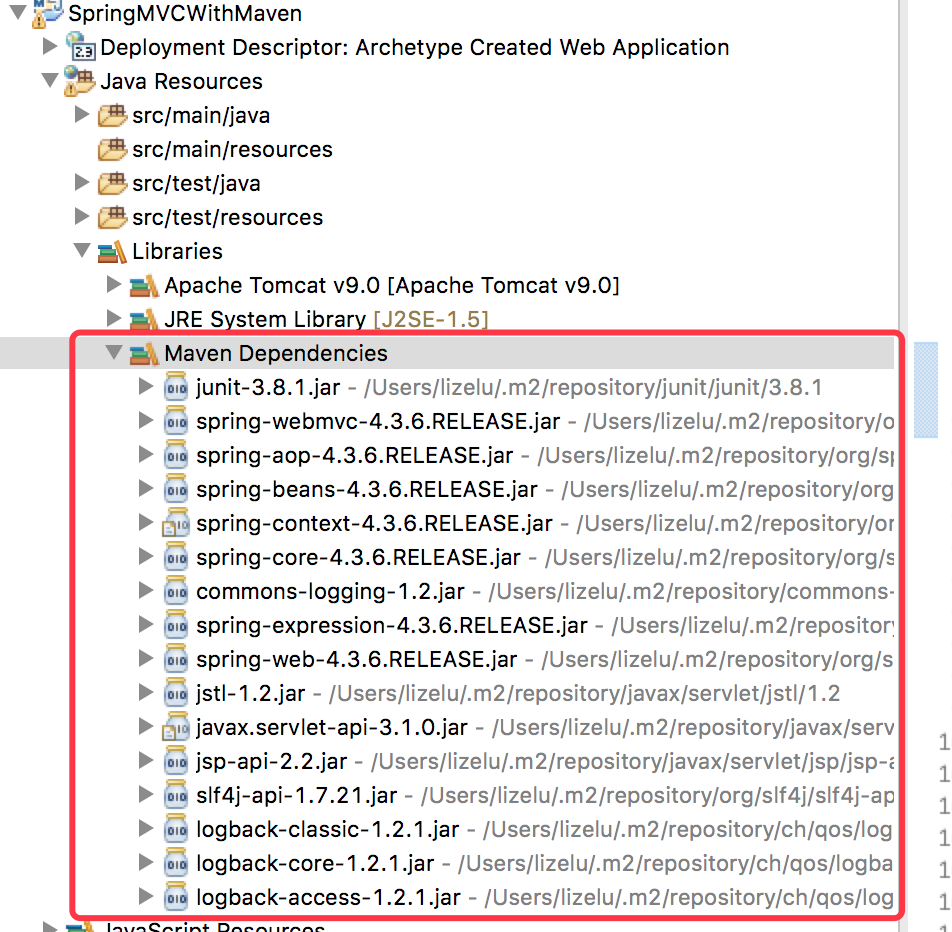
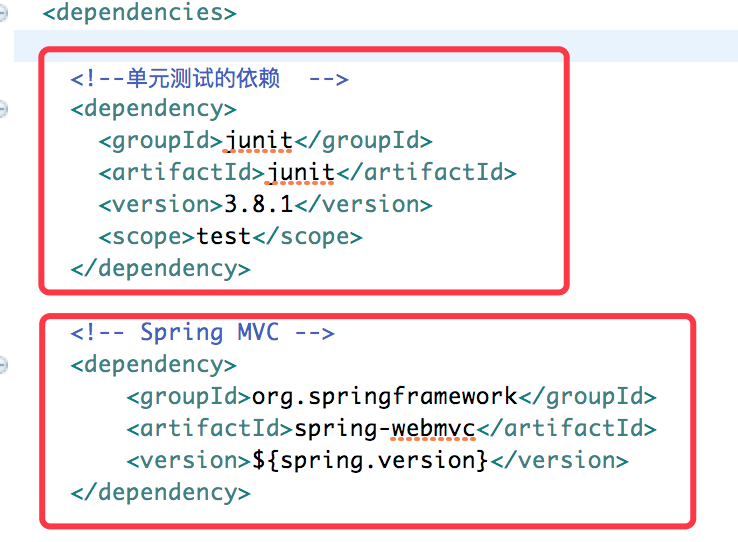
Then add the dependencies of the unit test as well as spring-webmvc dependencies, as shown below. The following configuration of spring-webmvc is used for the spring-version we defined above.
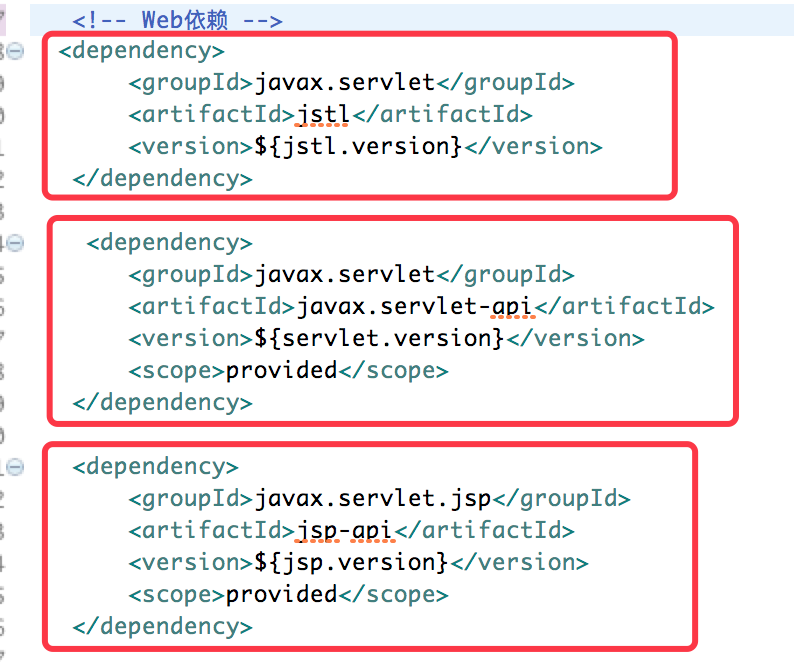
Then add the jstl template library, servlet and jsp dependency library, as shown below. Of course, different libraries correspond to different version attribute values, as follows:
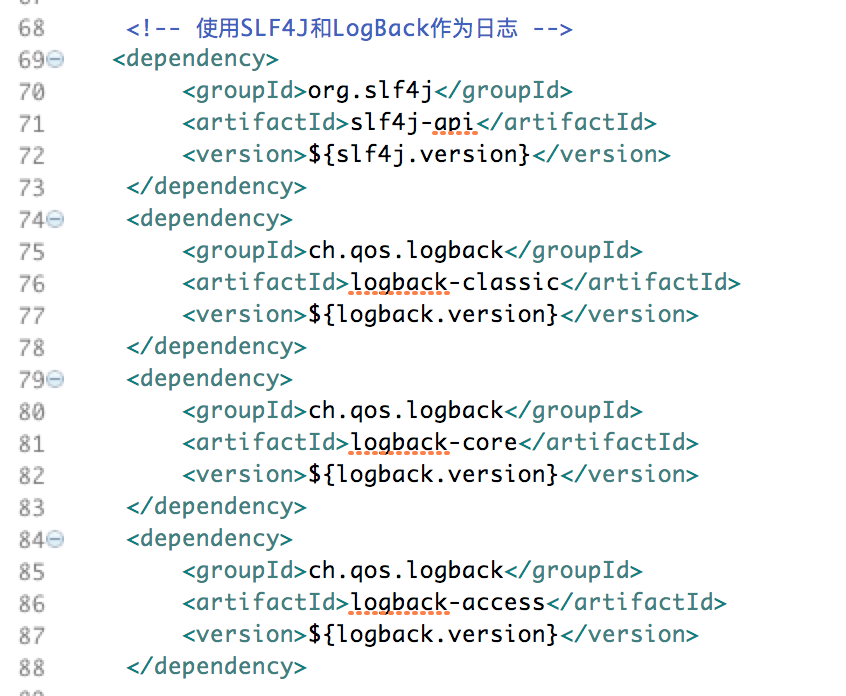
Then add SLF4J and LogBack to output the log, as follows:
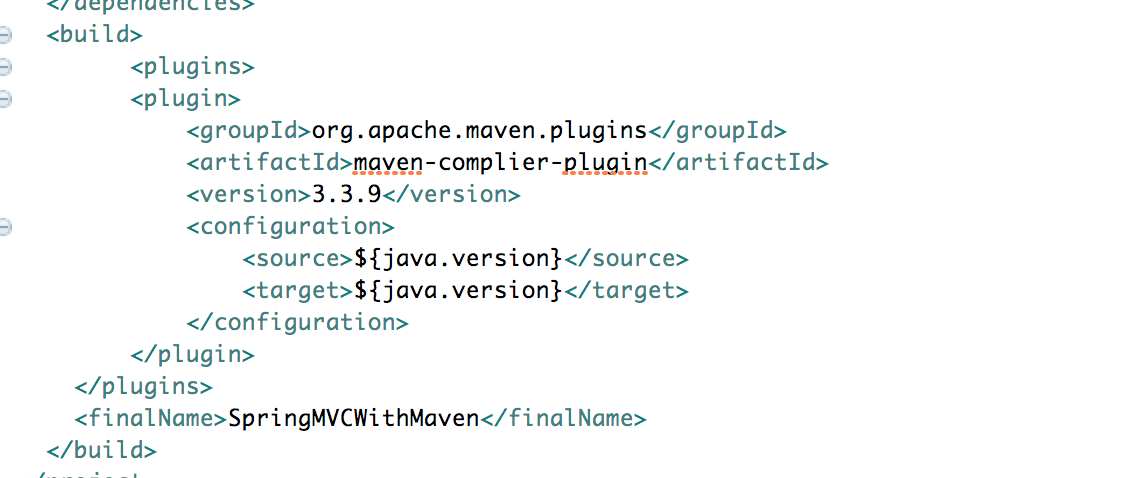
Finally, we added our Maven plug-in, which is the version of the M2Eclipse plug-in we installed earlier, as follows:
The following is the complete pom.xml of the project covered in this blog:
pom.xml <project xmlns="http://maven.apache.org/POM/4.0.0" xmlns:xsi="http://www.w3.org/2001/XMLSchema-instance" xsi:schemaLocation="http://maven.apache.org/POM/4.0.0 http://maven.apache.org/maven-v4_0_0.xsd"> <modelVersion>4.0.0</modelVersion> <groupId>com.zeluli</groupId> <artifactId>SpringMVCWithMaven</artifactId> <packaging>war</packaging> <version>0.0.1-SNAPSHOT</version> <name>SpringMVCWithMaven Maven Webapp</name> <url>http://maven.apache.org</url> <properties> <!-- Generic properties --> <java.version>1.8</java.version> <project.build.sourceEncoding>UTF-8</project.build.sourceEncoding> <project.reporting.outputEncoding>UTF-8</project.reporting.outputEncoding> <!-- web --> <jsp.version>2.2</jsp.version> <jstl.version>1.2</jstl.version> <servlet.version>3.1.0</servlet.version> <!-- Spring --> <spring.version>4.3.6.RELEASE</spring.version> <!-- Logging --> <logback.version>1.2.1</logback.version> <slf4j.version>1.7.21</slf4j.version> </properties> <dependencies> <!--Dependence on unit testing --> <dependency> <groupId>junit</groupId> <artifactId>junit</artifactId> <version>3.8.1</version> <scope>test</scope> </dependency> <!-- Spring MVC --> <dependency> <groupId>org.springframework</groupId> <artifactId>spring-webmvc</artifactId> <version>${spring.version}</version> </dependency> <!-- Web rely on --> <dependency> <groupId>javax.servlet</groupId> <artifactId>jstl</artifactId> <version>${jstl.version}</version> </dependency> <dependency> <groupId>javax.servlet</groupId> <artifactId>javax.servlet-api</artifactId> <version>${servlet.version}</version> <scope>provided</scope> </dependency> <dependency> <groupId>javax.servlet.jsp</groupId> <artifactId>jsp-api</artifactId> <version>${jsp.version}</version> <scope>provided</scope> </dependency> <!-- Adding Object Orientation json or xml Conversion support --> <!-- https://mvnrepository.com/artifact/com.fasterxml.jackson.dataformat/jackson-dataformat-xml --> <dependency> <groupId>com.fasterxml.jackson.dataformat</groupId> <artifactId>jackson-dataformat-xml</artifactId> <version>2.8.6</version> </dependency> <!-- Add to json Data binding support --> <!-- https://mvnrepository.com/artifact/com.fasterxml.jackson.core/jackson-databind --> <dependency> <groupId>com.fasterxml.jackson.core</groupId> <artifactId>jackson-databind</artifactId> <version>2.8.6</version> </dependency> <!-- Use SLF4J and LogBack As a log --> <dependency> <groupId>org.slf4j</groupId> <artifactId>slf4j-api</artifactId> <version>${slf4j.version}</version> </dependency> <dependency> <groupId>ch.qos.logback</groupId> <artifactId>logback-classic</artifactId> <version>${logback.version}</version> </dependency> <dependency> <groupId>ch.qos.logback</groupId> <artifactId>logback-core</artifactId> <version>${logback.version}</version> </dependency> <dependency> <groupId>ch.qos.logback</groupId> <artifactId>logback-access</artifactId> <version>${logback.version}</version> </dependency> </dependencies> <build> <plugins> <plugin> <groupId>org.apache.maven.plugins</groupId> <artifactId>maven-complier-plugin</artifactId> <version>3.3.9</version> <configuration> <source>${java.version}</source> <target>${java.version}</target> </configuration> </plugin> </plugins> <finalName>SpringMVCWithMaven</finalName> </build> </project>