[JavaScript] Web magnifying glass effect case
- Deepen the understanding and application of e.pageX, e.pageY, offsetLeft, offsetTop, offsetWidth and offsetHeight
- Application of mouse events mouseover, mouseout and MouseMove
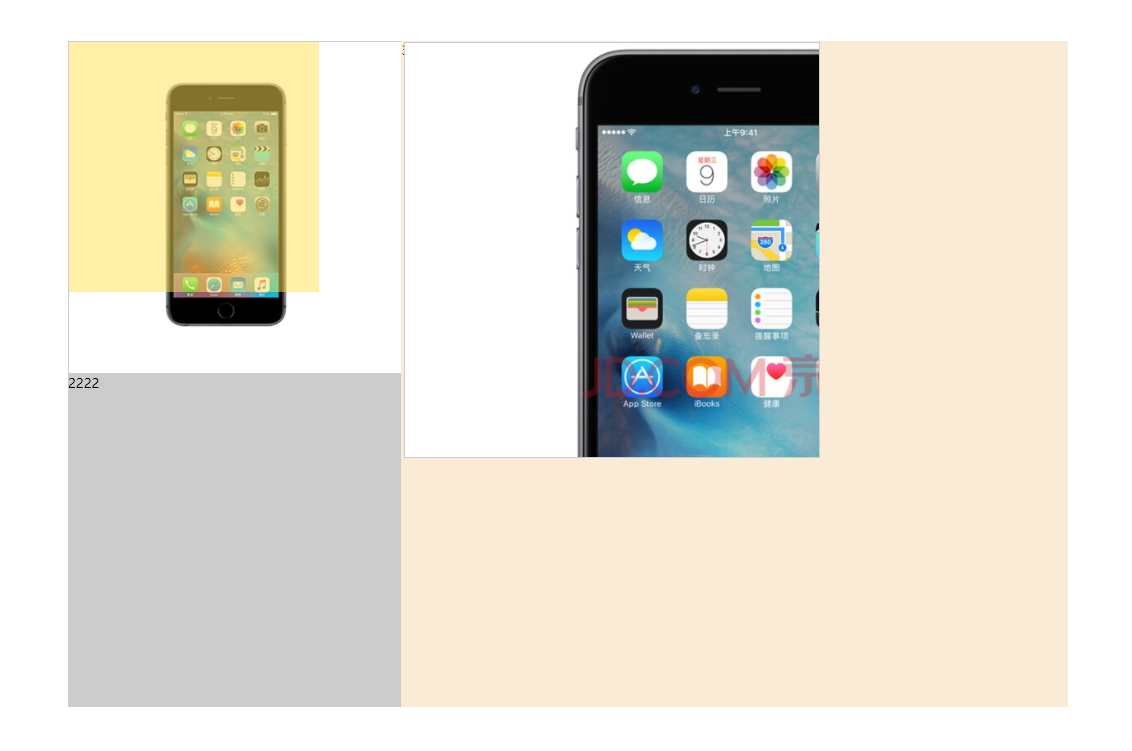
Implementation effect: the mouse moves in the small picture on the left, and the enlarged effect of this part of the area is displayed on the right.
Effect preview:

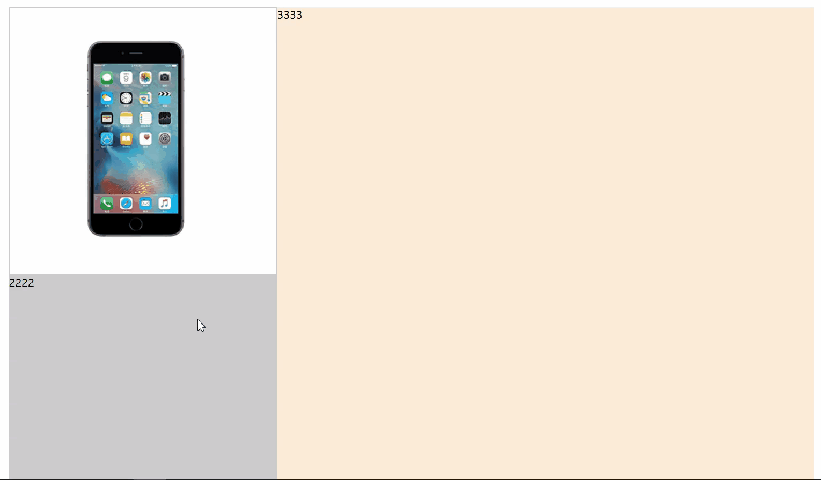
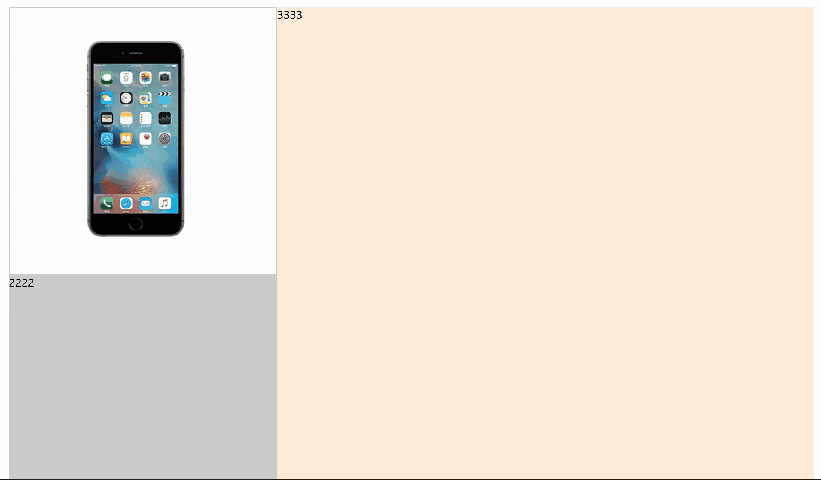
First, build a simple web page structure:
<style>
    * {
        margin: 0;
        padding: 0;
    }

    .wrap {
        width: 1200px;
        margin: 50px auto;
        background-color: #ccc;
        overflow: hidden;
    }

    .left {
        float: left;
        width: 400px;
    }

    .right {
        float: left;
        width: 800px;
        height: 800px;
        background-color: antiquewhite;
    }

    .preview-img {
        height: 400px;
        border: 1px solid #ccc;
        box-sizing: border-box;
        position: relative;
        cursor: move;
    }

    .mask {
        position: absolute;
        left: 0;
        top: 0;
        width: 300px;
        height: 300px;
        background-color: #FEDE4F;
        opacity: 0.5;
        /*display: none;*/
    }

    .big {
        position: absolute;
        top: 0;
        left: 101%;
        width: 500px;
        height: 500px;
        border: 1px solid #ccc;
        box-sizing: border-box;
        background-color: pink;
        overflow: hidden;
        /*display: none;*/
    }
</style>

<body>
    <div class="wrap">
        <div class="left">
            <div class="preview-img">
                <img src="images/small.png" alt="">
                <div class="mask"></div>
                <div class="big">
                    <img src="images/big.jpg" alt="" id="bigImg">
                </div>
            </div>
            <div>2222</div>
        </div>
        <div class="right">
            3333
        </div>
    </div>
</body>
The effect is as follows:
1, First, implement: the mouse passes through preview_ When img, the effect of mask occlusion layer and big box will be displayed. When the mouse leaves, it will be hidden.
This is relatively simple. First, hide the mask masking layer and big box, and then implement it through mouseover and mouseout functions.
The code is as follows:
- First, hide the mask and big box.
<style>
	.mask {
	        position: absolute;
	        left: 0;
	        top: 0;
	        width: 300px;
	        height: 300px;
	        background-color: #FEDE4F;
	        opacity: 0.5;
	        display: none;
	    }

    .big {
        position: absolute;
        top: 0;
        left: 101%;
        width: 500px;
        height: 500px;
        border: 1px solid #ccc;
        box-sizing: border-box;
        background-color: pink;
        overflow: hidden;
        display: none;
    }
</style>
- Bind the mouse passing and mouse leaving events to previewImg.
var mask = document.querySelector('.mask');
var big = document.querySelector('.big');
var previewImg = document.querySelector('.preview-img');
var bigImg = document.getElementById('bigImg');
//Mouse over display
previewImg.addEventListener('mouseover', function () {
    mask.style.display = 'block';
    big.style.display = 'block';
})
//Mouse away hidden
previewImg.addEventListener('mouseout', function () {
    mask.style.display = 'none';
    big.style.display = 'none';
})
The effect is as follows:
2, Implementation: mask moves with the mouse. Because the mouse moves in previewImg, the mouse move event is bound to previewImg.
- Calculate the coordinates of the mouse in the previewImg box.
previewImg looks up for the parent element with positioning, but it is not found (. Neither left nor. wrap has positioning set). So previewImg Offsetleft is the distance from the previewImg box to the left of the entire page.
Therefore, the x coordinate of the mouse in the previewImg box is: the distance from the mouse to the left of the whole page - the distance from the previewImg box to the left of the whole page, that is, e.pagex - previewImg Offsetleft, y coordinate is the same. - Set the left and top values of the mask to achieve the effect of the mouse following the movement.
The parent previewImg of the mask is positioned, so the x coordinate of the mouse in the previewImg box is the distance from the mask to the left of the parent. Just make the left value equal to maskX. Pay attention to adding 'px'.
The code is as follows:
previewImg.addEventListener('mousemove', function (e) {
    //1. Calculate the coordinates of the mouse in previewImg
    var maskX = e.pageX - this.offsetLeft;
    var maskY = e.pageY - this.offsetTop;

    //2.mask follows the mouse
    //Set the left and top values for the mask. Note that the parent previewImg of the mask is positioned, so maskX is the distance from the mask to the left of the parent
    mask.style.left = maskX + 'px';
    mask.style.top = maskY + 'px';
})
- At this time, the following effect has been realized, but the mouse is always located in the upper left corner of the mask box. We make a slight improvement to make the mouse display in the center of the mask box.
Before assigning the left value, first subtract half the width of the mask box. The same is true for the top value.
The code is as follows:
previewImg.addEventListener('mousemove', function (e) {
    //1. Calculate the coordinates of the mouse in the mask
    var maskX = e.pageX - this.offsetLeft;
    var maskY = e.pageY - this.offsetTop;

    //2.mask follows the mouse
    //(1) Let the mouse display in the center of the mask
    maskX = maskX - mask.offsetWidth / 2;
    maskY = maskY - mask.offsetHeight / 2;
    //(2) The parent distance of preview mask should be set to the left, so the parent distance of preview mask should be set to the left
    mask.style.left = maskX + 'px';
    mask.style.top = maskY + 'px';
})
The effect is as follows:
 It can be seen that there is a problem. The mask will go beyond the scope of previewImg. The mask should be moved in the previewImg and cannot exceed the scope of previewImg. So we need to limit the scope of the mask.
- Define boundaries for the mask. The minimum moving distance of the mask on the x.y axis is 0. Calculate the maximum moving distance of the mask on the x.y axis respectively. The maximum moving distance of the X axis is the width of previewImg - the width of the mask. The y-axis is the same.
The code is as follows:
previewImg.addEventListener('mousemove', function (e) {
    //1. Calculate the coordinates of the mouse in the mask
    var maskX = e.pageX - this.offsetLeft;
    var maskY = e.pageY - this.offsetTop;

    //2.mask follows the mouse
    //(1) Let the mouse display in the center of the mask
    maskX = maskX - mask.offsetWidth / 2;
    maskY = maskY - mask.offsetHeight / 2;

    //(2) Define boundaries for mask
    var maxMoveX = this.offsetWidth - mask.offsetWidth;
    var maxMoveY = this.offsetHeight - mask.offsetHeight;

    if (maskX < 0) {
        maskX = 0;
    } else if (maskX > maxMoveX) {
        maskX = maxMoveX;
    }

    if (maskY < 0) {
        maskY = 0;
    } else if (maskY > maxMoveY) {
        maskY = maxMoveY;
    }
    //(3) Set the left and top values for the mask. Note that the parent previewImg of the mask is positioned, so maskX is the distance from the mask to the left of the parent
    mask.style.left = maskX + 'px';
    mask.style.top = maskY + 'px';
})
The effect is as follows:

3, Implementation: the right side corresponds to the large picture.
- This is a mathematical problem. First, let's sort out the relationship between the left and right layers.
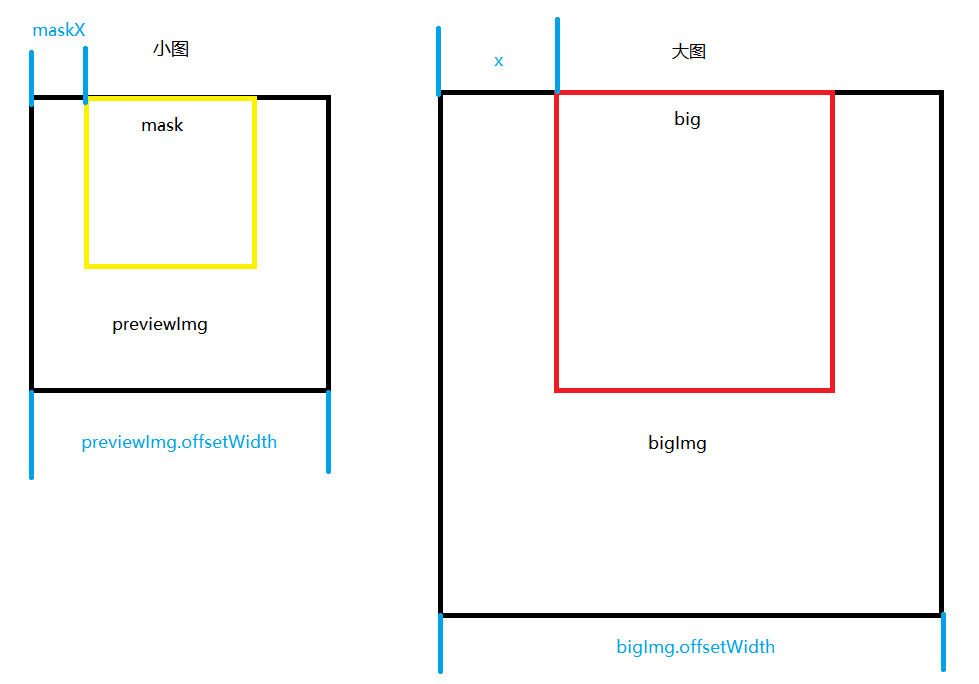 Previewimg (i.e. small.png) corresponds to #bigImg, which is the large base map below. mask corresponds to big, you can think of them as a smaller display window covered on the base map.
 - Calculate the pixel scale relationship corresponding to how many pixels should be moved in the large image.
How much the small window moves on the small map should be proportional to the distance the large window moves on the large map, so that the same area can be displayed.
 So x = maskx * bigimg offsetWidth / previewImg. Offsetwidth, y is the same.
 - Set the left and top values for bigImg (also added to the mousemove event of previewImg).
(1) Note that the large image here is the moving base image bigImg, while the small image above is the moving window mask, so the direction is opposite and the negative value is taken.
(2) bigImg has no positioning, so there are no left and top values. Remember to go back and add positioning to it.
The code is as follows:
<style>
#bigImg {
    position: absolute;
    top: 0;
    left: 0;
}
</style>
//3. Corresponding display large drawing
//(1) Calculate the pixel scale relationship corresponding to how many pixels should be moved in the large image
var bigX = maskX * bigImg.offsetWidth / this.offsetWidth;
var bigY = maskY * bigImg.offsetHeight / this.offsetHeight;

//(2) Set left and top values for bigImg.
bigImg.style.left = -bigX + 'px';
bigImg.style.top = -bigY + 'px';
The effect is as follows:

Attach complete code:
<style>
    * {
        margin: 0;
        padding: 0;
    }

    .wrap {
        width: 1200px;
        margin: 50px auto;
        background-color: #ccc;
        overflow: hidden;
    }

    .left {
        float: left;
        width: 400px;
        /* background-color: pink; */
    }

    .right {
        float: left;
        width: 800px;
        height: 800px;
        background-color: antiquewhite;
    }

    .preview-img {
        height: 400px;
        border: 1px solid #ccc;
        box-sizing: border-box;
        position: relative;
        cursor: move;
    }

    .mask {
        position: absolute;
        left: 0;
        top: 0;
        width: 300px;
        height: 300px;
        background-color: #FEDE4F;
        opacity: 0.5;
        display: none;
    }

    .big {
        position: absolute;
        top: 0;
        left: 101%;
        width: 500px;
        height: 500px;
        border: 1px solid #ccc;
        box-sizing: border-box;
        background-color: pink;
        overflow: hidden;
        display: none;
    }

    #bigImg {
        position: absolute;
        top: 0;
        left: 0;
    }
</style>

<body>
    <div class="wrap">
        <div class="left">
            <div class="preview-img">
                <img src="images/small.png" alt="">
                <div class="mask"></div>
                <div class="big">
                    <img src="images/big.jpg" alt="" id="bigImg">
                </div>
            </div>
            <div>2222</div>
        </div>
        <div class="right">
            3333
        </div>
    </div>
    <script>
        var mask = document.querySelector('.mask');
        var big = document.querySelector('.big');
        var previewImg = document.querySelector('.preview-img');
        var bigImg = document.getElementById('bigImg');
        //Mouse over display
        previewImg.addEventListener('mouseover', function () {
            mask.style.display = 'block';
            big.style.display = 'block';
        })
        previewImg.addEventListener('mouseout', function () {
            mask.style.display = 'none';
            big.style.display = 'none';
        })

        //mask moves with the mouse
        previewImg.addEventListener('mousemove', function (e) {
            //1. Calculate the coordinates of the mouse in the mask
            var maskX = e.pageX - this.offsetLeft;
            var maskY = e.pageY - this.offsetTop;

            //2.mask follows the mouse
            //(1) Let the mouse display in the center of the mask
            maskX = maskX - mask.offsetWidth / 2;
            maskY = maskY - mask.offsetHeight / 2;

            //(2) Define boundaries for mask
            var maxMoveX = this.offsetWidth - mask.offsetWidth;
            var maxMoveY = this.offsetHeight - mask.offsetHeight;

            if (maskX < 0) {
                maskX = 0;
            } else if (maskX > maxMoveX) {
                maskX = maxMoveX;
            }

            if (maskY < 0) {
                maskY = 0;
            } else if (maskY > maxMoveY) {
                maskY = maxMoveY;
            }
            //(3) Set the left and top values for the mask.
            mask.style.left = maskX + 'px';
            mask.style.top = maskY + 'px';

            //3. Corresponding display large drawing
            //(1) Calculate the pixel scale relationship corresponding to how many pixels should be moved in the large image
            var bigX = maskX * bigImg.offsetWidth / this.offsetWidth;
            var bigY = maskY * bigImg.offsetHeight / this.offsetHeight;

            //(2) Set left and top values for bigImg.
            bigImg.style.left = -bigX + 'px';
            bigImg.style.top = -bigY + 'px';
        })
    </script>
</body>
The code can be reduced to a mathematical problem in the end. The importance of learning mathematics well hhh