After the continuous integration deployment based on jenkins is completed, the task construction is completed, and the test results need to be notified to relevant personnel. Here is how to configure email notification in jenkins.
1, Install mail plugin
System management - > management plug-in - > optional plug-in, select email extension plug-in for installation, and restart Jenkins after installation
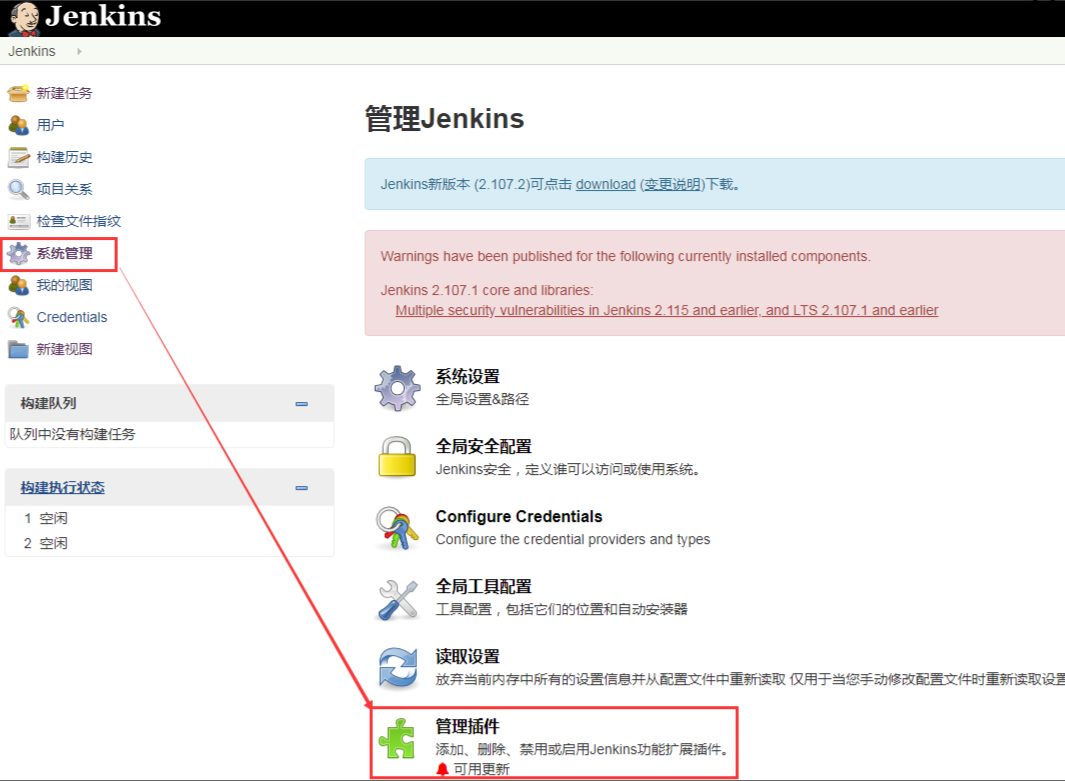
I have installed the plug-in, so it is displayed in the installed directory here. For children's shoes that have not been installed, you can search for the plug-in through the search box in the upper right corner, and then install it online. After installation, restart Jenkins.

2, System settings
Configure the mail through system management → system settings:
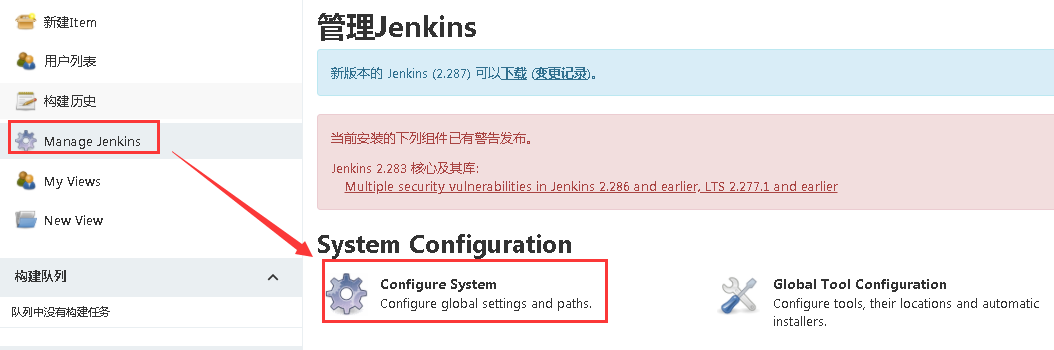
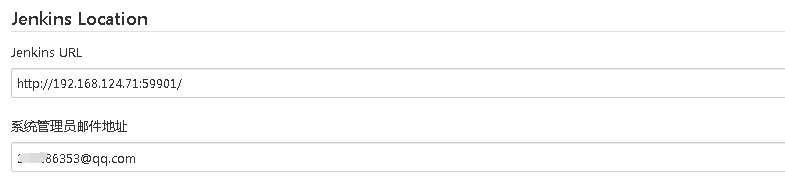
1. Set jenkins address and administrator email address
2. Set sender and other information
PS: the sender's email address here should be consistent with the email address of the system administrator (of course, a special sender's email can also be set, but it does not affect the use. It can be set according to the specific situation)
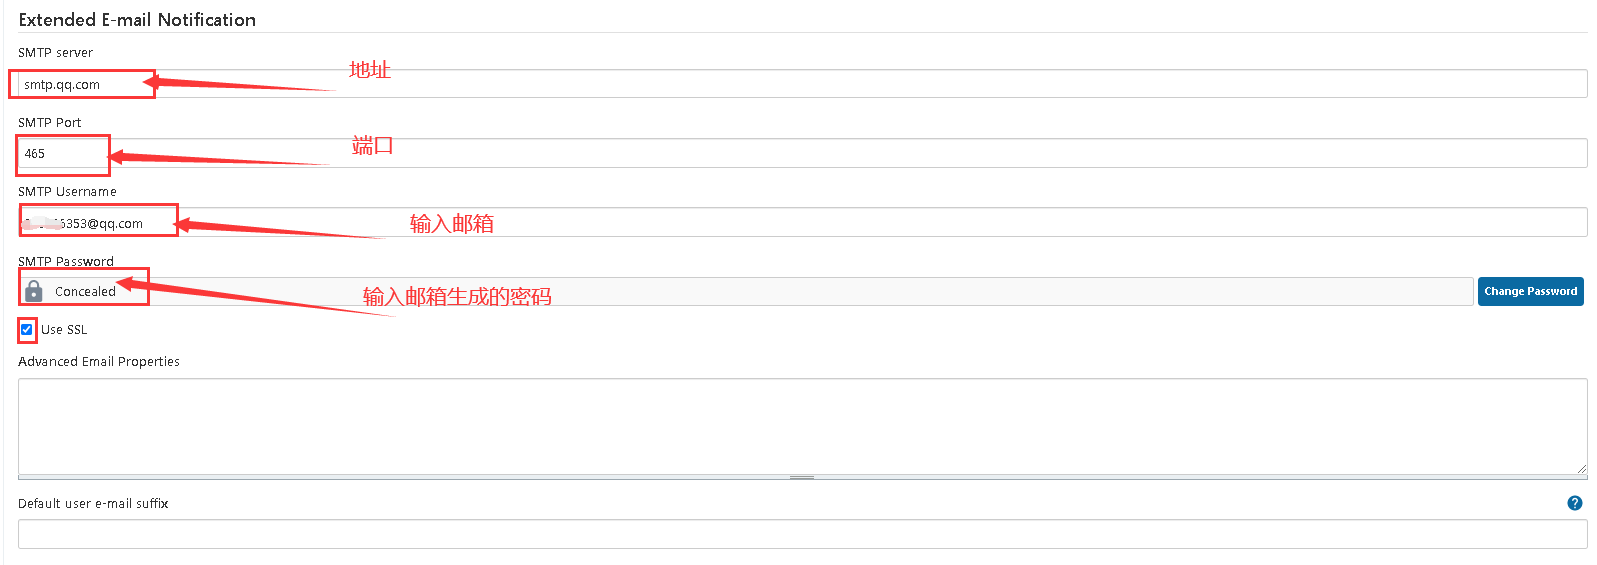
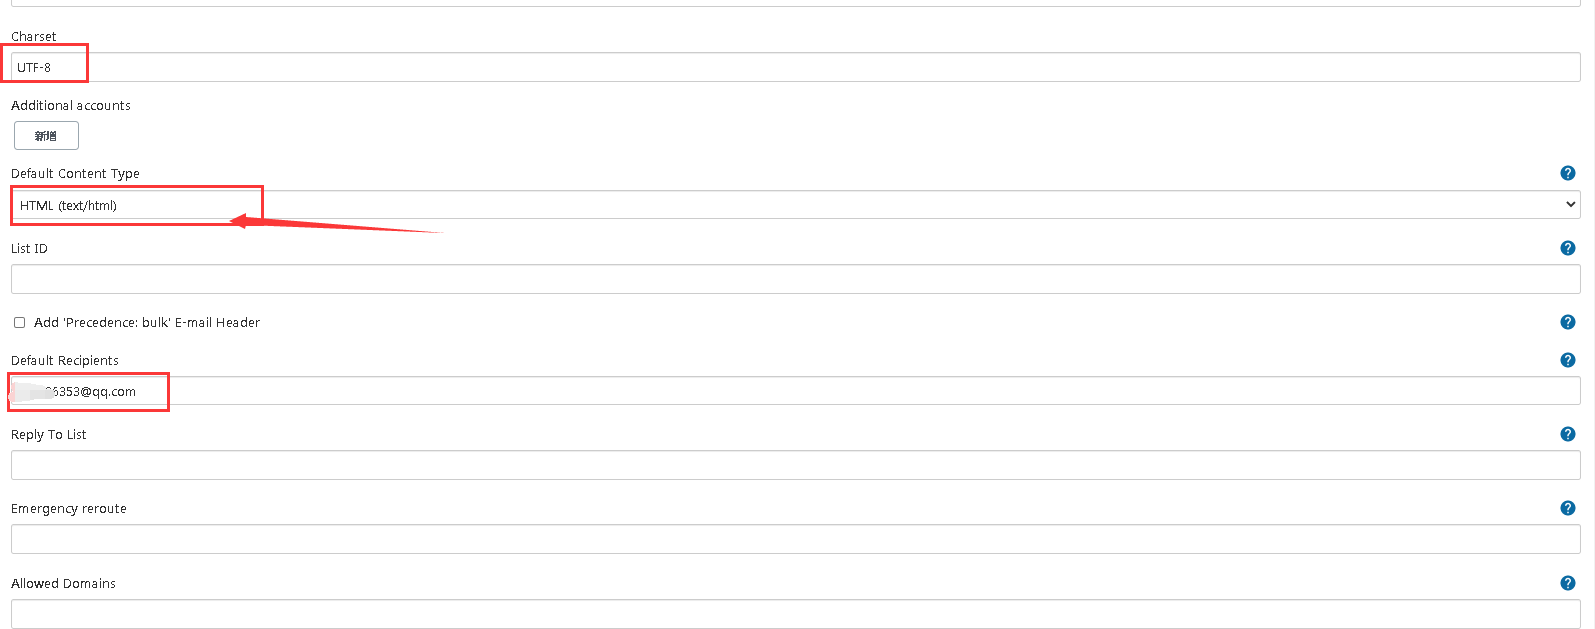
Multiple people can be added to the default recipient mailbox in the figure above, separated by English half width commas.
3. Configure message content template
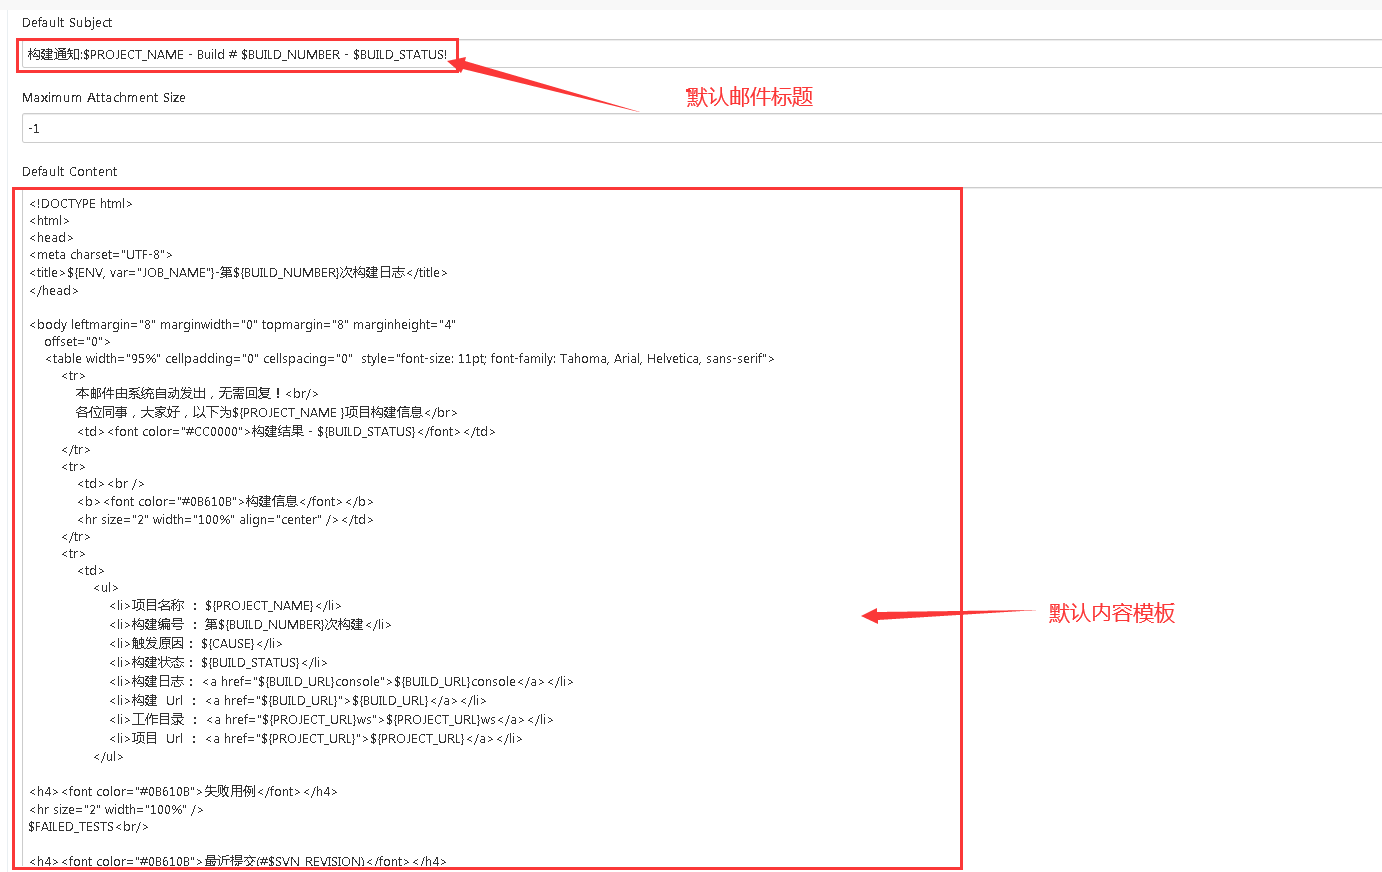
Attachment: email content template (Default Content):
<!DOCTYPE html>
<html>
<head>
<meta charset="UTF-8">
<title>${ENV, var="JOB_NAME"}-The first ${BUILD_NUMBER}Secondary build log</title>
</head>

<body leftmargin="8" marginwidth="0" topmargin="8" marginheight="4"
    offset="0">
    <table width="95%" cellpadding="0" cellspacing="0"  style="font-size: 11pt; font-family: Tahoma, Arial, Helvetica, sans-serif">
        <tr>
            This email is sent automatically by the system without reply!<br/>
            Hello, colleagues, the following is ${PROJECT_NAME }Project construction information</br>
            <td><font color="#CC0000 "> build result - ${build_status} < / font ></td>
        </tr>
        <tr>
            <td><br />
            <b><font color="#0b610b "> build information < / font ></b>
            <hr size="2" width="100%" align="center" /></td>
        </tr>
        <tr>
            <td>
                <ul>
                    <li>Project Name: ${PROJECT_NAME}</li>
                    <li>Build No.: page ${BUILD_NUMBER}Secondary construction</li>
                    <li>Trigger reason: ${CAUSE}</li>
                    <li>Build status: ${BUILD_STATUS}</li>
                    <li>Build log: <a href="${BUILD_URL}console">${BUILD_URL}console</a></li>
                    <li>structure  Url :  <a href="${BUILD_URL}">${BUILD_URL}</a></li>
                    <li>Working directory: <a href="${PROJECT_URL}ws">${PROJECT_URL}ws</a></li>
                    <li>project  Url :  <a href="${PROJECT_URL}">${PROJECT_URL}</a></li>
                </ul>

<h4><font color="#0b610b "> failure case < / font > < / H4 >
<hr size="2" width="100%" />
$FAILED_TESTS<br/>

<h4><font color="#0B610B">Recently submitted(#$SVN_REVISION)</font></h4>
<hr size="2" width="100%" />
<ul>
${CHANGES_SINCE_LAST_SUCCESS, reverse=true, format="%c", changesFormat="<li>%d [%a] %m</li>"}
</ul>
Detailed submission: <a href="${PROJECT_URL}changes">${PROJECT_URL}changes</a><br/>

            </td>
        </tr>
    </table>
</body>
</html>
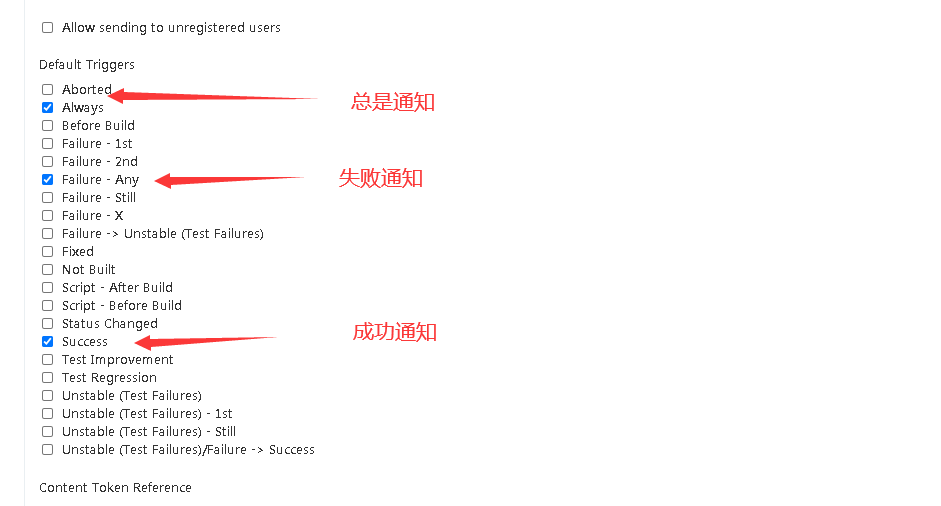
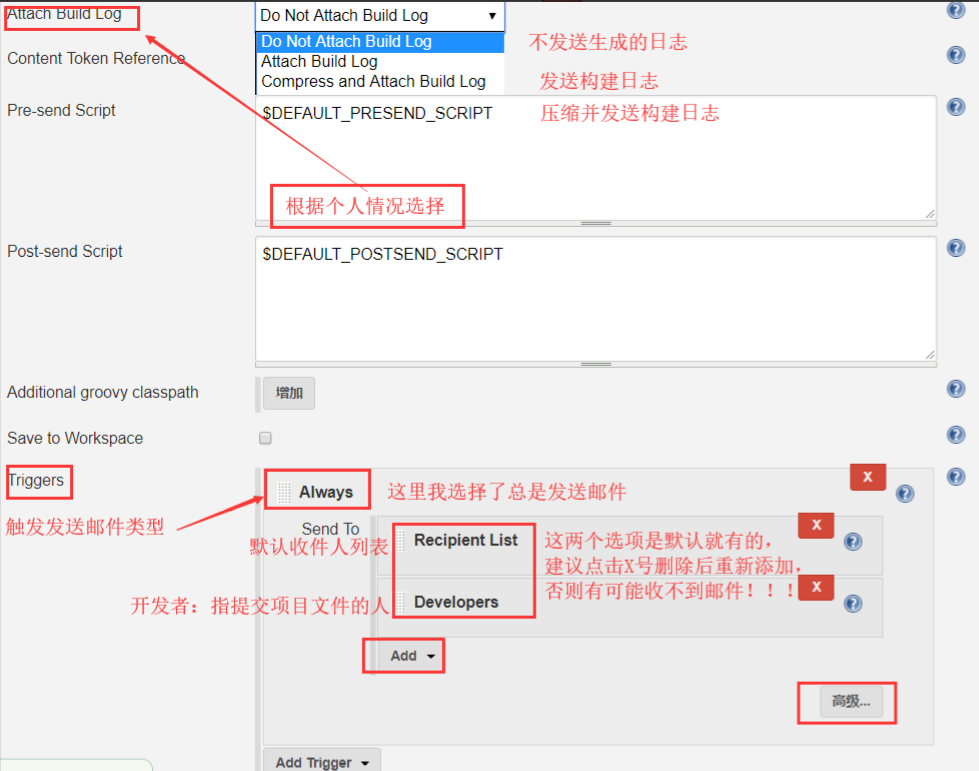
4. Set email trigger mechanism
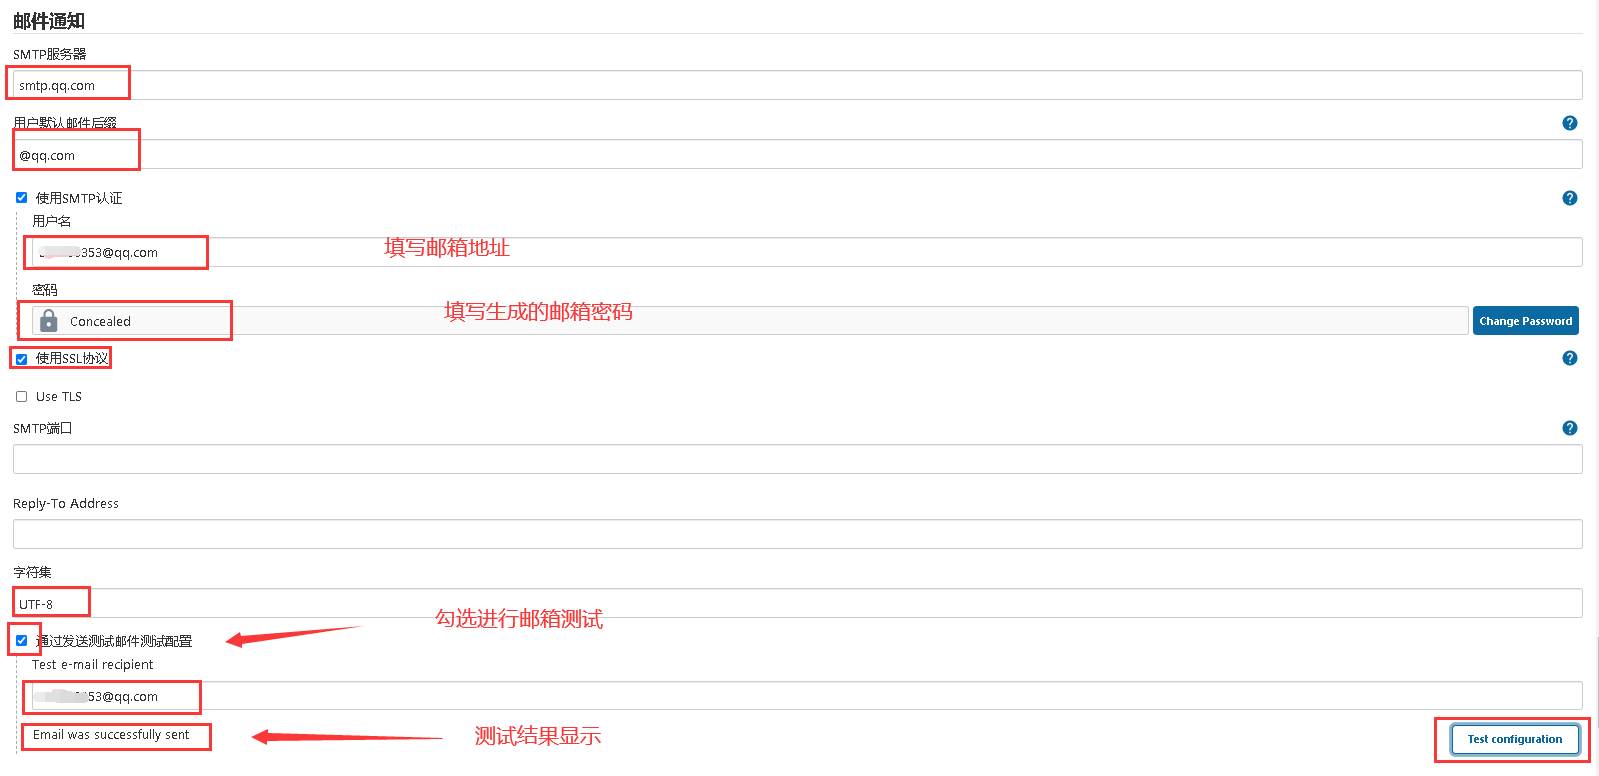
5. Configure the mail function of Jenkins
The configuration contents are as follows. The configuration is the same as that of the Email Extension Plugin. You can check the test configuration by sending test email button to test whether the configuration successfully sends email, as shown in the following figure:
3, Project configuration
After completing the system setting, you also need to configure the mail for the project to be built.
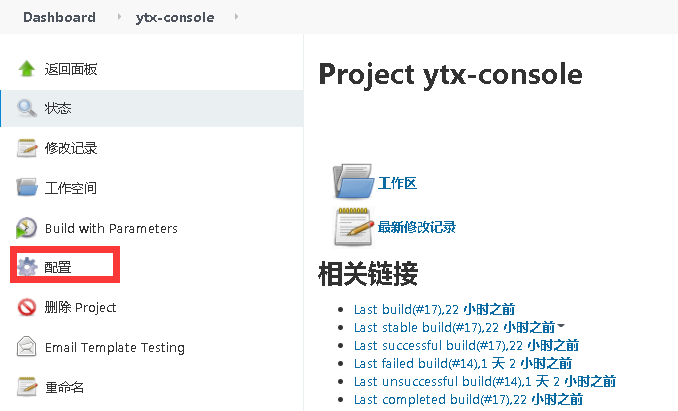
1. Enter the project configuration interface
Enter the new project interface, click the configuration button to enter the system configuration page:
2. Configure post build operation module
After entering the system configuration page, click the post build operation option above. The configuration contents are as follows:
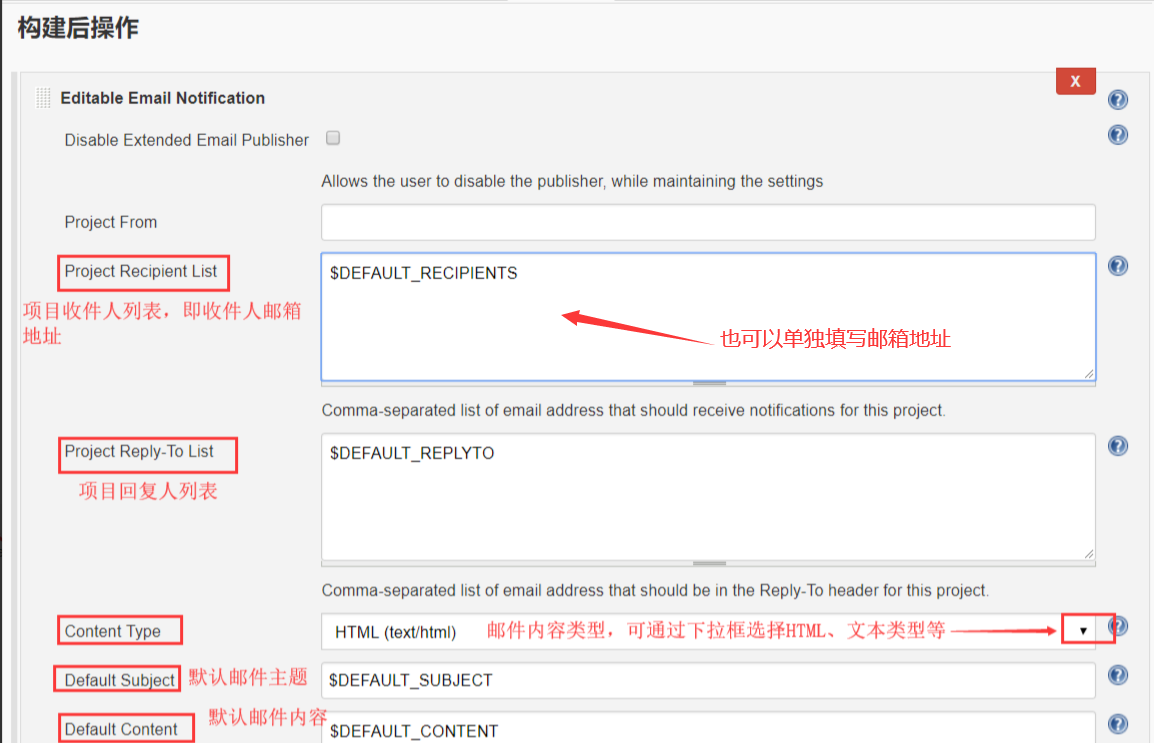
You can configure the content by default. The mail content type can be selected according to your own configuration. The recipient list can be configured from the default recipient option in the previous system settings.
4, Build trigger mail test
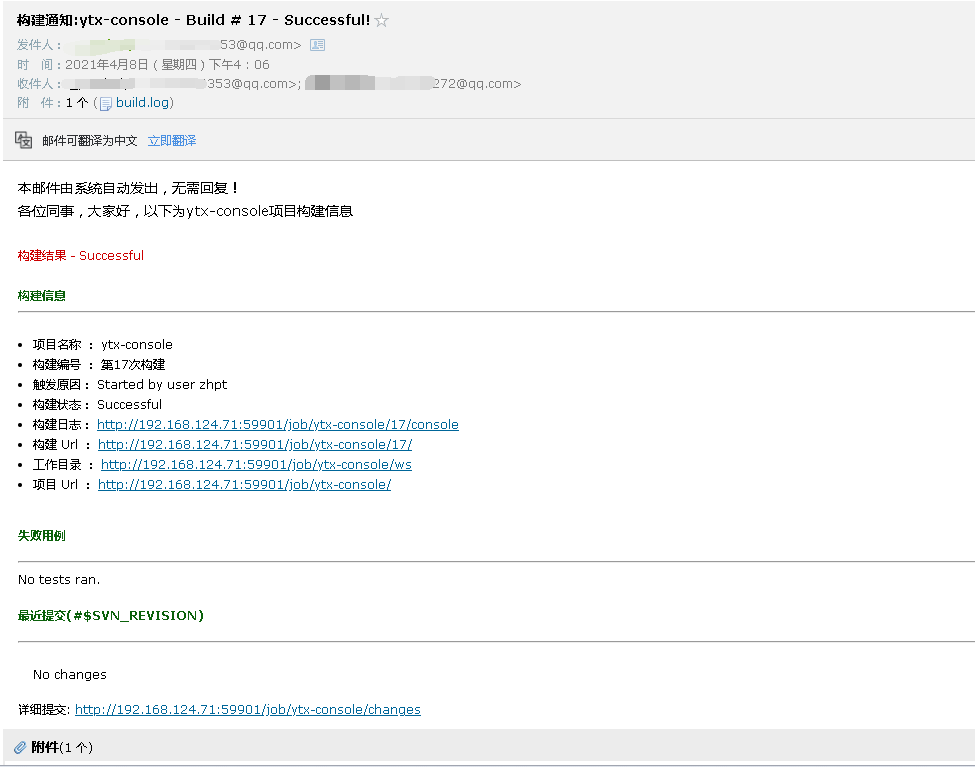
The following figure shows the test email I received. The email content can be personalized through the system settings. You can refer to the template above or customize it.
Supplement:
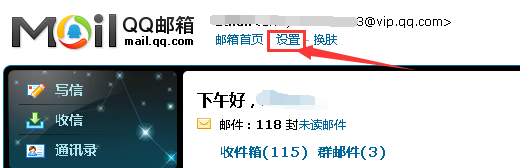
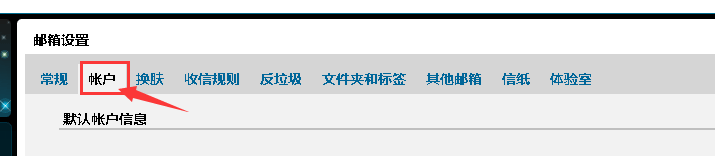
Enable POP3/SMTP service for mailbox. Take QQ mailbox as an example
1. Log in to QQ email
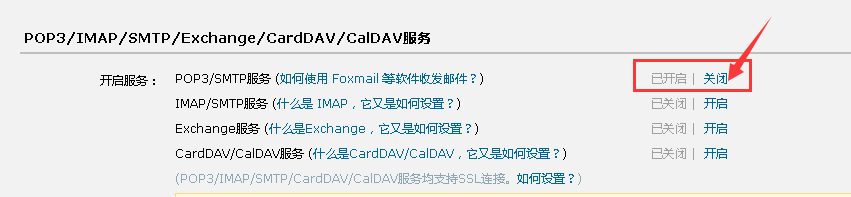
2. Open "POP3/SMTP" in "account" and obtain the authorization code
3. After sending SMS verification, get the following verification code
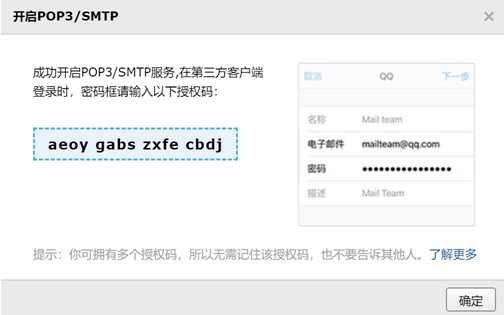
The verification code is the password configured in Jenkins email settings.
https://www.cnblogs.com/imyalost/p/8781759.html