1, Foreword
jenkins deployment is divided into two parts. The first part mainly introduces the basic environment configuration during jenkins deployment, and the second part introduces how to use jenkins to publish the project to the remote server. maven and svn (git is similar in theory) are the relevant software environments in this link
2, maven environment installation
1. Download maven installation package
wget http://mirror.bit.edu.cn/apache/maven/maven-3/3.6.0/binaries/apache-maven-3.6.0-bin.tar.gz
2. Extract, install and configure the relevant environment variables
1,tar vxf apache-maven-3.6.0-bin.tar.gz
2,mv apache-maven-3.6.0 /usr/local/maven

3,vim /etc/profile
 Add the following:
export MAVEN_HOME=/usr/local/maven
export PATH=${MAVEN_HOME}/bin:${PATH}
4,source /etc/profile
5,mvn -version
3. Modify Maven setting XML configuration file
cd /usr/local/maven/conf
vim settings.xml
 Amend the following:
<localRepository>/usr/local/repository</localRepository>

<profiles>
     <profile>
     <id>nexus</id>
      <repositories>
        <repository>
            <id>aliyun-repos</id>
            <name>Aliyun Repository</name>
            <url>http://maven.aliyun.com/nexus/content/groups/public</url>
            <releases><enabled>true</enabled></releases>
            <snapshots><enabled>true</enabled></snapshots>
        </repository>
         <repository>
            <id>private repository</id>
            <name>private repository</name>
            <url>Own company private server address/repository/maven-public/</url>
            <releases><enabled>true</enabled></releases>
            <snapshots><enabled>true</enabled></snapshots>
        </repository>
        <repository>
            <id>sonatype-repos</id>
            <name>Sonatype Repository</name>
            <url>https://oss.sonatype.org/content/groups/public</url>
            <releases><enabled>true</enabled></releases>
            <snapshots><enabled>false</enabled></snapshots>
        </repository>
        <repository>
            <id>sonatype-repos-s</id>
            <name>Sonatype Repository</name>
            <url>https://oss.sonatype.org/content/repositories/snapshots</url>
            <releases><enabled>false</enabled></releases>
            <snapshots><enabled>true</enabled></snapshots>
        </repository>
      </repositories>
     <pluginRepositories>
        <pluginRepository>
            <id>aliyun-repos</id>
            <name>Aliyun Repository</name>
            <url>http://maven.aliyun.com/nexus/content/groups/public</url>
        </pluginRepository>
        <pluginRepository>
            <id>sonatype-repos</id>
            <name>Sonatype Repository</name>
            <url>https://oss.sonatype.org/content/groups/public</url>
        </pluginRepository>
      </pluginRepositories>
    </profile>
  </profiles>
  <activeProfiles>
    <activeProfile>nexus</activeProfile>
  </activeProfiles>
3, Related plug-in installation
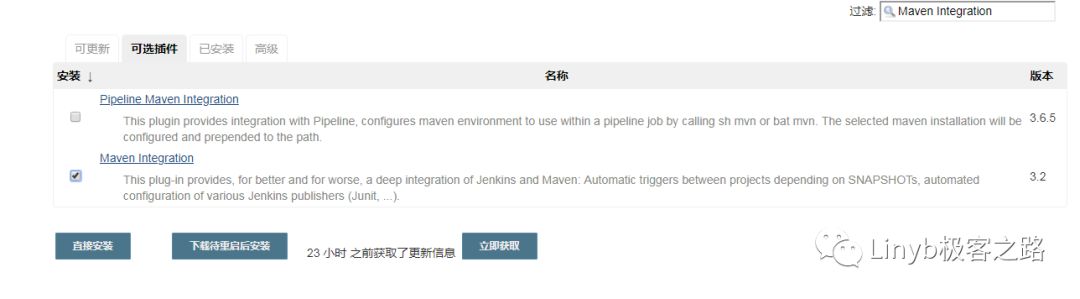
1,Maven Integration plugin,publish over SSH,Zentimestamp plugin
Note: Zentimestamp plugin (optional, this plug-in is mainly used to generate timestamp)
2. Plug in installation system management > plug in Management > optional plug-ins, check the plug-ins to be installed, click direct installation or download to install after restart
3. If the installation or update of plug-ins fails
You can put the following website
http://mirror.xmission.com/jenkins/updates/current/update-center.json Or http://mirror.esuni.jp/jenkins/updates/update-center.json Paste to "Jenkins / plug-in management / advanced / upgrade site" to submit
Note: if none of the above websites are available, you can visit the website below
http://mirrors.jenkins-ci.org/status.html You can find the available links
4, Global variable configuration
System Management > global tool configuration
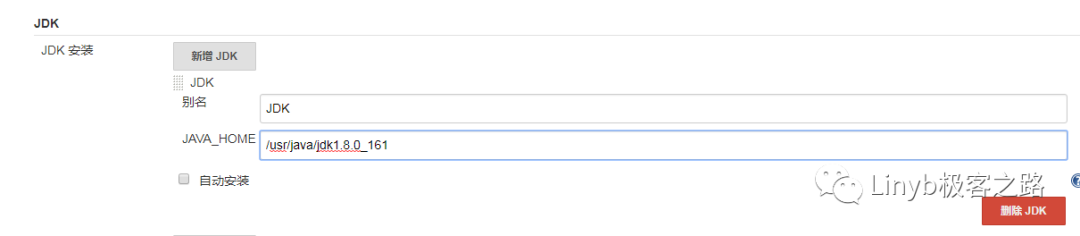
1. Configure JDK
Configure the local JDK path and uncheck automatic installation
2. Configure maven
Configure the local maven path and uncheck automatic installation

3. Configure ssh
System Management > system settings, select Publish over SSH
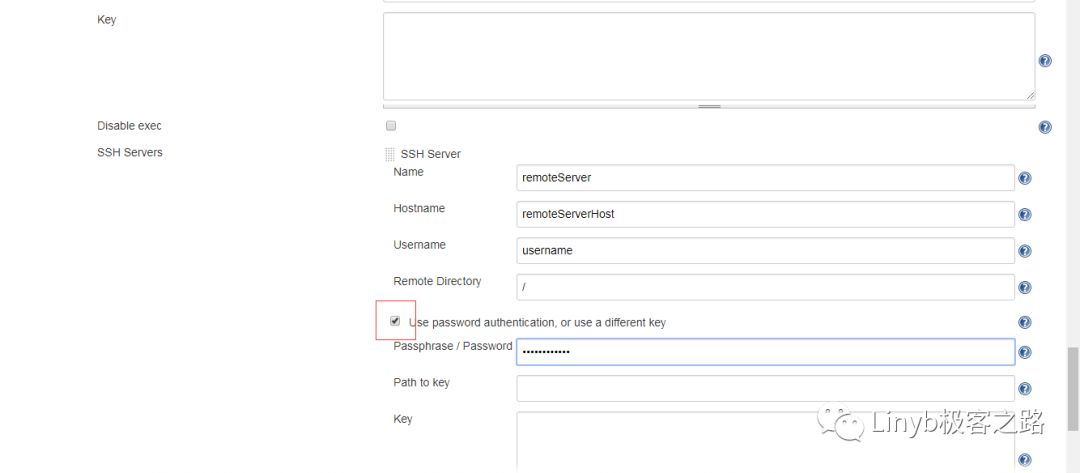
SSH server click the Add button
Name: fill in the name, which will be used for publishing to the remote server. Hostname: enter the remote server IP Username: remote server login username Remote Directory: which folder directory to publish to the remote server, you can fill in / or leave it blank. Click Advanced and check Use password authentication, or use a different key to fill in the remote server password
Click Test Configuration to verify whether the configuration is successful

4. Format of global timestamp under configuration (optional)
System Management > system settings, select the global attribute and check Date pattern for the BUILD_TIMESTAMP (build timestamp) variable fill in the time format: for example, yyyy mm DD

5. Configure global environment variable information

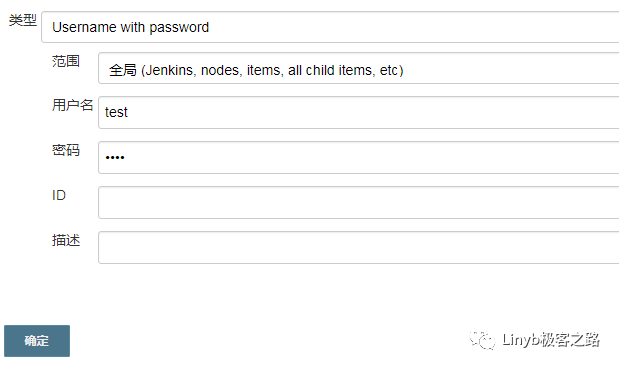
5, Credential configuration
Credentials > system > Global credentials > add some credentials select type -- >: username with password to facilitate some operations (for example, svn, git select user credentials)
6, Summary
In general, it will not be difficult for jenkins to deploy these basic projects to remote servers. The next article describes how to use jenkins to publish svn server projects to remote servers