jenkins enables automatic deployment (CD/CI)
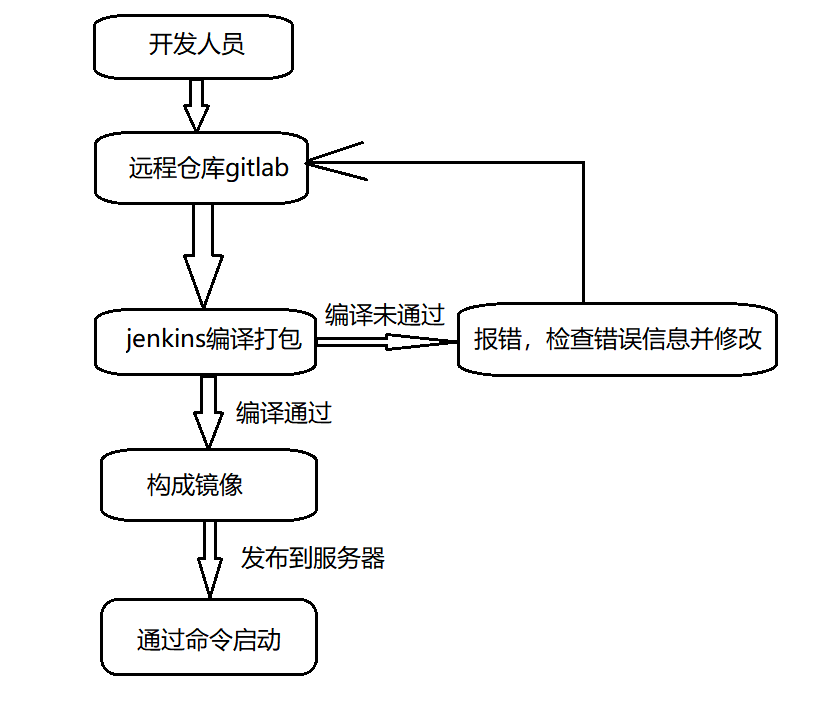
Execution flow chart
I. environment server configuration
1. The following environments need to be installed on the server:
1) Install jdk-1.8
2) Install maven-3.6 one
3) Installing git-2.34
4) Install node-16.13 1 (optional, depending on the deployment method)
5)sonarQube-6.7.4
2. After installation, configure the environment variables

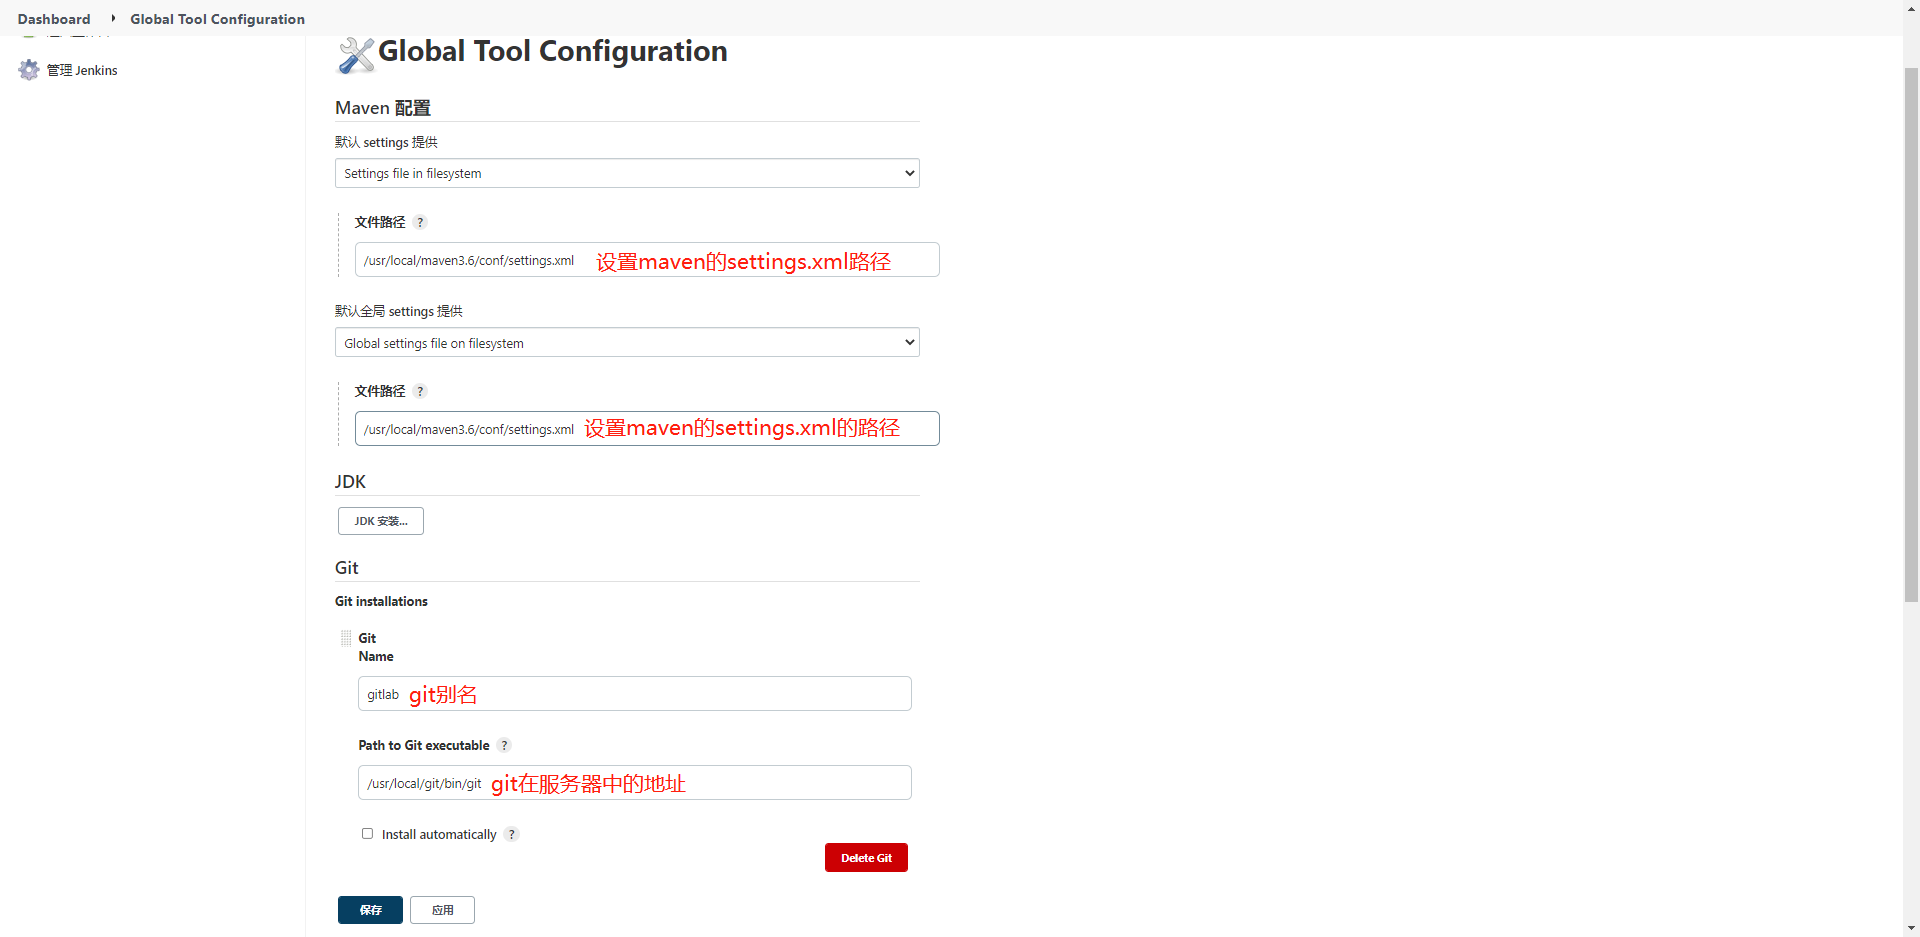
3. Enter maven's setting XML file changes the store to

4. Change the image address to Alibaba cloud image address. Two images are added as follows to prevent some images from finding packages
	<mirror>
		<id>alimaven</id>
		<name>aliyun maven</name>
		<url>http://maven.aliyun.com/nexus/content/groups/public/</url>
		<mirrorOf>central</mirrorOf>
	</mirror>
	<mirror>
		<id>alimaven</id>
		<mirrorOf>central</mirrorOf>
		<name>aliyun maven</name>
		<url>http://maven.aliyun.com/nexus/content/repositories/central/</url>
	</mirror>
5. By command
mvn install:install-file -Dfile=/usr/local/jars/formal/Algorithm_assessment.jar -DgroupId=com.xjgd -DartifactId=algorithm_sd -Dversion=2.0 -Dpackaging=jar
Add algorithm package to maven warehouse
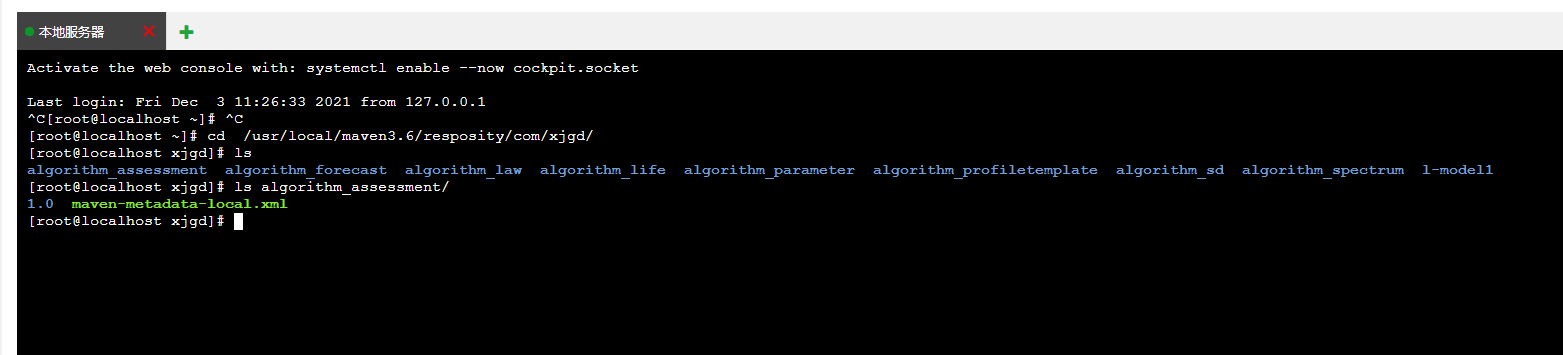
6. After adding to the maven warehouse, you can see the algorithm package in the reposity / COM / xjgd directory
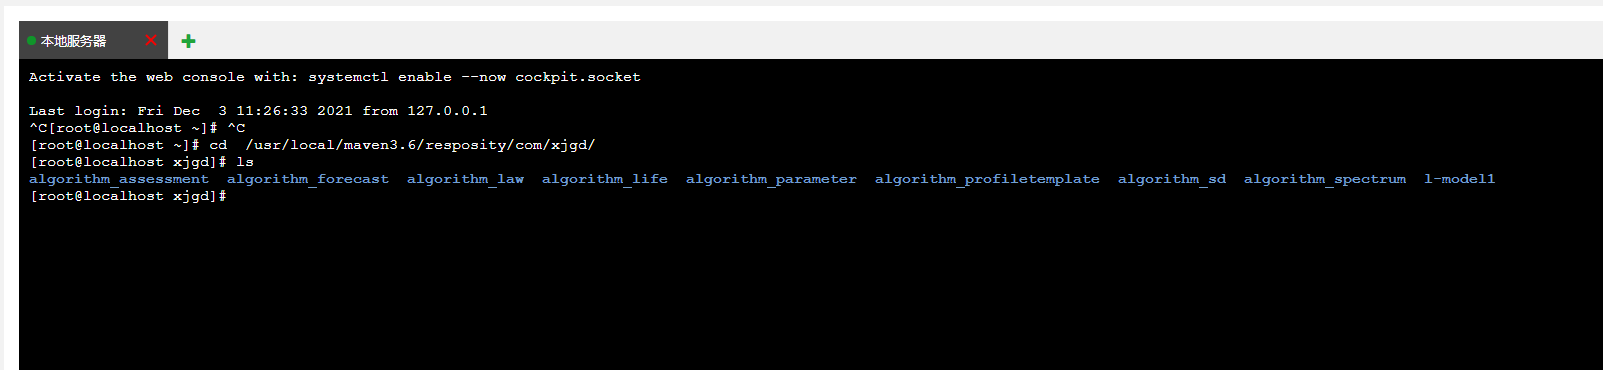
7. The configuration process may be due to the lack of maven metadata local XML file leads to compilation failure all the time. This file is a coordinate guide, which will guide us where to find the package path. If maven can't find the package without this file, it will find the corresponding package in the cloud image. The customized package can't be found in the cloud image, and an error will be reported if it can't be found.
8. In this case, we copy the package directly from the original normal package. I copy the whole reposity directly under windows to avoid making a difference
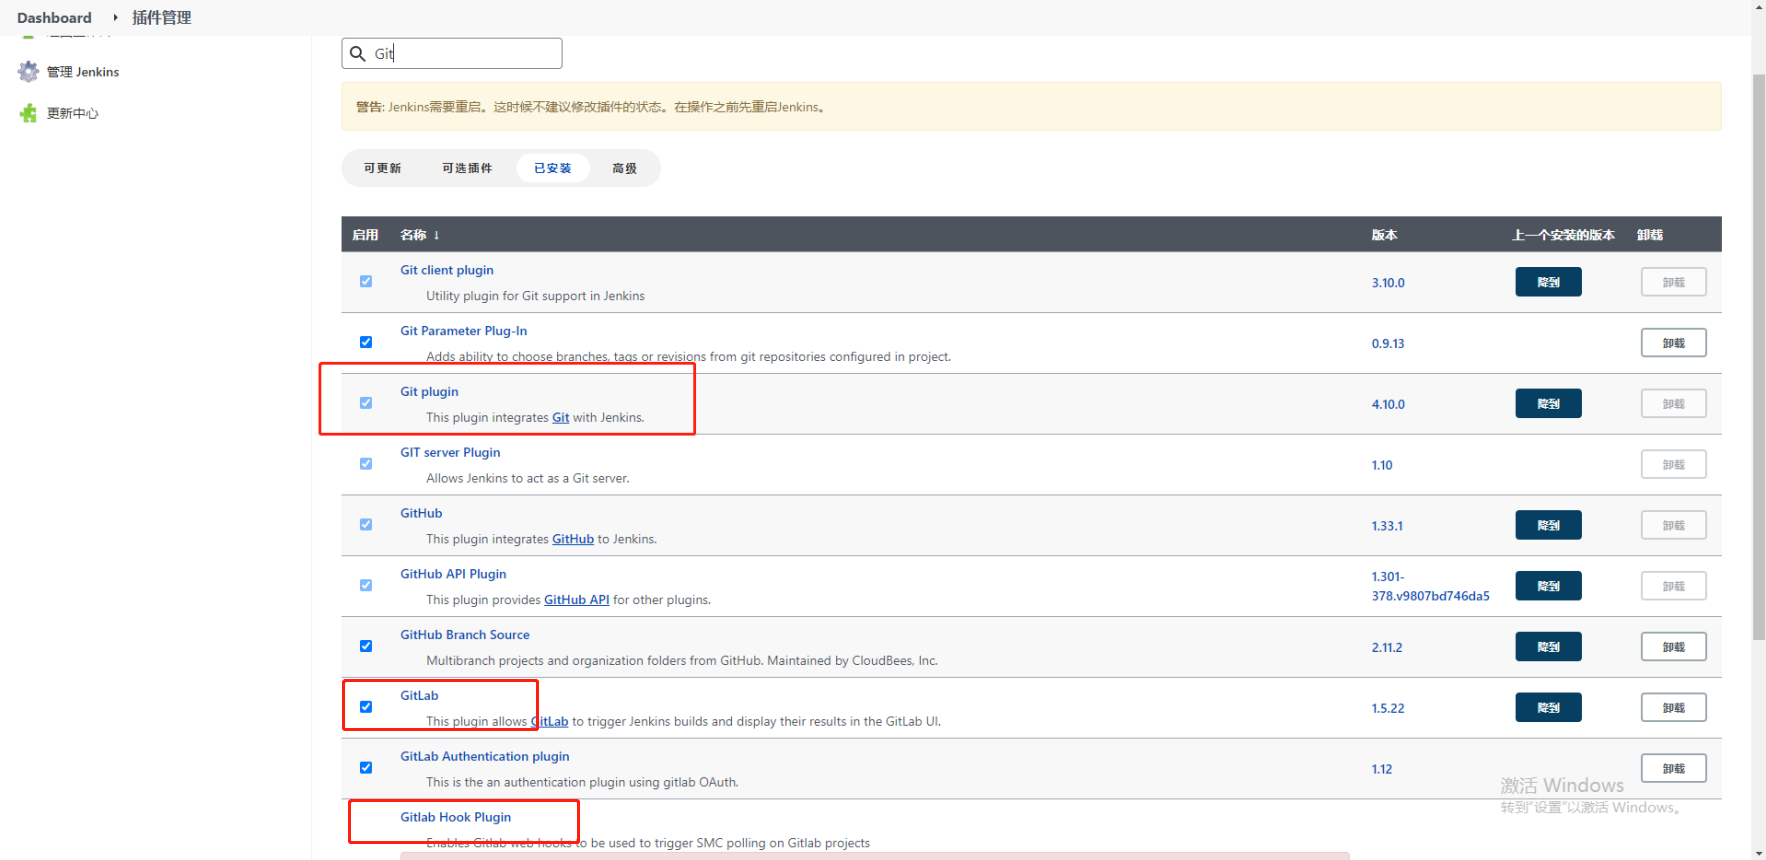
II. Installation of plug-ins
Related plug-ins
1 jdk
2 maven
3 git
4 Gedentials Binding (Document related)
5 Gitlab Hook (Build triggers. In order to use real-time build at build time, submit code and build)
6 gitlab
7 SonarQube Scaner(Code check plug-in)
Other plug-ins are installed according to their own needs. The above is the main plug-in
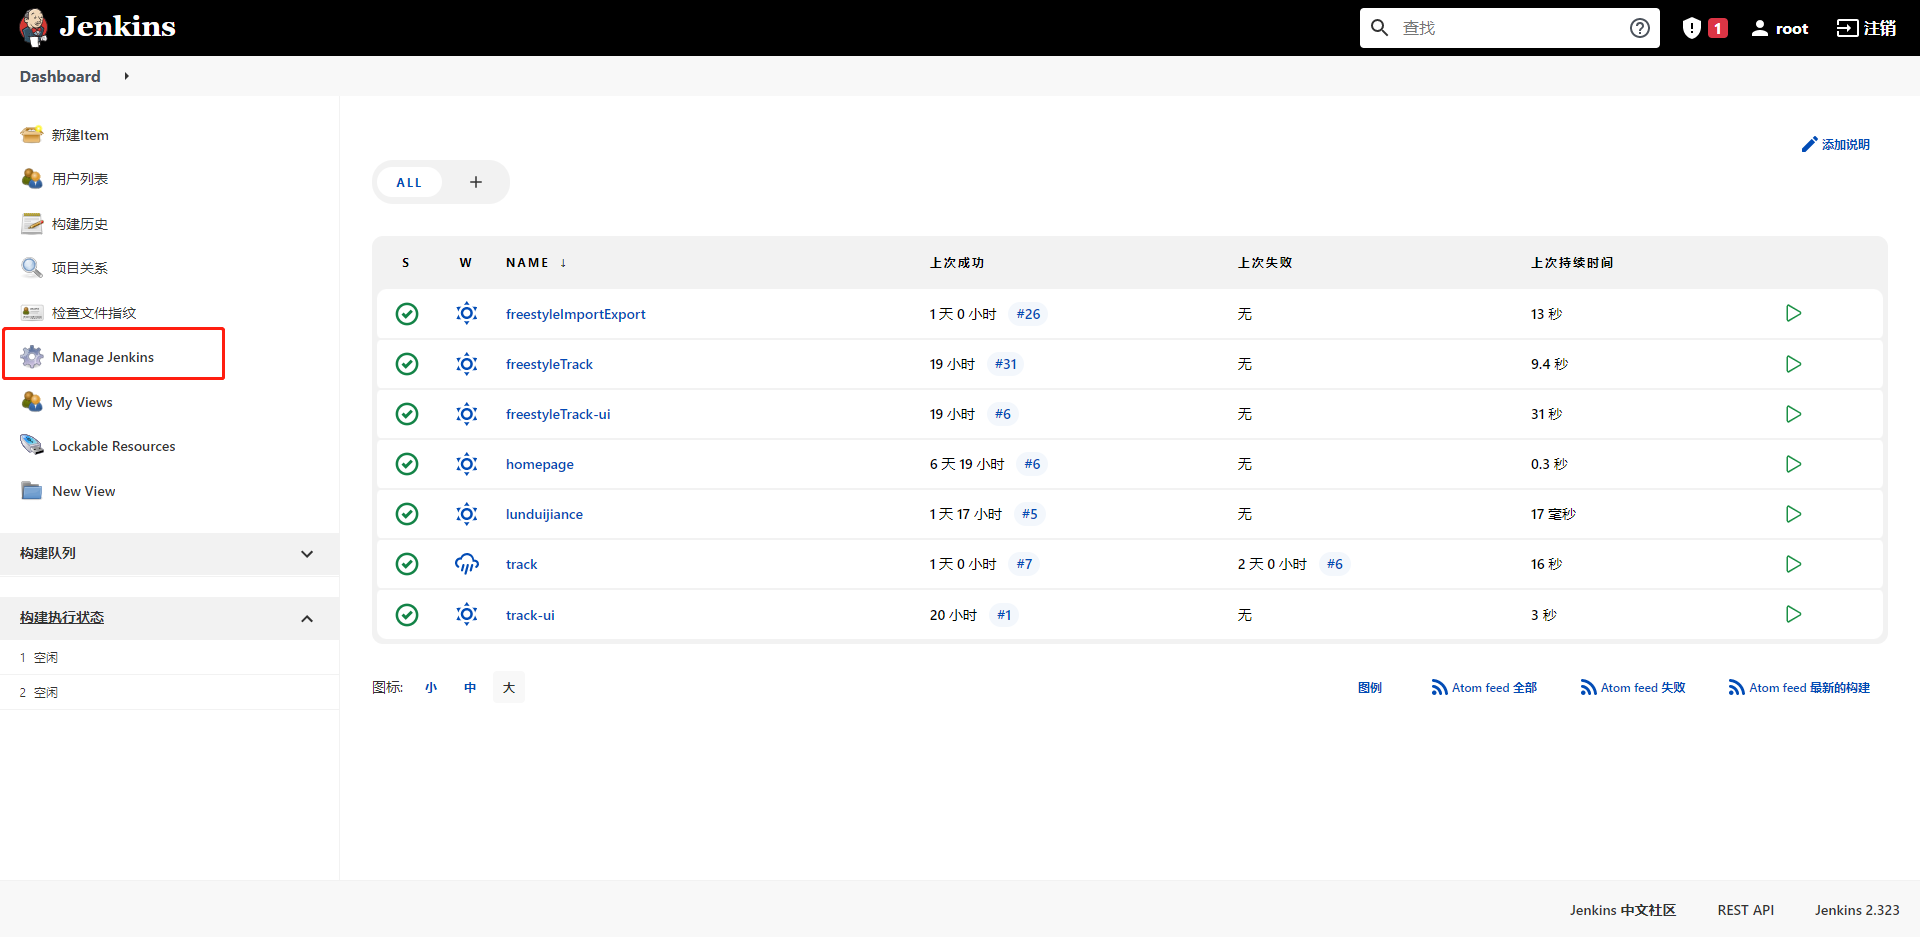
Since jenkins is installed on the server, we don't need to install it. After logging in to jenkins, click mange jenkins to enter the management page - > Click Mannage Plugins, as shown below
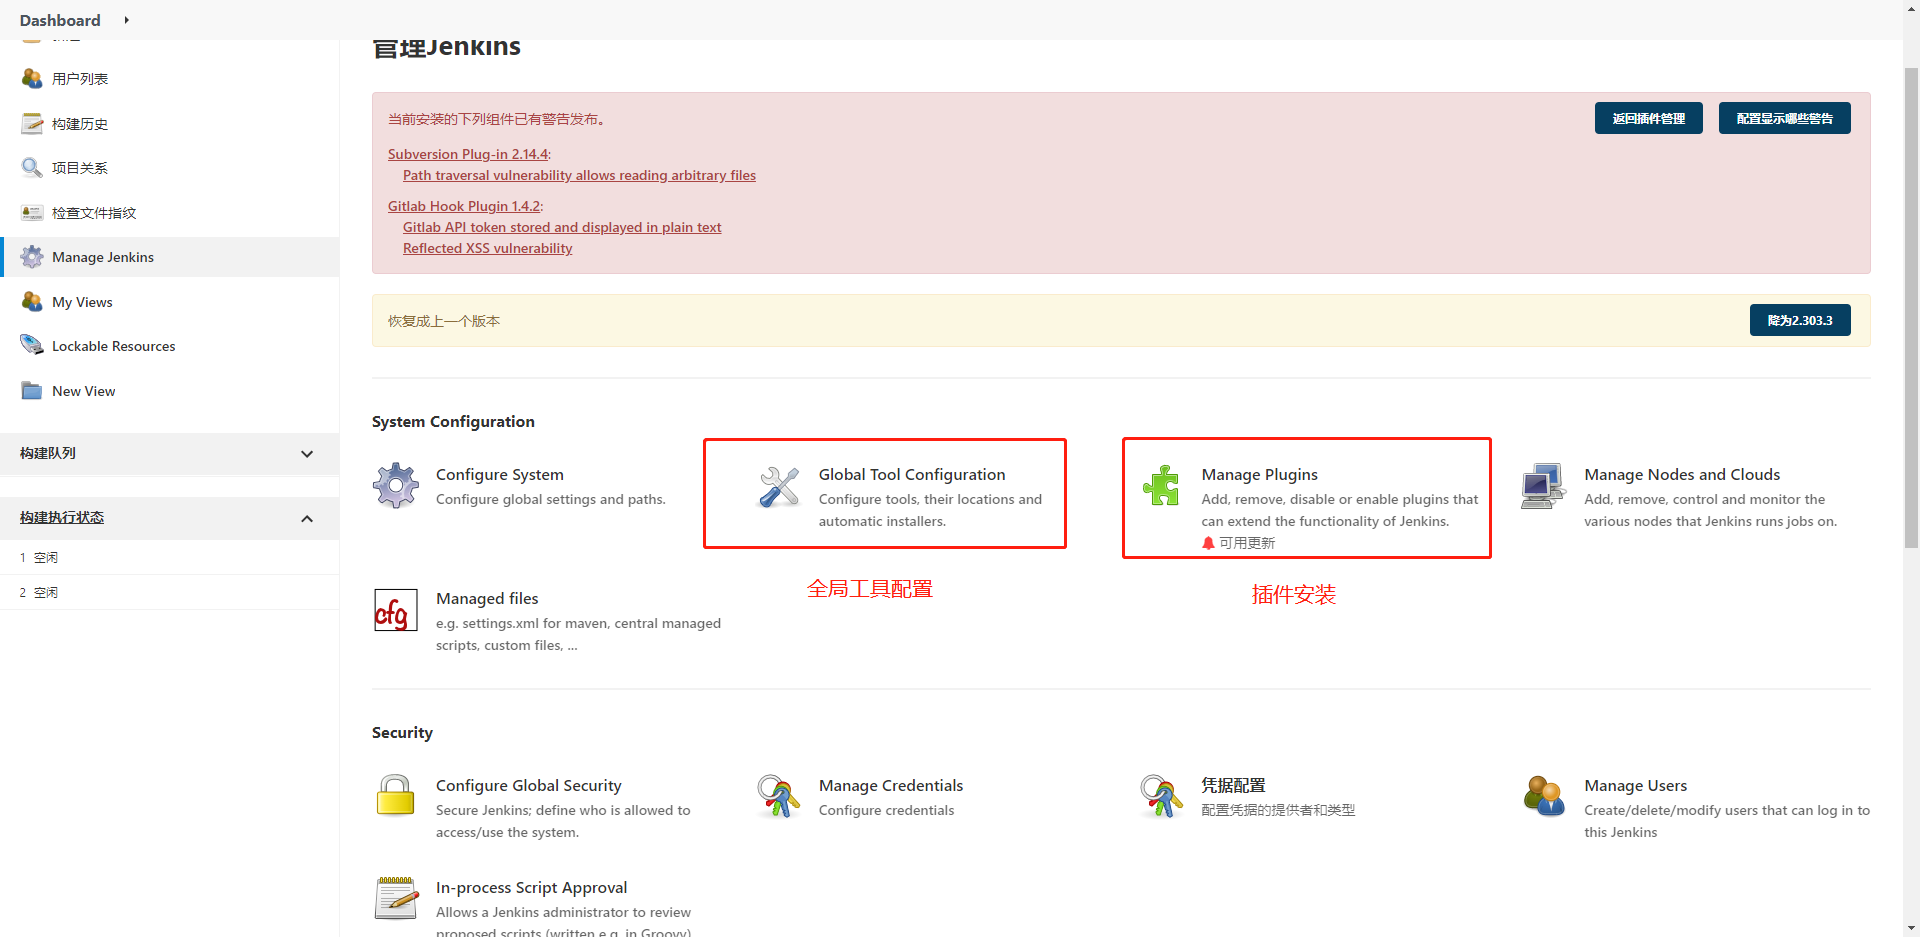
Three configuration
1. After installation, go back and click mange Jenkins to enter the management page - > Click Global Tool Configuration to enter global configuration to view the installed plug-ins
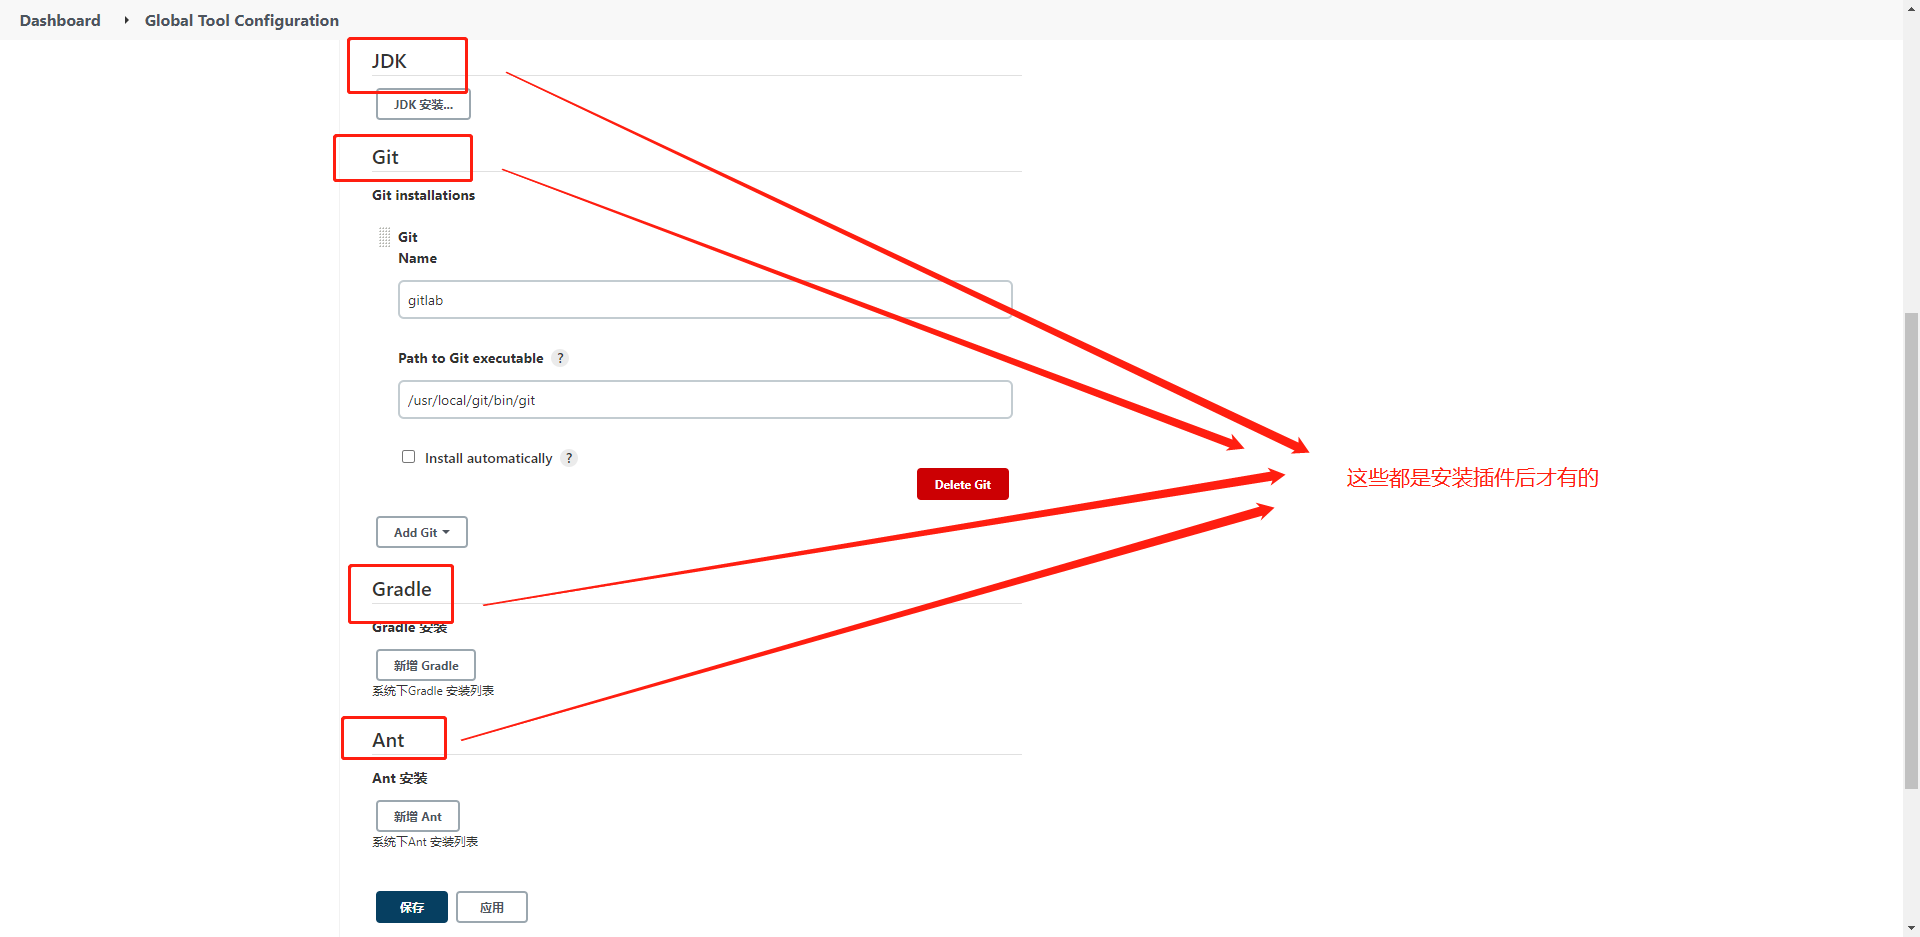
2. Then configure the information corresponding to the plug-in
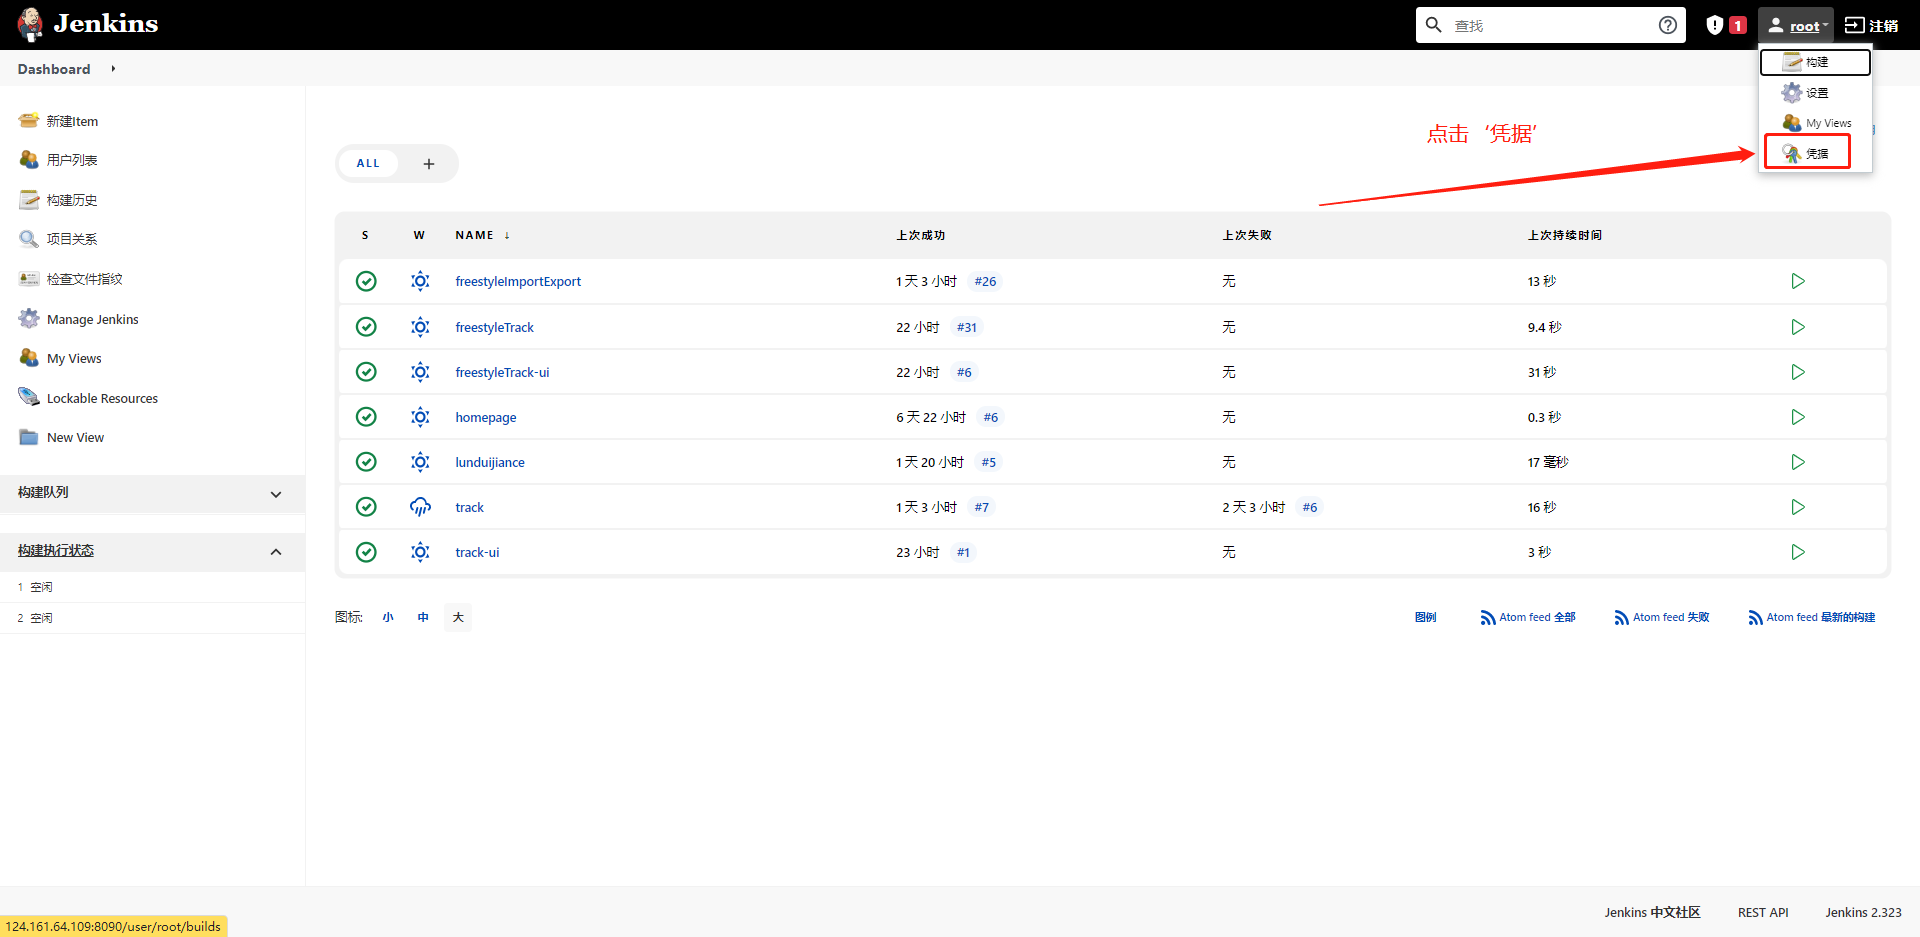
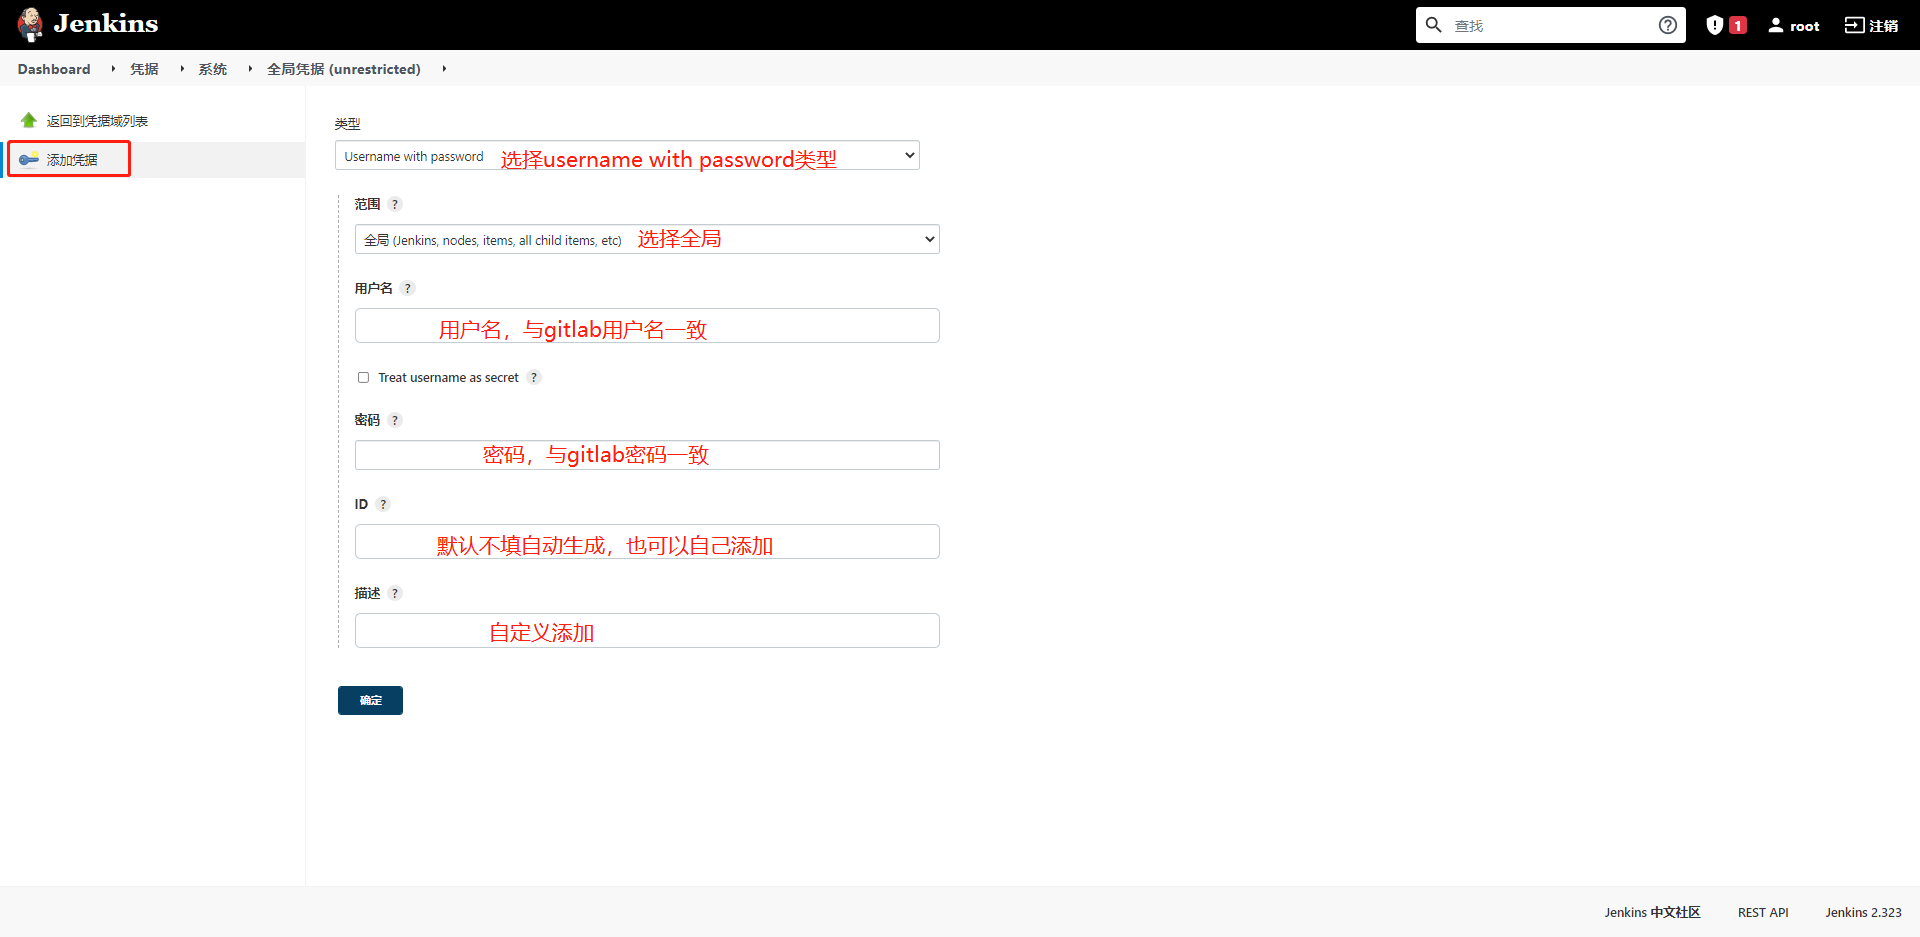
3. Configure credentials / credentials
4. Configure credentials to associate with gitlab
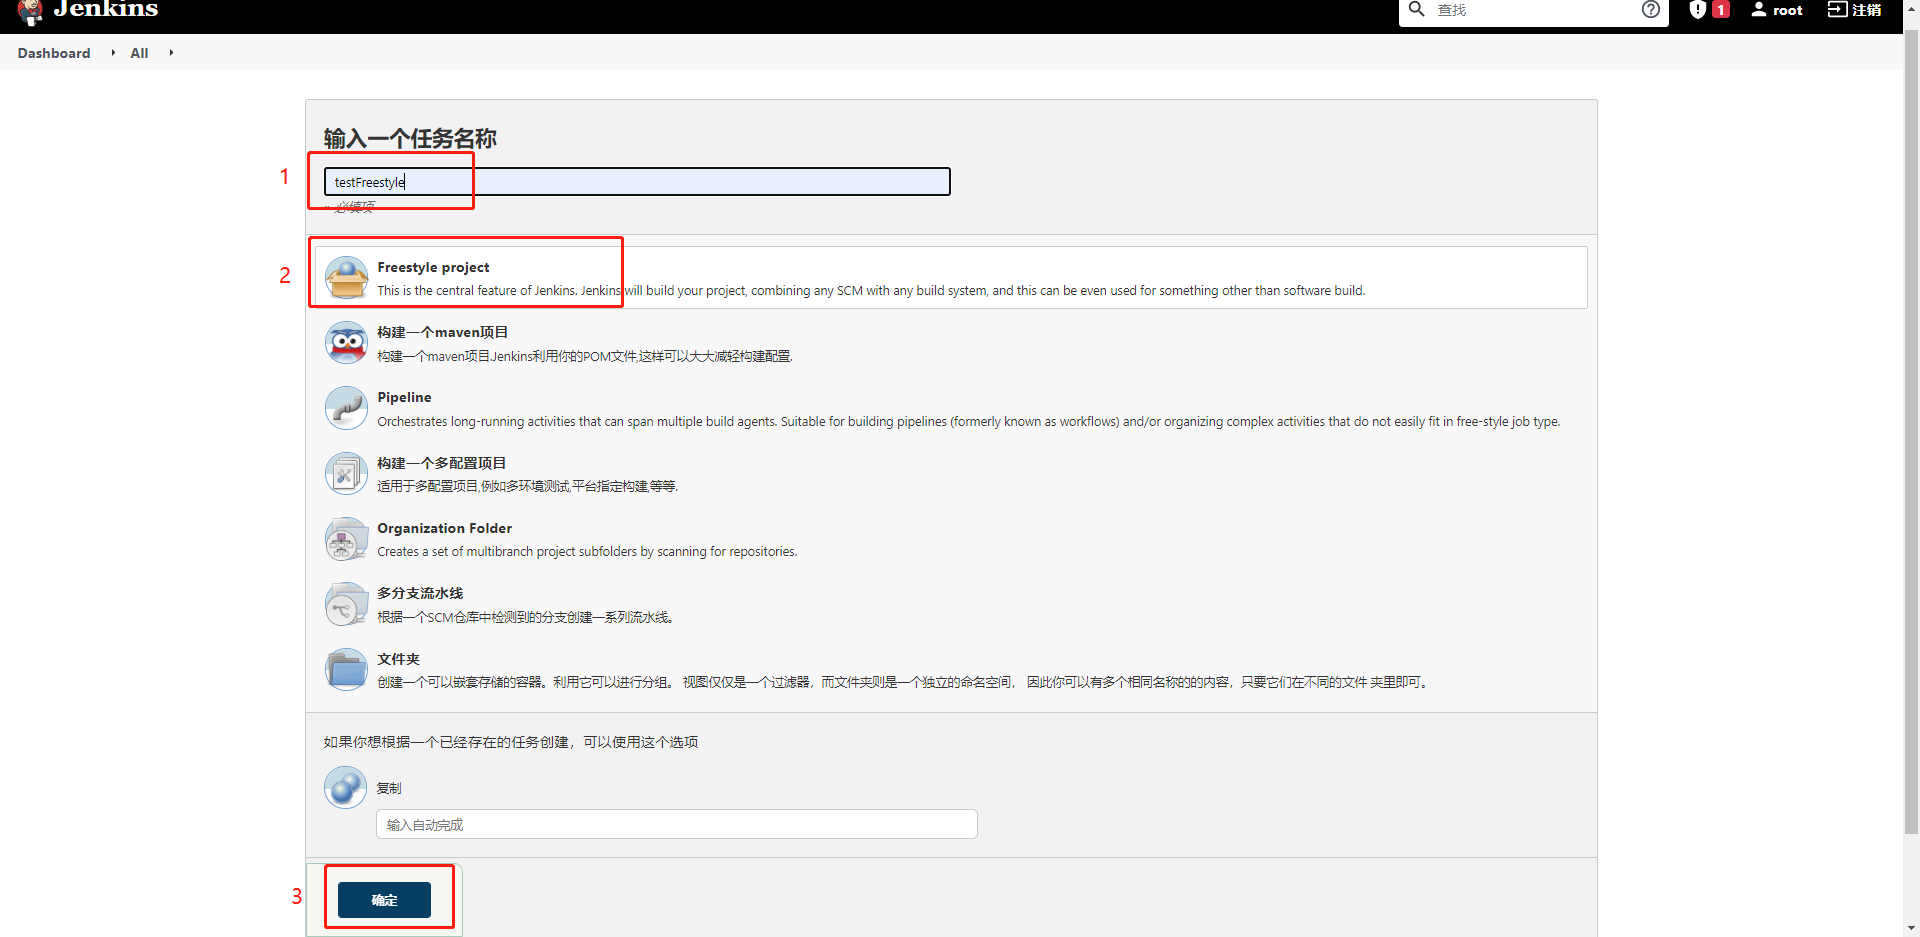
IV. new projects
1. After the preparatory work is configured, create a new project. Here we mainly introduce the freestyle project
2. Set retention time after build
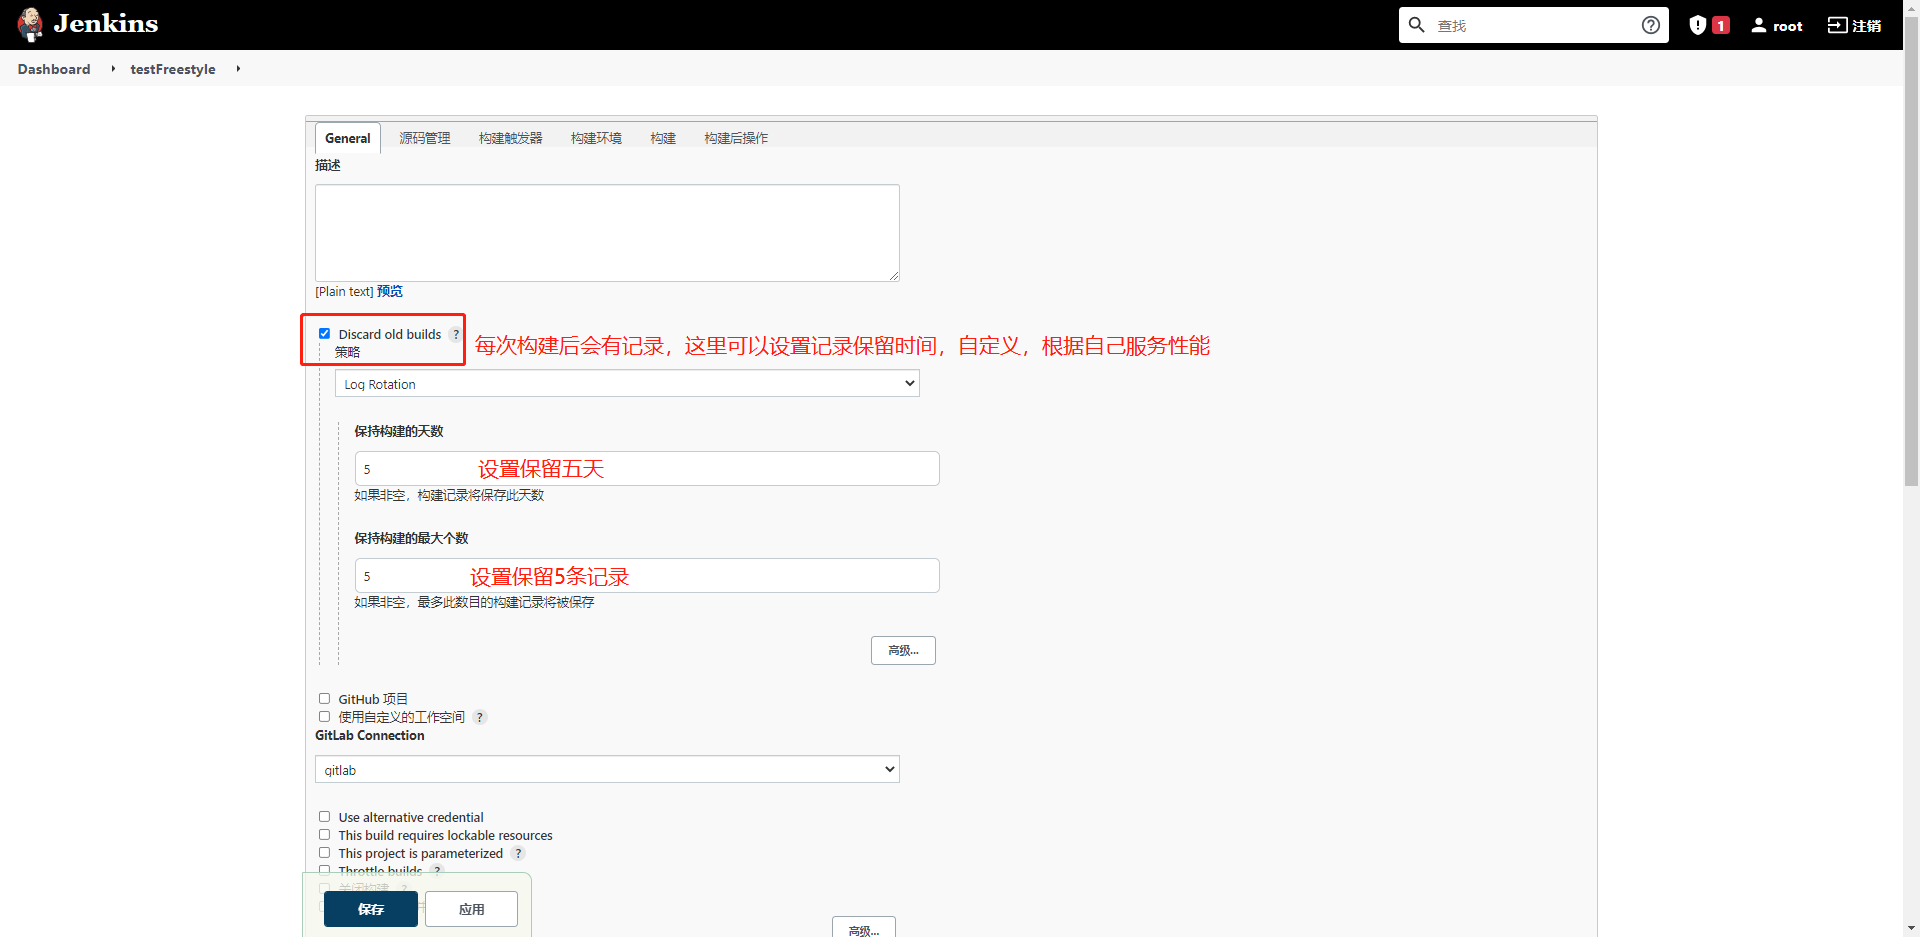
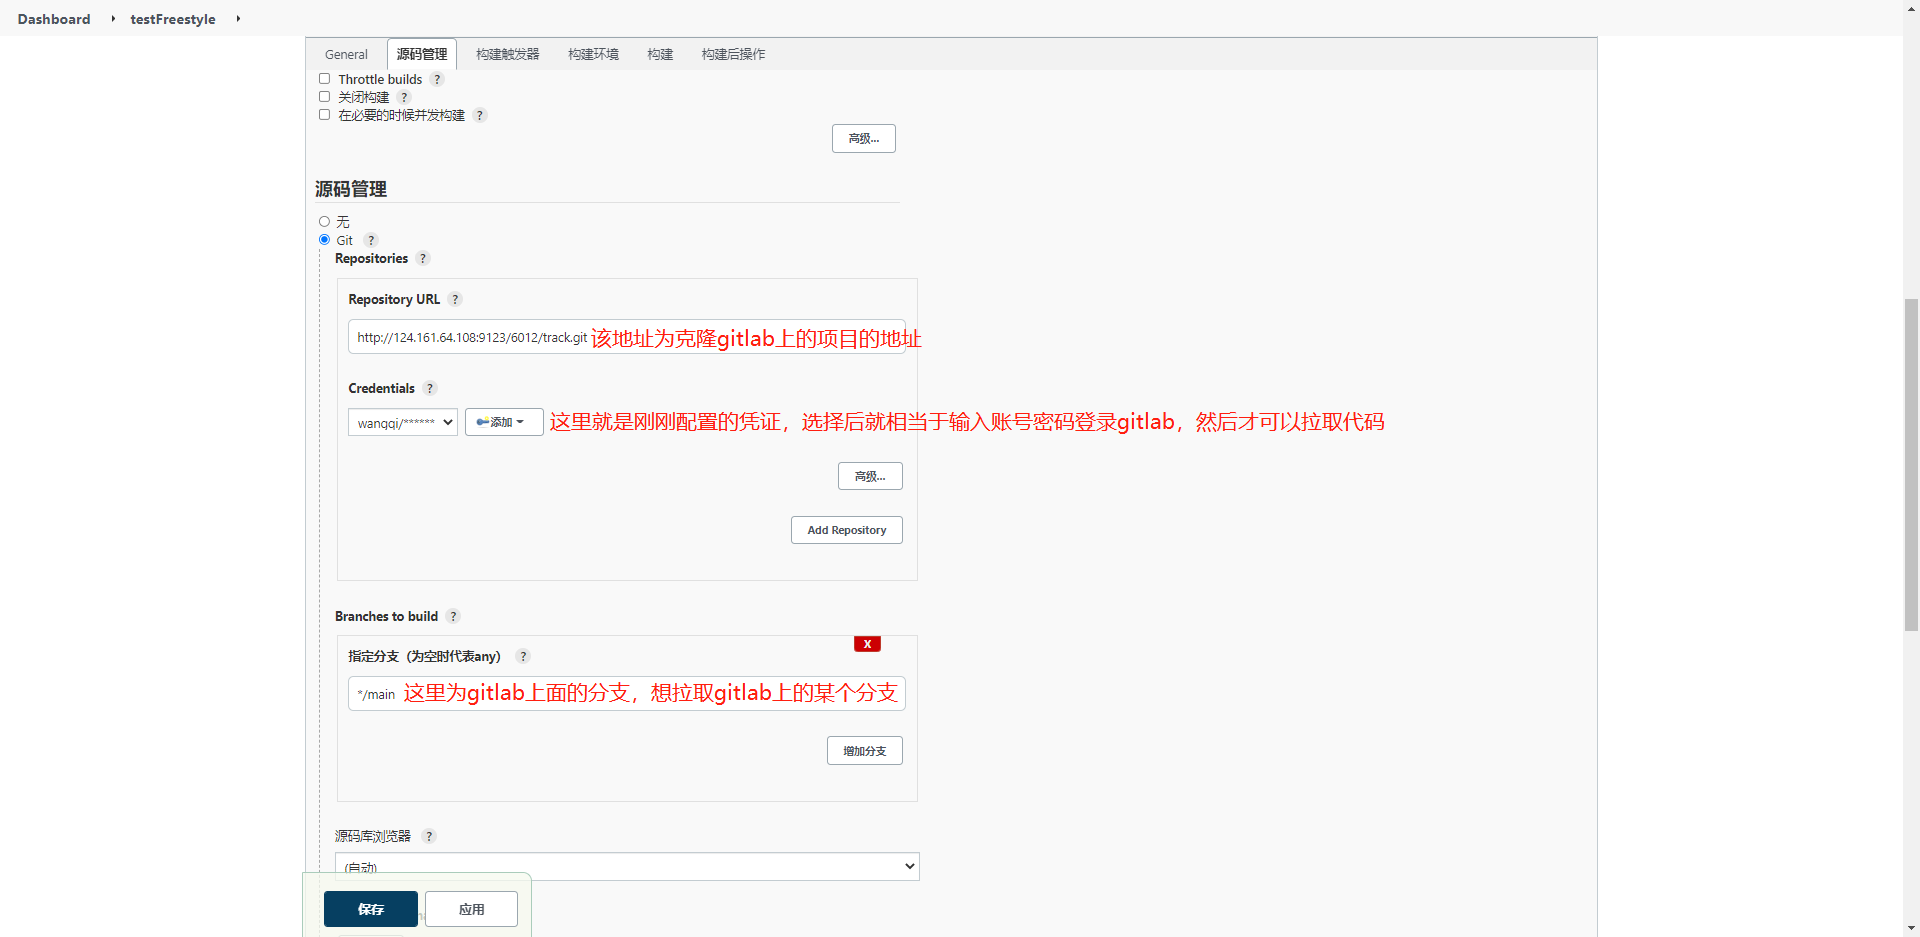
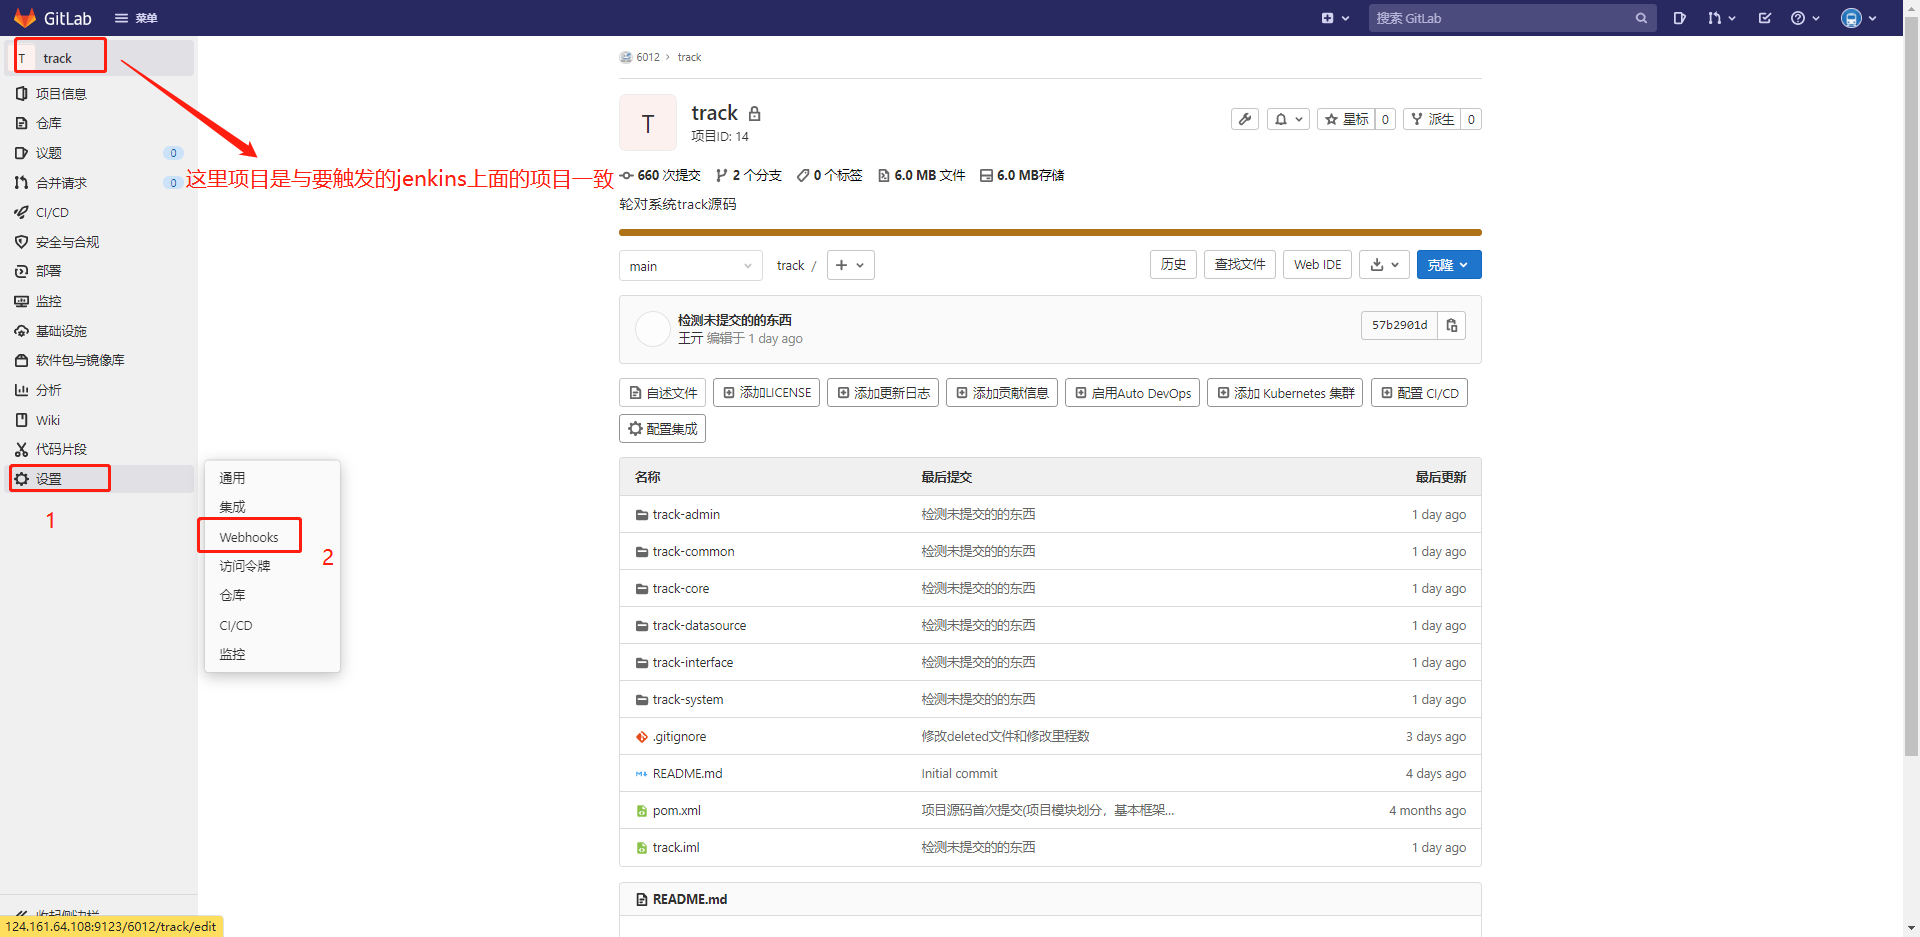
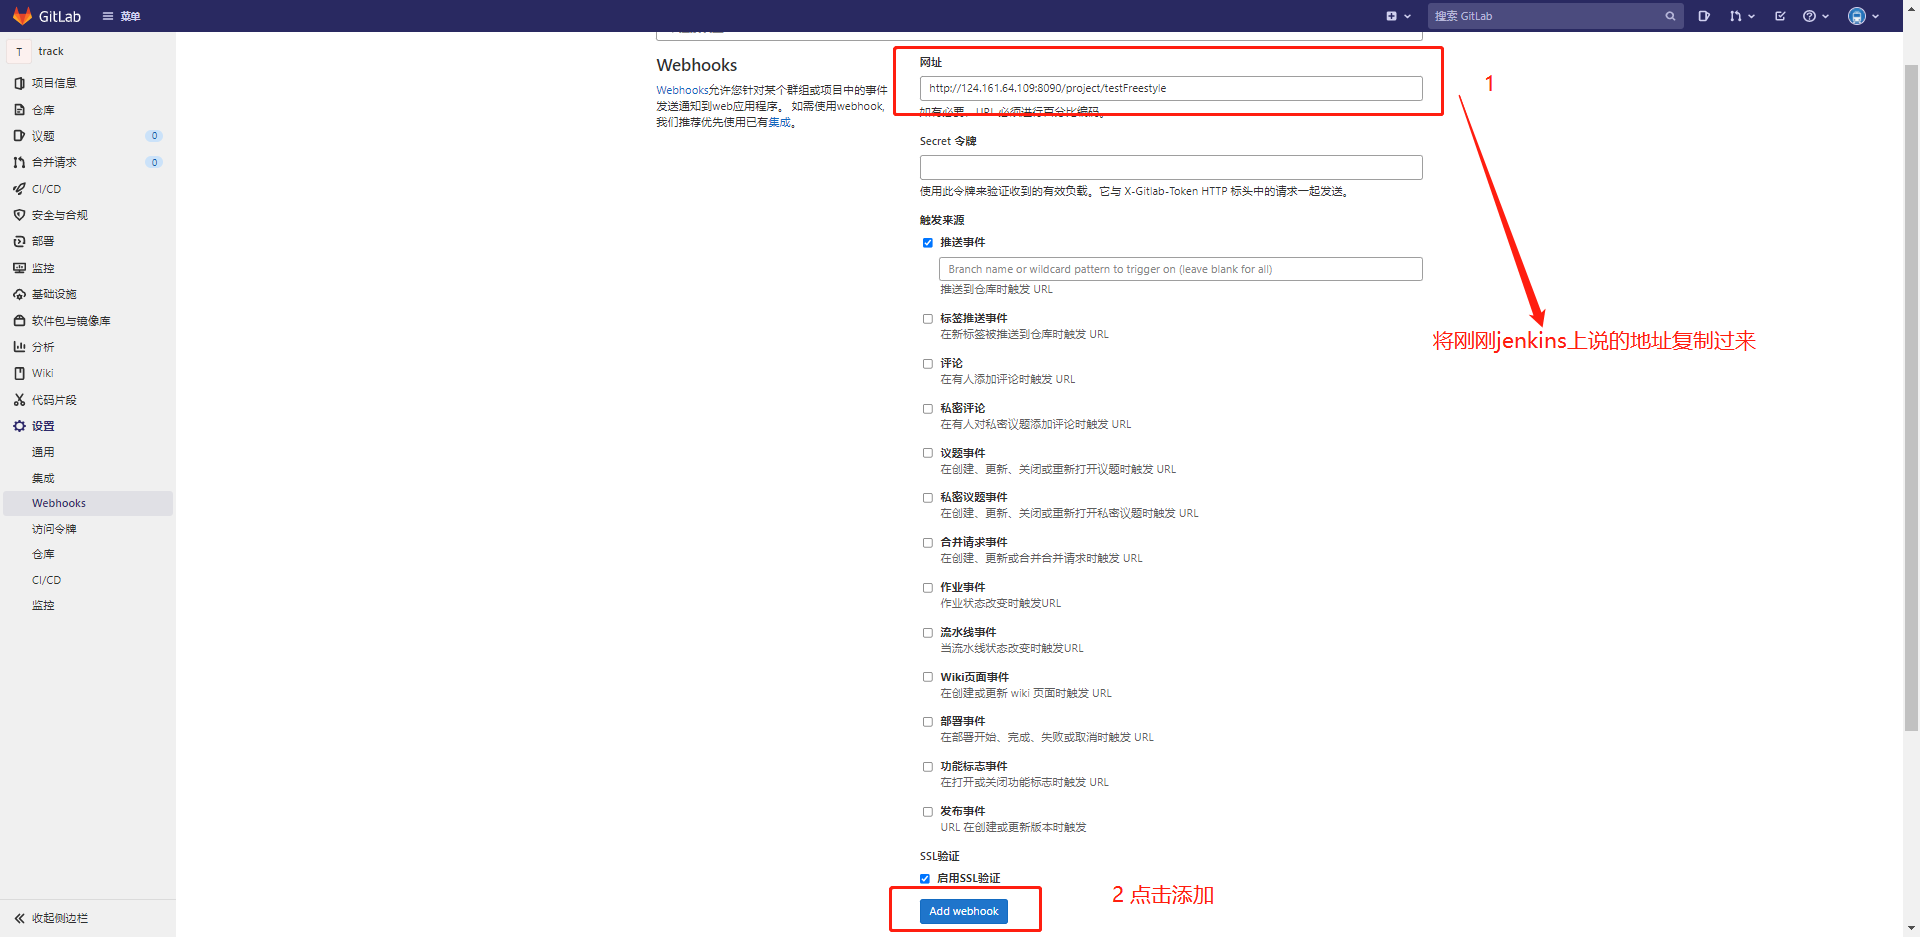
3. Configure gitlab
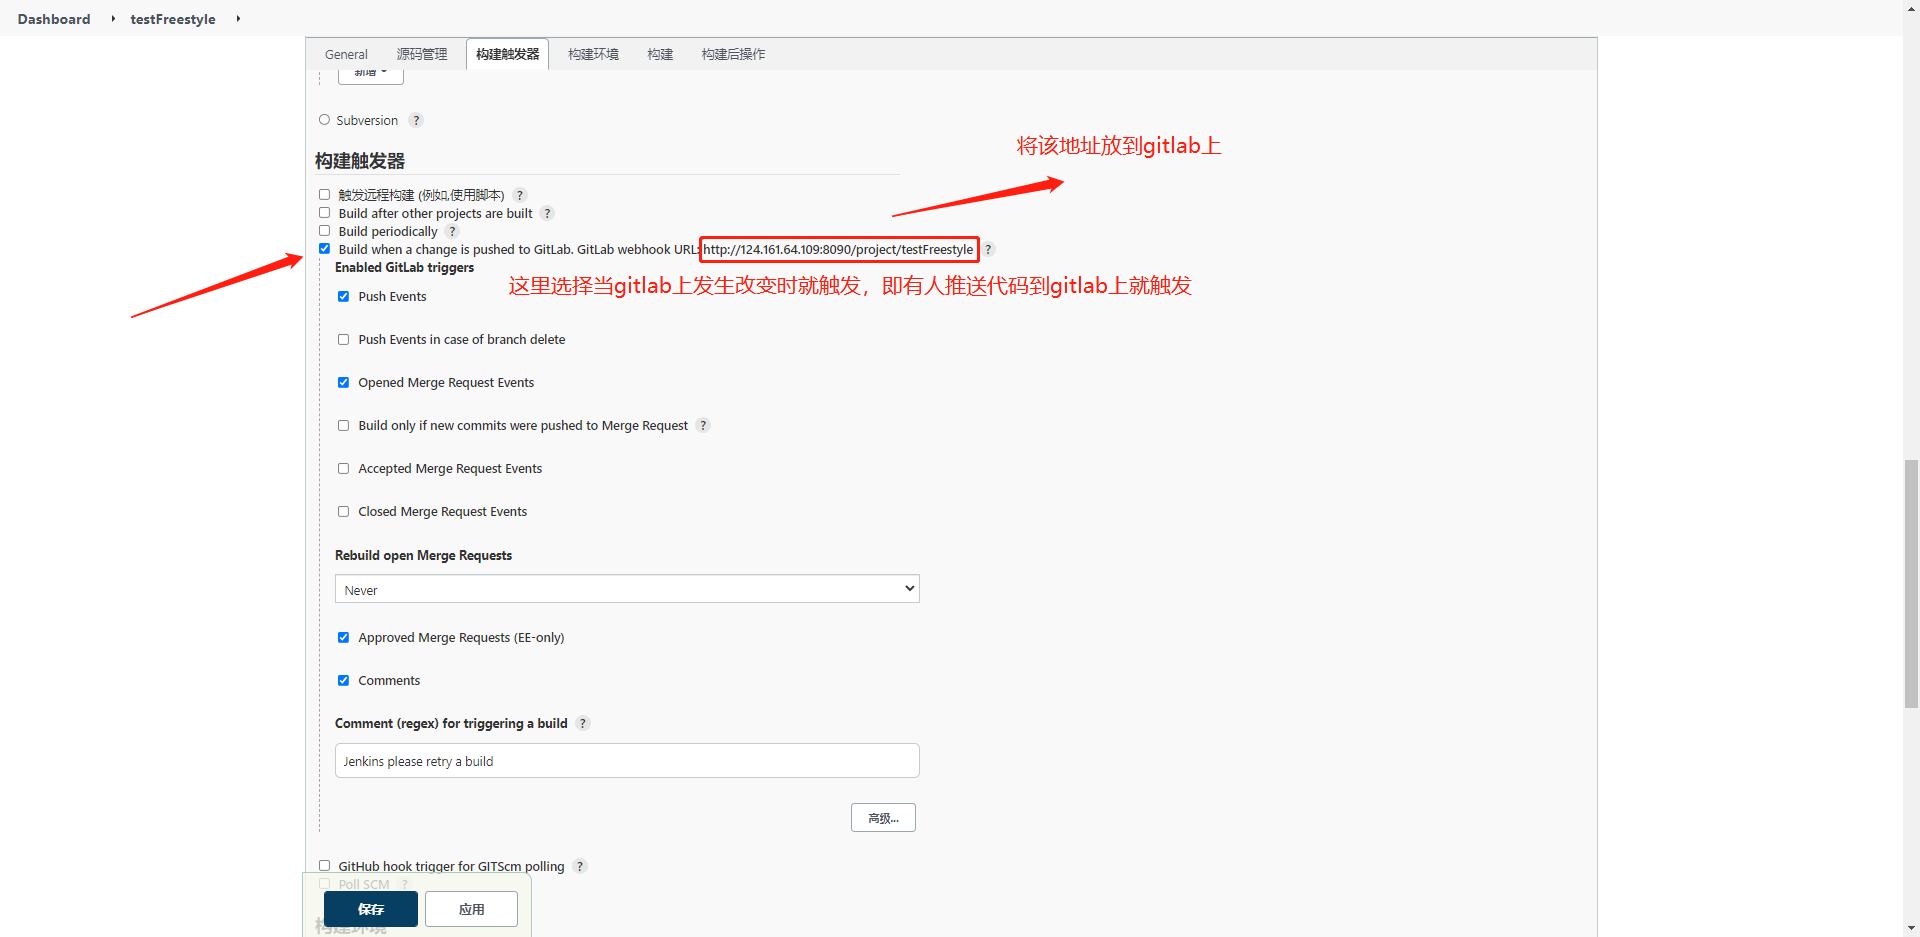
4. Build trigger configuration
5. Configuration script
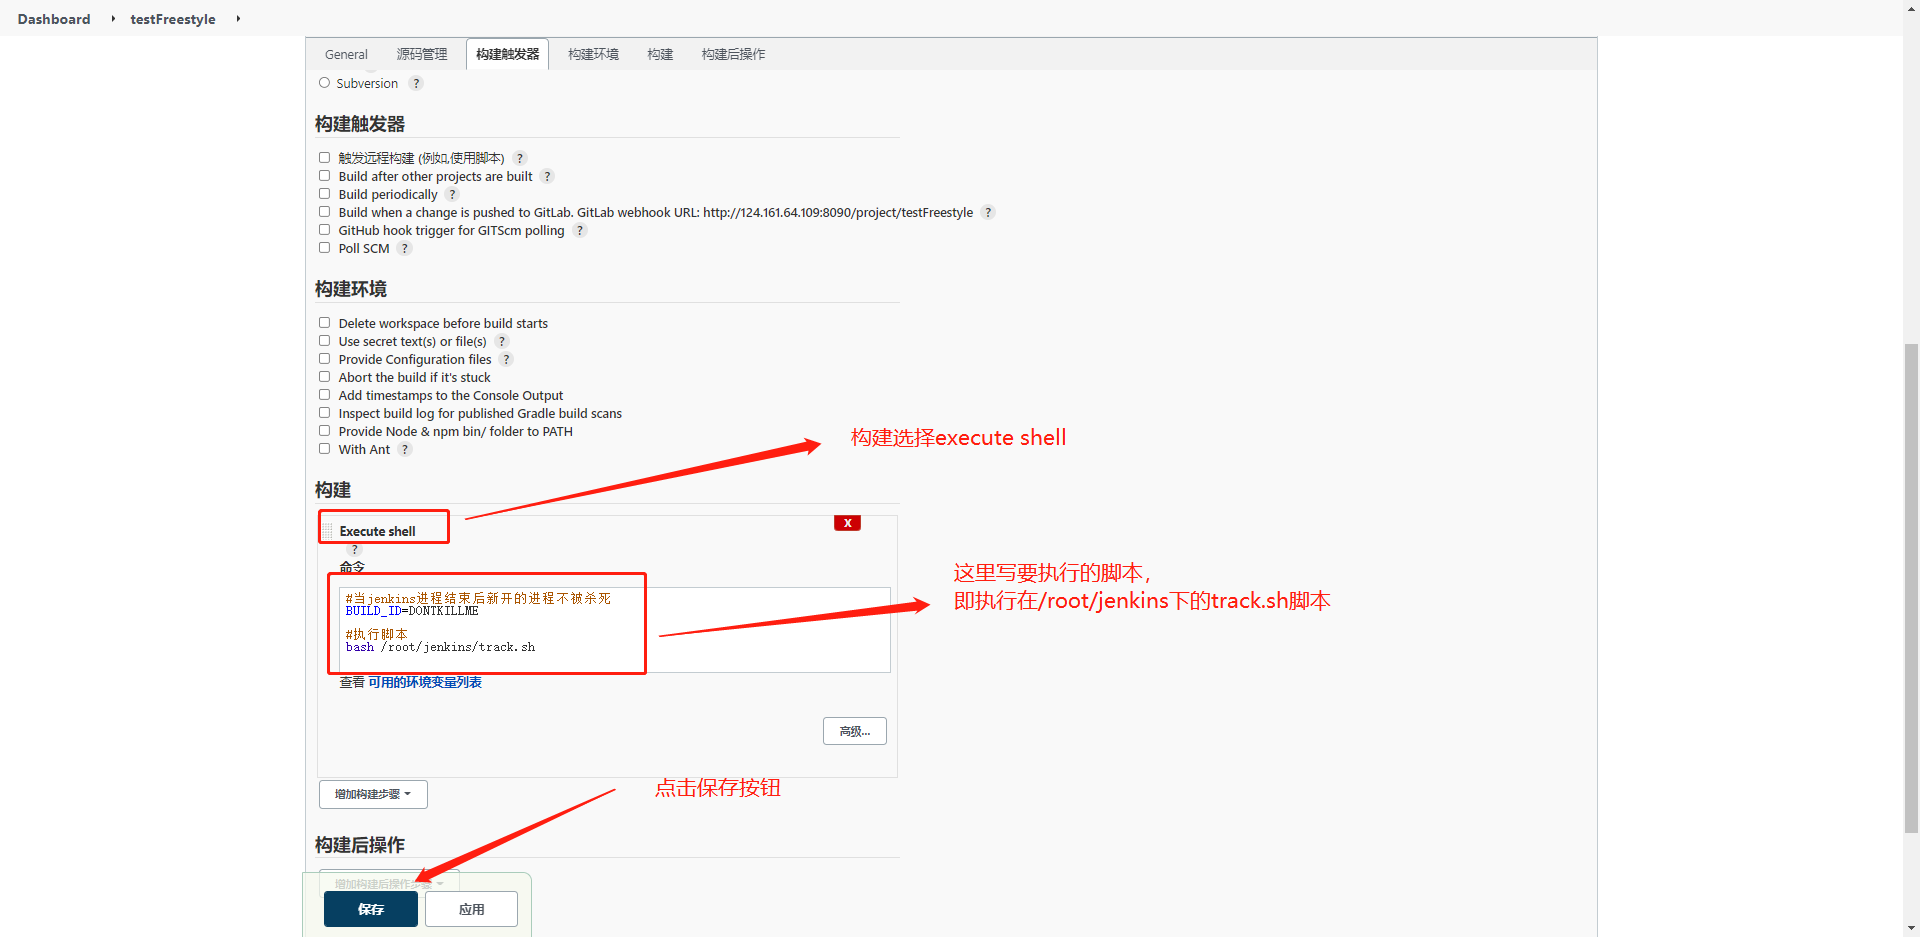
track.sh specific script
#!/bin/sh
#.etc/profil
mvn clean package
#This directory is the target directory of the jenkins workspace
app_dir=/var/lib/jenkins/workspace/freestyleTrack/track-admin/target
#jar package in jenkins working directory
app_file_path=$app_dir/track-admin.jar
#jar package in jenkins working directory
app_path=$app_dir/track-admin.jar

if [ -f $app_file_path ] ;then
echo -- stop app
       pidlist=`ps -ef | grep track-admin.jar | grep -v grep | awk '{print $2}'`

       if [ "$pidlist" = "" ] ;then
              echo "process pid non-existent!"
       else
          echo "process pid :$pidlist"
          kill -9 $pidlist
          echo "KILL $ pidlist:"
       fi

# export JAVA_HOME=/usr/lib/jvm/java-1.8.0-openjdk-1.8.0.312.b07-2.el8_5.x86_64

   echo -- Start $app_path
    nohup java -jar $app_path &
   echo -- Start complete
fi
Similarly, when deploying the front-end project, the script
#!/bin/sh
echo $PATH
node -v
npm -v
#npm install is required for the first installation, but not later
echo 'Start installation npm'
# npm install
echo 'Start packing'
npm run build:prod
echo 'Package succeeded'
#Remove original path
rm -R /opt/track/track-ui/
#Put the newly packaged file in the original path
cp -r /var/lib/jenkins/workspace/freestyleTrack-ui/dist/. /opt/track/track-ui
echo 'to configure track-ui success'
V. configure SonarQube code walkthrough
Official website: https://www.sonarqube.org
The download version is 6.7 4. If the download version is too high, mysql5.0 will not be supported Version 7 and jdk1 Version 8
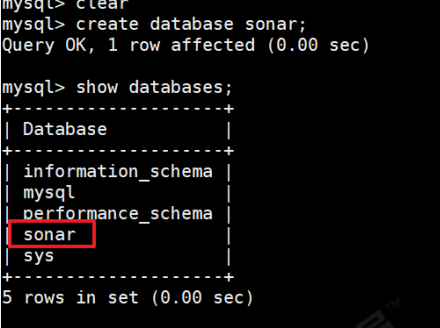
1 in mysql5 7 create sonar database in database
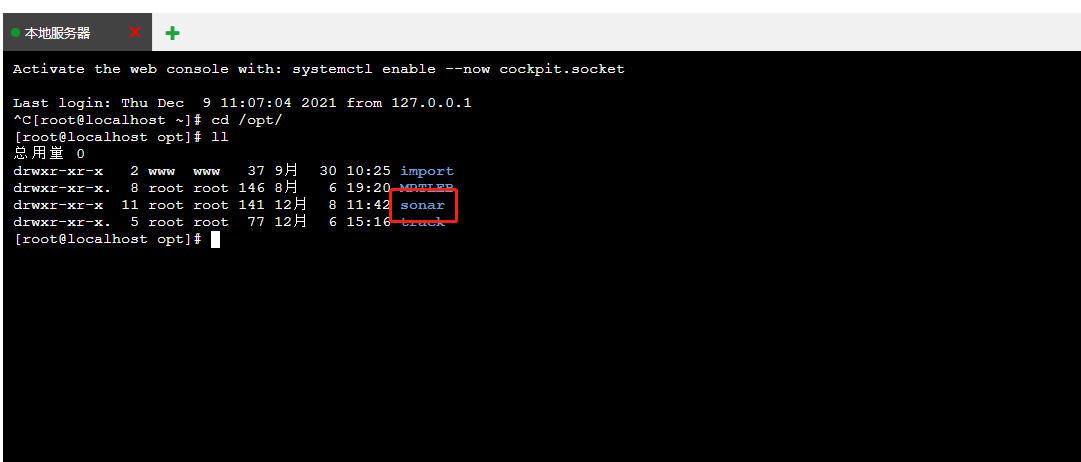
2 download sonar compressed package https://www.sonarqube.org/downloads/
After downloading, unzip it to the / opt directory
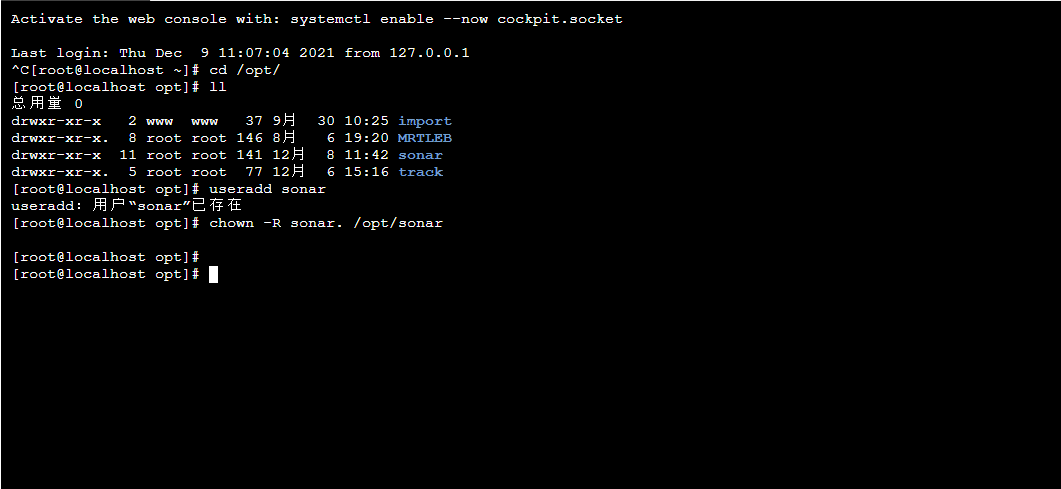
3. To create a sonar user through the command useradd sonar, you must start it with sonar, otherwise an error will be reported
Through the command chown - R sonar/ Opt / sonar change sonar directory and file permissions
4. Modify sonar configuration file
Via the command VIM / opt / sonar / conf / sonar Properties enter sonar Properties file
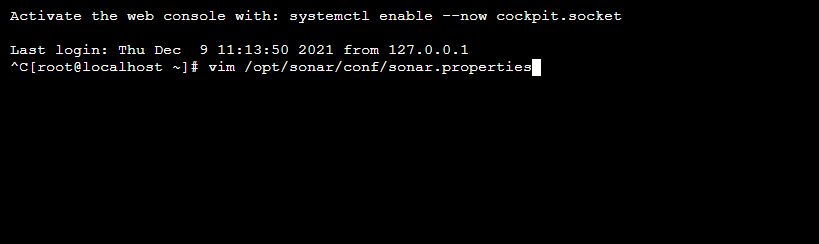
5. Configure the following places
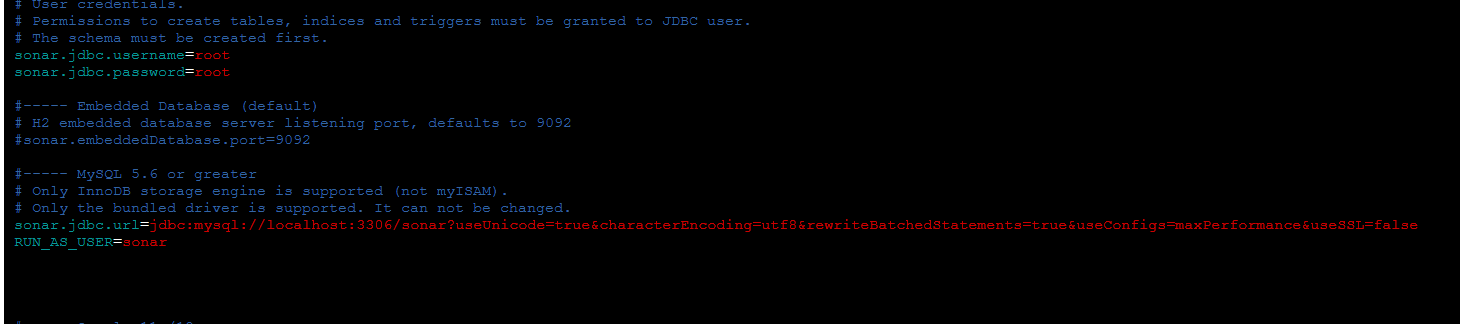
sonar.jdbc.username=root
sonar.jdbc.password=root
sonar.jdbc.url=jdbc:mysql://localhost:3306/sonar?useUnicode=true&characterEncoding=utf8&rewriteBatchedStatements=true&useConfigs=maxPerformance&useSSL=false
RUN_AS_USER=sonar
Note: sonar listens to the 9000 port by default. If the 9000 port is occupied, it needs to be changed.
6. Start sonar. During the startup process, some pits can be solved through Baidu
cd /opt/sonar
su sonar ./bin/linux-x86-64/sonar.sh start start
su sonar ./bin/linux-x86-64/sonar.sh status view status
su sonar ./bin/linux-x86-64/sonar.sh stop stop
tail -f logs/sonar.logs view logs
7. Visit sonar http://124.161.64.109:9000
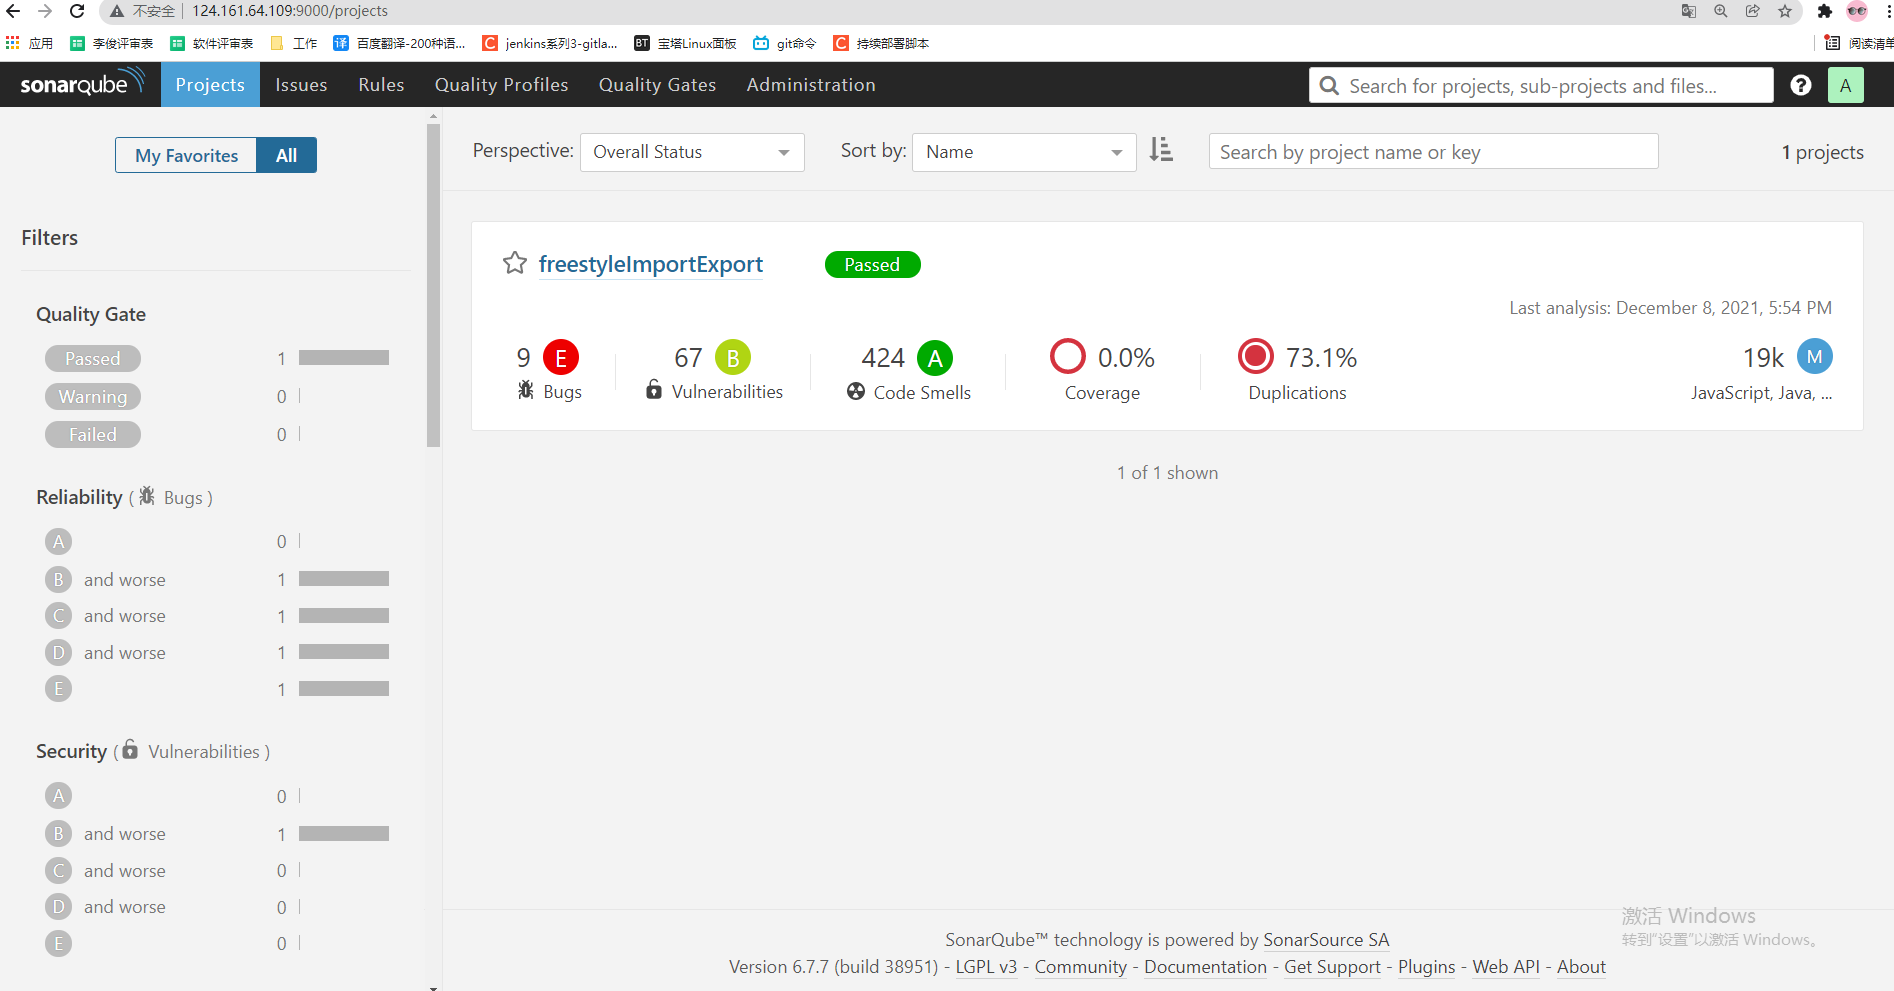
Default account: admin/admin
Create token
When logging in for the first time, you will be asked to create a token. At this time, the token should be saved, which will be used in jenkins integration later. Since the token value has been set, there is no screenshot effect of setting token here
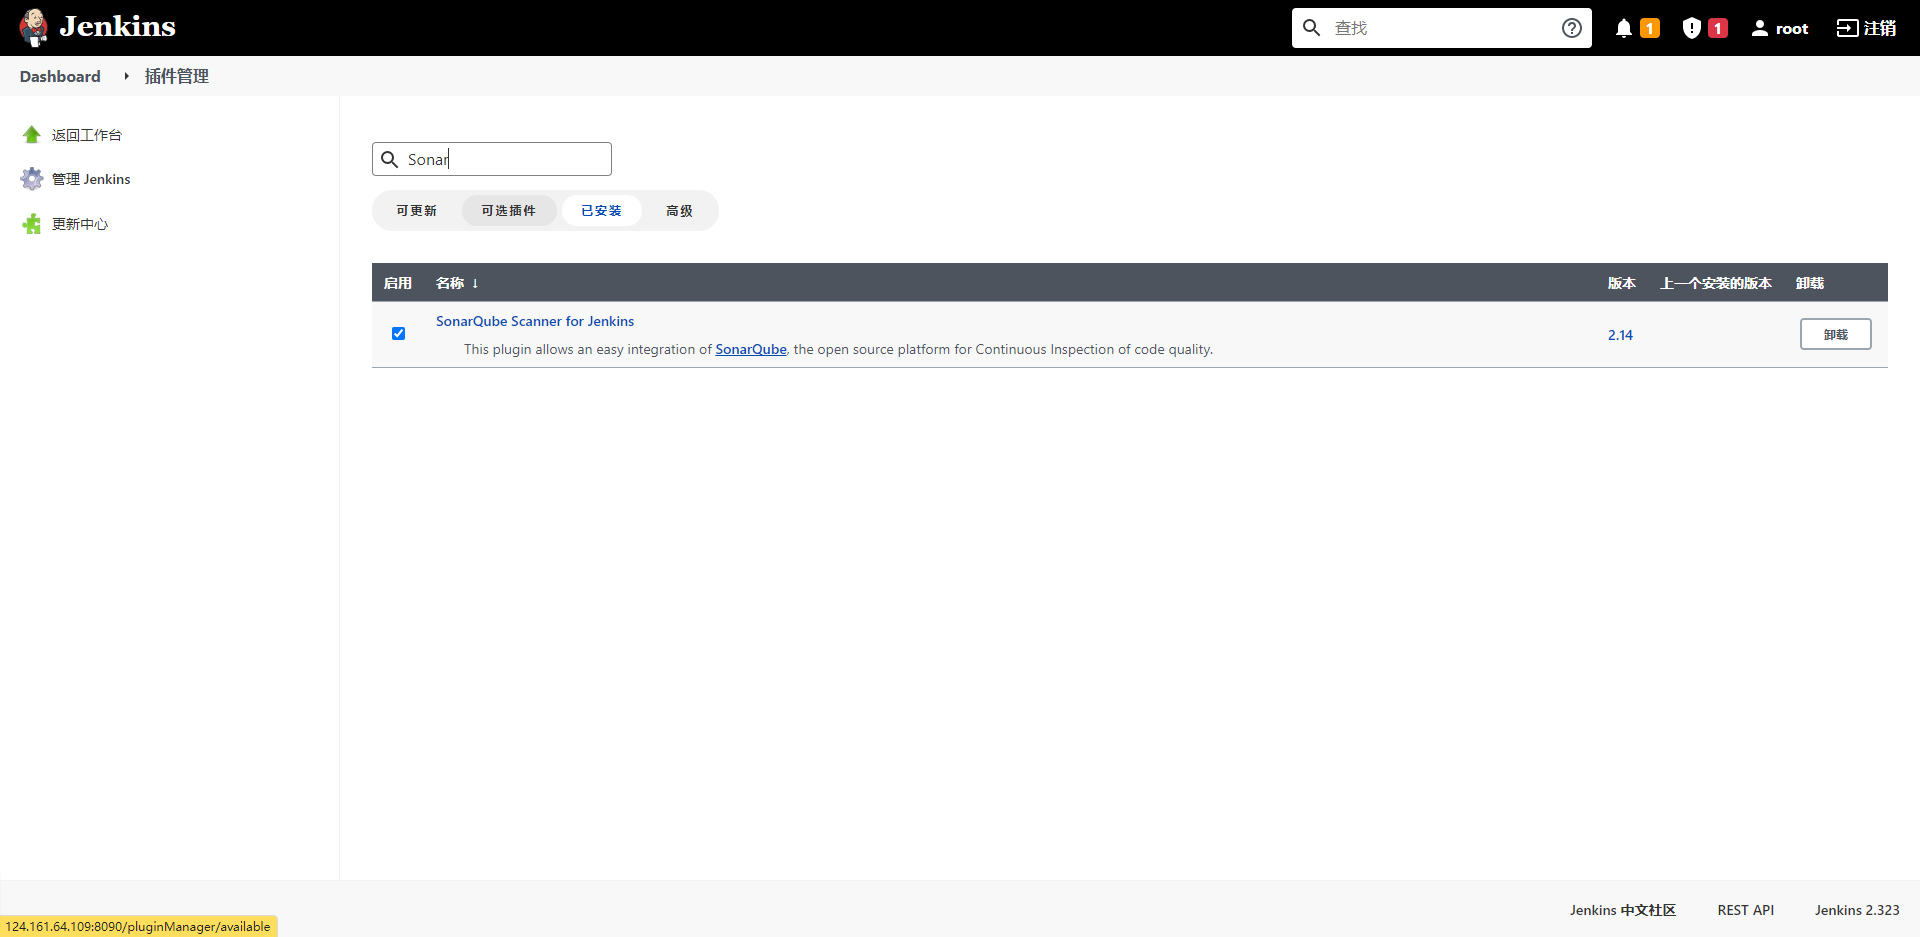
8. Installing the SonarQube Scanner plug-in in jenkins
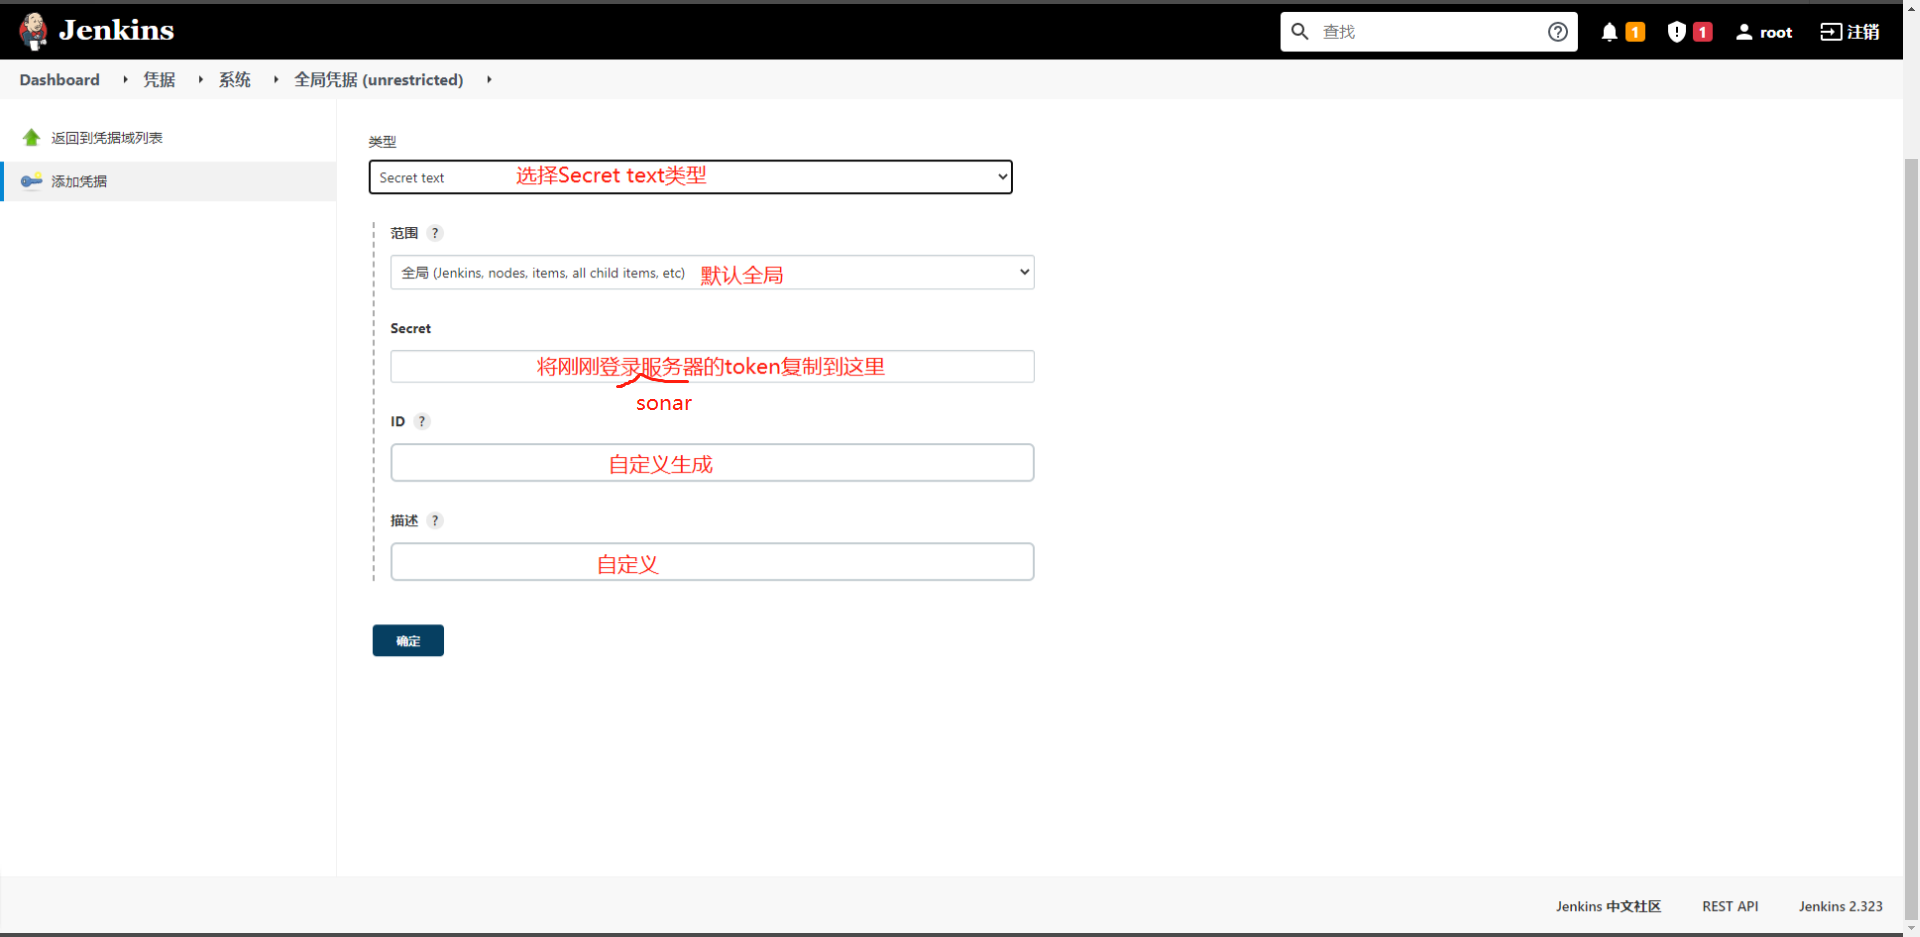
9. Add SonarQube credentials
1) In user list - > root - > credentials
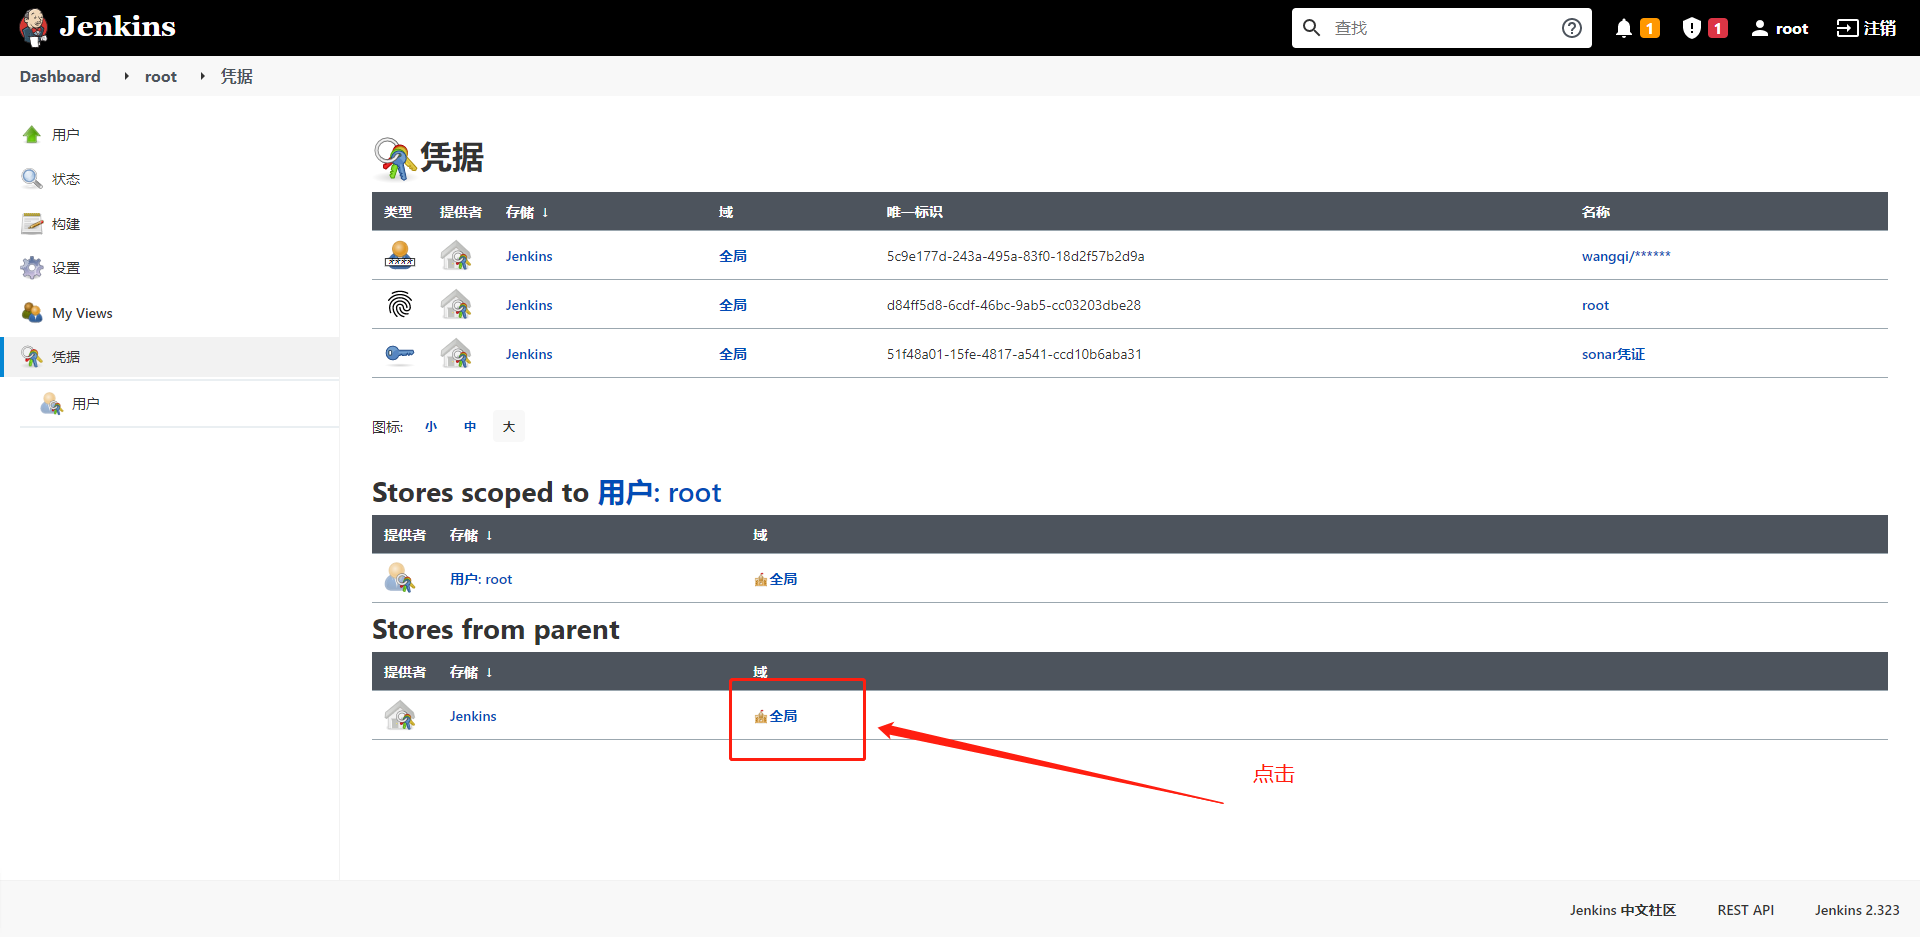
Then click "add credentials"
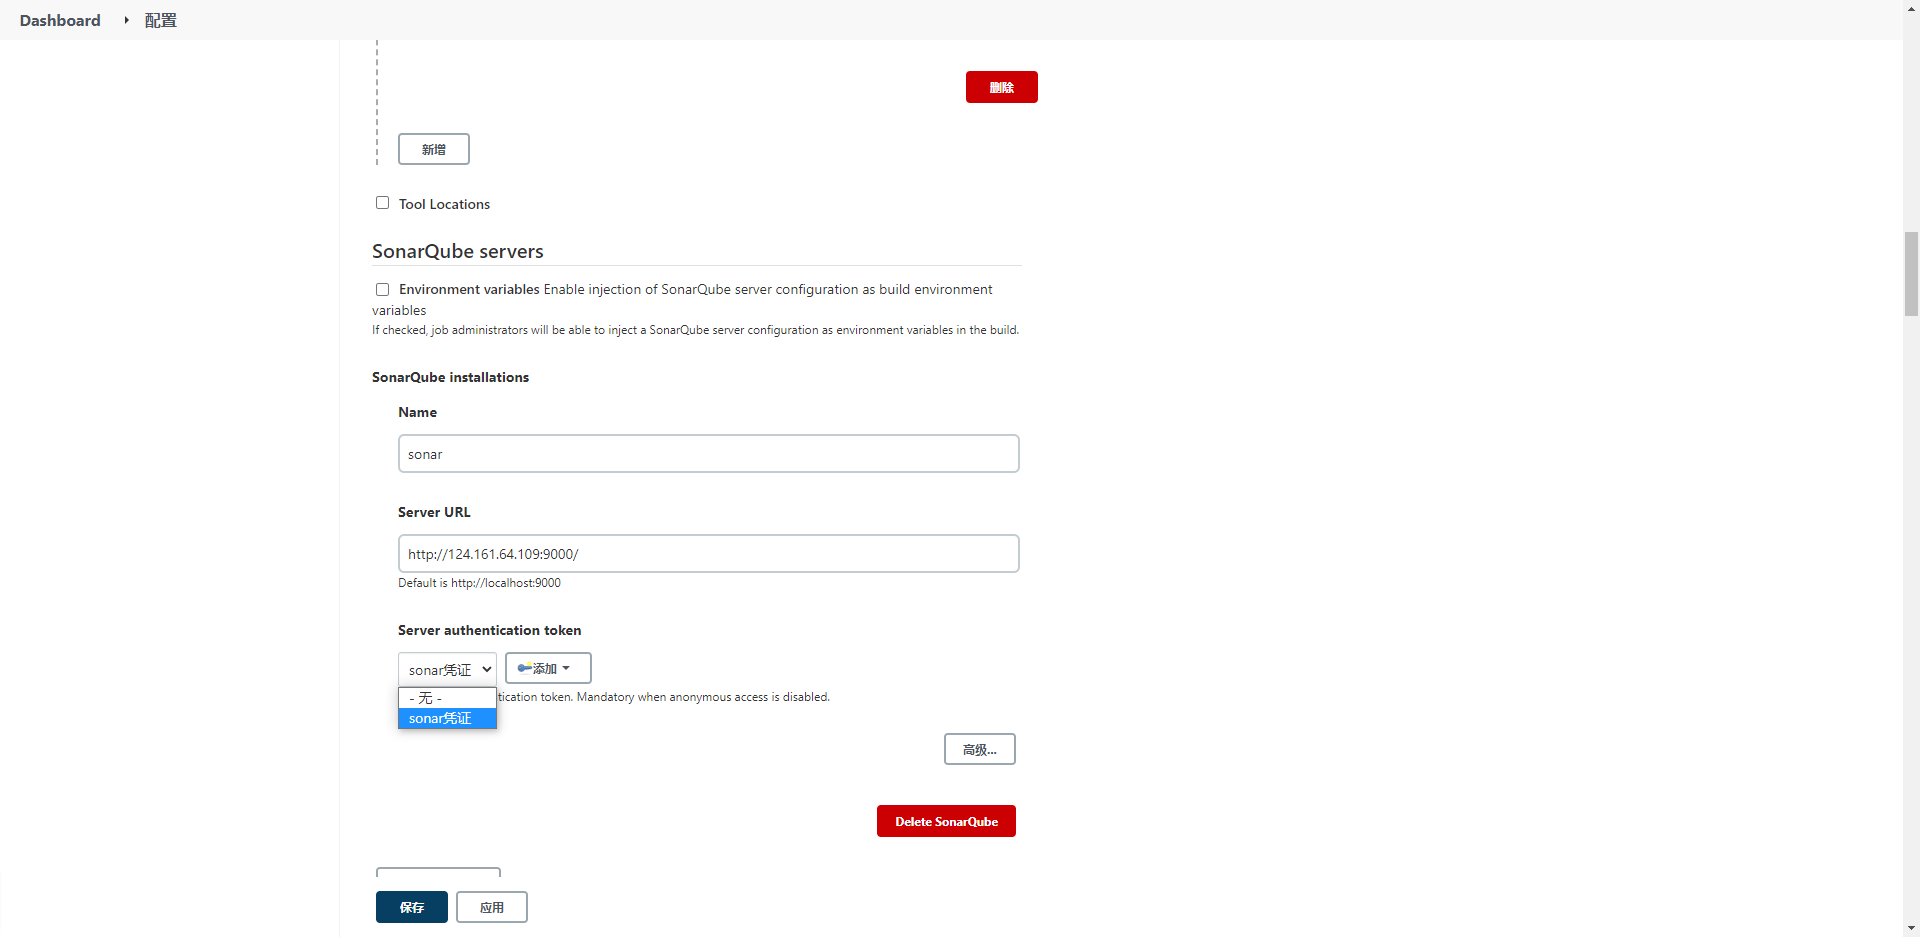
10. Jenkins configures SonarQube, and manage Jenkins - > configure system - > SonarQube servers
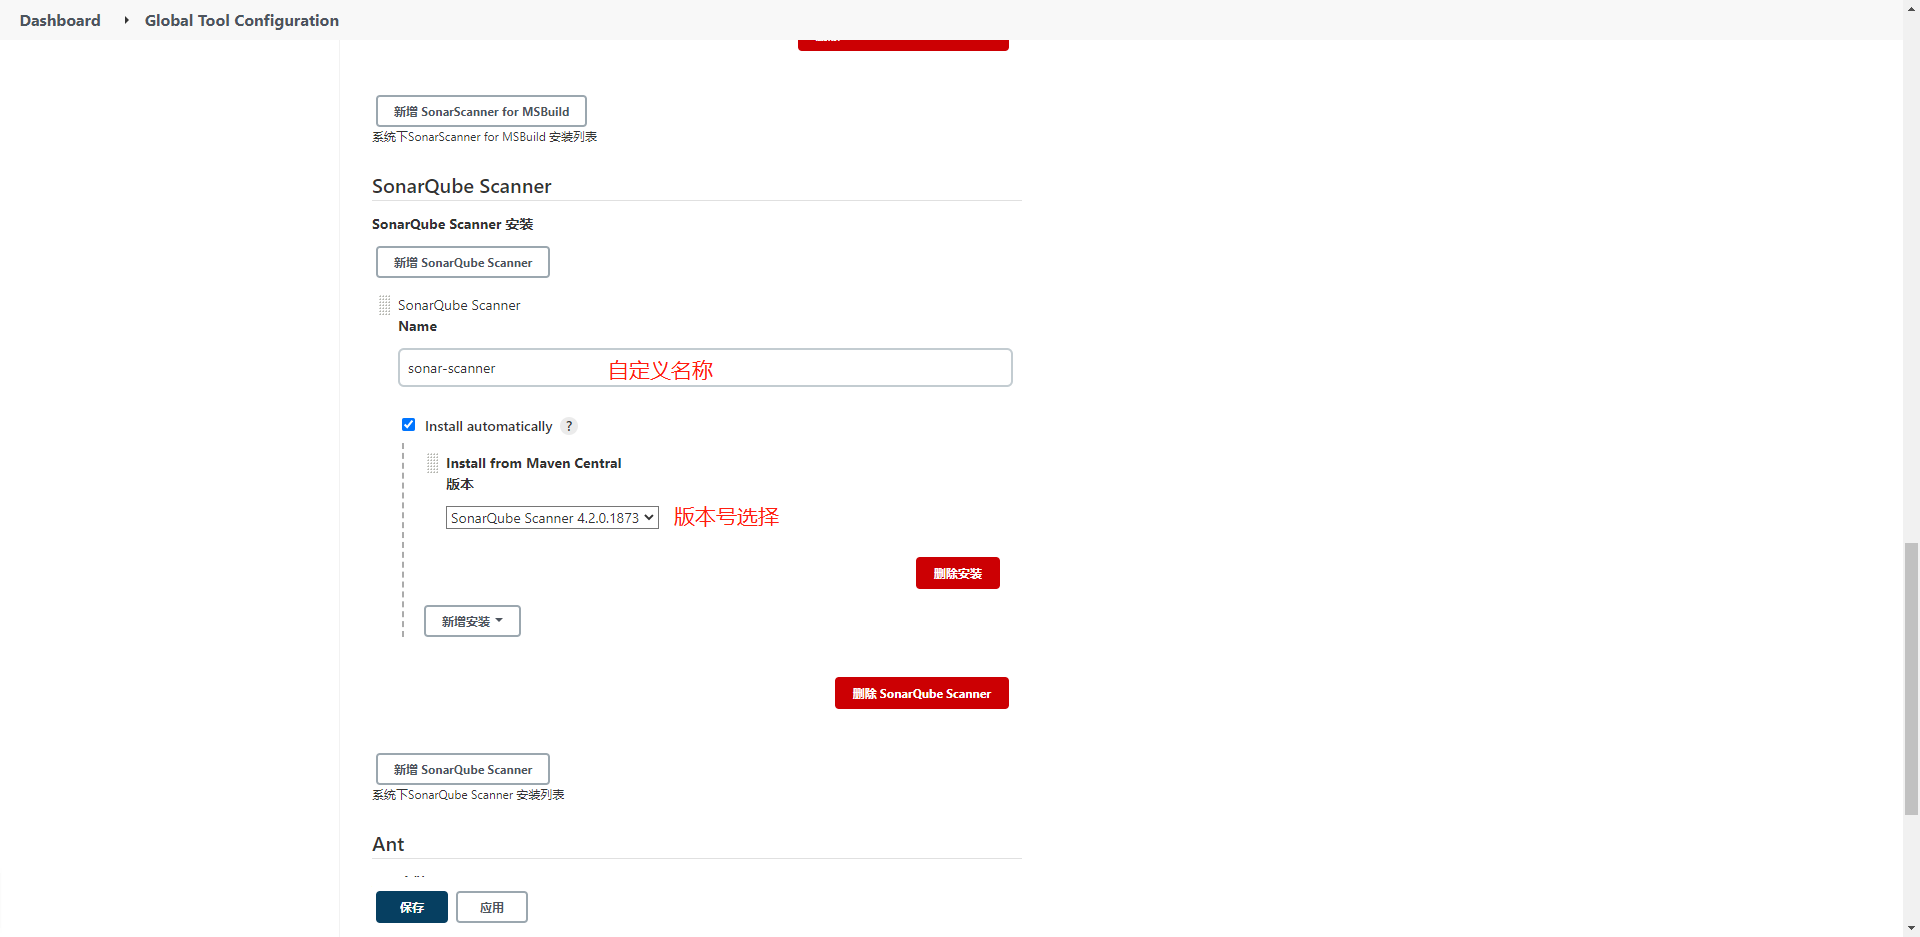
11. Configure in manage Jenkins - > global tool configuration
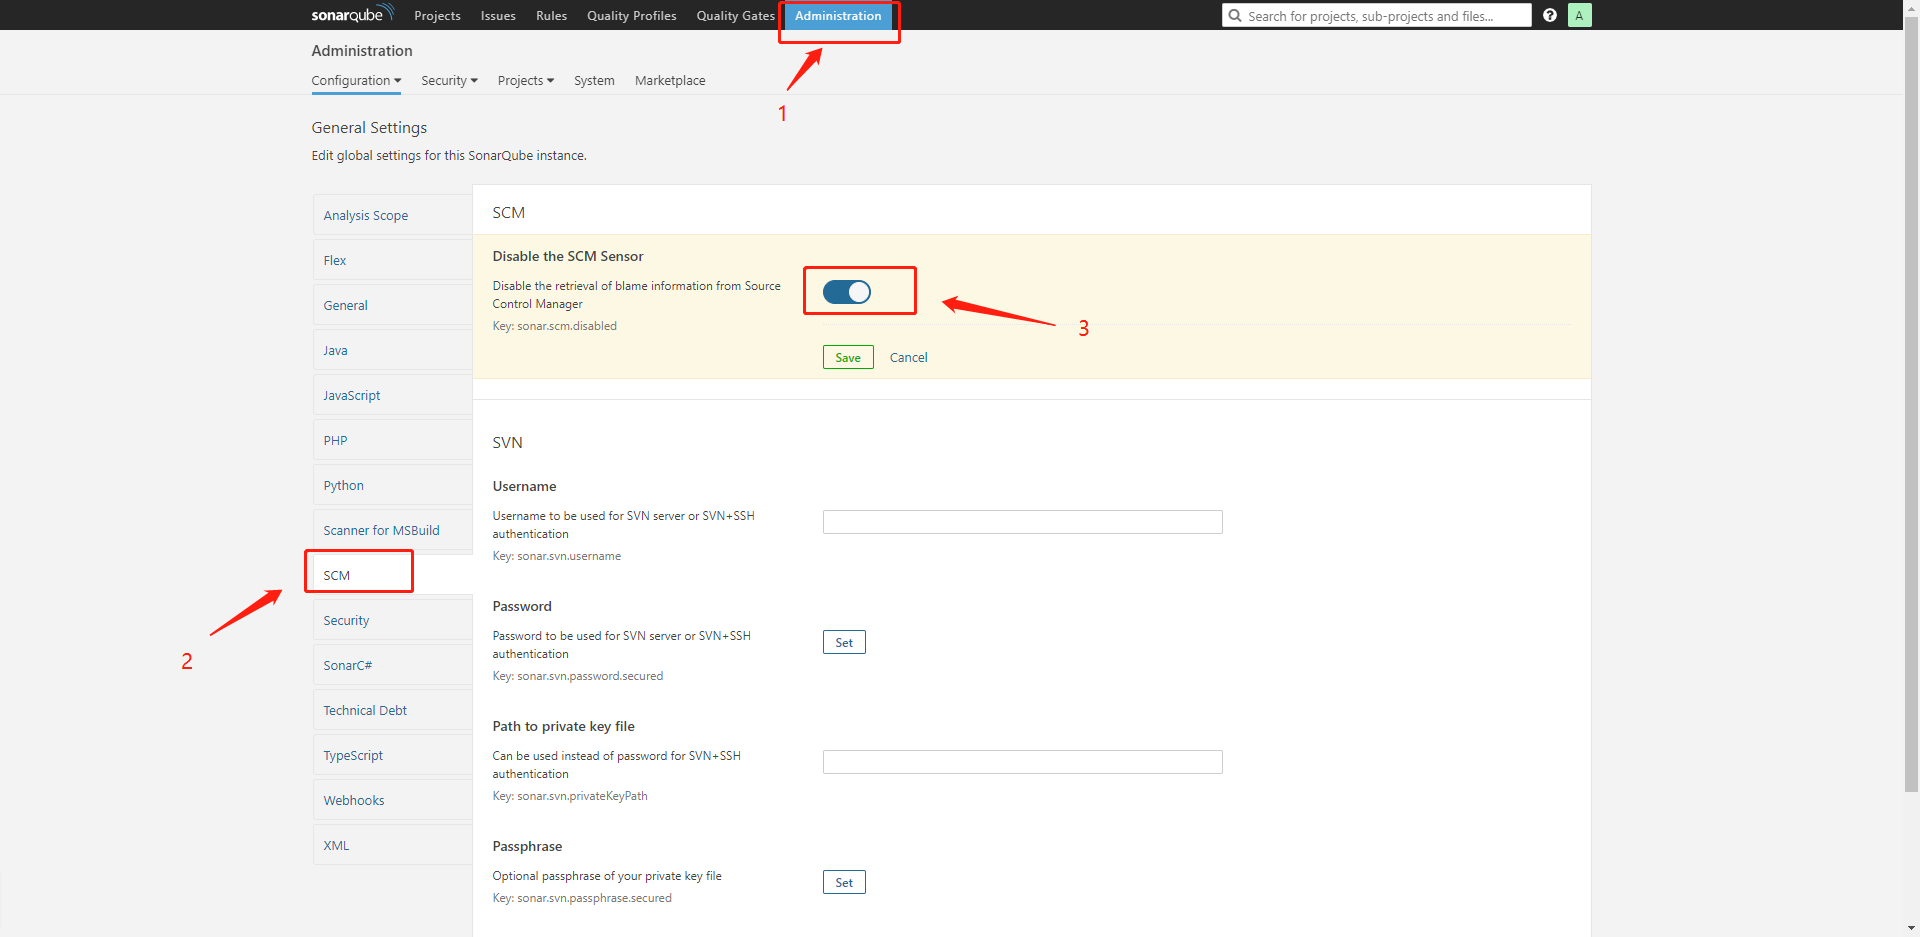
12. SonaQube turns off the function of uploading audit results to SCM
13. Add SonaQube code review to the project (non pipeline project)
Add build steps:
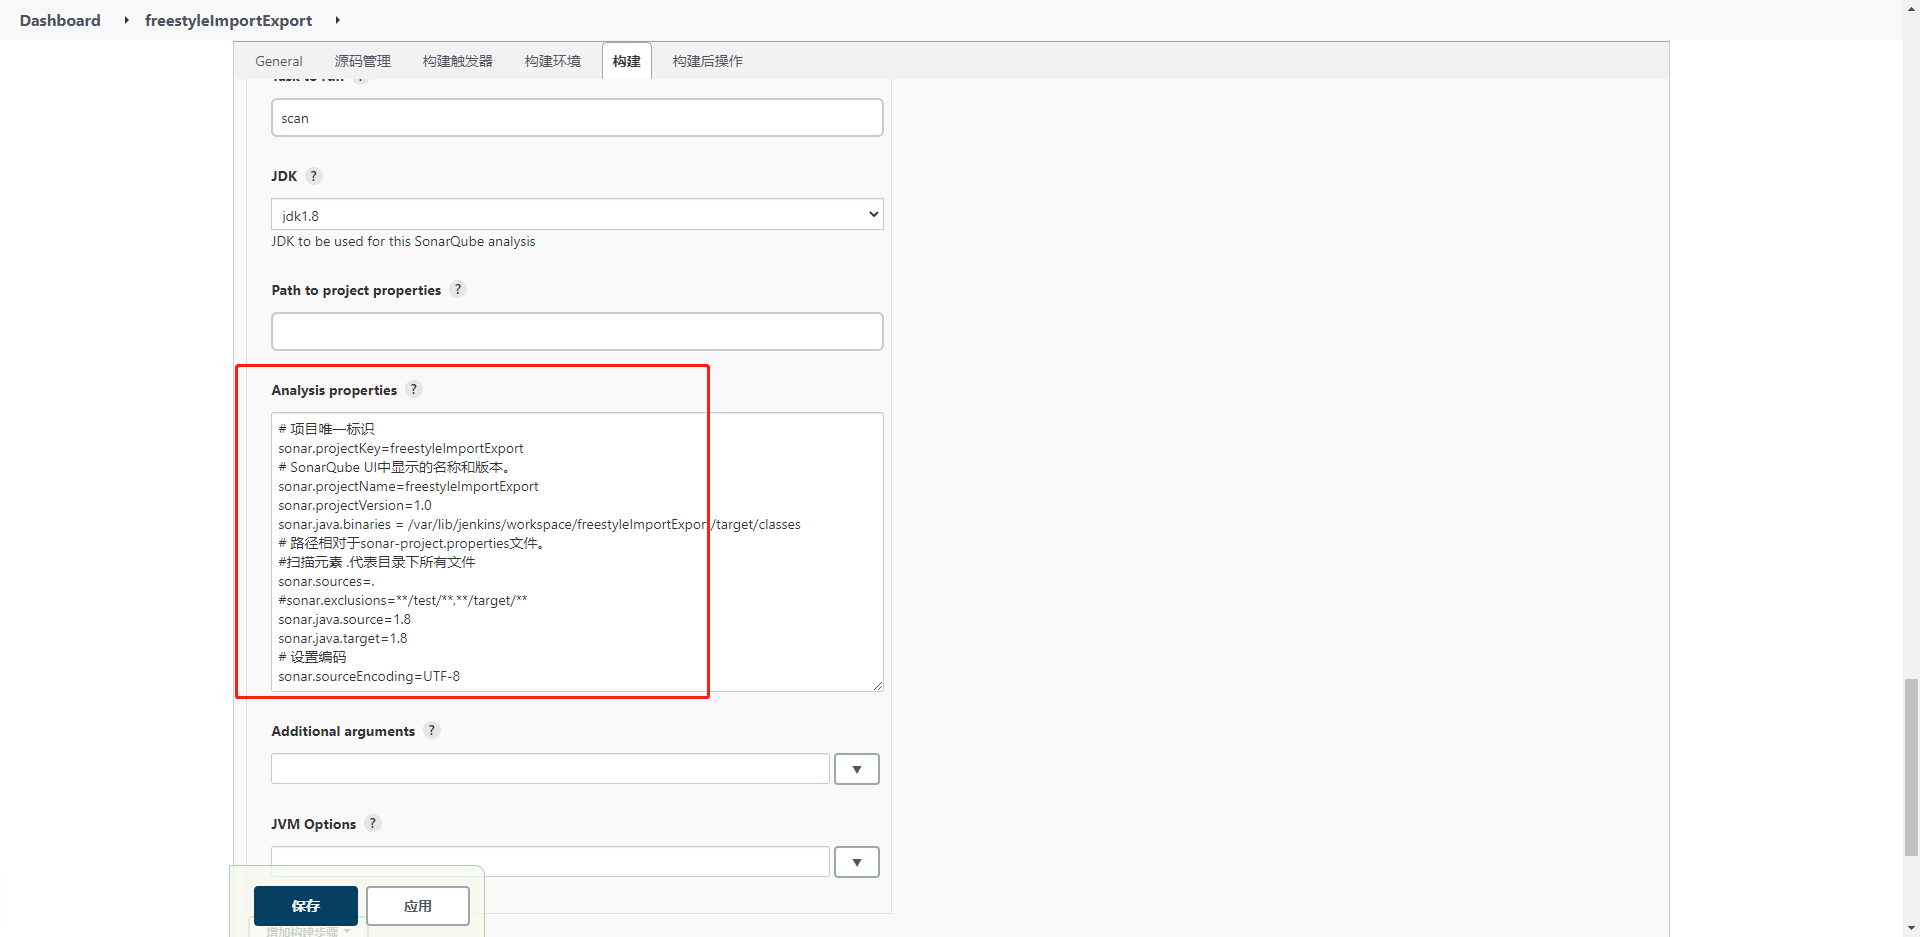
# Project unique ID
sonar.projectKey=freestyleImportExport
# The name and version displayed in the SonarQube UI.
sonar.projectName=freestyleImportExport
sonar.projectVersion=1.0
#This configuration is used to load the compiled files under the project. If this version of sonar does not have this configuration, an error will be reported
sonar.java.binaries =/var/lib/jenkins/workspace/freestyleImportExport/target/classes
#Scan elements Represents all files in the directory
sonar.sources=.
#sonar.exclusions=**/test/**,**/target/**
sonar.java.source=1.8
sonar.java.target=1.8
# Set encoding
sonar.sourceEncoding=UTF-8
Summary:
In fact, CI/CD continuous integration continuous deployment is to monitor the code Submission on gitlab through a webhook trigger. If new code is submitted, synchronize the code to genkins workspace, and then recompile and package the projects in the workspace and start after script deployment.