1. Background
I have previously translated the tutorial on Google's official CodeLabs. The tutorial is very detailed, and the code can also be found on Github. This article aims to use the effect and Demo on my APP to specifically use Navigation. And analyze its source code.
For the basic introduction, you can see the articles I translated before. Basically, google translated a general introduction.
1, Android Jetpack_Note_CodeLabs Navigation
2. Basic use
Although Navigation has been introduced in detail in the previous article, here is a brief description of my specific use in the project:
2.1 Navigation+DrawerLayout+ToolBar
We can work by using Navigation in conjunction with the DrawerLayout sidebar and Toolbar title. We no longer need to define click events, nor do we need to manage fragments to switch. We only need to do relevant configuration and a very small amount of code.
2.1.1 DrawerLayout
The usage of the sidebar is the same as our previous use. Configure the sidebar in our NavigationView_ headerLayout_,_ menu_ OK;
**Note: * * the menu here is a little different from our previous one. The id of the item must be the same as that of the fragment in navigation, otherwise the click event will not take effect. It will be mentioned here first and described in detail below.
2.1.2 ToolBar and NavHostFragment
After the DrawerLayout is configured, we will configure the title bar again. Before, we used to add a container for storing fragments in the middle, which may be FrameLayout, ViewPager, etc. in which we need to configure a Fragment whose name is Android X navigation. Fragment. NavHostFragment, which is a special part added to the layout. NavHostFragment is associated with the navigation navigation editor through navGraph. The specific codes are as follows:
<androidx.drawerlayout.widget.DrawerLayout
            xmlns:tools="http://schemas.android.com/tools"
            android:id="@+id/drawer_layout"
            android:layout_width="match_parent"
            android:layout_height="match_parent"
            android:fitsSystemWindows="true"
            tools:openDrawer="start">
        <LinearLayout
                android:layout_width="match_parent"
                android:layout_height="match_parent"
                android:orientation="vertical">
            <com.google.android.material.appbar.AppBarLayout
                    android:layout_height="wrap_content"
                    android:layout_width="match_parent"
                    android:theme="@style/AppTheme.AppBarOverlay">

                <androidx.appcompat.widget.Toolbar
                        android:id="@+id/toolbar"
                        android:layout_width="match_parent"
                        android:layout_height="?attr/actionBarSize"
                        android:background="?attr/colorPrimary"
                        android:theme="@style/AppTheme.PopupOverlay"
                />

            </com.google.android.material.appbar.AppBarLayout>

            <fragment
                    android:id="@+id/fragment_home"
                    android:name="androidx.navigation.fragment.NavHostFragment"
                    android:layout_width="match_parent"
                    android:layout_height="match_parent"
                    app:defaultNavHost="true"
                    app:navGraph="@navigation/navigation_main"/>
        </LinearLayout>

        <com.google.android.material.navigation.NavigationView
                app:itemIconTint="@color/nav_item_txt"
                app:itemTextColor="@color/nav_item_txt"
                android:id="@+id/nav_view"
                android:layout_width="wrap_content"
                android:layout_height="match_parent"
                android:layout_gravity="start"
                android:fitsSystemWindows="true"
                app:headerLayout="@layout/nav_header_main"
                app:menu="@menu/activity_main_drawer"/>

    </androidx.drawerlayout.widget.DrawerLayout>
We can see that there are two special attributes in NavHostFragment: app:defaultNavHost and app:navGraph="@navigation/navigation_main". The former is whether it is the default page, and the latter is the Navigation layout file we want to design
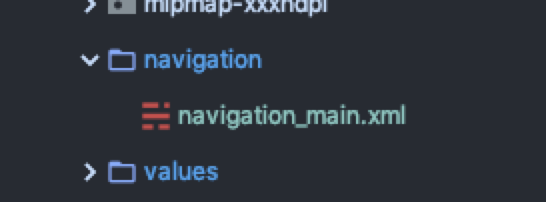
2.1.3 navigation_main.xml
In Android studio 3 The navigation design panel tool is embedded in version 2 or above. We can design our fragment/Activity in the navigation file under the res folder.
Open the Destination panel and enter the design mode, where we can create our target page. If you haven't created a * * Destination yet, * * you can click create a destination to create a fragmentt / activity. Of course, if you have created it before, you can directly select:
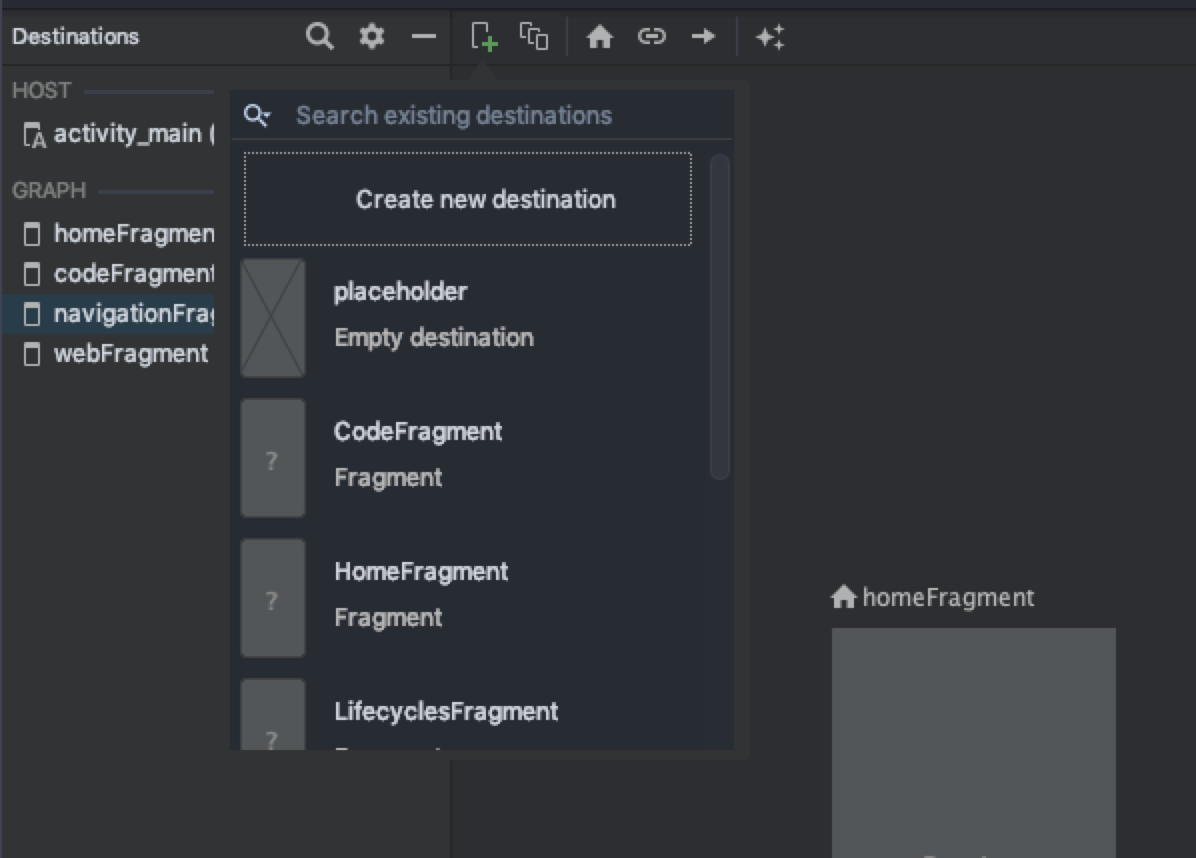
After selecting a Destination, you can see it in the panel. The specific action s and arguments will not be introduced. For details, see the previous articles.
Open the xml in Text mode and we can see the Fragmengt configuration information we have selected. Of course, you can code directly in xml without panel design. startDestination is the default startup page of APP, which must be specified, otherwise an error crash will be reported. The default page referred to in my code here is HomeFragment, as follows:
<navigation xmlns:android="http://schemas.android.com/apk/res/android"
            xmlns:app="http://schemas.android.com/apk/res-auto"
            xmlns:tools="http://schemas.android.com/tools"
            android:id="@+id/navigation_main"
            app:startDestination="@+id/homeFragment"
            tools:ignore="UnusedNavigation">

 <fragment android:id="@+id/homeFragment"
              android:name="com.hankkin.jetpack_note.ui.home.HomeFragment"
              android:label="@string/menu_home">
        <action android:id="@+id/action_navigationFragment_to_webFragment"
                app:destination="@id/webFragment"
                app:enterAnim="@anim/slide_in_right"
                app:exitAnim="@anim/slide_out_left"
                app:popEnterAnim="@anim/slide_in_left"
                app:popExitAnim="@anim/slide_out_right"/>
    </fragment>

    <fragment android:id="@+id/codeFragment"
              android:name="com.hankkin.jetpack_note.ui.CodeFragment"
              android:label="@string/menu_code"/>
We can see that the default start page of the layout code above is homeFragment, and there is a codeFragment below. In fact, these two fragments correspond to two menus in the menu, as well as a home page and a code page in our sidebar,
<item
                android:id="@+id/homeFragment"
                android:icon="@drawable/ic_menu_home"
                android:title="@string/menu_home"/>
        <item
                android:id="@+id/codeFragment"
                android:icon="@drawable/ic_menu_code"
                android:title="@string/menu_code"/>
Remember that the id mentioned above should be the same? The id of the item above should be the same as that of navigation_ main. The id of fragment in XML is the same, otherwise clicking the menu will not switch the id of fragment.
After configuring the above information, how to bind them for use?
2.1.4 NavController
First look at the code:
		navController = Navigation.findNavController(this, R.id.fragment_home)
        appBarConfiguration = AppBarConfiguration(setOf(R.id.homeFragment, R.id.codeFragment), drawerLayout)
        // Set up ActionBar
        setSupportActionBar(mDataBinding.toolbar)
        setupActionBarWithNavController(navController, appBarConfiguration)
        // Set up navigation menu
mDataBinding.navView.setupWithNavController(navController)- We find the navController corresponding to Navigation by passing in the container id of the previously defined loading fragment (that is, the previously defined NavHostFragment) through findNavController;
- By configuring an AppBarConfiguration, a set set of IDS and a drawerlayout are passed in the AppBarConfiguration. The set of IDS is our * * navigation_ main. fragment id defined by XML * *
- Finally, association binding is performed by setting setupActionBarWithNavController and setupWithNavController
At this point, our basic configuration is over. You can see that the home page and code button in our drawerlayout will switch to the corresponding fragment, and the hamburger button and return button of the toolbar will switch automatically; Of course, Navigation can also be used with BottomNavigationView.
2.2 use of bottomnavigationview
2.2.1 configuration file
Similar to the above steps: configure navigation XML layout and menu file corresponding to BottomNavigationView
2.2.2 setupWithNavController
Of course, BottomNavigationView also provides an extension method setupWithNavController to bind menus and fragment s. It is very simple to use here, so it will not be introduced in detail. Details can be found at BottomNavSampleActivity.
2.3 Action jump and meal delivery
2.3.1 Action jump
Let's take a look at the destination mode of navigation:
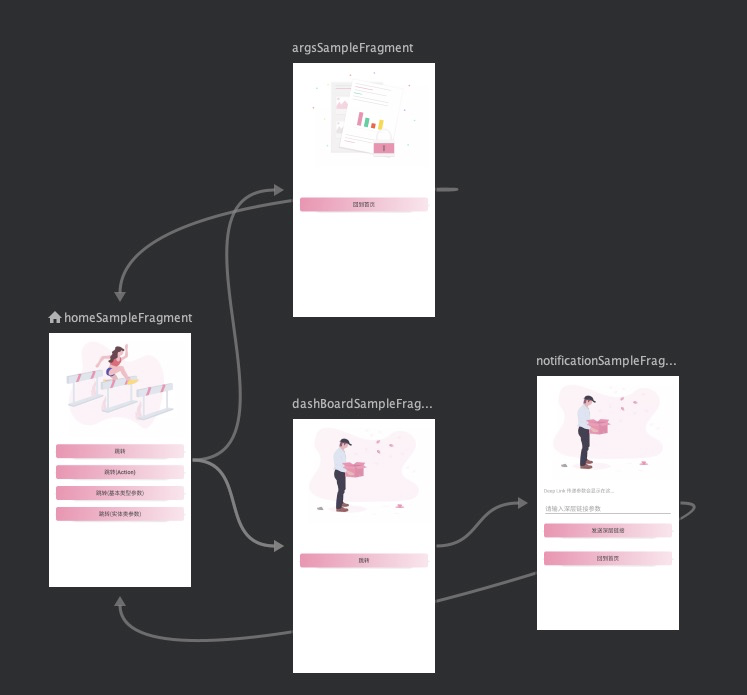
Maybe you'll notice what these lines are? Yes, this is an Action one by one. When you manually connect two fragments, a label will be generated in the xml layout, for example:
<action android:id="@+id/action_dashBoardSampleFragment_to_notificationSampleFragment"
                app:destination="@id/notificationSampleFragment"/>
It will automatically create an id, which may be long, but it is clear that you can change it from the xtoy mode. Of course, if you don't like it, the destination is the target interface we want to jump to.
After the action is set, we can execute the following code to jump:
findNavController().navigate(R.id.action_homeSampleFragment_to_dashBoardSampleFragment_action)
2.3.2 NavOptions switching animation
Of course, the switching between fragment s supports animation. NavOptions is an animation management class. We can set the entry and fallback animation in two ways:
- Animate directly in labels
<action android:id="@+id/action_homeSampleFragment_to_dashBoardSampleFragment_action"
                app:destination="@id/dashBoardSampleFragment"
                app:enterAnim="@anim/slide_in_right"
                app:exitAnim="@anim/slide_out_left"
                app:popEnterAnim="@anim/slide_in_left"
app:popExitAnim="@anim/slide_out_right"/>- Animating with NavOptions
val options = navOptions {
            anim {
                enter = R.anim.slide_in_right
                exit = R.anim.slide_out_left
                popEnter = R.anim.slide_in_left
                popExit = R.anim.slide_out_right
            }
        }
        view.findViewById<Button>(R.id.navigate_destination_button)?.setOnClickListener {
            findNavController().navigate(R.id.flow_step_one_dest, null, options)
        }
2.3.3 parameter transfer
The method of switching parameters between fragments is also very simple. Previously, we may have to use methods such as host Activity or interface. In short, it is very troublesome. Let's see how to transfer between fragments controlled by Navigation?
We can use labels in the navigation layout,
- name is the key we passed the parameter to
- argType is the parameter type
- defaultValue default value
- nullable can be null
<argument
         android:name="deep_args"
         app:argType=""
         android:defaultValue=""
         app:nullable=""/>
**Note: * * of course, the type type also supports our customized entity class, but you need to fill in the full path of the class and ensure that the entity class implements serialization
We can pass the parameters to the Bundle by encapsulating them, and then pass them when executing the navigate() method, for example:
val args = Bundle()
args.putString("link","1")
args.putString("title","1")
it.findNavController().navigate(R.id.webFragment, args)
Of course, you can also use getarguments() GetString (XXXX) is a way to get it, but the Navigation component also provides us with a simpler way. After you set the tag and compile the code, it will automatically generate a XXXFragmentDirections class for us, which encapsulates the parameters for us, and the NavController's navigate() method supports the transmission of direction type at the same time.
val direction = HomeFragmentDirections.actionNavigationFragmentToWebFragment(link,title)
it.findNavController().navigate(direction)
At the same time, there is a XXXFragmentArgs corresponding to our target page. We can get navArgs() directly. From here, we can get the parameters directly.
private val args: WebFragmentArgs by navArgs()
2.4 Deep Link
Deep Link refers to a function that jumps into the application. I translated it into Deep Link. Navigation provides such a function, which is also very simple to use:
            val args = Bundle()
            args.putString("deep_args",et_deep_link.text.toString())
            val deep = findNavController().createDeepLink()
                .setDestination(R.id.notificationSampleFragment)
                .setArguments(args)
                .createPendingIntent()

            val notificationManager =
                context?.getSystemService(Context.NOTIFICATION_SERVICE) as NotificationManager
            if (Build.VERSION.SDK_INT >= Build.VERSION_CODES.O) {
                notificationManager.createNotificationChannel(
                    NotificationChannel(
                        "deeplink", "Deep Links", NotificationManager.IMPORTANCE_HIGH)
                )
            }
            val builder = NotificationCompat.Builder(
                context!!, "deeplink")
                .setContentTitle(resources.getString(R.string.app_name))
                .setContentText("Navigation Deep link test")
                .setSmallIcon(R.mipmap.jetpack)
                .setContentIntent(deep)
                .setAutoCancel(true)
            notificationManager.notify(0, builder.build())
We can create a DeepLink with parameters, test the effect through Notification notification, and directly jump to the page in the project. Specific information can be viewed SampleNotificationFragment.
3. Source code analysis
3.1 NavHostFragment
NavHostFragment provides an area within your layout for self contained navigation to occur NavHostFragment provides an area in the layout for inclusion navigation
Next, let's look at its source code:
public class NavHostFragment extends Fragment implements NavHost {
    @CallSuper
    @Override
    public void onAttach(@NonNull Context context) {
        super.onAttach(context);
        if (mDefaultNavHost) {
            requireFragmentManager().beginTransaction()
                    .setPrimaryNavigationFragment(this)
                    .commit();
        }
    }
}
You can see that it is a Fragment. Start the transaction in the onAttach life cycle and set itself to PrimaryFragment. Of course, it is judged by the defaultNavHost condition. Does this Boolean look familiar? Yes, the one we set in the xml layout.
					<fragment
                    android:id="@+id/fragment_home"
                    android:name="androidx.navigation.fragment.NavHostFragment"
                    android:layout_width="match_parent"
                    android:layout_height="match_parent"
                    app:defaultNavHost="true"
                    app:navGraph="@navigation/navigation_main"/>
Then look at its onCreate life cycle
    @CallSuper
    @Override
    public void onCreate(@Nullable Bundle savedInstanceState) {
        super.onCreate(savedInstanceState);
        final Context context = requireContext();

        mNavController = new NavController(context);
        mNavController.getNavigatorProvider().addNavigator(createFragmentNavigator());

       	.......

        if (navState != null) {
            // Navigation controller state overrides arguments
            mNavController.restoreState(navState);
        }
        if (mGraphId != 0) {
            // Set from onInflate()
            mNavController.setGraph(mGraphId);
        } else {
            // See if it was set by NavHostFragment.create()
            final Bundle args = getArguments();
            final int graphId = args != null ? args.getInt(KEY_GRAPH_ID) : 0;
            final Bundle startDestinationArgs = args != null
                    ? args.getBundle(KEY_START_DESTINATION_ARGS)
                    : null;
            if (graphId != 0) {
                mNavController.setGraph(graphId, startDestinationArgs);
            }
        }
    }
We see that a NavController is created in the onCreate lifecycle, and a NavController is created for this NavController_ Navigator__ Added it_ We tracked createFragmentNavigator and found that it created a FragmentNavigator. What does this class do? It inherits the navigator. Check the notes. We know that it sets the policy for each Navigation, that is, it operates the Navigation switching between fragments. It will be introduced in detail below. Let's take a brief look at it first. Next, we see that setGraph() is set for NavController, that is, navGraph defined in xml, Fragment and action jump in navigation layout.
There are also onCreateView, onViewCreated and other life cycle methods, which are basically the methods to load the layout setting ID.
Let's follow navcontroller Let's see how to add the fragment we designed in setgraph()?
3.2 NavController
/**
     * Sets the {@link NavGraph navigation graph} to the specified graph.
     * Any current navigation graph data (including back stack) will be replaced.
     *
     * <p>The graph can be retrieved later via {@link #getGraph()}.</p>
     *
     * @param graph graph to set
     * @see #setGraph(int, Bundle)
     * @see #getGraph
     */
    @CallSuper
    public void setGraph(@NonNull NavGraph graph, @Nullable Bundle startDestinationArgs) {
        if (mGraph != null) {
            // Pop everything from the old graph off the back stack
            popBackStackInternal(mGraph.getId(), true);
        }
        mGraph = graph;
        onGraphCreated(startDestinationArgs);
    }
If the set graph is not null, it executes popBackStackInternal. The comment means to pop up all graphs from the previous graph stack:
boolean popBackStackInternal(@IdRes int destinationId, boolean inclusive) {
        .....
        .....
        boolean popped = false;
        for (Navigator navigator : popOperations) {
            if (navigator.popBackStack()) {
                mBackStack.removeLast();
                popped = true;
            } else {
                // The pop did not complete successfully, so stop immediately
                break;
            }
        }
        return popped;
    }
If you really remove all the previous naviagtor s. When was the navigator added to the mBackStack? Looking at the source code, we found that:
private void navigate(@NonNull NavDestination node, @Nullable Bundle args,
            @Nullable NavOptions navOptions, @Nullable Navigator.Extras navigatorExtras) {
        boolean popped = false;
        if (navOptions != null) {
            if (navOptions.getPopUpTo() != -1) {
                popped = popBackStackInternal(navOptions.getPopUpTo(),
                        navOptions.isPopUpToInclusive());
            }
        }
        Navigator<NavDestination> navigator = mNavigatorProvider.getNavigator(
                node.getNavigatorName());
        Bundle finalArgs = node.addInDefaultArgs(args);
        NavDestination newDest = navigator.navigate(node, finalArgs,
                navOptions, navigatorExtras);
        if (newDest != null) {
            // If NavGraph is not in the stack, get the parent NavGraph first
            ArrayDeque<NavBackStackEntry> hierarchy = new ArrayDeque<>();
            NavGraph parent = newDest.getParent();
            while (parent != null) {
                hierarchy.addFirst(new NavBackStackEntry(parent, finalArgs));
                parent = parent.getParent();
            }
            // Now walk through the stack and see which navigation charts are already in the stack
            Iterator<NavBackStackEntry> iterator = mBackStack.iterator();
            while (iterator.hasNext() && !hierarchy.isEmpty()) {
                NavDestination destination = iterator.next().getDestination();
                if (destination.equals(hierarchy.getFirst().getDestination())) {
                    //If the destination is already at the top of the stack, there is no need to add
                    hierarchy.removeFirst();
                }
            }
            // Add all of the remaining parent NavGraphs that aren't
            // already on the back stack
            mBackStack.addAll(hierarchy);
            //Add a new destination
            NavBackStackEntry newBackStackEntry = new NavBackStackEntry(newDest, finalArgs);
            mBackStack.add(newBackStackEntry);
        }
        if (popped || newDest != null) {
            dispatchOnDestinationChanged();
        }
    }
Remember this method? Generally, we can call this method when manually switching fragments, and finally trace it here.
findNavController().navigate(R.id.bottomNavSampleActivity)
At the same time, switch the target Fragment to the top of the stack. We found that the last method, dispatchOnDestinationChanged(), switches the distribution target interface. It's necessary to follow up. You may find something unexpected:
 /**
     * Dispatch changes to all OnDestinationChangedListeners.
     * <p>
     * If the back stack is empty, no events get dispatched.
     *
     * @return If changes were dispatched.
     */
    @SuppressWarnings("WeakerAccess") /* synthetic access */
    boolean dispatchOnDestinationChanged() {
        // We never want to leave NavGraphs on the top of the stack
        //noinspection StatementWithEmptyBody
        while (!mBackStack.isEmpty()
                && mBackStack.peekLast().getDestination() instanceof NavGraph
                && popBackStackInternal(mBackStack.peekLast().getDestination().getId(), true)) {
            // Keep popping
        }
        if (!mBackStack.isEmpty()) {
            NavBackStackEntry backStackEntry = mBackStack.peekLast();
            for (OnDestinationChangedListener listener :
                    mOnDestinationChangedListeners) {
                listener.onDestinationChanged(this, backStackEntry.getDestination(),
                        backStackEntry.getArguments());
            }
            return true;
        }
        return false;
    }
All methods that implement the OnDestinationChangedListener interface are distributed. Continue to track and see which implement this interface?
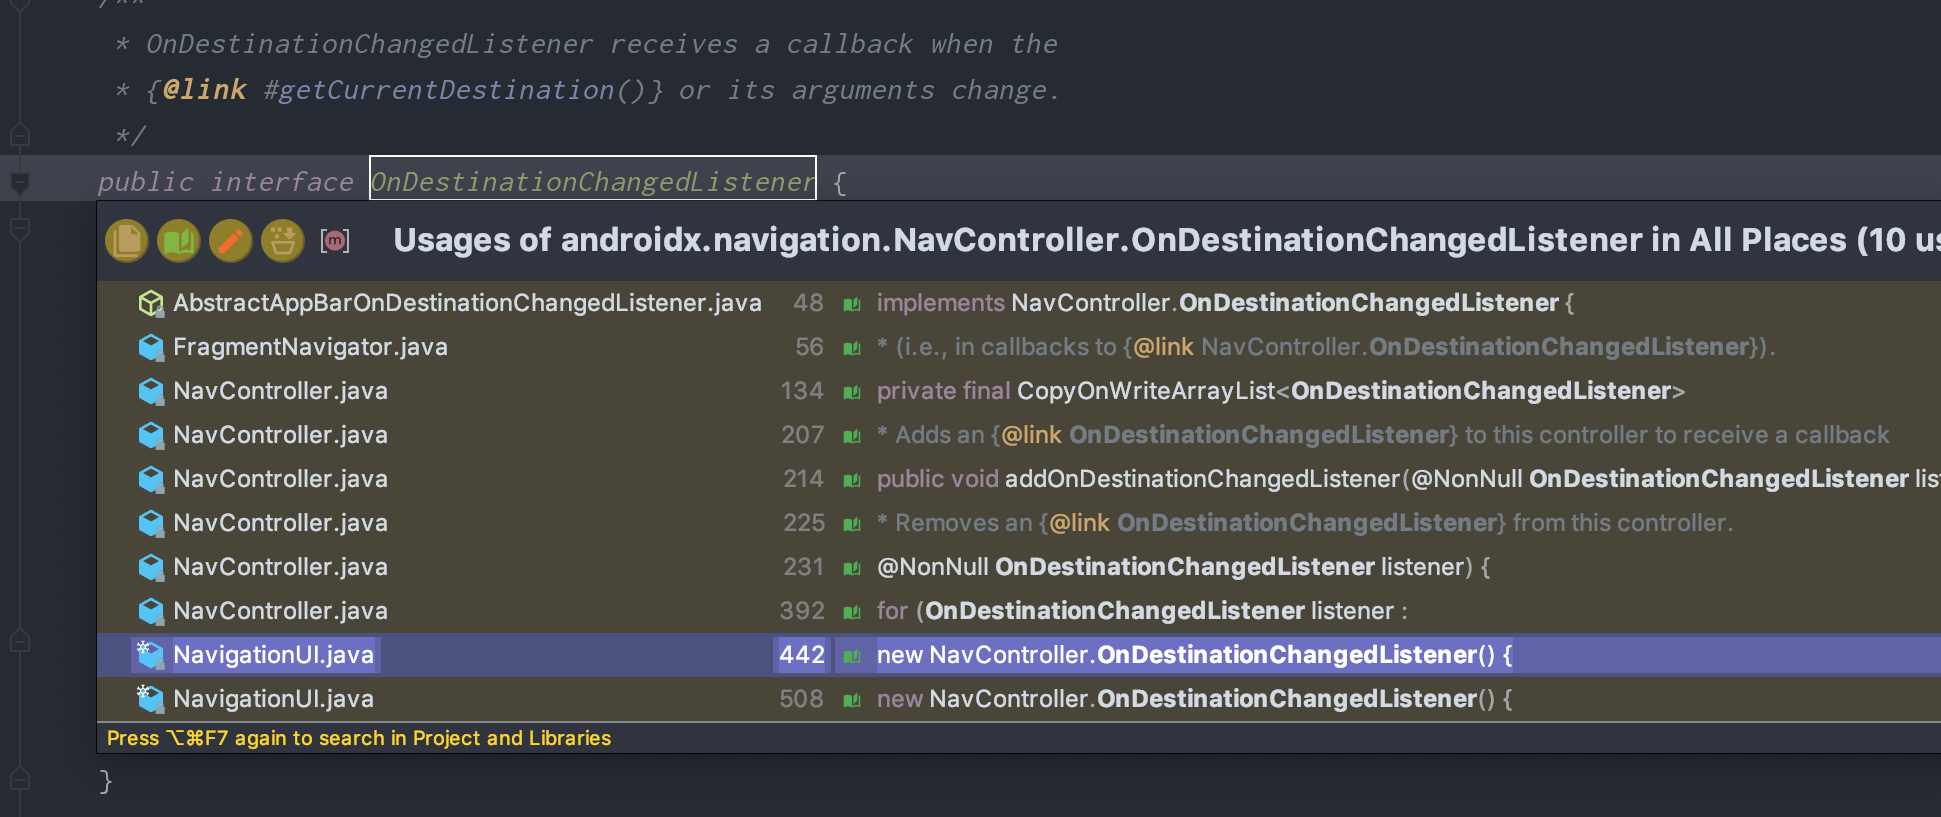
Only one class implements AbstractAppBarOnDestinationChangedListener. Let's see the specific implementation:
@Override
    public void onDestinationChanged(@NonNull NavController controller,
            @NonNull NavDestination destination, @Nullable Bundle arguments) {
        DrawerLayout drawerLayout = mDrawerLayoutWeakReference != null
                ? mDrawerLayoutWeakReference.get()
                : null;
        if (mDrawerLayoutWeakReference != null && drawerLayout == null) {
            controller.removeOnDestinationChangedListener(this);
            return;
        }
        CharSequence label = destination.getLabel();
        if (!TextUtils.isEmpty(label)) {
            ......
            ......
            matcher.appendTail(title);
            //Set title
            setTitle(title);
        }
        boolean isTopLevelDestination = NavigationUI.matchDestinations(destination,
                mTopLevelDestinations);
        if (drawerLayout == null && isTopLevelDestination) {
            //Set icon
            setNavigationIcon(null, 0);
        } else {
            //Set return arrow status
            setActionBarUpIndicator(drawerLayout != null && isTopLevelDestination);
        }
    }
I see. It should be clear here. When we switch fragments, the general process is as follows:
- Switch the target fragment to the top of the stack
- Distribution target Fragment switching state
- Set the title, icon status, etc. of the toolbar
- Of course, setTitle() and setNavigationIcon() are abstract methods. The specific implementation depends on how it is implemented in the subclass, which is not described
Here, we have a basic understanding of the basic core classes and related implementations. Let's take a look at the basic process. First, we go in from the entrance and follow up a little bit
3.3 Navigation.findNavController(this, R.id.fragment_home)
We will initialize a NavController at the beginning:
@NonNull
    public static NavController findNavController(@NonNull Activity activity, @IdRes int viewId) {
        View view = ActivityCompat.requireViewById(activity, viewId);
        NavController navController = findViewNavController(view);
        .......
        return navController;
    }

@Nullable
    private static NavController findViewNavController(@NonNull View view) {
        while (view != null) {
            NavController controller = getViewNavController(view);
            .........
        }
        return null;
    }

@SuppressWarnings("unchecked")
    @Nullable
    private static NavController getViewNavController(@NonNull View view) {
        Object tag = view.getTag(R.id.nav_controller_view_tag);
        NavController controller = null;
        if (tag instanceof WeakReference) {
            controller = ((WeakReference<NavController>) tag).get();
        } else if (tag instanceof NavController) {
            controller = (NavController) tag;
        }
        return controller;
    }
Looking at the code, you can see that it is found through a tag value. When was it set? Remember the NavHostFragment lifecycle onViewCreated introduced in 3.1?
@Override
    public void onViewCreated(@NonNull View view, @Nullable Bundle savedInstanceState) {
        super.onViewCreated(view, savedInstanceState);
        .......
        View rootView = view.getParent() != null ? (View) view.getParent() : view;
        Navigation.setViewNavController(rootView, mNavController);
    }
Naviagtion. Is called when the view is created setViewNavController(). After NavController is initialized, bind it to NavigationView, ToolBar, BottomNavigationView and DrawerLayout:
3.4 setupActionBarWithNavController
Both NavigationView and Bottom``NavigationView will call this method. It is an extension method of AppCompatActivity and calls the NavigationUI class:
public static void setupActionBarWithNavController(@NonNull AppCompatActivity activity,
            @NonNull NavController navController,
            @NonNull AppBarConfiguration configuration) {
        navController.addOnDestinationChangedListener(
                new ActionBarOnDestinationChangedListener(activity, configuration));
    }
You can see that it is the interface that calls the target switch to change the status of the title button. View its method implementation:
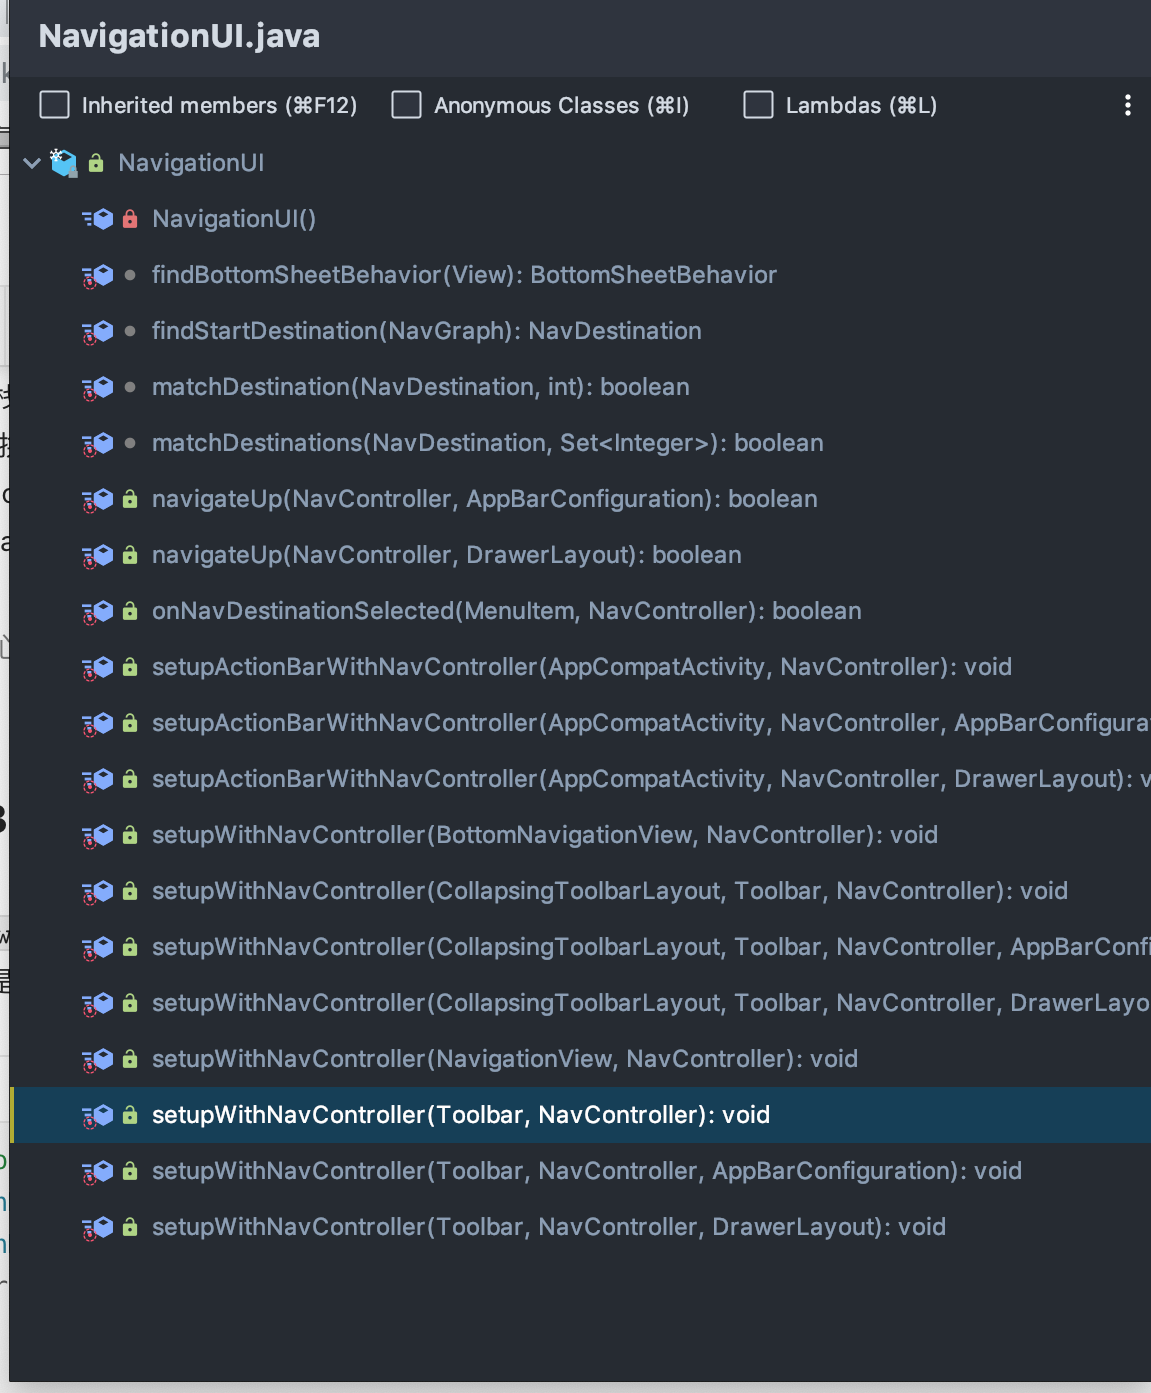
We see that it overloads many methods, including NavigationView, ToolBar, BottomNavigationView and DrawerLayout mentioned above. In this way, the state switching of components is bound. When the fragment is switched, the interface mentioned above is distributed to switch the state of layout buttons.
3.5 navView.setupWithNavController(navController)
public static void setupWithNavController(@NonNull final NavigationView navigationView,
            @NonNull final NavController navController) {
        navigationView.setNavigationItemSelectedListener(
                new NavigationView.OnNavigationItemSelectedListener() {
                    @Override
                    public boolean onNavigationItemSelected(@NonNull MenuItem item) {
                        //Is the target page selected
                        boolean handled = onNavDestinationSelected(item, navController);
                        if (handled) {
                            //Switch menu status and close drawer
                            ViewParent parent = navigationView.getParent();
                            if (parent instanceof DrawerLayout) {
                                ((DrawerLayout) parent).closeDrawer(navigationView);
                            } else {
                                BottomSheetBehavior bottomSheetBehavior =
                                        findBottomSheetBehavior(navigationView);
                                if (bottomSheetBehavior != null) {
                                    bottomSheetBehavior.setState(BottomSheetBehavior.STATE_HIDDEN);
                                }
                            }
                        }
                        return handled;
                    }
                });
        final WeakReference<NavigationView> weakReference = new WeakReference<>(navigationView);
        navController.addOnDestinationChangedListener(
                new NavController.OnDestinationChangedListener() {
                    @Override
                    public void onDestinationChanged(@NonNull NavController controller,
                            @NonNull NavDestination destination, @Nullable Bundle arguments) {
                        NavigationView view = weakReference.get();
                        if (view == null) {
                            navController.removeOnDestinationChangedListener(this);
                            return;
                        }
                        Menu menu = view.getMenu();
                        for (int h = 0, size = menu.size(); h < size; h++) {
                            MenuItem item = menu.getItem(h);
                            item.setChecked(matchDestination(destination, item.getItemId()));
                        }
                    }
                });
    }
Finally, the state is switched. When you click the menu menu or target Fragment to switch, the state is changed.
3.6 remaining problems
Legacy: remember that the ID of the item in the setting menu bar should be the same as navigation Is the ID of the fragment in XML the same? As for why, let's look at the first code above: tracking onNavDestinationSelected():
public static boolean onNavDestinationSelected(@NonNull MenuItem item,
            @NonNull NavController navController) {
       	.......
        .......
        if ((item.getOrder() & Menu.CATEGORY_SECONDARY) == 0) {
            builder.setPopUpTo(findStartDestination(navController.getGraph()).getId(), false);
        }
        NavOptions options = builder.build();
        try {
            //TODO provide proper API instead of using Exceptions as Control-Flow.
            navController.navigate(item.getItemId(), null, options);
            return true;
        } catch (IllegalArgumentException e) {
            return false;
        }
    }
We see that the Navigator () method is called and the ID of the MenuItem is passed as a parameter:
public void navigate(@IdRes int resId, @Nullable Bundle args, @Nullable NavOptions navOptions,
            @Nullable Navigator.Extras navigatorExtras) {
        NavDestination currentNode = mBackStack.isEmpty()
                ? mGraph
                : mBackStack.getLast().getDestination();
        if (currentNode == null) {
            throw new IllegalStateException("no current navigation node");
        }
        @IdRes int destId = resId;
        ......
        ......
        //Query the target page according to the menu id
        NavDestination node = findDestination(destId);
        if (node == null) {
            final String dest = NavDestination.getDisplayName(mContext, destId);
            throw new IllegalArgumentException("navigation destination " + dest
                    + (navAction != null
                    ? " referenced from action " + NavDestination.getDisplayName(mContext, resId)
                    : "")
                    + " is unknown to this NavController");
        }
        navigate(node, combinedArgs, navOptions, navigatorExtras);
    }
NavDestination node = findDestination(destId) query NavDestination through the ID of Menu Item: **
@SuppressWarnings("WeakerAccess") /* synthetic access */
    NavDestination findDestination(@IdRes int destinationId) {
        .......
        return currentGraph.findNode(destinationId);
    }

@Nullable
    final NavDestination findNode(@IdRes int resid, boolean searchParents) {
        NavDestination destination = mNodes.get(resid);
        // Search the parent for the NavDestination if it is not a child of this navigation graph
        // and searchParents is true
        return destination != null
                ? destination
                : searchParents && getParent() != null ? getParent().findNode(resid) : null;
    }
mNodes is a SparseArrayCompat array, and NavDestination maintains navigation Information about each fragment in XML:
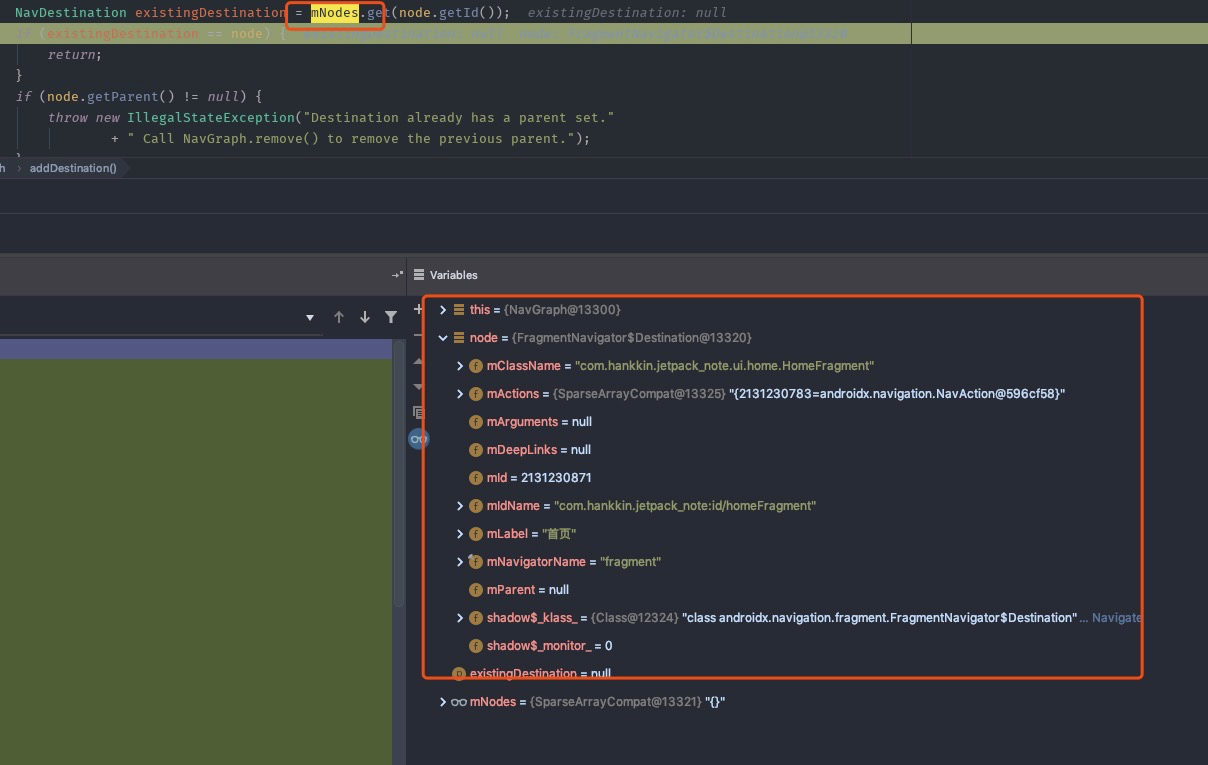
During initialization, it is put into the array mNodes through addDestination(), and MIM is the ID of our MenuItem, so it is very clear.
4. Summary
4.1 process
- Considering that it may not be easy to find out how to create a fragment in the graph layout and what the NavHostFragment is when we start to analyze it directly from the setupWithNavController entry, we first analyzed * * NavHostFragment in the layout. We found out why a NavHostFragment is declared in the layout and * * what it is used for, Finally, it is found that a NavController is created in its life cycle, a FragmentNavigator is added, and setGraph is set.
- Then we enter the NavController class through setGraph, and see the code for switching fragments in the switching stack through the initial fragment set in the graph.
- We saw the familiar navigate() method. In it, dispatchOnDestinationChanged() attracted my attention. Through searching, we found that after switching fragments, we can change the layout state through this method, that is, the OnDestinationChangedListener interface.
- Here, I have almost understood the basic code implementation, and then I went back to the entrance. By initializing NavController, I called the methods in NavigationUI to bind NavigationView, ToolBar, BottomNavigationView, DrawerLayout and other layouts. After calling the navigation () method, I changed the state and the whole process went through.
There may be some unreasonable places. Please forgive me, but this is my basic process this time.
4.2 class diagram
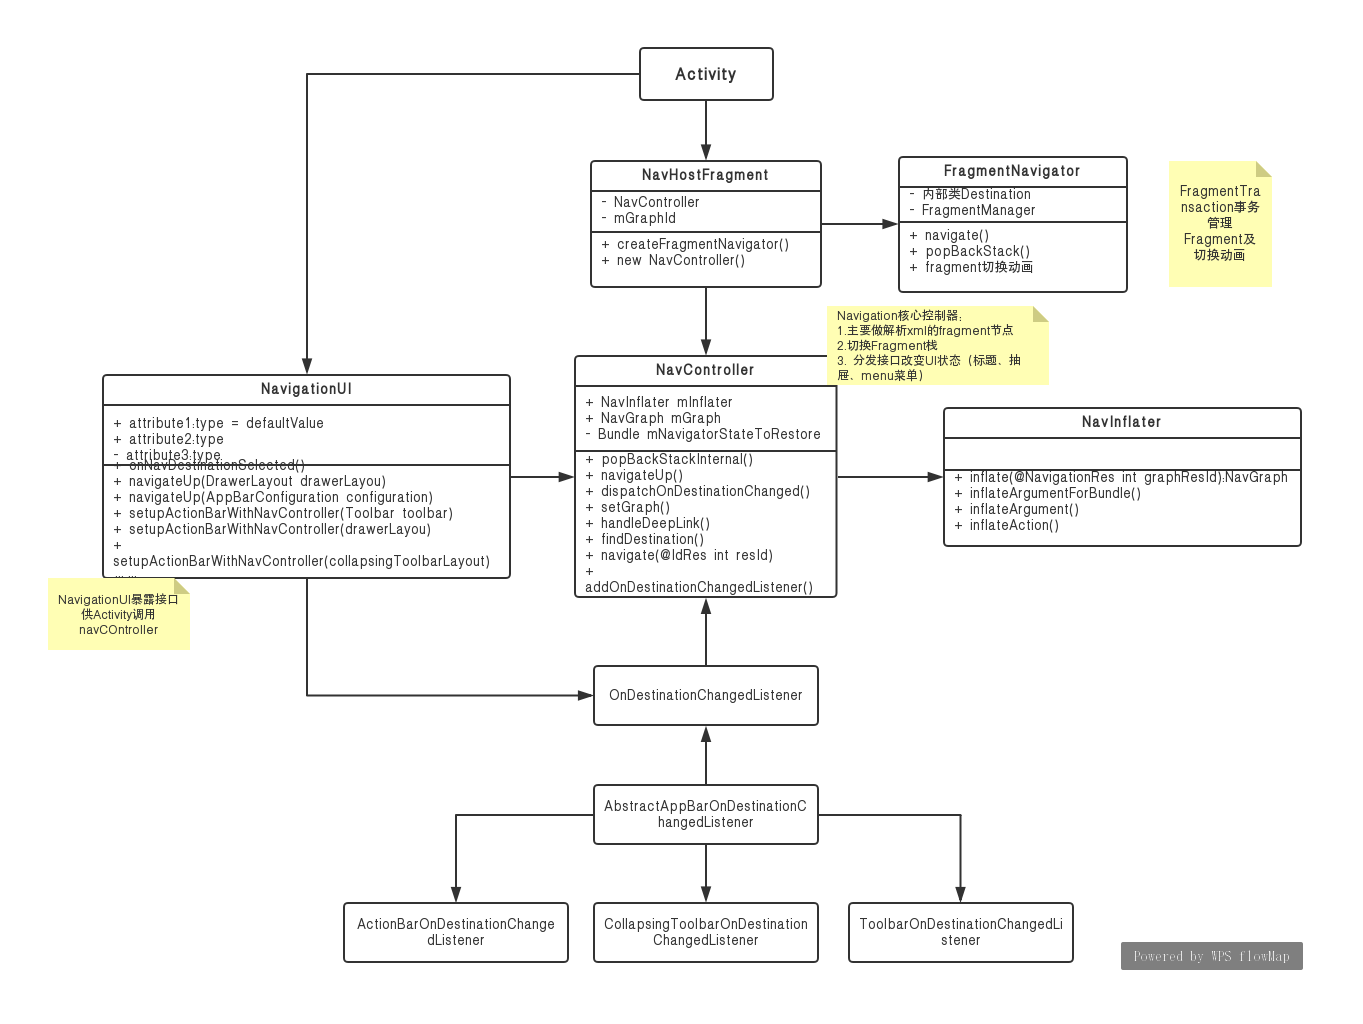
4.3 analysis
4.3.1 NavHostFragment
We set NavHostFragment and navGraph layout in the Activity layout. Through the above analysis, we know that NavController is newly created in NavHostFragment, and a FragmentNavigator is created to manage Fragment transactions and switching. It can be simply understood as a bridge connecting Fragment and NavController, A container layout with navigation is also provided.
4.3.2 NavController
Navconverter is the core of the whole navigation component. It loads the fragment node in xml, converts it into NavDestination, and saves it in the stack. It switches the NavDestination in the stack through the Navigator () method to switch the fragments. At the same time, after the fragment is switched, issue the OnDestinationChanged interface to change the NavgationView, BottomNavgationView, Menu and other related UI operations.
4.3.3 NavigationUI
Through the NavgationUI class, set interface listening for each View, and bind the UI state of the View to the switching Fragment in the NavController.
Here, the source code analysis of the whole Navgation component is over. The general process has been very clear. Of course, it has not been 100%. For example, the Deep Link part, you can take a look at it yourself. You can really take a look at the source code according to this idea. After reading it, you will really have a deeper understanding of the Navgation component. Of course, you can also refer to the Demo and documentation in CodeLabs, or see my Jepack_Note code, if there is anything wrong, please point out and understand