Record my problems and solutions in using nano
Hardware introduction
There are three main boards in jetson nano series, namely jetson nano B01,jetson nano A02 and jetson nano 2GB.
The difference between the two official models is that they are different from the other 2GB models, except for some of the official ones.

NVD|A NVIDIA China Zhihu home page
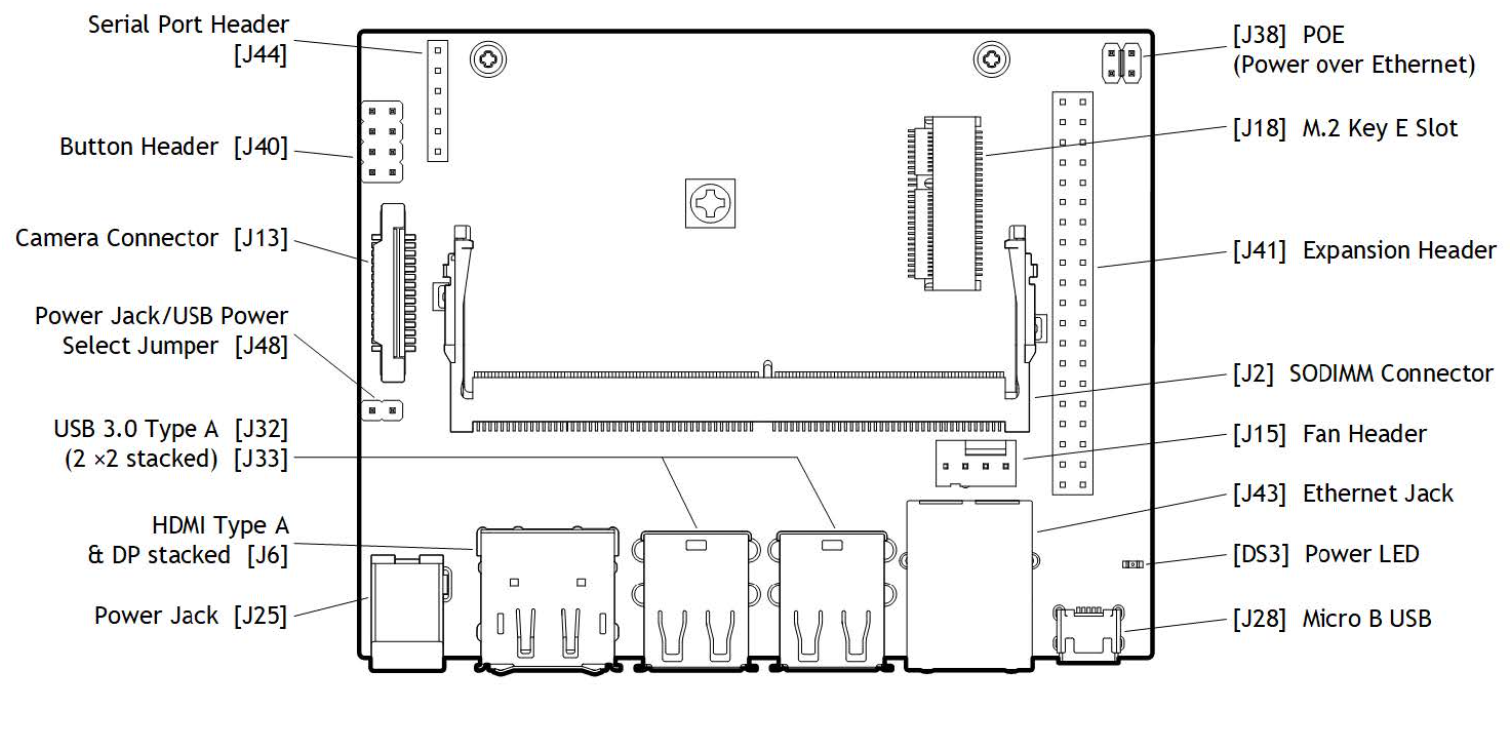
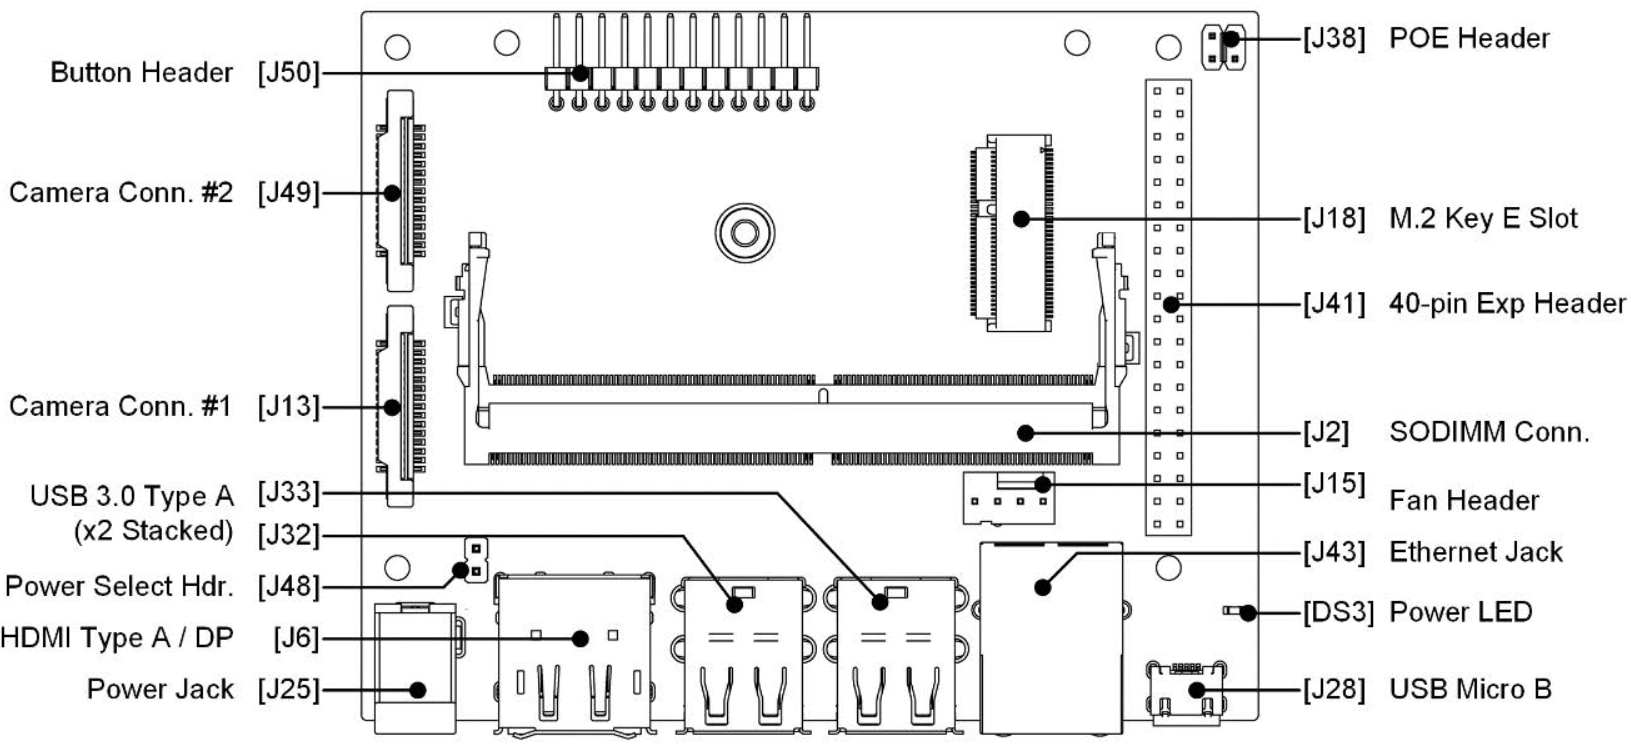
The difference between the two boards can be clearly seen by referring to the carrier Manual:
Get started
[1]. Brush Mirror
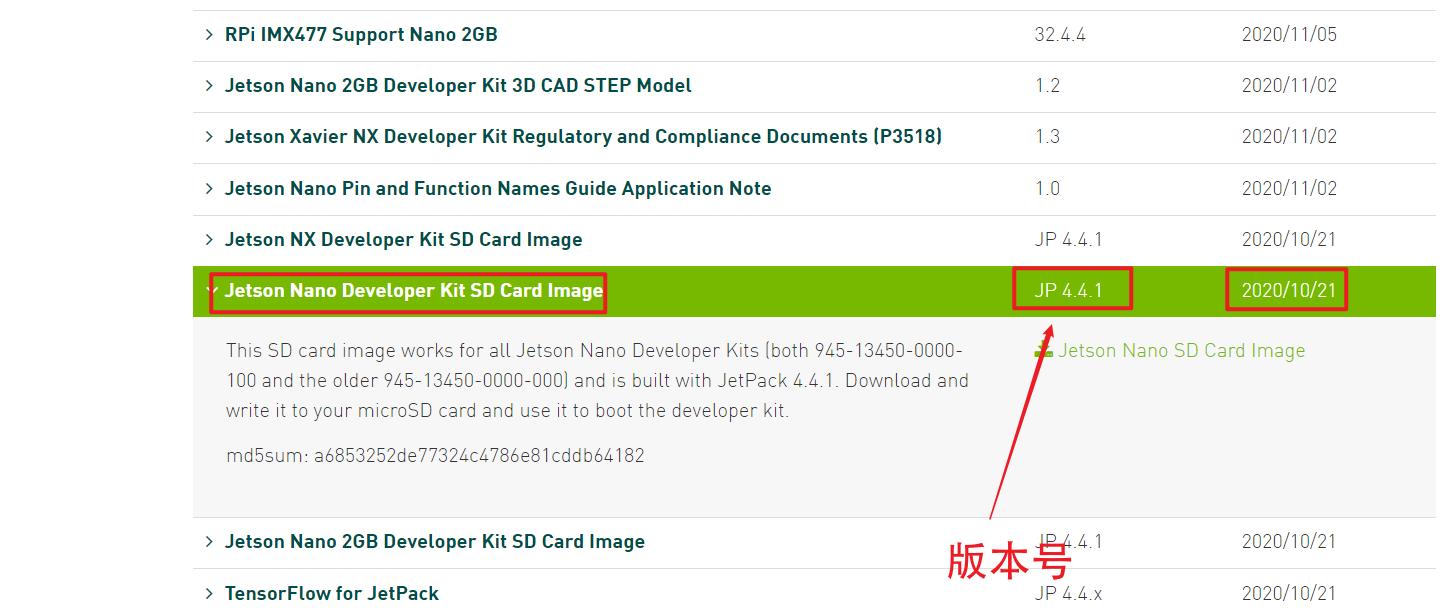
Go directly to NVIDIA's official website address to download, which is the same location as the driver of the computer update graphics card( NVIDIA official website address ), select the corresponding version. The latest version may not be good, and online resources may not match. Therefore, select version 4.4.1 or 4.5.1.
[2]. Prepare an sd card. The system runs in the sd card. The sd card should be selected as well as possible. The quality of the sd card has an impact on the running speed of the system behind it. The new TX2-NX module and NX module have hard disks. The running speed of the hard disk is much faster than that of the sd card, but nano does not support it. Therefore, the sd method is still used for burning like raspberry pie, Here I use two tools, format and burn.
Both software will automatically detect the drive letter and give a prompt when the system hard disk is misoperated. The burning process can basically follow the English prompt, which will not be repeated here.
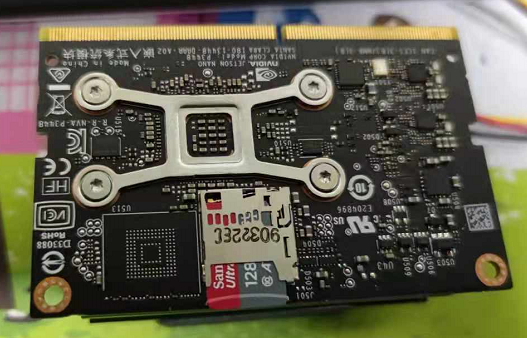
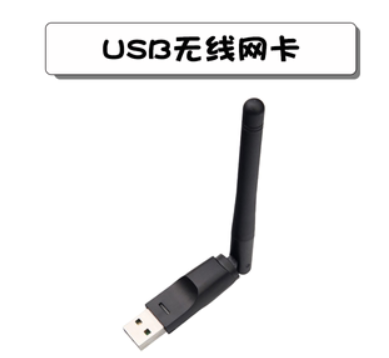
[3] Hardware installation: note that a network card is required. Many resources are configured from the Internet. The network card can choose usb or direct on-board interface. The schematic diagram is as follows.

[4] Power on. After the above work is completed, you can start to power on. Note that unlike raspberry pie, the nano image is Ubuntu 18 Unlike raspberry pie's own system, the system of 04 does not bring vnc tools, so it's best to have a display screen. The external display screen can facilitate some settings. Then we can turn it on, select some relevant settings, basically click a little, if we don't understand it, it will be the default, and it will be completed all the way.
Start using
[1] Changing the source is basically necessary. The image sources under are all abroad. Therefore, if you can't access the Internet scientifically, you can only gg.
The source changing operation is as follows:
Open the command line tool:
Backup software source
sudo cp /etc/apt/sources.list /etc/apt/sources.list.bak
Edit source. gedit is the default editor for text editing in linux system. You can freely choose what you want, such as vim and nano
sudo gedit /etc/apt/sources.list
Here I choose Tsinghua source to delete the original and replace the following
deb http://mirrors.tuna.tsinghua.edu.cn/ubuntu-ports/ bionic main multiverse restricted universe
deb http://mirrors.tuna.tsinghua.edu.cn/ubuntu-ports/ bionic-security main multiverse restricted universe
deb http://mirrors.tuna.tsinghua.edu.cn/ubuntu-ports/ bionic-updates main multiverse restricted universe
deb http://mirrors.tuna.tsinghua.edu.cn/ubuntu-ports/ bionic-backports main multiverse restricted universe
deb-src http://mirrors.tuna.tsinghua.edu.cn/ubuntu-ports/ bionic main multiverse restricted universe
deb-src http://mirrors.tuna.tsinghua.edu.cn/ubuntu-ports/ bionic-security main multiverse restricted universe
deb-src http://mirrors.tuna.tsinghua.edu.cn/ubuntu-ports/ bionic-updates main multiverse restricted universe
deb-src http://mirrors.tuna.tsinghua.edu.cn/ubuntu-ports/ bionic-backports main multiverse restricted universe
[2] After updating the software source, use the update command to update the software:
sudo apt-get update
sudo apt-get full-upgrade
[3] Now we can start to install some necessary software to help us develop and experience the feeling of notebook computer:
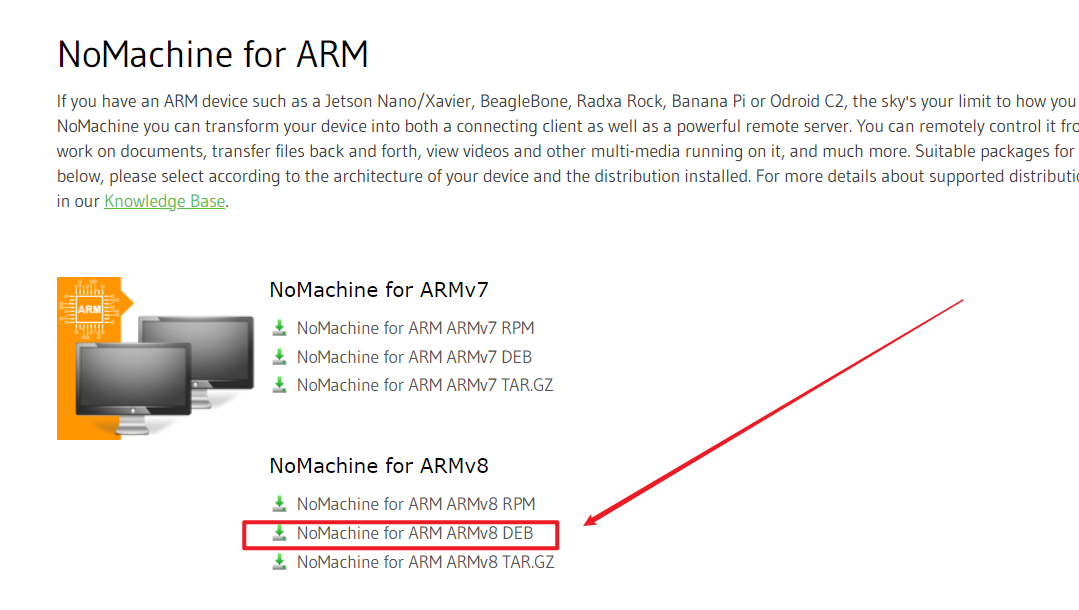
Remote tools: nomachine is recommended here Click to enter the download page , select the package of armv8 and deb. After installation, you can scan all ip addresses under the LAN with the scanning tool like vnc, and then find the required devices according to the host name. After that, we can connect remotely by entering the account and password. Well, the secondary screen borrowed from our roommate can be returned.
As explained here, apt is equivalent to the application market, but if there is no application market, we can only download the corresponding installation package and install it in other ways. This is the way we use here.
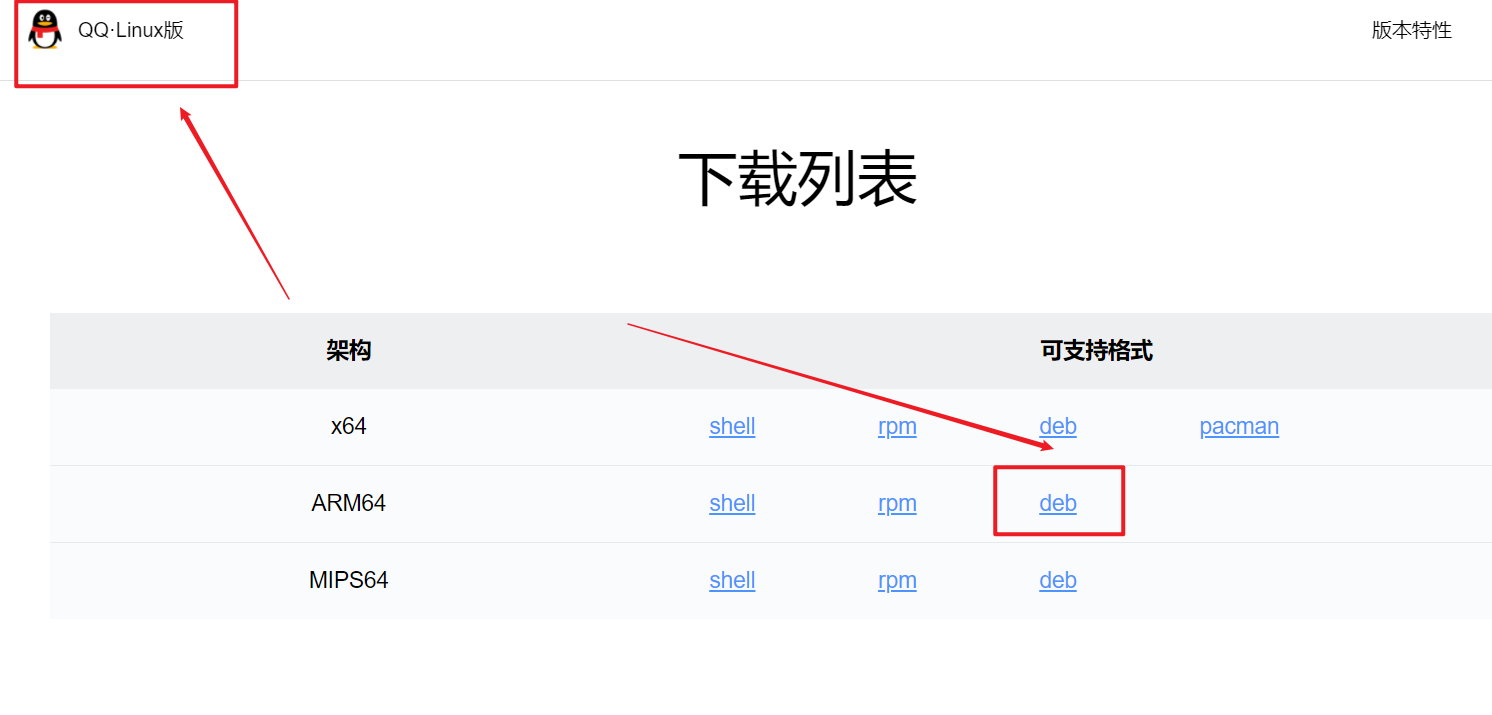
QQ: personally, I think QQ is still very necessary hh. It is more convenient to transmit files. Of course, we can also use ssh to transmit files, which will not affect us. Using QQ can facilitate us to timely feed back the problems we encounter to the universal group of friends, hoping to get an answer. Click to enter the download page The style is quite old and has a unique flavor.
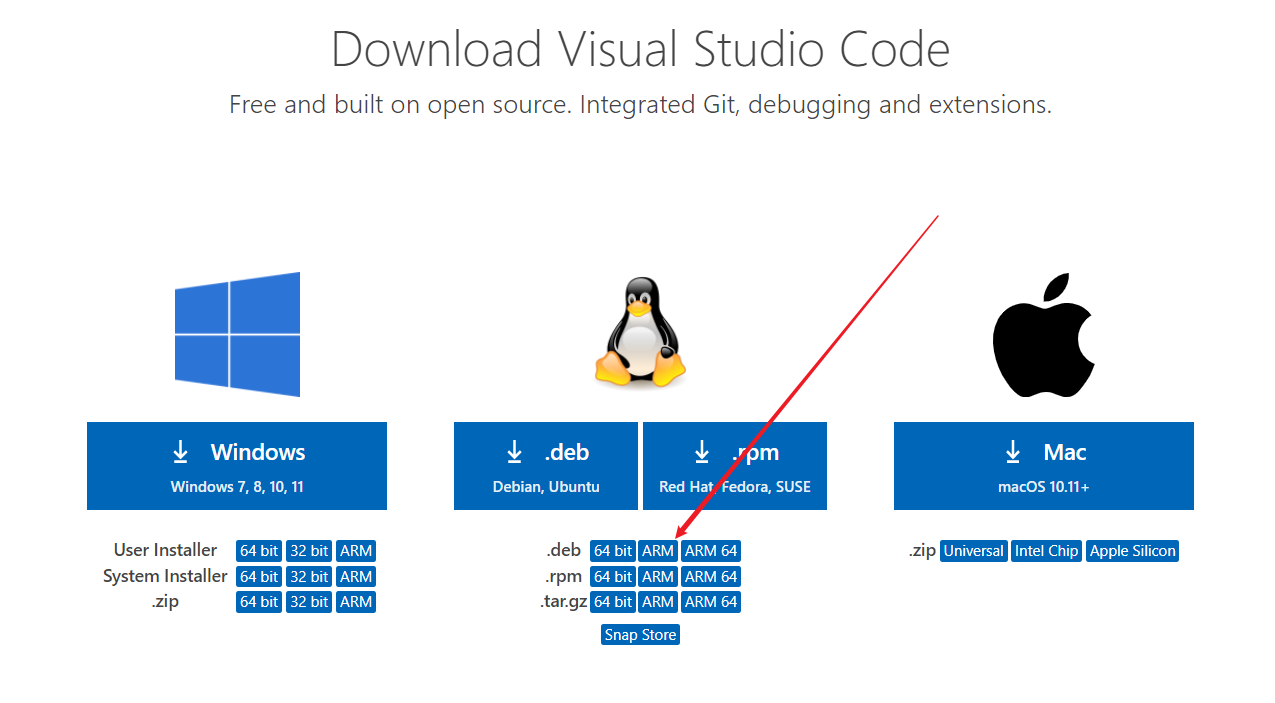
vscode: the strongest compiler in the universe is still needed, Click to enter the download page After these three downloads, we probably know how to install the software using deb package. Baidu searches for the corresponding software (the search engine must be modified before nano enters the browser), looks for the package that meets the requirements, downloads it, and enters the folder where the installation package is located from the command line:
sudo dpkg -i xxxx.deb
Of course, we don't have to remember it all. The name of the package is old and long. We enter a few letters, and then press the Tab key to complete it automatically.
[4] The following are some environments for deep learning. Deep learning needs the support of computing power. NVIDIA's graphics card supports it. Many open source projects also use relevant board test as a parameter. The opencv environment already exists in the image. We enter:
python3
after
import cv2
cv2.__version__
You can print the version of opencv.
Next are cuda and cudnn. Enter the command line tool and enter:
gedit ~/.bashrc
Add at the end:
export PATH=/usr/local/cuda-10.2/bin${PATH:+:${PATH}}
export LD_LIBRARY_PATH=/usr/local/cuda-10.2/lib64${LD_LIBRARY_PATH:+:${LD_LIBRARY_PATH}}
export CUDA_ROOT=/usr/local/cuda
Then we save and exit, enter:
nvcc -V
It will print the publication number. The number of 4.4.1 should be 10.2. I'm not sure about others. I haven't tried yet.