windows environment deployment
1. Installation environment variables
To download JDK, you can download it on the official website of oracle or Baidu online disk
Link: https://pan.baidu.com/s/1QncVzXbJmKr8jzl-f0YXeg
Extraction code: v5ek
2. Configure environment variables
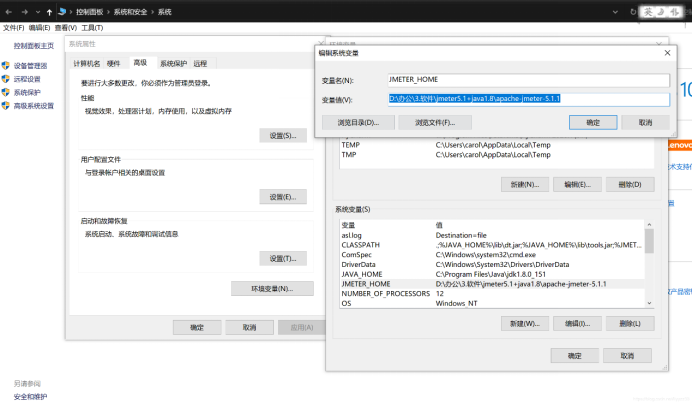
Install the downloaded JDk and add JAVA_HOME Fill in the JDK storage path (fill in according to your own path), such as C: \ program files \ Java \ jdk1 8.0_ two hundred and two

Add JMETER_HOME Fill in the Jmeter storage path (fill in according to your own path), such as D: \ office \ 3 Software \ Jmeter5 1+java1. 8\apache-Jmeter-5.1.1
Add CLASSPATH and add the following at the end
;%JAVA_HOME%\lib\dt.jar;%JAVA_HOME%\lib\tools.jar;%JMETER_HOME\lib\ext\ApacheJMeter_core.jar;%JMETER_HOME%\lib\jorphan.jar;%JMETER_HOME%\lib\logkit-2.0.jar

Add Path and add the following at the end
%JAVA_HOME%\bin
%JAVA_HOME%\jre\bin
%JMETER_HOME%\bin

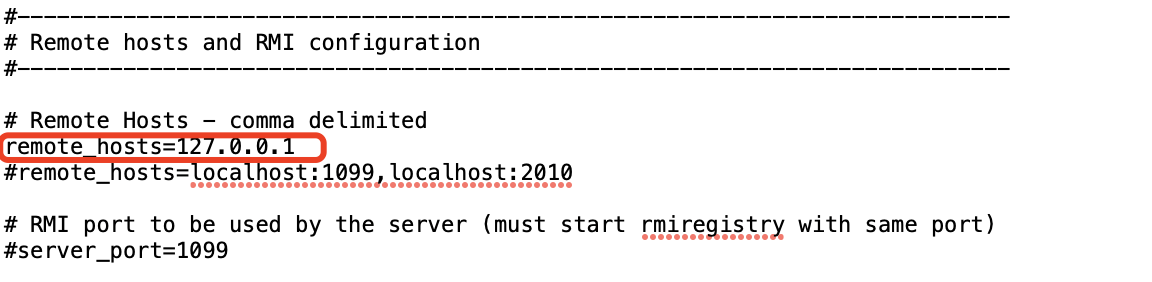
3. Modify Jmeter configuration file
Enter Jmeter configuration file D: / * * / apache-Jmeter-5.3/bin/Jmeter properties
server.rmi.ssl.disable=true # change false to true and remove the preceding # number

Add the generator press (this step is to add the generator press that needs to be started using Jmeter distribution, IP + port):
remote_hosts=xxx.168.xxxx.2:1099,xxxx.168.xxx.3:1099,xxxx.168.xx.4:1099
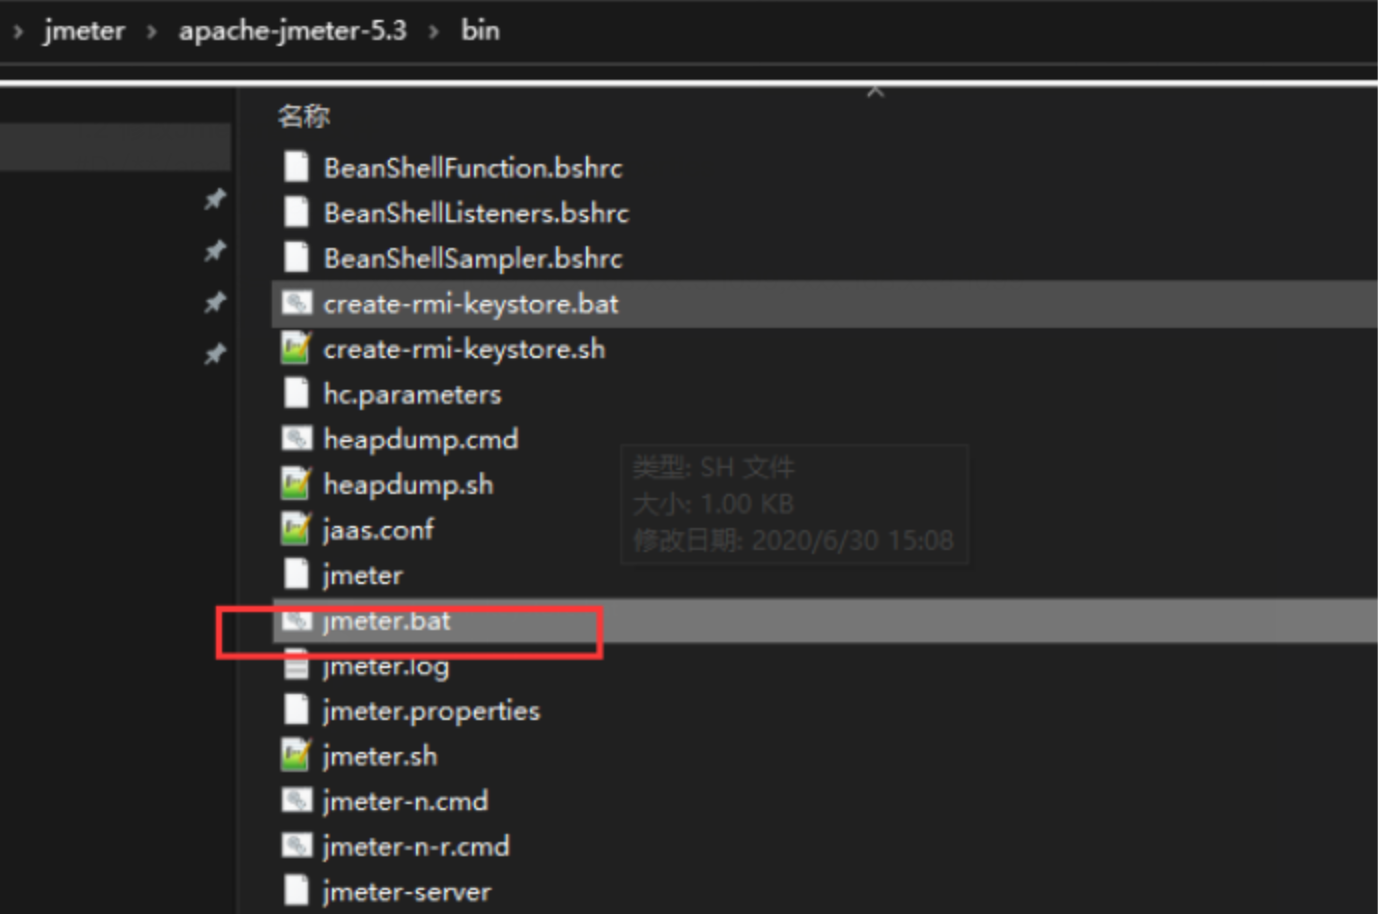
4. Start jmeter
For the use of Jmeter tool, please see the following article: Jmeter pressure measuring tool beginner level chapter
5. Start distributed service
Start the client JMeter server on the slave machine (generator) bat
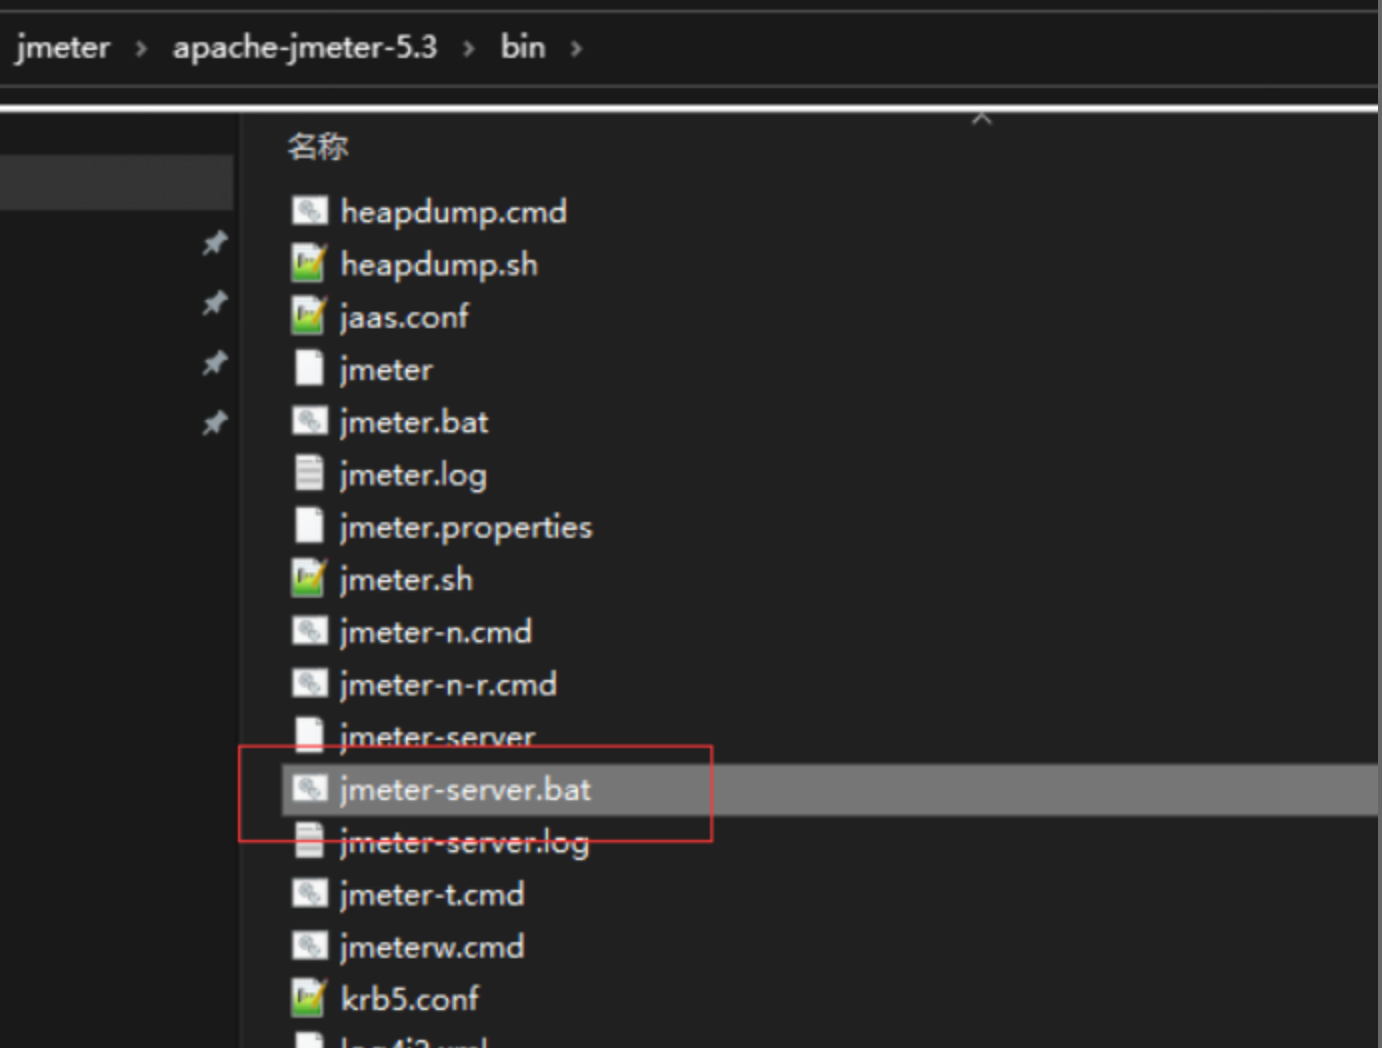
As shown in the figure below, you can see that the slave has been started.

After the slave machine is started, choose to run in the master and start / start all the slave machines remotely, and then the distributed multiple slave machines can be tested together.

Linux environment deployment
1. Install JDK+Jmeter
Before installing jmeter, you need to install JDK and download JDK (you can use the following address to download or go to the official website, which needs to log in to oracle) https://www.jdkdownload.com/ , I choose jdk-8u181-linux-x64 tar. GZ version download (for intranet deployment, you only need to manually upload the JDK and Jmter packages to the intranet and decompress them, and the other steps remain the same)
Unzip the jdk and install it in the / usr/local/java / directory (the installation path depends on your preference, but it should match the address in the environment variable)
tar -zxvf jdk-8u181-linux-x64.tar.gz
Configure environment variables, modify the configuration file vi /etc/profile, and add the following content at the end of the text
JAVA_HOME=/usr/local/java/jdk1.8.0_181
CLASSPATH=$JAVA_HOME/lib/
PATH=$PATH:$JAVA_HOME/bin
export PATH JAVA_HOME CLASSPATH
Make environment variables effective
source /etc/profile
Verify jdk configuration successfully
java -version

Use the command to install Jmeter directly
wget https://mirrors.bfsu.edu.cn/apache//jmeter/binaries/apache-jmeter-5.4.1.tgz
If it is an intranet environment, you need to manually upload the Jmeter installation package and download the latest version of Jmeter Click download
Unzip jmeter and install it in the / usr/local directory (the installation path depends on your preference, but it should match the address in the environment variable)
tar -zxf apache-jmeter-5.4.1.tgz
Create script Directory: / root/jmeter/scripts, # script upload address
Create report Directory: / root/jmeter/report, # report generation and storage directory
Configure jmeter environment variable, vi /etc/profile, and add the following content at the end of the text
export JMETER_HOME=/usr/local/apache-jmeter-5.4.1
export CLASSPATH=$JMETER_HOME/lib/ext/ApacheJMeter_core.jar:$JMETER_HOME/lib/jorphan.jar:$CLASSPATH
export PATH=$JMETER_HOME/bin:$PATH
Make environment variables effective
source /etc/profile
Verify jmeter configuration successfully
jmeter --version

2. Environmental optimization
1. Configure the memory used by jmeter and modify it according to the actual server and test requirements
vi /usr/local/apache-jmeter-5.4.1/bin/jmeter

2. Optimize linux memory parameters and modify limits Conf file:
vi /etc/security/limits.conf
Finally, add (centos may be different for different operating systems):
*               soft    nofile            102400
*               hard    nofile            102400
*               soft    nproc             65535
*               hard    nproc             65535
Reopen the SSH terminal and execute the following command to check whether it takes effect
ulimit -n

3. Modify Linux kernel parameters and / etc / sysctl Conf file:
vi /etc/sysctl.conf
And add the following:
net.ipv4.tcp_syncookies = 0
fs.file-max = 12553500
fs.nr_open = 12453500
kernel.shmall= 1048576
kernel.shmmax = 1887436
kernel.msgmax = 65536
kernel.sysrq = 0
kernel.pid_max= 65536
net.core.netdev_max_backlog = 2000000
net.core.rmem_default = 699040
net.core.rmem_max = 50331648
net.core.wmem_default = 131072
net.core.wmem_max = 33554432
net.core.somaxconn = 65535
net.ipv4.ip_nonlocal_bind = 1
net.ipv4.tcp_max_orphans = 3276800
net.ipv4.tcp_mem = 1048576 1572864 2097152
net.ipv4.tcp_rmem = 4096 4194304 8388608
net.ipv4.tcp_wmem = 4096 4194304 8388608
net.ipv4.tcp_slow_start_after_idle = 0
net.ipv4.tcp_synack_retries = 1
net.ipv4.tcp_window_scaling = 1
vm.swappiness = 0
#TCP connection recovery
net.ipv4.tcp_max_tw_buckets = 6000000
net.ipv4.tcp_tw_reuse = 1
net.ipv4.tcp_tw_recycle = 1
net.ipv4.tcp_fin_timeout = 30
net.ipv4.route.max_size = 5242880
net.ipv4.ip_forward = 1
#0 indicates that the check time is wrong without opening. It is recommended to set 0
net.ipv4.tcp_timestamps = 0
#Enable support for TCP timestamp. If this item is set to 0, the following settings will not work
#TCP connection manager
net.ipv4.tcp_max_syn_backlog = 655360
net.ipv4.tcp_syn_retries = 6
net.ipv4.tcp_retries1 = 3
net.ipv4.tcp_retries2 = 6
#TCP keepalive
net.ipv4.ip_local_port_range = 1025 65534
net.ipv4.tcp_keepalive_time = 30
net.ipv4.tcp_keepalive_intvl = 30
net.ipv4.tcp_keepalive_probes = 3
Enter the following command to make the kernel parameters take effect:
sysctl-p
3. Modify Jmeter configuration file
Enter Jmeter configuration file D: / * * / apache-Jmeter-5.3/bin/Jmeter properties
server.rmi.ssl.disable=true # change false to true and remove the preceding # number
Add the load machine (this step is to add the load machine that needs to be started using Jmeter distribution, IP + port):
remote_hosts=xxx.168.xxxx.2:1099,xxxx.168.xxx.3:1099,xxxx.168.xx.4:1099
4. Write Jmeter script
Debug the Jmeter script to be pressure tested through Windows and save it as * * * * jmx file, upload to Linux service.
For the use of Jmeter tool, please see the following article: Jmeter pressure measuring tool beginner level chapter
5. Start Jmeter
1) First start the services on the slave (so the engine Press) respectively, and the command is as follows
nohup jmeter-server -Djava.rmi.server.hostname=172.168.xxx.2 & #Generator press IP
2) Start the master and execute the following command to start jmeter
jmeter -r -n -t ***.jmx -l test.jtl
 Parameter Description:
-n wrong GUI pattern -> In Africa GUI Run in mode JMeter
-t Test file -> To run JMeter Test script file
-l log file -> Document recording results
-r Represent all agent Start and participate in the test
3) If you want to start the specified generator, execute the following command
jmeter -n -t ***.jmx -l test.jtl -R xxxx.168.xx,xxxx.168.xx,xxxx.168.xx
 Parameter Description:
-n wrong GUI pattern -> In Africa GUI Run in mode JMeter
-t Test file -> To run JMeter Test script file
-l log file -> Document recording results
-R designated agent Start and participate in the test
6. Stop Jmeter
Enter the bin directory of JMeter and enter/ shutdown. The SH command stops the script
Note: if you want to terminate the pressure measurement in the process of distributed pressure measurement, do not press ctrl + c on Linux to forcibly terminate the program. In this way, you will know that after the main program hangs, the slave machine does not accept and execute, and will continue to run. When you run the script from the host again, the slave will still run in the program of the previous script. At this time, you need to kill the process.
7. Package and view the test report
Package the report under linux into zip, and then export it to windows to view the index HTML test report


8. It is strongly recommended to view the test results visually
Refer to the following deployment methods: JMeter+Grafana+Influxdb build a visual performance test and monitoring platform