realization
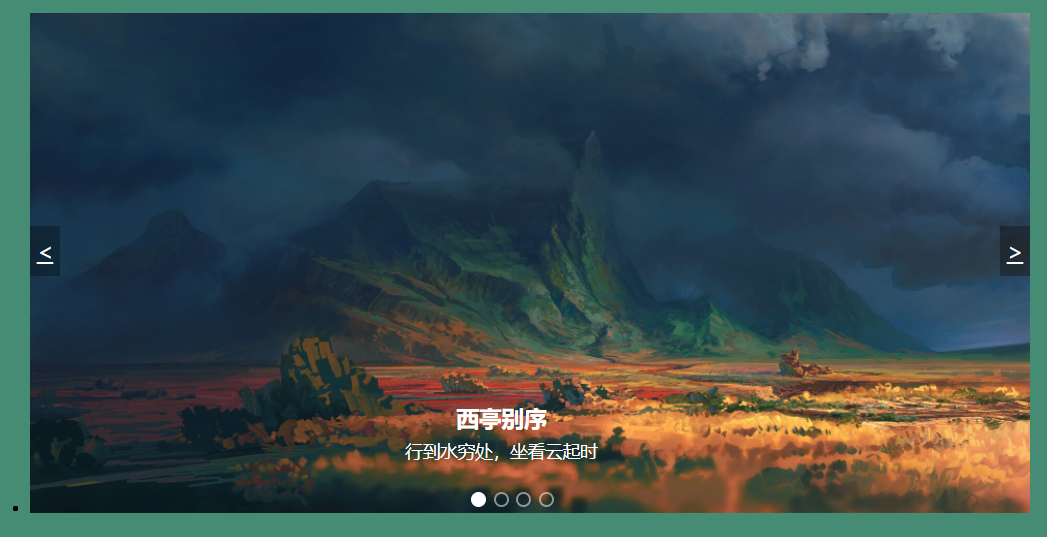
To realize the rotation chart shown in the figure, the main functions to be realized include:
- When the mouse passes through the rotation chart module, the left and right buttons are displayed and the left and right buttons are hidden.
- Click the button on the right once, and the picture will slide down one; Click the button on the left to slide a picture.
- While the picture is playing, the following small circle module changes with it.
- Click the small circle to play the corresponding picture.
- If the mouse does not go through the rotation map, the rotation map will be played automatically.
- When the mouse passes, the rotation chart module automatically stops playing.
analysis
First, we should create a bottom box with pictures, left and right buttons and small circles. The html part is as follows:
<body> <!--Bottom box--> <div class="focus"> <!--Core image area--> <ul>
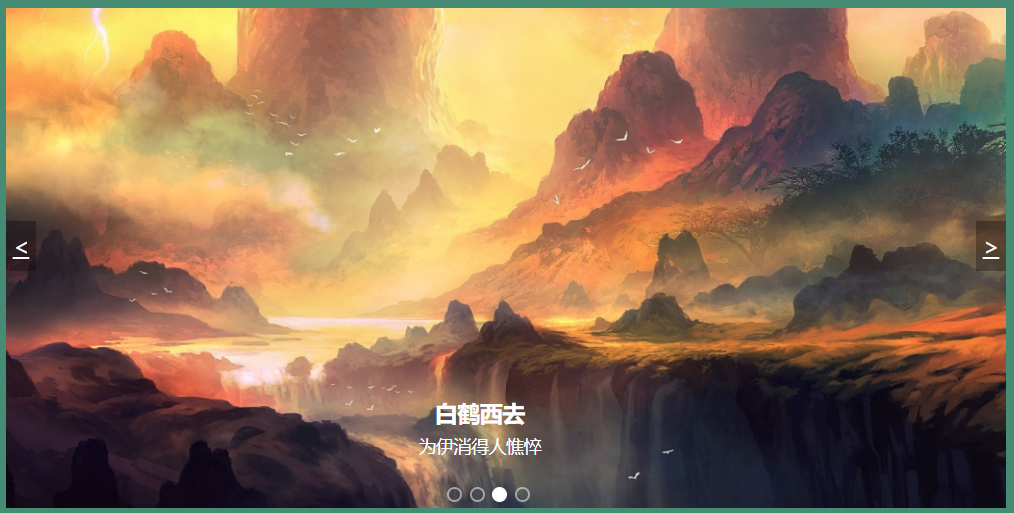
//The first picture is displayed by default <li class="active"> <img src="img/one.jpg" alt=""> <!--Text on picture--> <div class="content"> <h2>Xiting biexu</h2> <p>Go to the water poor place, sit and watch the clouds rise</p> </div> </li> <li> <img src="img/two.jpg" alt=""> <div class="content"> <h2>Su Shi</h2> <p>A bamboo stick and sandals are lighter than a horse, and a raindrop and a misty rain will serve you all your life</p> <p>Others laugh that I am too crazy. I laugh that others can't see through</p> </div> </li> <li> <img src="img/three.png" alt=""> <div class="content"> <h2>White crane goes West</h2> <p>It makes people haggard for Iraq</p> </div> </li> <li> <img src="img/four.png" alt=""> <div class="content"> <h2>White crane goes West</h2> <p>for you am I thus wasting away in sorrow and pain</p> </div> </li> </ul> <!--Left button--> <a href="#" class="arrow-l" id="left"><</a> <!--Right button--> <a href="#" class="arrow-r" id="right">></a> <!--Small circle: dynamically added according to the number of pictures--> <ol class="circle"> </ol> </div> </body>
Note that set the parent box focus as relative and the child box li for storing pictures as absolute to stack the pictures together. The style layout of other css will not be explained in detail, and detailed code will be added later.
js thought implementation
The core idea of this rotation chart is to use z-index to set the stacking order of pictures to display pictures. If the value of z-index is high, it will be displayed on the top layer, and the bottom value will be blocked by the value of high. Next, let's take a look at the specific function implementation of js.
Function 1: when the mouse passes through the carousel map module, the left and right buttons are displayed and the left and right buttons are hidden.
window.addEventListener('load',function (){
    //1,Get element
    var arrow_l = document.querySelector('.arrow-l');//Left button
    var arrow_r = document.querySelector('.arrow-r');//Right button
    var focus = document.querySelector('.focus');//The bottom box where the carousel map is placed

    //2,When the mouse passes through the bottom box, the hidden left and right buttons are displayed
    focus.addEventListener('mouseenter',function (){
        arrow_l.style.display = 'block';
        arrow_r.style.display = 'block';
    })
    //When the mouse leaves the bottom box, the left and right buttons are hidden
    focus.addEventListener('mouseleave',function (){
        arrow_l.style.display = 'none';
        arrow_r.style.display = 'none';
    })

  //... subsequent function codes are placed in this listening event, which will be described separately


})
Function 2: click the button on the right once to slide one picture; Click the button on the left to slide a picture.
//1,Get element
    var ul = focus.querySelector('ul');//Picturesque ul
    var ol = focus.querySelector('ol');//Small circle ol
    var goleft = document.getElementById('left'); //Left button
    var goright = document.getElementById('right');//Right button

    var index = 0;//index Indicates which picture is on display. Add style to it.active
    //2,Exclusive thought: remove the style of all elements, leaving only the second index Picture style
    var goIndex = function (index){
        //Left and right buttons
        for(var i = 0;i < ul.children.length;i++){
            ul.children[i].className = '';
        }
        ul.children[index].className = 'active';

        //Small circle below
        for(var i = 0;i < ol.children.length;i++){
            ol.children[i].className = '';
        }
        ol.children[index].className = 'current';
    }
    //3,Right button: next
    var goNext = function (){
        //Note here index The initial value of is 0, so the comparison length should be reduced by 1. When you click the last picture, the first picture will be returned
        if (index < ul.children.length-1){
            index ++;
        }else{
            index = 0;
        }
        //confirm index Display picture after setting style
        goIndex(index);
    }
    //4,Left button: Previous
    var preNext = function (){
        //Note here index=0 Click to the first picture, and then click to return to the last one
        if (index === 0){
            index = ul.children.length-1
        }else{
            index --;
        }
        //confirm index Display picture after setting style
        goIndex(index);
    }
    //5,Add click events to the left and right buttons respectively
    goleft.addEventListener('click',function (){
        preNext();
    })
    goright.addEventListener('click',function (){
        goNext();
    })
Function 3: dynamically generate a small circle, click the circle to display the corresponding picture, and the circle becomes a ball
//3,Dynamically generate small circles. If there are several pictures, several small circles will be generated
    for(var i = 0;i < ul.children.length;i++){
        //Create a small li
        var li = document.createElement('li');
        //Add an index value for each small circle
        li.setAttribute('index',i);
        //hold li insert ol inside
        ol.appendChild(li);
        //4,We can directly bind click events while generating small circles
        li.addEventListener('click',function (){

            //5,Click the circle to display the corresponding picture
            //Gets the index value of the currently clicked small circle
            var point = this.getAttribute('index');
            //Call the exclusive function above
            goIndex(point);
        })
    }
    //Default handle ol The first one inside li Set the class name to current
    ol.children[0].className = 'current';
Function 4: if the mouse does not go through the rotation map, the rotation map will be played automatically. While the picture is playing, the following small circle module changes with it.
//Automatic rotation
    var self = setInterval(function (){
        goIndex(index);
        if (index < ul.children.length-1){
            index ++;
        }else{
            index = 0;
        }
    },1000)
Function 5: when the mouse passes, the rotation chart module automatically stops playing. It plays automatically when you leave. (just add a clear timer to the mouse passing event of the bottom box above)
//2,When the mouse passes through the bottom box, the hidden left and right buttons are displayed
    focus.addEventListener('mouseenter',function (){
        //...
        //7,When the mouse passes, the rotation chart module automatically stops playing.
        clearTimeout(selfTimer);
        selfTimer = null;//Clear timer variable to free memory
    })
    //When the mouse leaves the bottom box, the left and right buttons are hidden
    focus.addEventListener('mouseleave',function (){
        //...
        //7,Automatically play when the mouse leaves
        selfTimer = setInterval(function (){
            goIndex(index);
            if (index < ul.children.length-1){
                index ++;
            }else{
                index = 0;
            }
        },1000)
    })
Well, all the functions of the rotation chart have been realized. Of course, this is only one way to realize the rotation chart. There are many other methods, which are waiting for you to explore. Next, paste some style codes
appendix
<style>

* {
  margin:0;
  padding:0;
}
body{
  background-color: rgba(50, 128, 102, 0.9);
}

.focus {
  position: relative;
  margin: 20px auto;
  width: 800px;
  height: 400px;
}

.focus ul {
  position:relative;
  width: 800px;
  height: 400px;
}
.focus ul li {
  position: absolute;
  width: 100%;
  height: 100%;
  opacity: 1;
  transition: all .5s;
}
.focus ul li img {
  width: 100%;
  height: 100%;
}
.focus ul li .content {
  position: absolute;
  bottom: 40px;
  left: 300px;
  text-align: center;
  color: white;
}
.focus ul li .content h2 {
  margin-bottom: 5px;
}
.focus ul li .content p {
  font-size: 14px;
}

.arrow-l,.arrow-r {
  display: none;
  position: absolute;
  top: 170px;
  /*margin-top: -20%;*/
  width: 24px;
  height: 40px;
  background: rgba(0,0,0,.3);
  text-align: center;
  line-height: 40px;
  color: #fff;
  font-size: 18px;
  /*The left and right buttons are always displayed*/
  z-index: 100;
}
.arrow-r {
  right: 0;
}

.circle {
  position: absolute;
  bottom: 5px;
  left: 350px;
  list-style:none;
  /*The circle is always displayed*/
  z-index: 100;
}
.circle li {
  float: left;
  width: 8px;
  height: 8px;
  border: 2px solid rgba(255,255,255,0.5);
  margin: 0 3px;
  border-radius: 50%;
  /*Mouse over display small hand*/
  cursor: pointer;
}
.current {
  background-color: #fff;
}
/*Stack order dynamically added to pictures*/
.active {
  opacity: 1;
  z-index: 10;
}

</style>