Catalog:
1. day01 - Framework

Files uploaded and shared
2. day02 - Design Mode
 Files uploaded and shared
3, day03 - Inject the value of the Bean property into Spring
 Files uploaded and shared
4. day04 - Annotation-based Spring MVC
 Files uploaded and shared
5. day05 - Case Target: Registration
 Files uploaded and shared
6. day06 - Case Target: Registration
 Files uploaded and shared
7. day07-Figure
8,day-08-SSM

Files uploaded and shared
1. day01 - Framework
A framework is a set of code that has been completed to facilitate our development process.
Course Topic: SSM
Spring + Spring MVC + Mybatis
Review: MVC
MVC (Model + View + Controller) is a design concept that divides parts of a program into different classes and then represents them as different classes, thus achieving "Each class has its own positioning, focusing solely on its own business or function, and not on how other parts are implemented and completed"!
Design Mode
Singleton mode
The performance of the singleton pattern is:
Only one instance (object) of a class can exist at any time!
Assume:
Then:
User u1 = new User();
User u2 = new User();
That is, developers can create objects of any number of User classes! To implement the singleton pattern, you should first:
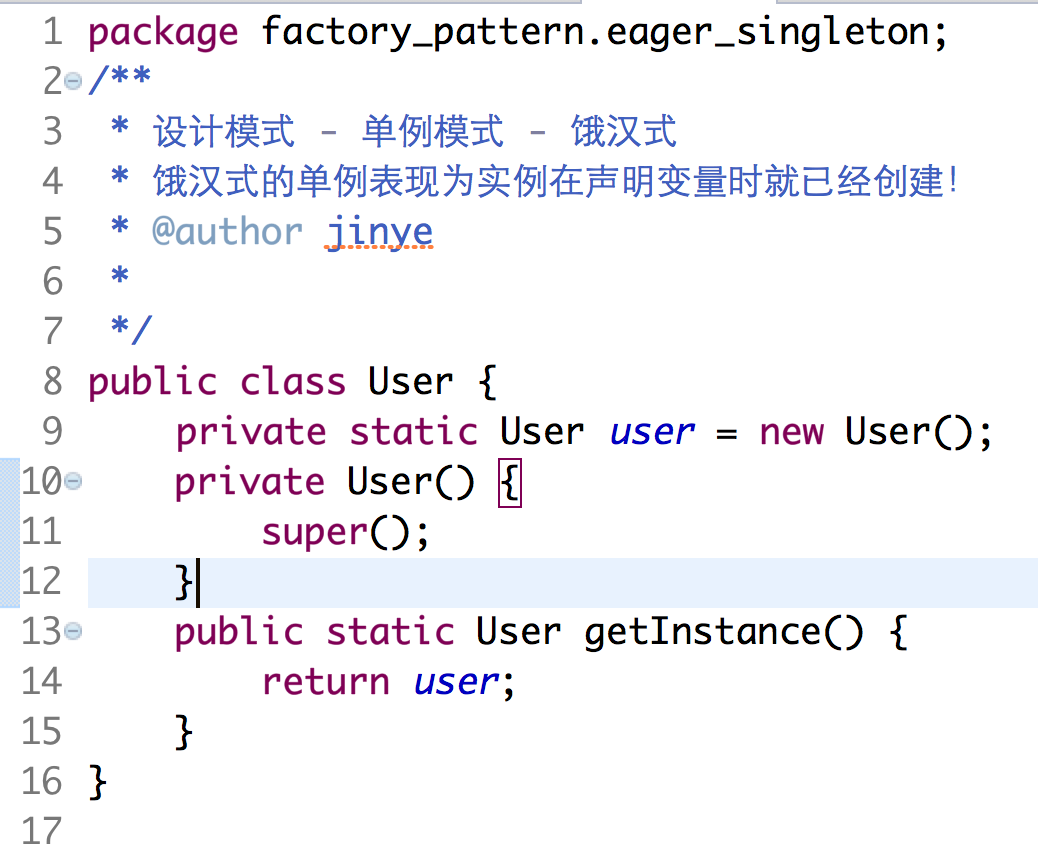
public class User {
private User() {}
}
Once the construction method is privatized, you are not free to create objects of that class, and then:
public class User {
private static User user = new User();
private User() {}
}
Next:
public class User {
private static User user = new User();
private User() {}
public static User getInstance() {
return user;
}
}
Factory Mode
The purpose of the factory mode is to:
Production object so that the party who needs the object does not care about the production process of the object
Typically, you should design object standards first, that is, design interfaces:
public interface IUserDao {
void insert(User user);
}
Then, design the implementation class for the interface:
public class UserDaoImpl implements IUserDao {
public void insert(User user) {}
}
Next, design the factory class:
public class UserDaoFactory {
public static IUserDao newInstance() {
return new UserDaoImpl();
}
}
When the above is complete, when the object is needed:
IUserDao dao = UserDaoFactory.newInstance();
dao.insert(...);
You can see that the name of the implementation class is not reflected in the above code!
In the above programs, there is not much dependency on UserDaoImpl! Also called "decoupling"!
Even if one day the UserDaoImpl class is not enough to meet the requirements of the program, just write another example, UserDaoImpl2, which also implements the IUserDao interface, and modify the return value of the factory. No other code in the whole project needs to be adjusted!
Spring Framework
Developing Spring DEMO
Implementation Steps
1 Create Maven Project of type war
2 Configure Maven dependencies: spring-webmvc opens pom.xml, switches to the dependencies tab, clicks the Add button, enters spring-webmvc, and selects the item whose Group ID corresponds to org.springframework. Note: There are many Group IDs, please check!
3Add Spring profile source: Profiles can be downloaded from FTP to target location: src\mainresouces
4 Create a Spring-managed class, which can be any class such as Create User Class
5 Create a class for the test run
6 Configure Spring's profile to add nodes, adding IDs and class attributes to nodes - id: Custom name, recommended to associate with class name - class: Full name of managed class, i.e.'Package name + Class name'
7 Test Runs
a) Load configuration file
String file = "applicationContext.xml";
ApplicationContext ac = new ClassPathXmlApplicationContext(file);
b) Call the getBean() method of AC to get the object User user = (User) ac.getBean("user");
The parameter to getBean() above is the id of the XML configuration
Matters needing attention
If you switched Workspace, select Preferences from the Window menu in Eclipse, select maven -> User Settings on the left of the Preferences dialog box that pops up, and select the correct maven configuration file on the right User Settings item.If the above actions are performed after the project is created and no existing problems are automatically resolved, you may need to right-click the project, select maven -> Update Project, and check Force Update...
maven resolves the jar package dependency and then retests the project.
-------------------------------------------------------------------------------------------------------------------------
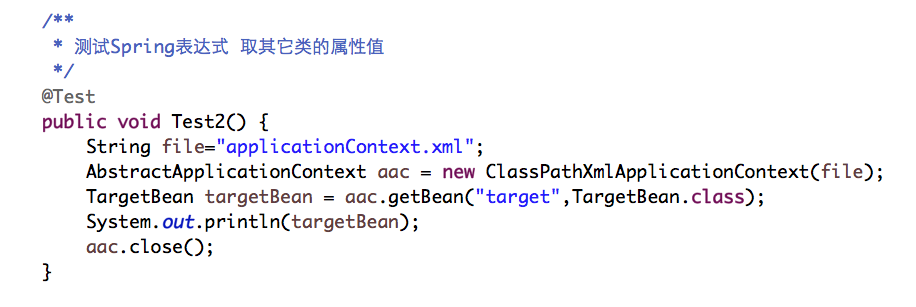
About the type of getBean()
The getBean() defined by the ApplicationContext is overloaded many times, and the return value of getBean(String, Class) is generic!
-------------------------------------------------------------------------------------------------------------------------
About close() of ApplicationContext
The ApplicationContext interface does not declare the close() method, and if you need to close it, you should declare the variable as AbstractApplicationContext.
-------------------------------------------------------------------------------------------------------------------------
Notes on Different Versions from Teaching Versions
If you have problems, find the Maven Library in the project's library, find one of the spring-related jar packages, such as spring-context-??.jar, expand the jar package, find the spring.schemas file under META-INFO, find the version number in the file, and then modify the version number in the applicationContext.xml file in the project.Each version number is the same, so you just need to find one of them (for example, spring-context) and modify them all to this version!
-------------------------------------------------------------------------------------------------------------------------
How to get objects using Spring
By parameterless construction
Scope of application: As long as the corresponding class is a normal class (non-abstract) and has a construction method with or without parameters!
Configuration code example:
Get an example object: Date date = ctx.getBean("date", Date.class);
-------------------------------------------------------------------------------------------------------------------------
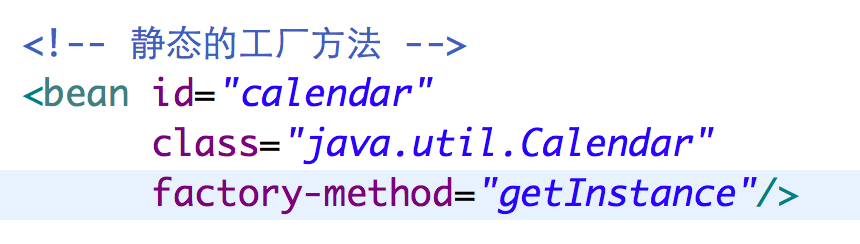
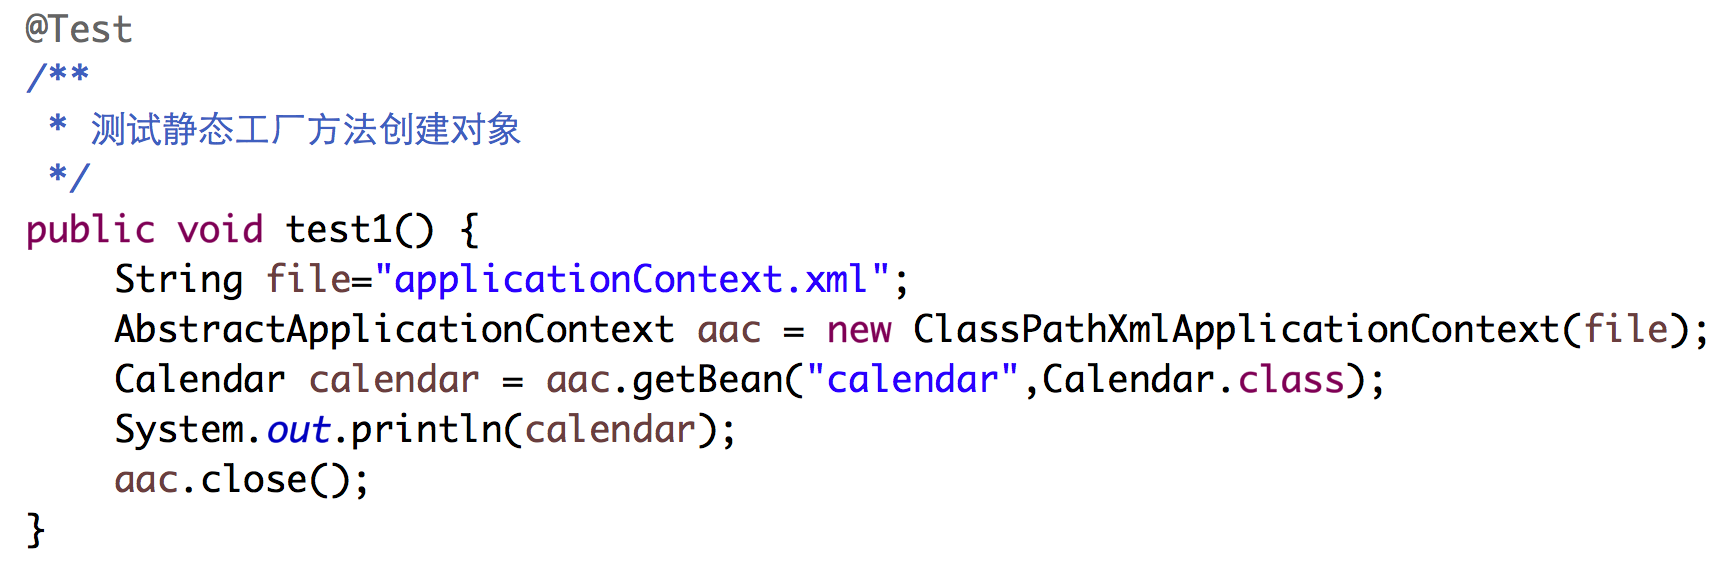
By Static Factory Method
Analysis: Take the Calendar class as an example, it is an abstract class and cannot create objects directly. However, there is a static method public static Calendar getInstance() in this class, so you can get objects of Calendar type through Calendar.getInstance()!
Scope of application: This class may not have parameterless construction methods, but there is a static parameterless method in this class that can return objects of this class.
Note:
To create a class of objects and a class that provides static methods, it must be the same class!
Example configuration code: <bean id="calendar" class="java.util.Calendar" factory-method="getInstance"/>i.e., the factory-method attribute needs to be configured more than the construction method
Get an example object: Calendar calendar = ctx.getBean("calendar", Calendar.class);
-------------------------------------------------------------------------------------------------------------------
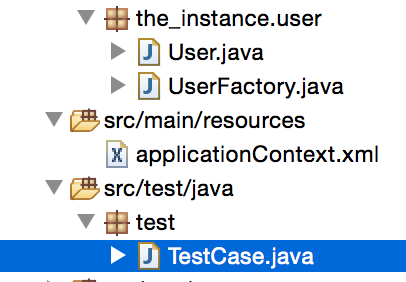
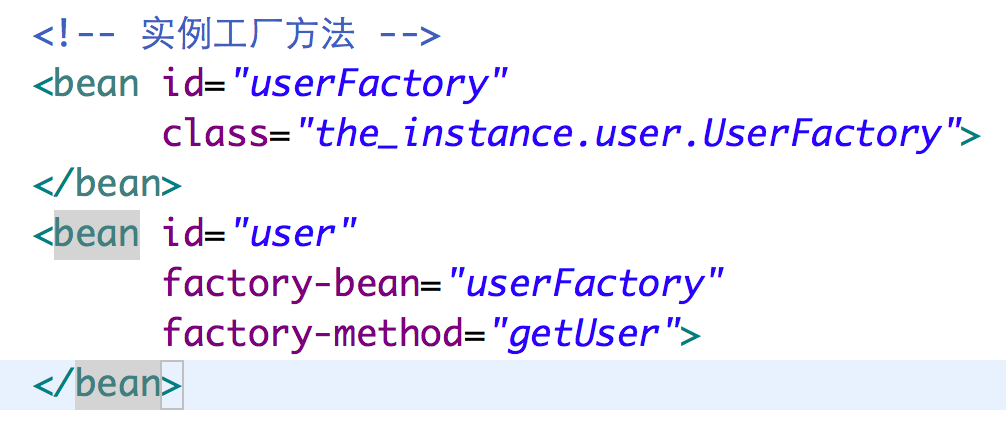
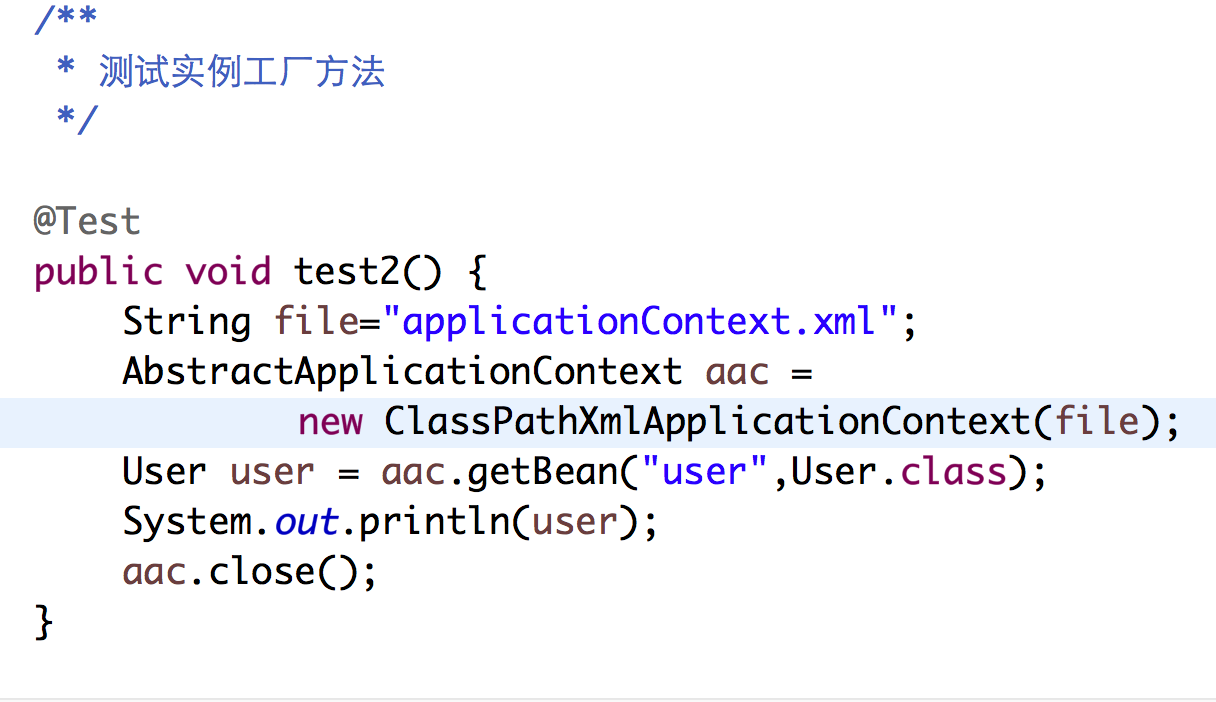
By Instance Factory Method
Analysis: When the factory method is not a static method, or the class in which the factory method resides is not the same as the class in which the object needs to be created, the instance factory method is required to get the object!
Scope of application: There are also individual methods (which do not need to be static) that can be used for production objects!
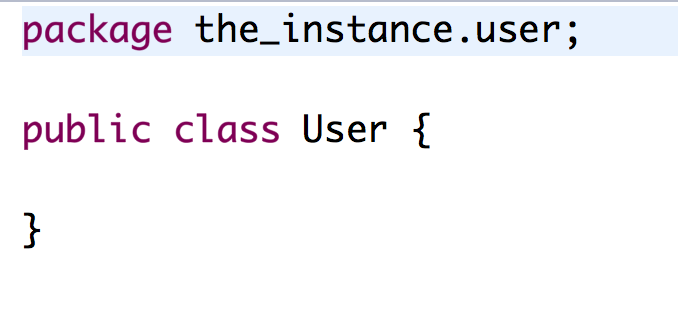
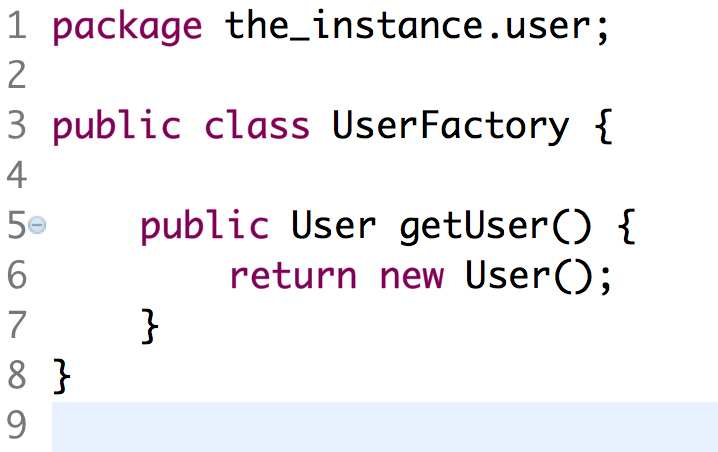
Example requirements: public class User {} public class UserFactory {public User getUser () {return new User ();}}
1. List of items
2.User class
3.UserFactory class
4.
applicationContext.xml file configuration
5.TestCase Test Class
Configuration code example: Note: Because an object of this class must be created before calling a non-static method, configure the factory first! Then: <bean id="user" factory-bean="userFactory" factory-method="getUser"/>
Get an example of the object: User user = ctx.getBean("user", User.class);
-------------------------------------------------------------------------------------------------------------------------
Scope of beans managed through Spring
By default, objects of Spring-managed classes are singleton and bean s are created when the Spring configuration file is loaded!
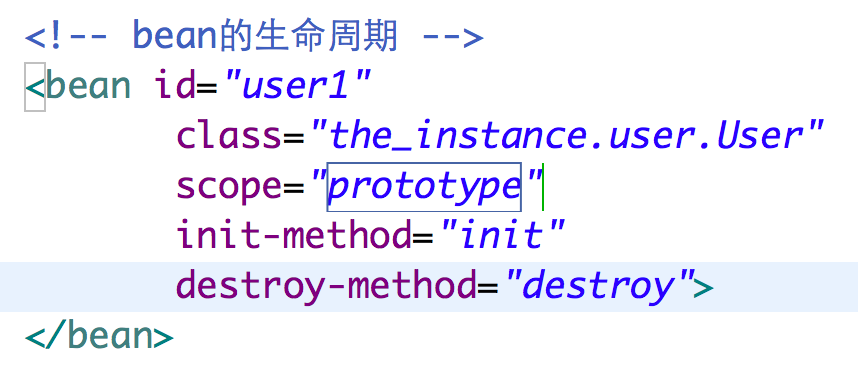
In the Spring configuration file, adding a scope attribute to a node configures the scope, and the value of the attribute can be singleton or default, indicating a singleton, or prototype, which is not singleton, and the object is not created directly when the Spring configuration file is loaded, but only when it is needed (when the object is acquired).
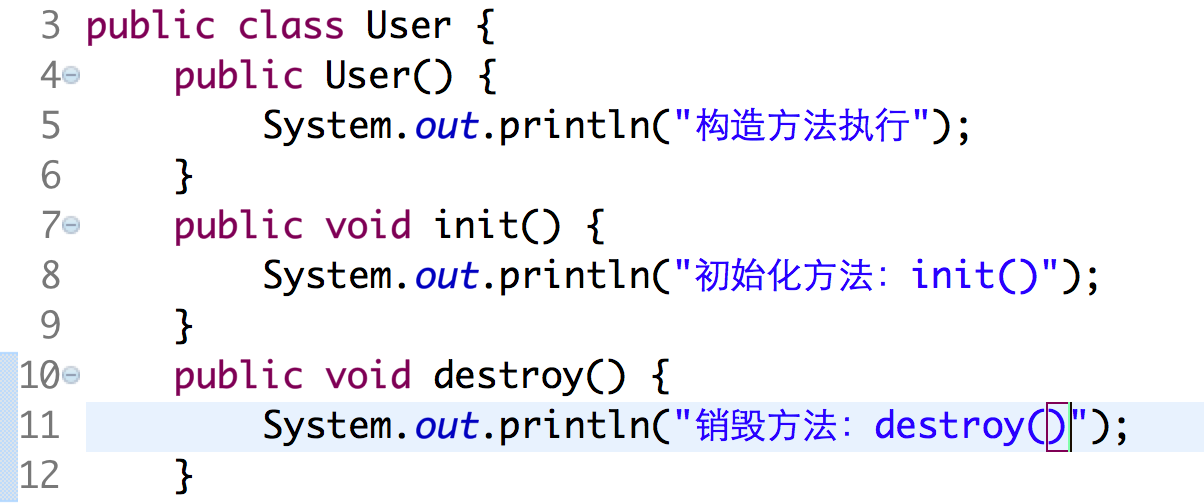
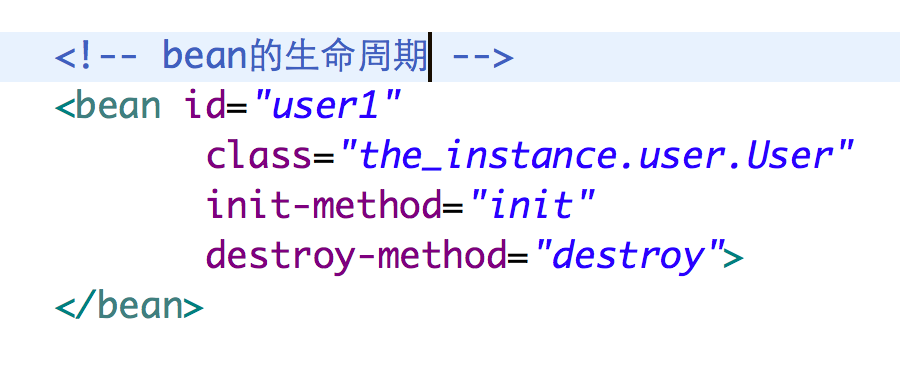
Life cycle of beans managed through Spring
Spring-managed beans allow you to design initialization lifecycle methods at creation and destruction.
-------------------------------------------------------------------------------------------------------------------------
Development steps:
1 Design these two methods (or one of them) yourself in a custom Spring-managed Bean class, such as adding public void init() and public void destroy() methods to the User class
Steps to achieve:
2 In the Spring configuration file, add the configuration init-method attribute and destroy-method attribute to the User class node, and the value of the attribute is the name of the method added in step 1
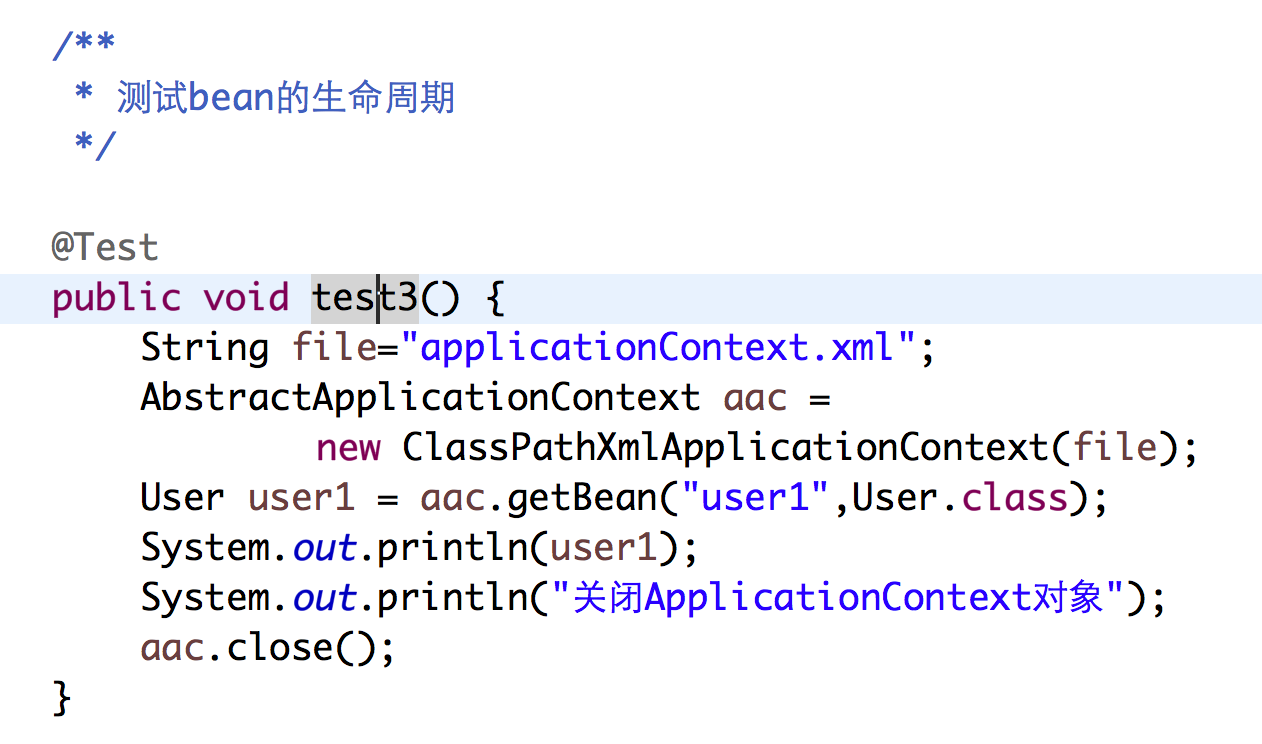
3. Testing in TestCase Test Class
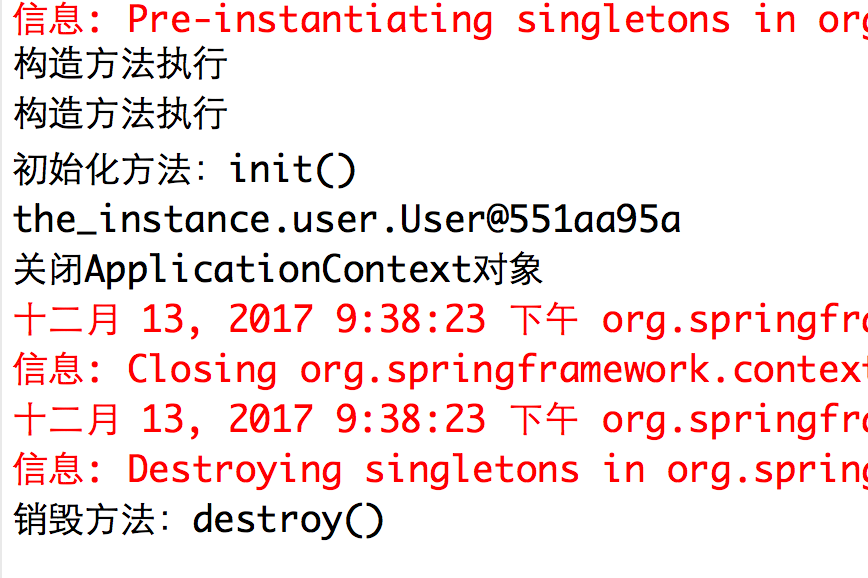
4. View the results; Bean with default or scope=singleton executes the initialized lifecycle method after the execution of the construct method and destroyed lifecycle method after the closure of the ApplicationContext object
5.Bean with scope=prototype, which executes the initialized lifecycle method after the execution of the construction method, but does not execute the destroyed lifecycle method
6. Test View Results
No prompts when writing XML files
[Review] Memory leaks and memory overflows
When a resource is attempted to be freed but cannot be freed because it is being used, it may persist in memory for a long time! This condition is called a memory leak!
In fact, a small amount of memory leak is harmless! Especially for single-machine programs!
However, leaked data can no longer be used, but it takes up memory space, that is, unnecessary memory! It will affect the performance of the entire computer!
Moreover, as more and more data is leaked, less and less memory will be available. The most extreme is that there is a very large amount of leaked data in the memory, resulting in almost no memory available. Creating new data in memory at this time, there will be no memory to store, and there will be a "memory overflow"!
[Review] Abnormal Architecture
Throwable
-- Error
-- Exception
-- -- IOException
-- -- -- FileNotFoundException
-- -- RuntimeException
-- -- -- ClassCastException (??) ???
-- -- -- ArithmeticException x / 0
-- -- -- NullPointerException null.getxxx null.xxx
-- -- -- IndexOutOfBoundsException list.get(-1)
-- -- -- -- ArrayIndexOutOfBoundsException arr[-1]
2. day02 - Design Mode
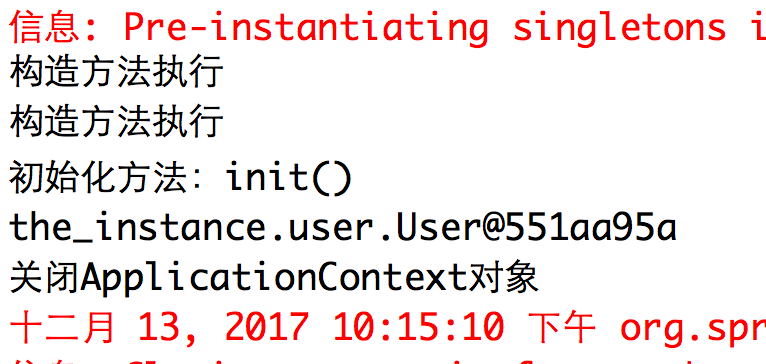
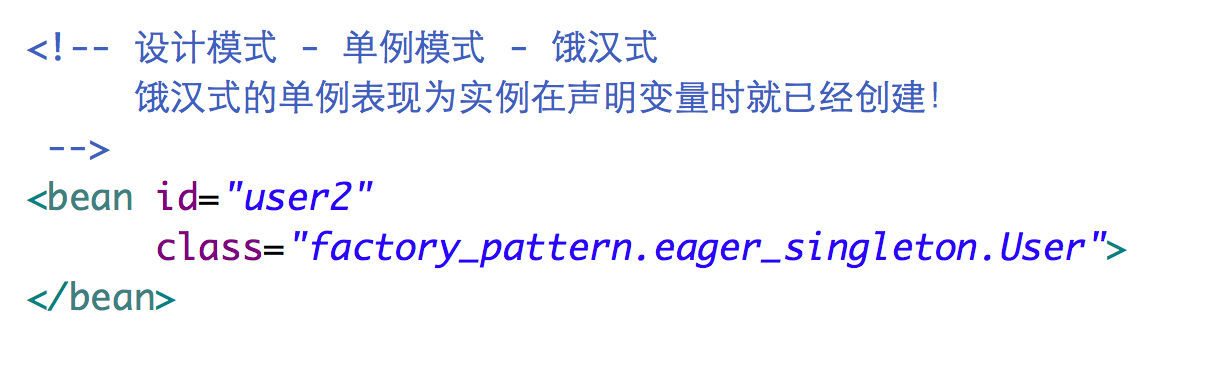
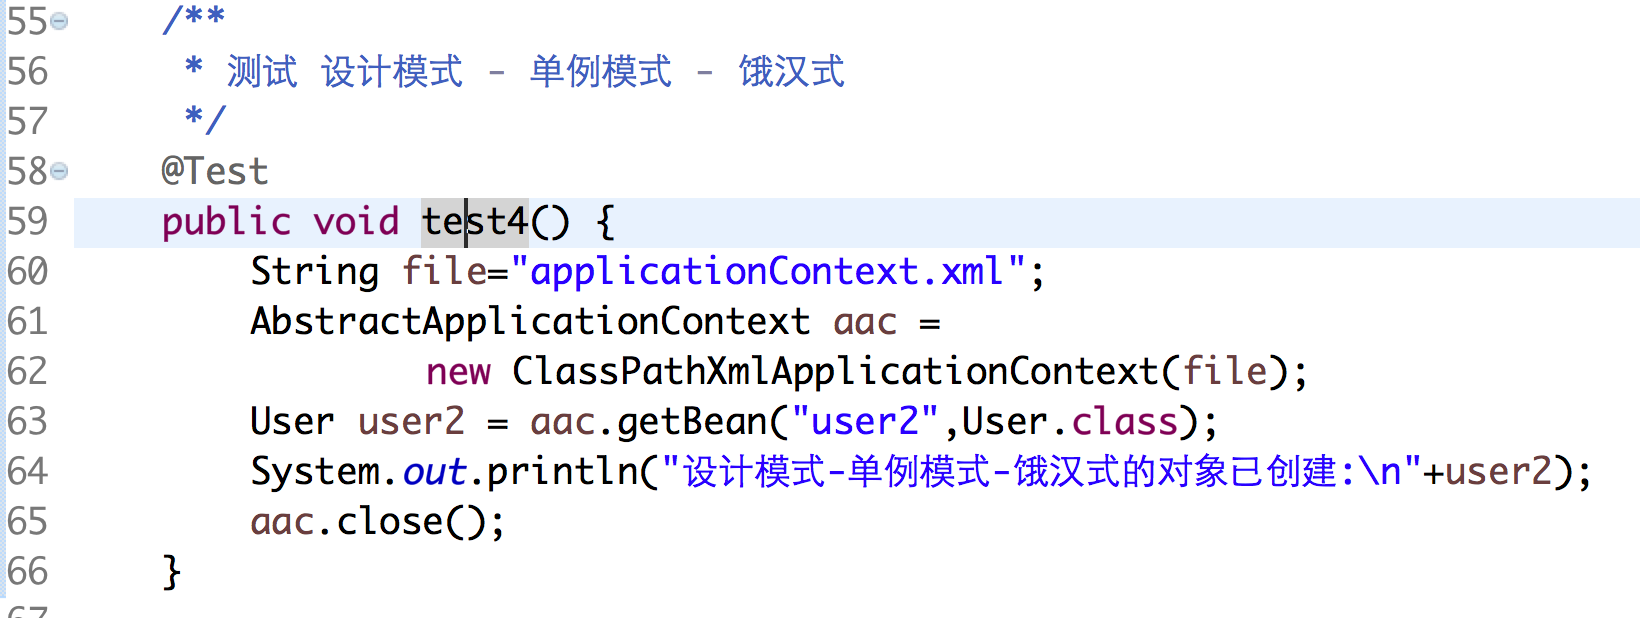
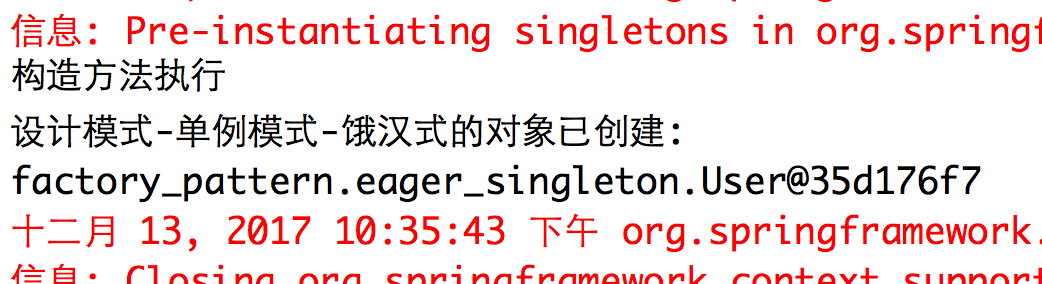
Single case pattern - Eager Singleton
1. Create a User class:
2. Configure bean s in the applicationContext.xml file
3. In the test class, test the Hungry-Han style:
4. View the execution results:
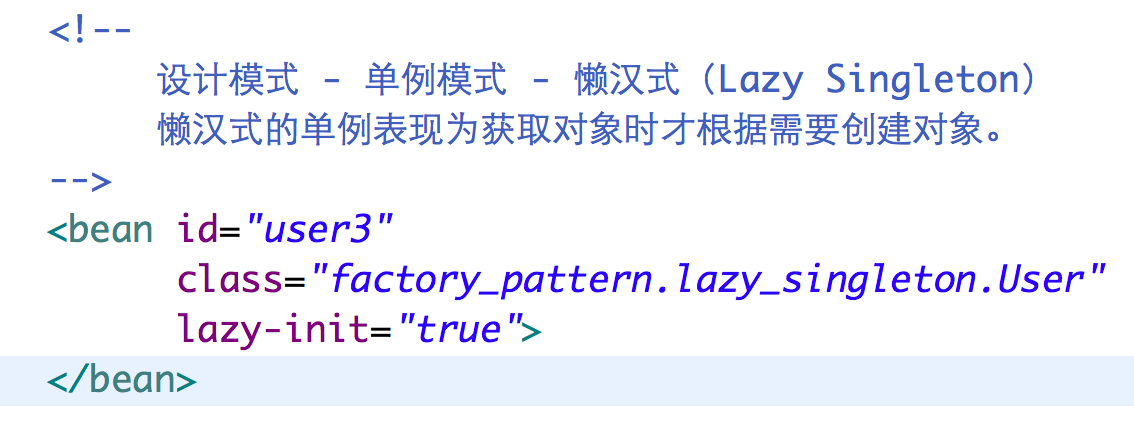
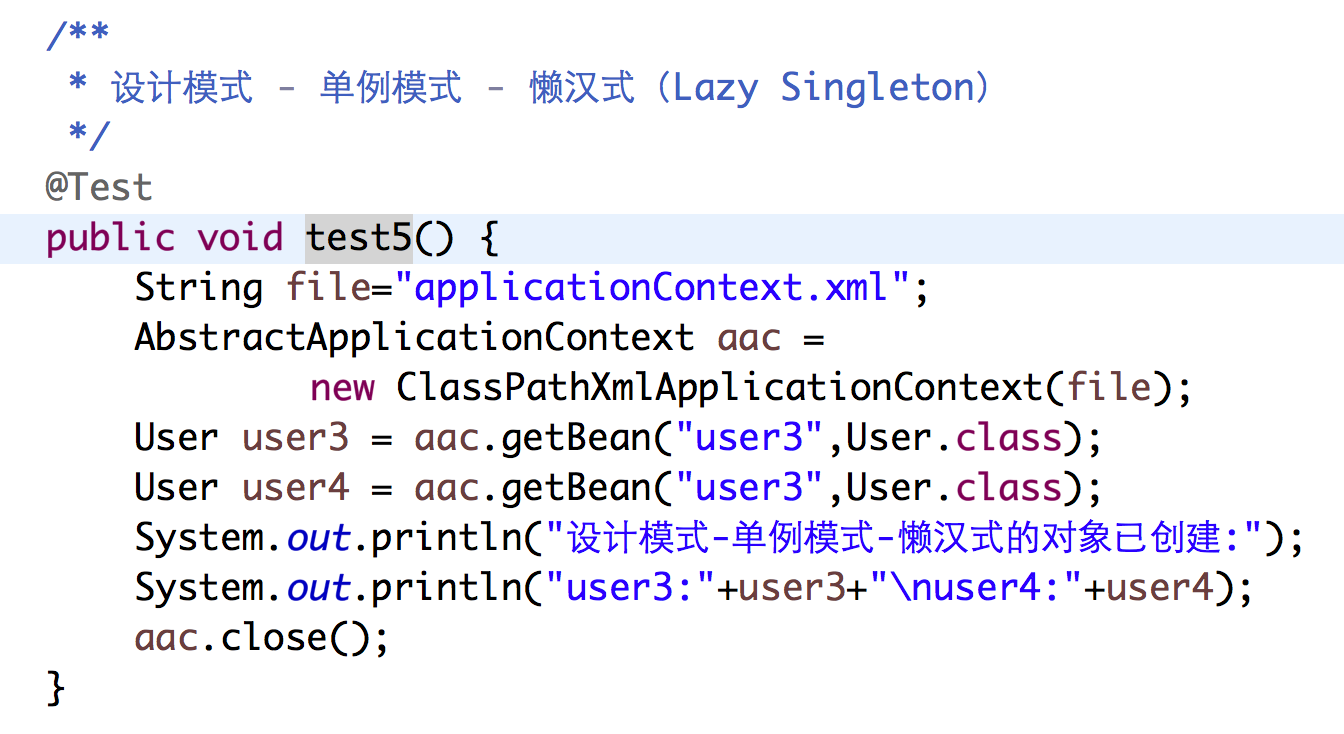
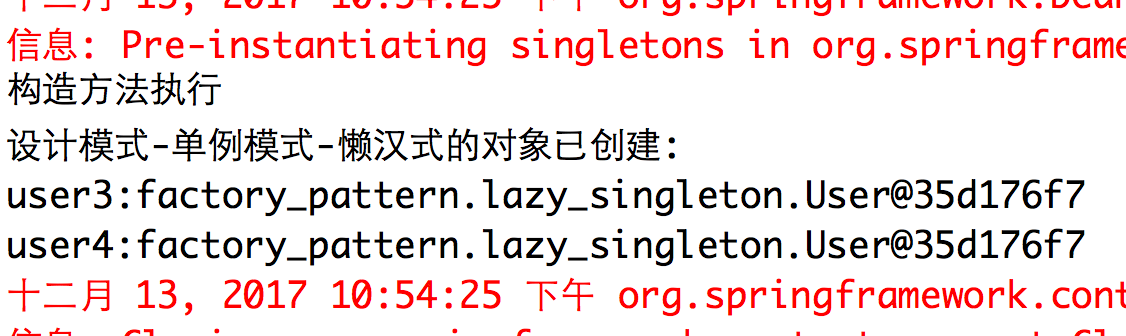
Design Mode-Singleton-Lazy Singleton
The lazy singleton is that objects are created on demand when they are acquired.
public class User {
private static User user = null;
private static Object lock = new Object();
private User() {}
public static User getInstance() {
if (user == null) {
synchronized (lock) {
if (user == null) {
user = new User();
}
}
}
return user;
}
}
1. Create a User class in the project:
2. Configure bean s in the applicationContext.xml file
3. Test the lazy style in the test class:
4. View the execution results:
Use lazy loading (delayed loading) when Spring manages beans
When Spring manages beans, the default is singleton and loaded hungry, and Bean objects are created when the Spring configuration file is read!
If you want beans to be loaded lazily, you need to add the lazy-init attribute in the Spring configuration file under the corresponding node, which can be default, true, false.
For example: <bean id="user" class="cn.tedu.spring.bean.User" lazy-init="true"/>
---------------------------------------------------------------------------------------------------------------------------------
User registration for MVC
Rough process
View: username, password
Controller -> Model(Service -> Dao)
Simulated implementation of code in Model
public class UserService {
private UserDao userDao;
public void reg(User user) {
dao.insert(user);
}
}
public class UserDao {
public void insert(User user) {
// Access database, add data
}
}
Injecting values of attributes directly through the Set method of attributes in Spring-managed beans
Application Scenarios
For example, UserDao is required in UserService to perform business
---------------------------------------------------------------------------------------------------------------------------------
Development steps
1 Declare the public class UserService {private UserDao dao;} attribute of UserDao type in UserService
2. Provide a canonical Set method for attributes: precede the attribute name with a set and capitalize the first letter of the attribute name. This step can be done automatically through the development tool by setting the method public class UserService {private UserDao dao;
public void setDao(UserDao arg0) {
dao = arg0;
}
}
3 Configure UserService and UserDao's in Spring's configuration file
4 In Spring's configuration file, add a child node for UserService to configure the injection of attribute values, that is, the original node needs to be modified, in which the value of the name attribute must be the same as the name of the attribute in the UserService class, and it is also the character to the right of the set word in the Set method for designing attribute values, with the first letter lowercase and the value of ref set to the subordinateThe id of the object of sex configured in Spring, that is, the id of UserDao
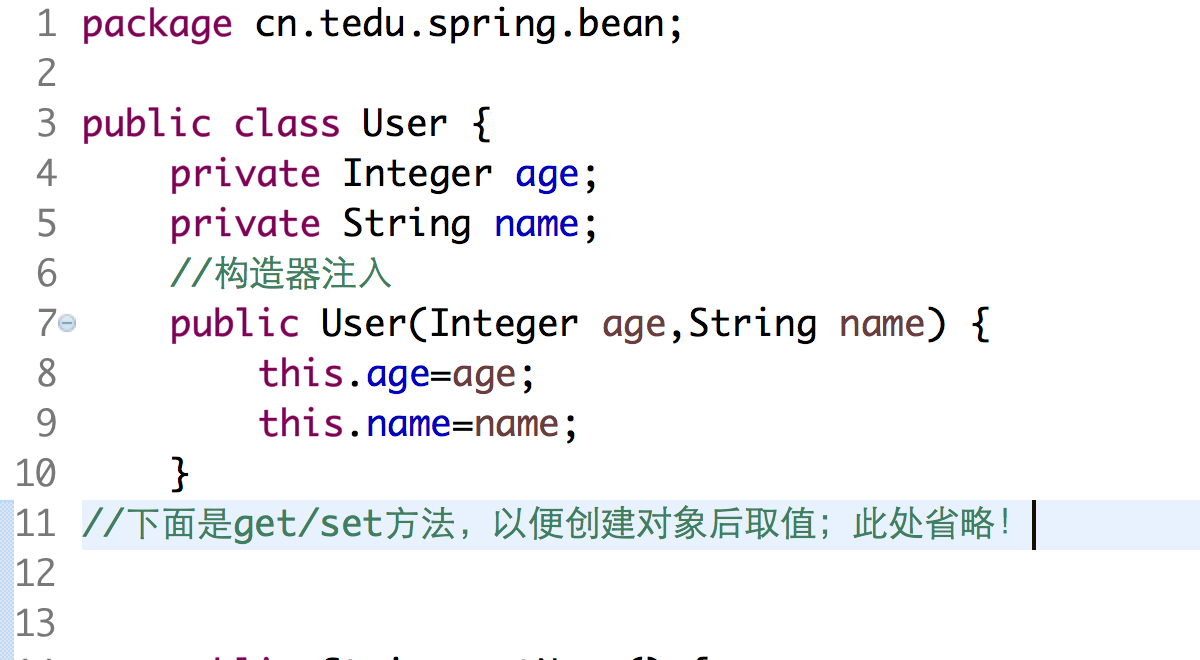
Injecting values of attributes through construction methods in Spring-managed beans
Development steps
1 Declare the public class UserService {private UserDao dao;} attribute of UserDao type in UserService
2 Add a construction method and assign public class UserService {private UserDao Dao to the attribute via parameters in the construction method;
public UserService(UserDao dao) {
this.dao = dao;
}
}
3 Configure UserService and UserDao's in Spring's configuration file
4 In the Spring configuration file, add a subordinate <constructor-arg>node for UserService and configure the index and ref attributes for the node. The index represents the ordinal number of the parameters of the currently configured construction method, the index of the first parameter is 0, the index of the second parameter is 1, and so on. The ref represents the id of the other bean s referenced. If the construction method requires more than one parameter, the current nodeMultiple <constructor-arg>nodes need to be configured <constructor-arg index="0" ref="userDao" />
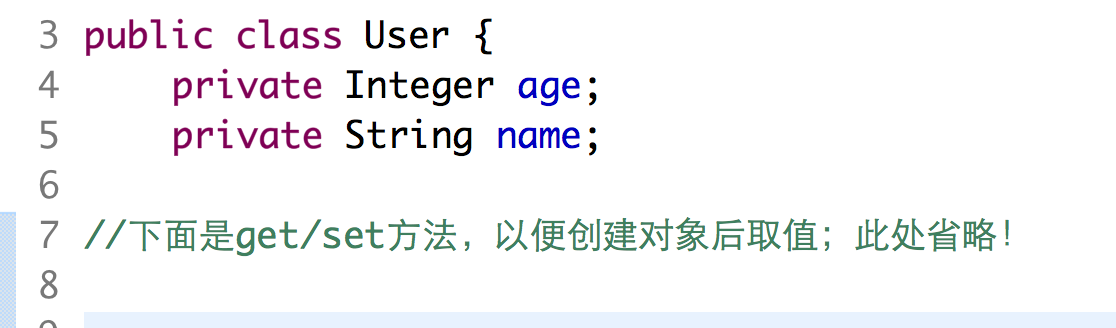
Injecting base values directly into Spring-managed beans
What are the base values
Values that can be expressed using direct constants, including eight basic data types and String
---------------------------------------------------------------------------------------------------------------------------------
How to set the base value
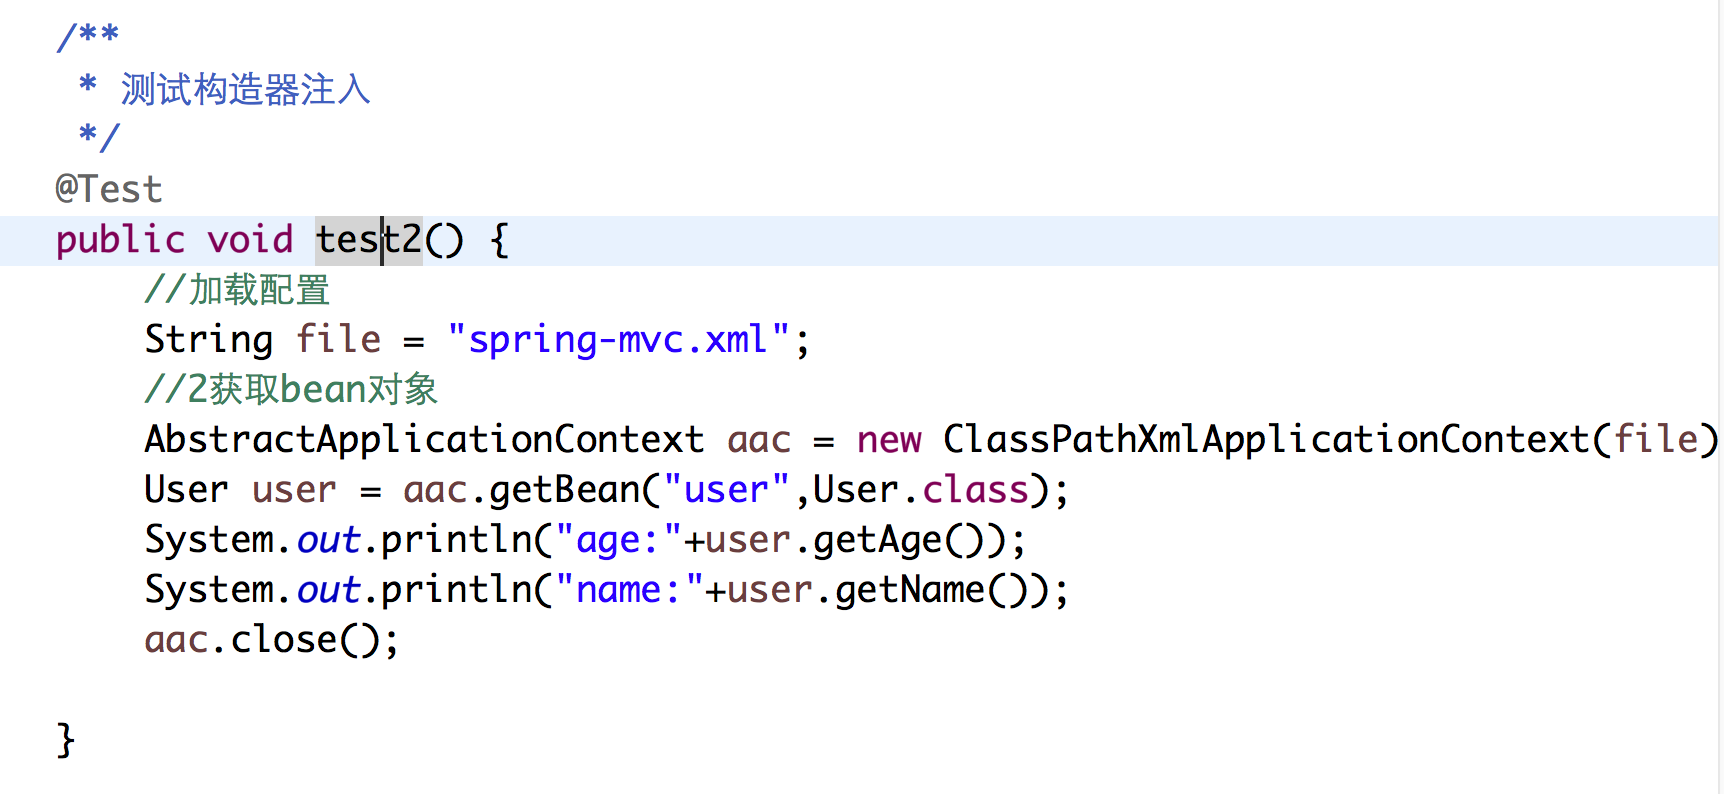
Construction method injection value:
1. Declare private properties and construction methods in classes
2. If the construction method injects a value, add the value attribute to the <constructor-arg>node under the node and set the value.
index="0" represents the first parameter value="20" represents the value of the first parameter
index="1" for the second parameter value="zhangsan" for the value of the second parameter
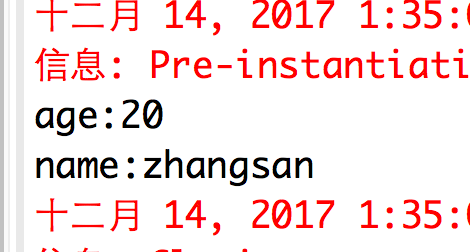
3. Testing in Test Class
4. See if the result was injected successfully:
Be careful:
When explicitly specifying a data type, you must ensure that the specified data type is identical to the parameter data type required by the Set method/construction method in the Bean! For example, if a Date class has a Date(long) construction method, the type attribute value configured in the Date class must be long, not its wrapper type Long!!!
Direct injection of collection type values into Spring managed beans
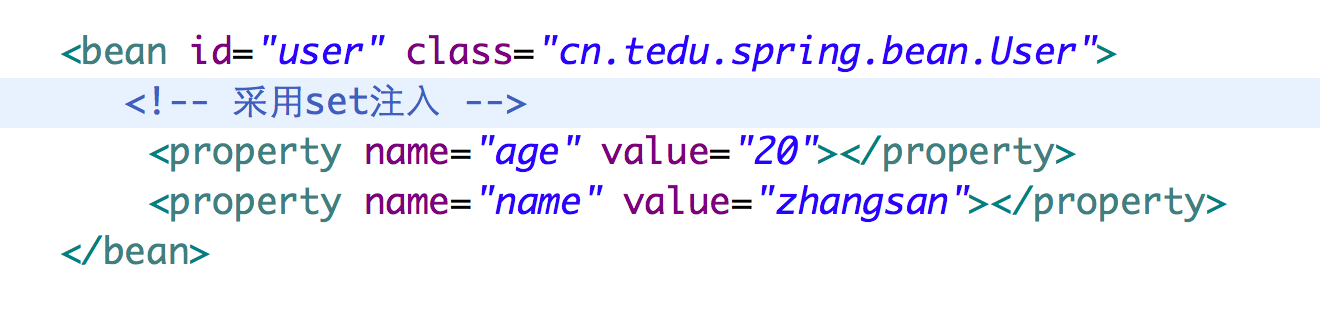
Use set injection to assign values to attributes:
If the value is injected via Set, then the value attribute is added to the node under the node and the value is set.
1. Define private properties in the User class and generate get/set methods:
2. Configure bean s in the configuration file and use set injection:
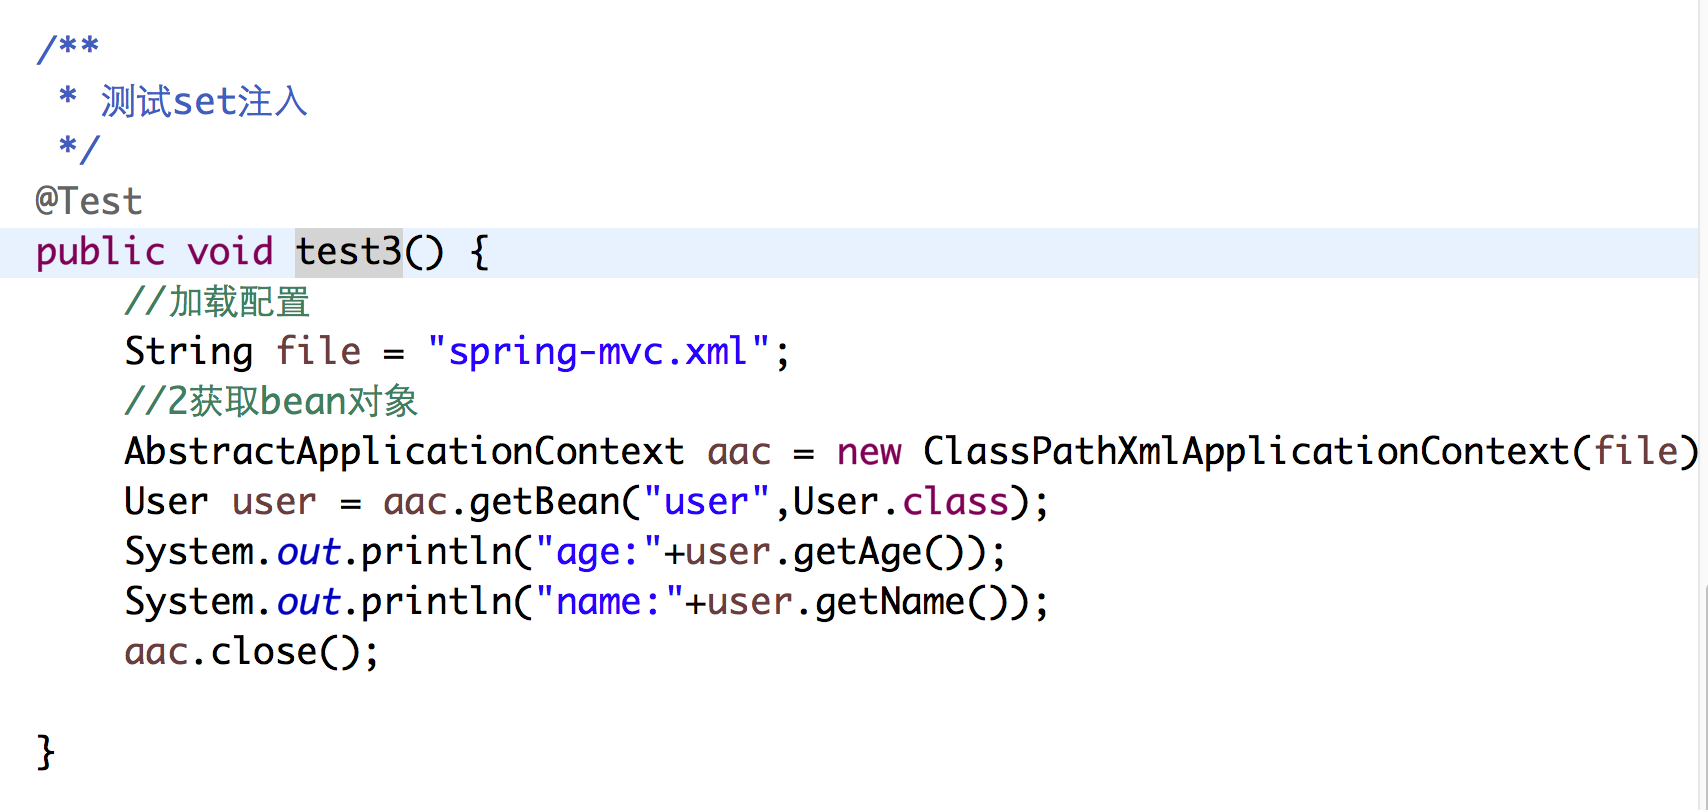
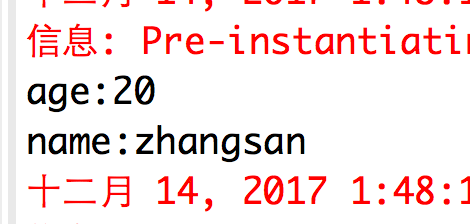
3. Testing in the Test class:
4. See if the result was injected successfully:
The following is the collection type injection configuration:
<!-- To configure List Collection data -->
<property name="listData">
<list>
<value>list-data-1</value>
<value>list-data-2</value>
<value>list-data-3</value>
<value>list-data-4</value>
<value>list-data-5</value>
</list>
</property>
<!-- To configure Set Collection data -->
<property name="unorderedData">
<set>
<value>set-data-1</value>
<value>set-data-2</value>
<value>set-data-3</value>
<value>set-data-4</value>
<value>set-data-5</value>
</set>
</property>
<!-- To configure Map Collection data -->
<property name="mapData">
<map>
<entry key="K-1" value="V-1"></entry>
<entry key="K-2" value="V-2"></entry>
<entry key="K-3" value="V-3"></entry>
<entry key="K-4" value="V-4"></entry>
<entry key="K-5" value="V-5"></entry>
</map>
</property>
[Understand only] If you configure a List collection type, the final data type is ArrayList; if you configure a Set collection type, the final data type is LinkedHashSet; if you configure a Map collection type, the final data type is LinkedHashMap.
Inject Properties type values directly into Spring managed beans
Typically, data of type Properties comes from reading
.properties file! Spring framework can read directly
The.Properties file and encapsulates data of type Properties!
---------------------------------------------------------------------------------------------------------------------------------
Development steps
1 Create a file with a.Properties extension under the src\mainresources folder, such as db-config.properties, and then customize the configuration information inside the file
2 In the Spring configuration file, add the <util:properties>node at the root node and configure the id and location properties, where the id configuration refers to the id configuration of the general node, where the value of the location is prefixed with the classpath:and the name of the.Properties configuration file, for example:
<util:properties id="dbConfig"
location="classpath:db-config.properties" />
3 When an attribute value of Properties type needs to be injected, take Set injection as an example:
<property name="Bean Property name in" ref="dbConfig" />
[Review] List and Set
Common ground
Difference
-
List collection is ordered/sequential, Set collection is unordered/hashed
-
Data in a List collection is allowed to be duplicated, while data in a Set collection is unique
Criteria for identical/unique data in a Set
The equals() comparison of the two data is true, and the hashCode() returns the same value for both data.
[Review] ArrayList and LinkedList
[Review] HashSet and TreeSet
3. day03 - Inject the value of the Bean property into Spring
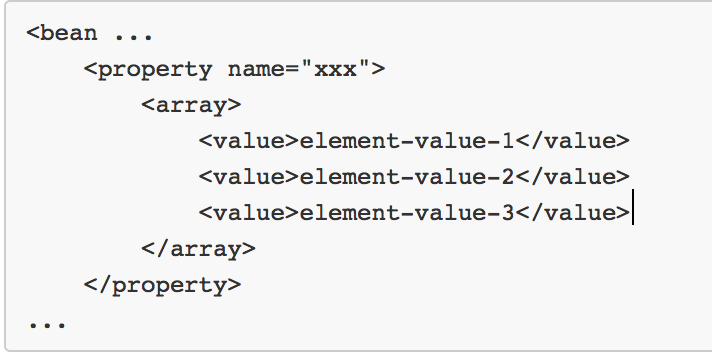
You can also inject array values for Bean attributes:
Arrays cannot be designed in a manner similar to <util:list>
In fact, when injecting values, arrays and lists can be confused! That is, even if an attribute is an array type, when injecting values, you can refer to a set of lists designed with a <util:List>ref! Of course, the data types must match!
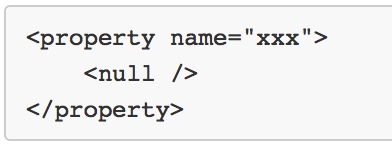
In addition, null values can be injected into attributes:
If it is a string-type property, null values can also be injected (that is, "):
Spring expression
Spring expressions can be applied to Spring's XML configuration files.
A Spring expression can be used to reference an attribute value of another Bean, or an element in a collection in another Bean when injecting a value...
Use condition: One BeanX has been injected with a value, and another BeanY has some values from BeanX.
The basic format of a Spring expression is: #{id.property name of the referenced bean}
If an element in an array or a List collection is referenced, #{id of the referenced bean.Array name or collection name [subscript]}
If a Map or Properties is referenced, then: #{id.Map name or Properties name.key} of the referenced bean or: #{id.Map name or Properties name ['key']}
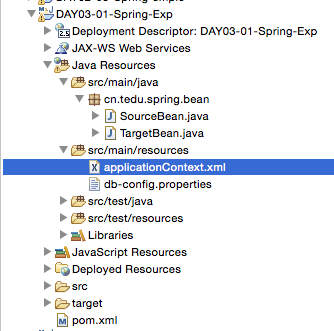
1. Project catalogue:
2.sourceBean.java class
3.TargetBean.java class
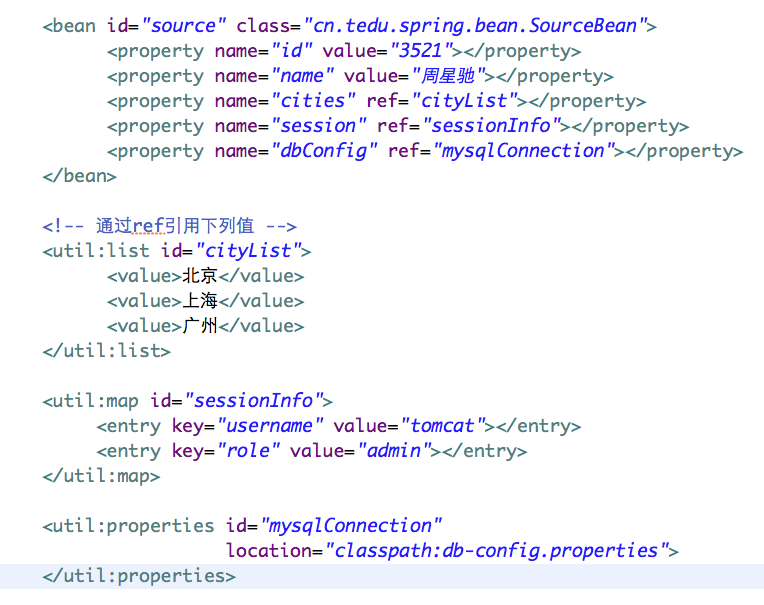
4.ApplicationContext.xml file configuration,
The attribute values of the sourceBean.java class have been defined as follows:
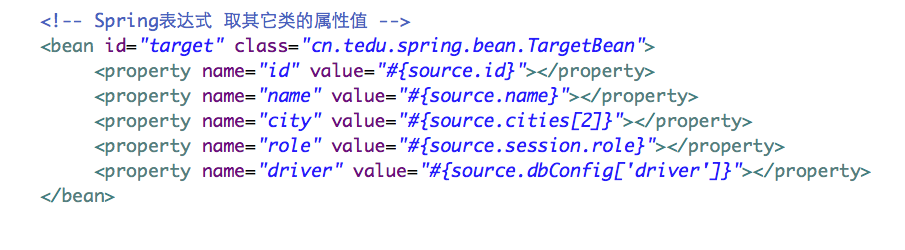
5.Get it in the applicationContext.xml file using a Spring expression
The property values of the sourceBean.java class are configured on the properties of the TargetBean.java class.
The configuration is as follows:
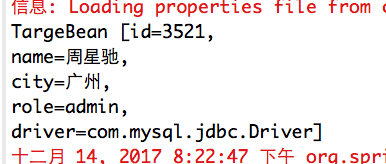
6. Testing in a test class
Whether to configure the property values of the sourceBean.java class to the properties in the TargetBean.java class:
7. View the results:
[Understand] Spring's AutoWire
Spring's auto-assembly manifests itself as values that can be automatically injected without needing to be injected in XML via Set or construction methods!
Basically above, when configuring UserService in XML:
Then Spring finds the corresponding attribute in the UserSerivce class in the XML based on the attribute name (byName). In the exercise, UserService has an attribute named userDao.
Spring looks for <bean id="userDao"...> and gets the object, then calls the Set method corresponding to the userDao property in UserService.
That is, to call the setUserDao() method and invoke the parameters of the setUserDao() method for the function of the object you just obtained, thus completing the automatic injection!
In an XML configuration, the value of the autowire attribute in a node can be:
- no: default value, will not be automatically assembled.
- byName: Complete auto-assembly based on attribute names, requiring configurations with the same name in the XML file. If not, no auto-assembly will occur and no errors will be reported.
- byType: Complete auto-assembly based on the type of attribute, requiring the same Bean configuration as the type of attribute in the XML file, which does not require an id!
Be careful:
If two or more types can be matched, the program will crash!!!
- constructor: Based on the construction method, the pattern can refer to byType - autodetect: automatic detection
Summary: Using Autowire can simplify development, avoid bulky XML configuration files, and avoid possible adjustments, such as modified IDs for some reason.
However, there are also problems with unclear dependencies between them!
---------------------------------------------------------------------------------------------------------------------------------
Component Scan for Spring
What is Component Scan
Spring can be configured to scan specified packages so that when you develop with Spring, you do not have to configure beans in Spring's XML file!
When Spring scans a specified package, it manages the scanned beans directly! For developers,
The most direct manifestation is that you no longer have to configure nodes in Spring's XML file!
Why use component scanning
Easy! The relevant configurations are reflected in the corresponding Java classes, which are more intuitive and easy to adjust!
---------------------------------------------------------------------------------------------------------------------------------
Basic development steps
1 Create a project that supports Spring
2In Spring's configuration file, under the root node, add the <context:component-scan /> node, configure the base-package property whose value is in which packages you want Spring to manage! Code example:
<context:component-scan
base-package="cn.tedu.spring" />
Note: When configuring a package, it is not necessarily an exact point to the package where a class is located. It can be a more parent package name, for example cn.tedu.spring Yes,
So, in cn.tedu.spring.bean or cn.tedu.spring.dao And so the classes in these packages will be Spring Administration!
3 Add a comment for @Component above the declaration of the class that needs to be managed by Spring.
---------------------------------------------------------------------------------------------------------------------------------
General implementation principles of basic projects
When Spring scans into the cn.tedu.spring.bean.User class, it automatically determines the generated id to be user based on the class name, that is, the id after the first lowercase letter of the class name, to complete the configuration of the node!
---------------------------------------------------------------------------------------------------------------------------------
Customize ID for Bean
@Component("u")
public class User {
    }
---------------------------------------------------------------------------------------------------------------------------------
Notes commonly used for classes (see Spring-Cheng Zuhong's notes for details)
SpringMVC Principle
SpringMVC process
1. Users send requests to the front-end controller Dispatcher Servlet.
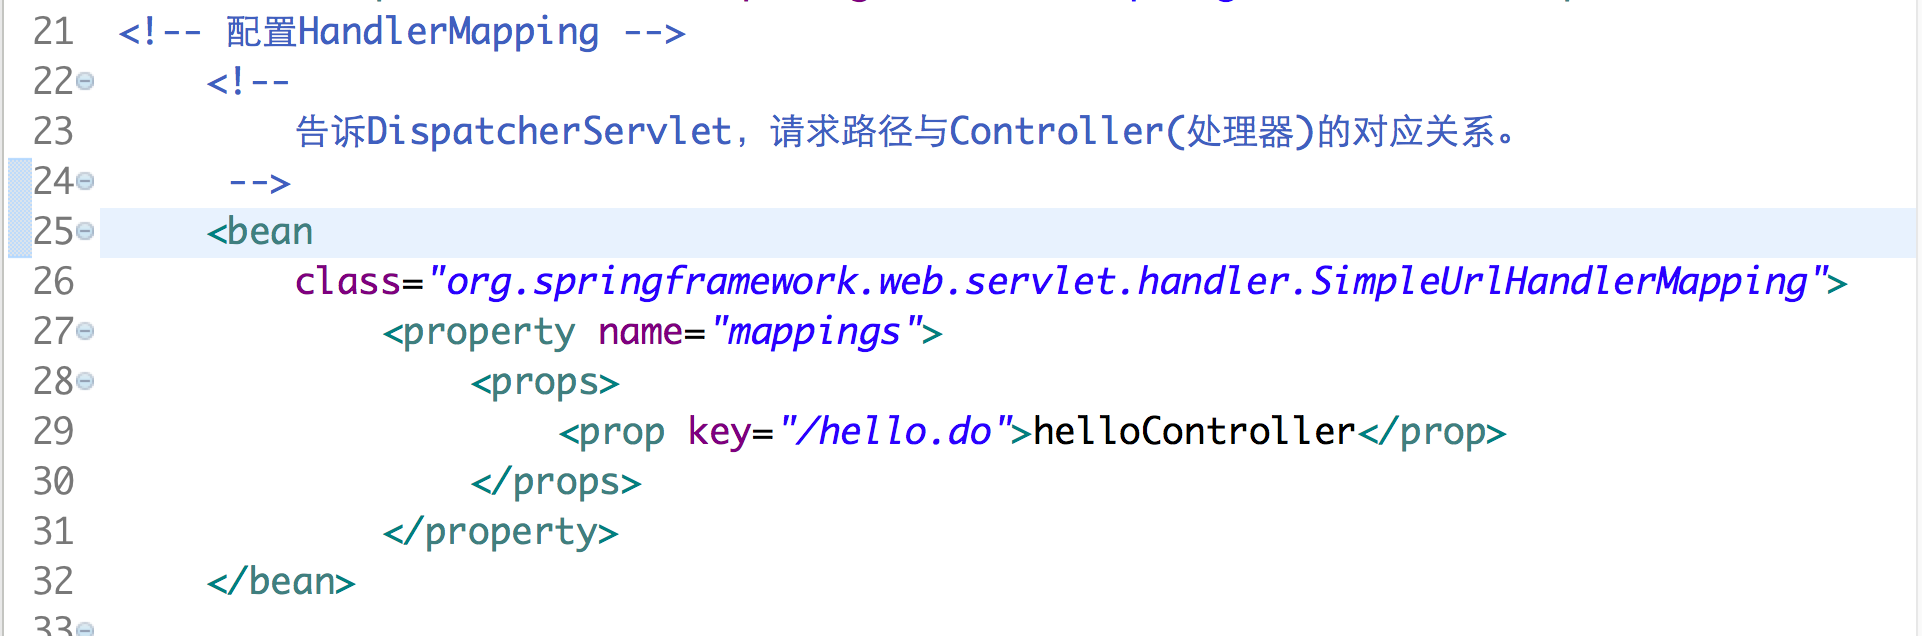
2. Dispatcher Servlet receives a request to call the HandlerMapping processor mapper.
3. Processor mapper finds specific processors (which can be found based on xml configuration and annotations), generates processor objects and processor interceptors (if any) and returns them to Dispatcher Servlet.
4. Dispatcher Servlet calls Handler Adapter processor adapter.
5. The HandlerAdapter adapts to call a specific processor (Controller, also known as a back-end controller).
6. Controller execution completes and returns to ModelAndView.
7. HandlerAdapter returns the controller execution result ModelAndView to Dispatcher Servlet.
8. Dispatcher Servlet passes ModelAndView to ViewReslover View Parser.
9. ViewReslover parses and returns to the specific View.
10. Dispatcher Servlet renders the view based on the View (that is, fills the view with model data).
11. Dispatcher Servlet responds to the user.
Component description:
The following components are typically implemented using a framework:
Dispatcher Servlet: As a front-end controller, the center of the entire process control, controls the execution of other components, unifies scheduling, reduces the coupling between components, and improves the scalability of each component.
HandlerMapping: Extend the processor mapper to achieve different mapping methods, such as profile, interface, annotation, etc.
HandlAdapter: Support for more types of processors by extending processor adapters.
ViewResolver: Support more types of view resolution by extending the view parser, such as jsp, freemarker, pdf, excel, and so on.
Components:
1. Front-end controller Dispatcher Servlet (not developed by engineers), provided by framework
Role: Receive requests, respond to results, equivalent to transponders, central processors. The presence of dispatcher Servlets reduces coupling between other components.
User requests reach the front-end controller, which is equivalent to c in mvc mode. dispatcher Servlet is the center of the entire process control. It calls other components to process user requests. The presence of dispatcher Servlet reduces the coupling between components.
2. Processor Mapper HandlerMapping (not developed by engineers), provided by framework
Role: Find Handler based on requested url
Handler Mapping is responsible for finding handlers as processors based on user requests. springmvc provides different mappers to implement different mapping methods, such as configuration file, interface, annotation, etc.
3. Processor Adapter HandlerAdapter
Role: Execute the Handler according to the specific rules required by the Handler Adapter
Processors are executed through the HandlerAdapter, an application of the adapter mode, which allows more types of processors to be executed by extending the adapter.
4. Processor Handler (Requires Engineer Development)
Note: When writing a Handler, follow the requirements of the Handler Adapter so that the adapter can execute the Handler correctly
Handler is the back-end controller that follows the front-end controller of Dispatcher Servlet and handles specific user requests under the control of Dispatcher Servlet.
Since handlers involve specific user business requests, engineers are generally required to develop handlers based on business needs.
5. View resolver View resolver (not developed by engineers), provided by framework
Role: Perform view resolution, which translates into a real view based on the logical view name
View Resolver is responsible for generating a View view from the processing result. View Resolver first parses the logical view name into a physical view name, that is, a specific page address, regenerates the View view object, and finally renders the View to display the processing result to the user through the page. The springmvc framework provides many types of View views, including jstlView, freemarkerView, pdfView, and so on.
Typically, model data is presented to users through a page using page labels or page templates, and engineers are required to develop specific pages based on business needs.
6. View View (requires engineer to develop jsp...)
View is an interface that implements classes that support different View types (jsp, freemarker, pdf...)
The specific process steps for the core architecture are as follows:
1. First the user sends the request - > Dispatcher Servlet, the front-end controller does not process the request itself after it is received, but delegates it to other parsers for processing as a unified access point for global process control;
2. Dispatcher Servlet - > Handler Mapping, Handler Mapping will map the request to a Handler ExecutionChain object (including a Handler Processor (Page Controller) object and multiple Handler Interceptor interceptor) objects, which makes it easy to add new mapping strategies;
3. Dispatcher Servlet - > HandlerAdapter, HandlerAdapter will package the processor as an adapter to support multiple types of processors, that is, the application of adapter design mode, which makes it easy to support many types of processors;
4. HandlerAdapter - > Call of Processor Function Processing Method, HandlerAdapter will call the real Processor Function Processing Method based on the result of the Adaptation, complete the Function Processing, and return a ModelAndView object (including model data, logical view name);
5. The logical view name of ModelAndView - > ViewResolver, which resolves the logical view name to a specific View, makes it easy to change other view technologies through this strategy mode;
6. View-->Rendering, View will be rendered based on incoming Model data, where Model is actually a Map data structure, so it is easy to support other view technologies;
7. Return control to the Dispatcher Servlet, and the Dispatcher Servlet returns the response to the user until the end of this process.
The next two components typically require development:
Handler: The processor, that is, the back-end controller, is represented by a controller.
View: A view, which is an interface presented to the user, usually requires a label language to present the model data.
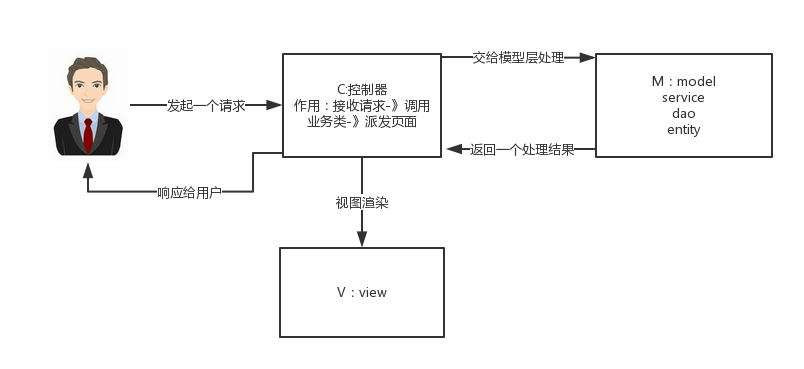
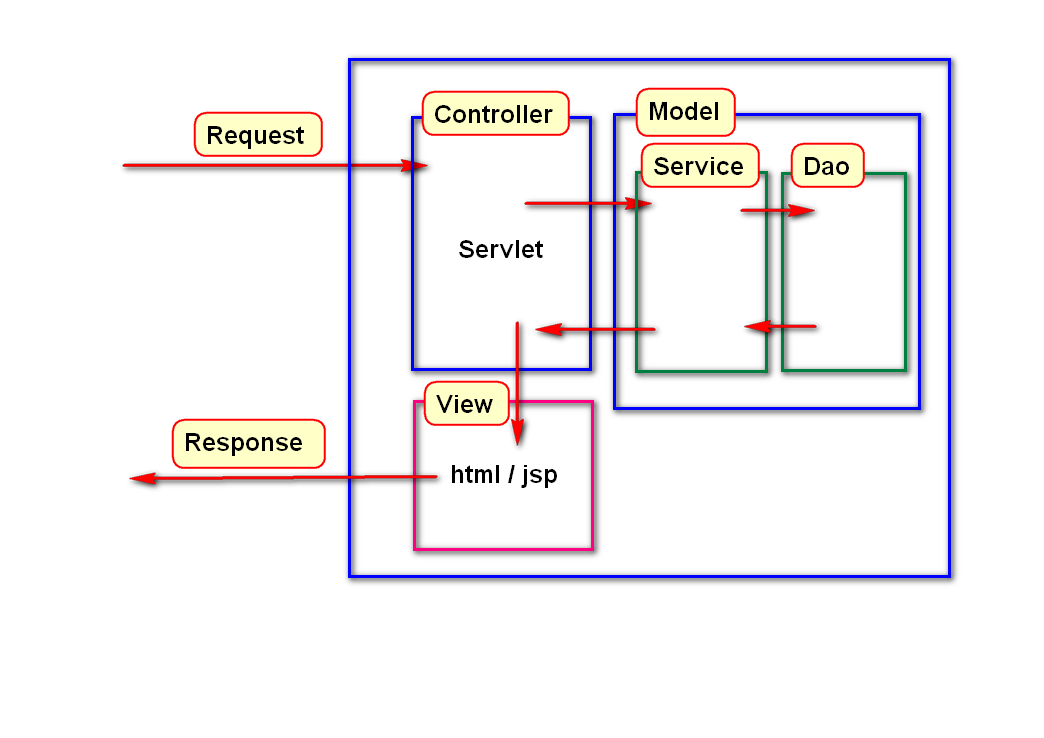
Before we move on to Spring MVC, let's look at what MVC mode is
MVC: MVC is a design pattern
Schematic diagram of MVC:
Analysis:
M-Model (Complete Business Logic: javaBean Composition, service+dao+entity)
V-View View (Show the interface jsp, html...)
C-Controller Controller Controller (Receive Request - > Call Model - > Dispatch Page Based on Results)
What is springMVC:
Spring MVC is an open source framework for MVC. Spring MVC=struts2+spring, Spring MVC is equivalent to the integration of Struts2 and sring, but here is a puzzle: what is the relationship between spring MVC and spring? This has a good explanation in Baidu Encyclopedia: meaning that spring MVC is a follow-up product of spring, in fact it is spring on its original basisOn the web, there is also a MVC module for web applications, which can be simply understood as a module of spring (such as AOP, IOC). On the web, it is often said that springMVC and spring integrate seamlessly. In fact, springMVC is a sub-module of spring, so there is no need to integrate with spring at all.
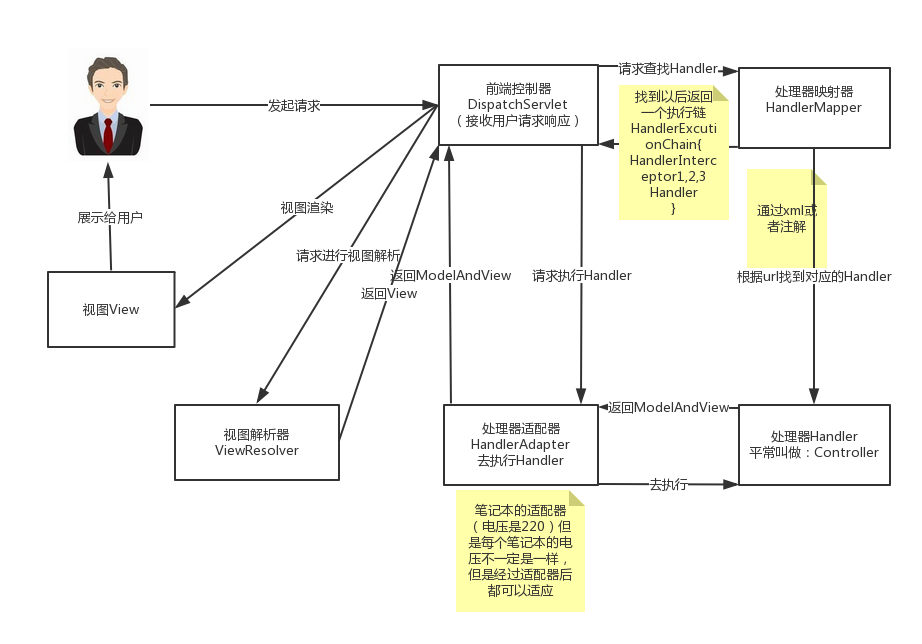
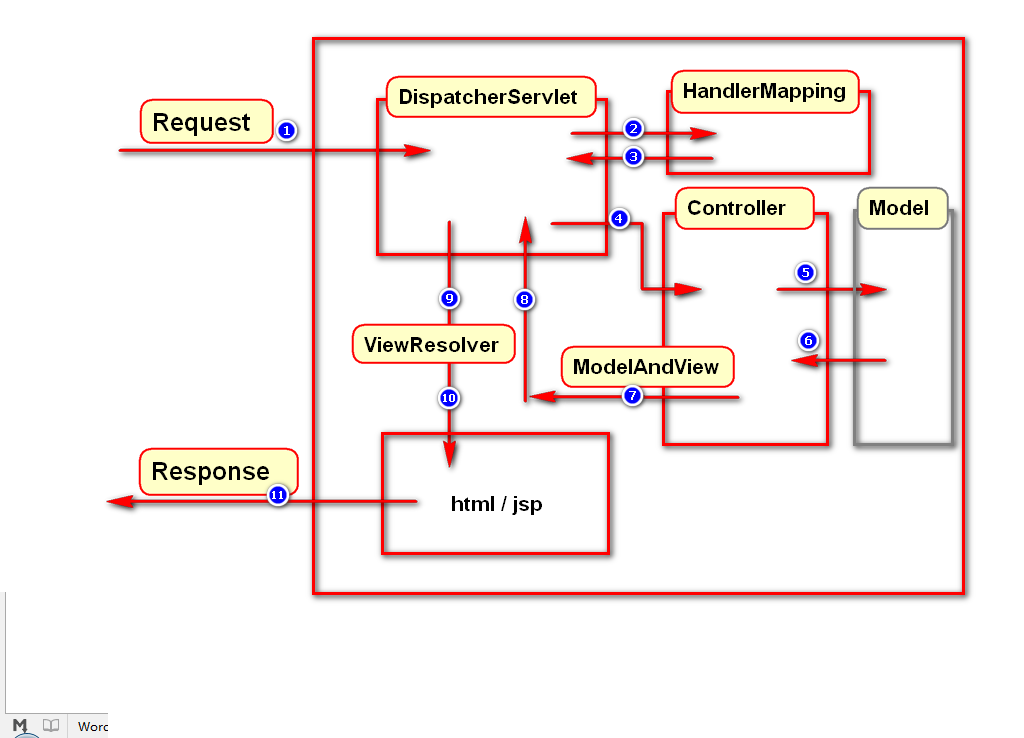
Schematic diagram of SpringMVC:
There may be a lot of confusion when you see this diagram. Now let's take a look at the steps of this diagram: (you can understand the schematic of MVC by comparing it)
Step 1: The user initiates a request to the front-end controller (Dispatcher Servlet)
Step 2: Front End Controller requests the Handler Mappering to find the Handle: Find it through xml configuration or annotations
Step 3: Find the processor mapper (HandlerMappering) and return the execution chain like the front-end controller (HandlerExecutionChain)
Step 4: The front-end controller (Dispatcher Servlet) calls the processor adapter (Handler Adapter) to execute the processor (Handler)
Step 5: Processor adapter to execute Handler
Step 6: Handler finishes executing and returns ModelAndView to the processor adapter
Step 7: The processor adapter returns ModelAndView to the front-end controller
Step 8: Front End Controller requests ViewResolver for view resolution
Step 9: View parser like front-end controller returns to View
Step 10: The front-end controller renders the view
Step 11: Front-end controller responds to user results
Looking at these steps, I believe it's normal for you to feel very confused, but here's the main point to understand the components of springMVC:
Front-end controller (Dispatcher Servlet): Receives requests, responds to results, and is equivalent to the CPU of a computer.
Handler Mapping: Find processors based on URL s
Handler: (Requires a programmer to write code processing logic)
Handler Adapter: Packages the processor as an adapter so that it can support multiple types of processors, analogous to notebook adapters (application of adapter mode)
ViewResovler: View parsing, multiple returned strings, processing, can be parsed into corresponding pages
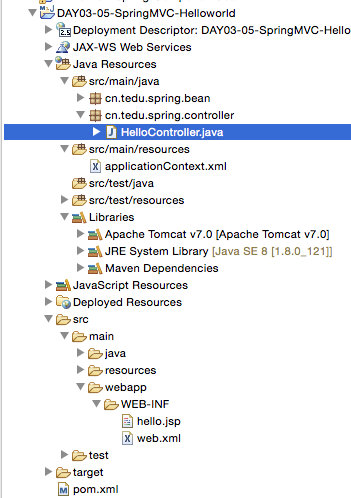
Preliminary implementation:
1. Project directory:
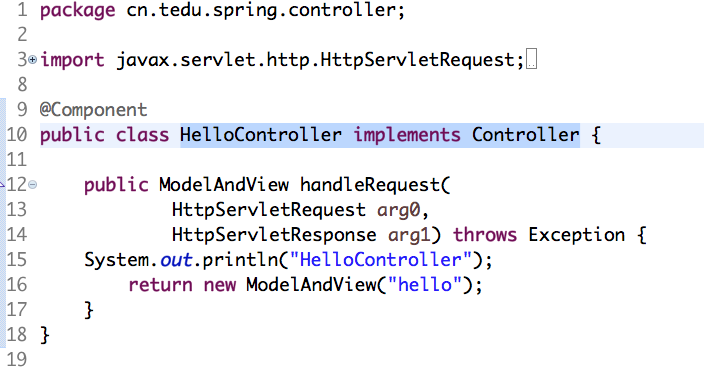
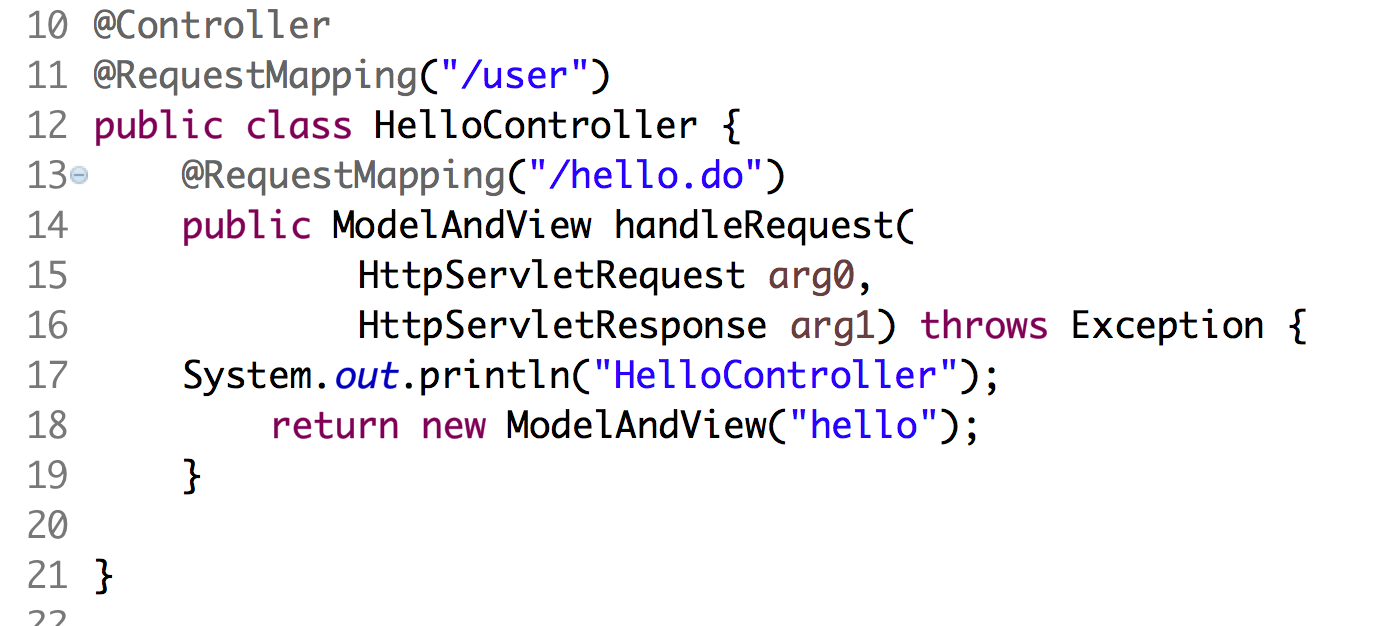
2. Create a HelloController class and implement the Controller interface:
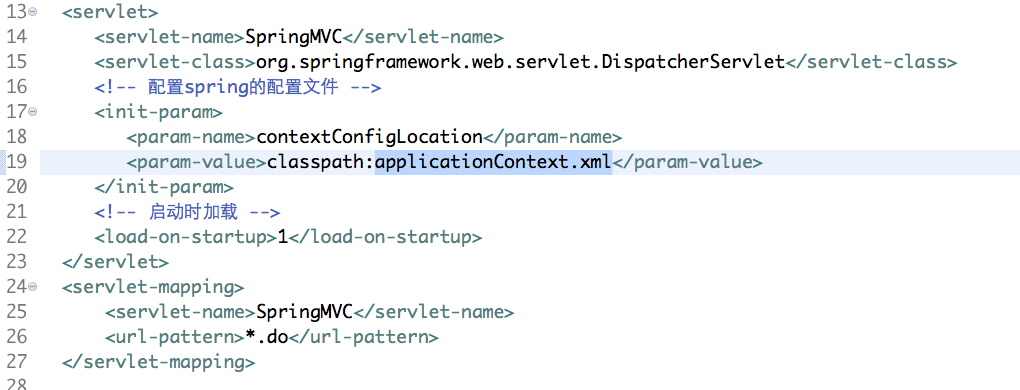
3. Configuring servlet s in web.xml
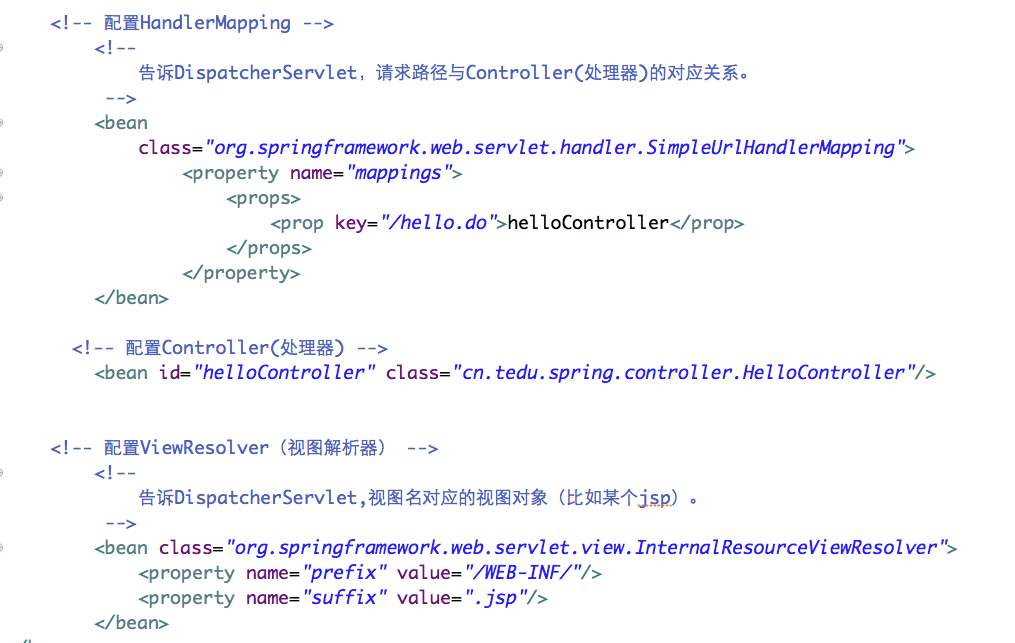
4. Configure three components in the applicationContext.xml file:
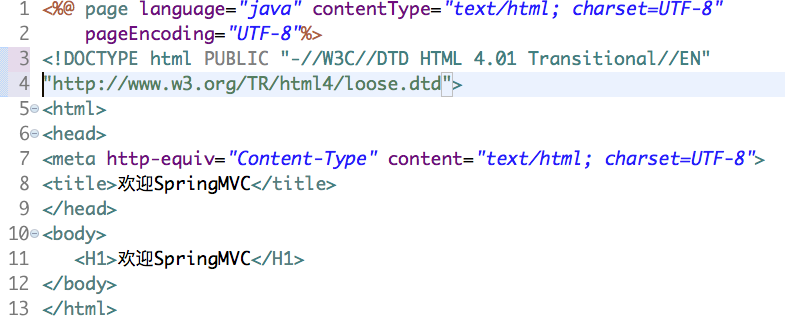
5. Write a hello.jsp file under WEB-INF on the web to hello world
6. Finish running
4. day04 - Annotation-based Spring MVC
Use the @Controller annotation
In the WEB application designed by Spring MVC, the controller class (the one that originally implements Controller) can be annotated with @Controller!
Once the @Controller annotation is used, the controller class does not have to implement the Controller interface!
Be careful:
The @Controller annotation cannot be used alone, it must match @RequestMapping!
Use the @RequestMapping annotation
@RequestMapping is used to annotate methods in the processor class and specify the path of the request being processed, for example:
Be careful:
After using a combination of @Controller and @RequestMapping, do not configure HandlerMapping in Spring's original XML configuration file anymore! If there is still a configuration of HandlerMapping and there is no configuration of the mapping relationship between the current request and the processor, you will get an error! In short, do not configure HandlerMapping!!
@RequestMapping can be used not only to annotate methods, but also to annotate processor classes! However, annotating a processor class cannot replace annotating a method, it should be used at the same time! There are multiple levels of requirements for processing request paths, such as request paths:
http://SERVER:PORT/PROJECT/user/register.do
Use notes:
@Controller
@RequestMapping("/user")
public class RegisterController {
@RequestMapping("/register.do")
public ModelAndView handleRequest(...
When @RequestMapping is used to annotate both processor classes and methods, the path written in both places is not required for the path separator when combined! For example, the following combinations are correct:
/user /register.do [Recommendation)
/user register.do
/user/ /register.do
user /register.do
user register.do
Summary: @RequestMapping is used to configure mappings between processor classes and request paths. Methods in the processor class must be annotated. If the request path has multiple levels, you can add annotations to the processor class, and you can write fewer paths in the annotations to the methods.
---------------------------------------------------------------------------------------------------------------------------------
Use the same Controller to handle many different requests
With the above annotations, many different requests can be processed in the same Controller, and the methods used to process requests in classes can be customized! The customization of methods is as follows:
-Method name is not required
-Method parameters are not required
-Method does not declare throwing exceptions
-Method must be public
- ** The return value of the method must be ModelAndView or String**
---------------------------------------------------------------------------------------------------------------------------------
Annotation-based Spring MVC development process
1 Create a project and complete the basic configuration: create a project, solve web.xml problems, add a spring-webmvc dependency, paste applicationContext.xml in resources, add Tomcat Runtime to the project
2 Configure Dispatcher Servlet in web.xml (code not modified)
3 Configure component scan, ViewResolver in the applicationContext, and note that the path is correct when configuring ViewResolver
4 Design Request:http://SERVER:PORT/PROJECT/user/login.do
5 Create a controller class for processing requests, annotate it with @Controller, and annotate the path (/user) with @RequestMapping:
@Controller
@RequestMapping("/user")
public class UserController {
}
6 Add a method to process the request in the controller class and map to the requested resource using @RequestMapping:
@Controller
@RequestMapping("/user")
public class UserController {
@RequestMapping("/login.do")
public String showLoginForm() {
return null;
}
}
7 Improve the method of handling requests, if this request only needs to be forwarded to a jsp page, then the return value type of the processing method is designed to be String! The return value is the name of the View component that is ultimately responsible for displaying it! For the time being, it can be understood as the file name of the jsp page (excluding the.jsp part)!
8 Design the JSP page. Note: The JSP page must be positioned in accordance with the prefix configuration in Spring's XML configuration file, and the file name of the JSP page should match the string of the value returned in step 7 above!
9 Add part to Server for management, redeploy to Tomcat, test run!
---------------------------------------------------------------------------------------------------------------------------------
Practice
Project name: DAY04-02-SpringMVC-Sample
Request path:http://SERVER:PORT/PROJECT/user/register.do
Processor class: cn.tedu.spring.controller.UserController
Processing method: public String showRegisterForm() {}
JSP page:user
register
form.jsp
JSP page content: at least 3 input boxes, including: username, password, salary
This case does not implement post-submission processing
---------------------------------------------------------------------------------------------------------------------------------
Get Request Parameters
Get request parameters from HttpRequestServlet
In the method that handles the request, add the HttpServletRequest parameter, for example:
public String handleRegister(HttpServletRequest request) {
// ...
}
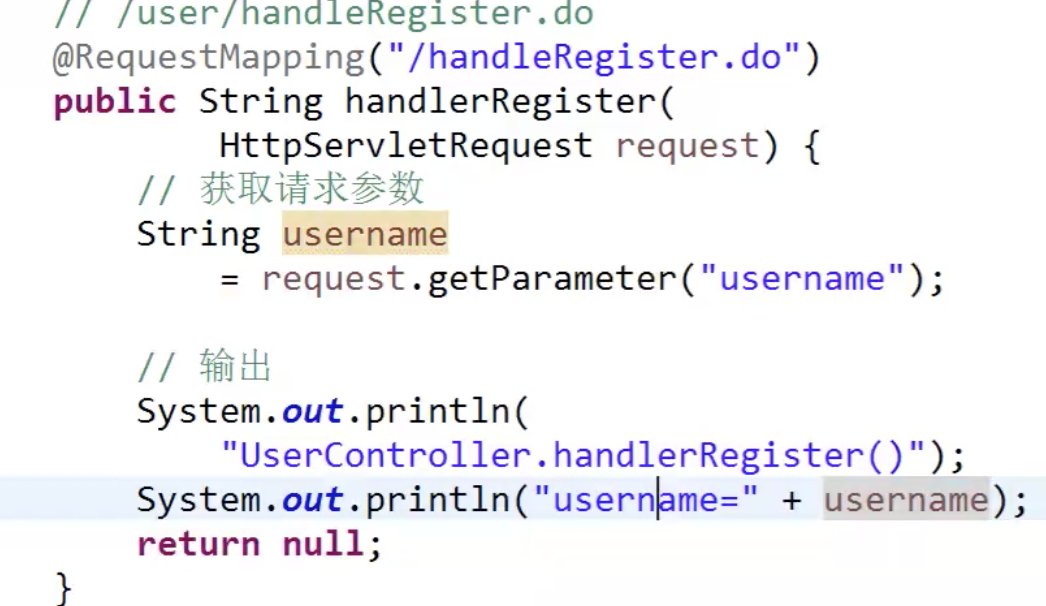
Note: Adding the HttpServletRequest parameter does not necessarily require adding the HttpServletResponse parameter.
When a parameter is added, the getParameter(String) method of the parameter is called to get the value of the requested parameter, in the same way as programming with a Servlet.
---------------------------------------------------------------------------------------------------------------------------------
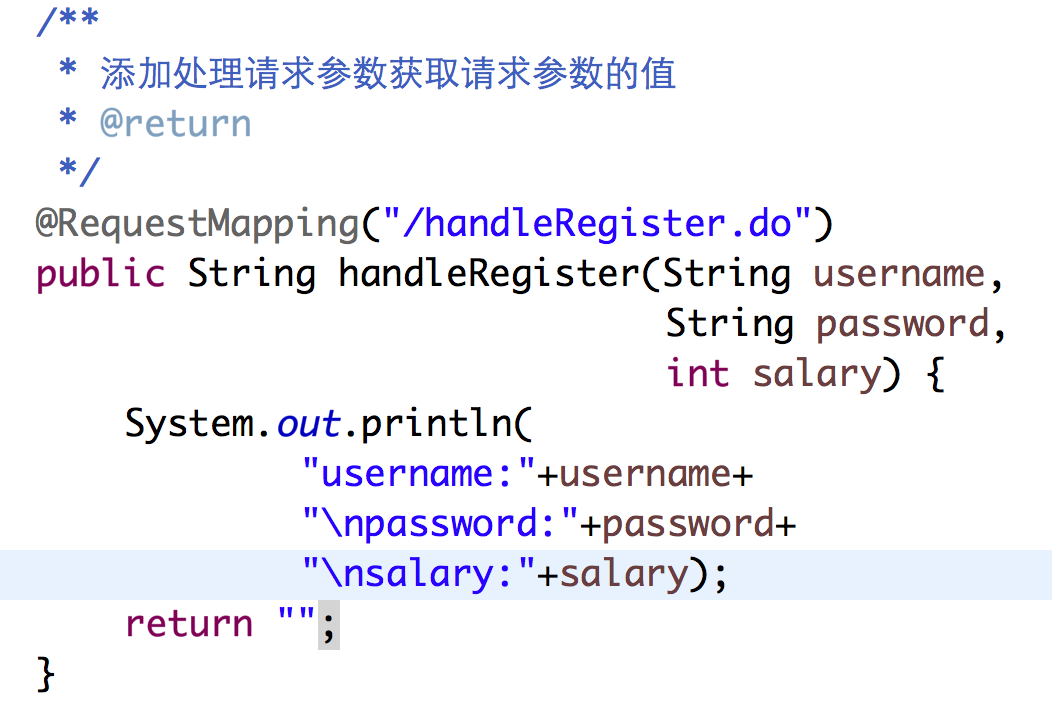
Get request parameter values by adding parameters to the method that handles the request
In the method of processing the request, declaring a parameter with the same name as the form on the front-end page (html/jsp/...), this parameter is automatically assigned a value submitted by the user.
public String handleRegister(String username, String password, int salary) {
// You can simply use the above parameters, which have been assigned
}
This requires that the name of the parameter be the same as the name in the form on the front-end page! If the parameter name is different from the name used in the form, you can use the @RequestParam annotation:
public String handlerRegister(
String username, // If the name is the same, use it directly
@RequestParam("password") String pwd // If the names are different, the notes
) {
// ...
}
Although this method is simple and easy to use, it is not suitable for scenarios where the number of data submitted is high. It is not appropriate to add 20 parameters to the method if a business requires users to submit 20 data.
---------------------------------------------------------------------------------------------------------------------------------
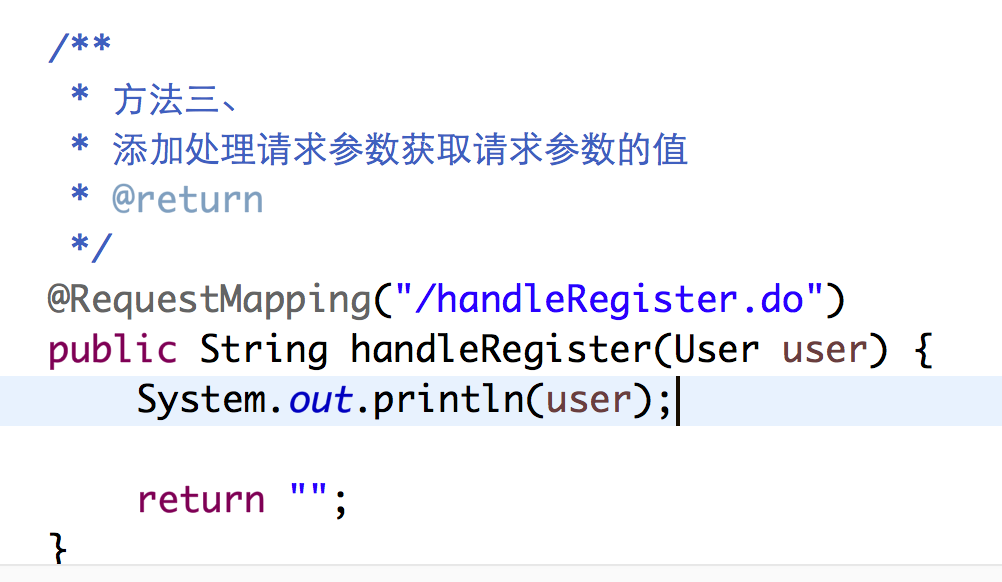
Receive values for all request parameters directly through Java Bean
Designing a Java Bean that contains all the request parameters and has the same attribute name as the name used in the form on the front-end page, you can then add this Java Bean type parameter to the method of processing the request (similar to the second method above)
public class User {
private String username;
private String password;
private int salary;
// ...Set/Get method...
}
public String handleRegister(User user) {
// You can simply use the parameters, which have been assigned
}
---------------------------------------------------------------------------------------------------------------------------------
Forward the processed data to the View component
Encapsulate through request and forward
Add the HttpServletRequest parameter to the method that handles the request. In the method, invoke the setAttribute() method of the parameter to encapsulate the data. Since Spring's processing forwards the request to the View component by default, the data can be applied through an EL expression in the View component, such as a jsp page.
public String handlerRegister(
HttpServletRequest request,
User user) {
// Encapsulate data to forward to JSP
request.setAttribute("name", user.getUsername());
// ....
}
In the above practice, the forwarding behavior does not need to be written by yourself, Spring will complete automatically!
---------------------------------------------------------------------------------------------------------------------------------
Using ModelAndView
There is a Map <String, Object> in the ModelAndView class. If the request is processed by returning the ModelAndView object, the Map will be obtained by the View component! Then you can:
String viewName = "user_register_info";
Map<String, Object> data = new HashMap<String, Object>();
data.put("pwd", "123456");
ModelAndView mav = new ModelAndView(
If you already have ModelAndView objects in your method, you can:
mav.getModel.put("pwd, "123456");
return mav;
This practice requires that the return value of the method that handles the request must be of type ModelAndView!
---------------------------------------------------------------------------------------------------------------------------------
Using ModelMap
This approach is almost identical to using HttpServletRequest: first add a parameter of type ModelMap to the method that handles the request, then call the addAttribute() method of the parameter in the method to encapsulate the data!
public String handlerRegister(User user, ModelMap data) {
// Encapsulate data
data.addAttribute("name", user.getUsername());
// ....
}
Although this approach is the same in code as using HttpServletRequest, it is recommended (for reasons to be continued).
---------------------------------------------------------------------------------------------------------------------------------
Use HttpSession
Referring to the first method, when HttpServletRequest can be used, calling the getSession() method of the object will result in an HttpSession object, or referring to the syntax of the first method, it is also possible to declare HttpSession session s in the parameters of the method!
Be careful:
Because Sessions exist for a relatively long time, do not store all data in Sessions!
5. day05 - Case Target: Registration
Interface
user
register
form.jsp: Registered form
user
register
success.jsp: Registration succeeded (tentative)
error.jsp: The operation failed to submit information about the failure of the operation
---------------------------------------------------------------------------------------------------------------------------------
User Information
Integer id
String username
String password
Integer salary
---------------------------------------------------------------------------------------------------------------------------------
Database and Datasheet
Database: springmvc
Data sheet:
CREATE TABLE user (
id int auto_increment,
username varchar(16) not null unique,
password varchar(16) not null,
salary int,
primary key(id)
);
What classes are required in the program
cn.tedu.spring.bean.User
cn.tedu.spring.controller.UserController
cn.tedu.spring.util.DBUtils: Releasing resources
cn.tedu.spring.dao.IUserDao
-- Integer(id) insert(User user)
-- User findUserByUsername(String username)
cn.tedu.spring.dao.UserDaoImpl
cn.tedu.spring.service.IUserService
-- Integer(id) reg(User user)
cn.tedu.spring.service.UserServiceImpl
cn.tedu.spring.exception.UsernameAlreadyExistsException
---------------------------------------------------------------------------------------------------------------------------------
What configurations are needed in the program
db.properties
<util:properties location="classpath:db.properties" id="dbConfig" />
<bean id="ds" class="......BasicDataSource">
<property name="driverClassName" value="#{dbConfig.???}">
<property name="url" value="#{dbConfig.???}"">
</bean>
Development steps
1 Create project DAY05-SpringMVC-Sample, generate web.xml
2 copies of applicationContext.xml
3 Add dependencies: spring-webmvc, commons-dbcp, mysql-conntection-java, junit
4 Add Tomcat Runtime
5 Write database configuration: db.properties
6 Configure the bean s of BasicDataSource in Spring and test with JUnit
7 Creating databases and tables
8 Complete the less difficult and supportive JAVA classes: User, DBUtils, UsernameAlreadyExistsException
9 Write the IUserDao interface and recommend documenting the methods
10 Write the UserDaoImpl class, annotate it with @Component, customize Bean ID, remember the development steps when writing methods in the UserDaoImpl class, and test with JUnit every time a method is completed!
11 Write the IUserService interface and recommend documenting the methods
12 Write the UserServiceImpl class and annotate it with @Component to customize the Bean ID
If you have enough time, please design your login!
Interface
user
register
form.jsp: Registered form
user
register
success.jsp: Registration succeeded (tentative)
error.jsp: The operation failed, indicating that the operation failed
User Information
Integer id
String username
String password
Integer salary
Database and Datasheet
Database: springmvc
Data sheet:
CREATE TABLE user (
id int auto_increment,
username varchar(16) not null unique,
password varchar(16) not null,
salary int,
primary key(id)
);
What classes are required in the program
cn.tedu.spring.bean.User
cn.tedu.spring.controller.UserController
cn.tedu.spring.util.DBUtils: Releasing resources
cn.tedu.spring.dao.IUserDao
-- Integer(id) insert(User user)

-- User findUserByUsername(String username)
cn.tedu.spring.dao.UserDaoImpl
cn.tedu.spring.service.IUserService
-- Integer(id) reg(User user)
cn.tedu.spring.service.UserServiceImpl
cn.tedu.spring.exception.UsernameAlreadyExistsException
---------------------------------------------------------------------------------------------------------------------------------
What configurations are needed in the program
db.properties
<util:properties location="classpath:db.properties" id="dbConfig" />
<bean id="ds" class="......BasicDataSource">
<property name="driverClassName" value="#{dbConfig.???}">
<property name="url" value="#{dbConfig.???}"">
</bean>
Development steps
1 Create project DAY05-SpringMVC-Sample, generate web.xml
2 copies of applicationContext.xml
3 Add dependencies: spring-webmvc, commons-dbcp, mysql-conntection-java, junit
4 Add Tomcat Runtime
5 Write database configuration: db.properties
6 Configure the bean s of BasicDataSource in Spring and test with JUnit
7 Creating databases and tables
8 Complete the less difficult and supportive JAVA classes: User, DBUtils, UsernameAlreadyExistsException
9 Write the IUserDao interface and recommend documenting the methods
10 Write the UserDaoImpl class, annotate it with @Component, customize Bean ID, remember the development steps when writing methods in the UserDaoImpl class, and test with JUnit every time a method is completed!
11 Write the IUserService interface and recommend documenting the methods
12 Write the UserServiceImpl class and annotate it with @Component to customize the Bean ID
13 Write the UserController class, annotate it with @Controller and @RequestMapping("/user"), then add a method to it: @RequestMapping ("/reg.do") public String showRegisterForm () {} @RequestMapping ("/handleRegister.do") public String handleRegister () {}
14 Complete the corresponding JSP page
---------------------------------------------------------------------------------------------------------------------------------
Reasonable data forwarding
When a Controller needs to pass data to a View component, it can either use a forwarding mechanism (encapsulating the data in a request or using a ModelAndView or using a ModelMap) or use Session, typically identifying data for user information and common data (which may be needed on many pages)Session is recommended for storage, and other data may only be needed at one request, so a forwarding mechanism should be used.
---------------------------------------------------------------------------------------------------------------------------------
Solve garbled problems
The only reason for the random code: the codes are not uniform!
The only way to solve this problem is to unify encoding, including database encoding, program source code encoding, transmission and processing encoding, and front-end display encoding.
Since after using SpringMVC, the requested data will be handed over to Dispatcher Servlet and distributed to each Controller, it is not advisable to use request.setCharacterEncoding() inside the Controller if there is a problem with the encoding of the data being processed!
In Spring MVC, a character encoding filter, CharacterEncoding Filter, has been defined, so when you need to set a character encoding, you only need to configure the filter in web.xml!
<filter>
<filter-name>CharacterEncodingFilter</filter-name>
<filter-class>org.springframework.web.filter.CharacterEncodingFilter</filter-class>
<init-param>
<param-name>encoding</param-name>
<param-value>utf-8</param-value>
</init-param>
</filter>

<filter-mapping>
<filter-name>CharacterEncodingFilter</filter-name>
<url-pattern>/*</url-pattern>
</filter-mapping>
Be careful:
The above method only applies to requests submitted through POST!
---------------------------------------------------------------------------------------------------------------------------------
Interceptor:
The role of interceptors: intercept, judge, and ultimately choose to release or intercept requests.
In Spring MVC, the interceptor first appears before calling the Controller's method.
In an interceptor, there are three abstract methods that need to be implemented: preHandle(), postHandle(), afterCompletion(), where preHandle() is executed before calling a method in Controller, which returns a boolean value, if true, a release, a false for interception, postHandle(), and afterCompletion ()Called after Controller executes the result!
---------------------------------------------------------------------------------------------------------------------------------
Steps for using interceptors
1 Customize interceptor class to implement HandlerInterceptor interface
2 In the Spring configuration file, add <mvc:interceptors>node to configure
<mvc:interceptors>
<mvc:interceptor>
<mvc:mapping path="/*" />
<mvc:exclude-mapping path="/login.do"/>
<mvc:exclude-mapping path="/handleLogin.do"/>
<bean class="cn.tedu.spring.interceptor.SessionInterceptor"></bean>
</mvc:interceptor>
</mvc:interceptors>
Under what circumstances do interceptors need to be used
Business that multiple Controller s need to process can be accomplished using interceptors!
---------------------------------------------------------------------------------------------------------------------------------
Match all resources when configuring interceptors
When configuring interceptors, <mvc:mapping path="/
/in'/>
Represents all resources under the matching root path!
Does not mean matching all resources!
For example, in such a configuration, /user/login.do is unaffected by the interceptor!
If you need to match all resources, you need to use /**.
---------------------------------------------------------------------------------------------------------------------------------
How to use interceptor exceptions (exclude-mapping)
If there are only a few exceptions, configure them directly!
If there are many requests for exceptions, the format of the path should be re-planned, such as/xyz for the path to be intercepted and/xxx for the exception, configure the interceptor and intercept/xyz only.
---------------------------------------------------------------------------------------------------------------------------------
What is the difference between an interceptor and a filter
Interceptors and filters have similarities, such as multiple interceptors or filters in the same Web project, and they all form a "chain" when executed, each request may result in multiple interceptors or filters being executed as long as the request path is met!
The filter is executed before the Servlet, while the interceptor's
first
Execution is after the Servlet and before the Controller.
Filters are inherent components of JAVA EE and interceptors are components of Spring MVC.
---------------------------------------------------------------------------------------------------------------------------------
Use interceptors to determine login
Assume there is a request path:
login.do user_info.do index.do
Login.do can be accessed directly without login, while the other two can only be accessed after login. Before login, login.do will be jumped directly if accessed.
public boolean preHandle(
HttpServletRequest request,
HttpServletResponse response, Object handler)
throws Exception {
// Output Log
System.out.println("SessionInterceptor.preHandle()");
System.out.println("\targ0=" + request);
System.out.println("\targ1=" + response);
System.out.println("\targ2=" + handler);

// Get Session
HttpSession session = request.getSession();
// Check Session
// For example, there are rules: username must be present in Session after login
if (session.getAttribute("username") == null) {
// Redirect to login if there is no login data in Session
response.sendRedirect("login.do");
// No release allowed, this request will be intercepted
return false;
} else {
// If there is login data in Session, it will be released normally
return true;
}
}
Add a request/handleLogin.do to simulate login and give Session information.
Configure Interceptors:
<mvc:interceptor>
<mvc:mapping path="/*" />
<mvc:exclude-mapping path="/login.do"/>
<mvc:exclude-mapping path="/handleLogin.do"/>
<bean class="cn.tedu.spring.interceptor.SessionInterceptor" />
</mvc:interceptor>
Exception handling for Spring MVC
SimpleMappingExceptionResolver
Scope of application: When an exception may occur in multiple places in the project, and the way to resolve the exception is to jump to the specified View component.
SimpleMappingExceptionResolver is a class that requires registration with nodes in Spring's configuration file.
---------------------------------------------------------------------------------------------------------------------------------
@ExceptionHandler
Inside Controller, customize the method for handling exceptions and annotate it with @ExceptionHandler! This method is written in a similar way to handling requests, and then Exception should be added to the method's parameters.
---------------------------------------------------------------------------------------------------------------------------------
Two ways to compare
Configuration using SimpleMappingExceptionResolver is simple, but it can be "rough" to handle, making it difficult to prompt for accurate information unless the exception itself may occur infrequently!
Using @ExceptionHandler is more free and can be handled more "finely", but it is more cumbersome because each exception handling method can only work on the Controller class in which it is located. If an exception can occur in more than one Controller class, it needs to be handled more than once!
---------------------------------------------------------------------------------------------------------------------------------
Forwarding and redirection of Spring MVC
In Controller's method of handling requests, the returned String represents the name of the View component that is responsible for subsequent display. By default, it is forwarded, for example, by returning "index" and prefixed with "/WEB-INF/jsp/" and suffixed with ".jsp" in Spring's configuration file, which means it will be forwarded to "/WEB-INF/jsp/index.jsp".
When using forwarding, you can also prefix it with "path:", which means the return value of the method that handles the request can be "path:index", equivalent to "index".
If you need to redefine it, prefix it with "redirect:": @RequestMapping("
handleLogin.do
") public String handleLogin() {//Verify login, assuming successful return""redirect:index";}
---------------------------------------------------------------------------------------------------------------------------------
Annotation Driver
In the Spring configuration file, add <mvc:annotation-driven /> nodes under the root node to drive annotations.
7. day07-Figure
8,day-08-SSM
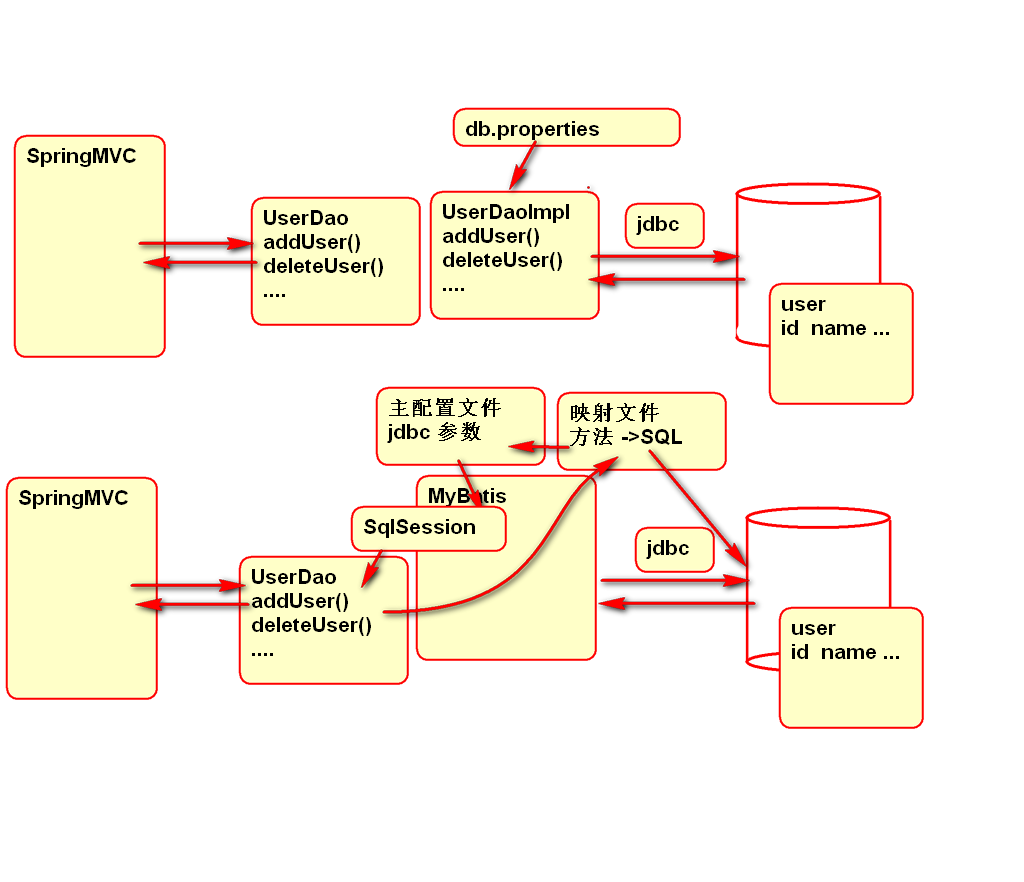
SSM Application Setup
1. Deploy Spring + Spring MVC
-
Import Package
<dependency>
<groupId>org.mybatis</groupId>
<artifactId>mybatis</artifactId>
<version>3.2.8</version>
</dependency>

<dependency>
<groupId>mysql-connector-java</groupId>
<artifactId>mysql-connector-java</artifactId>
<version>5.1.37</version>
</dependency>

<dependency>
<groupId>junit</groupId>
<artifactId>junit</artifactId>
<version>4.12</version>
</dependency>


<dependency>
<groupId>org.mybatis</groupId>
<artifactId>mybatis-spring</artifactId>
<version>1.3.1</version>
</dependency>
<dependency>
<groupId>org.springframework</groupId>
<artifactId>spring-webmvc</artifactId>
<version>3.2.8.RELEASE</version>
</dependency>
<dependency>
<groupId>org.springframework</groupId>
<artifactId>spring-jdbc</artifactId>
<version>3.2.8.RELEASE</version>
</dependency>
<dependency>
<groupId>commons-dbcp</groupId>
<artifactId>commons-dbcp</artifactId>
<version>1.4</version>
</dependency>
-
Configure the front-end controller web.xml for Spring MVC:
<servlet>
<description></description>
<display-name>DispatcherServlet</display-name>
<servlet-name>DispatcherServlet</servlet-name>
<servlet-class>org.springframework.web.servlet.DispatcherServlet</servlet-class>
<init-param>
<param-name>contextConfigLocation</param-name>
<param-value>classpath:conf/spring-*.xml</param-value>
</init-param>
<load-on-startup>1</load-on-startup>
</servlet>
<servlet-mapping>
<servlet-name>DispatcherServlet</servlet-name>
<url-pattern>*.do</url-pattern>
</servlet-mapping>
The Spring Configuration File Village exists in the conf folder and its file name conforms to the spring - *. xml rule.
-
Add database connection parameter file conf / db.properties
url=jdbc:mysql://localhost:3306/tedustore
driver=com.mysql.jdbc.Driver
user=root
password=root
initsize=1
maxsize=5
-
Add database connection pool profile spring-db.xml
<?xml version="1.0" encoding="UTF-8"?>
<beans xmlns="http://www.springframework.org/schema/beans"
xmlns:xsi="http://www.w3.org/2001/XMLSchema-instance"
xmlns:context="http://www.springframework.org/schema/context"
xmlns:jdbc="http://www.springframework.org/schema/jdbc"
xmlns:jee="http://www.springframework.org/schema/jee"
xmlns:tx="http://www.springframework.org/schema/tx"
xmlns:aop="http://www.springframework.org/schema/aop"
xmlns:mvc="http://www.springframework.org/schema/mvc"
xmlns:util="http://www.springframework.org/schema/util"
xmlns:jpa="http://www.springframework.org/schema/data/jpa"
xsi:schemaLocation="
http://www.springframework.org/schema/beans http://www.springframework.org/schema/beans/spring-beans-3.2.xsd
http://www.springframework.org/schema/context http://www.springframework.org/schema/context/spring-context-3.2.xsd
http://www.springframework.org/schema/jdbc http://www.springframework.org/schema/jdbc/spring-jdbc-3.2.xsd
http://www.springframework.org/schema/jee http://www.springframework.org/schema/jee/spring-jee-3.2.xsd
http://www.springframework.org/schema/tx http://www.springframework.org/schema/tx/spring-tx-3.2.xsd
http://www.springframework.org/schema/data/jpa http://www.springframework.org/schema/data/jpa/spring-jpa-1.3.xsd
http://www.springframework.org/schema/aop http://www.springframework.org/schema/aop/spring-aop-3.2.xsd
http://www.springframework.org/schema/mvc http://www.springframework.org/schema/mvc/spring-mvc-3.2.xsd
http://www.springframework.org/schema/util http://www.springframework.org/schema/util/spring-util-3.2.xsd">
<!-- conf/spring-db.xml Connections used to manage databases -->
<!-- read conf/db.properties -->
<util:properties id="dbConfig"
location="classpath:conf/db.properties" />
<!-- To configure DBCP Required Bean -->
<!-- various property In name In class set Method name prevails -->
<bean id="ds"
class="org.apache.commons.dbcp.BasicDataSource">
<property name="driverClassName"
value="#{dbConfig.driver}"/>
<property name="url"
value="#{dbConfig.url}"/>
<property name="username"
value="#{dbConfig.user}"/>
<property name="password"
value="#{dbConfig.password}"/>
<property name="initialSize"
value="#{dbConfig.initsize}"/>
<property name="maxActive"
value="#{dbConfig.maxsize}"/>
</bean>
</beans>
-
Add the Spring MVC configuration file spring-mvc.xml:
<?xml version="1.0" encoding="UTF-8"?>
<beans xmlns="http://www.springframework.org/schema/beans"
xmlns:xsi="http://www.w3.org/2001/XMLSchema-instance"
xmlns:context="http://www.springframework.org/schema/context"
xmlns:jdbc="http://www.springframework.org/schema/jdbc"
xmlns:jee="http://www.springframework.org/schema/jee"
xmlns:tx="http://www.springframework.org/schema/tx"
xmlns:aop="http://www.springframework.org/schema/aop"
xmlns:mvc="http://www.springframework.org/schema/mvc"
xmlns:util="http://www.springframework.org/schema/util"
xmlns:jpa="http://www.springframework.org/schema/data/jpa"
xsi:schemaLocation="
http://www.springframework.org/schema/beans http://www.springframework.org/schema/beans/spring-beans-3.2.xsd
http://www.springframework.org/schema/context http://www.springframework.org/schema/context/spring-context-3.2.xsd
http://www.springframework.org/schema/jdbc http://www.springframework.org/schema/jdbc/spring-jdbc-3.2.xsd
http://www.springframework.org/schema/jee http://www.springframework.org/schema/jee/spring-jee-3.2.xsd
http://www.springframework.org/schema/tx http://www.springframework.org/schema/tx/spring-tx-3.2.xsd
http://www.springframework.org/schema/data/jpa http://www.springframework.org/schema/data/jpa/spring-jpa-1.3.xsd
http://www.springframework.org/schema/aop http://www.springframework.org/schema/aop/spring-aop-3.2.xsd
http://www.springframework.org/schema/mvc http://www.springframework.org/schema/mvc/spring-mvc-3.2.xsd
http://www.springframework.org/schema/util http://www.springframework.org/schema/util/spring-util-3.2.xsd">
<!-- conf/spring-mvc.xml For management MVC Configuration -->
<context:component-scan
base-package="cn.tedu.spring" />
<mvc:annotation-driven/>
<bean
class="org.springframework.web.servlet.view.InternalResourceViewResolver">
<property name="prefix" value="/WEB-INF/jsp/"></property>
<property name="suffix" value=".jsp"></property>
</bean>
</beans>
-
Deployment Test...
2. Deploy Spring MyBatis
-
Import package (omitted)
-
Add Spring MyBatis configuration file spring-mybatis.xml
<?xml version="1.0" encoding="UTF-8"?>
<beans xmlns="http://www.springframework.org/schema/beans"
xmlns:xsi="http://www.w3.org/2001/XMLSchema-instance"
xmlns:context="http://www.springframework.org/schema/context"
xmlns:jdbc="http://www.springframework.org/schema/jdbc"
xmlns:jee="http://www.springframework.org/schema/jee"
xmlns:tx="http://www.springframework.org/schema/tx"
xmlns:aop="http://www.springframework.org/schema/aop"
xmlns:mvc="http://www.springframework.org/schema/mvc"
xmlns:util="http://www.springframework.org/schema/util"
xmlns:jpa="http://www.springframework.org/schema/data/jpa"
xsi:schemaLocation="
http://www.springframework.org/schema/beans http://www.springframework.org/schema/beans/spring-beans-3.2.xsd
http://www.springframework.org/schema/context http://www.springframework.org/schema/context/spring-context-3.2.xsd
http://www.springframework.org/schema/jdbc http://www.springframework.org/schema/jdbc/spring-jdbc-3.2.xsd
http://www.springframework.org/schema/jee http://www.springframework.org/schema/jee/spring-jee-3.2.xsd
http://www.springframework.org/schema/tx http://www.springframework.org/schema/tx/spring-tx-3.2.xsd
http://www.springframework.org/schema/data/jpa http://www.springframework.org/schema/data/jpa/spring-jpa-1.3.xsd
http://www.springframework.org/schema/aop http://www.springframework.org/schema/aop/spring-aop-3.2.xsd
http://www.springframework.org/schema/mvc http://www.springframework.org/schema/mvc/spring-mvc-3.2.xsd
http://www.springframework.org/schema/util http://www.springframework.org/schema/util/spring-util-3.2.xsd">
<!-- conf/spring-mybatis.xml For management MVC Configuration -->
<bean id="sqlSessionFactory"
class="org.mybatis.spring.SqlSessionFactoryBean">
<property name="dataSource" ref="ds"/>
<!--
<property name="mapperLocations"
value="classpath:mapping/*.xml"/> -->
</bean>
<bean class="org.mybatis.spring.mapper.MapperScannerConfigurer">
<property name="sqlSessionFactory"
ref="sqlSessionFactory"/>
<property name="basePackage"
value="cn.tedu.store.dao"/>
</bean>
</beans>
The mapperLocations property is temporarily commented out and then opened later with a map file.
-
Offline testing with JUnit:
public class MyBatisTest {
ClassPathXmlApplicationContext ctx;
@Before
public void init(){
ctx = new ClassPathXmlApplicationContext(
"conf/spring-db.xml",
"conf/spring-mybatis.xml");
}
@Test
public void testSqlSession(){
SqlSessionFactory factory=
ctx.getBean("sqlSessionFactory",
SqlSessionFactory.class);
SqlSession session=factory.openSession();
System.out.println(session);
session.close();
}
}
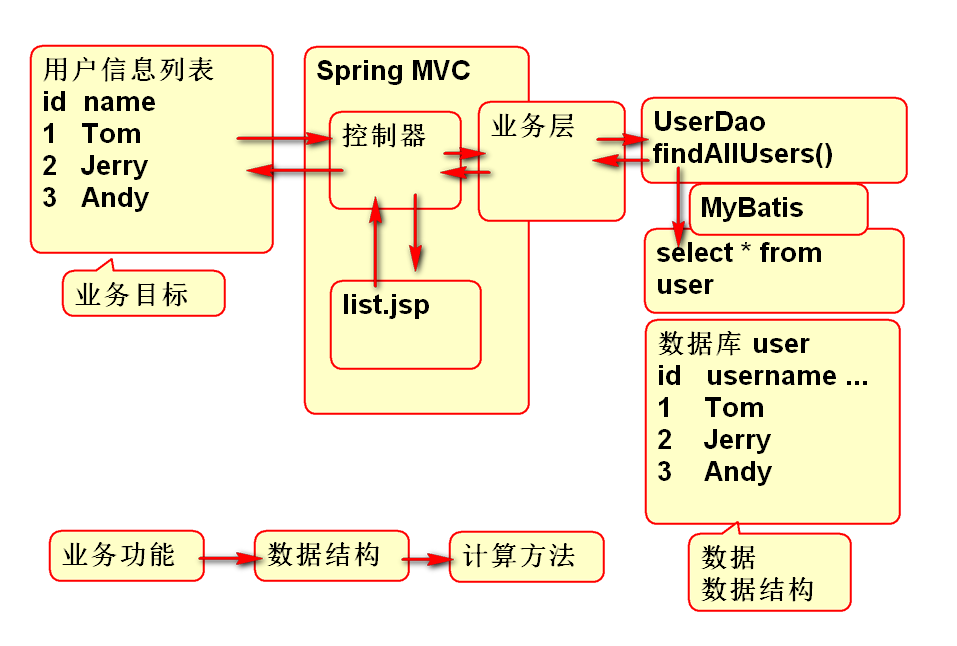
Implement User List
Data Layer
Steps to achieve:
-
Data table structure:
desc user;
+-------------+-------------+------+-----+-------------------+-----------------------------+
| Field | Type | Null | Key | Default | Extra |
+-------------+-------------+------+-----+-------------------+-----------------------------+
| id | int(11) | NO | PRI | NULL | auto_increment |
| username | varchar(20) | YES | | NULL | |
| password | varchar(30) | YES | | NULL | |
| email | varchar(20) | YES | | NULL | |
| mobile | varchar(20) | YES | | NULL | |
| create_time | timestamp | NO | | CURRENT_TIMESTAMP | on update CURRENT_TIMESTAMP |
+-------------+-------------+------+-----+-------------------+-----------------------------+
-
Add entity class user
public class User implements Serializable {
private static final long serialVersionUID = -7291170424207323214L;
private Integer id;
private String username;
private String password;
private String mobile;
private String email;
private Date createTime;
public User() {
}
public User(Integer id, String username, String password, String mobile, String email, Date createTime) {
super();
this.id = id;
this.username = username;
this.password = password;
this.mobile = mobile;
this.email = email;
this.createTime = createTime;
}
public Integer getId() {
return id;
}
public void setId(Integer id) {
this.id = id;
}
public String getUsername() {
return username;
}
public void setUsername(String username) {
this.username = username;
}
public String getPassword() {
return password;
}
public void setPassword(String password) {
this.password = password;
}
public String getMobile() {
return mobile;
}
public void setMobile(String mobile) {
this.mobile = mobile;
}
public String getEmail() {
return email;
}
public void setEmail(String email) {
this.email = email;
}
public Date getCreateTime() {
return createTime;
}
public void setCreateTime(Date createTime) {
this.createTime = createTime;
}
@Override
public String toString() {
return "User [id=" + id + ", username=" + username + ", password=" + password + ", mobile=" + mobile
+ ", email=" + email + ", createTime=" + createTime + "]";
}
@Override
public int hashCode() {
final int prime = 31;
int result = 1;
result = prime * result + ((id == null) ? 0 : id.hashCode());
return result;
}
@Override
public boolean equals(Object obj) {
if (this == obj)
return true;
if (obj == null)
return false;
if (getClass() != obj.getClass())
return false;
User other = (User) obj;
if (id == null) {
if (other.id != null)
return false;
} else if (!id.equals(other.id))
return false;
return true;
}
}
-
Declare channel interface
public interface UserDao {
/**
* Query all user information
* @return User Information List
*/
List<User> findAllUsers();
}
-
Add mapping profile mapping / userMapper.xml
<?xml version="1.0" encoding="UTF-8"?>
<!DOCTYPE mapper
PUBLIC "-//mybatis.org//DTD Mapper 3.0//EN"
"http://mybatis.org/dtd/mybatis-3-mapper.dtd">
<mapper namespace="cn.tedu.store.dao.UserDao">
<!-- mapping/userMapper.xml Mapping File -->
<!--
result: Result
parameter: parameter
type: type
resultType: Type of return result element used to declare methods
parameterType: Type of parameter, used when the method has only one parameter!
If more parameters are recommended @Param Annotation Label
-->
<select id="findAllUsers"
resultType="cn.tedu.store.bean.User">
select
id,
username,
password,
mobile,
email,
create_time as createTime
from
user
</select>
</mapper>
-
Update db.properties
url=jdbc:mysql://localhost:3306/tedustore
-
Update spring-mybatis.xml
<property name="mapperLocations"
value="classpath:mapping/*.xml"/>
-
Offline Testing with JUnit
public class UserDaoTest {
ClassPathXmlApplicationContext ctx;
UserDao dao;
@Before //Method to execute before all test cases
public void init(){
ctx = new ClassPathXmlApplicationContext(
"conf/spring-db.xml",
"conf/spring-mybatis.xml");
dao = ctx.getBean("userDao",UserDao.class);
}
@After //Execute destory method after all test cases are executed
public void destory(){
ctx.close();
}
@Test
public void testFindAllUsers(){
List<User> list=dao.findAllUsers();
for (User user : list) {
System.out.println(user);
}
}
}
Author: Darren
QQ: 603026148
The above content belongs to Jin Ye. If there are any mistakes or deficiencies, please contact me and hope we can make progress together.