Two ways to create resources
Command-based approach:
- Simple, intuitive and quick to use.
- Suitable for temporary testing or experimentation.
Profile-based approach:
- The configuration file describes What, that is, the state the application will ultimately achieve.
- Configuration files provide templates for creating resources that can be deployed repeatedly.
- Deployments can be managed like code.
- Formal, cross-environment, large-scale deployment.
- This requires familiarity with the syntax of the configuration file and is difficult.
1. Create resources from the command line
Accept only json format
Configuration List (yml, yaml)
[root@master ~]# cd /etc/kubernetes/manifests/
//yml, yaml files of k8s
1. Noe01 and Noe02 Download nginx Mirrors
docker pull nginx
//Download nginx image
2.master creates a Pod controller (test-web), deployment
[root@master ~]# kubectl run test-web --image=nginx --replicas=5
//Create a Pod controller, deployment
3. View the controller
(1)
[root@master ~]# kubectl get deployments.
//View Controller Status

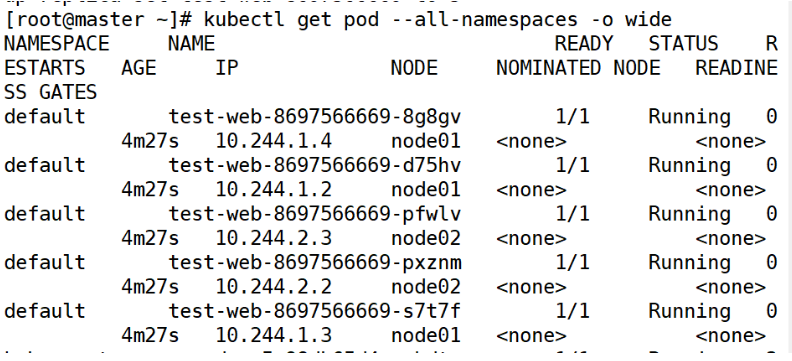
[root@master ~]# kubectl get pod --all-namespaces -o wide
//Display node information for pod
(2)
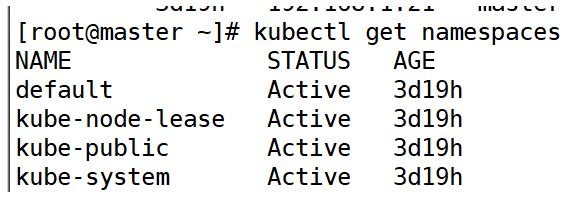
[root@master ~]# kubectl get namespaces
//View k8s namespace
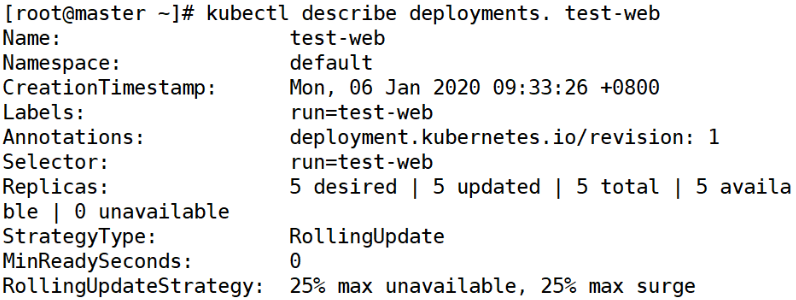
[root@master ~]# kubectl describe deployments. test-web
//View resource details
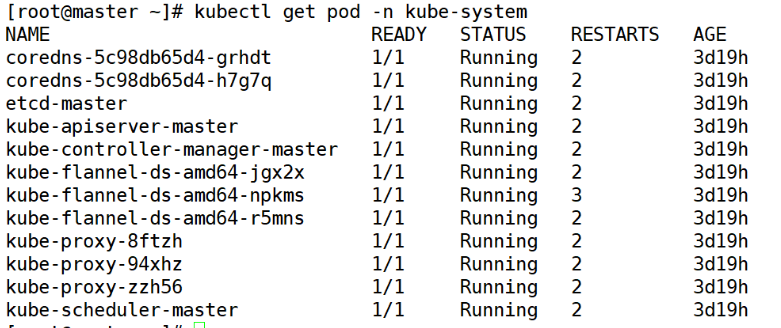
View a resource object without specifying a namespace. The default namespace is the default namespace.You can add the -n option to view the resources for the specified namespace.
[root@master ~]# kubectl get pod -n kube-system
3. Delete test-web controller
[root@master ~]# kubectl delete deployments. test-web
4.master creates a Pod controller (web), deployment
[root@master ~]# kubectl run web --image=nginx --replicas=5
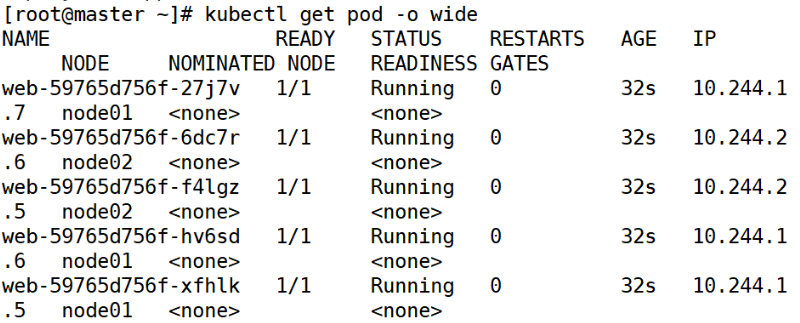
Check out the pod information
[root@master ~]# kubectl get pod -o wide
//Check out pod node information
[root@master ~]# kubectl describe deployments. web
//View resource details
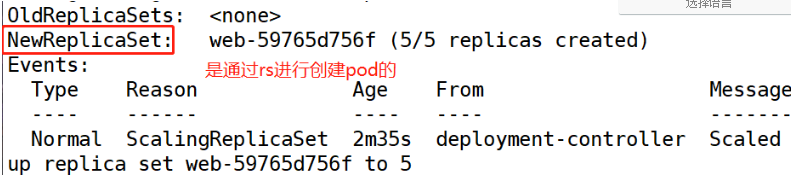
Note: Running the created deployment resource object directly is a common type of controller resource. In addition to deployment, there are pod controllers such as rc, rs, and so on. Deployment is an advanced pod controller.
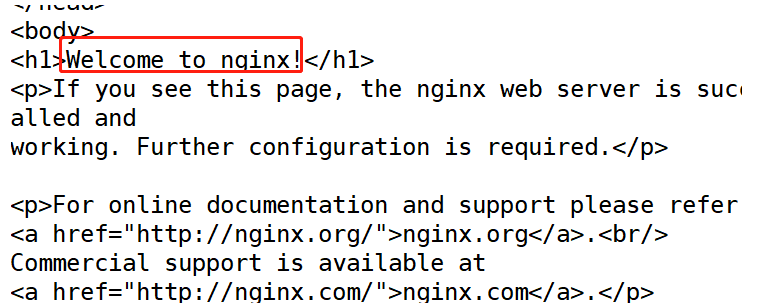
Native Test Access nginx
[root@master ~]# curl 10.244.1.7
5. Create service resource type
[root@master ~]# kubectl expose deployment web --name=web-xgp --port=80 --type=NodePort
//Create service resource type, where we set the mapping port
If you want the external network to have access to the service, you can expose the deployment resource and get the service resource, but the svc resource must be of type NodePort.
Mapped Port Range: 30000-32767
View service information
[root@master ~]# kubectl get svc
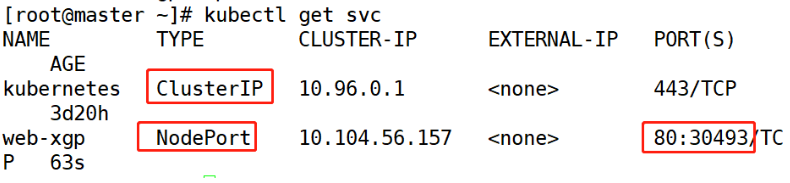
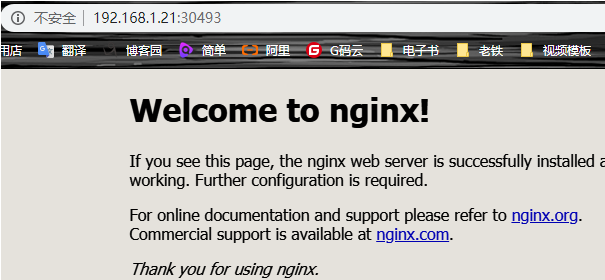
Browser Test Access http://192.168.1.21:30493/
2. Expansion and contraction of services
1. View Controller Information
[root@master ~]# kubectl get deployments. -o wide

2. Expansion
[root@master ~]# kubectl scale deployment web --replicas=8
Check it out
[root@master ~]# kubectl get deployments. -o wide

3. Compact
[root@master ~]# kubectl scale deployment web --replicas=4
Check it out
[root@master ~]# kubectl get deployments. -o wide

3. Scale by modifying the web's yaml file
Backup yaml file for web
[root@master ~]# kubectl get deployments. -o yaml > web.yaml
Using edit to modify the yaml file of the web
[root@master ~]# kubectl edit deployments. web
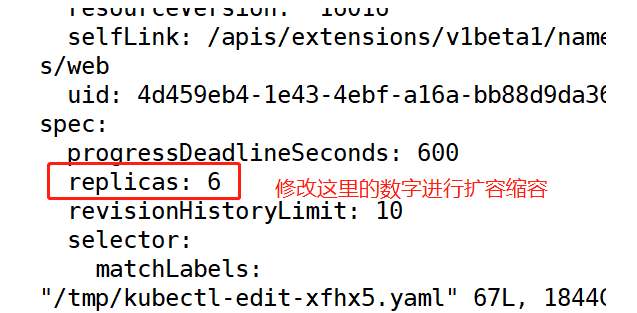
Check it out
[root@master ~]# kubectl get deployments. -o wide

3. Upgrade and Rollback of Services
node01 and node02 download version 1.15 nginx
[root@master ~]# docker pull nginx:1.15
1.master Settings Service Upgrade
[root@master ~]# kubectl set image deployment web web=nginx:1.15
Check it out

2.master Sets Service Rollback
(1) Modify profile rollback
Using edit to modify the yaml file of the web
[root@master ~]# kubectl edit deployments. web
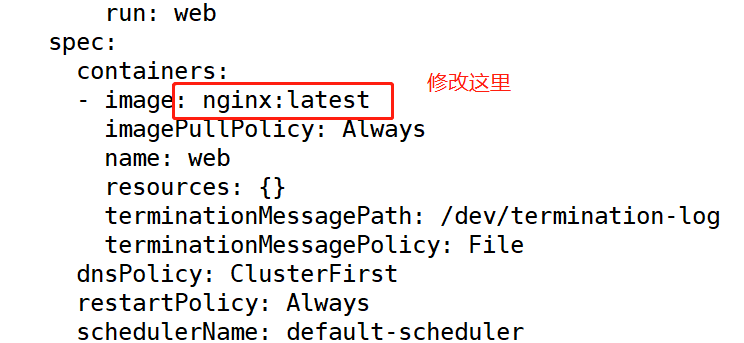
Check it out
[root@master ~]# kubectl get deployments. -o wide

(2) Command rollback
[root@master ~]# kubectl rollout undo deployment web

Note: You can only roll back to the state of the last operation
4. Small Experiments
Experimental environment
| Host | IP Address | service |
|---|---|---|
| master | 192.168.1.21 | registry+Deployment |
| node01 | 192.168.1.22 | |
| node02 | 192.168.1.23 |
1.master makes his own mirror based on httpd, which requires 3 versions, v1,v2,v3. And the corresponding version mirrors, the contents of the home directory accessed are different
(1) master downloads httpd image
[root@master ~]# docker pull httpd
(2) Writing Dockerfile
[root@master xgp]# vim Dockerfile
FROM httpd
COPY index.html /usr/local/apache2/htdocs/index.html
(3) Create test web page v1
[root@master xgp]#echo "<h1>xgp | test-web | httpd:v1<h1>" > index.html
(4) Create mirror web1 based on Dockerfile
[root@master xgp]# docker build -t web1 .
(5) Create test web page v2
[root@master xgp]#echo "<h1>xgp | test-web | httpd:v1<h1>" > index.html
(6) Create mirror web2 based on Dockerfile
[root@master xgp]# docker build -t web2 .
(7) Create test web page v3
[root@master xgp]# echo "<h1>xgp | test-web | httpd:v3<h1>" > index.html
(8) Create mirror web3 based on Dockerfile
[root@master xgp]# docker build -t web3 .
2.master deploys private warehouses
(1) master downloads registry image
[root@master ~]# docker pull registry
(2) Start registry
[root@master xgp]# docker run -itd --name registry -p 5000:5000 --restart=always registry:latest
(3) Modify the docker configuration file to join the private warehouse (three)
[root@master xgp]# vim /usr/lib/systemd/system/docker.service
ExecStart=/usr/bin/dockerd --insecure-registry 192.168.1.21:5000
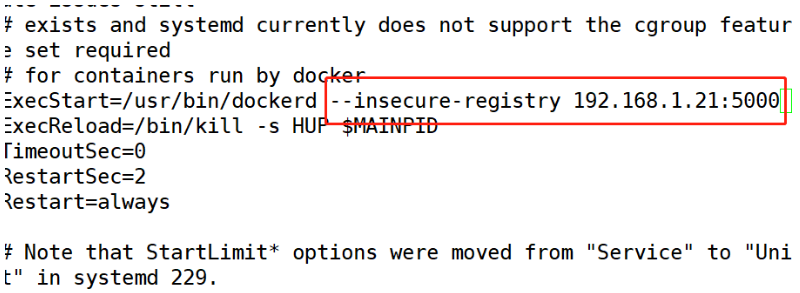
(4) Restart docker (three)
[root@master xgp]# systemctl daemon-reload
[root@master xgp]# systemctl restart docker
3. Upload the three web images created before uploading to the private repository
(1) Modify the mirror label
[root@master xgp]# docker tag web1:latest 192.168.1.21:5000/web1:latest
[root@master xgp]# docker tag web2:latest 192.168.1.21:5000/web2:latest
[root@master xgp]# docker tag web3:latest 192.168.1.21:5000/web3:latest
(2) Upload three web mirrors to a private repository
[root@master xgp]# docker push  192.168.1.21:5000/web1:latest
[root@master xgp]# docker push  192.168.1.21:5000/web2:latest
[root@master xgp]# docker push  192.168.1.21:5000/web3:latest
4. Deployment of a Deployment resource object requires mirroring to use the private mirror version v1 described above.Six copies of Pod.
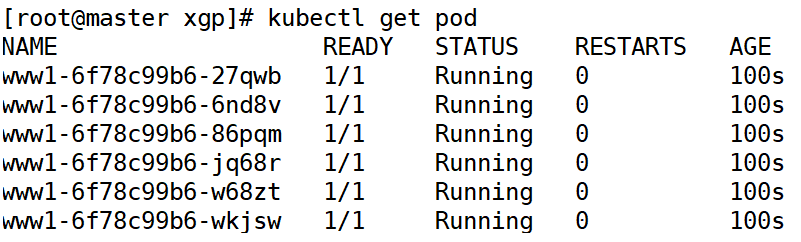
[root@master xgp]# kubectl run www1 --image=192.168.1.21:5000/web1:latest --replicas=6
Check it out
[root@master xgp]# kubectl get pod
5. Expose the above Deployment to a service resource object to make the service accessible to the external network.
[root@master xgp]# kubectl expose deployment www1 --name=web-xgp --port=80 --type=NodePort
Check it out
[root@master xgp]# kubectl get svc
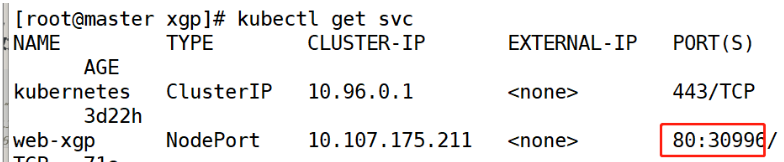
Browser access

6. Expand and and shrink Deployment to 8 copies of Pod, then shrink to 4 copies of Pod.
(1) Capacity expansion
[root@master xgp]# kubectl scale deployment www1 --replicas=8
Check it out
[root@master xgp]# kubectl get deployments. -o wide

(2) Compact
Modify k8s configuration file
Backup yaml file for web
[root@master ~]# kubectl get deployments. -o yaml > www1.yaml
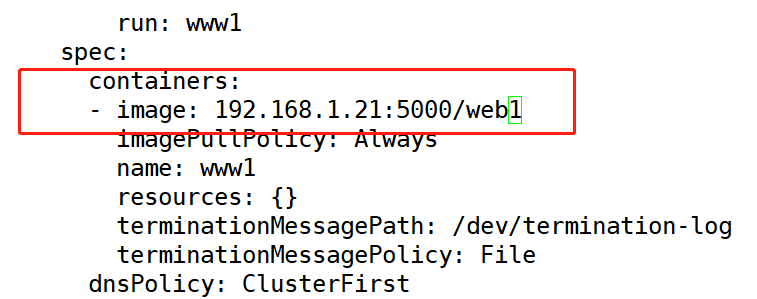
Using edit to modify the yaml file of the web
[root@master ~]# kubectl edit deployments. www1
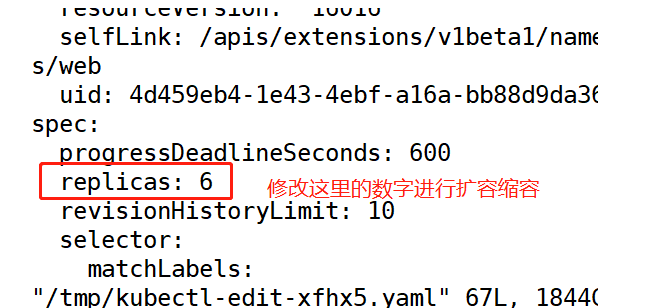
Check it out
[root@master xgp]# kubectl get deployments. -o wide

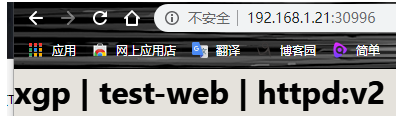
7. Upgrade and rollback the above Deployment, upgrade v1 version to v2 version.
(1) Upgrade to web2
[root@master ~]# kubectl set image deployment www1 www1=192.168.1.21:5000/web2
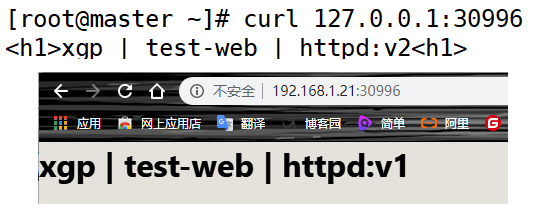
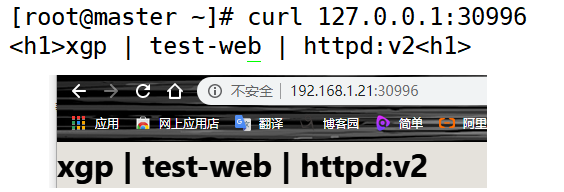
Native Test Access
[root@master ~]# curl 127.0.0.1:30996
<h1>xgp | test-web | httpd:v2<h1>

Browser Test Access
(2) Rollback version to web1
<1>Modify Profile Rollback
Using edit to modify the yaml file of the web
[root@master ~]# kubectl edit deployments. www1
Check it out
[root@master ~]# kubectl get deployments. -o wide

Visit
<2>Command rollback
[root@master ~]# kubectl rollout undo deployment www1

Note: You can only roll back to the state of the last operation
Visit
_uu Done_u_