source
Learning companion - big front-end advanced - Chapter learning - KuangStudy - Articles
The most easy to understand explanation of big front-end skills must be read! The fastest time to learn about NodeJS, Npm, Es6, Babel, Webpack and modular use. From now on, there is no fear of front-end code!
1. Front end development and front end development tools
2. Nodejs installation and quick start
3. Es6's new vocabulary sugar
4. Npm package manager
5. Installation function of Babel
6. Modular management
7. Webpack packaging and compilation
8. How to quickly build a nodejs project Vue element admin
01. Tools
HBuilder X
HBuilderX - effective geek skills (dcloud.io)

02,Nodejs
2.1 introduction and installation of Nodejs
Objective: understand nodejs and install the software locally
Official website: http://nodejs.cn/
Introduction:
Node is a development platform that allows javascript to run on the server side. It makes javascript a scripting language on an equal footing with PHP, Python, Perl, Ruby and other server-side languages. It was released in May 2009 and developed by Ryan Dahl. In essence, it encapsulates the Chrome V8 engine. Simply put, node JS is the javascript running on the server. Node.js is a platform based on Chrome JavaScript runtime. The underlying architecture is javascript File suffix: jsNode.js is an event driven I/O server javascript environment. It is based on Google's V8 engine. The V8 engine executes javascript very fast and has very good performance.
2.2 introduction to Nodejs
Objectives: console output string, use function and carry out modular programming
2.2.1 quick start - Hello World
1. Create folder nodejs
2. Create HelloWorld js
console.log('Hello World!!!')
Run: node HelloWorld js
result:
image-20220115113753897
The browser kernel consists of two cores:
- DOM rendering engine;
- java script parser (js engine)
- js runs inside the js engine in the browser kernel
Summary
Node.js is a JavaScript program that runs away from the browser environment and is based on the V8 engine
2.2.2 Node - implementation request response
1. Create httpserver js ;
// The import module is require d, which is similar to importing Java io
const http = require('http');
// 1: Create an HTTP server service
http.createServer(function(request,response){
// How do browsers know hello server!!!
//The meaning of this sentence is: tell the browser to parse the hello server data in text plain.
response.writeHead(200,{'Content-type':'text/plain'});
// Output content to browser
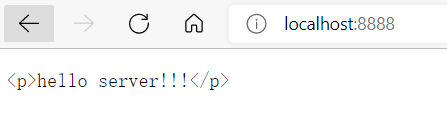
response.end("<p>hello server!!!</p>");
}).listen(8888);// 2: Listen to port 8888
console.log("The services you started are: http://localhpst:8888 to start successfully!! ");
2. Run the server program;
node httpserver.js
3. After the server starts successfully, enter in the browser: http://localhost:8888/ View the successful operation of the web server and output the html page
4. Stop service: ctrl + c
2.2.3. Node operation MYSQL database
reference resources: https://www.npmjs.com/package/mysql
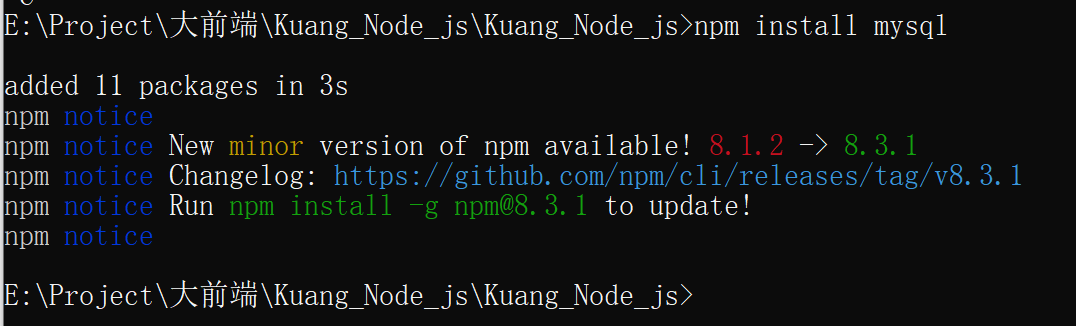
1: Installing mysql dependencies
npm install mysql
2. Database

3: Define dB JS
//1: Import the mysql dependency package. mysql belongs to a third-party module, which is similar to Java SQL is the same
var mysql = require("mysql");
// 1: Create a mysql Connection object
// 2: Configure data connection information
var connection =mysql.createConnection({
    host:"127.0.0.1",
    port:3306,
    user:"root",
    password:"mkxiaoer",
    database:"testdb"
});
// 3: Open connection
connection.connect();
// 4: Execute curd
connection.query("select * from kss_user",function(error,results,fields){
    // If there is an error in the query, it is thrown directly
    if(error)throw error;
    // query was successful
    console.log("results = ",results);
});
// 5: Close connection
connection.end();
4. Run js
node db.js
If you want to develop more complex node based JS application background, you need to further learn node JS Web development related frameworks express, art template, koa, etc
03,Es6
ECMAScript ES6 (hereinafter referred to as ES6) was officially released in June 2015 JavaScript The standard of language is officially called ECMAScript 2015 (ES2015). Its goal is to make JavaScript language can be used to write complex large-scale applications and become an enterprise development language
ECMAScript is the syntax specification of the front-end js; It can be applied in various js environments. Such as browser or node js environment.
It has many versions: es1/2/3/5/6 and many new features that can be used in the js environment.
Es6 has many syntax sugars: simplify the original code. But not necessarily easy to use
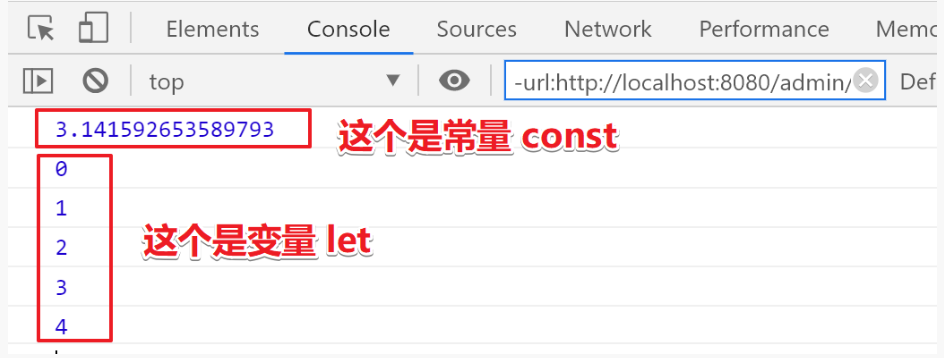
3.2. Syntax of ES6: let and const commands
Strict distinction between variables and constants.
Core code:
Create new espro6 \ Demo01 The html is as follows
<!DOCTYPE html>
<html lang="en">
<head>
    <meta charset="UTF-8">
    <meta name="viewport" content="width=device-width, initial-scale=1.0">
    <meta http-equiv="X-UA-Compatible" content="ie=edge">
    <title>Document</title>
</head>
<body>
    <script>
         // 1: The data type defined in JavaScript has only one identity - var
         // Flexible torture: does js have data types?
         // Yes, string,number,Object, boolean, undefined
         let name = "zhangsan";
         let age = 100;
         let flag = false;
         //js was scolded without constants
         const PI = Math.PI;
         // Error will be reported after modification
         //PI = 1245;
         console.log(PI)
         //var or cause variable penetration
         for(let i=0;i<5;i++){
             console.log(i);
         };
         // console.log("= = = here is the variable penetration = = = >" + I)
    </script>
</body>
</html>
Summary
let: variable variable
const is a constant
var: the most primitive.
3.3. Syntax of ES6: template string
Before: We used to use '' or '' to wrap strings
Now: ` ` [backquote]
First use: basic string formatting. Embed expressions into strings for splicing. Defined by ${}.
//es5
let name = 'itcast'
console.log('hello ' + name)    //es6
const name = 'itcast'
console.log(`hello ${name}`) //hello itcast
The second purpose: in ES5, we use backslash () to do multi line string or string line by line splicing. ES6 back quotation marks (` `) are directly handled.
- Create a new espro6 \ Demo02 The html is as follows:
<!DOCTYPE html>
<html lang="en">
<head>
    <meta charset="UTF-8">
    <meta name="viewport" content="width=device-width, initial-scale=1.0">
    <meta http-equiv="X-UA-Compatible" content="ie=edge">
    <title>Template string</title>
</head>
<body>
    <script>
        var username = "Zhang San";
        var age = 30;
        // 1: The original approach is to splice strings
        var str = "My name is " + username+",Age is: "+age;
        console.log(str);
        // 2: Save with template string. Note: here is the ` (floating key) (the key on the tab keyboard)
        // jdk1.9
        var str2 = `My name is ${username},Age is: ${age}`;
        console.log(str2);
    </script>
</body>
</html>
3.4. Syntax of ES6: function default parameters and arrow function
Function default parameters
Just add a default value after the parameter of the method
Core code
// Default parameter sets the initial value for the parameter list
function add(a = 100, b = 100) {
	console.log(a, b);
}
// When the method is executed, it will be filled with the default value and printed out 100200
add();
// Overwrite the default value and the print result is 1, 2
add(1, 2);
E:\Project\Large front end\Kuang_Node_js\Kuang_Node_js\ES6>node demo.js
100 100
1 2
Arrow function
The arrow function simplifies the definition of the function, so that we don't need to use the function keyword
The three most intuitive features of arrow function.
1 the function keyword is not required to create a function
2 omit the return keyword
3 inherit the this keyword of the current context
// Arrow function
 // It is also a function definition, which simplifies the definition, that's all.
 // Steps: 1: remove function 2: add an arrow after the bracket.
 // 1: Declarative definition
 function add() {};
 // 2: Definition of expression
 var add2 = function() {}
 // 3: Definition of arrow function
 var sum = (a = 100, b = 300) => {
 	console.log(a + b);
 };
 // The arrow function is executed here
 sum(50, 50);
 // The arrow function is executed here
 sum();
 // The arrow function is executed here
 sum(400);
E:\Project\Large front end\Kuang_Node_js\Kuang_Node_js\ES6>node demo.js
100
400
Arrow function depth learning
// Arrow function
 // It is also a function definition, which simplifies the definition, that's all.
 // Steps: 1: remove function 2: add an arrow after the bracket.
 // Parameterless function
 var sum = function(){
 }
 // The arrow is modified as follows
 var sum = ()=>{}

 // With parameters
 // In the first case, the of a parameter is as follows
 var sum2 = function(a){
 };
 // The arrow is modified as follows
 var sum2 = (a) => {};
 var sum2 = a => {
 	return a;
 };

 // In the second case, if there are more than two parameters, remember to add parentheses
 var sum3 = function(a,b){
    return a + b;
 };
 // The arrow is modified as follows
 var sum3 = (a, b) => {
 	return a + b;
 };


 // In the third case, if there is no logical body, only the return value can be simplified as follows
 var sum4 = function(a,b){
    return a + b;
 };
 // The arrow is modified as follows
 var sum4 = (a, b) => a + b

 // implement
 console.log(sum2(100));
 console.log(sum3(100, 100));
 console.log(sum4(100, 100));
3.5 syntax of ES6: object initialization abbreviation
It means that if the names of key and value in an object are the same, it can be defined as one.
 function person(name, age) {
        //return {name:name,age:age};
        // Object abbreviation
        return { name, age };
    };
    // Call and execute
    var json = person("Xiaohuamei", 20);
    console.log(json.name, json.age);
    //=========================Practical application=========================
    //<button  ο Nclick = "login()" > login < / button >
    function login() {
        var username = $("#username").val();
        var password = $("#password").val();
        // Send ajax
        $.ajax({
            type: "post",
            // Object abbreviation
            data: { username, password },
            // Original score
            //data:{username:username,password:password},
            success() {
            }
        });
    }
3.6 syntax of ES6: object deconstruction
Object Deconstruction - es6 provides some quick ways to obtain object properties and behavior
// Object Deconstruction - es6 provides some quick ways to obtain object properties and behavior
 var person = {
 	name: 'zhangsan',
 	age: 32,
 	language: "cn",
 	// Functions are also handled
 	/* say:function(){
 	    console.log(this.name+"Age is: "+ this.age);
 	}   */
 	/* say:()=>{
 	    console.log(this.name+"Age is: "+ this.age);
 	}  */
 	say() {
 		console.log(this.name + "Age is:" + this.age);
 	}
 };
 // ===========================Traditional practice========================
 var name = person.name;
 var age = person.age;
 person.say();
 // ===========================Object deconstruction practices========================
 //The premise of es6: name and age must be jsonkey by default
 var {
 	name,
 	age
 } = person;
 console.log(name, age);

 // You can take a small name with a colon
 var {
 	name,
 	age,
 	language: lan
 } = person;
 console.log(name, age, lan);
E:\Project\Large front end\Kuang_Node_js\Kuang_Node_js\ES6>node demo.js
zhangsan Age: 32
zhangsan 32
zhangsan 32 cn
3.7. Syntax of ES6: propagation operator [...]
Propagate the properties of one object to another
// 1: Define an object
var person1 = {
    name: 'Birdie ',
    age: 16,
};
// 2: Object deconstruction
var {
    name,
    age
} = person1;
// =========================== ...  Object fusion=====================
var person2 = {
    ...person1,
    gender: 1,
    tel: 13478900
};

console.log(person2);  // {name: 'xiaofeifei', age: 16, gender: 1, tel: 13478900}

// =========================== ...  Object value=====================
// ...  Object value
var person3 = {
    name: "Li Si",
    gender: 1,
    tel: "11111",
    address: 'Guangzhou'
};
// ... person4 give me the rest.
var {
    name,
    gender,
    ...person4
} = person3;
console.log(name) //  Li Si
console.log(age) //  16
console.log(person4) //  {tel: '11111', address: 'Guangzhou'}
// =================Scenario analysis - pseudo code========================
// Simulation background: the user data returned by asynchronous query is as follows:
function findUsers() {
    $.get("xxxxx", function(res) {
        var res = {
            pages: 11,
            pageSize: 10,
            pageNo: 1,
            firstFlag: true,
            lastFlag: false,
            total: 123,
            data: [{}, {}, {}, {}],
        };
        // ==========================Object Value===============
        var {
            data: users,
            ...pagesjon
        } = res;
        //Equivalent to
        /*  var users = res.data;
  		   var pagesjon = {
  		    res = {
  		        pages:11,
  		        pageSize:10,
  		        pageNo:1,
  		        firstFlag:true,
  		        lastFlag:false,
  		        total:123,
  		    }; */
    })
}
Syntax of ES6: use of array map and reduce methods (understand)
Target: application scenario of map method in array
Explanation: map and reduce methods are added to the array.
1.map()
Method can process all elements in the original array through a function, put them into a new array and return the new array.
For example: there is a string array. You want to convert it to an int array
let arr = ['1', '20', '-5', '3'];

// 1: The function of changing the data type and looping the map itself
// 2: The map method can process all the elements in the original array through a function, put them into a new array and return the new array.
var newarr = arr.map(function (value) {
	return parseInt(value) * 2;
});
/*
// Arrow simplification 01
var newarr = arr.map(value=>{
	return parseInt(value) * 2;
});
// Arrow simplification 02
var newarr = arr.map(value => parseInt(value) * 2);
*/
console.log("Original array:", arr);  //Original array: ['1', '20', '5', '3']
console.log("map of newarr Array:", newarr); // 2 40 -10 6
- reduce calculation method
//reduce calculation method
let arr2 = [1, 2, 3, 4, 5, 6, 7, 8, 9, 10];
var result = arr2.reduce((a, b) => a + b);
console.log(result);//55
reduce(function(), initial value (optional):
Receive a function (required) and an initial value (optional), which receives two parameters:
- The first parameter is the result of the last reduce process
- The second parameter is the next element in the array to be processed
reduce() will reduce the elements in the array from left to right, and take the processing result as the first parameter of the next reduce. For the first time, the first two elements will be used as calculation parameters, or the initial value specified by the user will be used as the starting parameter
//reduce calculation method
let arr2 = [1, 2, 3, 4, 5, 6, 7, 8, 9, 10];
// Arrow writing -- add 1 to 10
var result = arr2.reduce((a, b) => a + b);
// Original writing -- add 1 to 10
//var result = arr2.reduce(function(a,b){
//    return a+b;
//})
console.log(result); //55
04. NPM package manager
Official website: https://www.npmjs.com/
The full name of NPM is Node Package Manager JS package management tool is the world's largest module ecosystem, in which all modules are open source and free; It's also a node JS package management tool, which is equivalent to Maven on the front end.
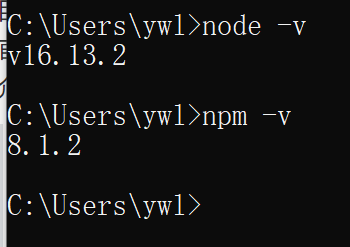
#Enter npm -v at the command prompt to view the current npm version
npm -v
4.2. Use npm to manage projects
1. Create folder npm
2. Project initialization
#Create an empty folder and enter the folder at the command prompt to execute command initialization
npm init
#Enter relevant information according to the prompt. If the default value is used, press enter directly.
#Name: project name
#Version: project version number
#Description: item description
#keywords: {Array} keyword, which is convenient for users to search our project
#Finally, a package. XML file is generated JSON file, which is the package configuration file, is equivalent to maven's POM xml
#We can also modify it as needed later.
#If you want to directly generate package JSON file, you can use the command
npm init -y
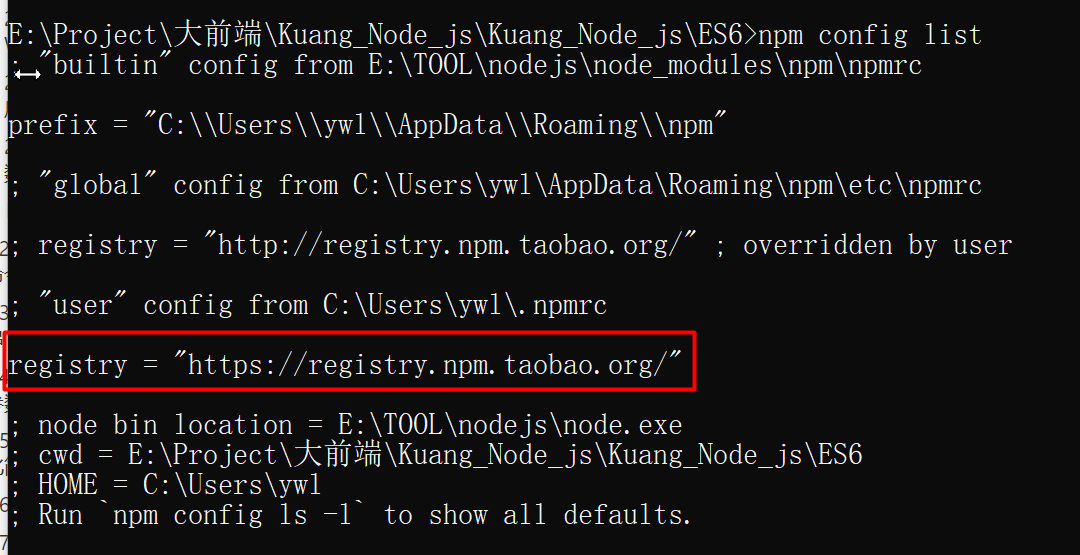
1. Modify npm image
The official management packages of NPM are from http://npmjs.com Download, but this website is very slow in China.
Taobao NPM image is recommended here http://npm.taobao.org/
Taobao NPM image is a complete npmjs Com image. The synchronization frequency is once every 10 minutes to ensure that it is synchronized with the official service as much as possible.
2. Set mirror address
#After the following configuration, all NPM installations will be downloaded through the image address of Taobao in the future
npm config set registry https://registry.npm.taobao.org
#View npm configuration information
npm config list
4.4,npm install
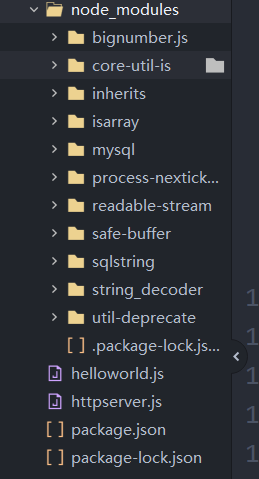
#Use npm install to install the latest version of the dependent package,
#Module installation location: project directory \ node_modules
#The installation will automatically add package lock. In the project directory JSON file, which helps lock the version of the installation package
#Also package In the JSON file, dependency packages will be added to the dependencies node, similar to < dependencies > in maven
npm install jquery
#If you want to specify a specific version during installation
npm install jquery@2.1.x
#devDependencies node: the dependency package during development, which is not included when the project is packaged into the production environment
#Use the - D parameter to add dependencies to the devDependencies node
npm install --save-dev eslint
#or
npm install -D eslint
#Global installation
#Node.js location of npm packages and tools installed globally: user directory \ AppData\Roaming\npm\node_modules
#Some command-line tools often use global installation
npm install -g webpack
#npm managed projects generally do not carry nodes during backup and transmission_ Modules folder
npm install #According to package The configuration download dependency in JSON initializes the project
4.5 other orders
#Update package (update to the latest version)
npm update Package name
#Global Update
npm update -g Package name
#Uninstall package
npm uninstall Package name
#Global uninstall
npm uninstall -g Package name
05,Babel
5.1 introduction
Some advanced syntax of ES6 is used in browser environment, even node Cannot execute in JS environment.
Babel is a widely used transcoder that can convert ES6 code to ES5 code for execution in an existing environment.
This means that you can write programs in ES6 now without worrying about whether the existing environment supports it.
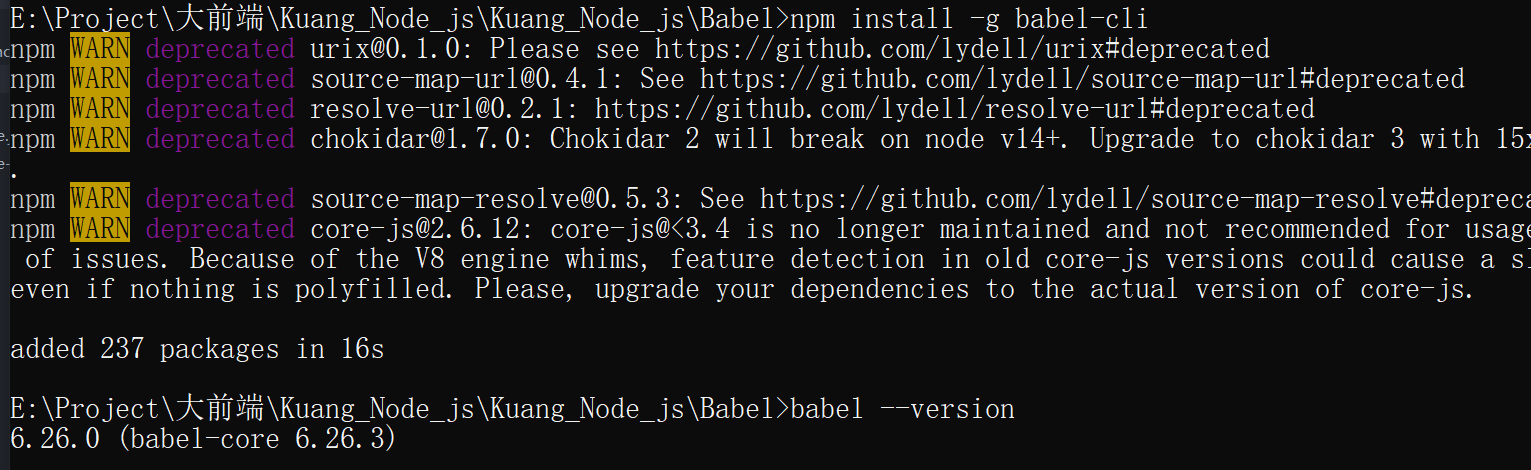
5.2 installation
Install command line transcoding tool
Babel provides a Babel cli tool for command line transcoding. Its installation commands are as follows:
npm install -g babel-cli
#Check whether the installation is successful
babel --version
5.3 use of Babel
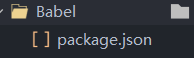
1. Create babel folder
2. Initialize project
npm init -y

3. Create the file Src / example JS, the following is an ES6 Code:
// Before transcoding
// Define data
let input = [1, 2, 3]
// Add + 1 to each element of the array
input = input.map(item => item + 1)
console.log(input)
4. Configuration babelrc
Babel's configuration file is babelrc is stored in the root directory of the project. This file is used to set transcoding rules and plug-ins. The basic format is as follows.
{
    "presets": [],
    "plugins": []
}
- The preset field sets transcoding rules and adds es2015 rules babelrc:
{
    "presets": ["es2015"],
    "plugins": []
}
5. Install transcoder in project
npm install --save-dev babel-preset-es2015

6. Transcoding
# npm install --save-dev csv-loader xml-loader

# Transcoding results are written to a file
mkdir dist1

# --The out file or - o parameter specifies the output file
babel src/example.js --out-file dist1/compiled.js
# perhaps
babel src/example.js -o dist1/compiled.js

# Transcoding the entire directory
mkdir dist2

# --The out dir or - d parameter specifies the output directory
babel src --out-dir dist2
# perhaps
babel src -d dist2
- Before transcoding
// Before transcoding
// Define data
let input = [1, 2, 3]
// Add + 1 to each element of the array
input = input.map(item => item + 1)
console.log(input)
- After transcoding
"use strict";

// Before transcoding
// Define data
var input = [1, 2, 3];
// Add + 1 to each element of the array
input = input.map(function (item) {
  return item + 1;
});
console.log(input);
5.4. User defined script
1. Overwrite package json
{
    // ...
    "scripts": {
        // ...
        // newly added
        "build":  "babel src\\example.js -o dist\\compiled.js"
    },
}
2. When transcoding, execute the following command
mkdir dist
npm run build
06. Modularization
6.1 introduction
Background of modularization
As the website gradually becomes an "Internet application", the Javascript code embedded in the web page is becoming larger and more complex.
Javascript modular programming has become an urgent need. Ideally, * * developers only need to implement the core business logic, and others can load modules written by others** However, Javascript is not a modular programming language. It does not support concepts such as "class", package, or "module".
Modular specification
- CommonJS modular specification
- ES6 modular specification
6.2 CommonJS specification
Each file is a module with its own scope. Variables, functions and classes defined in one file are private and invisible to other files.
1. Create "module" folder
2. Create mokuai common JS / four operations js
Define members and export members from the module
// Define members:
const sum = function(a,b){
    return a + b
}
const subtract = function(a,b){
    return a - b
}
const multiply = function(a,b){
    return a * b
}
const divide = function(a,b){
    return a / b
}

// Export members:
module.exports = {
    sum: sum,
    subtract: subtract,
    multiply: multiply,
    divide: divide
}
- Abbreviations of exported members
//Abbreviation
module.exports = {
    sum,
    subtract,
    multiply,
    divide
}
4. Create mokuai common JS / import module js
//The module is introduced. Note: the current path must be written/
const m = require('./Four arithmetic.js')
console.log(m)
const r1 = m.sum(1,2)
const r2 = m.subtract(1,2)
console.log(r1,r2)
5. Run program
E:\Project\Large front end\Kuang_Node_js\Kuang_Node_js\module\mokuai-common-js>node Introduction module.js
{
  sum: [Function: sum],
  subtract: [Function: subtract],
  multiply: [Function: multiply],
  divide: [Function: divide]
}
3 -1
6.3. ES6 modular specification
ES6 uses export and import to export and import modules.
1. Create mokuai-es6 folder
2. Create Src / userapi JS file, export module
export function getList() {
    console.log('Get data list')
}
export function save() {
    console.log('Save data')
}
3. Create Src / usercomponent JS file, import module
//Just take the required methods, and multiple methods are separated by commas
import { getList, save } from './userApi.js'
getList()
save()
Note: the program cannot run at this time because the modularization of ES6 cannot be implemented in node JS, which needs to be edited into ES5 with Babel before execution.
SyntaxError: Cannot use import statement outside a module
4. Initialize project
npm init -y
5. Configuration babelrc
{
    "presets": ["es2015"],
    "plugins": []
}
6. Install transcoder in project
npm install --save-dev babel-preset-es2015
7. Define the running script, package Add "build" in JSON
{
    // ...
    "scripts": {
       "build": "babel src -d dist"
    }
}
8. Execute the command transcoding to get dist/
npm run build
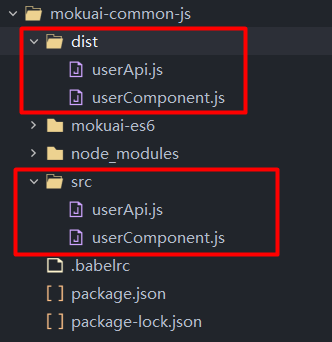
9. Run program
node dist/userComponent.js

- Before transcoding
export function getList() {
    console.log('Get data list')
}
export function save() {
    console.log('Save data')
}
- After transcoding
'use strict';

Object.defineProperty(exports, "__esModule", {
    value: true
});
exports.getList = getList;
exports.save = save;
function getList() {
    console.log('Get data list');
}
function save() {
    console.log('Save data');
}
- Before transcoding
//Just take the required methods, and multiple methods are separated by commas
import { getList, save } from './userApi.js'
getList()
save()
- After transcoding
'use strict';

var _userApi = require('./userApi.js');

(0, _userApi.getList)(); //Just take the required methods, and multiple methods are separated by commas

(0, _userApi.save)();
6.4 modular writing of ES6 2
1. Create Src / userapi2 JS, export module
export default {
    getList() {
        console.log('Get data list 2')
    },
    save() {
        console.log('Save data 2')
    }
}
2. Create Src / usercomponent2 JS, import module
import user from "./userApi2.js"
user.getList()
user.save()
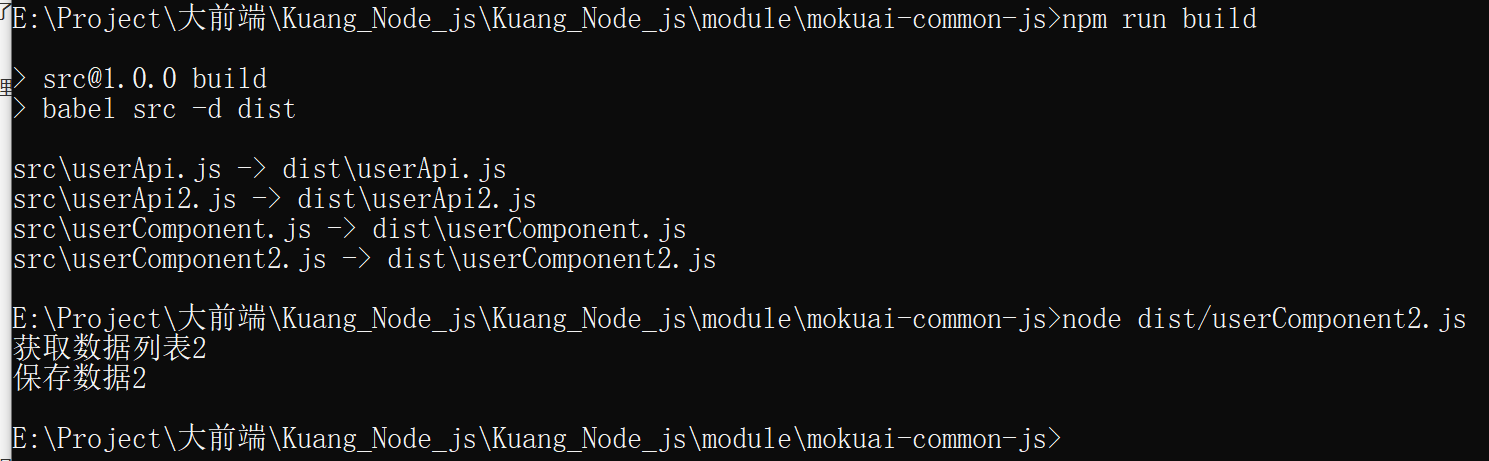
- function
//Execute command transcoding
npm run build
//Run program
node dist/userComponent2.js
07,Webpack
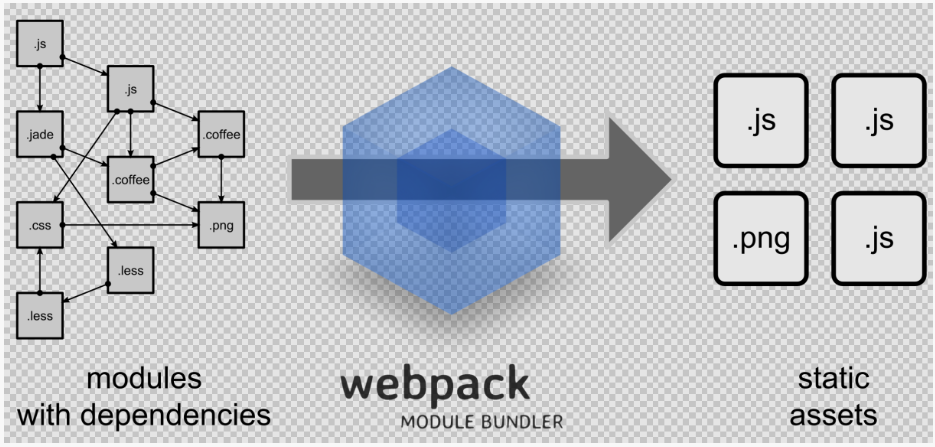
7.1. What is Webpack
Webpack is a front-end resource loading / packaging tool. It will conduct static analysis according to the dependencies of modules, and then generate corresponding static resources according to the specified rules.
As can be seen from the figure, Webpack can convert various static resources js, css and less into a static file, reducing page requests.
7.2 Webpack installation
1. Global installation
npm install -g webpack webpack-cli
2. View version number after installation
webpack -v

7.3 initialization items
1. Create webpack folder
npm init -y
2. Create src folder
3. Create common. Under src js
exports.info = function (str) {
    document.write(str);
}
4. Create utils under src js
exports.add = function (a, b) {
    return a + b;
}
5. Create main under src js
const common = require('./common');
const utils = require('./utils');
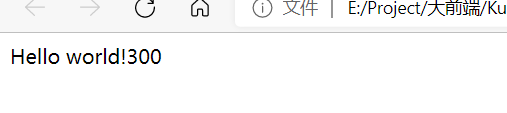
common.info('Hello world!' + utils.add(100, 200));
7.4 JS packaging
1. Create a configuration file in the webpack directory config. js
const path = require("path"); //Node.js built-in module
module.exports = {
entry: './src/main.js', //Configuration portal file
output: {
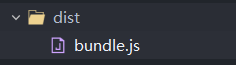
path: path.resolve(__dirname, './dist'), //Output path__ dirname: the path of the current file
filename: 'bundle.js' //output file
}
}
The above configuration means: read main in the src folder under the current project directory JS (entry file) content, analyze the resource dependency, package the relevant JS files, put the packaged files into the dist folder of the current directory, and the packaged JS file name is bundle js
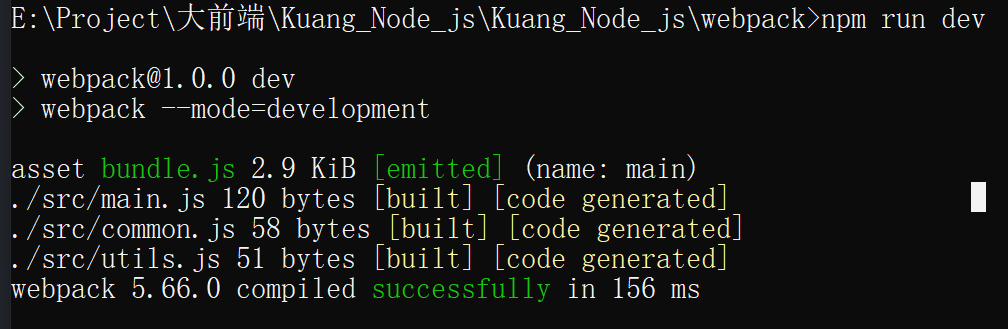
2. Execute the compile command from the command line
webpack --mode=development
#View the bundle after execution js contains the contents of the above two js files and compresses the code
You can also configure the npm run command of the project and modify the package JSON file
"scripts": {
    //...,
    "dev": "webpack --mode=development"
 }
Run the npm command to perform packaging
npm run dev
3. Create index. In the webpack directory HTML, reference bundle js
<body>
    <script src="dist/bundle.js"></script>
</body>
4. View index in the browser html
7.5. Css packaging
1. Install style loader and CSS loader
Webpack itself can only handle JavaScript modules. If you want to handle other types of files, you need to use loader for conversion.
Loader can be understood as a converter of modules and resources.
First, we need to install the relevant Loader plug-ins
- css loader loads css into javascript
- Style loader is to let javascript know css
npm install --save-dev style-loader css-loader
2. Modify webpack config. js
const path = require("path"); //Node.js built-in module
module.exports = {
    //...,
    output:{
        //Other configurations
    },
    module: {
        rules: [
            {
                test: /\.css$/,    //Packaging rules apply to files ending in css
                use: ['style-loader', 'css-loader']
            }
        ]
    }
}
3. Create a style in the src folder css
body{
    background:pink;
}
4. Modify main JS, introduce style. JS in the first line css
require('./style.css');
5. Run compile command
npm run dev
6. View index in the browser HTML, see if the background turns pink?
After learning all these knowledge, it will be easy for us to learn Vue later! These are the foundation of front-end engineers now!
08,Vue-element-admin
vue-element-admin Is a background front-end solution based on vue and element-ui realization. It uses the latest front-end technology stack, built-in i18 internationalization solution, dynamic routing and permission verification, refines typical business models, and provides rich functional components. It can help you quickly build enterprise level middle and back-end product prototypes. I believe that no matter what your needs are, this project can help you.
Official website address: https://panjiachen.github.io/vue-element-admin-site/zh/
Run project and compile project
# Clone project
git clone https://github.com/PanJiaChen/vue-element-admin.git
# Enter project directory
cd vue-element-admin
# Installation dependency
npm install
# It is recommended not to install with cnpm. There will be various strange bug s. You can solve the problem of slow npm download speed through the following operations
npm install --registry=https://registry.npm.taobao.org
# Local development launch project
npm run dev
Note: if the installation fails all the time:
- Please delete node modules and execute npm install
- Or another network
Browser access will be automatically opened after startup http://localhost:9527 , if you see the following page, it means that the operation is successful.
Summary
Several elements of nodejs project
- package.json (npm init \ npmt init -y)
- node_modules (npm install -g jquery/npm iinstall jquery)
- Operation is used: check the official website. Almost all nodejs are started and packaged as follows:
- npm run dev (development run)
- npm run build (package)
Explore: package json
1: When publishing a project or copying a project, node_moudles are meaningless. Because it is only used for development and packaging
2: If managed code is not really necessary, why. Because you package The module coordinates have been recorded in the JSON file. We can directly use npm install to reinstall and generate node modules. Therefore, the first command to execute after downloading the nodejs project is npm install, which is why.
3: This is why the official does not provide node modules. Because you can download it directly with npm install