1, System requirements
| software and hardware | Minimum configuration | Recommended configuration |
|---|---|---|
| cpu and memory | Master: at least 2 cores and 4GB memory | |
| Node: at least 4 cores and 16GB memory | Master: 4 cores and 16GB memory | |
| Node: it should be configured according to the number of containers to run | ||
| Docker | Version 1.9 or above | Version 1.12 |
| etcd | Version 2.0 or above | Version 3.0 |
Single master cluster
A single master node, and then manage multiple node nodes

Multi master cluster
Multiple master nodes manage multiple node nodes, and a load balancing process is added in the middle

2, etcd installation (can be skipped, etc can not be installed by using kubedm)
Taking Centos7 as an example, first turn off the firewall
# Turn off the firewall
systemctl disable firewalld
systemctl stop firewalld
# Disable SELinux so that the container can read the host file system
setenforce 0
# Or modify the system file / etc/sysconfig/selinux, change SELINUX=enforcing to SELINUX=disable, and then restart Linux
2.1 etcd yum installation
yum install etcd –y

vi /etc/etcd/etcd.conf


ETCD_NAME="default"

ETCD_DATA_DIR="/var/lib/etcd/default"

ETCD_LISTEN_CLIENT_URLS="http://0.0.0.0:2379"

ETCD_ADVERTISE_CLIENT_URLS=http://0.0.0.0:2379


systemctl enable etcd

systemctl start etcd
2.2 etcd binary installation
etcd github address: https://github.com/etcd-io/etcd/releases
Download etcd-v3 3.10-linux-amd64. tar. GZ version
Upload to the server / usr/local/etcd directory and unzip it
# decompression
tar zxvf etcd-v3.3.10-linux-amd64.tar.gz

# After decompression, enter the directory and copy the etcd and etcdctl binaries to the / usr/bin directory
cp etcd etcdctl /usr/bin/

# Create etcd in the / etc/systemd/system / directory service
[Unit]
Description=etcd.service
[Service]
Type=notify
TimeoutStartSec=0
Restart=always
WorkingDirectory=/var/lib/etcd
EnvironmentFile=-/etc/etcd/etcd.conf
ExecStart=/usr/bin/etcd
[Install]
WantedBy=multi-user.target

#Create configuration / etc / etcd / etcd Conf file
ETCD_NAME=ETCD Server
ETCD_DATA_DIR="/var/lib/etcd/"
ETCD_LISTEN_CLIENT_URLS="http://0.0.0.0:2379"
ETCD_ADVERTISE_CLIENT_URLS="http://Native IP:2379“
Set startup
systemctl daemon-reload
systemctl enable etcd.service
systemctl start etcd.service
Query whether to start automatically
systemctl is-enabled etcd.service
Turn off the start-up service
systemctl disable etcd.service
Verify correct installation
etcdctl cluster-health
View running status
systemctl status etcd.service

3, Use kubedm tool to quickly install Kubernetes cluster
The simplest installation method is to use the yum install kubernetes command to complete the installation of Kubernetes cluster, but you still need to modify the startup parameters of each component to complete the configuration of Kubernetes cluster. The whole process is complex and error prone, so use the kubedm based installation process first.
Installation money preparation
# Turn off the firewall
systemctl stop firewalld
systemctl disable firewalld

# Close selinux
# Permanent closure
sed -i 's/enforcing/disabled/' /etc/selinux/config
# Temporarily Closed
setenforce 0

# Close swap
# temporary
swapoff -a
# Permanent closure
sed -ri 's/.*swap.*/#&/' /etc/fstab

# Set the host name according to the plan [operate on the master node]
hostnamectl set-hostname k8smaster
# Set the host name according to the plan [node1 node operation]
hostnamectl set-hostname k8snode1


# The chain that passes bridged IPv4 traffic to iptables
cat > /etc/sysctl.d/k8s.conf << EOF
net.bridge.bridge-nf-call-ip6tables = 1
net.bridge.bridge-nf-call-iptables = 1
EOF
# take effect
sysctl --system

# time synchronization
yum install ntpdate -y
ntpdate time.windows.com
3.1 installing kubedm and related tools
First configure the yum source. The address of the official Yum source is https://packages.cloud.google.com/yum/repos/kubernetes-el7-x86_64 . If you cannot access the address of the official yum source, you can also use a domestic yum source with the address http://mirrors.aliyun.com/kubernetes/yum/repos/kubernetes-el7-x86_64/ , yum source's configuration file VI / etc / yum.com repos. d/kubernetes. The content of repo is as follows:
[kubernetes]name=Kubernetes Respositorybaseurl=http://mirrors.aliyun.com/kubernetes/yum/repos/kubernetes-el7-x86_64/enabled=1gpgcheck=0
Then run the yum install command to install kubedm and related tools:
yum install -y kubelet kubeadm kubectl --disableexcludes=kubernetes
Run the following command to start the Docker service (if Docker is installed, there is no need to start it again) and kubelet service, and set it to start automatically after startup:
systemctl enable docker && systemctl start dockersystemctl enable kubelet && systemctl start kubelet
3.2 kubedm config (executed by master node)
Kubedm has entered the GA stage, and its control surface initialization and node joining steps support a large number of customizable contents. Therefore, kubedm also provides the configuration file function for complex customization. At the same time, kubedm saves the configuration file to the cluster in the form of ConfigMap for subsequent query and upgrade. The kubedm config subcommand provides support for this set of functions:
- Kubedm config upload from file: upload the configuration file to the cluster to generate ConfigMap.
- Kubedm config upload from flags: generate ConfigMap from configuration parameters.
- Kubedm config view: view the configuration values in the current cluster.
- Kubedm config print init defaults: outputs the contents of the kubedm init default parameter file.
- Kubedm config print join defaults: outputs the contents of the kubedm join default parameter file.
- Kubedm config migrate: perform configuration conversion between old and new versions.
- Kubedm config images list: lists the required images.
- Kubedm config images pull: pull the image to the local.
For example, execute kubedm config print init defaults to get the default initialization parameter file:
kubeadm config print init-defaults > init-defaults.yaml

Edit the generated file to generate the appropriate configuration as needed. For example, if you need to customize the address of the image warehouse and the address range of the Pod, you can use the following configuration and save it as init config yaml:
apiVersion: kubeadm.k8s.io/v1beta2
kind: ClusterConfiguration
imageRepository: registry.aliyuncs.com/google_containers
kubernetesVersion: v1.18.0
networking:
  podSubnet: 10.100.0.0/16
3.3 download the relevant images of Kubernetes (executed by the master node)
In order to obtain image acceleration support from domestic image hosting sites, it is recommended to modify the Docker configuration file, add the RegistryMirror parameter, and write the image configuration into the configuration parameters, such as echo '{"registry mirrors":[“ https://registry.docker-cn.com ”]}’ > /etc/Docker/daemon. JSON, and then restart the Docker service. Use the config images pull subcommand to download the required images, for example:
kubeadm config images pull --config=init-config.yaml
After downloading the image, you can install it.
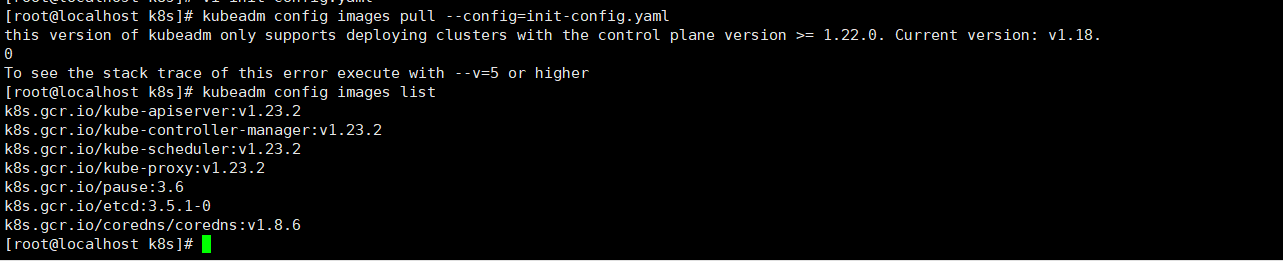
report errors:
this version of kubeadm only supports deploying clusters with the control plane version >= 1.22.0. Current version: v1.18.0
It can be seen from the error content that the version provided in the book is too old to be supported by the current kubedm.
1. View the requirements in the current mirror configuration
[root@localhost k8s]# kubeadm config images list
k8s.gcr.io/kube-apiserver:v1.23.2
k8s.gcr.io/kube-controller-manager:v1.23.2
k8s.gcr.io/kube-scheduler:v1.23.2
k8s.gcr.io/kube-proxy:v1.23.2
k8s.gcr.io/pause:3.6
k8s.gcr.io/etcd:3.5.1-0
k8s.gcr.io/coredns/coredns:v1.8.6
2. Modify init config yaml
apiVersion: kubeadm.k8s.io/v1beta2
kind: ClusterConfiguration
imageRepository: registry.aliyuncs.com/google_containers
kubernetesVersion: v1.23.2
networking:
  podSubnet: 10.100.0.0/16

3.4 run the kubedm init command to install the master (executed by the master node)
At this point, the preparations are ready. Execute the kubedm init command to install the Master of Kubernetes with one click. Next, use the kubedm init command to initialize the cluster control surface using the configuration file created earlier:
kubeadm init --config=init-config.yaml
Question:

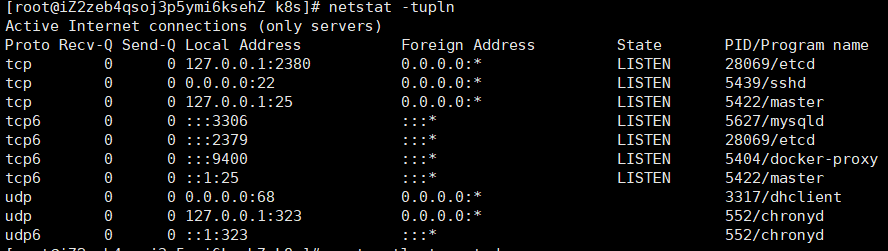
Port number occupied and / var/lib/etcd is not empty
#View port number
netstat -tupln
#Stop etcd service
systemctl stop etcd

#Delete content under file
rm -rf /var/lib/etcd

#Restart kubedm
kubeadm reset
Again, kubedm init -- config = init config Yaml reports an error.
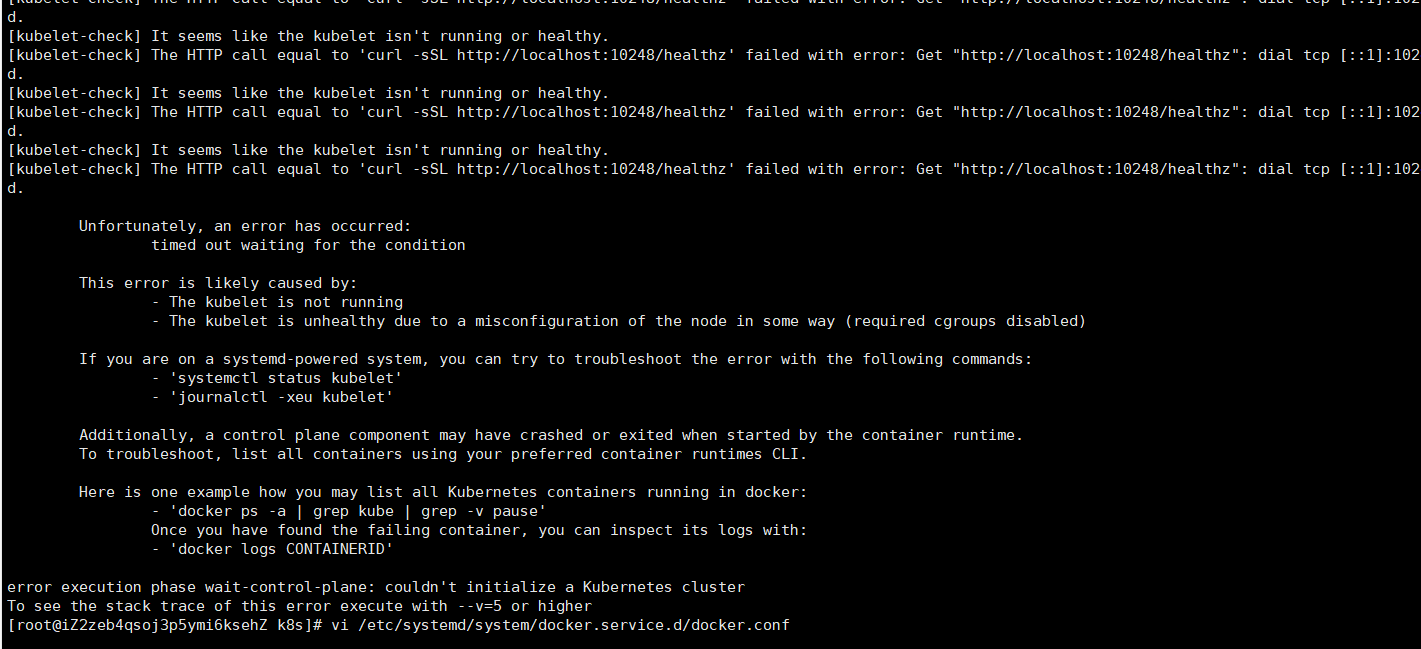
cat > /etc/docker/daemon.json <<EOF
{
  "exec-opts": ["native.cgroupdriver=systemd"],
  "log-driver": "json-file",
  "log-opts": {
    "max-size": "100m"
  },
  "storage-driver": "overlay2",
  "storage-opts": [
    "overlay2.override_kernel_check=true"
  ]
}
EOF

mkdir -p /etc/systemd/system/docker.service.d

systemctl daemon-reload
systemctl restart docker
Then go to kubedm init.
Kubernetes Master is installed successfully, and the following information is displayed
Follow the prompts and execute the following command to copy the configuration file to the home directory of ordinary users:
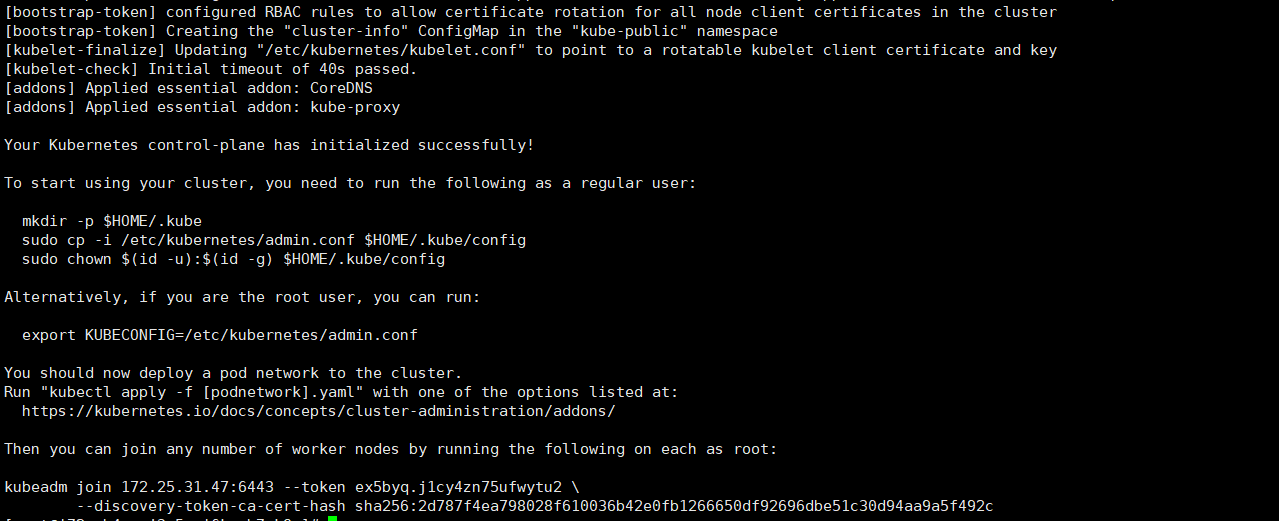
mkdir -p $HOME/.kube
sudo cp -i /etc/kubernetes/admin.conf $HOME/.kube/config
sudo chown $(id -u):$(id -g) $HOME/.kube/config
In this way, Kubernetes is installed on the Master, but there is still no working Node available in the cluster and there is a lack of configuration of the container network. Here, you should pay attention to the last few lines of prompt information after the execution of kubedm init command, including the instruction to join the Node (kubedm join) and the required Token.
At this time, you can use the kubectl command to verify the ConfigMap mentioned in section 2.2.2:
kubectl get -n kube-system configmap

Install calico network plug-in
Download and install calico
If we use kubectl get nodes, we will find that the status status is NotReady because we have not installed the network plug-in
wget https://docs.projectcalico.org/manifests/calico.yaml --no-check-certificate
Change calico Yaml, search for Cluster type to identify the deployment type from the command line: /
:/Cluster type to identify the deployment type
# Cluster type to identify the deployment type
  - name: CLUSTER_TYPE
  value: "k8s,bgp"
# Next xizeng NEW
  - name: IP_AUTODETECTION_METHOD
    value: "interface=ens32"
    # ens32 is the name of the local network card
Application configuration:
kubectl apply -f calico.yaml
3.5 node joining the cluster (executed by node node)
For the addition of new nodes, the system preparation is consistent with the configuration process of Kubernetes yum source. Perform the following installation process on the Node host.
1. Install kubedm and related tools:
# Set the host name according to the plan [node1 node operation]
hostnamectl set-hostname k8snode1

#Install kubedm and related tools:
yum install -y kubelet kubeadm kubectl --disableexcludes=kubernetes
2. Run the following command to start the Docker service and kubelet service, and set them to start automatically:
systemctl enable docker && systemctl start dockersystemctl enable kubelet && systemctl start kubelet
3. Execute the kubedm join command to join this Node into the cluster:
kubeadm join 192.168.152.173:6443 --token ual2oe.gk2r3mbnc5hxwacz \ --discovery-token-ca-cert-hash sha256:e52bfd0a5551604e368b6ed50ce14f9afd4c3d1366277b6a790b4cfc933255c4
The value of apiServerEndpoint comes from the address of the Master server, and the values of token and tlsBootstrapToken come from the last line of prompt for installing the Master using kubedm init. If you forget the token information and certificate information, you can use the following command to query:
[root@iZ2zeb4qsoj3p5ymi6ksehZ k8s]# kubeadm token list
TOKEN                     TTL         EXPIRES                USAGES                   DESCRIPTION                                                EXTRA GROUPS
ex5byq.j1cy4zn75ufwytu2   23h         2022-01-22T08:32:10Z   authentication,signing   <none>                                                     system:bootstrappers:kubeadm:default-node-token
If the token is invalid for 24 hours, you can use the following command to recreate it:
kubeadm token create
Error 1: if – discovery token ca cert hash is not added, the following errors may occur, indicating that ca verification is required. You can use the – discovery token unsafe skip ca verification parameter to ignore the verification
discovery.bootstrapToken: Invalid value: "": using token-based discovery without caCertHashes can be unsafe. Set unsafeSkipCAVerification to continue
kubeadm join --token ex5byq.j1cy4zn75ufwytu2 39.107.14.61:6443 --discovery-token-unsafe-skip-ca-verification
Error 2:

Execute command:
echo "1" >/proc/sys/net/bridge/bridge-nf-call-iptables
Join the master node again

View node status in master
kubectl get nodes

3.6 verify whether the Kubernetes cluster is installed
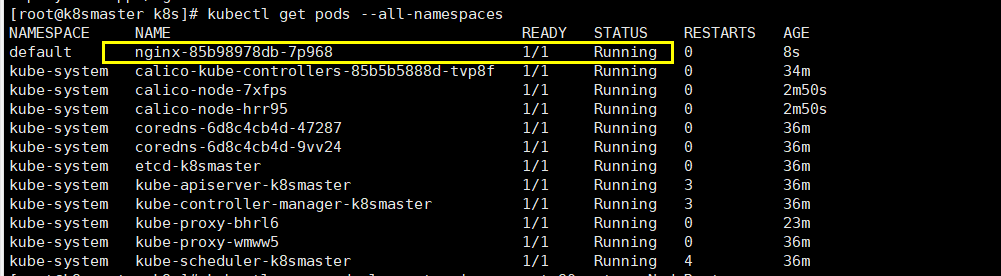
Execute the following command to verify whether the related pods of Kubernetes cluster are created and running normally:
kubectl get pods --all-namespaces
If a Pod with status error is found, execute kubectl -- namespace = Kube system describe Pod < Pod_ Name > to check the cause of the error. The common cause of the error is that the image is not downloaded. If the installation fails, you can execute the kubedm reset command to restore the host to its original state, and re execute the kubedm init command to install again (note that after executing the kubedm reset command, you need to execute rm -rf $HOME/.kube)
3.7 testing kubernetes clusters
We all know that K8S is a container technology. It can download images online and start them in a container way
Create a pod in the Kubernetes cluster and verify whether it works normally:
# Download nginx [can pull nginx image online]
kubectl create deployment nginx --image=nginx
# View status
kubectl get pod
If we are in Running status, it means that we have run successfully
Next, we need to expose the port so that other outsiders can access it
# Exposed port kubectl expose deployment nginx --port=80 --type=NodePort# Check the external ports kubectl, get pod, SVC
We can see that we have successfully exposed port 80 to 30608

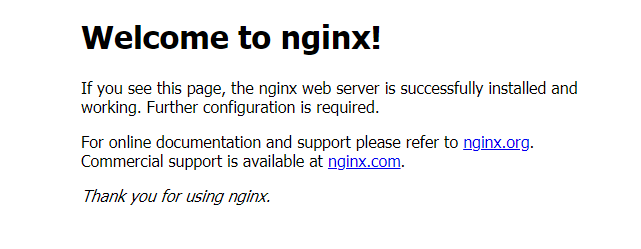
We go to our host browser and visit the following address
http://192.168.152.173:30608/
It is found that our nginx has been successfully started