kubeadm is a tool for rapid deployment of kubernetes clusters launched by the official community.
1. Installation requirements
Before you start to deploy the Kubernetes cluster machine, you need to meet the following conditions:
- One or more machines, operating system centos7.6-86
- Hardware configuration: 4GB or more RAM, 4 CPU s or more, 30GB or more hard disk
- Network interworking among all machines in the cluster
- Disable swap partition
2. Preparation environment
Turn off firewall:
systemctl stop firewalld
systemctl disable firewalld

Close selinux:
sed -i 's/enforcing/disabled/' /etc/selinux/config
setenforce 0

Close swap:
swapoff -a $temporary
 Sed - I '/ swap / S / ^ \ (. * \) $/ ා \ 1 / g' / etc / fstab $permanent

Add the corresponding relationship between host name and IP (remember to set the host name):
$ cat >> /etc/hosts<<EOF
9.110.187.120 k8s-master
9.110.187.125 k8s-node1
9.110.187.126 k8s-node2
EOF
 Pass the bridged IPv4 traffic to the iptables chain:
$ cat > /etc/sysctl.d/k8s.conf << EOF
net.bridge.bridge-nf-call-ip6tables = 1
net.bridge.bridge-nf-call-iptables = 1
net.ipv4.ip_forward = 1
EOF
$ sysctl --system
3. Install Docker/kubeadm/kubelet on all nodes
Kubernetes default CRI (container runtime) is Docker, so install Docker first.
3.1 installing Docker
$ wget https://mirrors.aliyun.com/docker-ce/linux/centos/docker-ce.repo -O /etc/yum.repos.d/docker-ce.repo
$ yum -y install docker-ce-18.06.1.ce-3.el7
$ systemctl enable docker && systemctl start docker
$ docker --version
Docker version 18.06.1-ce, build e68fc7a
$ yum list docker-ce --showduplicates | sort -r
3.2 add Alibaba cloud YUM software source
$ cat > /etc/yum.repos.d/kubernetes.repo << EOF
[kubernetes]
name=Kubernetes
baseurl=https://mirrors.aliyun.com/kubernetes/yum/repos/kubernetes-el7-x86_64
enabled=1
gpgcheck=0
repo_gpgcheck=0
gpgkey=https://mirrors.aliyun.com/kubernetes/yum/doc/yum-key.gpg https://mirrors.aliyun.com/kubernetes/yum/doc/rpm-package-key.gpg
EOF
3.3 installation of kubeadm, kubelet and kubectl
Due to frequent version updates, the version number deployment is specified here:
yum install -y kubelet-1.16.2 kubeadm-1.16.2 kubectl-1.16.2 bash-completion wget
systemctl enable kubelet
4. Deploy Kubernetes Master
Executed at 9.110.187.120 (Master).
$ kubeadm init \
  --apiserver-advertise-address=9.110.187.120 \
  --image-repository registry.aliyuncs.com/google_containers \
  --kubernetes-version v1.16.2 \
  --service-cidr=10.1.0.0/16 \
  --pod-network-cidr=10.244.0.0/16
Because the default pull image address k8s.gcr.io is inaccessible in China, Alibaba cloud image warehouse address is specified here.
Using the kubectl tool:
mkdir -p $HOME/.kube
sudo cp -i /etc/kubernetes/admin.conf $HOME/.kube/config
sudo chown $(id -u):$(id -g) $HOME/.kube/config
$ kubectl get nodes
5. Install Pod network plug-in (CNI)
$ kubectl apply -f https://raw.githubusercontent.com/coreos/flannel/master/Documentation/kube-flannel.yml
If the download fails, you can change to this image address: lizhenliang/flannel:v0.11.0-amd64
6. Join Kubernetes Node
Executed at 9.110.187.125/126 (Node).
To add a new node to the cluster, execute the kubeadm join command output at kubeadm init:
$ kubeadm join 9.110.187.120:6443 --token esce21.q6hetwm8si29qxwn \
    --discovery-token-ca-cert-hash sha256:00603a05805807501d7181c3d60b478788408cfe6cedefedb1f97569708be9c5
7. Test kubernetes cluster
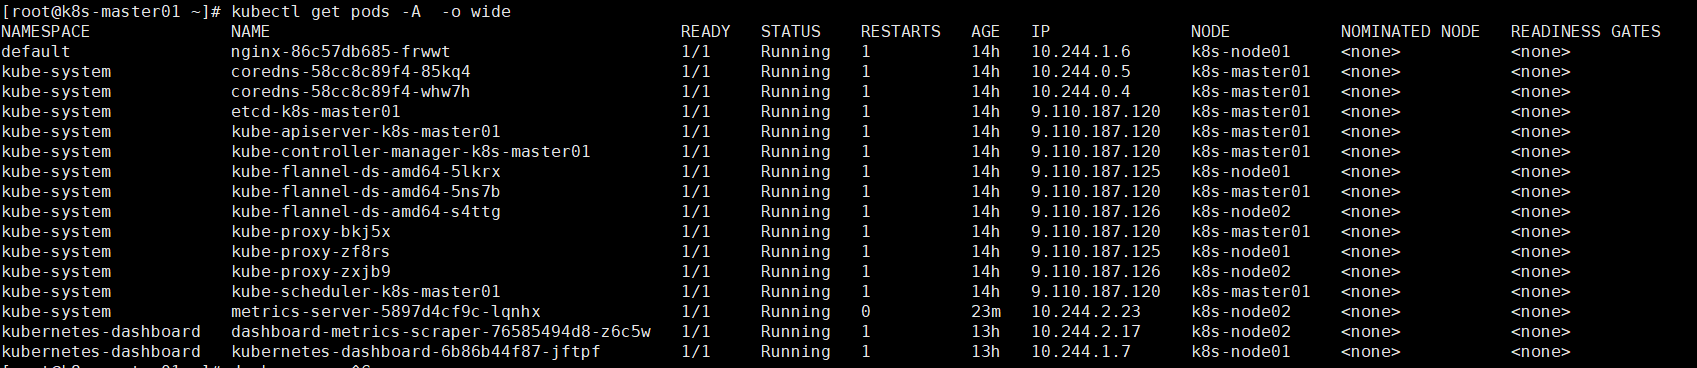
Create a pod in the Kubernetes cluster and verify that it works:
kubectl create deployment nginx --image=nginx.1.16
kubectl expose deployment nginx --port=80 --type=NodePort
kubectl get pods -A  -o wide
kubectl describe pod nginx-86c57db685-frwwt
Access address: http://NodeIP:Port
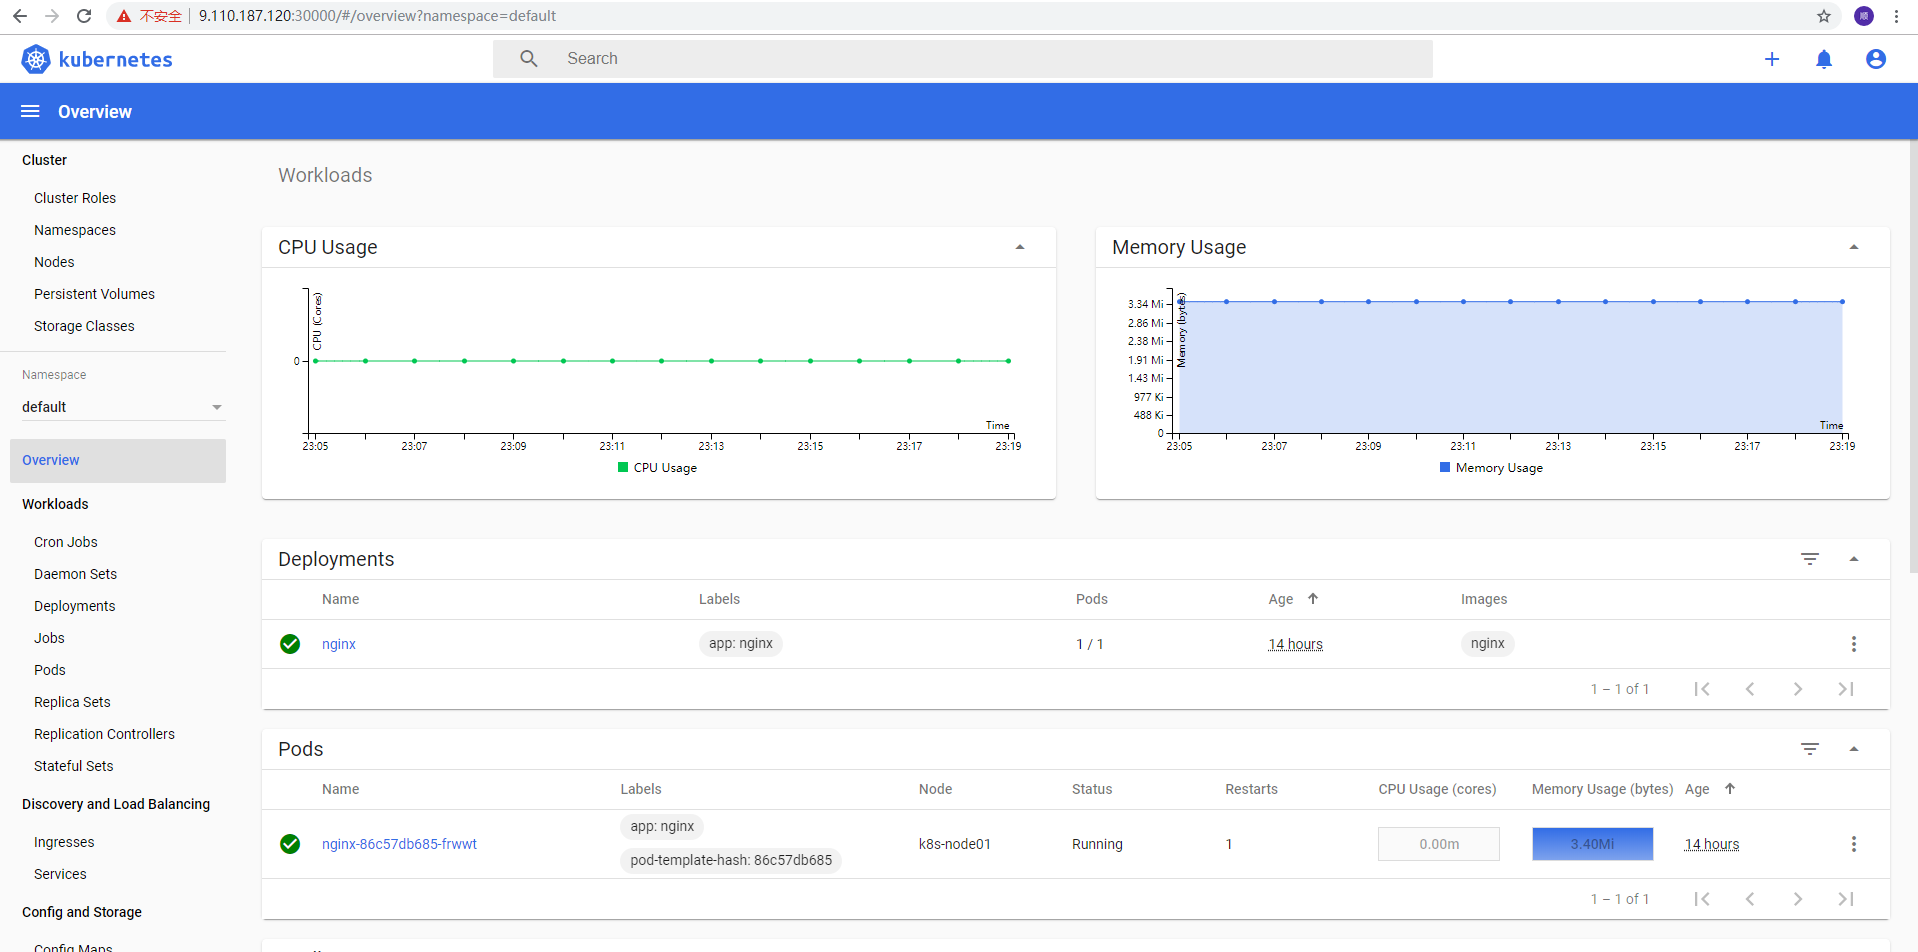
8. Kubernetes V1.16.2 deploy Dashboard V2.0(beta5)
$ wget https://raw.githubusercontent.com/kubernetes/dashboard/v2.0.0-beta5/aio/deploy/recommended.yaml
Modify the contents of the recommended.yaml file (vi recommended.yaml):
---
#Add direct access port
kind: Service
apiVersion: v1
metadata:
  labels:
    k8s-app: kubernetes-dashboard
  name: kubernetes-dashboard
  namespace: kubernetes-dashboard
spec:
  type: NodePort #increase
  ports:
    - port: 443
      targetPort: 8443
      nodePort: 30001 #increase
  selector:
    k8s-app: kubernetes-dashboard

---
#Because many browsers cannot use the automatically generated certificates, we create and comment out the kubernetes dashboard certs object declaration
#apiVersion: v1
#kind: Secret
#metadata:
#  labels:
#    k8s-app: kubernetes-dashboard
#  name: kubernetes-dashboard-certs
#  namespace: kubernetes-dashboard
#type: Opaque

---
Create certificate mkdir dashboard-certs cd dashboard-certs/ #Create namespace kubectl create namespace kubernetes-dashboard #It will be created automatically in yaml, and can be created independently # Create key file openssl genrsa -out dashboard.key 2048 #Certificate request openssl req -days 36000 -new -out dashboard.csr -key dashboard.key -subj '/CN=dashboard-cert' #Self signed certificate openssl x509 -req -in dashboard.csr -signkey dashboard.key -out dashboard.crt #Create kubernetes dashboard certs object kubectl create secret generic kubernetes-dashboard-certs --from-file=dashboard.key --from-file=dashboard.crt -n kubernetes-dashboard
Deploy Dashboard
The two images involved can be downloaded first
 Installation
kubectl create -f  ~/recommended.yaml
 #Inspection results
kubectl get pods -A  -o wide

kubectl get service -n kubernetes-dashboard  -o wide
9. Create dashboard administrator
cat >> dashboard-admin.yaml<<EOF
apiVersion: v1
kind: ServiceAccount
metadata:
  labels:
    k8s-app: kubernetes-dashboard
  name: dashboard-admin
  namespace: kubernetes-dashboard
EOF

kubectl create -f dashboard-admin.yaml

//Assign permissions to users:
cat >>dashboard-admin-bind-cluster-role.yaml<<EOF
apiVersion: rbac.authorization.k8s.io/v1
kind: ClusterRoleBinding
metadata:
  name: dashboard-admin-bind-cluster-role
  labels:
    k8s-app: kubernetes-dashboard
roleRef:
  apiGroup: rbac.authorization.k8s.io
  kind: ClusterRole
  name: cluster-admin
subjects:
- kind: ServiceAccount
  name: dashboard-admin
  namespace: kubernetes-dashboard
EOF

kubectl create -f dashboard-admin-bind-cluster-role.yaml
Access address: http://NodeIP:30001
Create a service account and bind the default cluster admin administrator cluster role:
$ kubectl create serviceaccount dashboard-admin -n kube-system
$ kubectl create clusterrolebinding dashboard-admin --clusterrole=cluster-admin --serviceaccount=kube-system:dashboard-admin
$ kubectl describe secrets -n kube-system $(kubectl -n kube-system get secret | awk '/dashboard-admin/{print $1}')
Log in to the Dashboard with the output token.
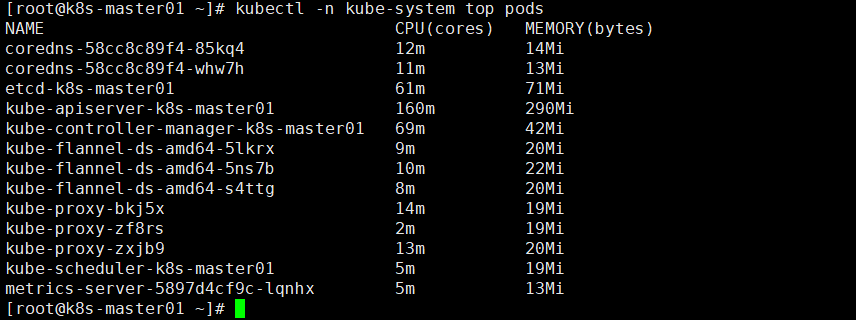
10. Install metrics server
Download the image file on Node1/Node2:
docker pull bluersw/metrics-server-amd64:v0.3.6
docker tag bluersw/metrics-server-amd64:v0.3.6 k8s.gcr.io/metrics-server-amd64:v0.3.6
To perform the installation on the Master:
git clone https://github.com/kubernetes-incubator/metrics-server.git
cd metrics-server/deploy/1.8+/
//Modify metrics-server-deployment.yaml
image: k8s.gcr.io/metrics-server-amd64  #Add the following content under image
        command:
        - /metrics-server
        - --metric-resolution=30s
        - --kubelet-insecure-tls
        - --kubelet-preferred-address-types=InternalIP

//Find runAsNonRoot: true modify to runAsNonRoot: false

kubectl create -f .

//If you can't get the image, you can change image: mirrorgooglecontainers/metrics-server-amd64:v0.3.6