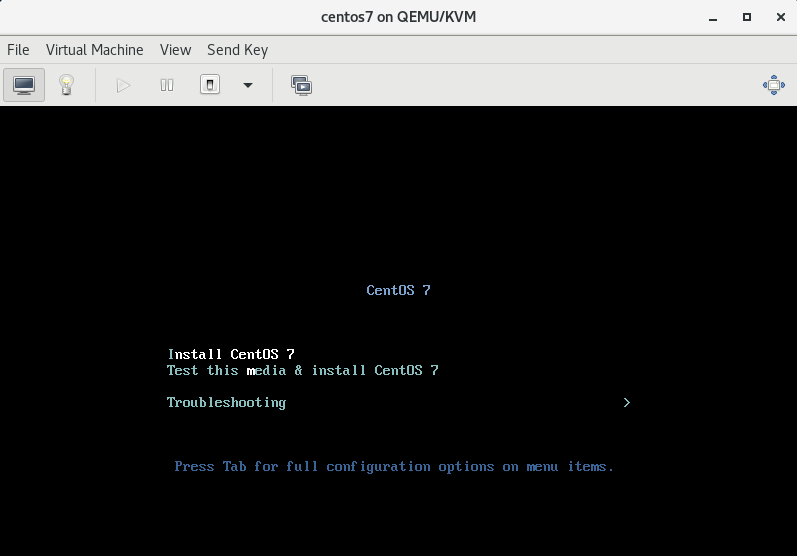
1. Install and configure kvm virtual machine and create virtual machine.
1.1 when minimizing installation, change to graphical interface
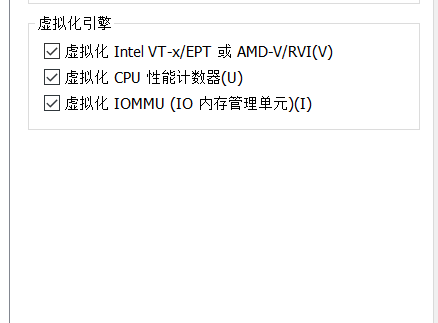
You need to turn on these CPU options when using the virtual machine

Turn off the firewall, turn off selinux
systemctl disable firewalld
sed -i 's/SELINUX=enforcing$/SELINUX=disabled/g' /etc/selinux/config
setenforce 0
 Minimize installation into a graphical interface
yum groupinstall -y "GNOME Desktop"
systemctl set-default graphical.target   set up linux The host is in graphical interface mode
 After installation, restart to check whether it is in graphical interface mode

stay linux Host installation VNC Server, used to Windows Next use VNC Client remote linux host
yum install tigervnc-server -y
cp /lib/systemd/system/vncserver@.service /etc/systemd/system/vncserver@:1.service

vi /etc/systemd/system/vncserver@\:1.service
 stay service Next modification USER,Which user writes which remotely
[Service]
Type=simple
ExecStart=/usr/bin/vncserver_wrapper root %i  #This line has < user >, and change it to root

vncpasswd          Use whichever user you log in with(su - user name)Switch to user and set vnc password
Would you like to enter a view-only password (y/n)? n

Multiple users remotely cp advantage service,Then modify the user name again, and the port number is 5900+vncserver@\:1.service 1 here, such as 5902.

systemctl start vncserver@\:1.service
systemctl enable vncserver@\:1.service
ss -tnl   Confirm that port 5901 is open

Download and install VNC client to test whether it can remote linux host
VNC client download address VNC client
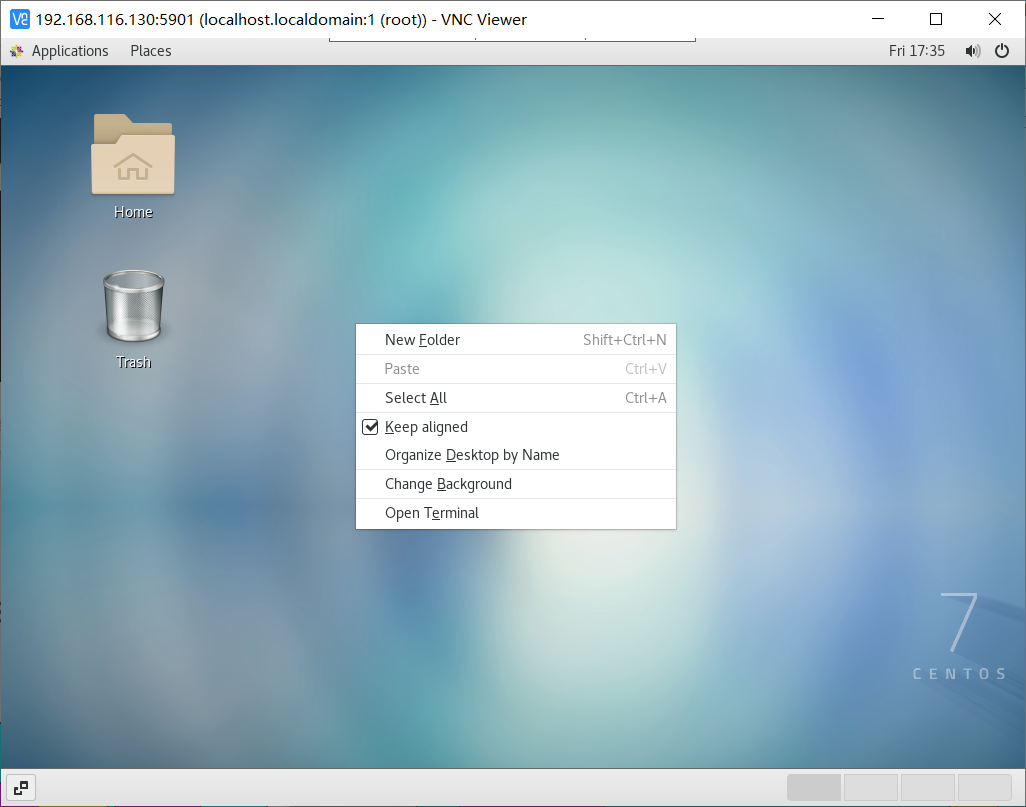
After the installation under Windows is completed, use win+s to call up the search bar and enter vnc

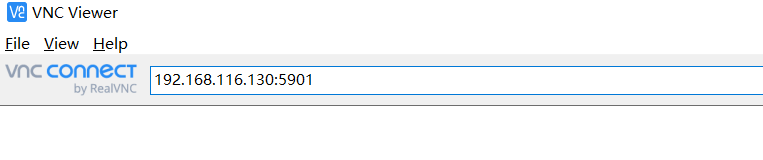
Enter the address and port of the remote
192.168.116.130:5901
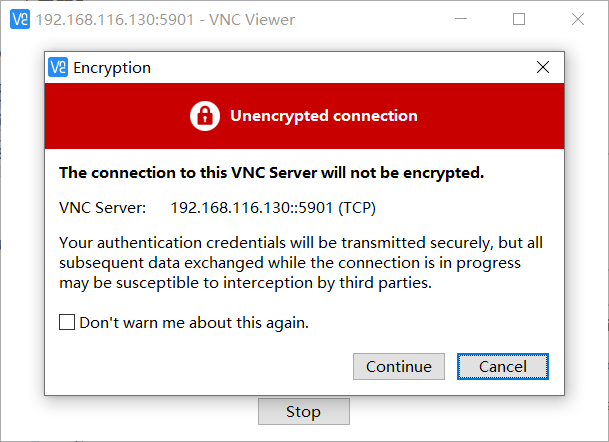
Click continue
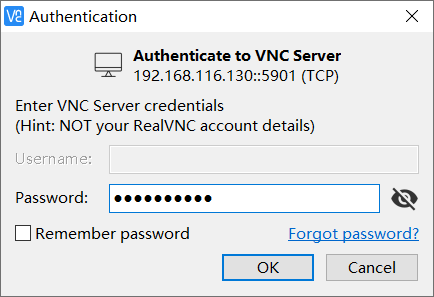
Input password
Pull the mouse up to see the login interface of linux. Enter the account password to log in

1.2 when the system installation is graphical
Turn on CPU virtualization option when installing graphical interface of virtual machine
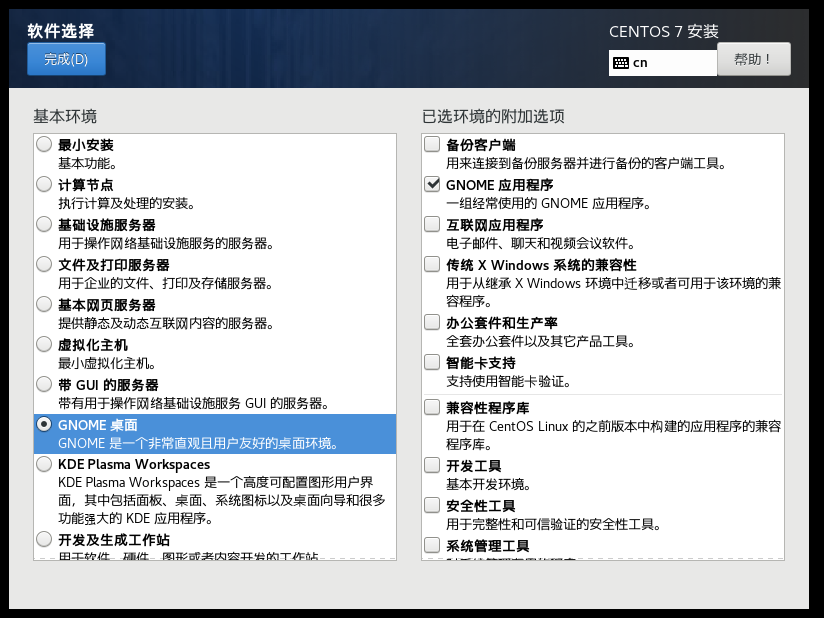
Select this option when installing the system
1.3 install KVM and create virtual machine with command line
Create a virtual machine from the command line
Upload the downloaded image to the linux host
centos image address: Centos
Select the version and find ISOs / x86_ Download in 64 / directory
Upload the image to the linux host using tools such as winscp or xshell
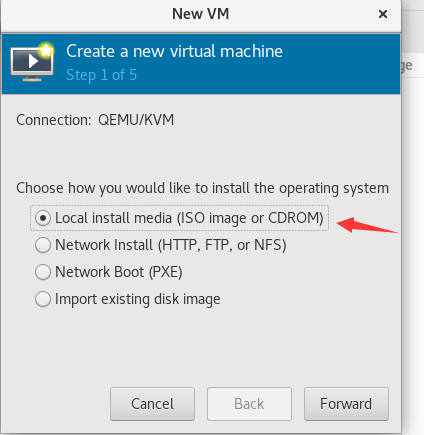
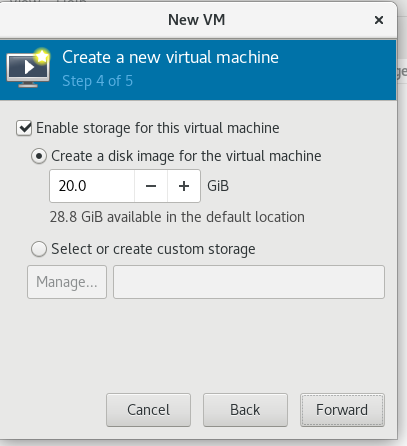
yum -y install qemu-kvm  libvirt   virt-manager virt-install virt-viewer   install KVM tool
qemu-img create -f qcow2 /var/lib/libvirt/images/centos7.7-1.qcow2 3G  Create virtual machine storage

virt-install --virt-type kvm --name centos7 --ram 1024 --vcpus 2 --cdrom=/tmp/CentOS-7-x86_64-DVD-1908.iso --disk path=/var/lib/libvirt/images/centos7.7-1.qcow2 --network network=default  --graphics vnc,listen=0.0.0.0 --noautoconsole --os-variant=Centos7.0

--virt-type kvm   Specify mode
--name centos7    Specify virtual machine name
--ram 1024        Specify virtual machine memory
--vcpus 2         appoint CPU number
--cdrom=/tmp/CentOS-7-x86_64-DVD-1908.iso               Specify the source of the system image, which cannot be placed in root Under the directory
--disk path=/var/lib/libvirt/images/centos7.7-1.qcow2   Specify the storage space of the virtual machine created above
--network network=default                               Specifies to use the default network
Enter in the graphical interface
virt-manager
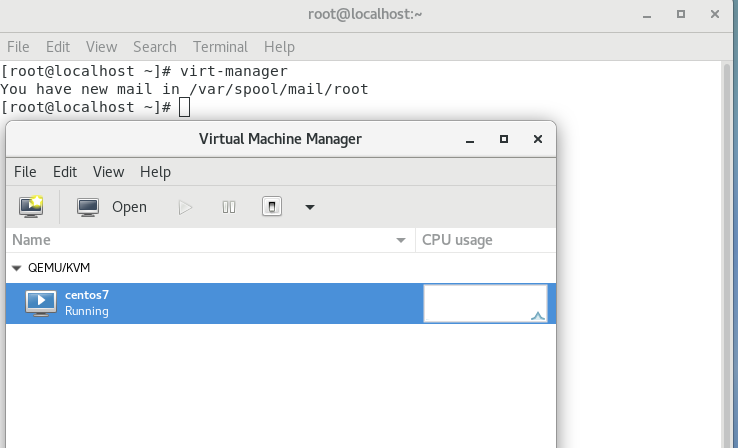
Right click open

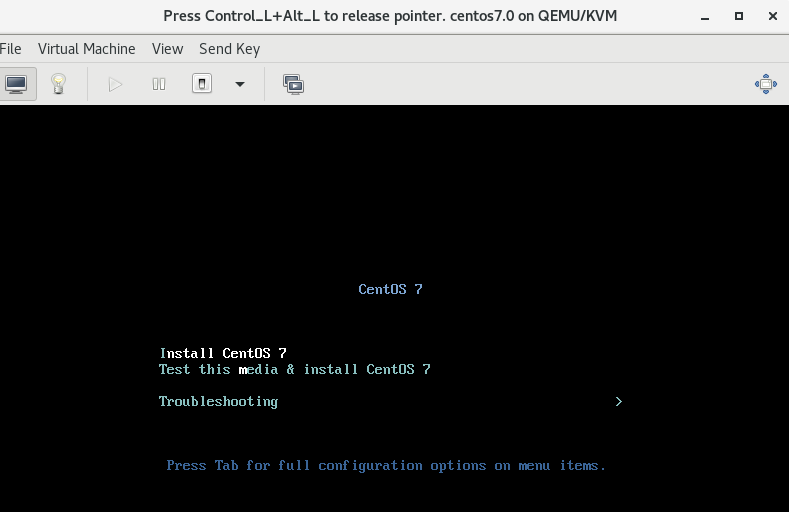
You can see the installation interface, and then install it all the time
1.4 interactive installation of KVM under graphical installation interface
Upload the downloaded image to the linux host
centos image address: Centos
Select the version and find ISOs / x86_ Download in 64 / directory
Upload the image to the linux host using tools such as winscp or xshell
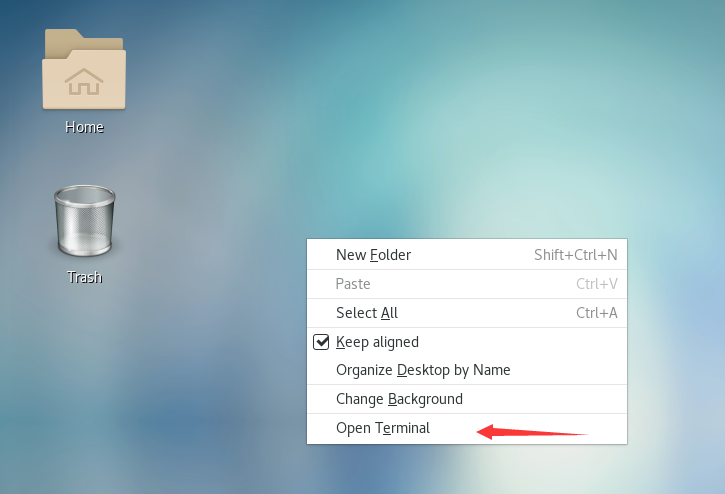
Enter the desktop and right-click to create a new terminal
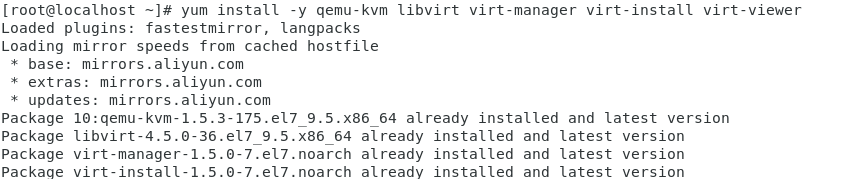
Install KVM tools
yum -y install qemu-kvm libvirt virt-manager virt-install virt-viewer
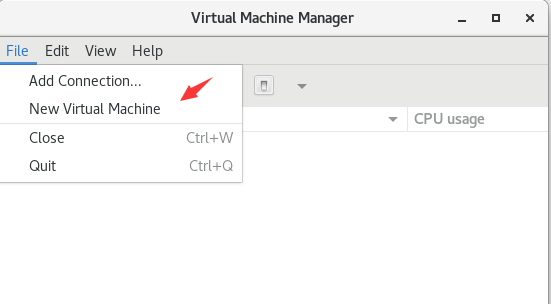
Enter in the graphical interface
virt-manager

Click this to start creating a new virtual machine
Select first
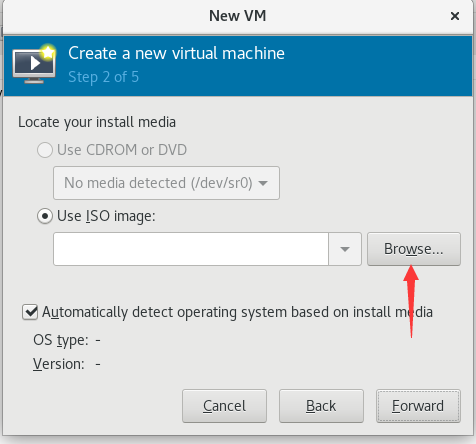
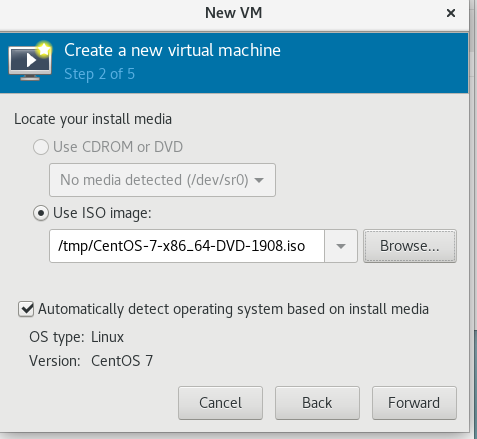
Click this to find the directory where the system image is uploaded
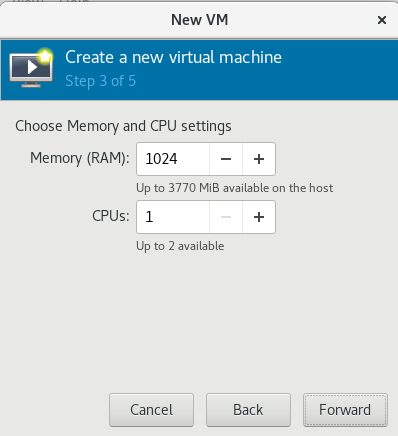
Set memory and CPU
Set virtual machine hard disk size
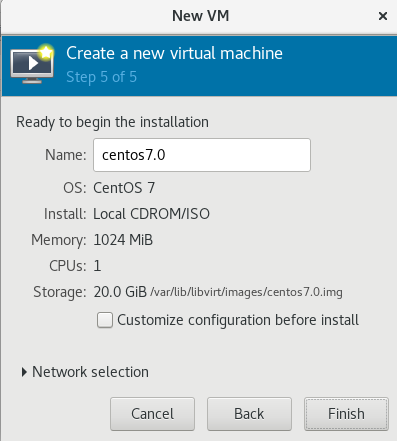
Set virtual machine name
Automatically jump to centos 7 by default
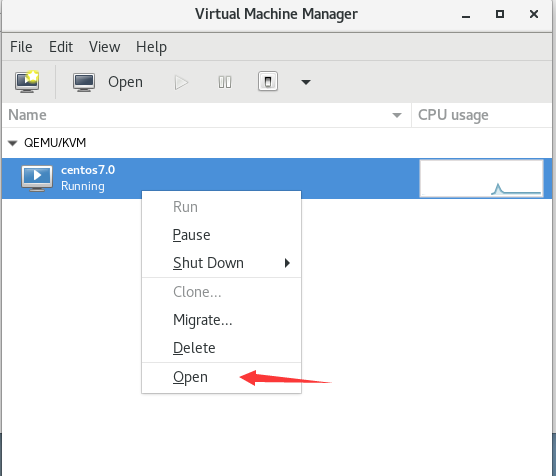
No jump. Right click open on the virtual machine
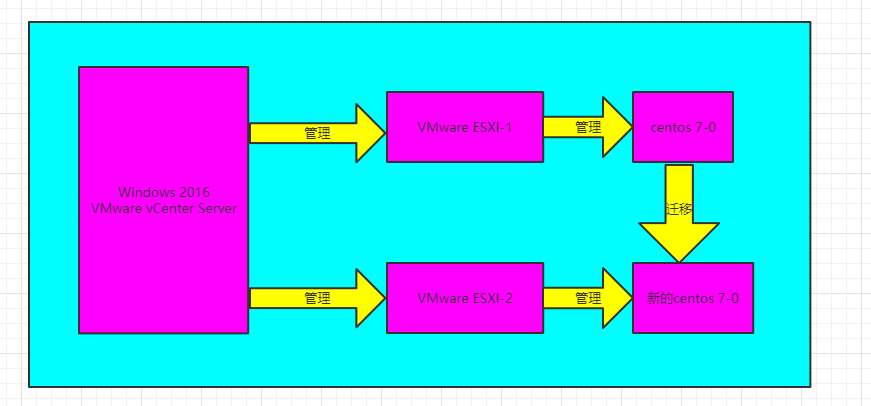
2. Realize the cross host migration of virtual machines between vmware esxi hosts.
Topology diagram:
2.1 vmware esxi 6.7 installation
System download link: esxi 6
System download link: esxi 7
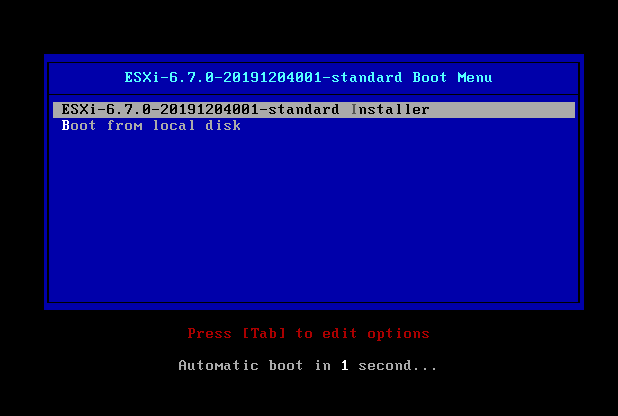
Install vmware esxi version: vmware-vmvisor-installer-201912001-15160138 x86_ 64.iso
Note: the vmware virtual machine can be installed in the way of ubantu system. The CPU option should enable these three virtualization functions, otherwise it cannot be installed

Installation steps
enter
Press F11 to agree to the agreement
enter
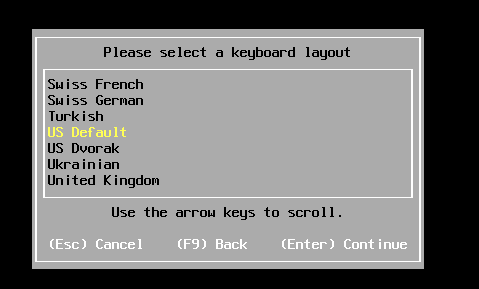
Press enter to select the default language
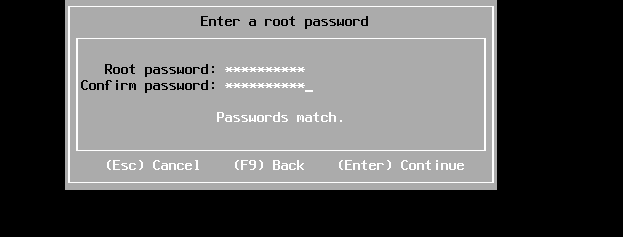
Input password
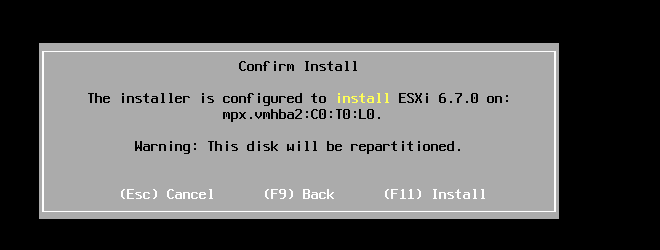
Press F11 to start the installation

Enter restart
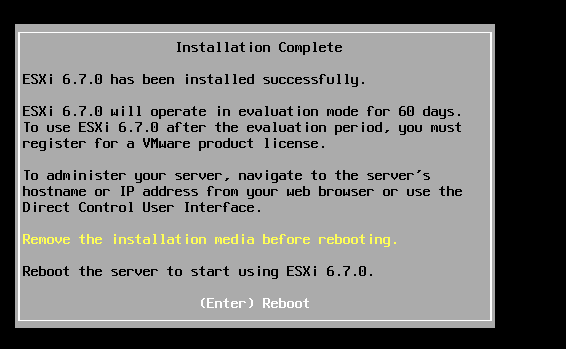
Configure IP, press F2 to enter the account password to log in
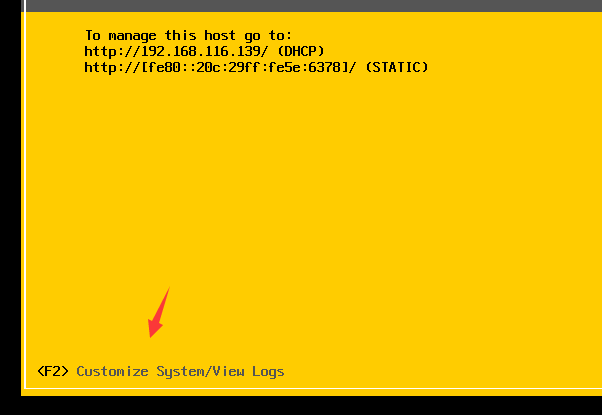
Press F2 to enter options again
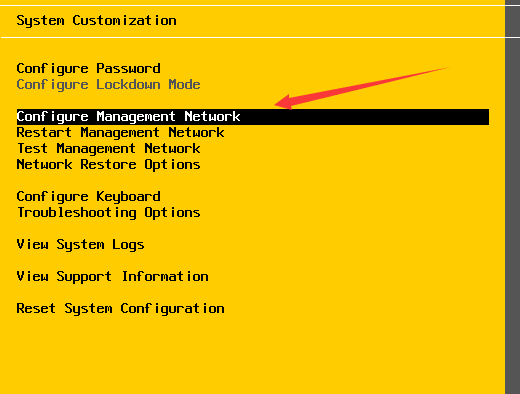
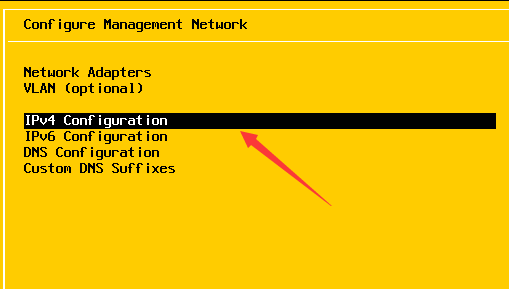
Select the third to configure IP
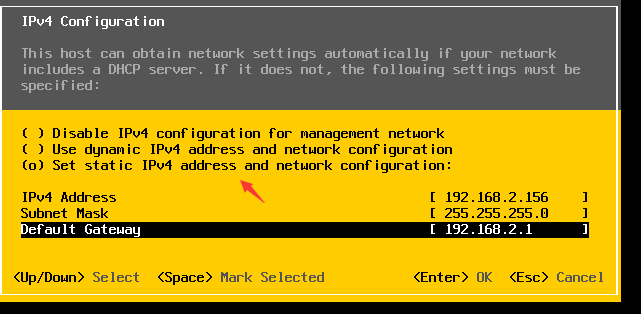
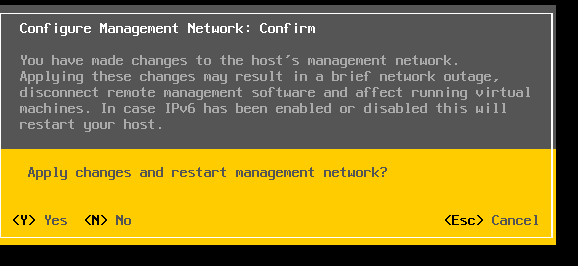
Press ESC to exit and select Y to save the IP address
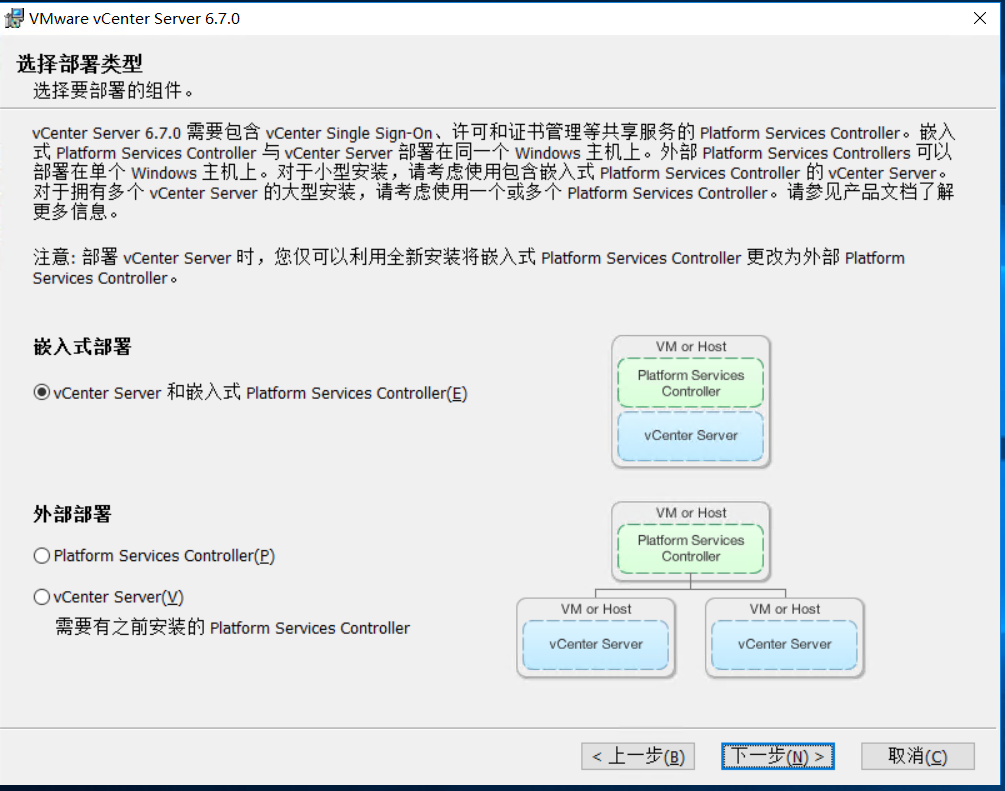
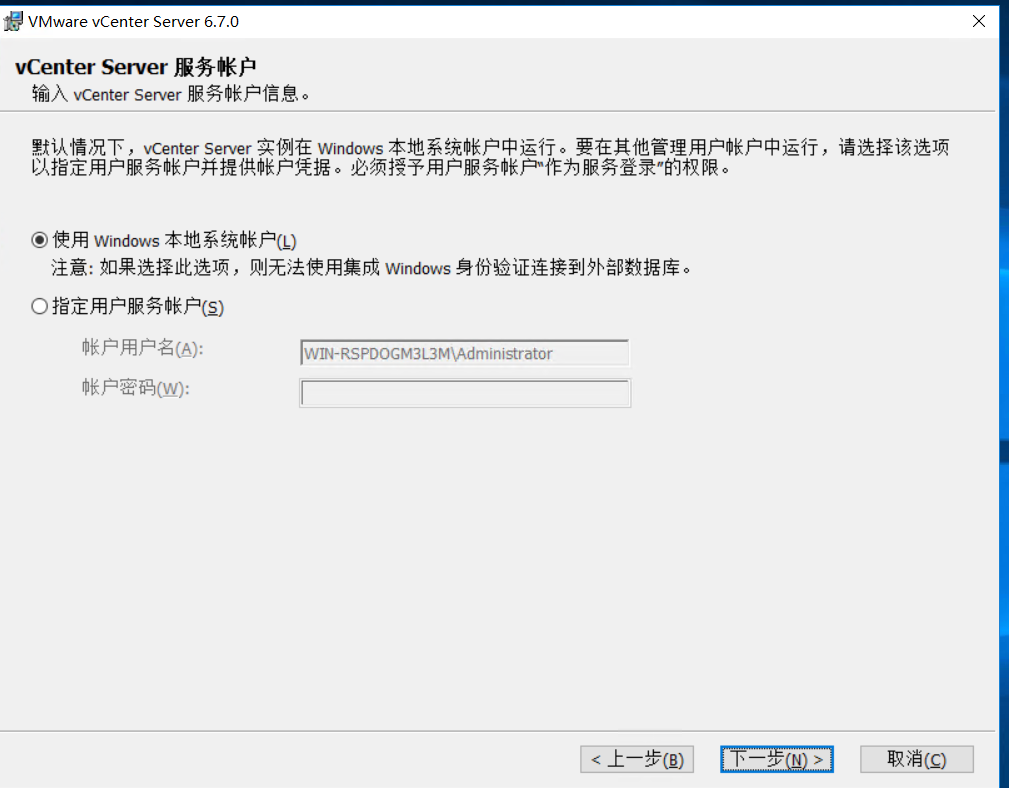
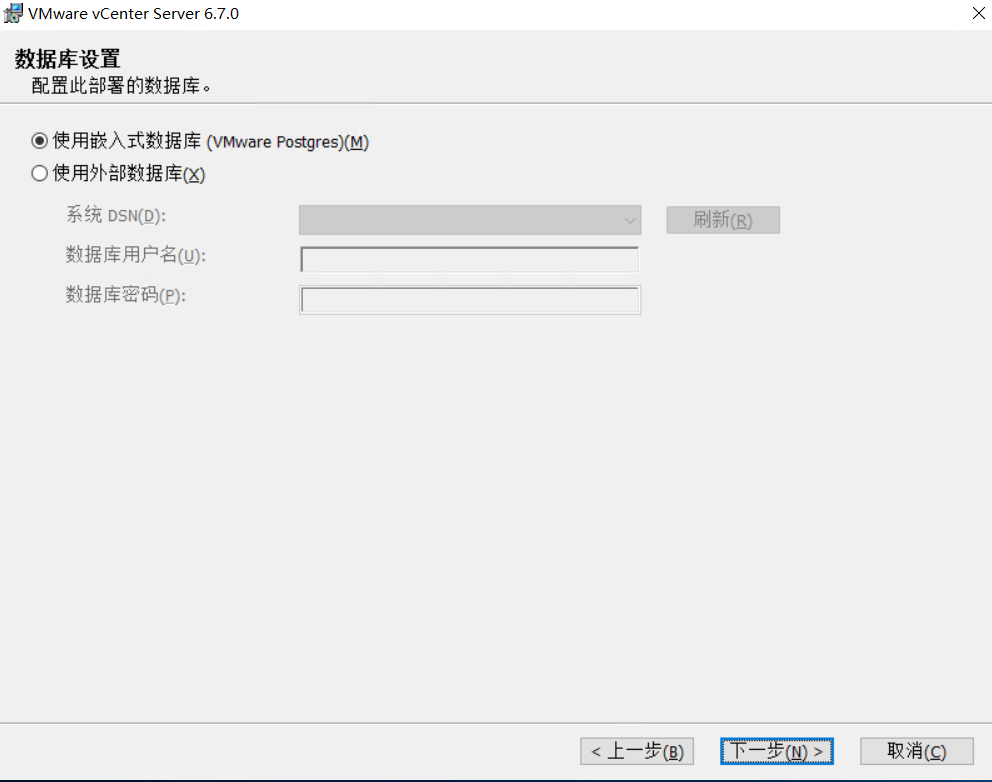
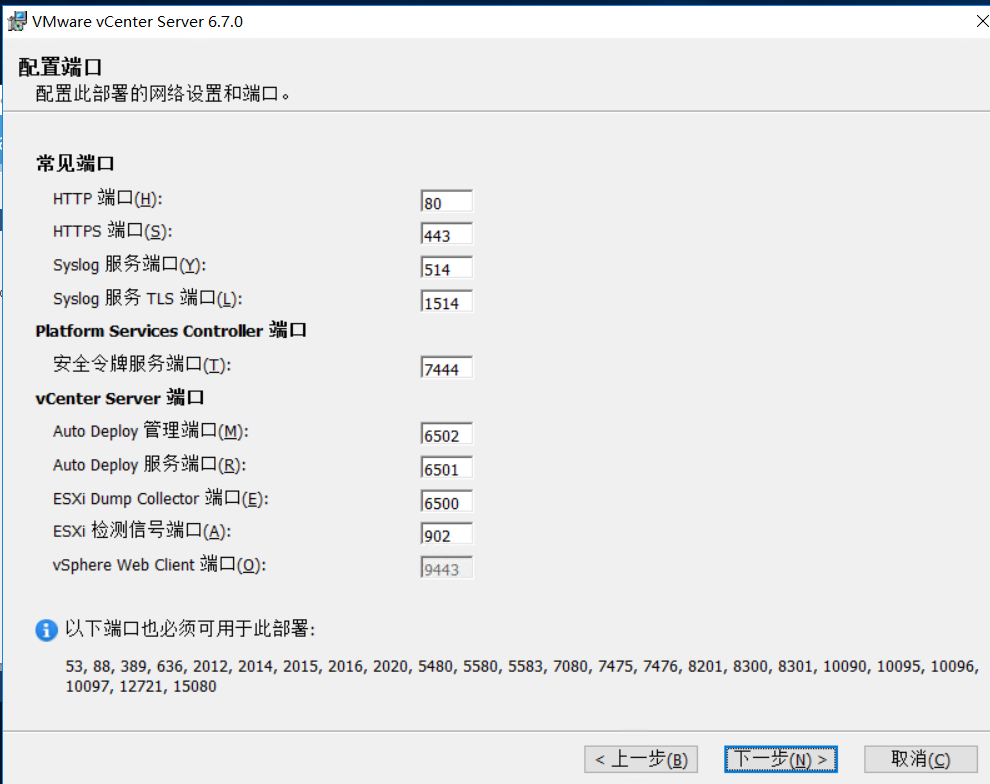
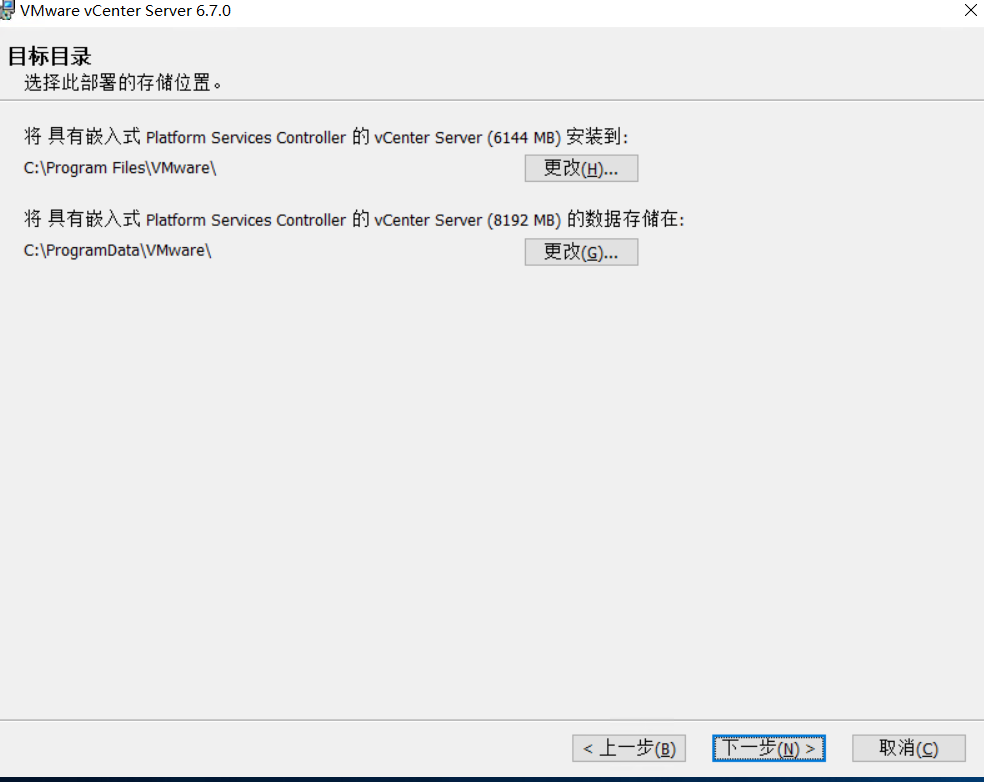
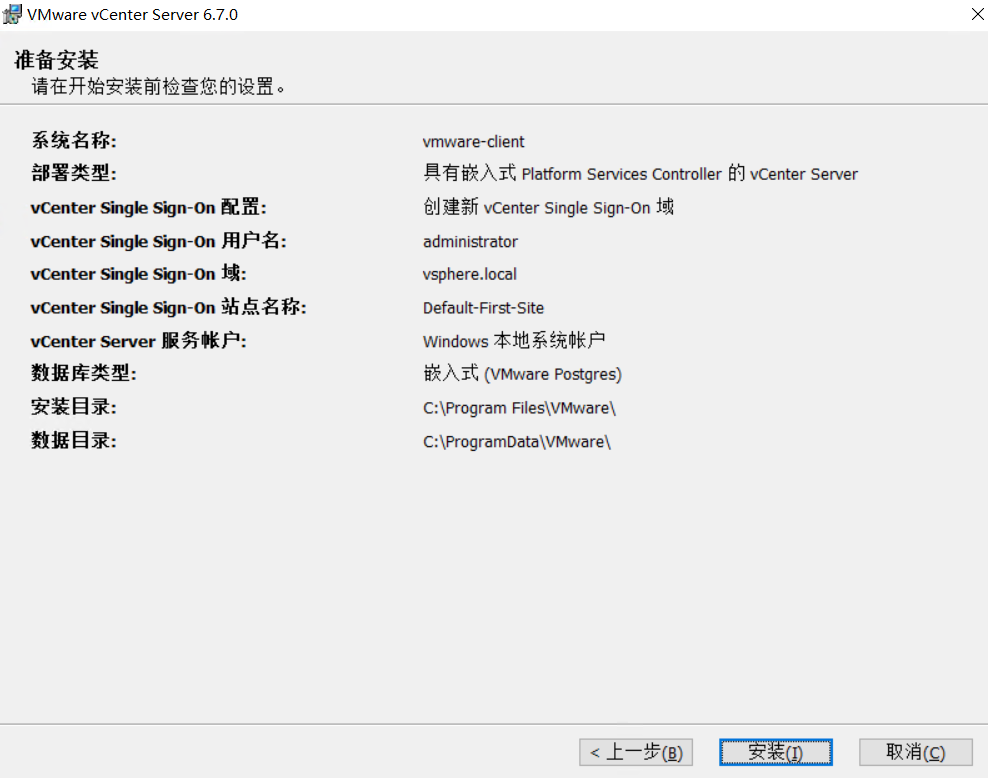
2.2 install windows 2016 and VMware vCenter Server on Windows 2016
This device is used to install VMware vCenter Server, and this software is used to manage multiple esxi
Note: it must be installed on the system. The version is Windows Server 2008 SP2 or later
VMware vCenter Server download: VMware vCenter Server
Download this, vmware-vim-all-6.7.0-14367737 VMware vCenter server for windows iso
With Windows 2016 system, the system memory should be more than 8G, and vCenter Server should be installed
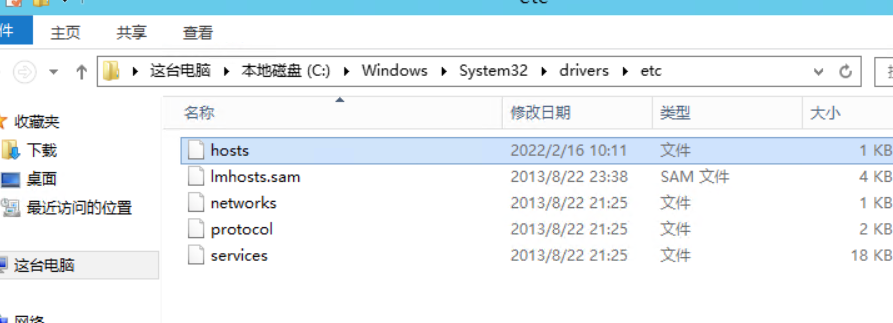
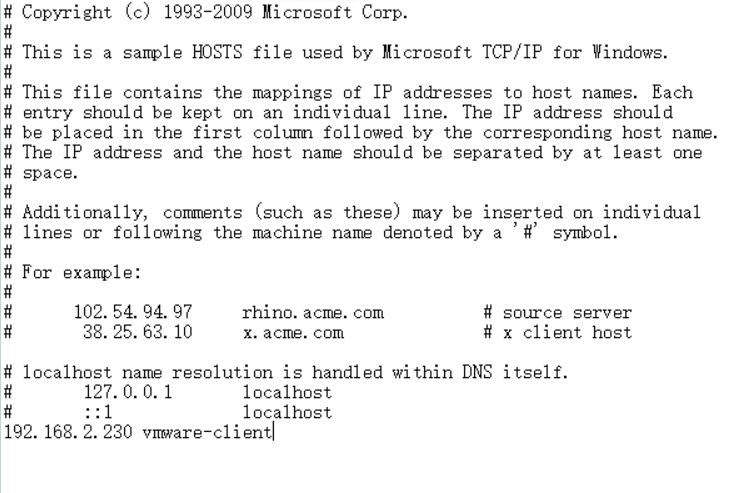
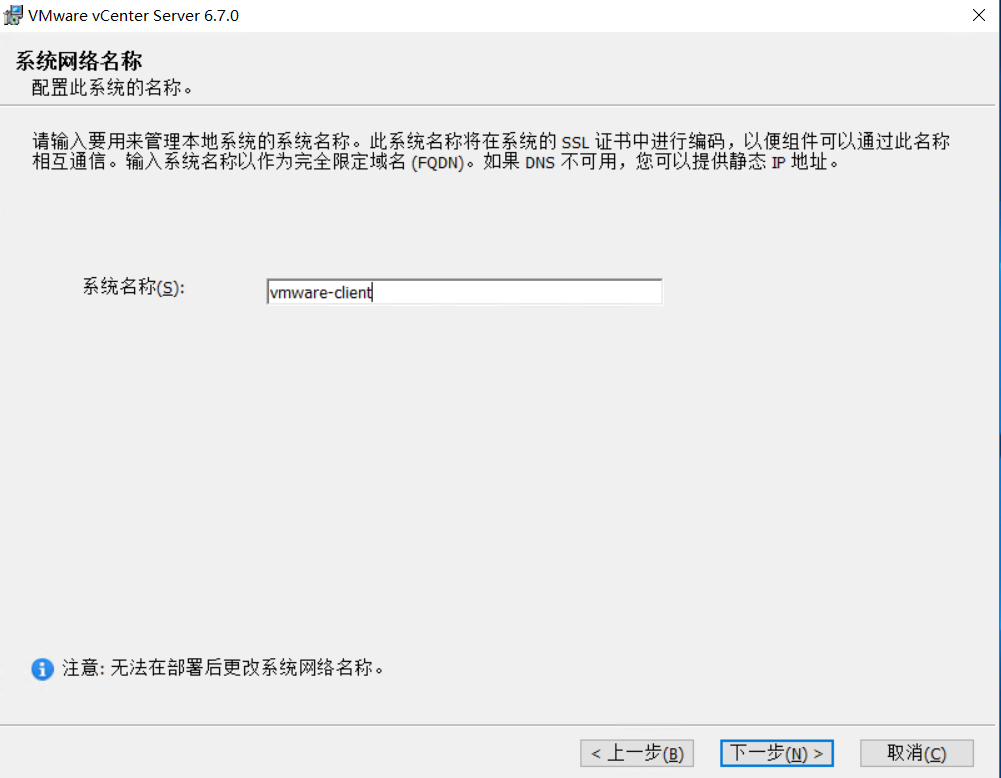
Set the local hosts file, which is used during installation
C:\Windows\System32\drivers\etc
 edit hosts file
192.168.2.230 vmware-client
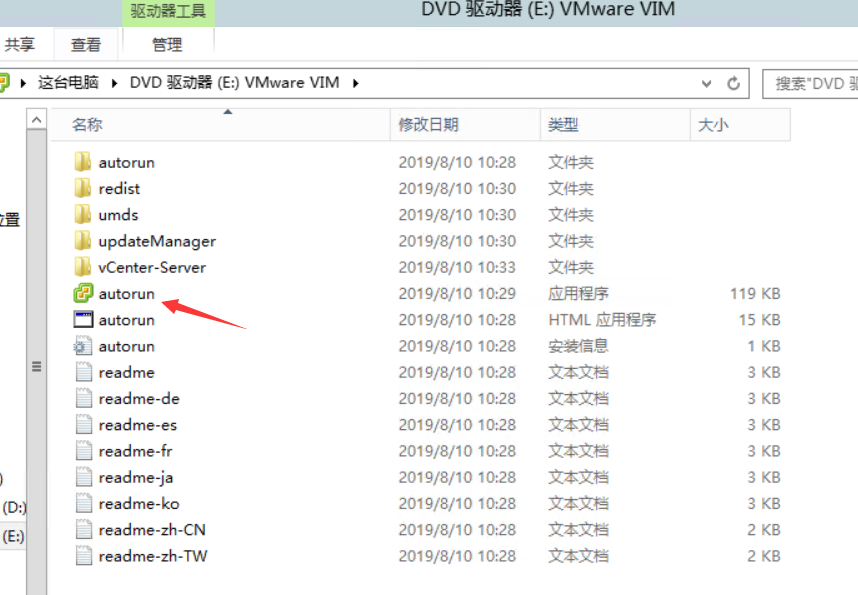
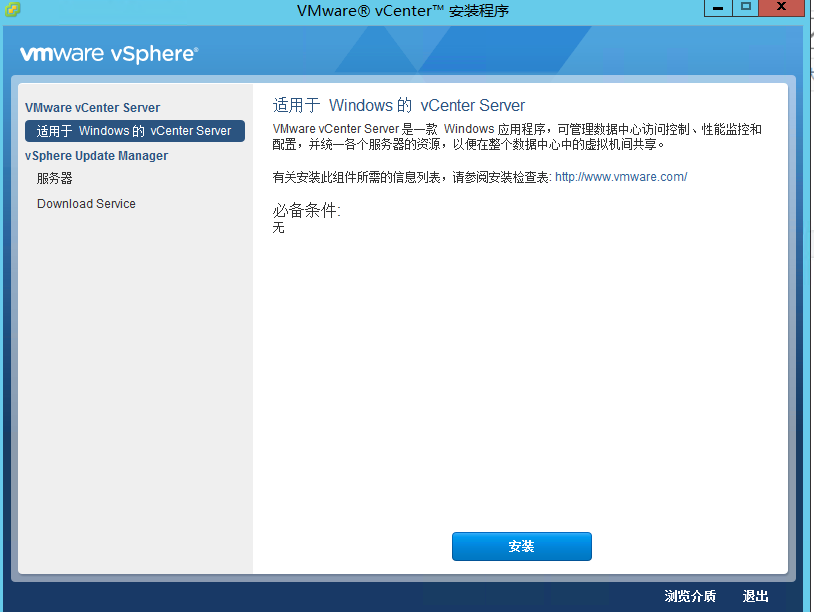
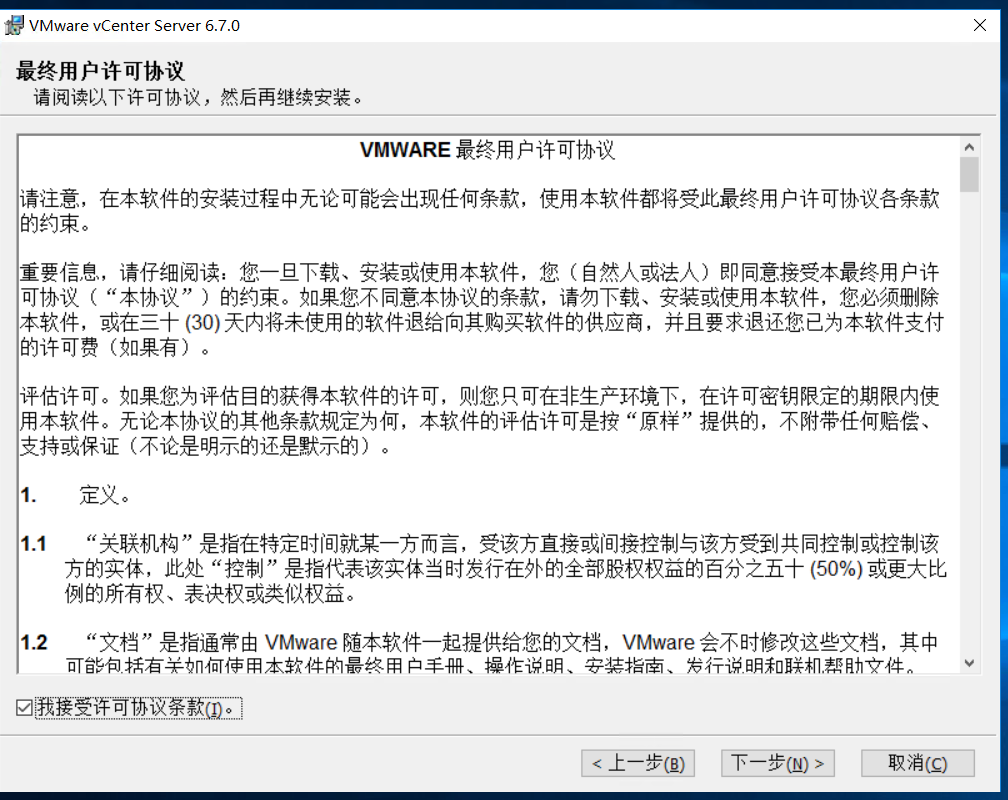
Open the file and start installing VMware vCenter Server
Select Install
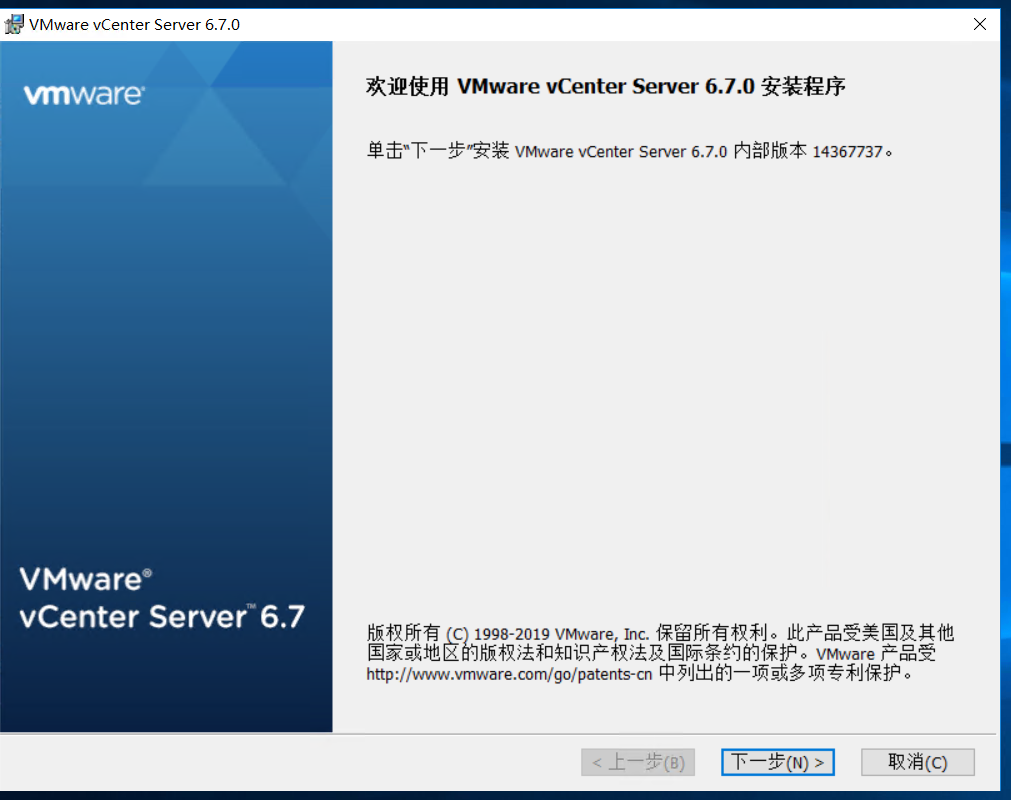
Select next
Enter the hosts name you just set
Ignore this

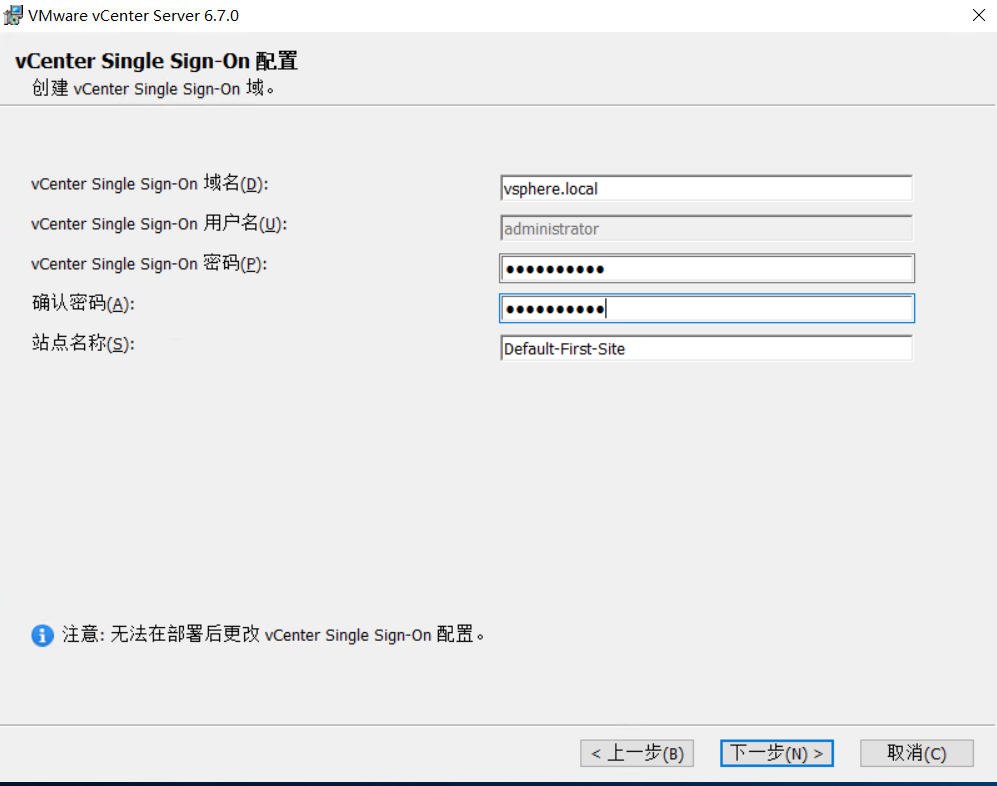
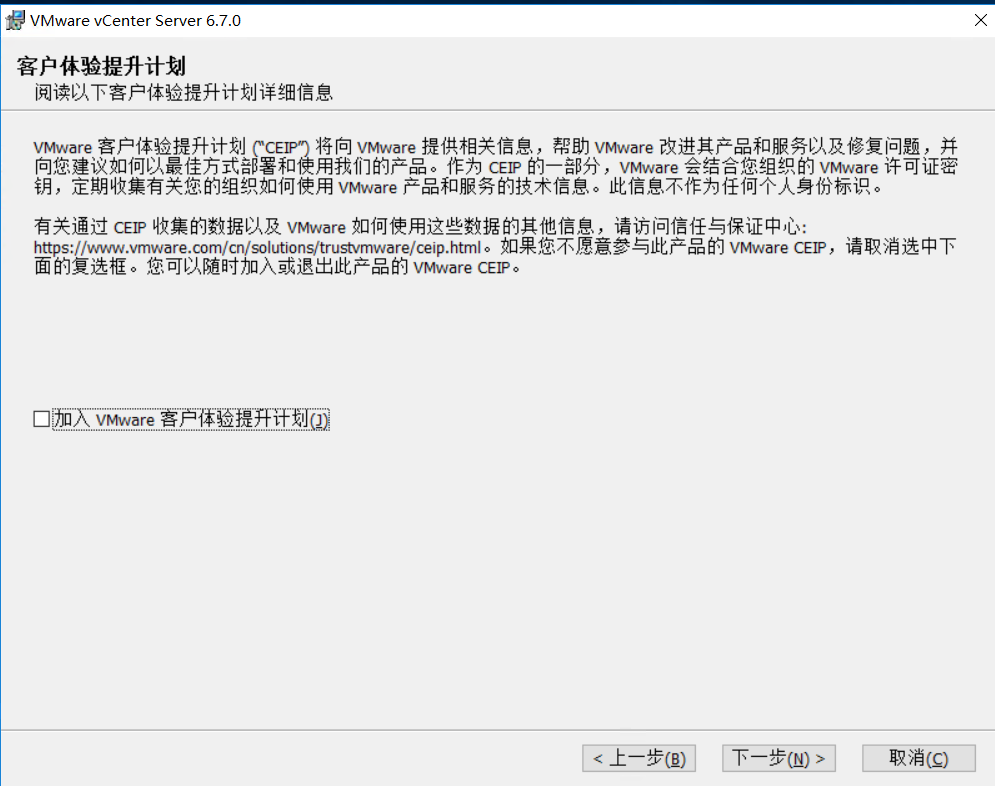
Input password

2.3 adding esxi hosts to VMware vCenter server
Open the web address and add 2 esxi hosts on the web page
http://192.168.2.230

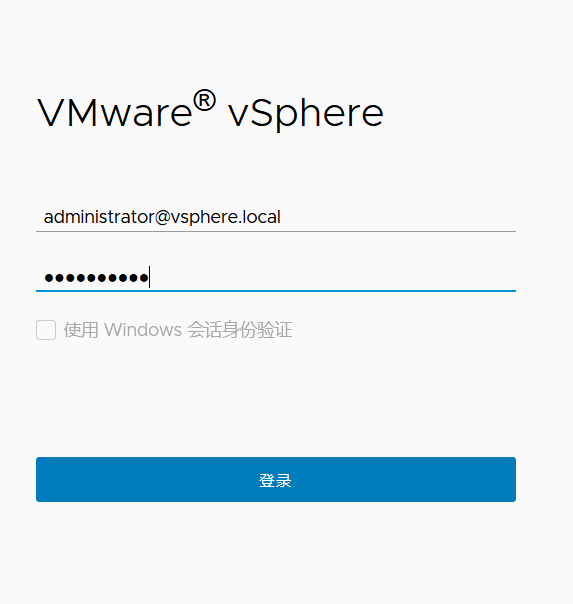
Enter the local account name and suffix administrator@vsphere.local , and the password set above
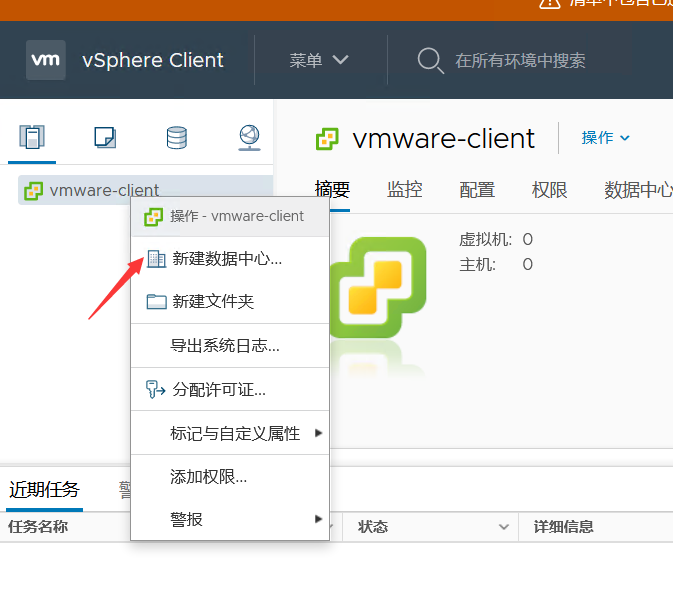
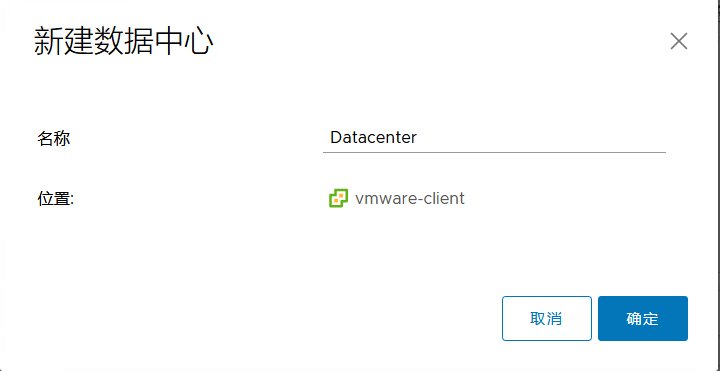
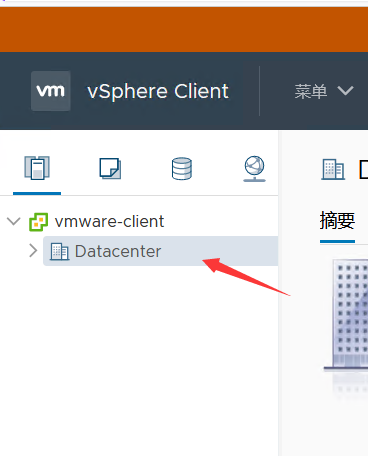
Right click and select new data center
Modify the settings, otherwise you will not be able to add esxi
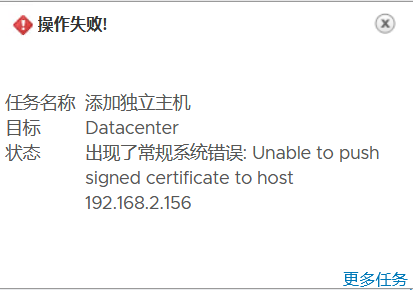
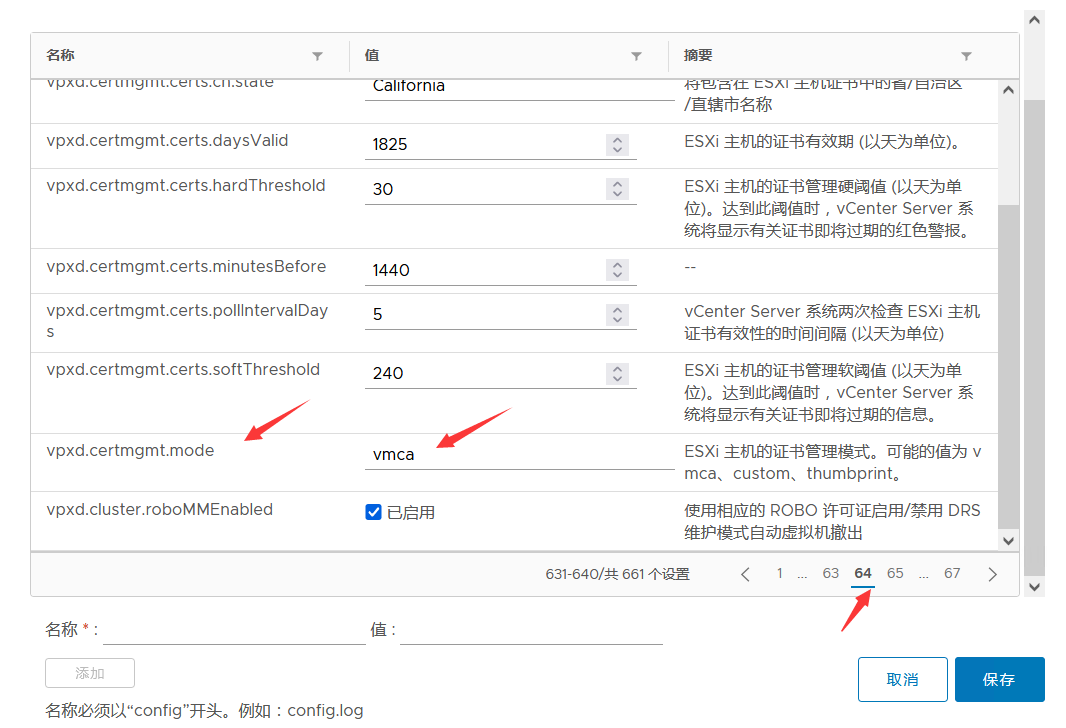
Select VMware client > select configuration > Settings > Advanced Settings > click Edit settings

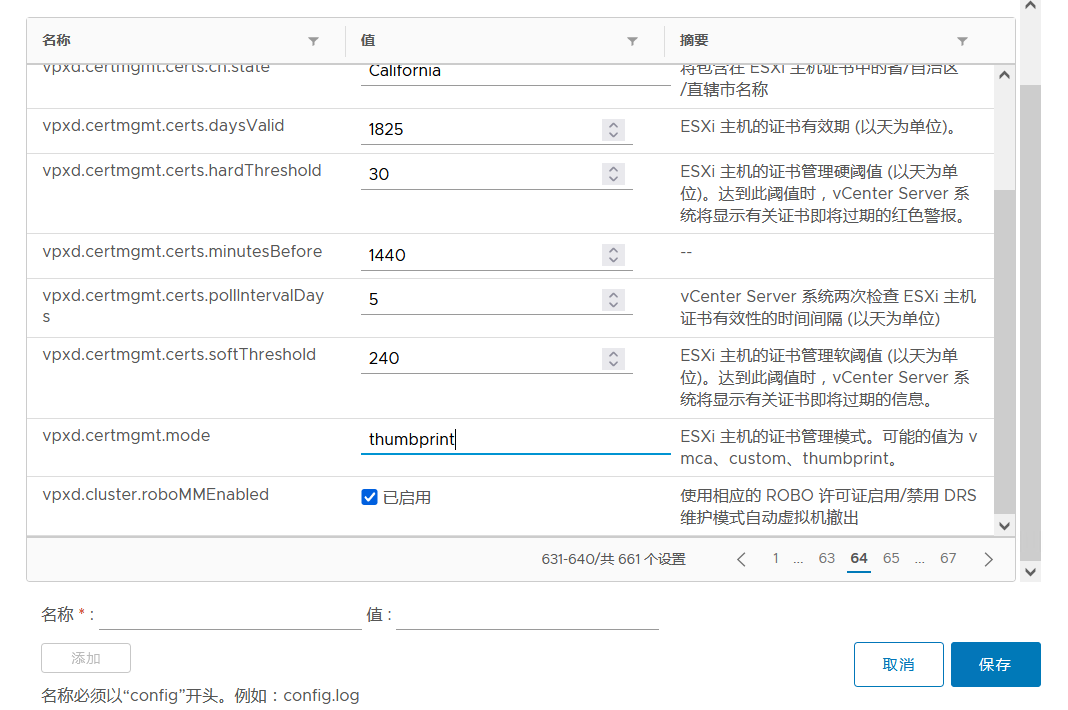
Find vpxd certmgmt. Mode. The original value is vmca. Change it to thumbprint and save it
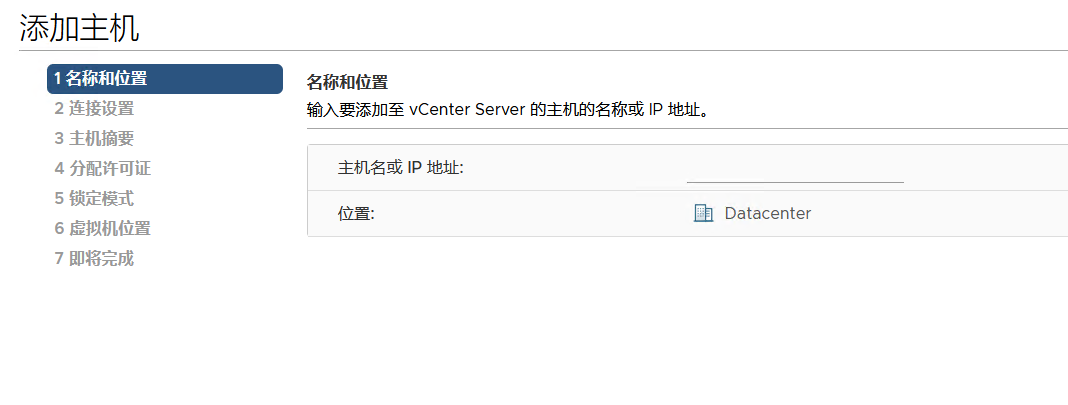
Right click to add esxi host in data center
Enter the IP of the esxi you want to add
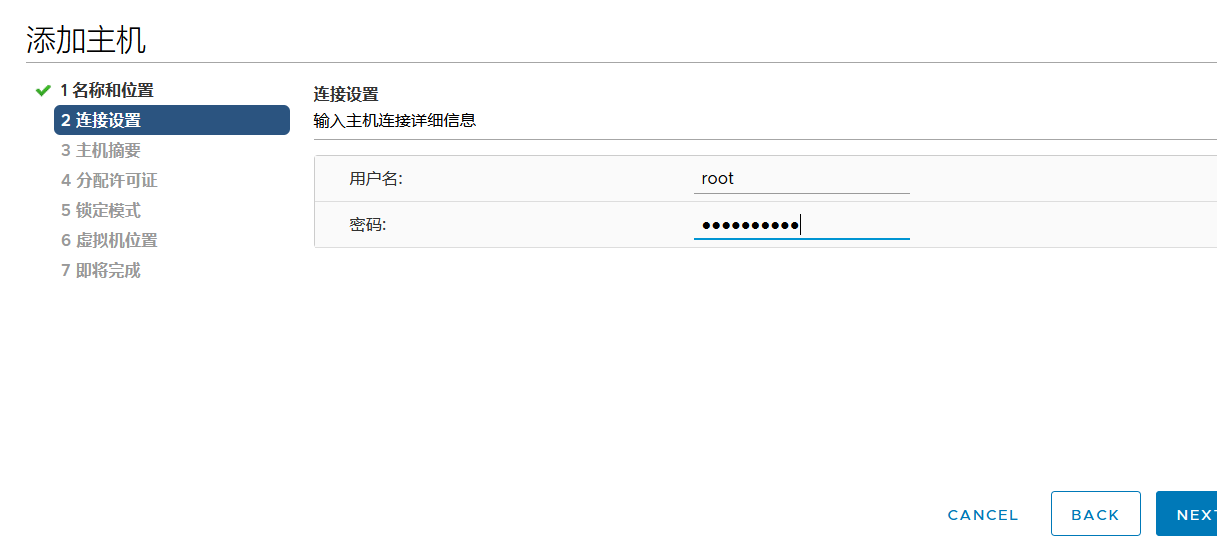
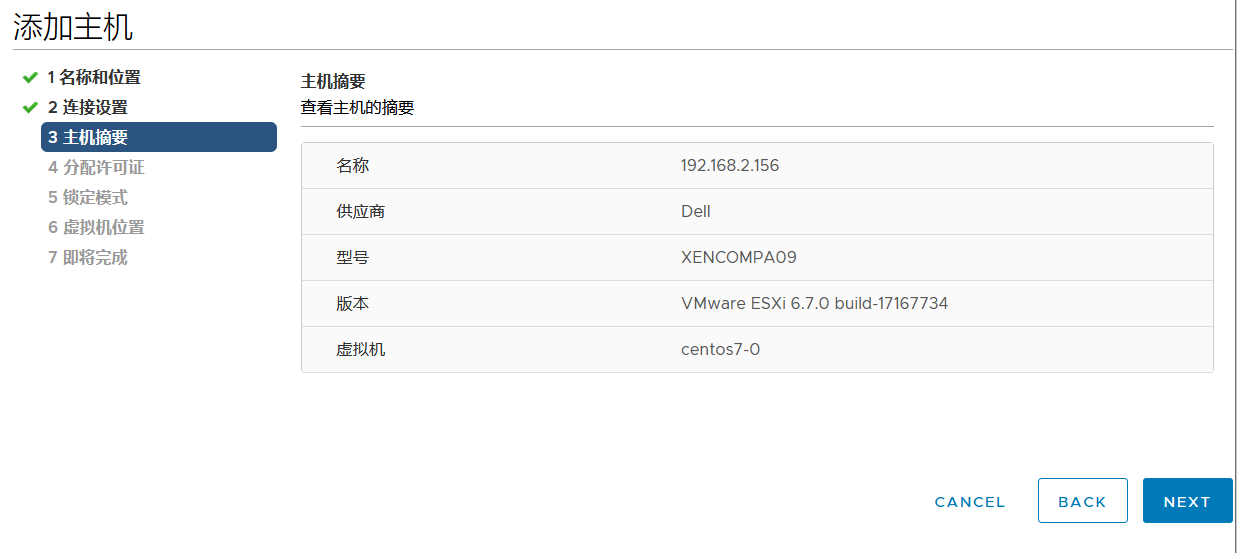
Enter esxi's account password
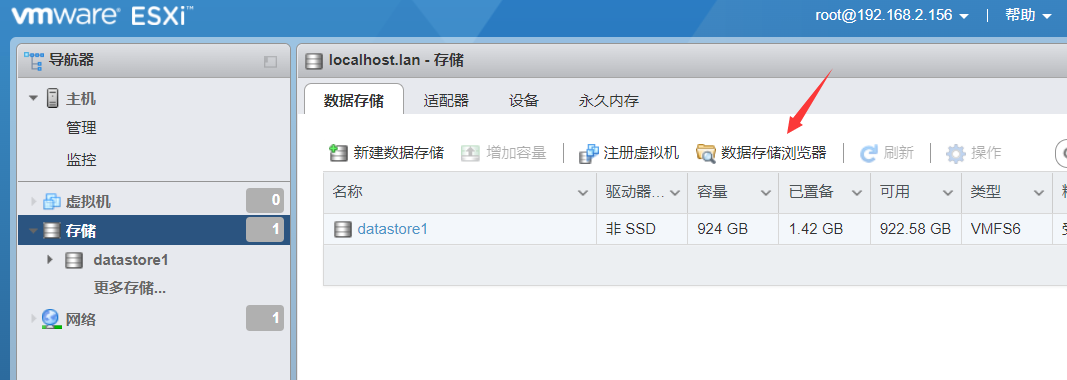
2.4 upload the virtual machine system image on a vmware esxi
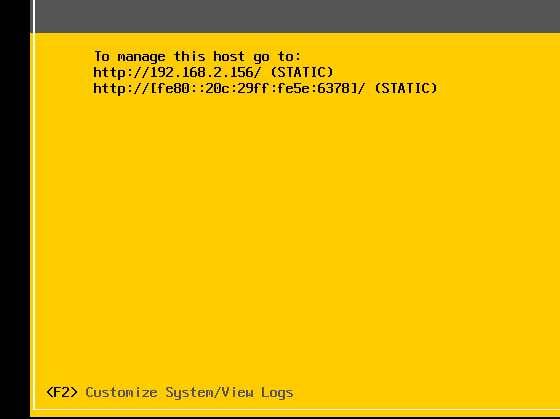
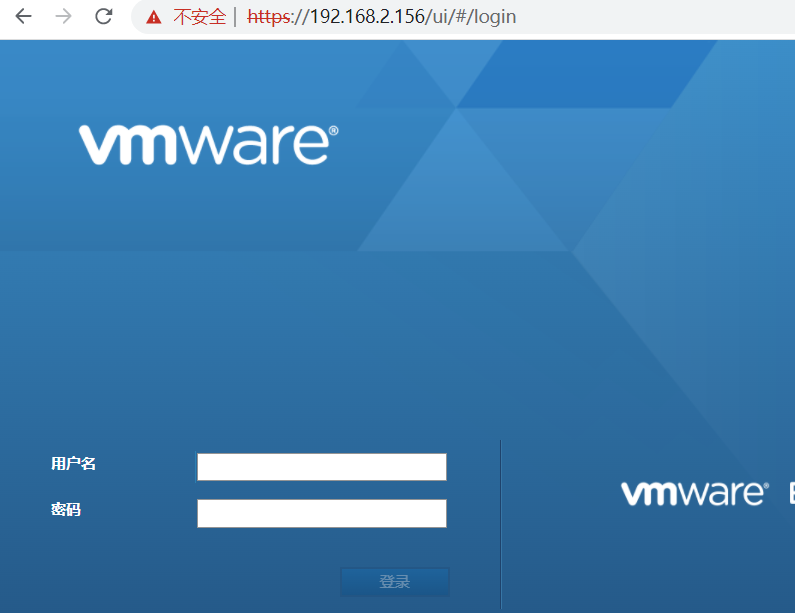
Log in to a vmware esxi web page and enter the root account and password set during installation
https://192.168.2.156/
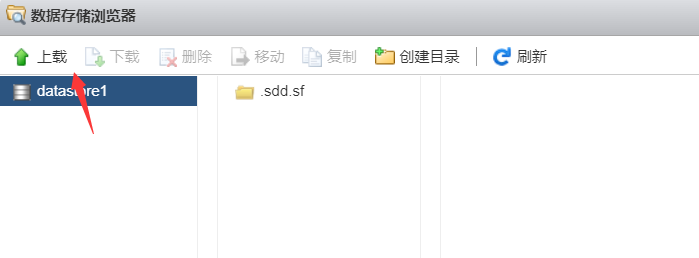
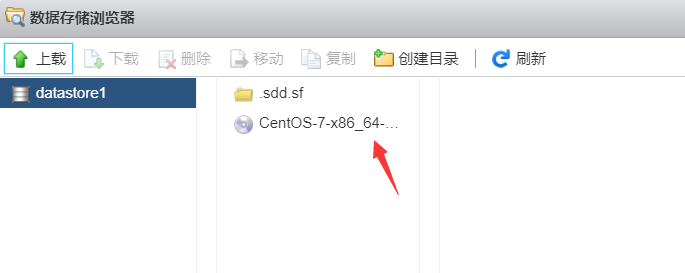
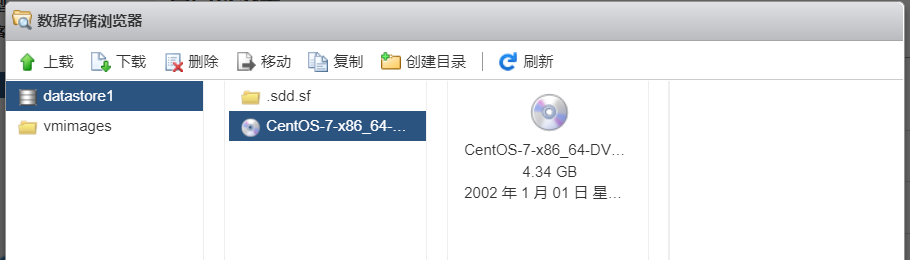
Click Browse memory
Click upload to upload the downloaded system image
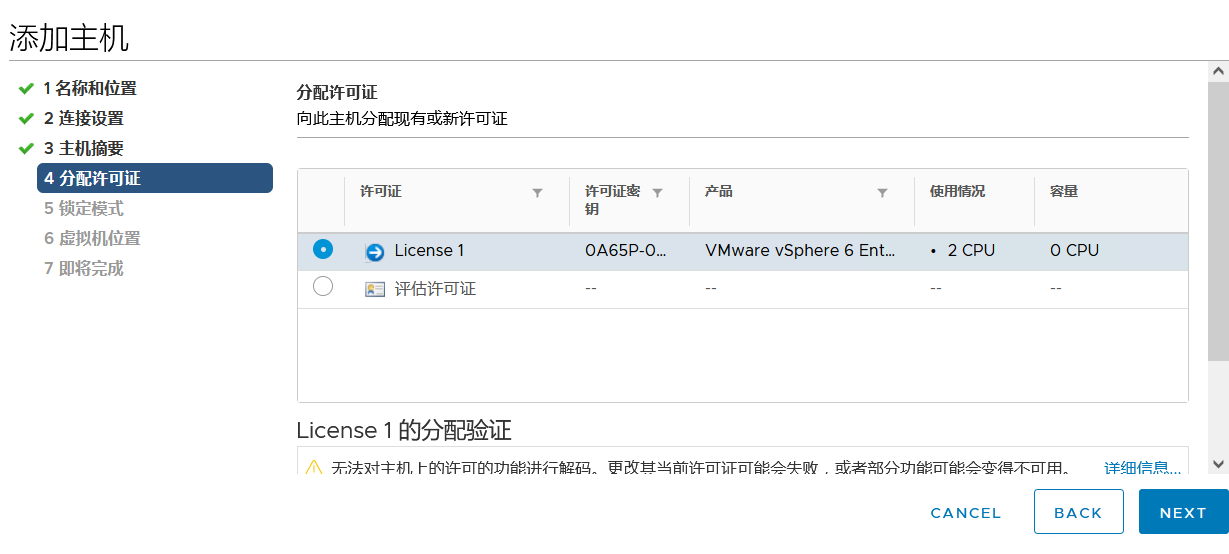
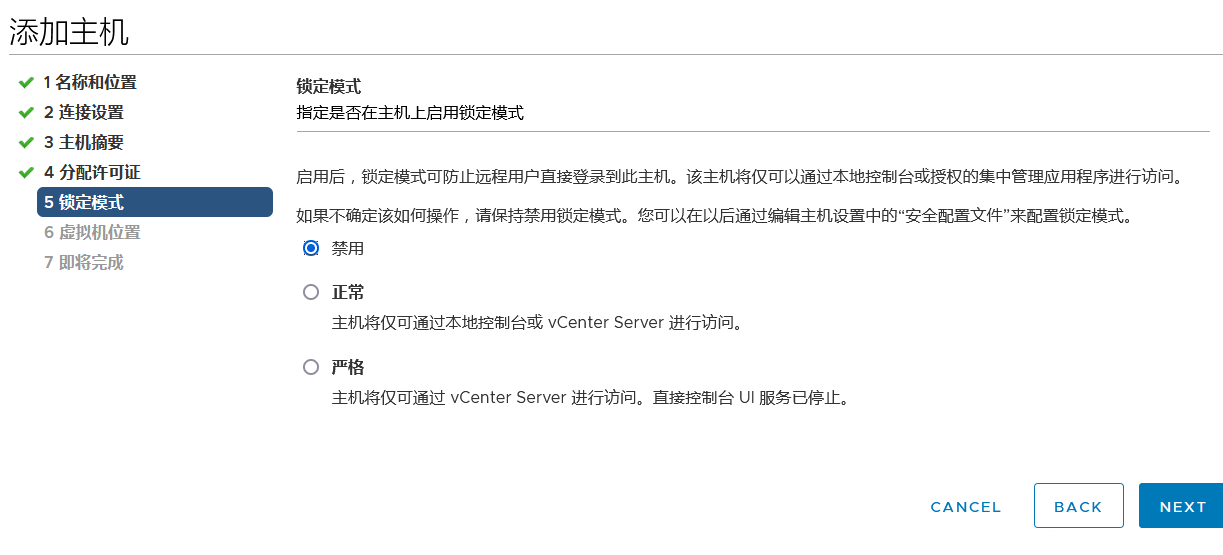
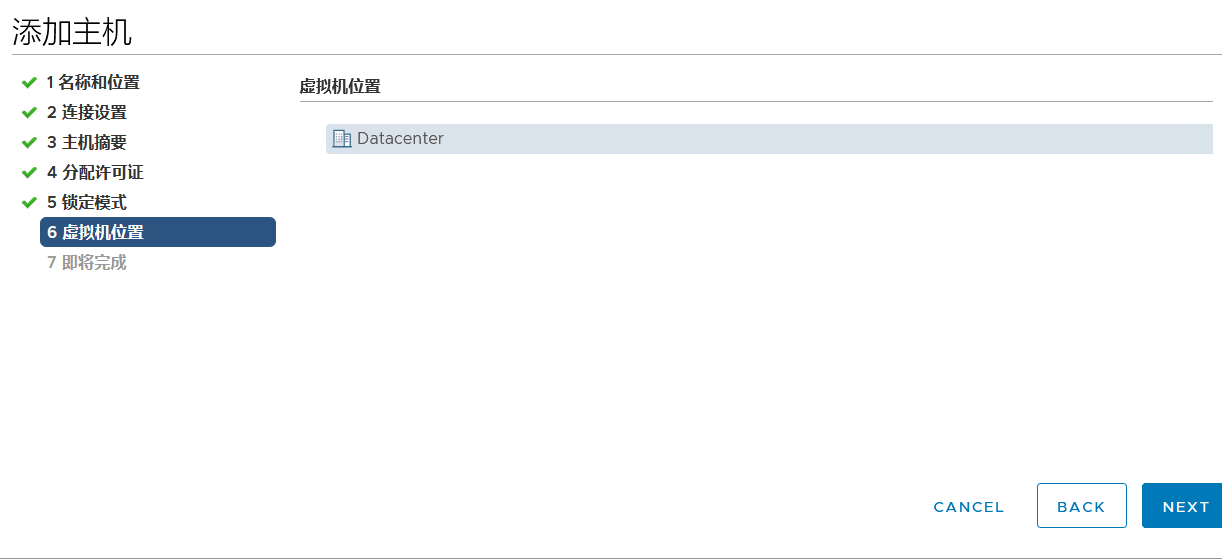
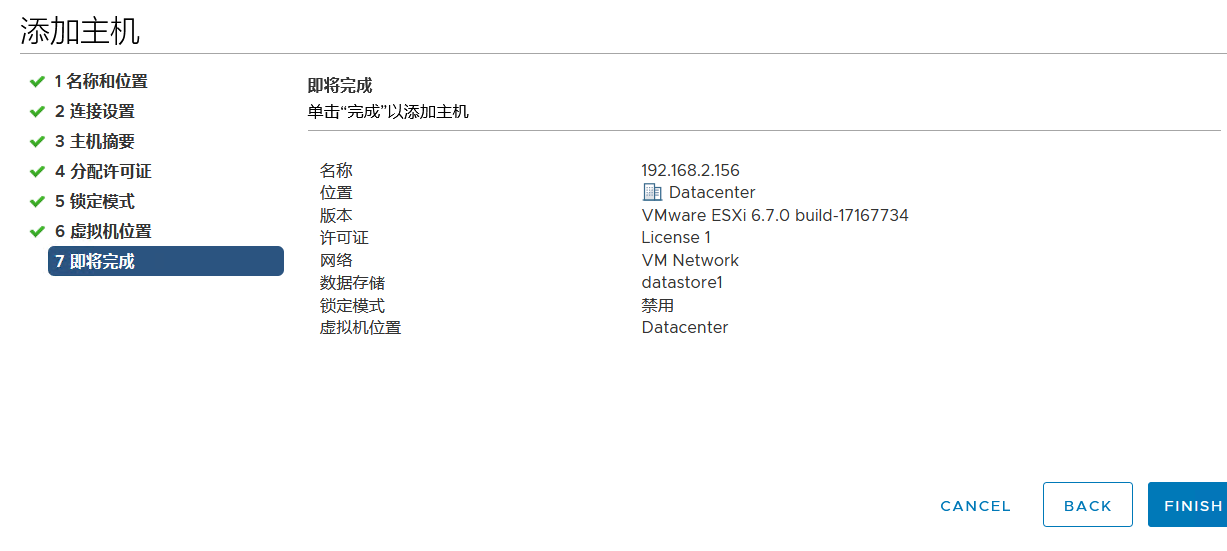
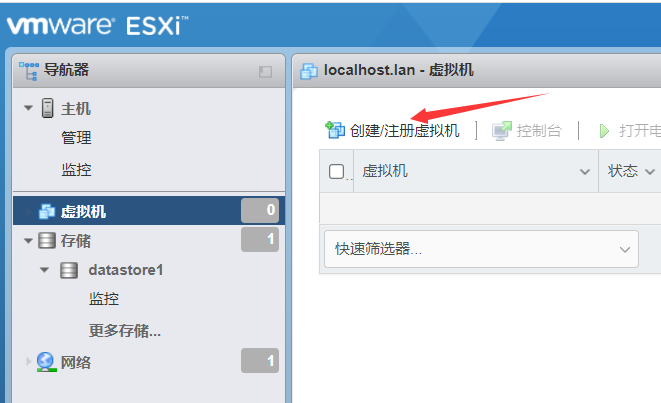
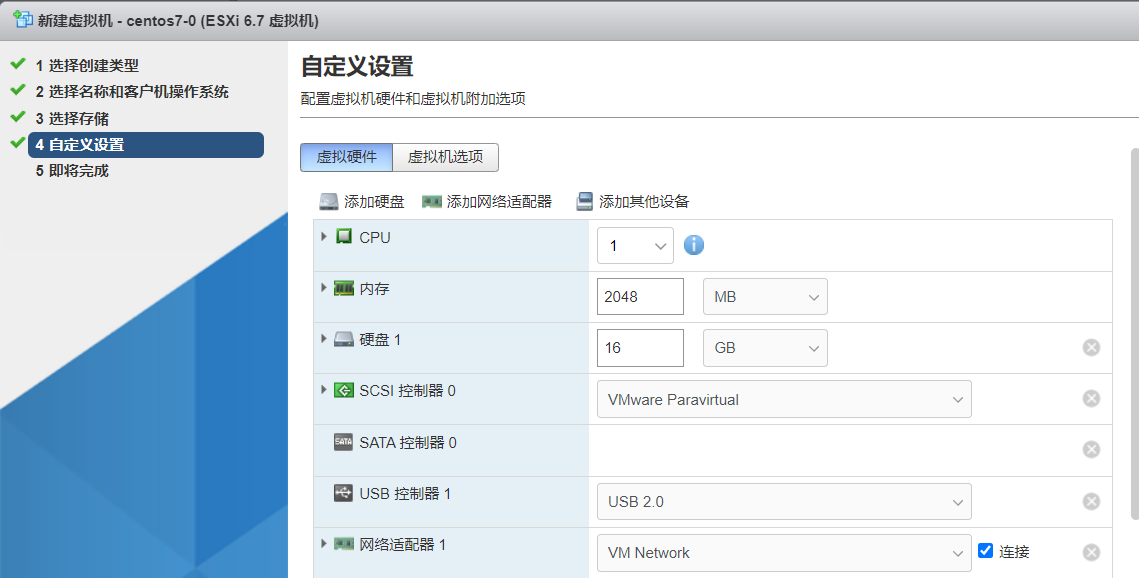
2.5 esxi create virtual machine
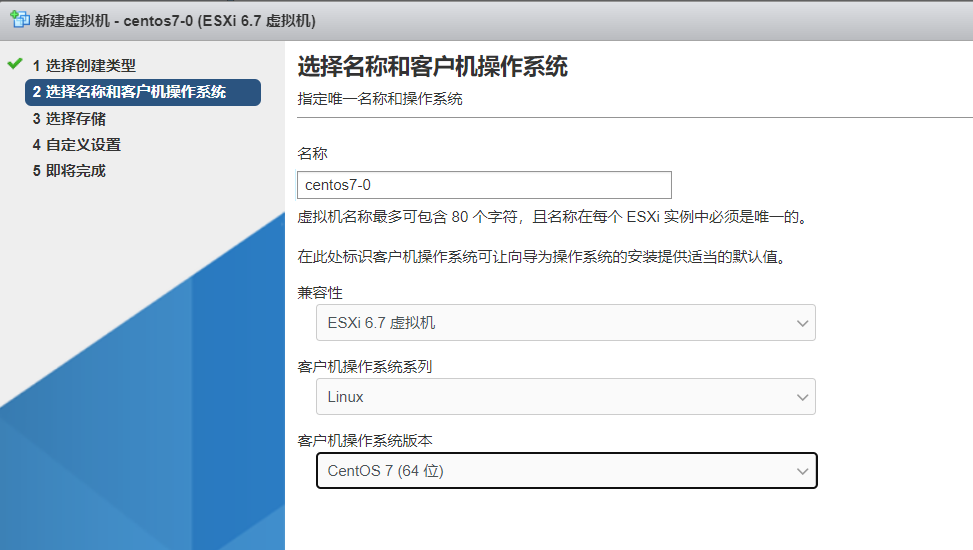
After uploading the image, click virtual machine to start creating centos7 virtual machine
Select first

Select the system version to install
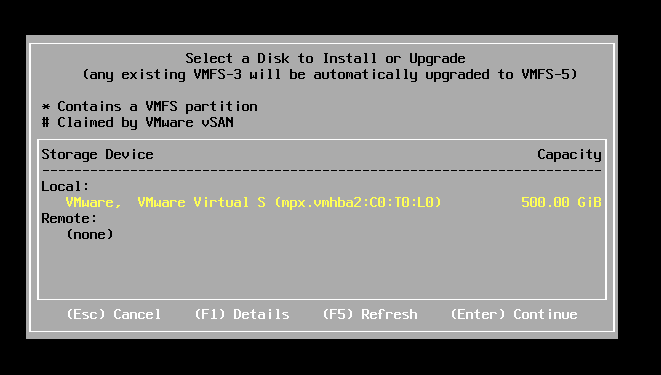
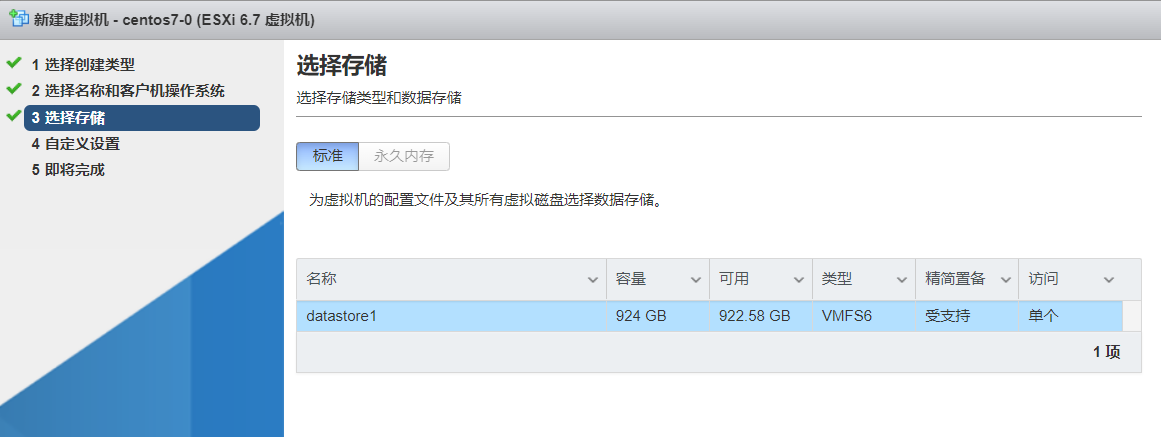
Select the hard disk to install the system. There are multiple hard disks to install as needed
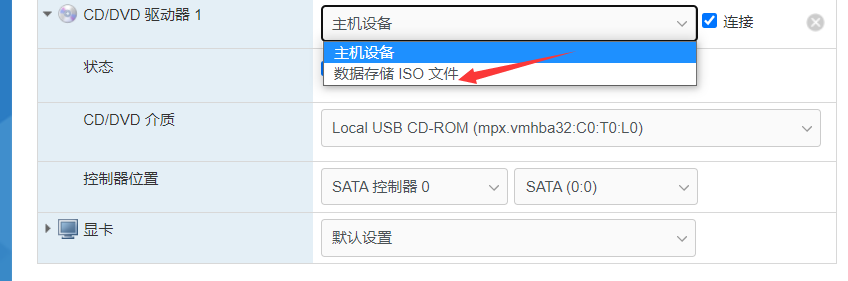
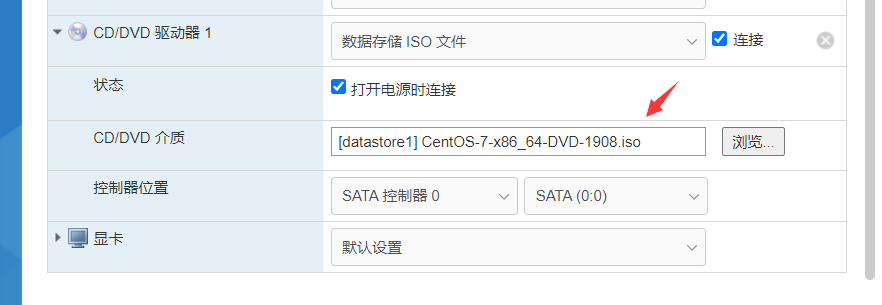
Other configurations are customized, but the system image just uploaded should be selected here
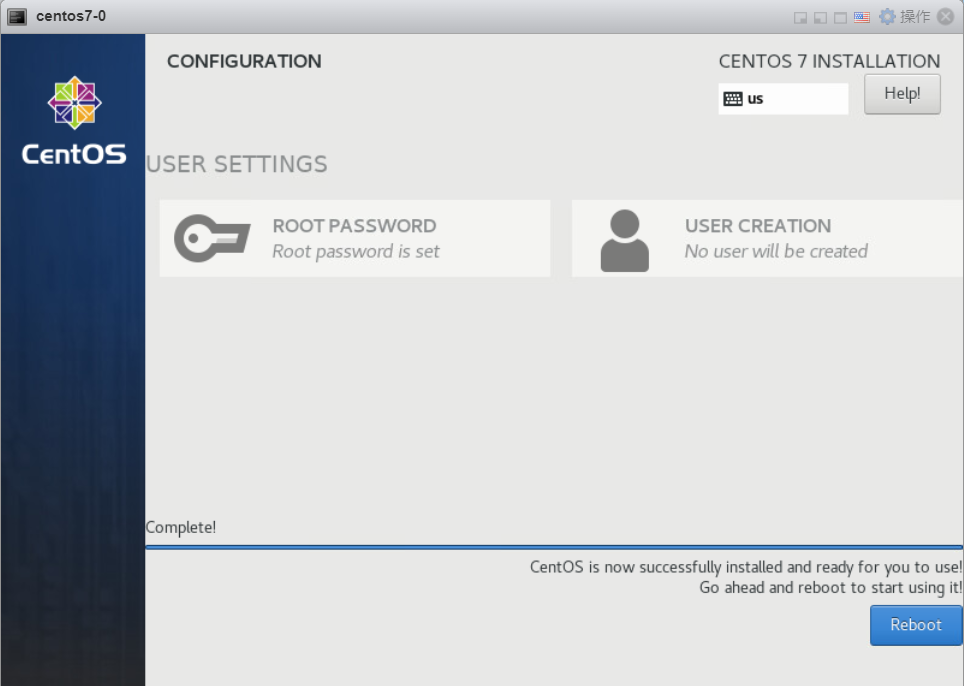
Click finish

By default, the created virtual machine is not powered on. Click to turn on the power
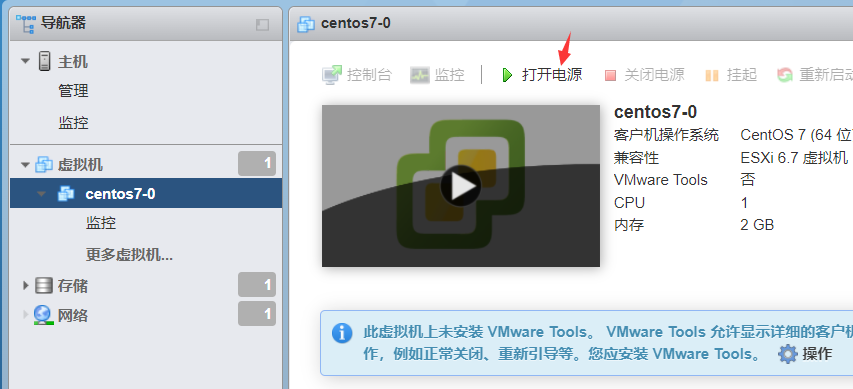
Right click to open the console
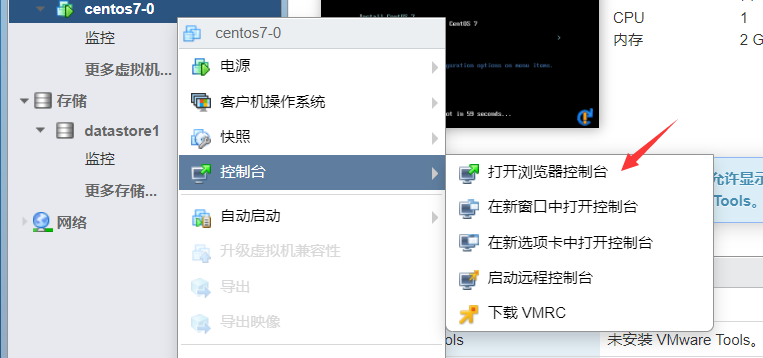
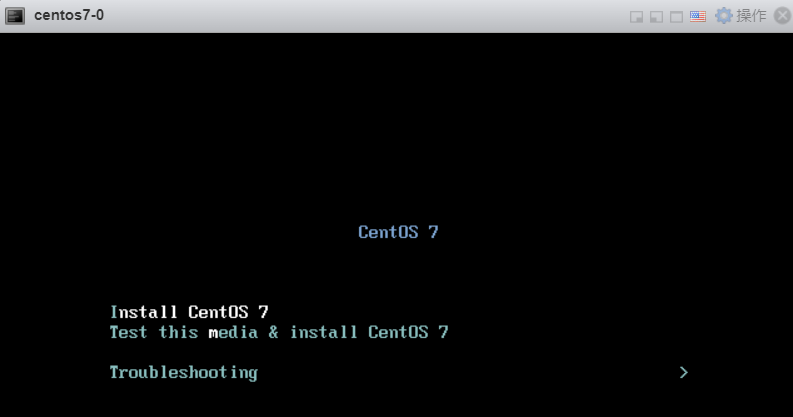
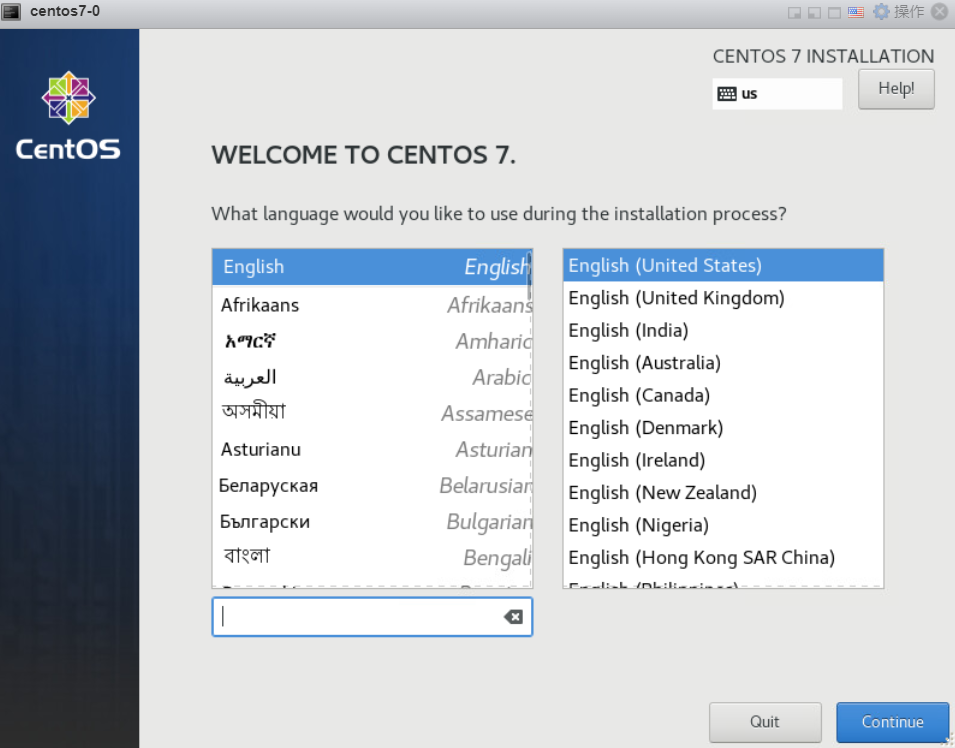
Select the first one to start installing centos 7
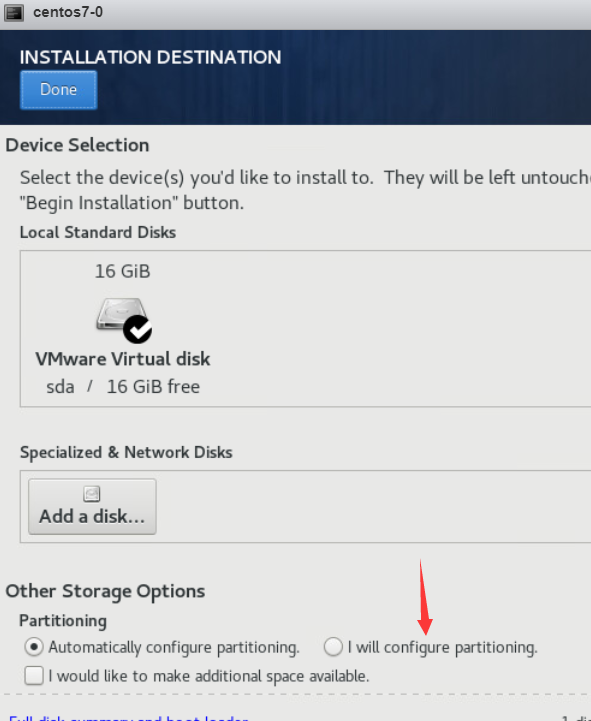
Select partition
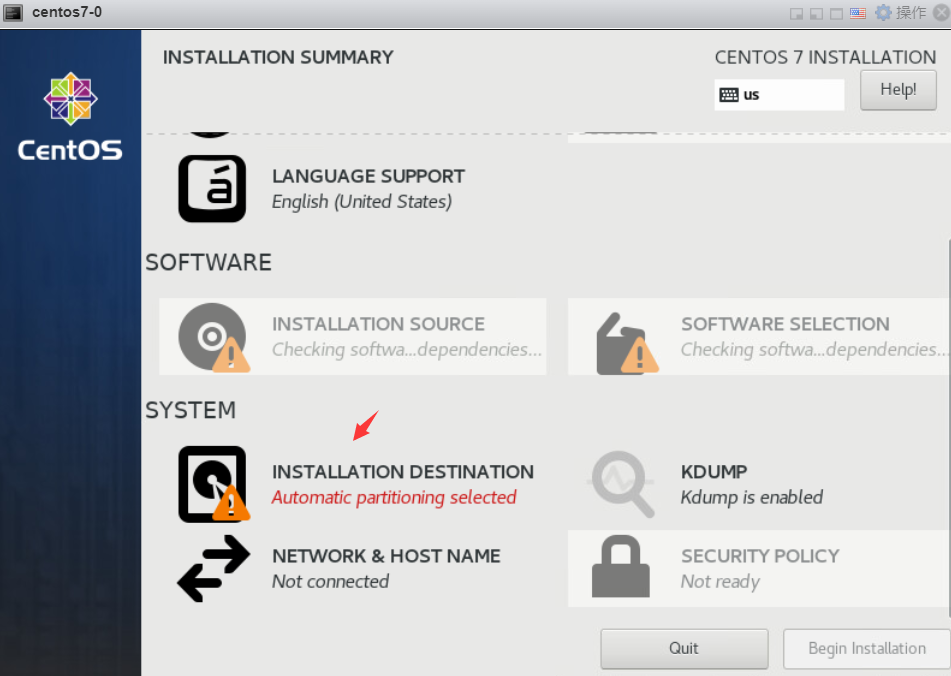
The default partition point is Done
Custom partition point red arrow and then click Done
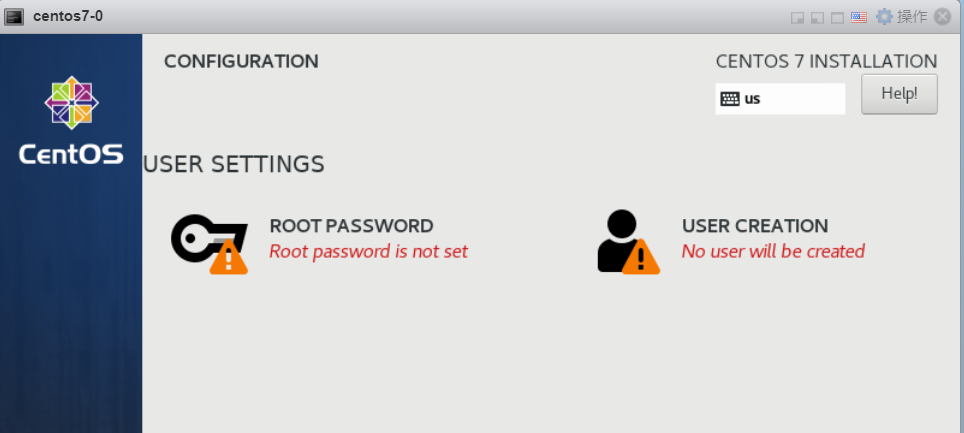
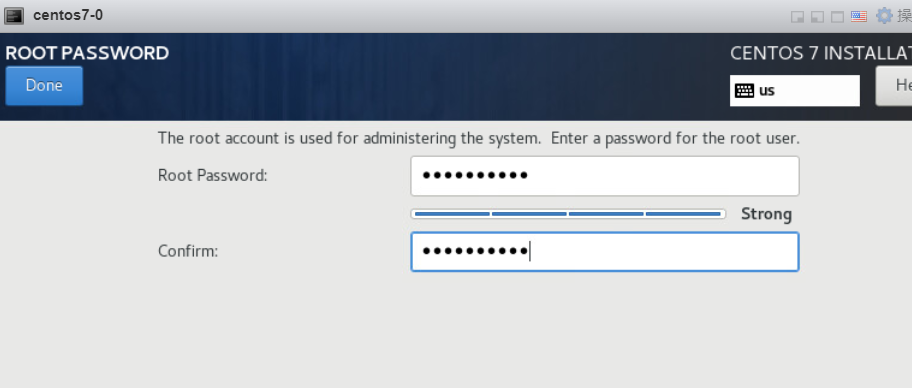
Set the password and wait for the installation to complete
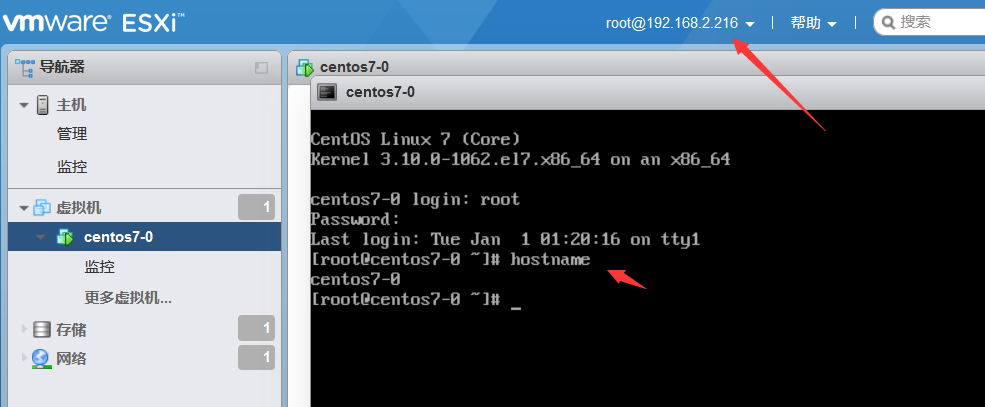
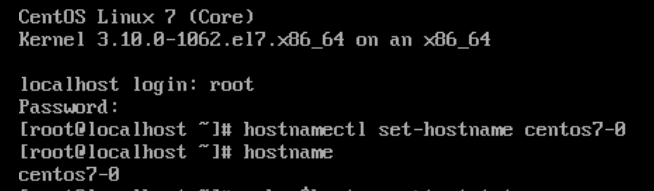
Set host name and test file
hostnamectl set-hostname centos7-0
hostname
echo `hostname` >test.txt

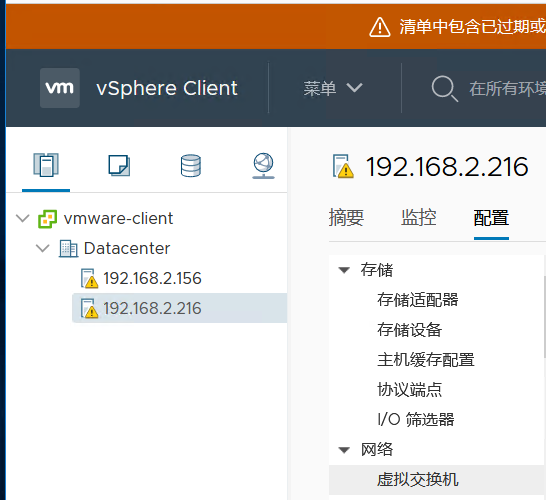
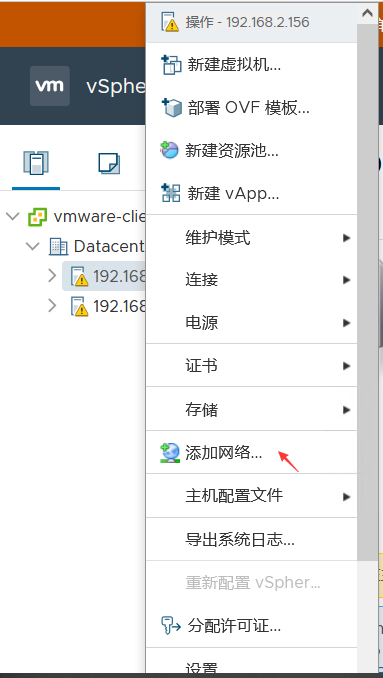
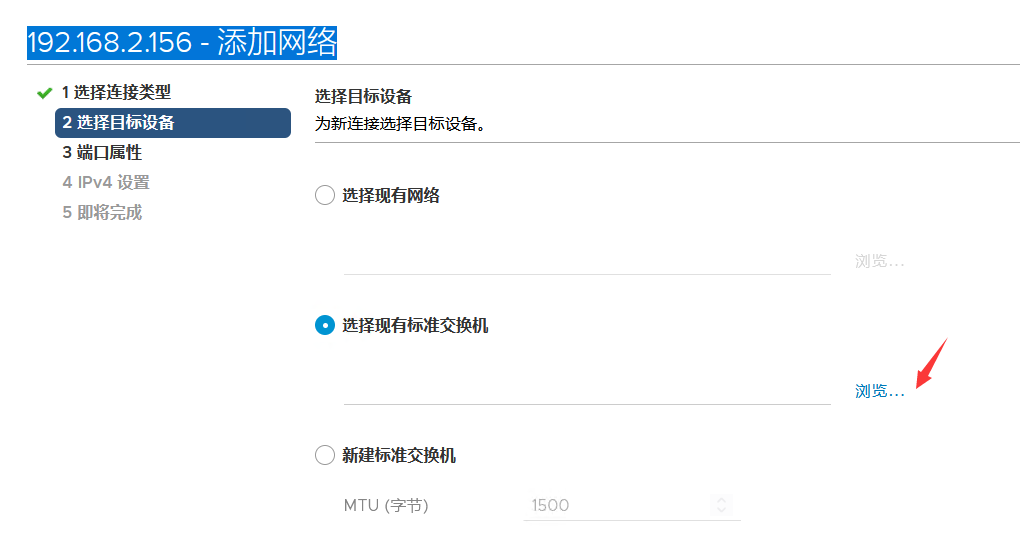
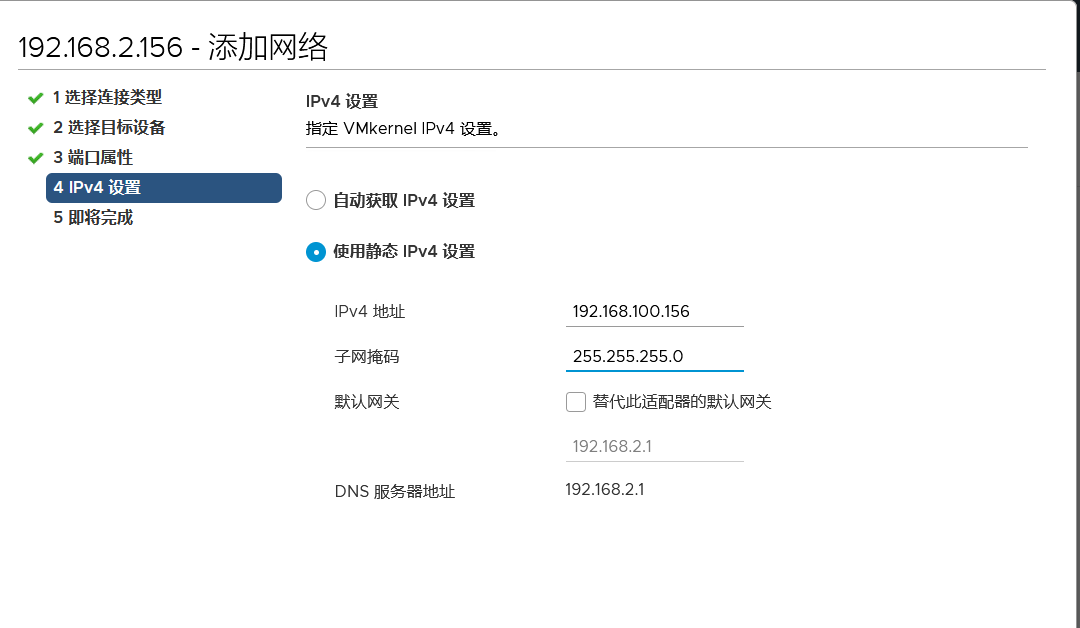
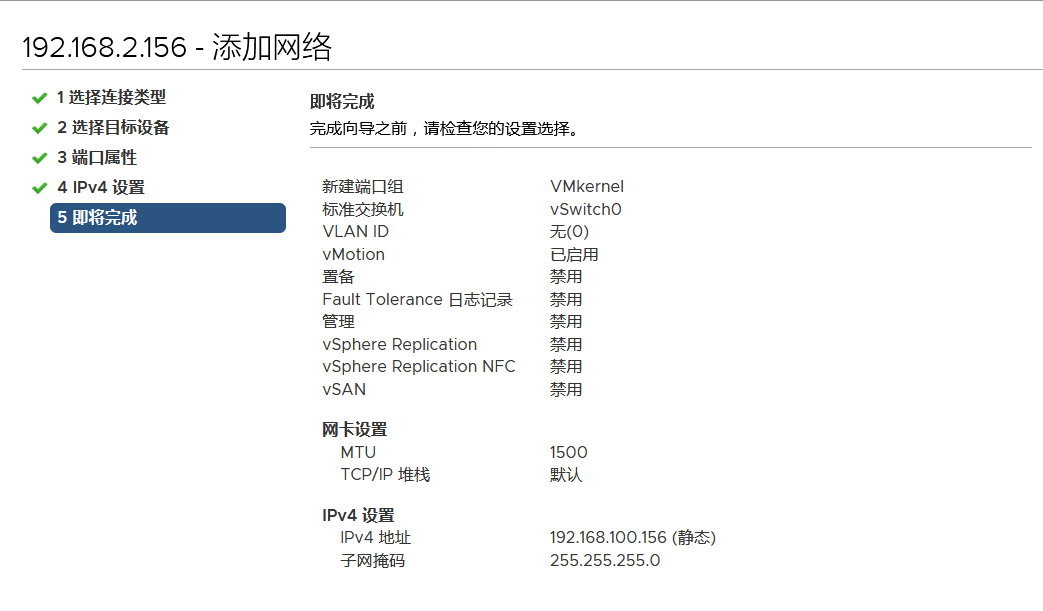
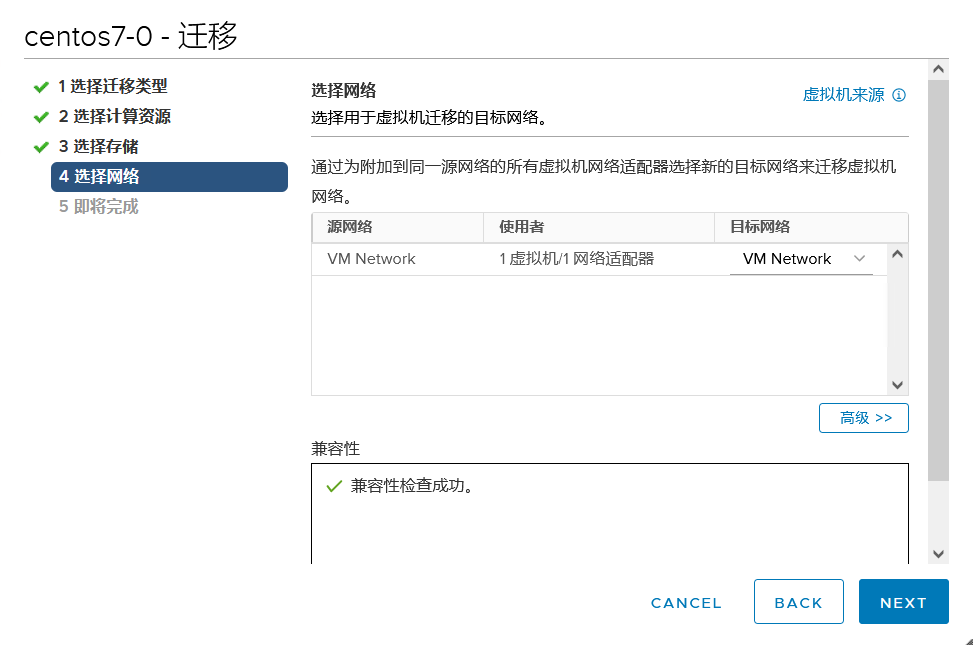
2.6 VMware vCenter Server creates a private network and migrates between two esxi virtual machines
The same network should be added to both esxi
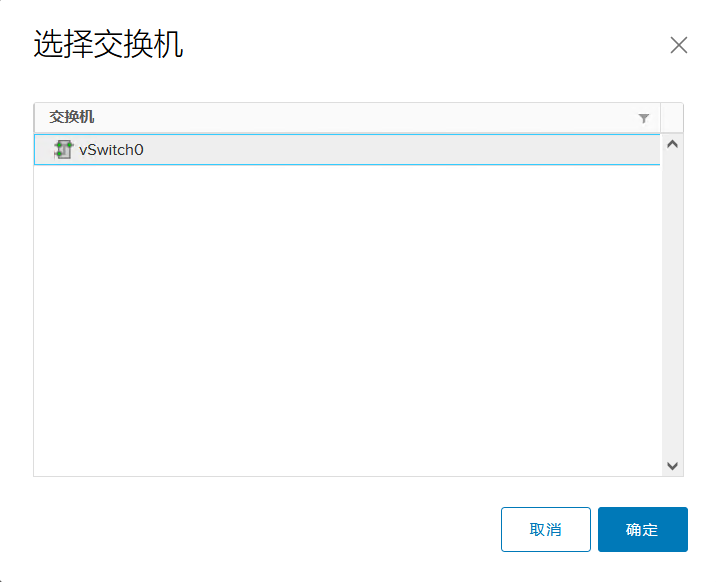
Log in to VMware vCenter Server, select esxi host, and right-click to add network
Select first
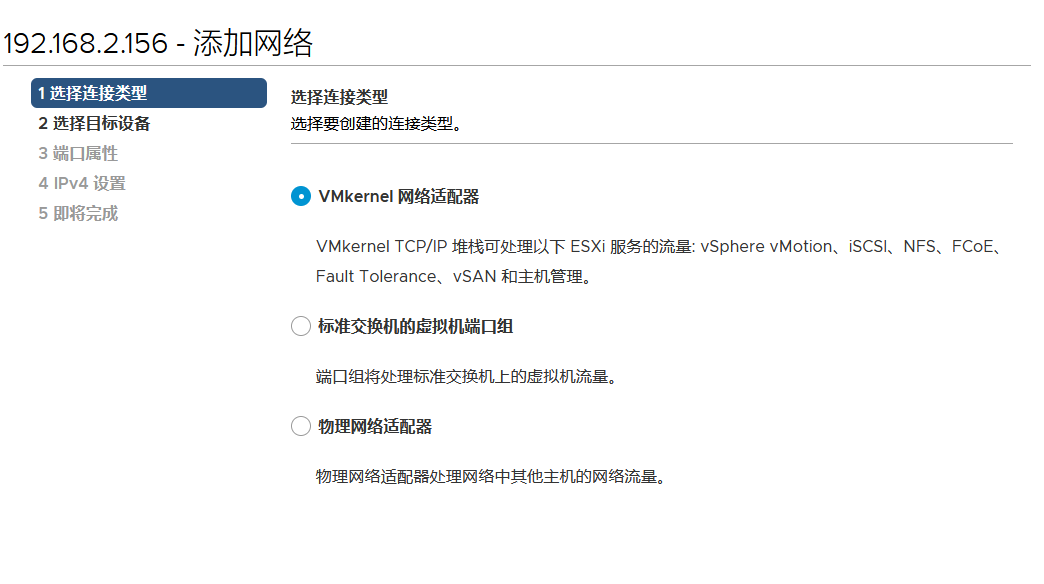
Select the existing switch and make a new network with its own network
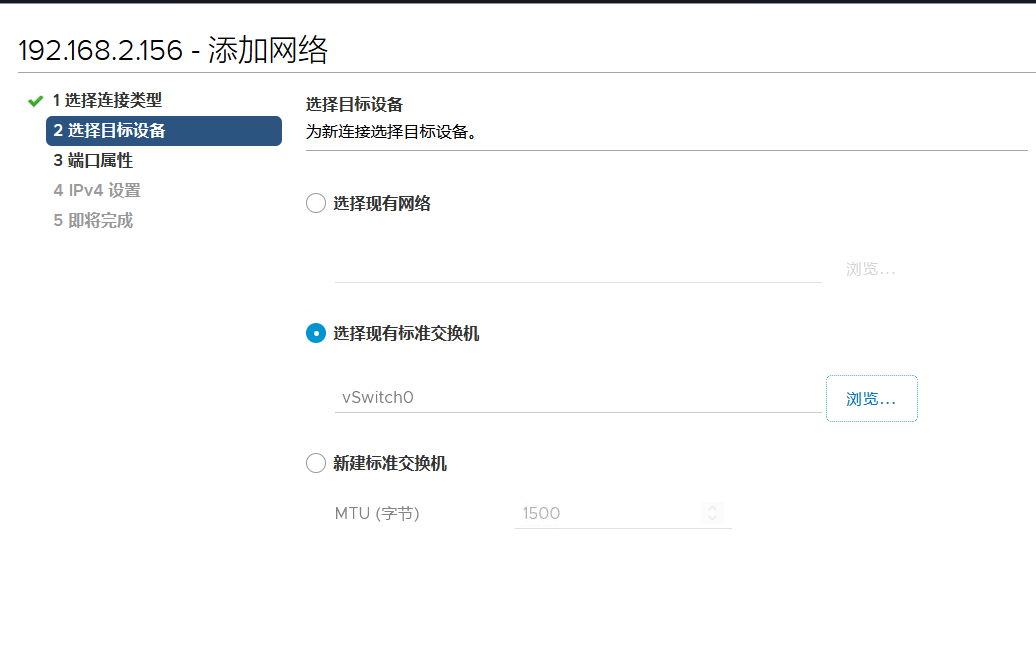
Adding this attribute, the new network tag names of the two esxi must be consistent
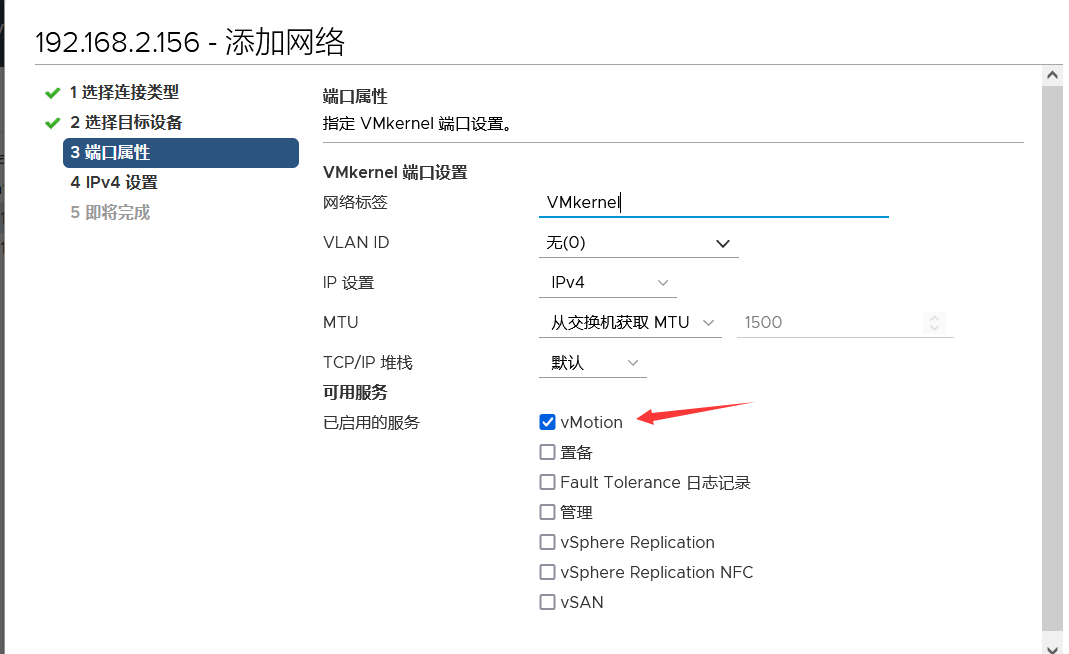
Enter a new network IP
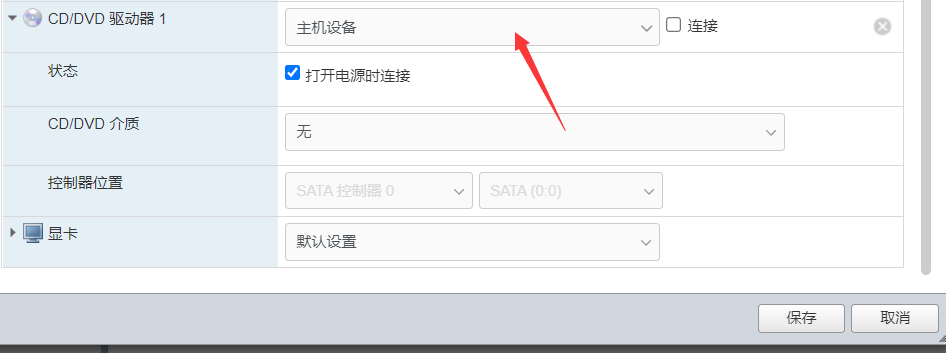
Note: the virtual machine that needs to be migrated needs to be unmounted. Log in to the esxi web page to ensure that no other devices are attached to the virtual machine
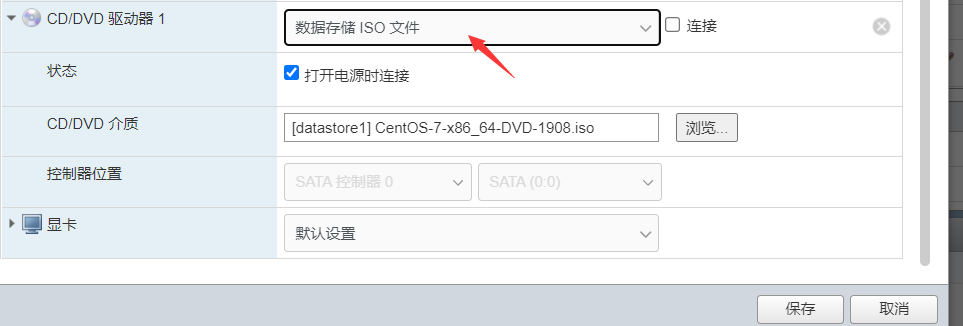
Unload the CD-ROM and leave only the device
Select esxi. It is better to shut down the virtual machine before migrating. Right click to select migration
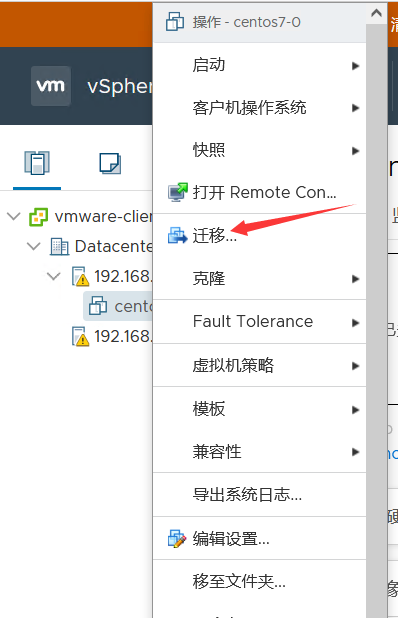
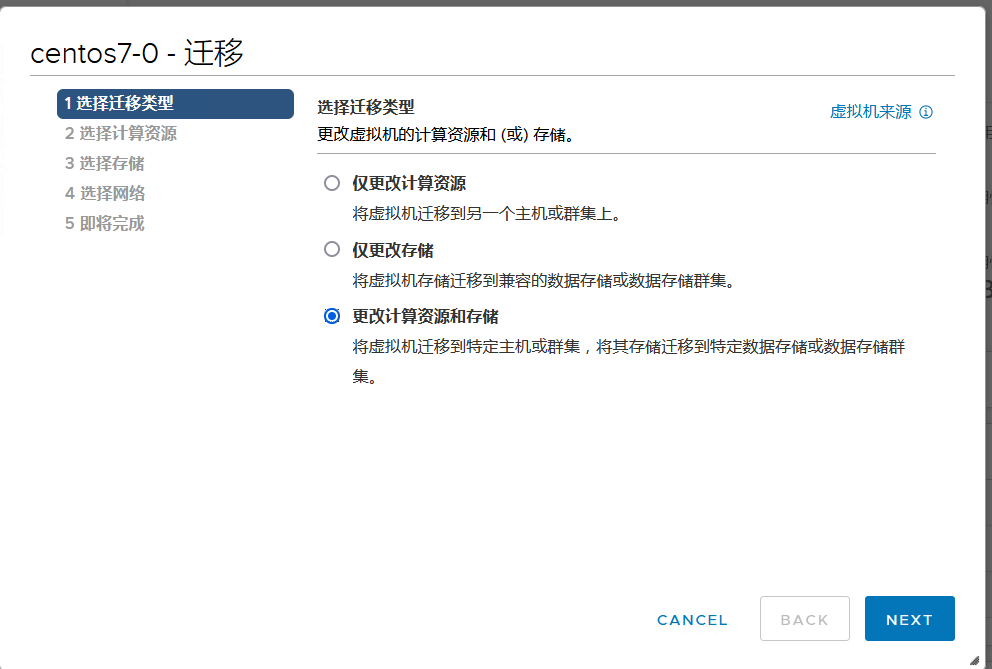
Select the third
Confirm that compatibility success is displayed here
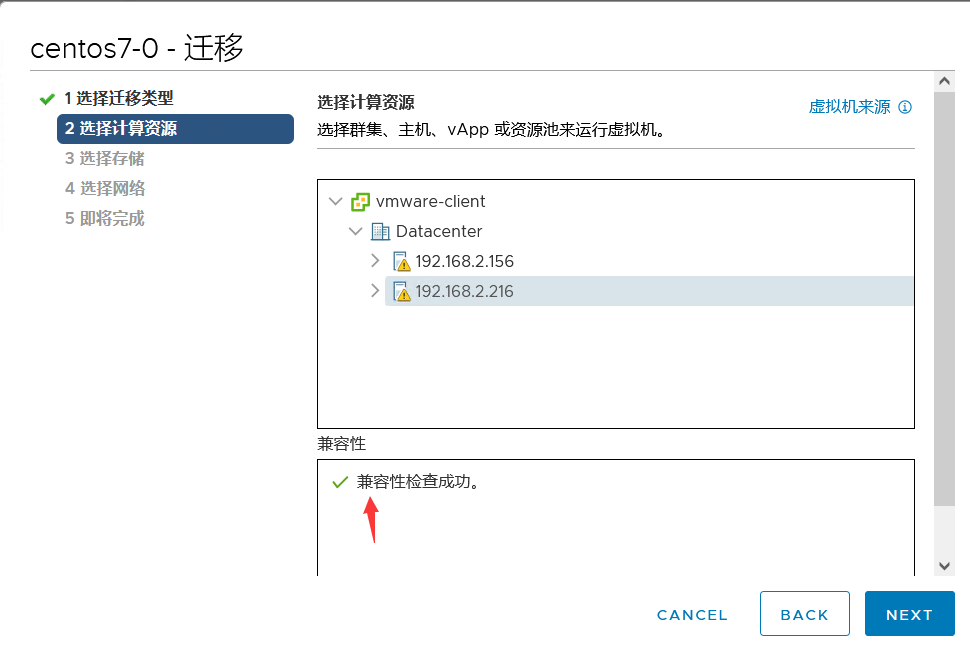
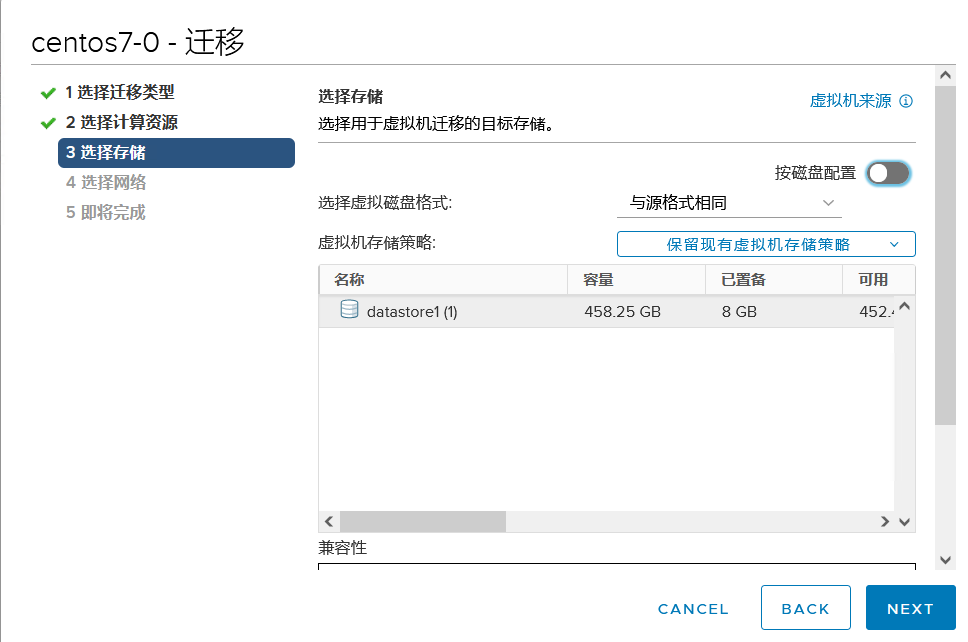
Select the storage location of the virtual machine on the new esxi host
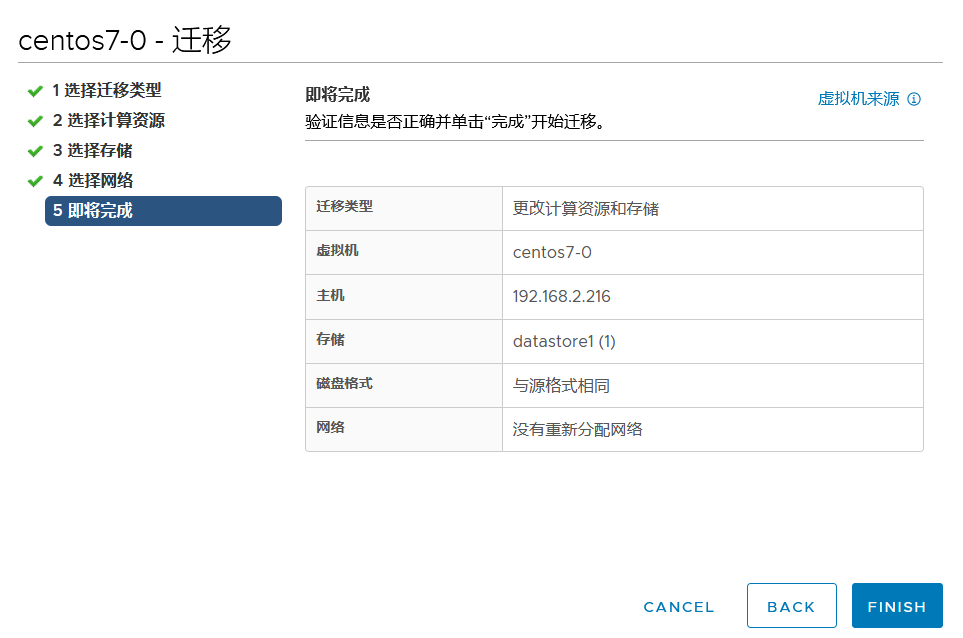
View the migration progress in the taskbar below
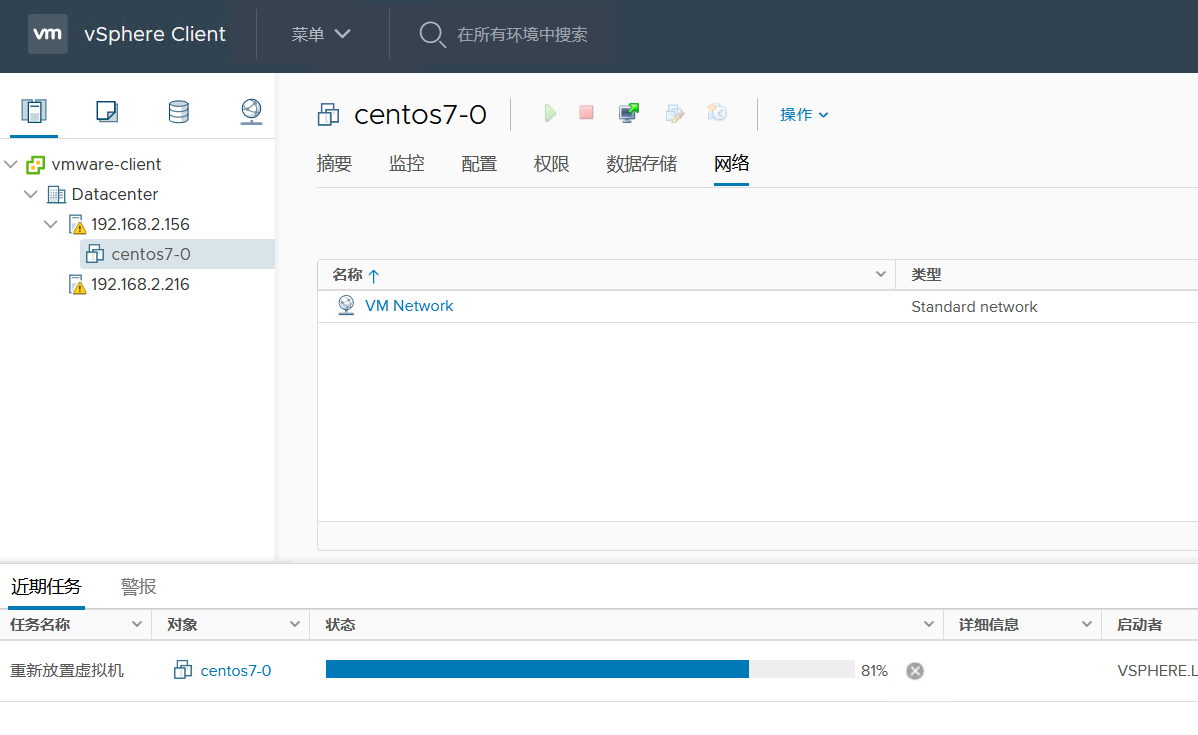
Finally, you can see that the device migration is successful
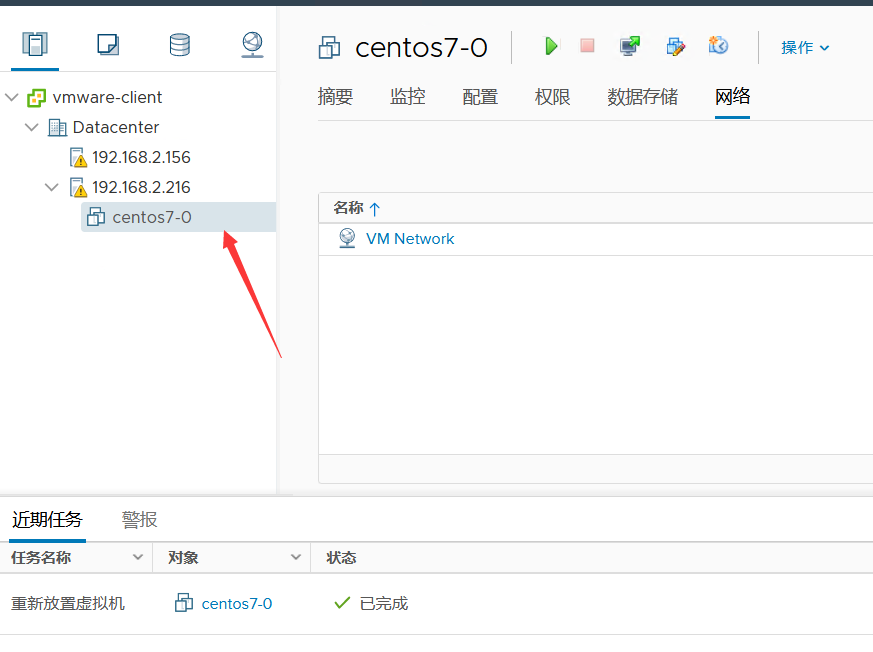
Log in to the esxi host and confirm the virtual machine status