LaTeX table format and common table types
in the process of writing papers, it is often necessary to present some data in tabular form. All macro package files of LaTeX should be written after the \ documentclass command and before \ begin{document}. In this article, the macro packages related to LaTeX tables will be used as follows:
\documentclass{article}
\usepackage{booktabs}  %% Three line meter
\usepackage{diagbox}   %% Slash meter
\usepackage{multirow}  %% merge cell


\begin{document}
\title{ ... }
\author{ ... }
\date{...}
\maketitle
...
\end{document}
1. Basic use of forms
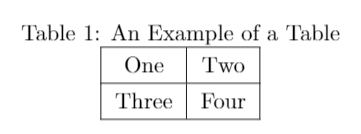
Detailed description of the basic template of the form:
\begin{table}[!h]
    \renewcommand{\arraystretch}{1.3}
    \caption{An Example of a Table}
    \label{table_example}
    \centering
    \begin{tabular}{|c|c|}
        \hline
        One & Two \\
        \hline
        Three & Four\\
        \hline
    \end{tabular}
\end{table}
The effects are as follows:
The insertion of tables and pictures are consistent in many places. Let's talk about different syntax:
1. Frame
  \begin{table}[!h]

  \end{table}
The overall framework defines the position of the beginning (\ begin) and end (\ end) of the table. The table indicates that the picture is inserted. [! h] is the layout format of the table. All formats are consistent with the pictures.
- [h] Current position (here): H indicates where you are when you are writing, and where the picture is finally displayed in the paper. However, if there is not enough space on this page to put down the picture, the picture will go to the next page;
- [t] Top: t indicates that the picture is preferentially placed at the top of the page facing the corresponding row;
- [b] Bottom: B means that the picture is preferentially placed at the bottom of the corresponding row of the page;
- [p] Floating: set the picture to floating status, and the system will automatically arrange the position of the picture;
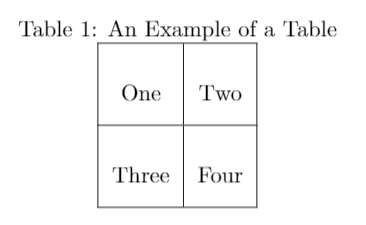
2. Row height
\renewcommand{\arraystretch}{1.3}
This paragraph sets the row height of the table. If we change 1.3 to 3, it becomes as follows:
3. Title and label
\caption{An Example of a Table}
\label{table_example}
caption is the title of the image. {} is the specific content of the title. The title will also have a number, which is generally automatically numbered. Label is a label, which is mainly used when referencing.
4. Center display
\centering
centering means that the table is displayed in the center. If it is used in the picture, it means that the picture is displayed in the center.
However, if the width of the table exceeds the width of the current row, it will pass.
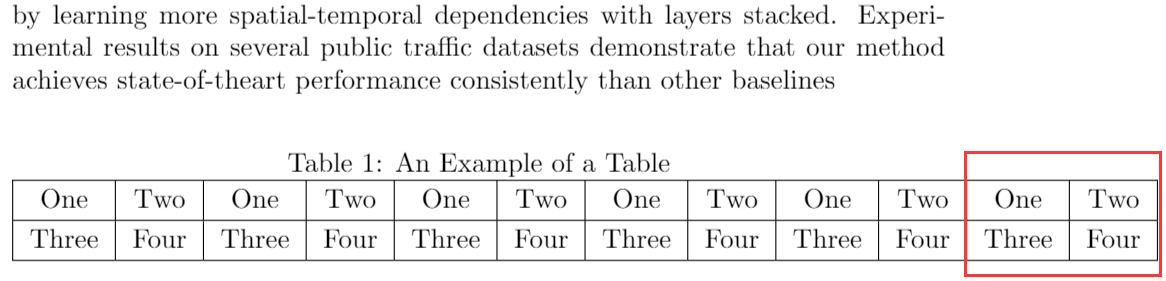
If so, we will talk about setting the picture to page floating format. We need to add * after the frame table above. In this way, the table will span two columns of the paper page.
5. Table content
\begin{tabular}{|c||c|}
      \hline
      One & Two \\
      \hline
      Three & Four\\
      \hline
    \end{tabular}
This whole block is the content of the table. The following statement indicates the beginning and end of the table content:
\begin{tabular}{|c||c|}

\end{tabular}
{| c|c} represents the style and vertical border of the content in the table. There are two columns, indicating that the table has two columns. There is a vertical line on the left of the first column, indicating that the table has a left border line, and there are two vertical lines between the two columns, indicating that the separation line in the middle is double line, and there is a vertical line on the right of the following columns, indicating that the table has a right border line.
We can also replace c with l or r:
- l: L stands for left, i.e. left alignment;
- c: C stands for center, i.e. center;
- r: R stands for right, i.e. right alignment;
Hline means that the border has a solid line. If there is no hline, it means that there is no horizontal line.
What if we want some to have solid lines and some not?
We hope to have horizontal in columns 1, 3 and 5 of the second row, which can be written as follows:
\cline{1-1} \cline{3-3} \cline{5-5};
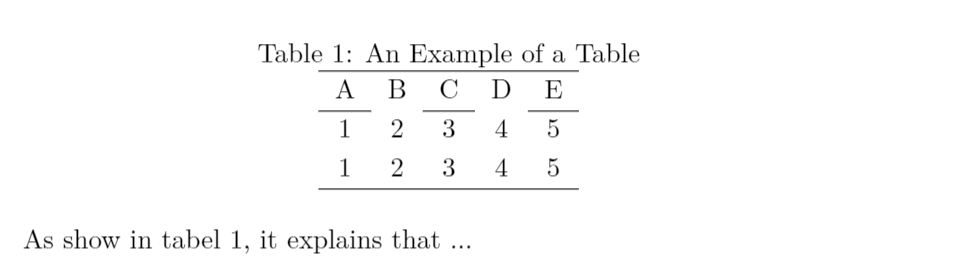
\begin{table*}[!h]
    \renewcommand{\arraystretch}{1.2}
    \caption{An Example of a Table}
    \label{table_example}
    \centering
    \begin{tabular}{c c c c c}
        \hline
        A & B & C & D & E \\
        \cline{1-1} \cline{3-3} \cline{5-5}
        1 & 2 & 3 & 4 & 5 \\
        1 & 2 & 3 & 4 & 5 \\
        \hline
    \end{tabular}
\end{table*}
Note: the contents of each column in the table shall be separated by &, one line shall end, and the \ \ symbol shall be used to wrap the line.
2. Table reference
The command ref is used for table reference. For example, if we want to reference the above table, we can call:
As show in tabel \ref{table_example}, it explains that ...
3. Common table types
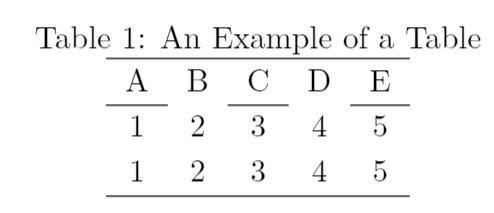
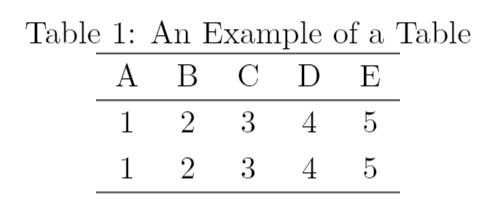
1. Three line meter
Three line table is a common type of table. According to the basic template of the table introduced above, we can simply write an example of three line table:
\begin{table}[!h]
    \renewcommand{\arraystretch}{1.2}
    \caption{An Example of a Table}
    \label{table_example}
    \centering
    \begin{tabular}{c c c c c}
        \hline
        A & B & C & D & E \\
        \hline
        1 & 2 & 3 & 4 & 5 \\
        1 & 2 & 3 & 4 & 5 \\
        \hline
    \end{tabular}
\end{table}
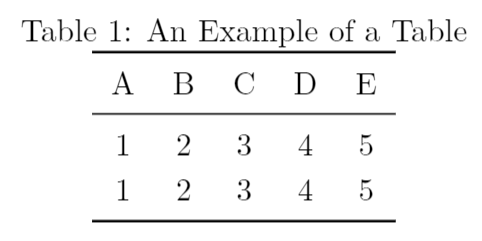
This is the simplest three line table. What if we want the top and bottom horizontal lines to be thicker?
Import macro package of three line table: \ usepackage{booktabs}
Then rewrite the horizontal line in the code:
\begin{table}[!h]
    \renewcommand{\arraystretch}{1.2}
    \caption{An Example of a Table}
    \label{table_example}
    \centering
    \begin{tabular}{c c c c c}
        \toprule
        A & B & C & D & E \\
        \midrule
        1 & 2 & 3 & 4 & 5 \\
        1 & 2 & 3 & 4 & 5 \\
        \bottomrule
    \end{tabular}
\end{table}
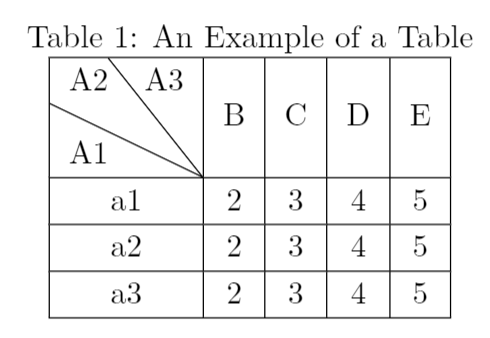
2. Slash meter
The slash header needs to import a macro package: \ usepackage{diagbox}
The slash header is mainly a cell divided into two or three blocks:
\diagbox{A1}{A2}      %% It is divided into two parts A1 and A2
\diagbox{A1}{A2}{A3}  %% It is divided into three parts A1,A2 and A3
Then we write this as a cell.
\begin{table}[!h]
    \renewcommand{\arraystretch}{1.2}
    \caption{An Example of a Table}
    \label{table_example}
    \centering
    \begin{tabular}{|c|c|c|c|c|}
        \hline
        \diagbox{A1}{A2}{A3} & B & C & D & E \\
        \hline
        a1 & 2 & 3 & 4 & 5 \\
        \hline
        a2 & 2 & 3 & 4 & 5 \\
        \hline
        a3 & 2 & 3 & 4 & 5 \\
        \hline
    \end{tabular}
\end{table}
The effect of implementation is as follows:
3. Merging of cells
Cell merging requires a package: \ usepackage{multirow}
Explain directly through an example:
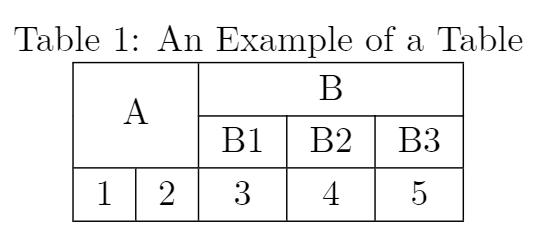
\begin{table}[!h]
    \renewcommand{\arraystretch}{1.2}
    \caption{An Example of a Table}
    \label{table_example}
    \centering
    \begin{tabular}{|c|c|c|c|c|}
        \hline
        \multicolumn{2}{|c|}{\multirow{2}{*}{A}} & \multicolumn{3}{c|}{B} \\
        \cline{3-5}
        \multicolumn{2}{|c|}{}   & B1     & B2    & B3    \\
        \hline
         1 & 2 & 3 & 4 & 5     \\
        \hline
    \end{tabular}
\end{table}
From the number of separators & and newline \ \ we know that this is a table with three rows and five columns. We find that the first row has only one &, which means that the first row has only two cells, the second row has three &, and the second row has four cells.
\multicolumn{2}{|c|}{\multirow{2}{*}{A}}
Two commands are used:
- \multicolumn{}{}{};
- \multirow{}{}{};
The first command is multi column merging. The second command is multi row merging. If it is nested, it is multi row and multi column merging.
The meaning of each brace is as follows:
- The first brace is the number of columns to be merged. The number of columns to be merged is used in the first command, and the number of rows to be merged is used in the second command.
- The second brace is the format of each column of data in the row and the corresponding border line. The format of merged lines generally follows the previous format by default, write *.
- The third brace is the content of the current cell.
This merging method is very troublesome to read and difficult to understand, let alone readers. The author also feels very complex to write. Is there a better solution to this cell merging? yes , we have!
Online form generation tool: https://www.tablesgenerator.com/
Step 1: select the table size;
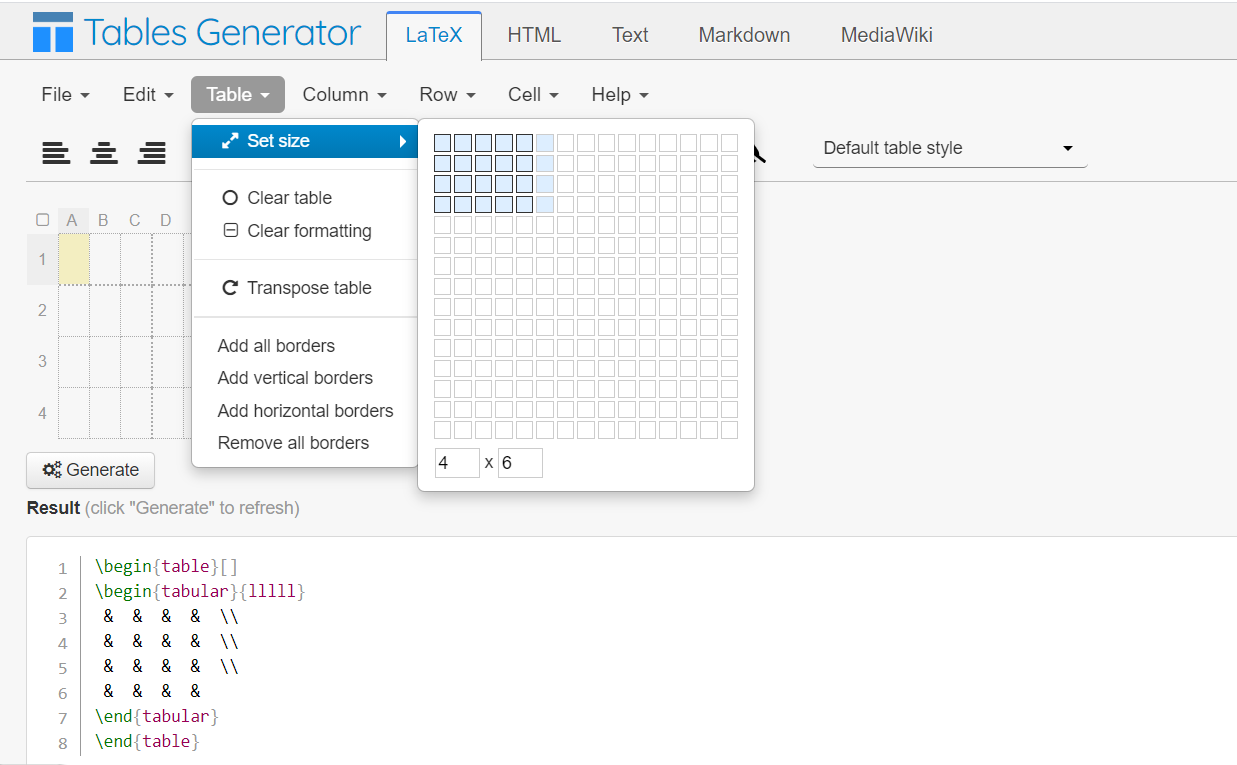
Click [Column] and [Row] to add columns to the left and right, and rows to the top and bottom of the selected table, including the basic style of the table (border, text centered, bold, etc.)
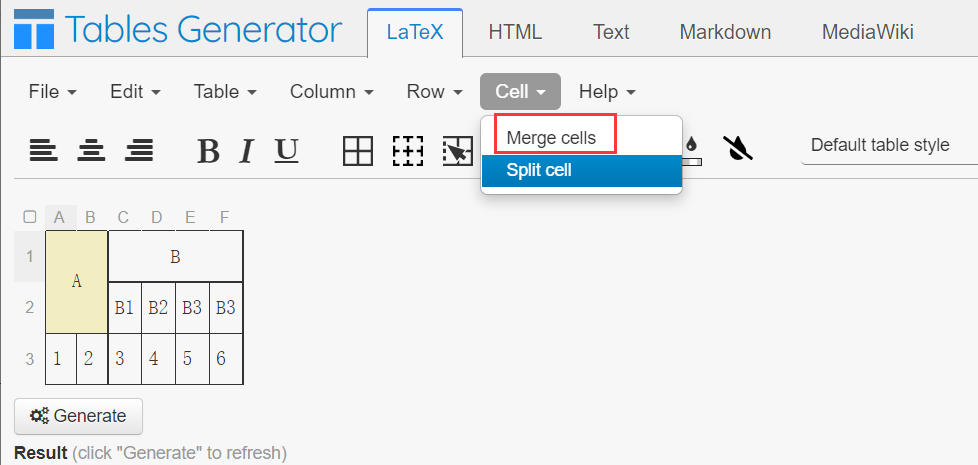
Step 2: merge and split cells, select the cells in the corresponding row or column, and click merge cells;
Step3: click one key to generate;
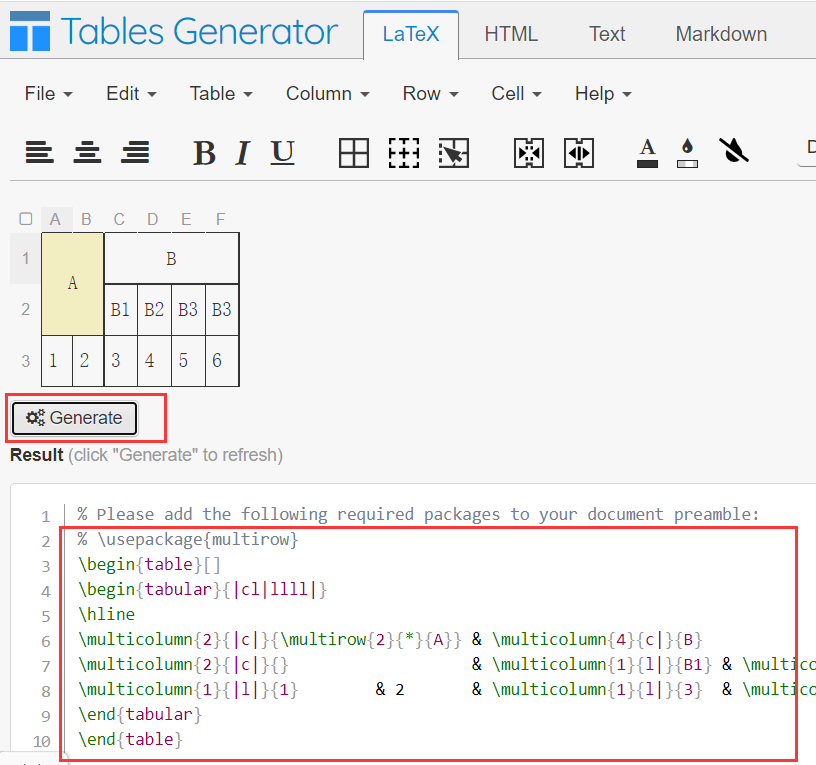
The notes of this part are sorted into PDF and uploaded to Baidu network disk , extraction code: 6666. -- share from Baidu online disk super member V2