Learn webpack series 3 (output management)
Zero. Preface
It's almost the National Day holiday! Have you found your favorite job when you are in the golden age! My daily life is similar to the following~

In short, I hope everyone can have a relaxed and comfortable National Day! Let's get to the point.
So far, we have manually introduced all resources into the index.html file. However, as the application grows, and once we start to use hash in the file name and output multiple bundle s, it will become difficult to continue to manually manage the index.html file. However, some plug-ins can make this process easier to control.
This article continues the code example from the previous article (managing resources).
First, sort out the directory and add the print.js file (used as the second entry. As for why, look down). The specific project path is as follows:
 webpack-demo
  |- package.json
  |- webpack.config.js
  |- /dist
  |- /src
    |- index.js
    |- print.js
  |- /node_modules
print.js Code:
export default function printMe() {
  console.log('I get called from print.js!');
}
1, Manually manage output
In the process of configuring webpack, once our program adds a new requirement (print.js) and needs to output multiple bundle s, we need to modify the code of the entry and exit parts. Now let's change the code of the part in webpack.config.js:
 const path = require('path');

 module.exports = {
  entry: {
     index: './src/index.js',
     print: './src/print.js',
  },
   output: {
     filename: '[name].bundle.js', // Packaged file name
     path: path.resolve(__dirname, 'dist') // Packaged directory
   }
 };
Type the following code in the original index.js:
import _ from 'lodash';
import printMe from './print';

function component(params) {
    const element = document.createElement('div');
    const btn = document.createElement('button');

    // Loadash (currently introduced through a script) is necessary to execute this line
    element.innerHTML = _.join(['Hello', 'webpack'], ' ');

    btn.innerHTML = 'Click me and check the console!';
    btn.onclick = printMe;

    element.appendChild(btn);

    return element;
}

document.body.appendChild(component());
Introduce the bundle to be packaged in dist/index.html:
<!DOCTYPE html>
<html>

<head>
    <meta charset="utf-8" />
    <title>Management output</title>
    <script src="./print.bundle.js"></script>
</head>

<body>
    <script src="./index.bundle.js"></script>
</body>

</html>
Next, run the previously configured packaging command:
npm run build
Then run to the browser to view the page:

We can see that the click effect we want has come out, and the packaging is successful.
However, we need to pay attention to one problem. What happens if we change the name of one of our entry starting points or even add a new entry? The generated bundle will be renamed during construction, but our index.html file still references the old name and will not introduce a new bundle. Does our output index.html need to be configured manually every time?
Obviously not. This goes against the original intention of webpack and fails to achieve the purpose of automatic packaging, such as:
Let's change the print of the entry in webpack.config.js to printer and repackage it. Let's see the results:
entry: {
    index: './src/index.js',
    printer: './src/print.js'
},

You can see that the browser still refers to print.bundle.js, but not to our latest packaged printer.bundle.js
This is not the automated packaging we want. So how can we do automated packaging? Then look down.
2, Plug in management output
HTML webpack plugin simplifies the creation of HTML files to serve your webpack package. This is particularly useful for webpack packages where the file name contains a hash value that changes with each compilation. You can let the plug-in generate an HTML file for you, use the lodash template to provide the template, or use your own loader.
The plug-in will generate an HTML5 file for you, and use the script tag in the body to automatically introduce all the bundle s generated by your webpack. Just install and add the plug-in to your webpack configuration, as shown below:
Documentation for the HtmlWebpackPlugin extension: HtmlWebpackPlugin
Install the plug-in with npm first:
npm install --save-dev html-webpack-plugin
Next, change the configuration in webpack.config.js:
const path = require('path');
// The plug-in package is introduced here
const HtmlWebpackPlugin = require('html-webpack-plugin');

// Here, in order, entry - > plugins plug-in - > output exit actually has no special meaning. It will be easier to understand in order

module.exports = {
    mode: 'development',
    entry: {
        index: './src/index.js',
        printer: './src/print.js'
    },
    plugins: [
        new HtmlWebpackPlugin({
            title: 'Management output 123' // title in HTML5
        })
    ],
    output: {
        filename: '[name].bundle.js', // Packaged file name
        path: path.resolve(__dirname, 'dist') // Packaged directory
    }
};
Then, without doing anything else, let's package it with the command line: npm run build


It can be seen that the bundle in index.html is automatically introduced and the name is automatically modified. The printer we modified earlier has been automatically packaged and introduced into the page, and the code has been partially compressed.
This is the automated packaging configuration we want.
3, Automatically clean up files
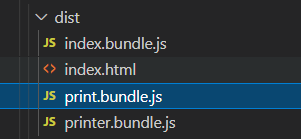
Now let's look at the dist folder:
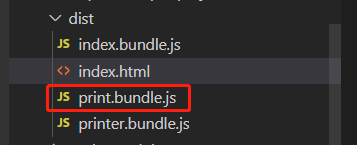
The bundle package before our modification still exists. If we discard a lot of packages, our project will be very bloated. Therefore, when we need to configure the output, let the project only output the resources in our current configuration:
output: {
    filename: '[name].bundle.js', // Packaged file name
    path: path.resolve(__dirname, 'dist'), // Packaged directory
    clean: true // Automatically clean up old bundle s
}
Now rerun the command line command to see the effect: npm run build
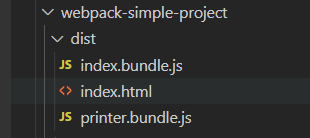
print.bundle.js has disappeared, and the remaining two bundles are configured at the portal.
I believe that through this article, you have a certain understanding of the output management of webpack, which should be enough to cope with the configuration of general projects.
Some people may wonder, why not choose the configuration of webpack in the project to code an article? You think it's very simple for me to take out the configuration of the project. But everyone's reading efficiency and knowledge are really not very efficient. In this way, you can know the context of webpack by sub modules ~ you learn a lot, don't you?
I hope you will pay more attention and praise. It's not easy for newcomers! Thank you~