Learning Content: Learning Java Web (Day47)
1,Maven
2. Create maven projects through IDEA
1,Maven
(1) Project automation and project management software provided by the Apache Software Foundation. Based on the concept of Project Object Model (POM), Maven uses a central piece of information to manage the steps of building, reporting, and documentation for a project.
Official website: http://maven.apache.org/
(2) Download and configure maven
1. Download address: http://maven.apache.org/download.cgi
2. Configuring environment variables
MAVEN_HOME = maven root path
PATH = %MAVEN_HOME%/bin
3. Execute maven command for validation
Mvn-v Displays maven version information
(3) maven project structure
myapp (entry name)
|-- pom.xml (Profile)
-- src|
	|-- main
	|	-- java
	|		-- com.mycompany.app
	|			-- App.java
	|-- test
		-- java
			-- com.mycompany.app
				-- AppTest.java
(4) maven's configuration file pom.xml
<?xml version="1.0" encoding="UTF-8"?>
<project xmlns="http://maven.apache.org/POM/4.0.0"
	xmlns:xsi="http://www.w3.org/2001/XMLSchema-instance"
	xsi:schemaLocation="http://maven.apache.org/POM/4.0.0
				http://maven.apache.org/xsd/maven-4.0.0.xsd">
	<!--Use schema Validation, labels in this profile must conform to validation-->

<!--groupId + artifactId + version = coordinate-->
<modelVersion>4.0.0</modelVersion>
<groupId>com.mycompany.app</groupId> <!--Name of the company project-->
<artifactId>myapp</artifactId> <!--Module Name-->
<version>0.0.1-SNAPSHOT</version> <!--version number-->

<!--Configuration Properties-->
<properties>
    <project.build.sourceEncoding>UTF-8</project.build.sourceEncoding>
    <maven.compiler.source>10</maven.compiler.source> <!--Installed jdk Edition-->
    <maven.compiler.target>10</maven.compiler.target>
</properties>

</project>
(5) dos directive from maven
1.maven project compile command: mvn compile
The first compilation downloads the components required by maven, and after compilation, a target directory is generated in the project where the compiled class file is saved.
2. Execute unit tests: mvn test
Before testing, you need to add a dependency on junit in pom.xml (download the jar package)
<!--In central warehouse according to coordinates http://Find jar package in mvnrepository.com/-->
<dependencies>
    <dependency>
        <groupId>junit</groupId>
        <artifactId>junit</artifactId>
        <version>3.8.1</version>
    </dependency>
</dependencies>
This directive tests Test.java in the Test.java directory. Methods in Test.java can be run with the @Test comment without writing the main method.
3. Clear target:mvn clean
Clear the compiled class file.
4. Packaging: mvn package
Put the maven project as a jar package in the target directory for others to use.
5. Publish to local repository: mvn install
Package the maven project and place it under c:/user/.m2/reporitory/com/mycompany/app/myapp/0.0.1-SNAPSHOT, which is the default local warehouse address.
Use this jar package next time to add dependencies in pom.xml
<!--Find in local warehouse based on coordinates jar package-->
<dependencies>
    <dependency>
        <groupId>com.mycompany.app.myapp</groupId>
        <artifactId>myapp</artifactId>
        <version>0.0.1-SNAPSHOT</version>
    </dependency>
</dependencies>
6. Use Archetype to quickly create projects: mvn archetype:generate
You can create it by entering coordinates in the output interactive command;
Or MVN archetype:generate-DgroupId=com.xixingit.pms-DartifactId=myapp2-Dversion=1.0.0-SNAPSHOT
(6) Modify local warehouse location
The default local warehouse location is in the ~/.m2 folder of the operating system, modified as follows:
1. Uncomment this line of code in the maven/conf/settings.xml configuration file: <local Repository>/path/to/local/repo</local Repository>
2. Modify the path to your desired path
<localRepository>J:/maven/repo</localRepository>
(7) Order in which maven finds dependencies
1. Find the required dependencies from the local warehouse
2. Find needed dependencies from private warehouses
3. From the central warehouse (http://repo.maven.apache.org/) to find the required dependencies
Private warehouse (private service): Companies usually have their own private service to store jar packages that they need to use.
Modify private service addresses for individual items:
<repositories>
    <repository>
        <id>local</id>
        <name>nexus_server</name>
        <url>http://192.168.1.100:8088/nexus/content/groups/public/</url>
    </repository>
</repositories>
Modify the global private service address:.m2/settings.xml:
<mirror>
    <id>mirrorId</id>
    <mirrorOf>*</mirrorOf>
    <name>Human Readable Name for this Mirror.</name>
    <url>http://xxxxx</url>
</mirror>
(8) <scope>label, usually appended after dependent coordinates, represents the dependent usage range, has four values, and the default value is compile:
* compile - compile (default, used when compiling, packaging)
* provided - Dependencies used in compilation and testing, not included in packaging, e.g. servlet-api.jar
* runtime - runtime dependent, compile independent, such as mysql.jar
* test - dependent only on tests, not used when compiling and packaging, e.g. junit.jar
(9) Dependent Delivery and Conflict
When you add a dependency, the added dependency may depend on another jar package, which automatically adds the dependency as well, which is the propagation of the dependency. But sometimes the dependency propagation conflicts, such as two different dependencies depending on the same jar package.
* Used before dependency when dependency levels are the same
* Dependency levels are different, short dependency paths will be used
* Dependency passing only passes packages at the compile level
Conflicting dependencies can then be excluded.
<dependency>
    <groupId>org.apache.struts</groupId>
    <artifactId>struts2-core</artifactId>
    <version>2.2.31</version>
    <exclusions> <!--Dependency to dispatch conflicts-->

        <exclusion>
            <groupId></groupId>
            <artifactId></artifactId>
        </exclusion>

        <exclusion>
            <groupId></groupId>
            <artifactId></artifactId>
        </exclusion>

    </exclusions>
</dependency>
(10) Other configurations
Dependent version numbers can be configured in <properties> and can be applied directly with ${} when a version number needs to be written in coordinates, which facilitates later modifications to the version number.
<properties>
    <junit.version>4.12</junit.version>
</properties>
<dependencies>
    <dependency>
        <groupId>junit</groupId>
        <artifactId>junit</artifactId>
        <version>${junit.version}</version>
        <scope>test</scope>
    </dependency>
</dependencies>
2. Create maven projects through IDEA
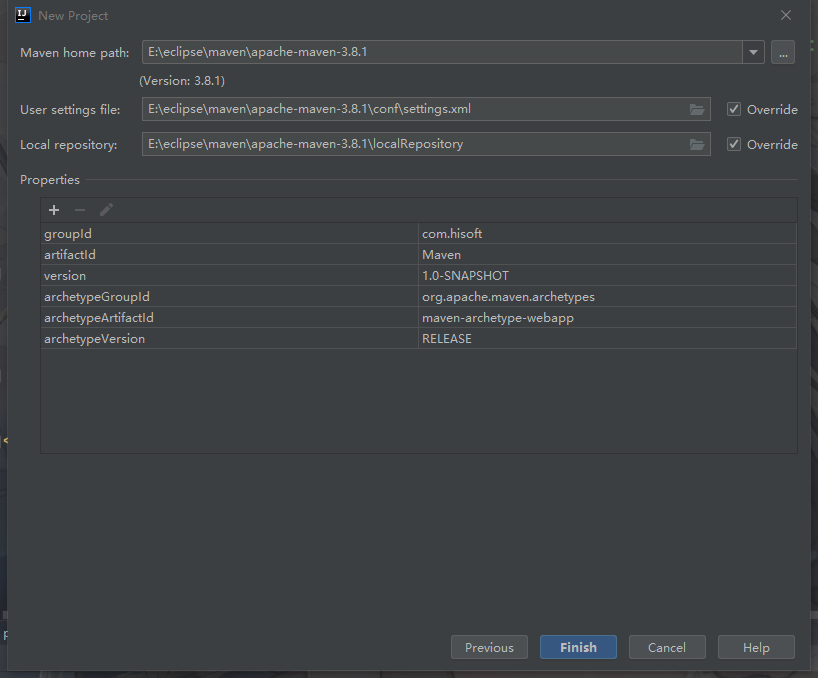
(1) When you create a Maven project using IDEA 2021, you find that there are no templates. It is not possible to configure the MavenMaven settings and add plug-ins in the settings, but when you create a Maven project without selecting a template, all the Maven skeleton will appear.
Configuration: -DarchetypeCatalog=internal allows idea to load the skeleton locally when creating a maven project.

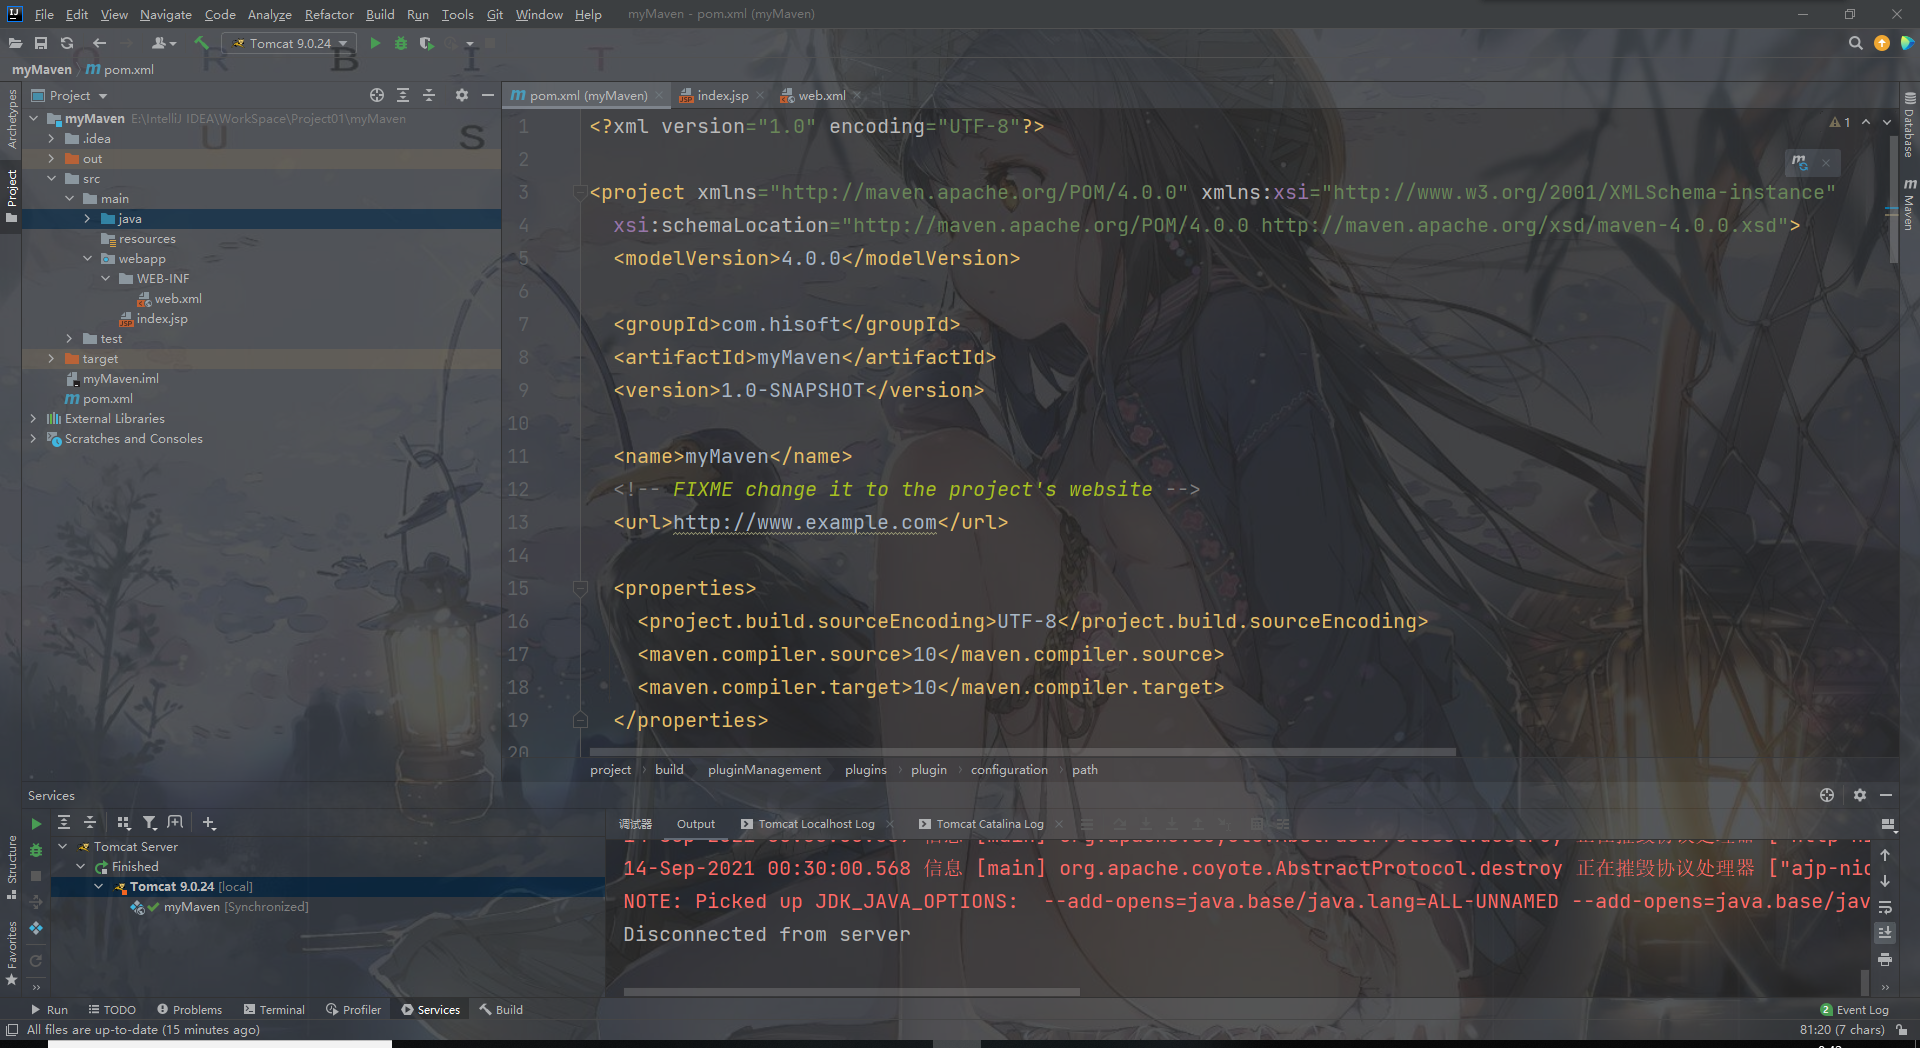
(2) Create a Maven project


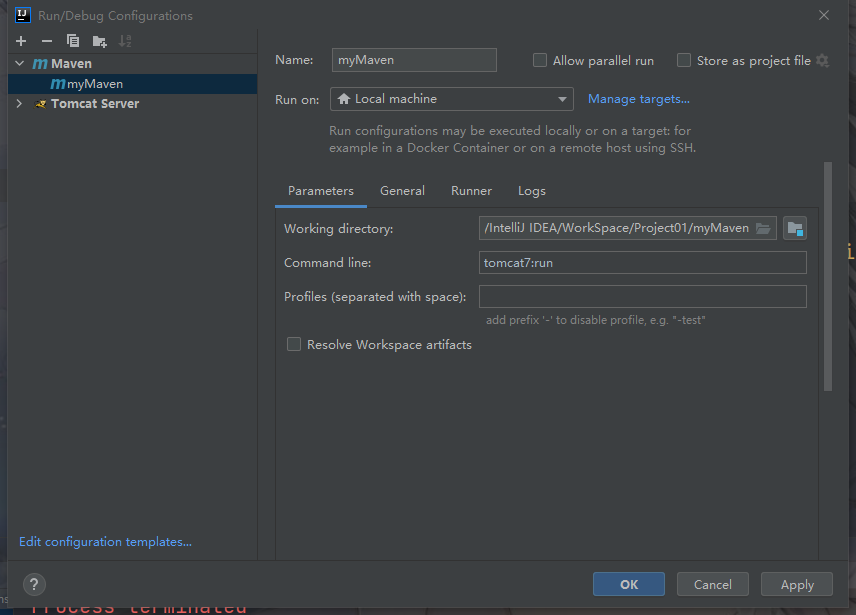
(3) You can configure tomcat to run the Maven project, or you can use the Maven integrated tomcat plug-in to run it
Maven integrated tomcat plug-in:
<packaging>war</packaging>
<build>
<plugins>
   <plugin>
      <groupId>org.apache.tomcat.maven</groupId>
      <artifactId>tomcat7-maven-plugin</artifactId>
      <configuration>
         <!-- Specify Port -->
         <port>8080</port>
         <!-- Request Path -->
         <path>/myMaven</path>
      </configuration>
   </plugin>
</plugins>
 </build>
Click on the "m" flag in the upper right corner of Maven, enter MVN Tomcat 7:run, and return. This starts Maven's integrated tomcat.

Debug using Maven integrated tomcat
