preface
The main purpose of recording the common operation commands of Docker is to consolidate learning, and also hope to play a reference role for beginners.
PS: the system environment of this drill is CentOS 7, Docker version is 20.10.12, and build e91ed57.
Reference to this article: Docker tutorial | rookie tutorial (runoob.com)
Docker image acceleration
It is sometimes difficult to pull images from DockerHub in China. You can configure an image accelerator. Docker officials and many domestic cloud service providers provide domestic accelerator services, such as:
- Alibaba cloud: https://tia33io9.mirror.aliyuncs.com
- HKUST image: https://docker.mirrors.ustc.edu.cn/
- Daoke cloud: http://f1361db2.m.daocloud.io
- Netease: https://hub-mirror.c.163.com/
- Qi niuyun: https://reg-mirror.qiniu.com
Docker official accelerator https://registry.docker-cn.com , it seems that it can no longer be used. We can add more domestic images. If there are images that cannot be used, we will switch to images that can be used to pull.
After configuring an accelerator address, if it is found that the image cannot be pulled, please switch to another accelerator address. All major domestic cloud service providers provide Docker image acceleration services. It is recommended to select the corresponding image acceleration services according to the cloud platform running Docker.
Open the terminal and use vim to open / etc / docker / daemon JSON file, write the following contents (if the file does not exist, please create a new file):
# Open / etc / docker / daemon JSON file
vim /etc/docker/daemon.json
{
	"registry-mirrors": [
		"https://tia33io9.mirror.aliyuncs.com",
		"https://docker.mirrors.ustc.edu.cn",
		"http://f1361db2.m.daocloud.io",
		"https://hub-mirror.c.163.com",
		"https://reg-mirror.qiniu.com",
		"https://registry.docker-cn.com"
	]
}
Restart the service after:
sudo systemctl daemon-reload
sudo systemctl restart docker
Docker simple example
Docker allows you to run an application in the container. Use the docker run command to run an application in the container. Here is a walkthrough with Nginx service deployment.
docker run --name my-nginx -d -p 8888:80 -e TZ=Asia/Shanghai nginx
The implementation results are shown in the figure below:
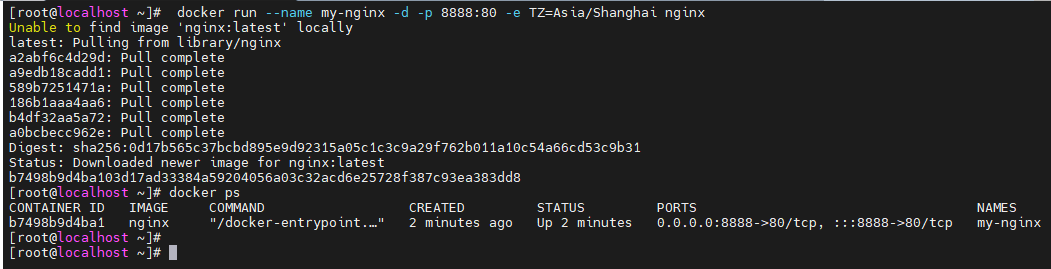
PS: since the Nginx image has not been pulled before, the Nginx image will be automatically downloaded first. Automatically run the container after pulling. The docker ps command allows you to view the list of containers in operation.
Analysis of each parameter:
- Docker: binary executable of docker.
- Run: run a container in combination with the previous docker.
- --Name my nginx: Specifies that the running container name is my nginx.
- -d: Running in the background. In most scenarios, we want the docker service to run in the background. We can specify the running mode of the container through - D. Note: adding the - D parameter will not enter the container by default. If you want to enter the container, you need to use the instruction docker exec (described below).
- -p 8888:80: mapping ports. Open port 8888 of the host and map to port 80 of the container.
- -e TZ=Asia/Shanghai: environment variable. Set the time zone for running programs in the container to Asia Shanghai. (personally, I think this setting is sometimes necessary. If the time zone of the server is inconsistent with that of the client, there will be problems.)
- nginx: Specifies the image to run. Docker first finds out whether the image exists on the local host. If it does not exist, docker will download the public image from the image warehouse Docker Hub.
Executing the docker ps command will list the currently running containers. The results are shown in the figure above.
| field | name | result |
|---|---|---|
| CONTAINER ID | Container ID | b7498b9d4ba1 |
| IMAGE | Image name | nginx |
| COMMAND | Execute command | "/docker-entrypoint...." |
| CREATED | Creation time | 2 minutes ago |
| STATUS | running state | Up 2 minutes |
| PORTS | Port mapping | 0.0.0.0:8888->80/tcp, :::8888->80/tcp |
| NAMES | Container name | my-nginx |
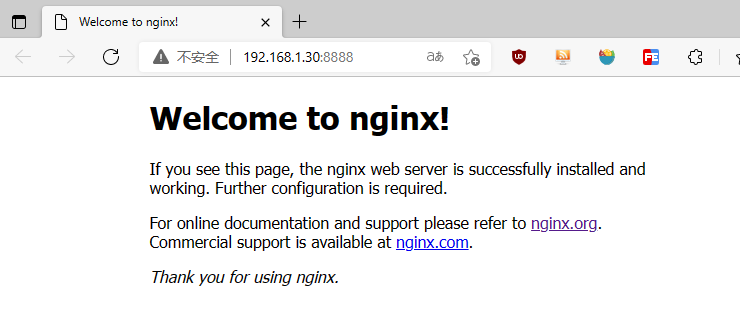
The LAN IP of CentOS virtual machine is 192.168.1.30, which can be accessed through the browser http://192.168.1.30:8888 , the following screen appears, indicating that the nginx server is running normally.
Docker image usage
When running the container, if the image used does not exist locally, docker will automatically download it from the docker image warehouse. By default, it is downloaded from the Docker Hub public image source.
1. List mirrors
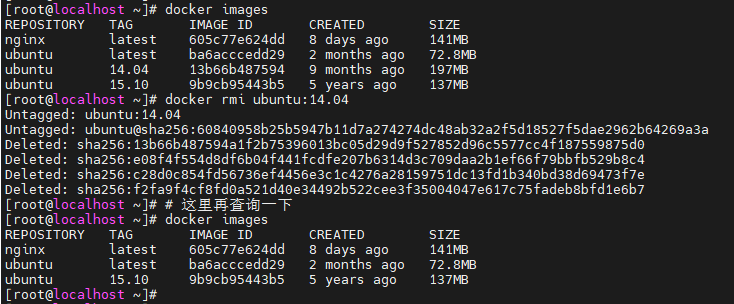
We can use docker images to list the images on the local host.
docker images

# The docker images command does not display intermediate images by default. To view all images, add the - a parameter and use the docker images -a command to query.

Description of each column field:
- REPOSITORY: indicates the warehouse source of the image
- TAG: the label of the mirror
- IMAGE ID: IMAGE ID
- CREATED: image creation time
- SIZE: mirror SIZE
The same warehouse source can have multiple tags representing different versions of the warehouse source. For example, there are 15.10, 14.04 and other different versions in the ubuntu warehouse source. We use REPOSITORY:TAG to define different images.
Therefore, if we want to use the ubuntu system image of version 15.10 to run the container, the command is as follows:
docker run -it ubuntu:15.10 /bin/bash
If you do not specify the version label of an image, for example, if you only use ubuntu, docker will use ubuntu:latest image by default.
PS: if you want to query the version (Tag) before an image, you need to go to the Docker Hub official website https://hub.docker.com/ Query for.
2. Find mirror
We can search for images from Docker Hub website, which is: https://hub.docker.com/
We can also use the docker search command to search for images. For example, we need an image of httpd as our web service. We can search httpd through the docker search command to find the image suitable for us.
[root@localhost ~]# docker search nginx
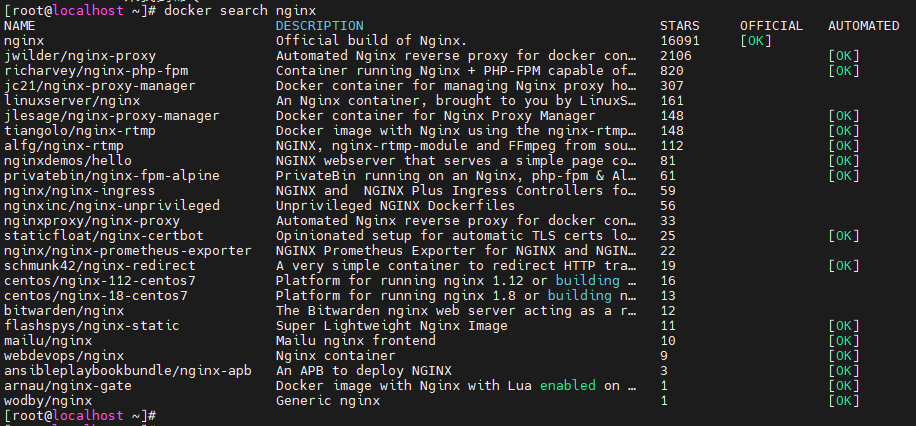
NAME: the NAME of the mirror warehouse source
DESCRIPTION: DESCRIPTION of the image
OFFICIAL: is it officially released by docker
STARS: similar to star in Github, which means like and like.
AUTOMATED: built automatically.
3. Drag mirror
When we use a nonexistent image on the local host, Docker will automatically download the image. If we want to download the image in advance, we can use the docker pull command to download it.
# Download the ubuntu image to the local computer
docker run ubuntu
The output is as follows:
[root@localhost ~]# docker pull ubuntu
Using default tag: latest
latest: Pulling from library/ubuntu
7b1a6ab2e44d: Pull complete
Digest: sha256:626ffe58f6e7566e00254b638eb7e0f3b11d4da9675088f4781a50ae288f3322
Status: Downloaded newer image for ubuntu:latest
docker.io/library/ubuntu:latest
[root@localhost ~]#
After downloading, we can use this image.
# Run and enter the container and execute the corresponding command
docker run -it ubuntu /bin/bash
PS: I failed to run here! The following prompt appears:
WARNING: IPv4 forwarding is disabled. Networking will not work.
I searched the Internet and solved the problem of "IPv4 forwarding is disabled" through the following methods.
Step 1: execute echo "net. IPv4. Ip_forward = 1" > > / usr / lib / sysctl. On the host machine d/00-system. conf
# Execute command
echo "net.ipv4.ip_forward = 1" >>/usr/lib/sysctl.d/00-system.conf

# see file
cat /usr/lib/sysctl.d/00-system.conf

# The following is the contents of the file. You can see net ipv4. ip_ The setting of forward = 1 has been appended to the end of the file.

# Kernel sysctl configuration file
#
# For binary values, 0 is disabled, 1 is enabled.  See sysctl(8) and
# sysctl.conf(5) for more details.

# Disable netfilter on bridges.
net.bridge.bridge-nf-call-ip6tables = 0
net.bridge.bridge-nf-call-iptables = 0
net.bridge.bridge-nf-call-arptables = 0
net.ipv4.ip_forward = 1
Step 2: restart the network and docker services
systemctl restart network && systemctl restart docker
Step 3: verify whether it is successful
docker run -it ubuntu /bin/bash
Perfect solution.
4. Delete mirror
To delete an image, use the * * docker rmi * * or docker image rm command:
docker rmi ubuntu:14.04
To delete a specified mirror, you can also use the mirror ID:
[root@localhost ~]# docker image rm 9b9cb95443b5
Untagged: ubuntu:15.10
Untagged: ubuntu@sha256:02521a2d079595241c6793b2044f02eecf294034f31d6e235ac4b2b54ffc41f3
Deleted: sha256:9b9cb95443b5f846cd3c8cfa3f64e63b6ba68de2618a08875a119c81a8f96698
Deleted: sha256:b616585738eaf78ff7d86c7526caf7c91a35bc4028ef63204e5bfee82f7494b5
Deleted: sha256:dee1316f97acc7e1a5088b02fbc2b3078e0bfa038dd904b8072e2de5656e7bb8
Deleted: sha256:e7d9ae1a69c53c9fefa1aef34348be5a5dbf2fe79e7dd647b3d4f4e927587ebc
Deleted: sha256:f121afdbbd5dd49d4a88c402b1a1a4dca39c9ae75ed7f80a29ffd9739fc680a7
[root@localhost ~]# #Here, you can see that ubuntu:15.10 has disappeared.
[root@localhost ~]# docker images
REPOSITORY   TAG       IMAGE ID       CREATED        SIZE
nginx        latest    605c77e624dd   8 days ago     141MB
ubuntu       latest    ba6acccedd29   2 months ago   72.8MB
[root@localhost ~]#
5. Create mirror
When the image we downloaded from the docker image warehouse cannot meet our needs, we can change the image in the following two ways.
- 1. Update the image from the container that has been created and commit the image
- 2. Use the Dockerfile directive to create a new image
5.1 update image
Before updating the image, we need to use the image to create a container.
[root@localhost ~]# docker run -t -i ubuntu:latest /bin/bash
root@dd88dacb1af7:/#
# Note: from the login account name shown above, you can see that it has entered the ubuntu container.
Use the apt get update command to update in the running container.
After completing the operation, enter the exit command to exit the container.

At this time, the container with ID dd88dacb1af7 is changed according to our requirements. We can submit the container copy with the command docker commit.
[root@localhost ~]# docker commit -m="This has been updated." -a="jack" dd88dacb1af7 jack/ubuntu:v2
sha256:d1c2e19bdcdcb5f3ffb4c5b1c795e938defa9c316588ec49603a817c472f303b
[root@localhost ~]#
Description of each parameter:
- -m: Description information submitted
- -a: Specify mirror author
- dd88dacb1af7: container ID
- jack/ubuntu:v2: Specifies the name of the target image to be created
We can use the docker images command to view our new image jack/ubuntu:v2:
[root@localhost ~]# docker images
REPOSITORY    TAG       IMAGE ID       CREATED              SIZE
jack/ubuntu   v2        d1c2e19bdcdc   About a minute ago   105MB
nginx         latest    605c77e624dd   8 days ago           141MB
ubuntu        latest    ba6acccedd29   2 months ago         72.8MB
5.2 building images
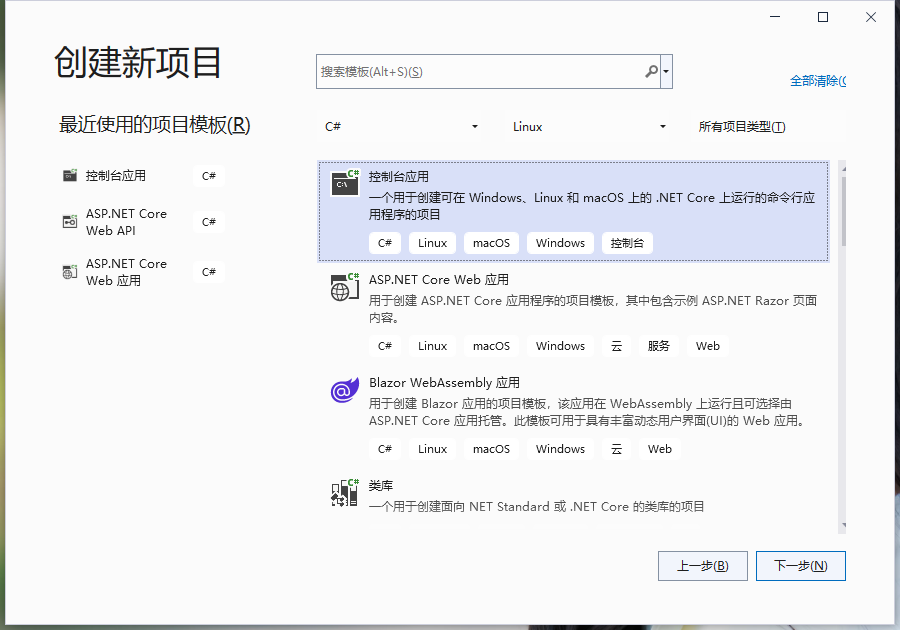
Use VS2022, based on NET 6, create a console program for image publishing. The simplest Hello World output.
- Select project template
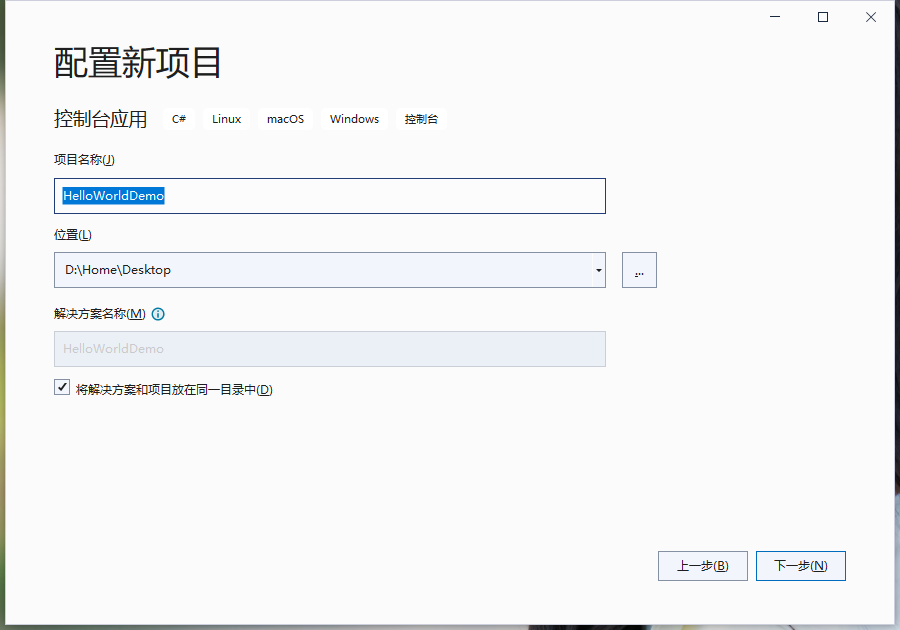
- Set the project name and call it HelloWorldDemo. (choose to put the solution and project in the same directory)
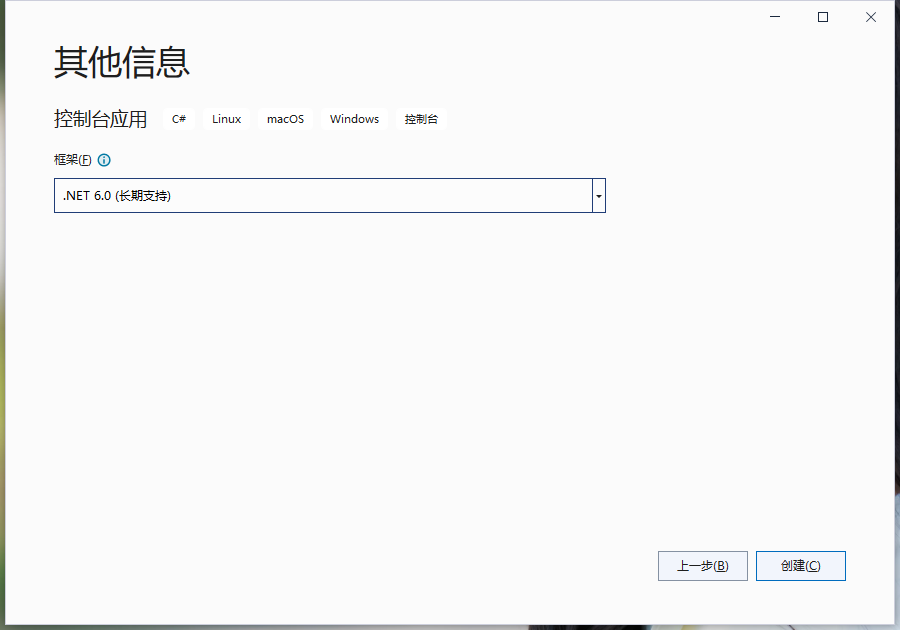
- Select runtime version as NET 6.0 (long-term support), and then click the "create" button.
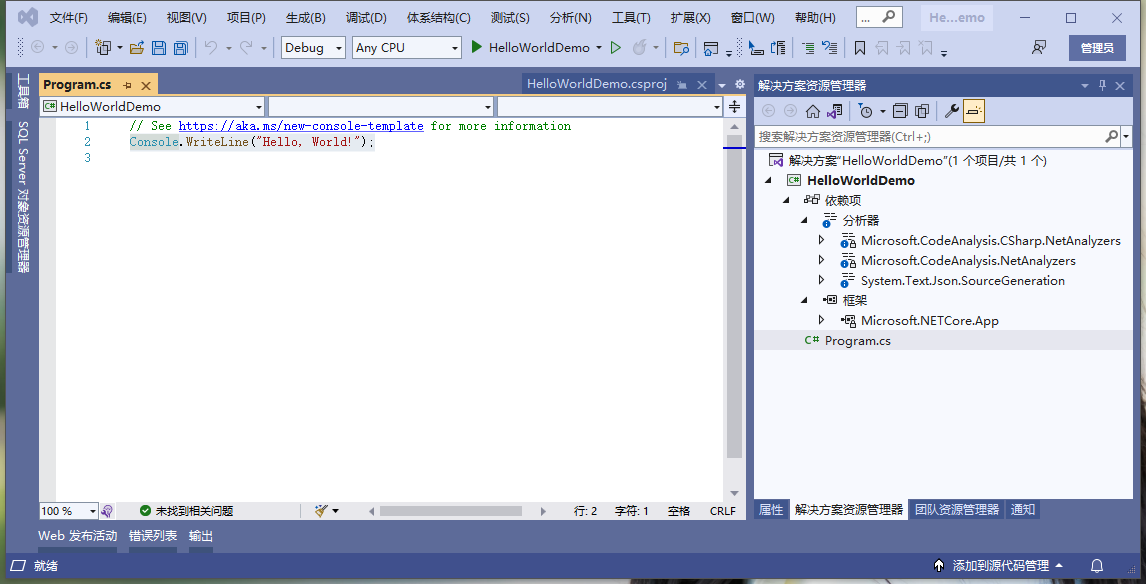
After the project is created, there is only one code in the whole program:
Console.WriteLine("Hello, World!");
- Click the solution explorer on the right, right-click the project name, and select "add" -- "Docker support...". A "Docker file options" window will pop up, and select "Linux".
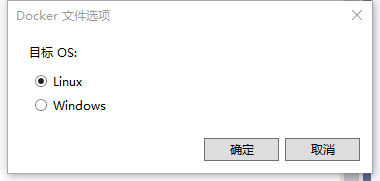
- Click OK to generate a Dockerfile file under the project.
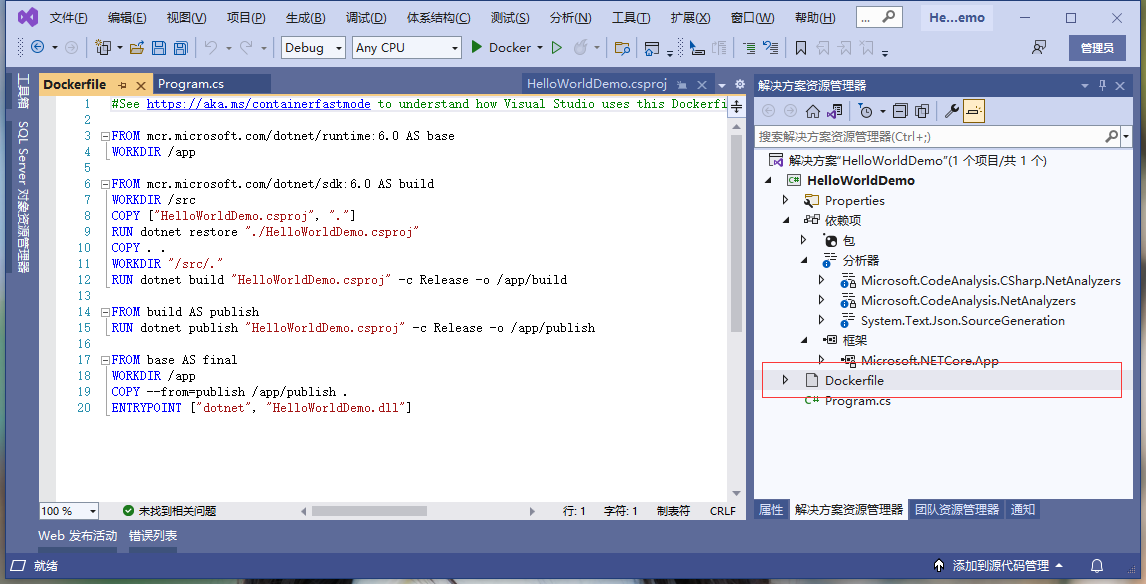
The Dockerfile file code is as follows:
#See https://aka.ms/containerfastmode to understand how Visual Studio uses this Dockerfile to build your images for faster debugging.

FROM mcr.microsoft.com/dotnet/runtime:6.0 AS base
WORKDIR /app

FROM mcr.microsoft.com/dotnet/sdk:6.0 AS build
WORKDIR /src
COPY ["HelloWorldDemo.csproj", "."]
RUN dotnet restore "./HelloWorldDemo.csproj"
COPY . .
WORKDIR "/src/."
RUN dotnet build "HelloWorldDemo.csproj" -c Release -o /app/build

FROM build AS publish
RUN dotnet publish "HelloWorldDemo.csproj" -c Release -o /app/publish

FROM base AS final
WORKDIR /app
COPY --from=publish /app/publish .
ENTRYPOINT ["dotnet", "HelloWorldDemo.dll"]
Each instruction will create a new layer on the image, and the prefix of each instruction must be uppercase.
The first FROM specifies which mirror source to use
The RUN command tells docker to execute the command in the image and what is installed...
Later, we will use the Dockerfile file to build an image through the docker build command.
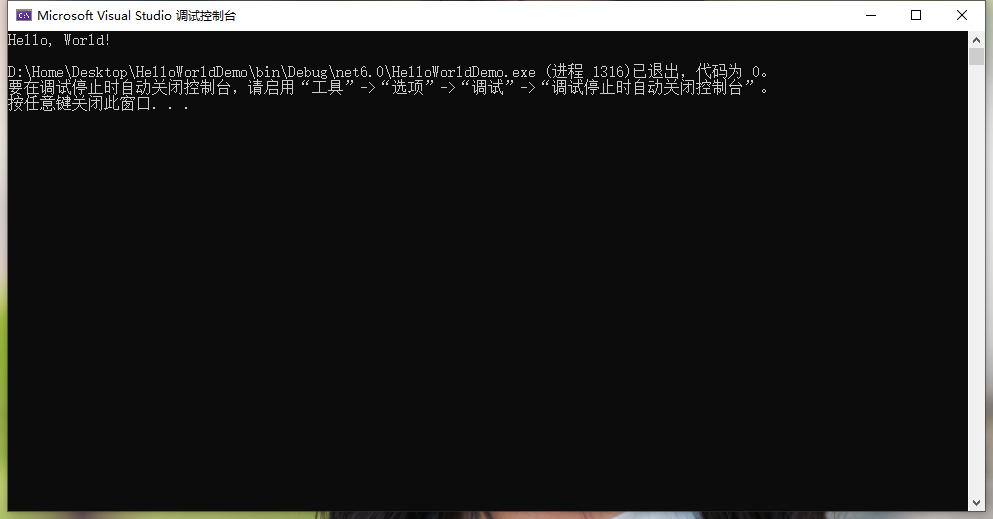
- Select console output mode and run debugging locally. Output "Hello World", indicating that the program is running normally.
OK, at this point, our program is ready. Next, choose to package the project to Linux as a whole, edit and package it on the server, and build the image.
- Open the folder where the project is located and delete some useless files.
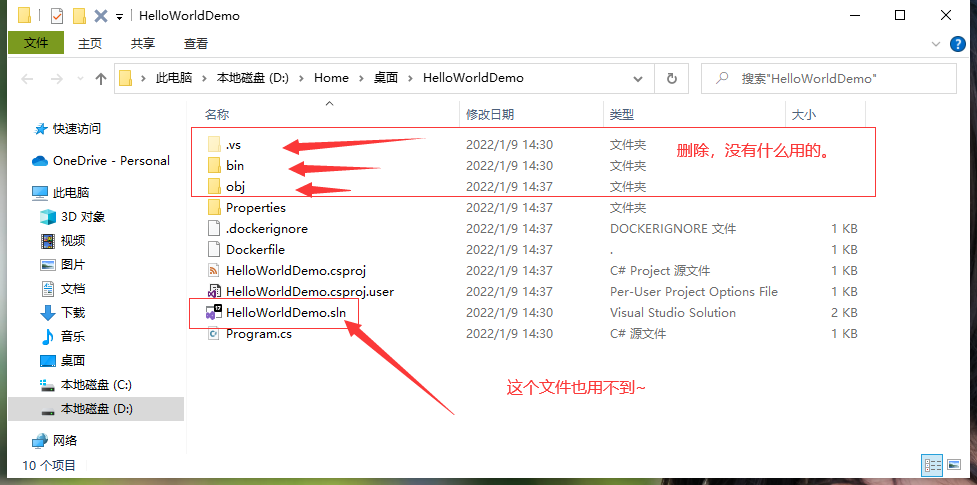
- Clean up useless folders and directly upload the project folders to the server. As shown in the figure below, the key point is that the uploaded file contains the Dockerfile file.
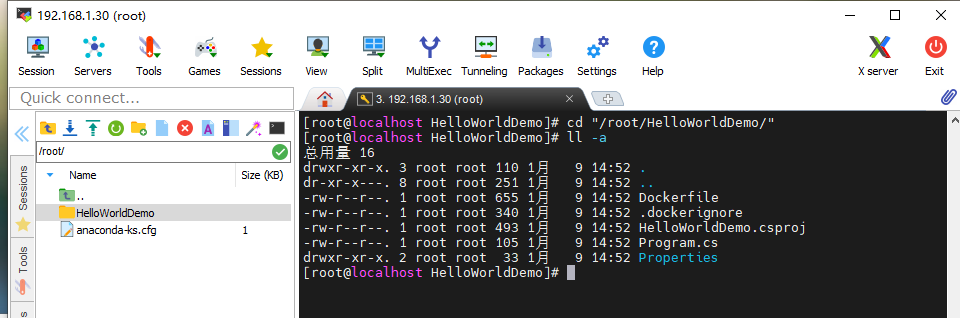
- Execute the image packaging docker build command: (note that there is a "." at the end of the command (symbol)
docker build -t my-hello-world .
Parameter Description:
- -t: Specifies the name of the target image to create
- .: the directory where the Dockerfile file is located. You can specify the absolute path of the Dockerfile
- Download the intermediate image and edit it.
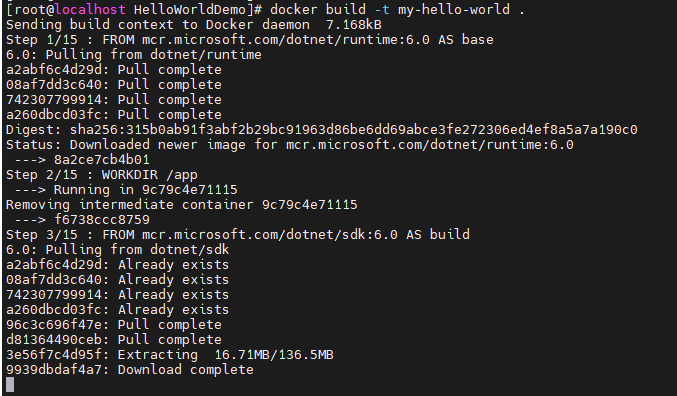
The final complete output is as follows:
[root@localhost HelloWorldDemo]# docker build -t my-hello-world .
Sending build context to Docker daemon  7.168kB
Step 1/15 : FROM mcr.microsoft.com/dotnet/runtime:6.0 AS base
6.0: Pulling from dotnet/runtime
a2abf6c4d29d: Pull complete
08af7dd3c640: Pull complete
742307799914: Pull complete
a260dbcd03fc: Pull complete
Digest: sha256:315b0ab91f3abf2b29bc91963d86be6dd69abce3fe272306ed4ef8a5a7a190c0
Status: Downloaded newer image for mcr.microsoft.com/dotnet/runtime:6.0
 ---> 8a2ce7cb4b01
Step 2/15 : WORKDIR /app
 ---> Running in 9c79c4e71115
Removing intermediate container 9c79c4e71115
 ---> f6738ccc8759
Step 3/15 : FROM mcr.microsoft.com/dotnet/sdk:6.0 AS build
6.0: Pulling from dotnet/sdk
a2abf6c4d29d: Already exists
08af7dd3c640: Already exists
742307799914: Already exists
a260dbcd03fc: Already exists
96c3c696f47e: Pull complete
d81364490ceb: Pull complete
3e56f7c4d95f: Pull complete
9939dbdaf4a7: Pull complete
Digest: sha256:a7af03bdead8976d4e3715452fc985164db56840691941996202cea411953452
Status: Downloaded newer image for mcr.microsoft.com/dotnet/sdk:6.0
 ---> e86d68dca8c7
Step 4/15 : WORKDIR /src
 ---> Running in 2442842227a1
Removing intermediate container 2442842227a1
 ---> d11c08ee15dd
Step 5/15 : COPY ["HelloWorldDemo.csproj", "."]
 ---> cf0d49961aad
Step 6/15 : RUN dotnet restore "./HelloWorldDemo.csproj"
 ---> Running in b3962d0da619
  Determining projects to restore...
  Restored /src/HelloWorldDemo.csproj (in 2.16 sec).
Removing intermediate container b3962d0da619
 ---> 649ed5b1ae54
Step 7/15 : COPY . .
 ---> e43f4a0cc84f
Step 8/15 : WORKDIR "/src/."
 ---> Running in 95ee5b391f75
Removing intermediate container 95ee5b391f75
 ---> dd6909ce462f
Step 9/15 : RUN dotnet build "HelloWorldDemo.csproj" -c Release -o /app/build
 ---> Running in e05f29a6ca5b
Microsoft (R) Build Engine version 17.0.0+c9eb9dd64 for .NET
Copyright (C) Microsoft Corporation. All rights reserved.

  Determining projects to restore...
  All projects are up-to-date for restore.
  HelloWorldDemo -> /app/build/HelloWorldDemo.dll

Build succeeded.
    0 Warning(s)
    0 Error(s)

Time Elapsed 00:00:06.11
Removing intermediate container e05f29a6ca5b
 ---> 266ccf4a1f98
Step 10/15 : FROM build AS publish
 ---> 266ccf4a1f98
Step 11/15 : RUN dotnet publish "HelloWorldDemo.csproj" -c Release -o /app/publish
 ---> Running in 1e914748682c
Microsoft (R) Build Engine version 17.0.0+c9eb9dd64 for .NET
Copyright (C) Microsoft Corporation. All rights reserved.

  Determining projects to restore...
  All projects are up-to-date for restore.
  HelloWorldDemo -> /src/bin/Release/net6.0/HelloWorldDemo.dll
  HelloWorldDemo -> /app/publish/
Removing intermediate container 1e914748682c
 ---> 018f9624857c
Step 12/15 : FROM base AS final
 ---> f6738ccc8759
Step 13/15 : WORKDIR /app
 ---> Running in 8764e2145751
Removing intermediate container 8764e2145751
 ---> d7ec7560e4f9
Step 14/15 : COPY --from=publish /app/publish .
 ---> 637fe040bfdc
Step 15/15 : ENTRYPOINT ["dotnet", "HelloWorldDemo.dll"]
 ---> Running in be3764a6bee1
Removing intermediate container be3764a6bee1
 ---> 1add28a21d49
Successfully built 1add28a21d49
Successfully tagged my-hello-world:latest
[root@localhost HelloWorldDemo]#
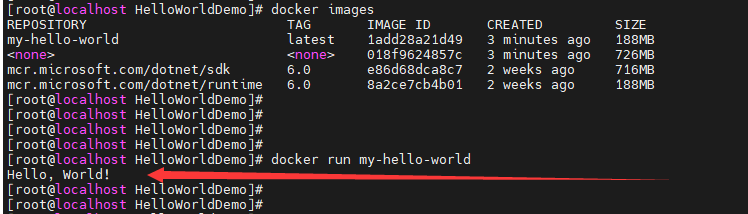
- Use docker images to view that the created image already exists in the list. The image ID is 1add28a21d49 and the name is my Hello world.

- Finally, we can use containers to run images. As you can see, Hello,World! Output is normal. ( • ̀ ω •́ ) ✧
docker run my-hello-world
6. Set label
We can use the docker tag command to add a new label to the image.
 docker tag 1add28a21d49 my-hello-world:V1.0
 # Parameter Description:
 # Docker tag < image ID > < image source name > < new tag name >
Using the docker images command, you can see that the image with ID 1add28a21d49 has one more label v1 0
[root@localhost HelloWorldDemo]# docker images
REPOSITORY                         TAG       IMAGE ID       CREATED          SIZE
my-hello-world                     V1.0      1add28a21d49   15 minutes ago   188MB
my-hello-world                     latest    1add28a21d49   15 minutes ago   188MB
<none>                             <none>    018f9624857c   15 minutes ago   726MB
mcr.microsoft.com/dotnet/sdk       6.0       e86d68dca8c7   2 weeks ago      716MB
mcr.microsoft.com/dotnet/runtime   6.0       8a2ce7cb4b01   2 weeks ago      188MB
[root@localhost HelloWorldDemo]#
PS: I personally understand that labeling is to copy the original image and add a label to display it.
Docker container usage
1. Help manual
The docker client is very simple. We can directly enter the docker command to view all the command options of the docker client.
[root@localhost ~]# docker
I won't put this on the map. I can try it myself. You can learn more about the usage of the specified Docker command through the command docker command --help.
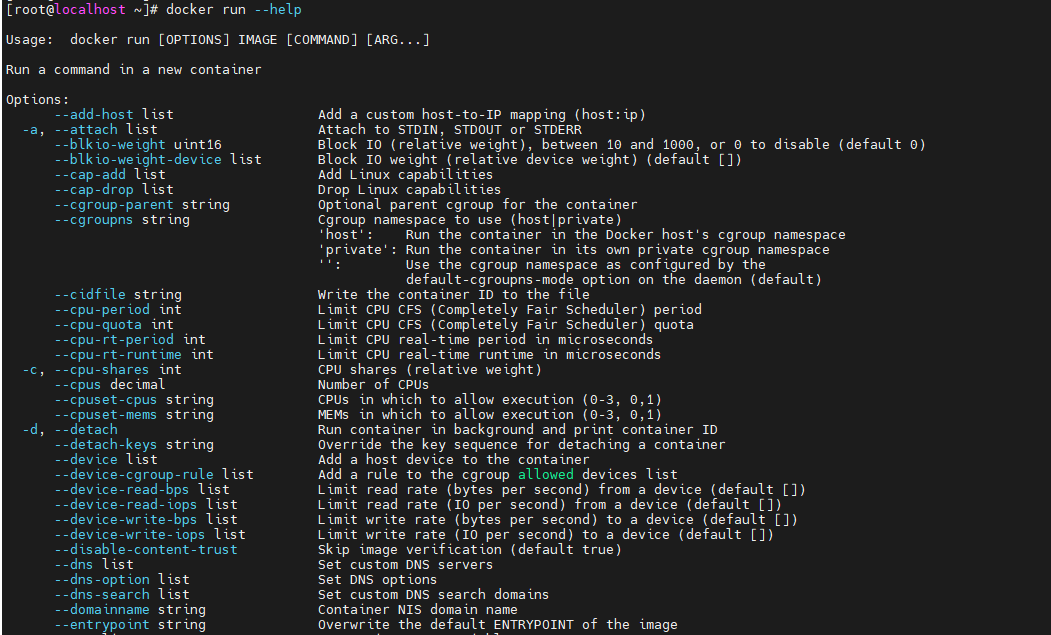
For example, we want to see how to use the docker run instruction:
[root@localhost ~]# docker run --help
2. Get image
If we do not have a local image, we can use the docker pull command to load the image:
docker pull nginx
2. Start container
[root@localhost HelloWorldDemo]# docker run -d -p 9999:80 --name my-nginx nginx
24054bd26a66522c9b3b6fc067d2a24d2bb9153b5be38f8dc3d658ba6a3a9e04
Parameter Description: (see the previous simple example)
3. Start a container that has stopped running
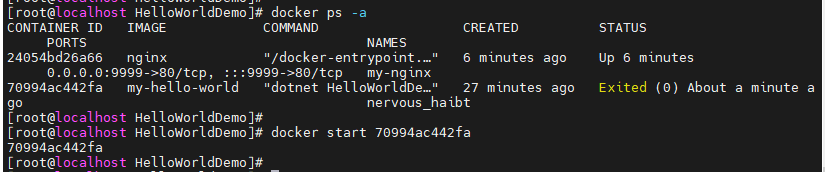
View all container commands as follows:
docker ps -a
Start a stopped container using docker start:
docker start 70994ac442fa
4. Background operation
In most scenarios, we want the docker service to run in the background. We can specify the running mode of the container through - d.
docker run -d -p 9999:80 --name my-nginx nginx
Note: adding the - d parameter will not enter the container by default. If you want to enter the container, you need to use the instruction docker exec.
5. Stop a container
The command to stop the container is as follows:
docker stop <container ID>
Stopped containers can be restarted through docker restart:
docker restart <container ID>
6. Enter container
When the - d parameter is used, the container will enter the background after starting. If you want to enter the container at this time, you can enter it through the following instructions:
- docker attach
- Docker exec: it is recommended that you use the docker exec command, because exiting the container terminal will not cause the container to stop.
# Enter container
[root@localhost HelloWorldDemo]# docker exec -it 24054bd26a66 /bin/bash

# View current directory
root@24054bd26a66:/# ls
bin   dev                  docker-entrypoint.sh  home  lib64  mnt  proc  run   srv  tmp  var
boot  docker-entrypoint.d  etc                   lib   media  opt  root  sbin  sys  usr

# Exit container
root@24054bd26a66:/# exit
exit
[root@localhost HelloWorldDemo]#
7. Delete container
To delete a container, use the docker rm command:
# Under normal circumstances, we can only delete the stopped container, add the - f parameter and enforce it, regardless of whether the container is running.
[root@localhost HelloWorldDemo]# docker rm -f 70994ac442fa
70994ac442fa
[root@localhost HelloWorldDemo]#
8. View log
docker logs [ID or name] can view the standard output inside the container.
[root@localhost HelloWorldDemo]# docker ps
CONTAINER ID   IMAGE     COMMAND                  CREATED          STATUS          PORTS                                   NAMES
24054bd26a66   nginx     "/docker-entrypoint...."   18 minutes ago   Up 18 minutes   0.0.0.0:9999->80/tcp, :::9999->80/tcp   my-nginx
[root@localhost HelloWorldDemo]# docker logs 24054bd26a66
/docker-entrypoint.sh: /docker-entrypoint.d/ is not empty, will attempt to perform configuration
/docker-entrypoint.sh: Looking for shell scripts in /docker-entrypoint.d/
/docker-entrypoint.sh: Launching /docker-entrypoint.d/10-listen-on-ipv6-by-default.sh
10-listen-on-ipv6-by-default.sh: info: Getting the checksum of /etc/nginx/conf.d/default.conf
10-listen-on-ipv6-by-default.sh: info: Enabled listen on IPv6 in /etc/nginx/conf.d/default.conf
/docker-entrypoint.sh: Launching /docker-entrypoint.d/20-envsubst-on-templates.sh
/docker-entrypoint.sh: Launching /docker-entrypoint.d/30-tune-worker-processes.sh
/docker-entrypoint.sh: Configuration complete; ready for start up
2022/01/09 07:29:48 [notice] 1#1: using the "epoll" event method
2022/01/09 07:29:48 [notice] 1#1: nginx/1.21.5
2022/01/09 07:29:48 [notice] 1#1: built by gcc 10.2.1 20210110 (Debian 10.2.1-6)
2022/01/09 07:29:48 [notice] 1#1: OS: Linux 3.10.0-1160.49.1.el7.x86_64
2022/01/09 07:29:48 [notice] 1#1: getrlimit(RLIMIT_NOFILE): 1048576:1048576
2022/01/09 07:29:48 [notice] 1#1: start worker processes
2022/01/09 07:29:48 [notice] 1#1: start worker process 32
2022/01/09 07:29:48 [notice] 1#1: start worker process 33
2022/01/09 07:29:48 [notice] 1#1: start worker process 34
2022/01/09 07:29:48 [notice] 1#1: start worker process 35
[root@localhost HelloWorldDemo]#
9. Running status
You can view the running status of the container through the docker stats < container name | ID > command (it will be monitored all the time).
[root@localhost HelloWorldDemo]# docker stats my-nginx
#================================
CONTAINER ID   NAME       CPU %     MEM USAGE / LIMIT     MEM %     NET I/O     BLOCK I/O     PIDS
24054bd26a66   my-nginx   0.01%     3.074MiB / 1.777GiB   0.17%     656B / 0B   0B / 14.3kB   5
CONTAINER ID   NAME       CPU %     MEM USAGE / LIMIT     MEM %     NET I/O     BLOCK I/O     PIDS
24054bd26a66   my-nginx   0.01%     3.074MiB / 1.777GiB   0.17%     656B / 0B   0B / 14.3kB   5
CONTAINER ID   NAME       CPU %     MEM USAGE / LIMIT     MEM %     NET I/O     BLOCK I/O     PIDS
24054bd26a66   my-nginx   0.00%     3.074MiB / 1.777GiB   0.17%     656B / 0B   0B / 14.3kB   5
...... ......
10. View configuration
Use docker inspect to view the underlying information of Docker. It will return a JSON file that records the configuration and status information of the Docker container.
[root@localhost HelloWorldDemo]# docker inspect my-nginx
[
    {
        "Id": "24054bd26a66522c9b3b6fc067d2a24d2bb9153b5be38f8dc3d658ba6a3a9e04",
        "Created": "2022-01-09T07:29:47.729484247Z",
        "Path": "/docker-entrypoint.sh",
        "Args": [
            "nginx",
            "-g",
            "daemon off;"
        ],
        "State": {
            "Status": "running",
            "Running": true,
            "Paused": false,
            "Restarting": false,
            "OOMKilled": false,
            "Dead": false,
            "Pid": 20677,
            "ExitCode": 0,
            "Error": "",
            "StartedAt": "2022-01-09T07:29:48.345380918Z",
            "FinishedAt": "0001-01-01T00:00:00Z"
        },
        "Image": "sha256:605c77e624ddb75e6110f997c58876baa13f8754486b461117934b24a9dc3a85",
        "ResolvConfPath": "/var/lib/docker/containers/24054bd26a66522c9b3b6fc067d2a24d2bb9153b5be38f8dc3d658ba6a3a9e04/resolv.conf",
        "HostnamePath": "/var/lib/docker/containers/24054bd26a66522c9b3b6fc067d2a24d2bb9153b5be38f8dc3d658ba6a3a9e04/hostname",
        "HostsPath": "/var/lib/docker/containers/24054bd26a66522c9b3b6fc067d2a24d2bb9153b5be38f8dc3d658ba6a3a9e04/hosts",
        "LogPath": "/var/lib/docker/containers/24054bd26a66522c9b3b6fc067d2a24d2bb9153b5be38f8dc3d658ba6a3a9e04/24054bd26a66522c9b3b6fc067d2a24d2bb9153b5be38f8dc3d658ba6a3a9e04-json.log",
        "Name": "/my-nginx",
        "RestartCount": 0,
        "Driver": "overlay2",
        "Platform": "linux",
        "MountLabel": "",
        "ProcessLabel": "",
        "AppArmorProfile": "",
        "ExecIDs": null,
        "HostConfig": {
            "Binds": null,
            "ContainerIDFile": "",
            "LogConfig": {
                "Type": "json-file",
                "Config": {}
            },
            "NetworkMode": "default",
            "PortBindings": {
                "80/tcp": [
                    {
                        "HostIp": "",
                        "HostPort": "9999"
                    }
                ]
            },
            "RestartPolicy": {
                "Name": "no",
                "MaximumRetryCount": 0
            },
            "AutoRemove": false,
            "VolumeDriver": "",
            "VolumesFrom": null,
            "CapAdd": null,
            "CapDrop": null,
            "CgroupnsMode": "host",
            "Dns": [],
            "DnsOptions": [],
            "DnsSearch": [],
            "ExtraHosts": null,
            "GroupAdd": null,
            "IpcMode": "private",
            "Cgroup": "",
            "Links": null,
            "OomScoreAdj": 0,
            "PidMode": "",
            "Privileged": false,
            "PublishAllPorts": false,
            "ReadonlyRootfs": false,
            "SecurityOpt": null,
            "UTSMode": "",
            "UsernsMode": "",
            "ShmSize": 67108864,
            "Runtime": "runc",
            "ConsoleSize": [
                0,
                0
            ],
            "Isolation": "",
            "CpuShares": 0,
            "Memory": 0,
            "NanoCpus": 0,
            "CgroupParent": "",
            "BlkioWeight": 0,
            "BlkioWeightDevice": [],
            "BlkioDeviceReadBps": null,
            "BlkioDeviceWriteBps": null,
            "BlkioDeviceReadIOps": null,
            "BlkioDeviceWriteIOps": null,
            "CpuPeriod": 0,
            "CpuQuota": 0,
            "CpuRealtimePeriod": 0,
            "CpuRealtimeRuntime": 0,
            "CpusetCpus": "",
            "CpusetMems": "",
            "Devices": [],
            "DeviceCgroupRules": null,
            "DeviceRequests": null,
            "KernelMemory": 0,
            "KernelMemoryTCP": 0,
            "MemoryReservation": 0,
            "MemorySwap": 0,
            "MemorySwappiness": null,
            "OomKillDisable": false,
            "PidsLimit": null,
            "Ulimits": null,
            "CpuCount": 0,
            "CpuPercent": 0,
            "IOMaximumIOps": 0,
            "IOMaximumBandwidth": 0,
            "MaskedPaths": [
                "/proc/asound",
                "/proc/acpi",
                "/proc/kcore",
                "/proc/keys",
                "/proc/latency_stats",
                "/proc/timer_list",
                "/proc/timer_stats",
                "/proc/sched_debug",
                "/proc/scsi",
                "/sys/firmware"
            ],
            "ReadonlyPaths": [
                "/proc/bus",
                "/proc/fs",
                "/proc/irq",
                "/proc/sys",
                "/proc/sysrq-trigger"
            ]
        },
        "GraphDriver": {
            "Data": {
                "LowerDir": "/var/lib/docker/overlay2/4a3a739f9a9119beba2e538df7337fea5f168341dc42c9bc65ce36be7a528718-init/diff:/var/lib/docker/overlay2/88d844c8acf8fbfec44d5f4c7327504bdca4e1873113199ade6260d4da46c623/diff:/var/lib/docker/overlay2/b69d39d9431945be58d6a8924dd234c0007243113890853cea9fe0c77a0b5586/diff:/var/lib/docker/overlay2/81a4e929367676ac2cdf41efbcc243f6d5ccb086f37bc68d0bc479126cfd4ec7/diff:/var/lib/docker/overlay2/9b1e65f53f3fdefeb5691bd2311fe667bdc235090b88044ccca7c1ae14d975ed/diff:/var/lib/docker/overlay2/f4eed501c804e0d20564b21c8168e6ad11cca0d39fbf540343a90cdcffed0977/diff:/var/lib/docker/overlay2/f551faa359b34434e21a0ab26f5bed102c84318472f73412e0e2c5adcb5fe968/diff",
                "MergedDir": "/var/lib/docker/overlay2/4a3a739f9a9119beba2e538df7337fea5f168341dc42c9bc65ce36be7a528718/merged",
                "UpperDir": "/var/lib/docker/overlay2/4a3a739f9a9119beba2e538df7337fea5f168341dc42c9bc65ce36be7a528718/diff",
                "WorkDir": "/var/lib/docker/overlay2/4a3a739f9a9119beba2e538df7337fea5f168341dc42c9bc65ce36be7a528718/work"
            },
            "Name": "overlay2"
        },
        "Mounts": [],
        "Config": {
            "Hostname": "24054bd26a66",
            "Domainname": "",
            "User": "",
            "AttachStdin": false,
            "AttachStdout": false,
            "AttachStderr": false,
            "ExposedPorts": {
                "80/tcp": {}
            },
            "Tty": false,
            "OpenStdin": false,
            "StdinOnce": false,
            "Env": [
                "PATH=/usr/local/sbin:/usr/local/bin:/usr/sbin:/usr/bin:/sbin:/bin",
                "NGINX_VERSION=1.21.5",
                "NJS_VERSION=0.7.1",
                "PKG_RELEASE=1~bullseye"
            ],
            "Cmd": [
                "nginx",
                "-g",
                "daemon off;"
            ],
            "Image": "nginx",
            "Volumes": null,
            "WorkingDir": "",
            "Entrypoint": [
                "/docker-entrypoint.sh"
            ],
            "OnBuild": null,
            "Labels": {
                "maintainer": "NGINX Docker Maintainers <docker-maint@nginx.com>"
            },
            "StopSignal": "SIGQUIT"
        },
        "NetworkSettings": {
            "Bridge": "",
            "SandboxID": "248e77ef721f2e006d6e200c746f6844beb190ec15ad229d17080e4ae644cada",
            "HairpinMode": false,
            "LinkLocalIPv6Address": "",
            "LinkLocalIPv6PrefixLen": 0,
            "Ports": {
                "80/tcp": [
                    {
                        "HostIp": "0.0.0.0",
                        "HostPort": "9999"
                    },
                    {
                        "HostIp": "::",
                        "HostPort": "9999"
                    }
                ]
            },
            "SandboxKey": "/var/run/docker/netns/248e77ef721f",
            "SecondaryIPAddresses": null,
            "SecondaryIPv6Addresses": null,
            "EndpointID": "ab9dd37591919447479f7a12c54fde1b45e39083a7906f6200092896d33b481b",
            "Gateway": "172.17.0.1",
            "GlobalIPv6Address": "",
            "GlobalIPv6PrefixLen": 0,
            "IPAddress": "172.17.0.2",
            "IPPrefixLen": 16,
            "IPv6Gateway": "",
            "MacAddress": "02:42:ac:11:00:02",
            "Networks": {
                "bridge": {
                    "IPAMConfig": null,
                    "Links": null,
                    "Aliases": null,
                    "NetworkID": "94f59e18e4d854c6dc8fa1848d791f91905e675619c9ddd2d6a46f880882c3bc",
                    "EndpointID": "ab9dd37591919447479f7a12c54fde1b45e39083a7906f6200092896d33b481b",
                    "Gateway": "172.17.0.1",
                    "IPAddress": "172.17.0.2",
                    "IPPrefixLen": 16,
                    "IPv6Gateway": "",
                    "GlobalIPv6Address": "",
                    "GlobalIPv6PrefixLen": 0,
                    "MacAddress": "02:42:ac:11:00:02",
                    "DriverOpts": null
                }
            }
        }
    }
]
Summary
The above contents have demonstrated some common operation commands of Docker container. After mastering them, there is no big problem in getting started with normal operation.
In the process of this exercise, I also stepped on a lot of pits. For example, for the part where I built the image myself, I always reported an error during the image packaging process because I did not write the correct configuration of the Dockerfile. After consulting friends in the community, it was released successfully.
^ _ ^ , Thank you, orange! This is an open source project he's working on, ccnetcore/Yi: Yi.Framework - based NET5+Vue rapid development framework (github.com) , you can have a look if you are interested! By the way, point a star.