Preface
Through two days of "actual combat", today we relax a little and let you breathe for a while. The control we brought to you today has solved too many adaptation problems encountered in the project. If you have encountered such problems, just keep up with us.~
In the previous articles, we introduced some common layout and UI controls. In the process of using, you may encounter such a scenario, when the drawn UI control exceeds the size of the mobile phone screen, it will cause the UI control to be unable to display. To solve this problem, Android provides ScrollView, a scroll view. Here's how to use ScrollView in detail.
brief introduction
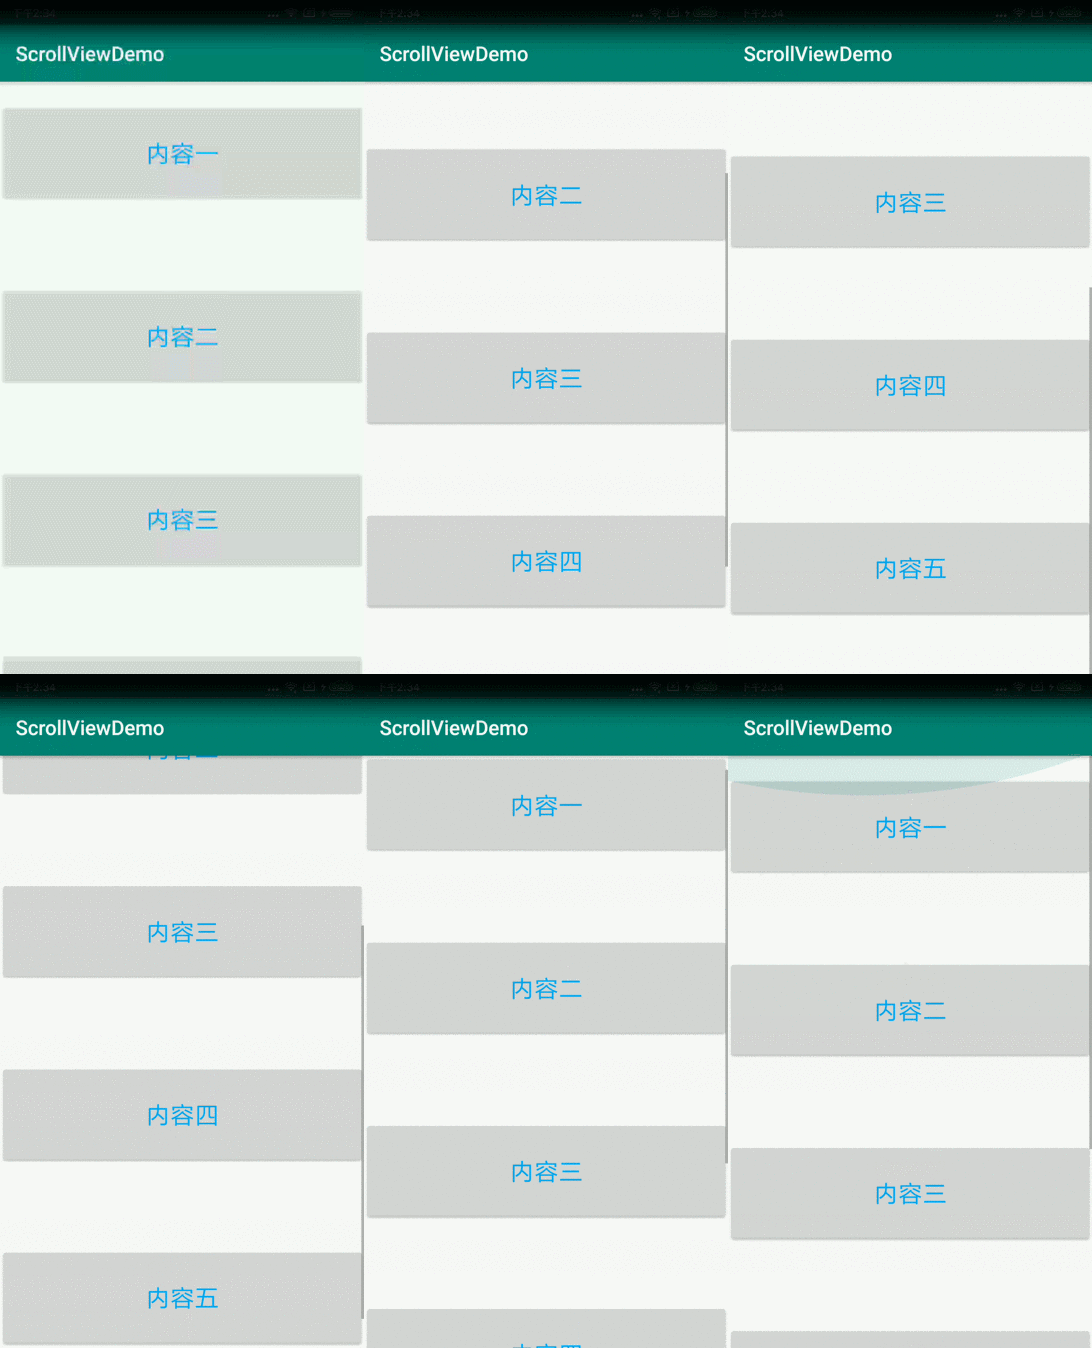
ScrollView is called scroll view. When the drawn UI control is not displayed on the pixel of a screen, the control can be displayed by sliding.
First look at the inheritance relationship of the ScrollView class:
java.lang.Object
  ↳android.view.View
    ↳android.view.ViewGroup
      ↳android.widget.FrameLayout
        ↳android.widget.ScrollView
As you can see, ScrollView was originally a container for FrameLayout, but scrolling was added to it to allow more content to be displayed than it actually is.
Usage
1. ScrollView Vertical ScrollView
Linear layout of 5 Button s in the vertical direction of the page, code as follows:
<?xml version="1.0" encoding="utf-8"?>
<ScrollView xmlns:android="http://schemas.android.com/apk/res/android"
    xmlns:tools="http://schemas.android.com/tools"
    android:layout_width="match_parent"
    android:layout_height="match_parent"
    tools:context=".MainActivity">

    <LinearLayout
        android:layout_width="match_parent"
        android:layout_height="match_parent"
        android:orientation="vertical">

        <Button
            android:layout_width="match_parent"
            android:layout_height="100dp"
            android:layout_marginTop="20dp"
            android:gravity="center"
            android:text="Content 1"
            android:textColor="#03A9F4"
            android:textSize="24sp" />

        <Button
            android:layout_width="match_parent"
            android:layout_height="100dp"
            android:layout_marginTop="80dp"
            android:gravity="center"
            android:text="Content 2"
            android:textColor="#03A9F4"
            android:textSize="24sp" />

        <Button
            android:layout_width="match_parent"
            android:layout_height="100dp"
            android:layout_marginTop="80dp"
            android:gravity="center"
            android:text="Content 3"
            android:textColor="#03A9F4"
            android:textSize="24sp" />

        <Button
            android:layout_width="match_parent"
            android:layout_height="100dp"
            android:layout_marginTop="80dp"
            android:gravity="center"
            android:text="Content IV"
            android:textColor="#03A9F4"
            android:textSize="24sp" />

        <Button
            android:layout_width="match_parent"
            android:layout_height="100dp"
            android:layout_marginTop="80dp"
            android:layout_marginBottom="80dp"
            android:gravity="center"
            android:text="Content 5"
            android:textColor="#03A9F4"
            android:textSize="24sp" />
    </LinearLayout>
</ScrollView>
As can be seen from the review view of Android Studio, five Button s have gone beyond the screen display. Without ScrollView, the parent layout directly uses Linear Layout, which can not make the screen slide to display all the controls.
Using ScrollView, it is shown as follows:

Note: ScrollView can only have one child element, either a View (such as ImageView, TextView, etc.) or a View Group (such as Linear Layout, Relative Layout, etc.). There are no restrictions within the child element, otherwise the following exception will be reported.
Caused by: java.lang.IllegalStateException: ScrollView can host only one direct child
2. Horizontal ScrollView
In practical use, we will also encounter horizontal direction, control beyond the screen. Horizontal ScrollView in horizontal direction is needed.
Add a Horizontal ScrollView in the header of the above code, and four ImageView s are laid out horizontally and linearly. The code is as follows:
<?xml version="1.0" encoding="utf-8"?>
<ScrollView xmlns:android="http://schemas.android.com/apk/res/android"
    xmlns:tools="http://schemas.android.com/tools"
    android:layout_width="match_parent"
    android:layout_height="match_parent"
    tools:context=".MainActivity">

    <LinearLayout
        android:layout_width="match_parent"
        android:layout_height="match_parent"
        android:orientation="vertical">

        <HorizontalScrollView
            android:layout_width="match_parent"
            android:layout_height="200dp"
            android:layout_marginTop="20dp">

            <LinearLayout
                android:layout_width="match_parent"
                android:layout_height="match_parent"
                android:gravity="center_vertical"
                android:orientation="horizontal">

                <ImageView
                    android:layout_width="120dp"
                    android:layout_height="120dp"
                    android:layout_margin="20dp"
                    android:src="@mipmap/ic_launcher" />

                <ImageView
                    android:layout_width="120dp"
                    android:layout_height="120dp"
                    android:layout_margin="20dp"
                    android:src="@mipmap/ic_launcher" />

                <ImageView
                    android:layout_width="120dp"
                    android:layout_height="120dp"
                    android:layout_margin="20dp"
                    android:src="@mipmap/ic_launcher" />

                <ImageView
                    android:layout_width="120dp"
                    android:layout_height="120dp"
                    android:layout_margin="20dp"
                    android:src="@mipmap/ic_launcher" />

            </LinearLayout>
        </HorizontalScrollView>

        <Button
            android:layout_width="match_parent"
            android:layout_height="100dp"
            android:layout_marginTop="20dp"
            android:gravity="center"
            android:text="Content 1"
            android:textColor="#03A9F4"
            android:textSize="24sp" />

        <Button
            android:layout_width="match_parent"
            android:layout_height="100dp"
            android:layout_marginTop="80dp"
            android:gravity="center"
            android:text="Content 2"
            android:textColor="#03A9F4"
            android:textSize="24sp" />

        <Button
            android:layout_width="match_parent"
            android:layout_height="100dp"
            android:layout_marginTop="80dp"
            android:gravity="center"
            android:text="Content 3"
            android:textColor="#03A9F4"
            android:textSize="24sp" />

        <Button
            android:layout_width="match_parent"
            android:layout_height="100dp"
            android:layout_marginTop="80dp"
            android:layout_marginBottom="80dp"
            android:gravity="center"
            android:text="Content IV"
            android:textColor="#03A9F4"
            android:textSize="24sp" />
    </LinearLayout>
</ScrollView>
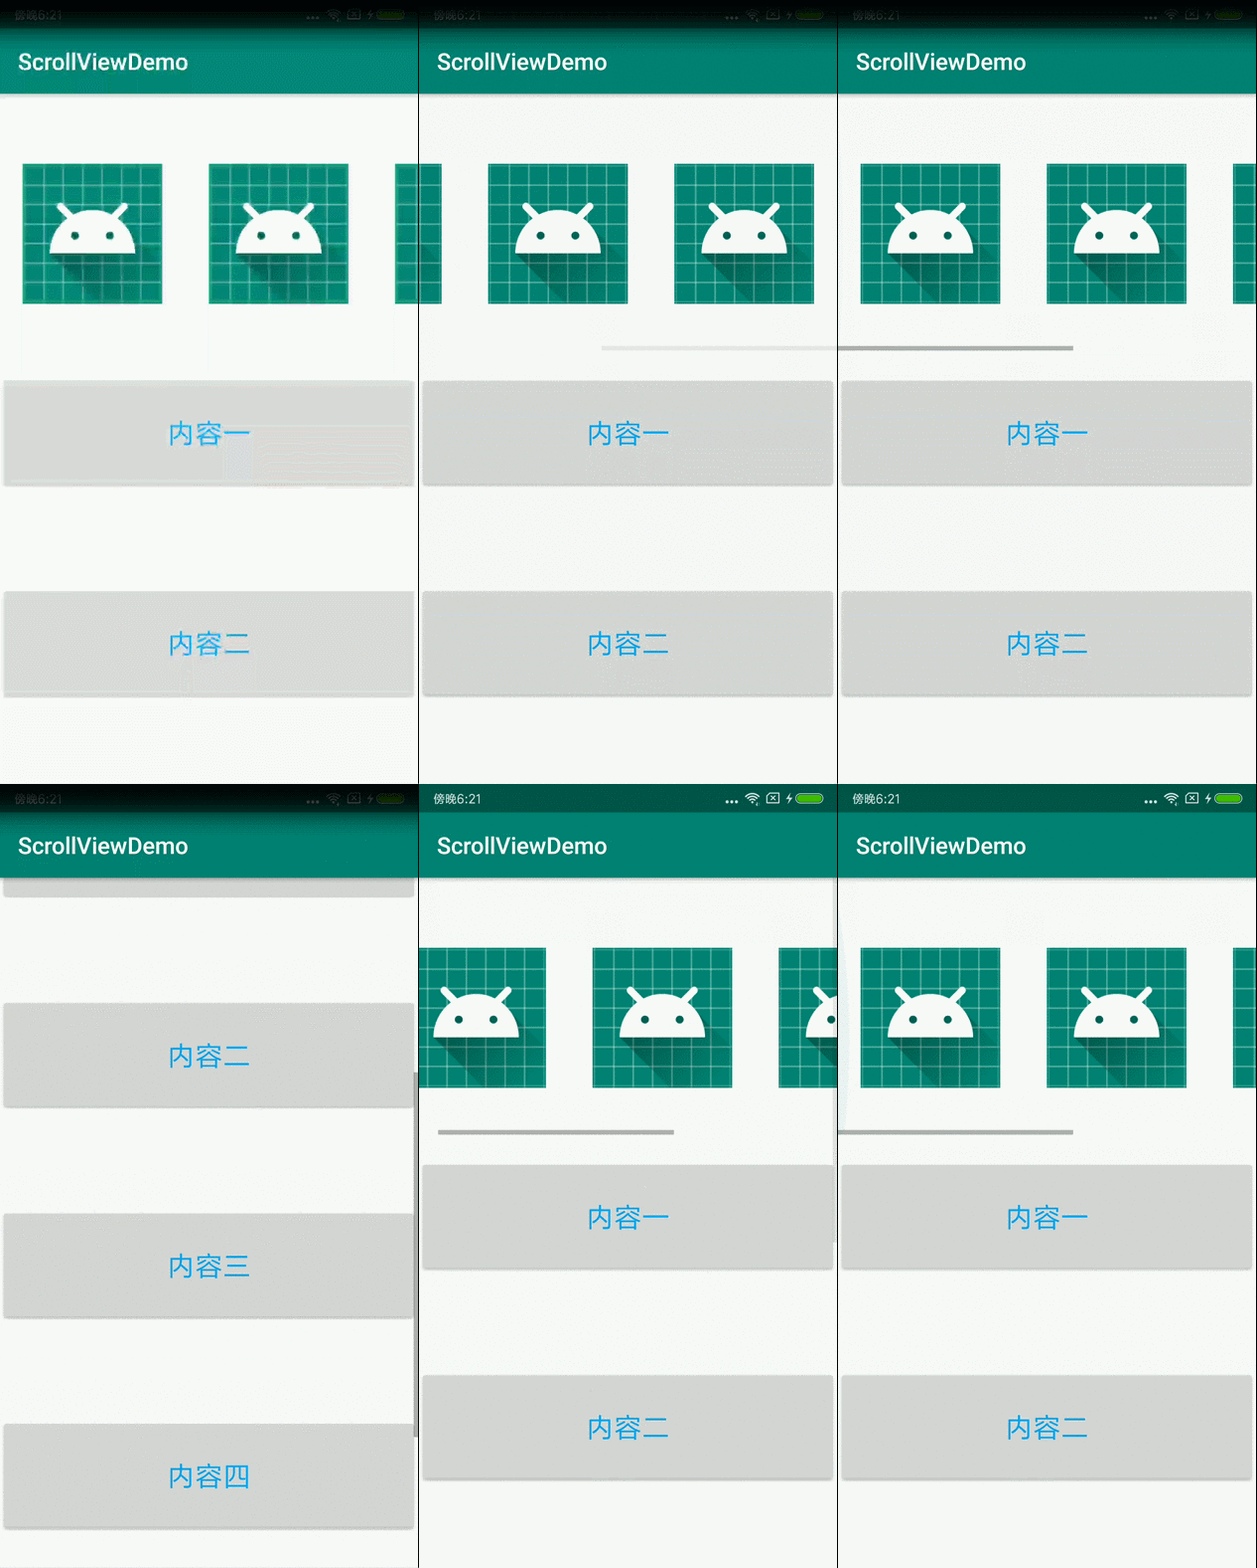
The display effect is as follows:

As you can see, the image content in Horizontal ScrollView can slide horizontally, and the whole layout can slide vertically because of the nested ScrollView outside.
Note: With ScrollView, there can only be one child element in Horizontal ScrollView, otherwise an error will be reported.
Introduction to Common Attributes in XML
1.android:fadingEdge="none"
Set the direction of the border gradient when you pull the scrollbar. Non (border color unchanged), horizontal (horizontal color fading), vertical (vertical color fading).
2.android:overScrollMode="never"
Delete ScrollView and pull it to the end (top, bottom), then continue to pull the shadow effect, which is applicable to 2.3 or above, otherwise no settings are required.
3.android:scrollbars="none"
Set scrollbar display, none (hidden), horizontal (horizontal), vertical (vertical).
4.android:descendantFocusability=""
This property defines the relationship between ViewGroup and its child controls when a view gets focus.
There are three values of attributes:
beforeDescendants    //viewgroup takes priority over its subclass controls to get focus
afterDescendants    //viewgroup gets focus only when its subclass controls do not need to get focus
blocksDescendants    //viewgroup overrides subclass controls and gains focus directly
5.android:fillViewport="true"
This is a unique property of ScrollView that defines whether ScrollView objects need to be stretched to fill in
viewport. In general, ScrollView is allowed to fill the entire screen. For example, when the height of the nested sub-controls in ScrollView can not reach the height of the screen, even though the height of ScrollView is set to match_parent, it can not fill the whole screen. android:fillViewport= "true" is needed to fill the whole page with ScrollView, which can be reflected by setting background color for ScrollView.
Common methods:
Sliding switch control
scrollView.setOnTouchListener(new View.OnTouchListener() {
    @Override
     public boolean onTouch(View view, MotionEvent motionEvent) {
        // true Prohibits Sliding false Sliding
         return true;
      }
});
Sliding position control
scrollView.post(new Runnable() {
    @Override
    public void run() {
        //Slide to the top
        scrollView.fullScroll(ScrollView.FOCUS_UP);

        //Slide to the bottom
        scrollView.fullScroll(ScrollView.FOCUS_DOWN);
    }
});
Slide to a certain position
scrollView.post(new Runnable() {
    @Override
    public void run() {
        //Offset value
        int offset = 100;
        scrollView.smoothScrollTo(0, offset);
    }
});
epilogue
As you can see, ScrollView is a View control that is often used in daily development, and its use is relatively simple. The above is just a description of some basic operation, in the next article will be combined with the actual project skills in-depth analysis, quickly to pay attention to us!
(WXGZH: See flowers below)