1, Overview
1.1 general
a. Basic command

b. Opens the display of the user interface

[name of currently logged in user @ hostname current path]#
#Refers to the user as super administrator
$means that the user is an ordinary user
c. View information about the current system
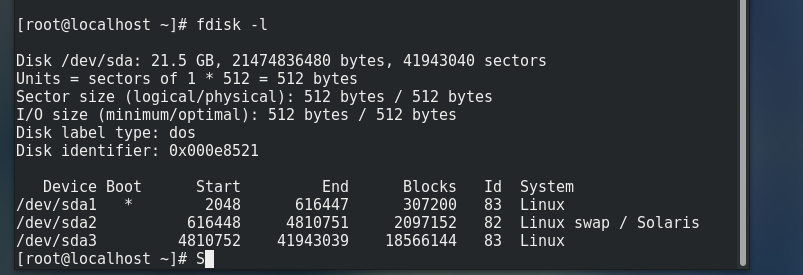
- View hard disk size
fdisk -l
/dev/sda The name and path of the first hard disk in the operating system
# All files in linux operating system are sd (hard disk type) a (the first piece)
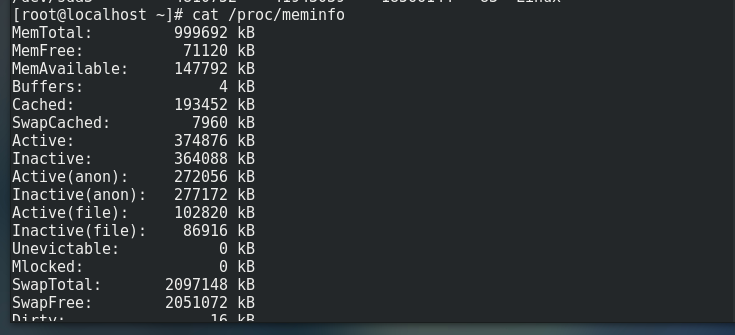
- View hard disk size
# View hard disk size
cat /proc/meminfo
- View cpu model
cat /proc/cpuinfo

- Shutdown and restart
reboot restart
poweroff Shut down
1.2 shortcut keys
ctrl + shift + = enlarge the font of the terminal window
ctrl + - reduce the font of the terminal window
ctrl+z terminate ping
ctrl+***l * * * clear screen
ctrl + c terminate command
table completion command
*linux is case sensitive
1.3 basic format of terminal command
command [-options] [parameter]
1.4 setting password
# Add a a user
sudo adduser user name(a)
#Add user a's password
sudo passwd a
user management
1.4
ifconfig  # View IP address
ifconfig eth0 xx.xx.xx.xx/24 # Configure IP address
route add default gw 192.168.2.2 # Add default gateway
2, centos operating system architecture
2.1 general
- Tree structure
- Directory = = folder
- cd change directory... Return to the previous directory
- /Operating system 1 Starting path

- pwd lists the path where the current directory is located
- ls list lists the contents of the current directory

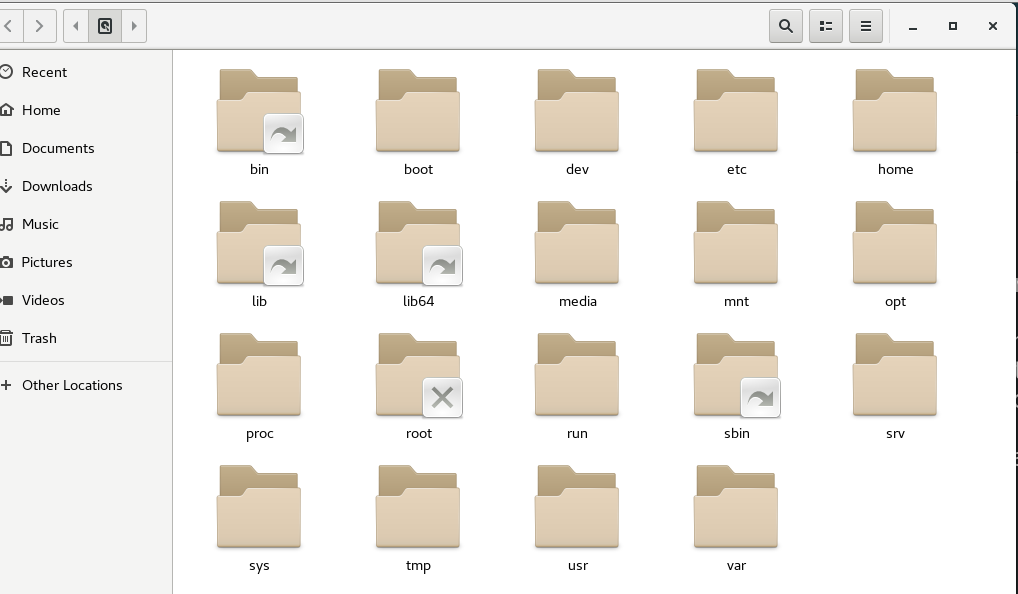
2.2 catalog overview
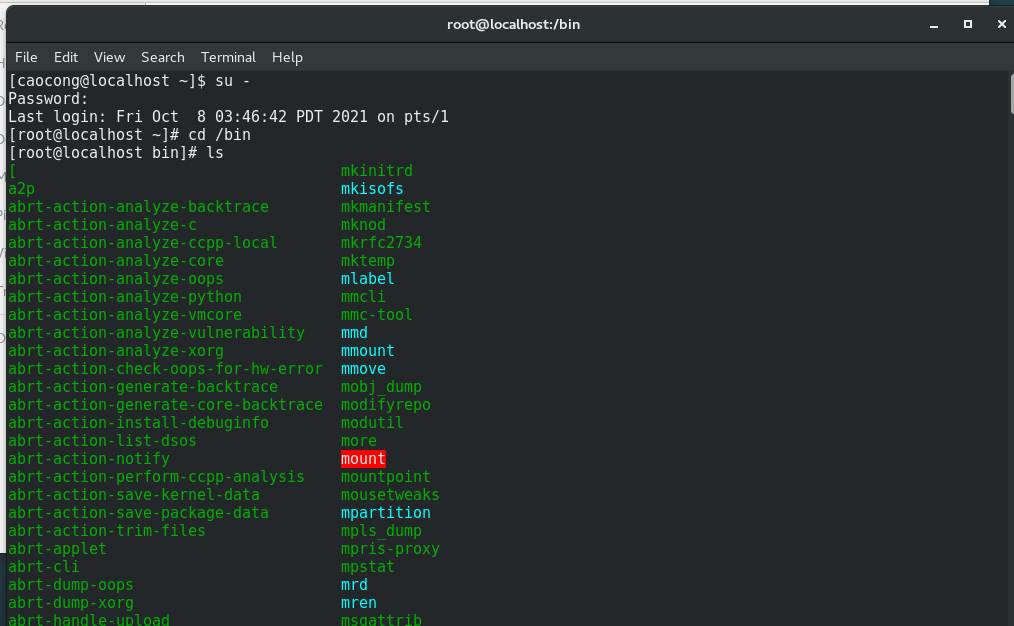
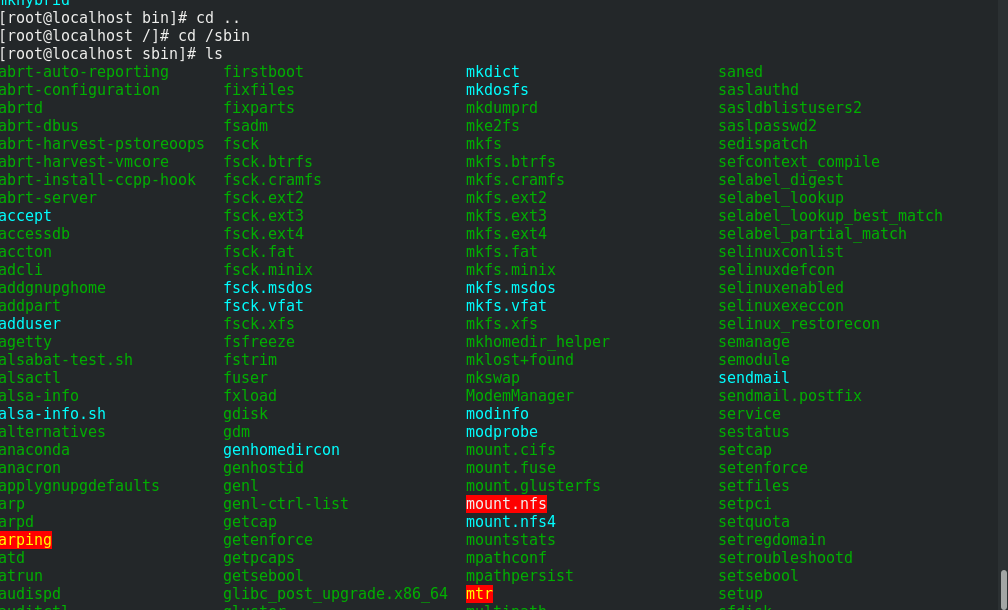
*Command words that can be executed by both ordinary users and administrators, such as cat
/bin
*Commands that only administrators can execute
/sbin
*Boot main boot directory, independent partition, boot menu, kernel
/boot
*Storage directory of equipment files
/dev
*Configuration file storage directory
/etc
*Home directory of ordinary users
/home
*Administrator's home directory
/root
*Mount directory of optical drive
/media
*Temporary device mount directory
/mnt
*The data inside is in memory
/proc
*Temporary file storage directory
/tmp
*Installation directory of software
/usr
*Constant variable file storage directory log file mail file
/var

3, Centos basic commands
1. Inquiry
*Check the contents in the directory
ls
*Viewing commands in files
cat
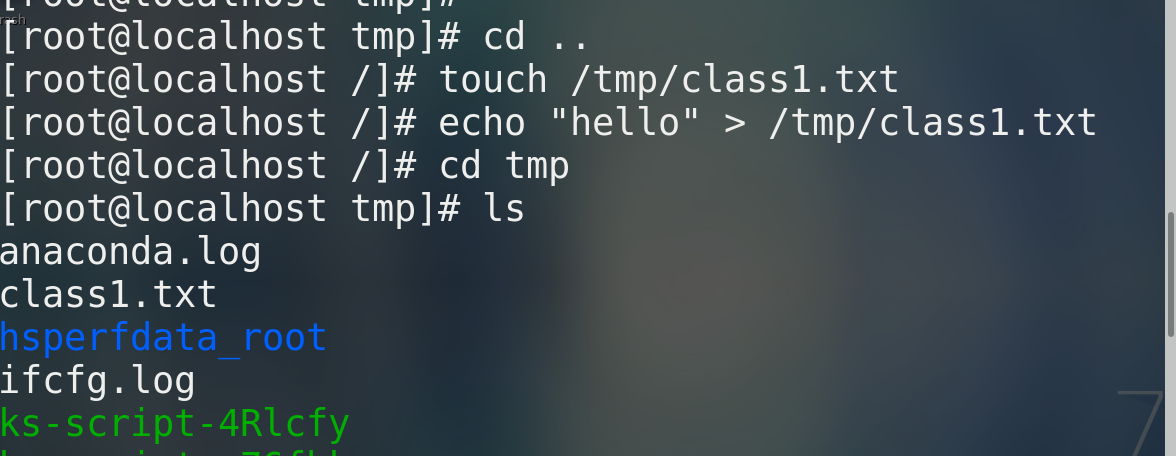
2. Increase
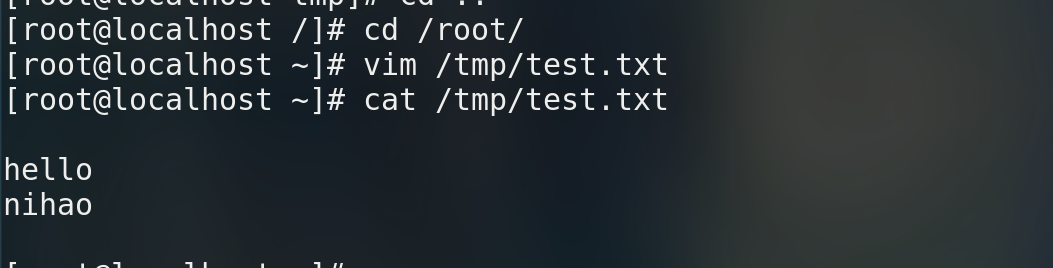
* create a file
touch route/file name
echo "hello" > file
* Create directory
mkdir Directory name
mkdir /tmp/class1

3. Changing: cutting and copying
*mv Rename and cut
*hold class1.txt Cut to class1 in
mv class1.txt class1
*Modify file name class1.txt by class11.txt
mv class1.txt class11.txt
*cp Copy
cp file name
*Symbolic connection
ln -s Connection file established by absolute path source file

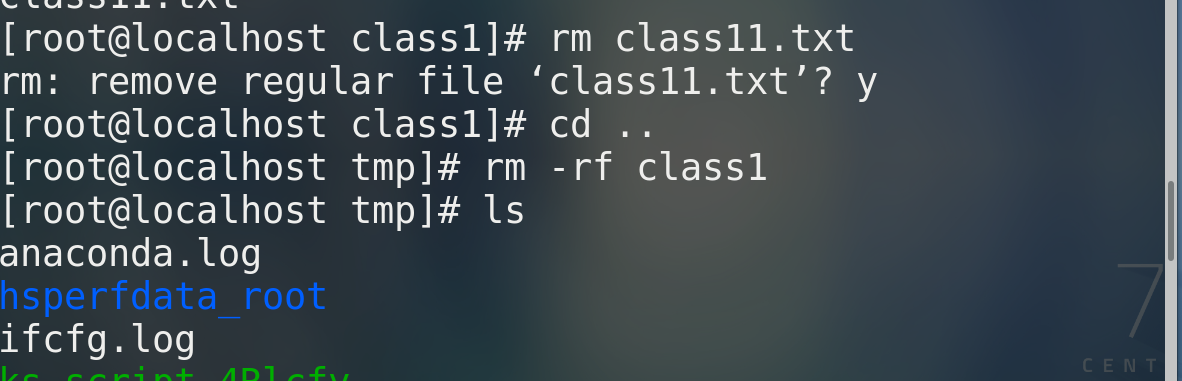
4. Delete
*Delete file
rm file
*Force delete
rm -f file
*Delete directory
rm -rf/-f Directory name
5. Help information query of command word
How to view the help manual for a command
* Show hidden files
man -a
* Displays all information about the file
man -l
* display files size
man -lh
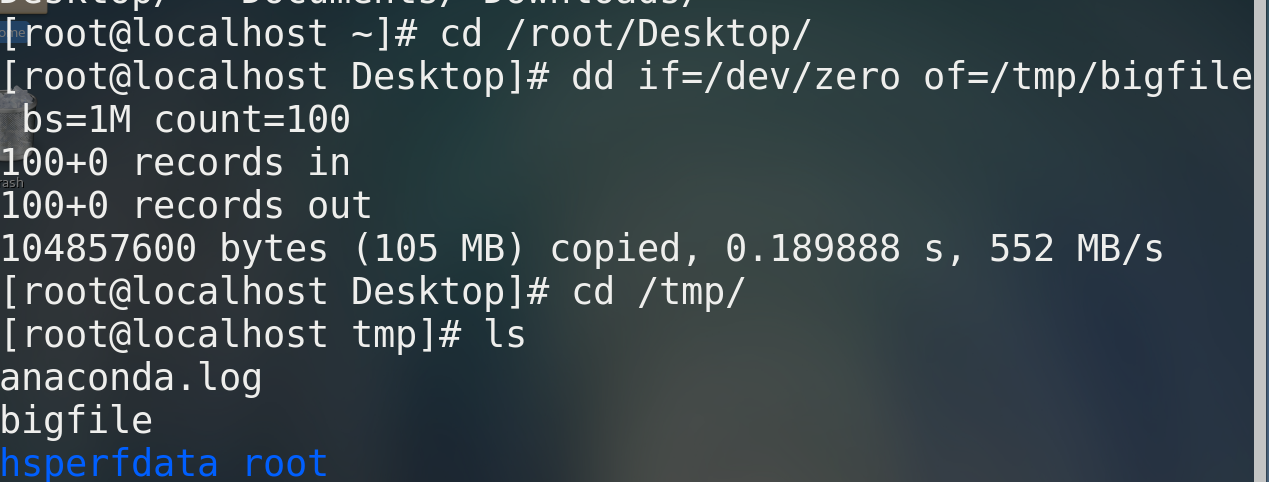
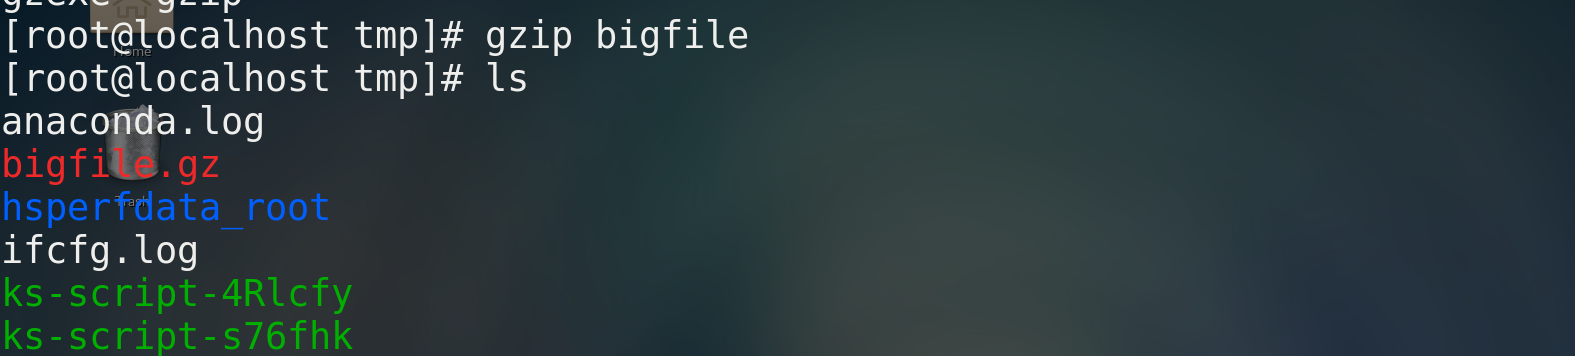
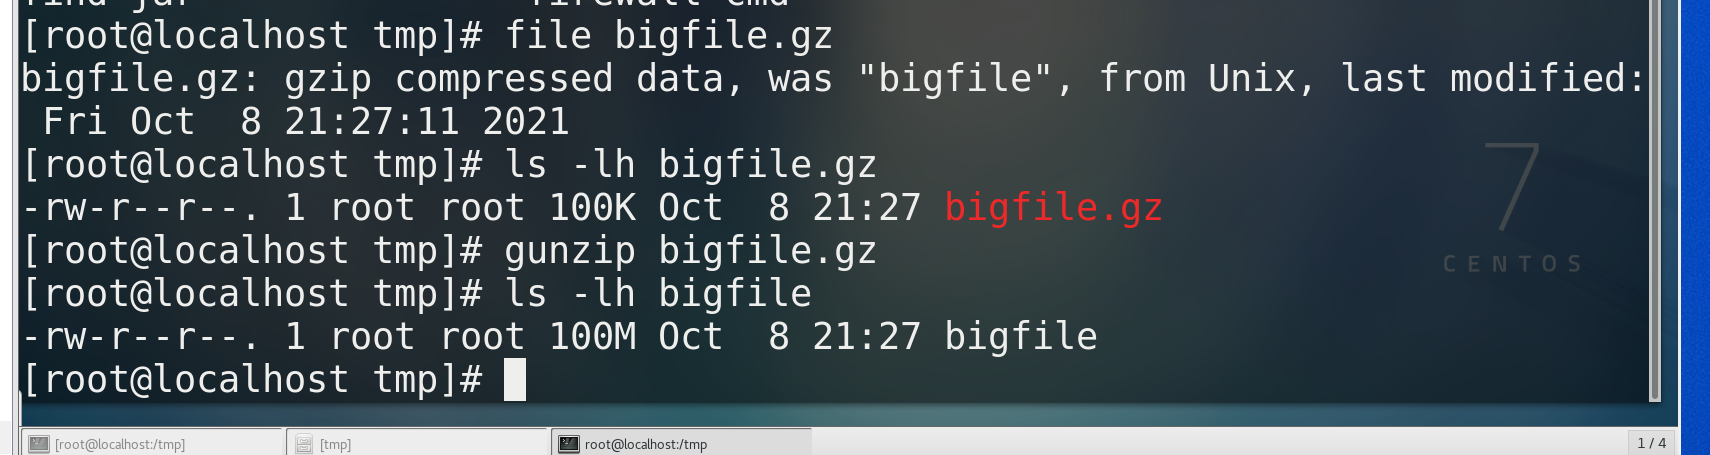
6. Compression and decompression
* /tmp Create a directory with a size of 100 M File bigfile
dd if=/dev/zero of=/tmp/bigfile bs=1M count=100

# if==inputfile,of==outputfile,bs unit, count counter

gzip/bzip2 file name # Compressed file
file file name # View file information
ls -lh file name # View file size
gunzip/bunzip2 Compressed package # Unzip file


* How to package and compress directories
tar -cf /tmp/allfile.tar /tmp/allfile
# Package the directory (allfile), tar--tape archive,c--create,f--file, and package allfile to generate a new file, allfile tar
gzip allfile.tar
# Compress the directory to generate allfile tar. gz
gunzip allfile.zip
# Decompress the directory to generate allfile tar
tar -xf allfile.tar [-C root]
# Unzip the tar package, and specify the unzip directory for the path - C in square brackets

------yes allfile Directly pack and compress in one step-------
tar -zcf /tmp/allfile.tar.gz allfile
------yes allfile. tar.gz Directly decompress and unpack in one step------
tar -zxf allfile.tar.gz [-C root]

7. Pagination
more file name
8. User classification in Linux operating system
Ordinary user xx
Super administrator root
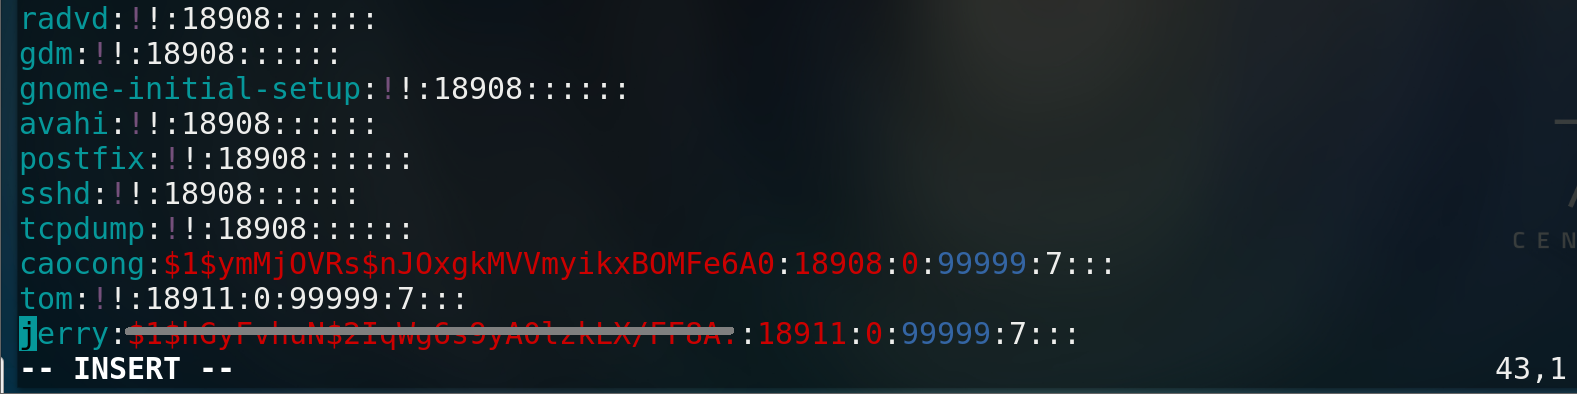
vim /etc/passwd *It saves the information of all users in the operating system

/*Display information:
root:x:0:0:root:/root:/bin/bash

Field 1: user name
 Field 2: password placeholder
 Field 3: user's uid 0 indicates super user 500-6000 ordinary user 1-499 program user
 Field 4: gid of base group
 Field 5: user information record field
 Field 6: user's home directory
 Field 7: the command interpreter used by the user after logging in to the system*/

vim /etc/shadow *Saved user password information

/*Display information:
root:$1$ymMjOVRs$nJOxgkMVVmyikxBOMFe6A0::0:99999:7:::

Field 1: user name
 Field 2: encrypted string of user's password
 Field 3: distance 1970/1/1 Last modification time
 Field 4: minimum validity of password
 Field 5: maximum password validity
 Field 6: warning 7 days before password expiration
 Field 7: inactive period of password
 Field 8: user's expiration time

vim /etc/group Records the information of all groups in the system
9. Manage users and groups
* New group
groupadd [-g *Specify new workgroup id] group id

* delete group
groupdel Group name

* Modify user
usermod [-G *Modify the additional group to which the user belongs
       / -g *Modify the group to which the user belongs
       / -u *Modify user's id] user name

* New user
useradd [-M *No home directory
       / -s /sbin/nologin *Unable to log in to the operating system
       / -u modify uid
        ]user name

* Set password for user
passwd user name
passwd [-l * Lock password for user
      / -u * Unlock password for user ]

*Modify user password validity
chage====change age
chage [-m Modify the minimum validity period
     / -M Modify the maximum validity period

* delete user

userdel -r *The representative deletes the user name together with the home directory

]
example:
requirement:

groupadd -g 1001 class1 # Create a group of class1. The group id is 1001
groupadd -g 2000 class2 # Create a group of class2 with group id 2000
cat /etc/group  # Check whether the group was added successfully
useradd -g class1 tom #Create the basic group class1 of user tom
id tom # Query tom's user group information
usermod -G 2000 -u 600 tom # Add user attachment group 2000 and modify uid600
useradd -u 250 -M -s /sbin/nologin testuser # Create a new user, uid250, who has no home directory and cannot log in to the system
passwd tom # Modify tom password
man passwd # View help for the passwd command
chage -M 90 tom # The modified user is valid for 90 days
passwd -S tom # View tom password information
passwd -l tom # Lock tom's user
userdel -r testuser # Delete user testuser
userdel -r tom  # Delete user tom
groupdel class1
groupdel class2
ps:
When the password is locked
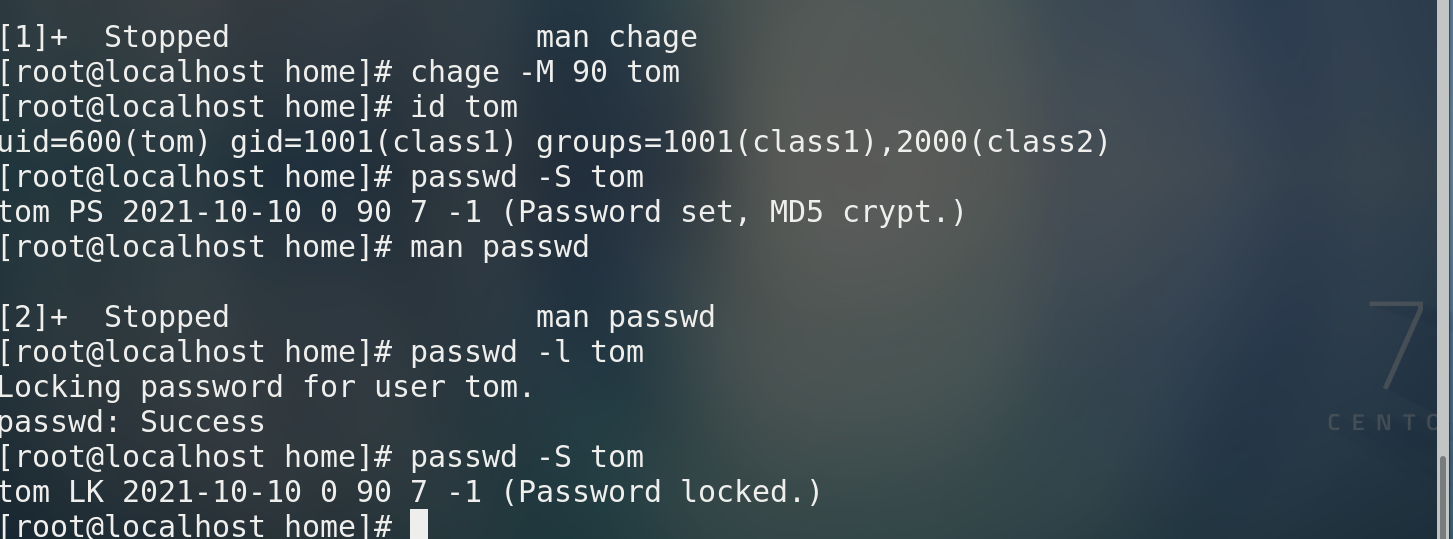
View user information vim /etc/shadow display:
tom:!!$1$AV0e5P9V$DTtiUnw/cIMfgTTiR5ZAF0:18911:0:90:7:::
* It is found that there are two exclamation marks in the user password, indicating that it has been locked
4, vim editor
4.1 several modes of vim
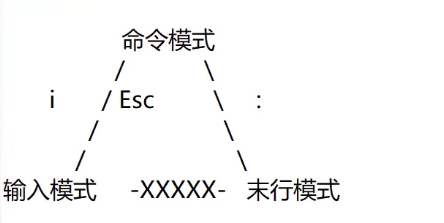
Convert command mode to last line mode
: wq
# w-write,q-quit
: q!
# Exit without saving
: set nu * set number

:% s/l/x/g  * Of each line l replace with x
4.2 vim shortcut keys
2yy copy current line and next line
p paste under current line
dd delete current row
gg go back to the first line
G to the last line
50G quick jump to line 50
4.3 software package under Linux operating system------
1. Software classification:
- Source package - generally published in GNU community
- Packaged software package
2. Characteristics of source package
- Usually in the form of compressed package
- Open source (free, open code, secondary editing)
- Precautions for installation:
4.4 problems encountered by VIM editor
1,
Found a swap file by the name"/etc/ettercap/.etter.dns.swp"
5, Adjust file and directory permissions
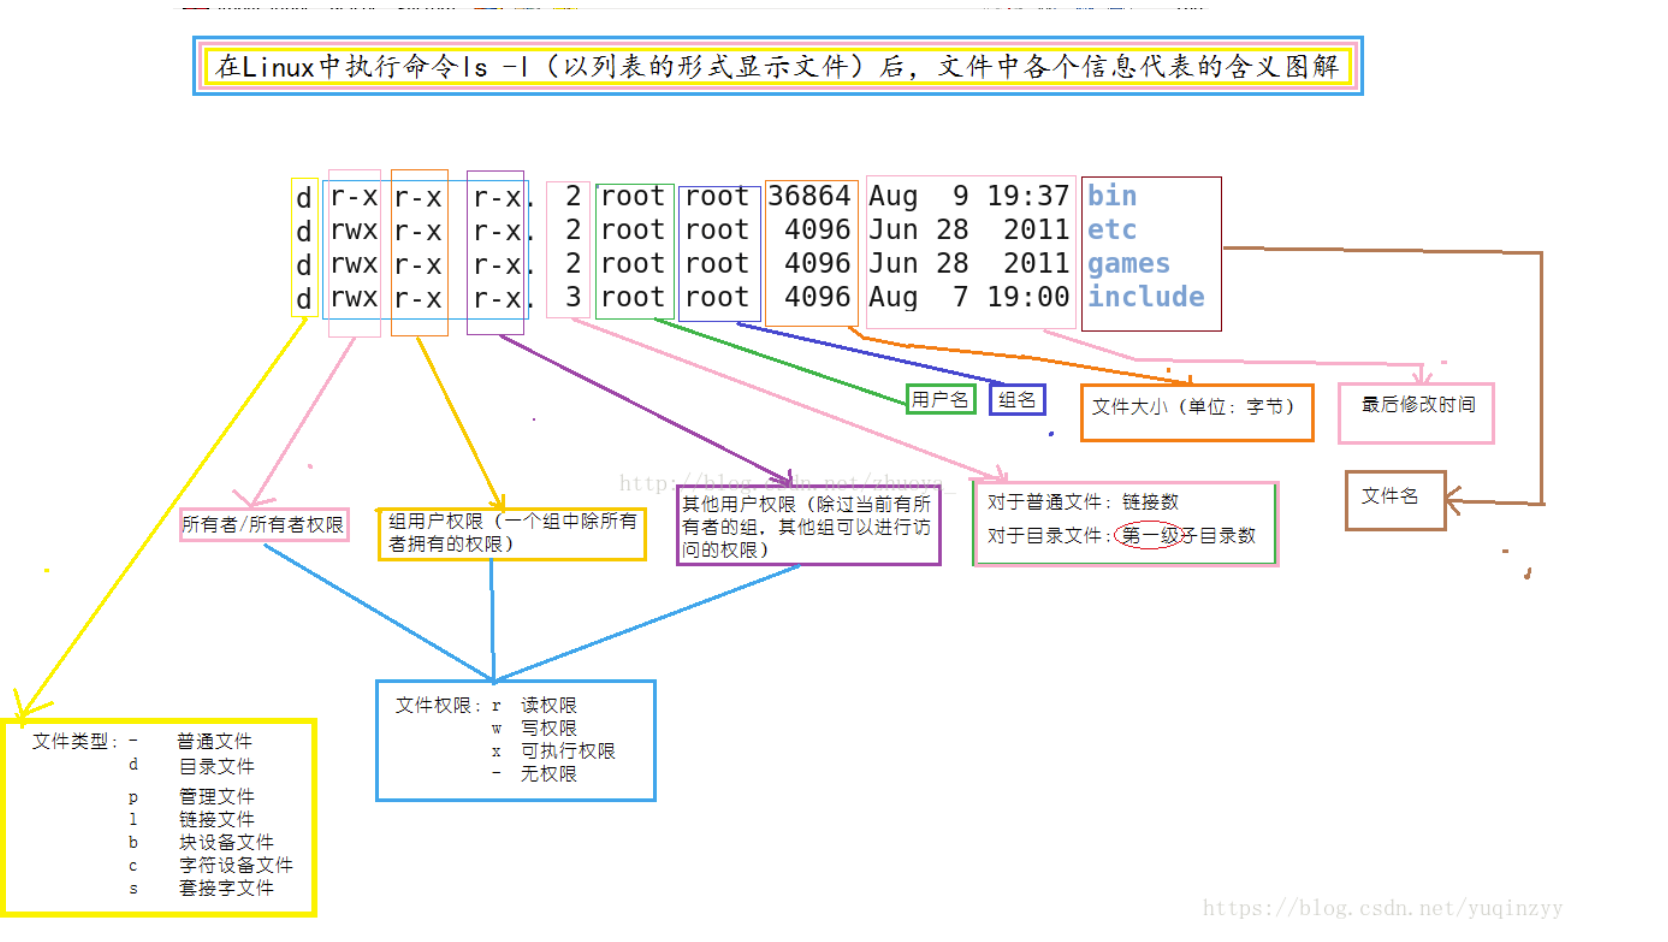
5.1 view file directory permission
ls -l file name / ll file name # View file permissions
ls -ld Directory path # View directory permissions

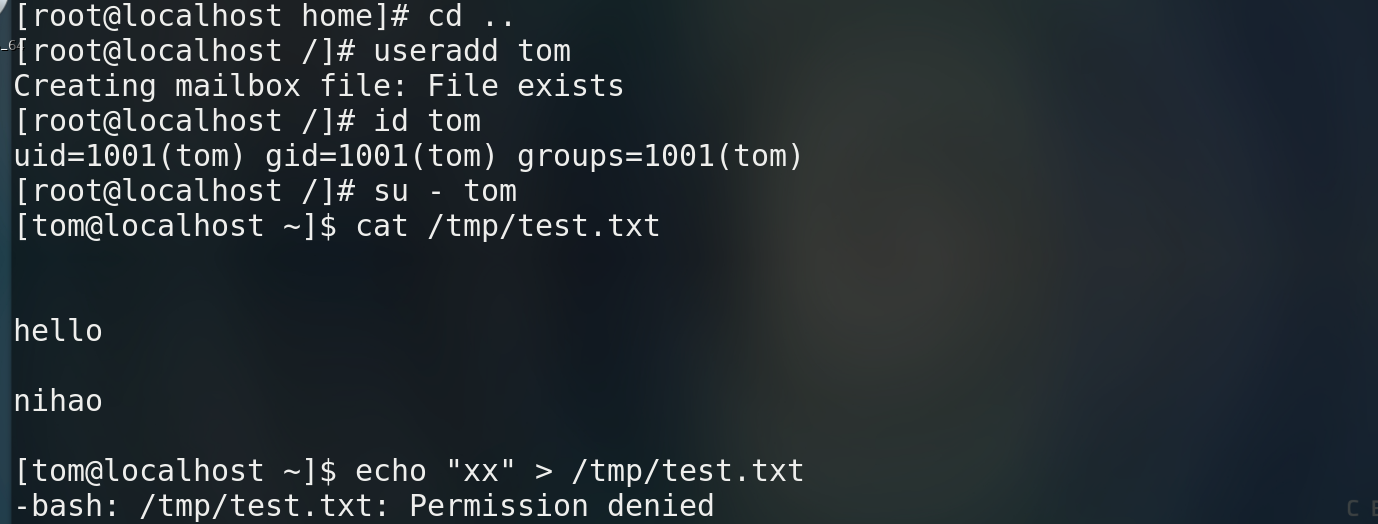
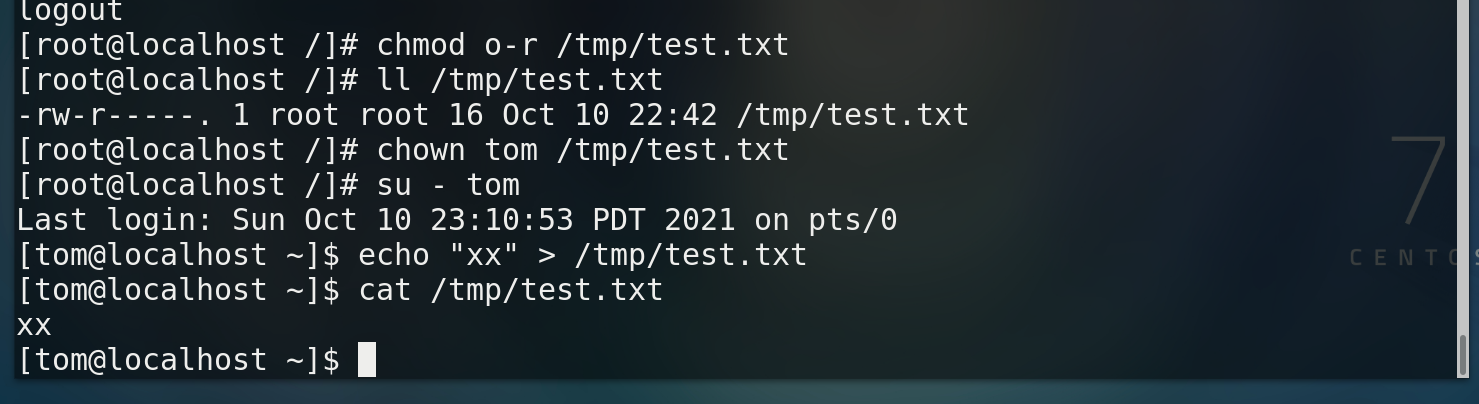
5.2 change the group permissions of the file / directory
* Change file mode

chmod * change mode Abbreviation of
chmod Object arithmetic operator permission file
- Object: u(Owner) g(Group) o(Other users) a(all)
- Arithmetic operators:- + =
- jurisdiction: r w x

* Change document owner
chown User files
* Change the group to which the file belongs
chgrp Group file
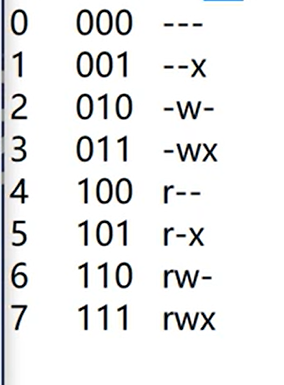
Permissions corresponding to 0-7
example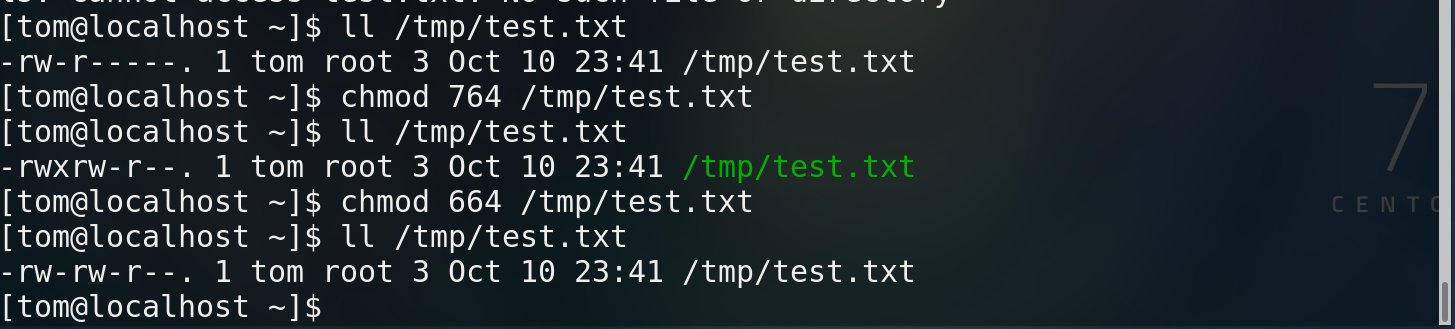
5.3 viscosity level and suid&sgid
- Viscous potential
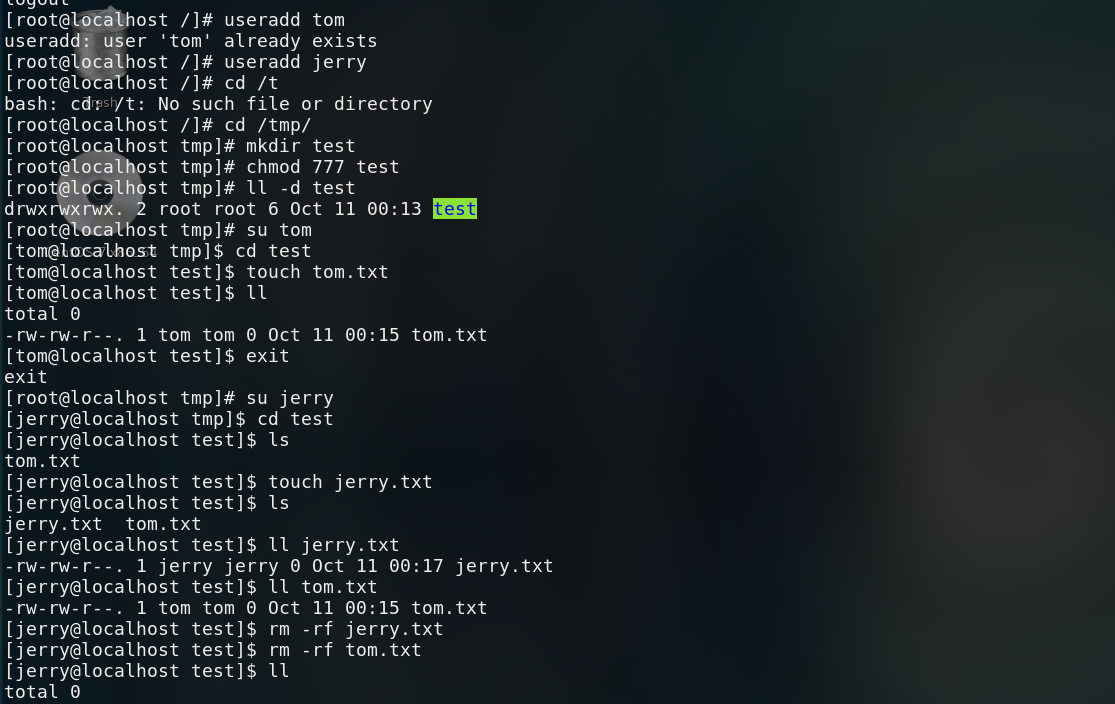
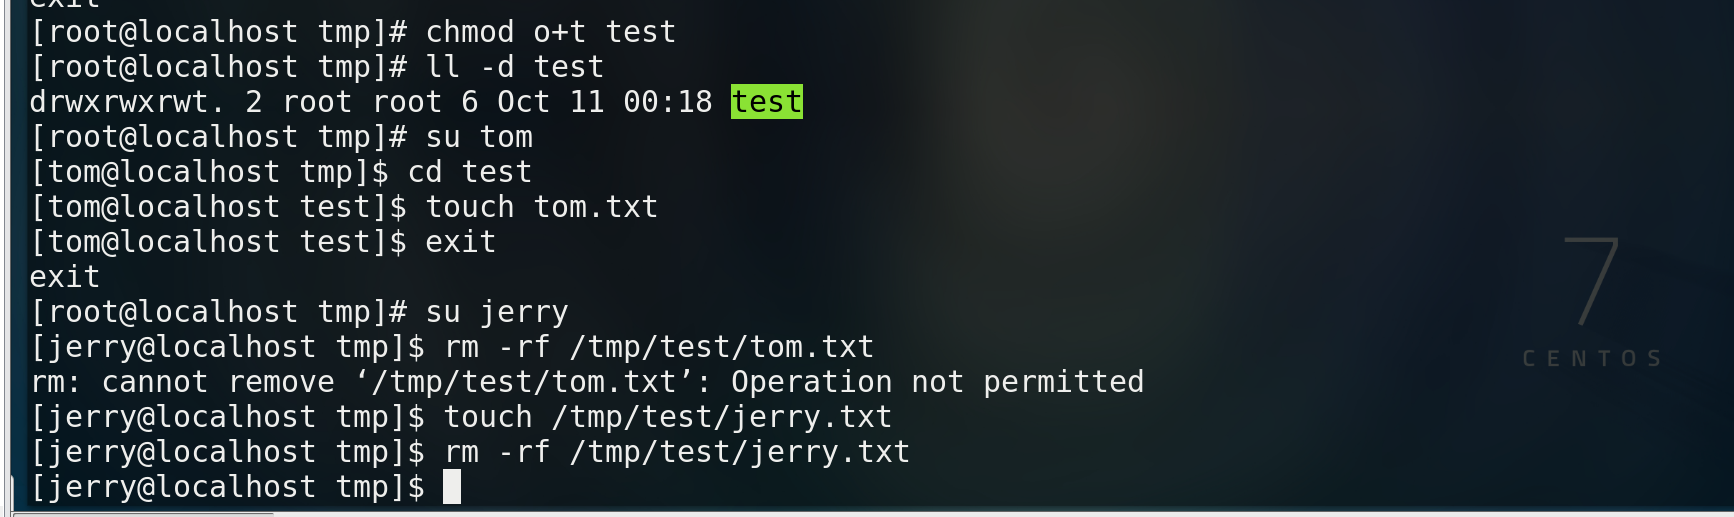
Sticky bit: for the directory, only the creator can delete the files created in the directory
Under normal circumstances, jerry can delete the tom user permission
Add sticky bit
chmod o+t file name
- sgid
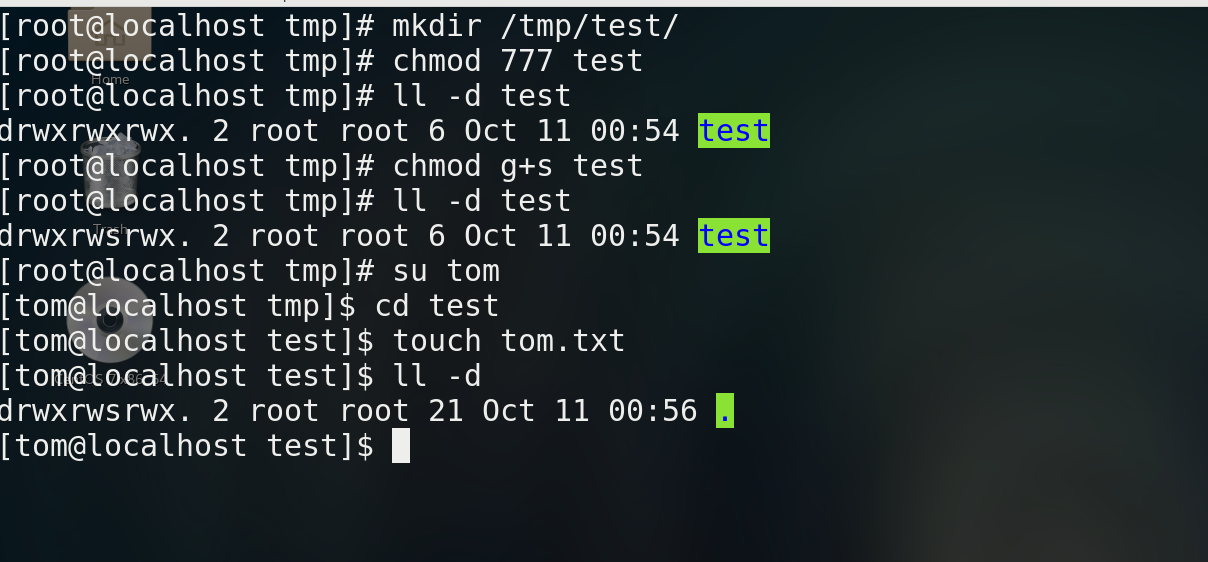
For the permissions established for the directory, the group to which the file established in the directory belongs inherits the group of the parent directory
chmod g+s file name
Create a new test file, set chmod g+s to sgid mode, change the group of the object, and finally the group of view permission becomes root
- suid -- user password can be deleted
For the establishment of an executable file, who allows the file to have the permissions of the file
chmod u+s file name
At this time, you can directly delete the login password of jerry user
Input: wq exit input mode

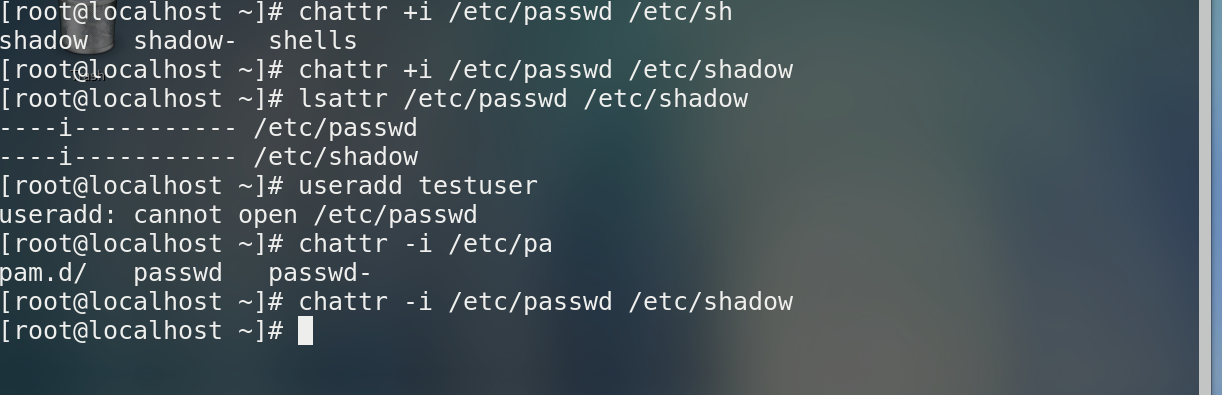
5.4 modify file attributes
chattr +i          * Do not change files or directories arbitrarily
chattr -i          * revoke
lsattr             * Show file properties
6, Network information viewing and configuration
6.1 confirm the network card information and IP address of the system
1. Network address configuration
Things to configure
IP, subnet mask, gateway, DNS
2. Basic command configuration temporary static IP
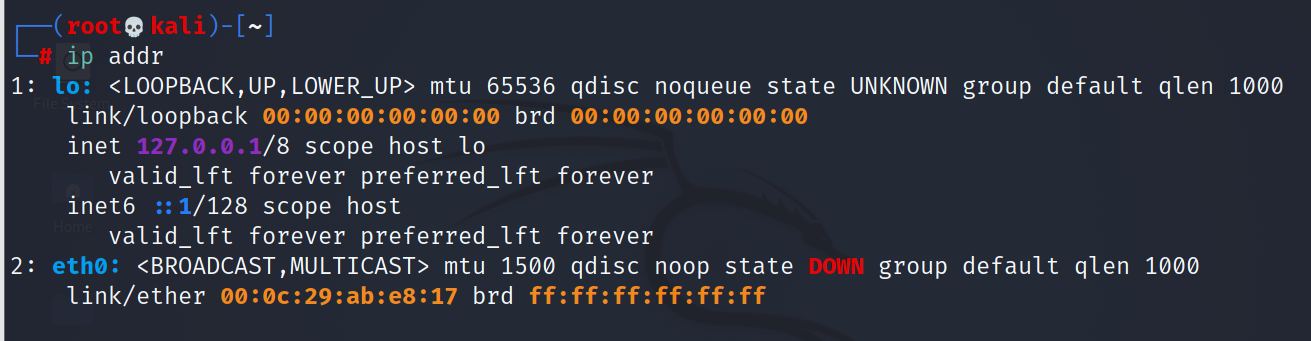
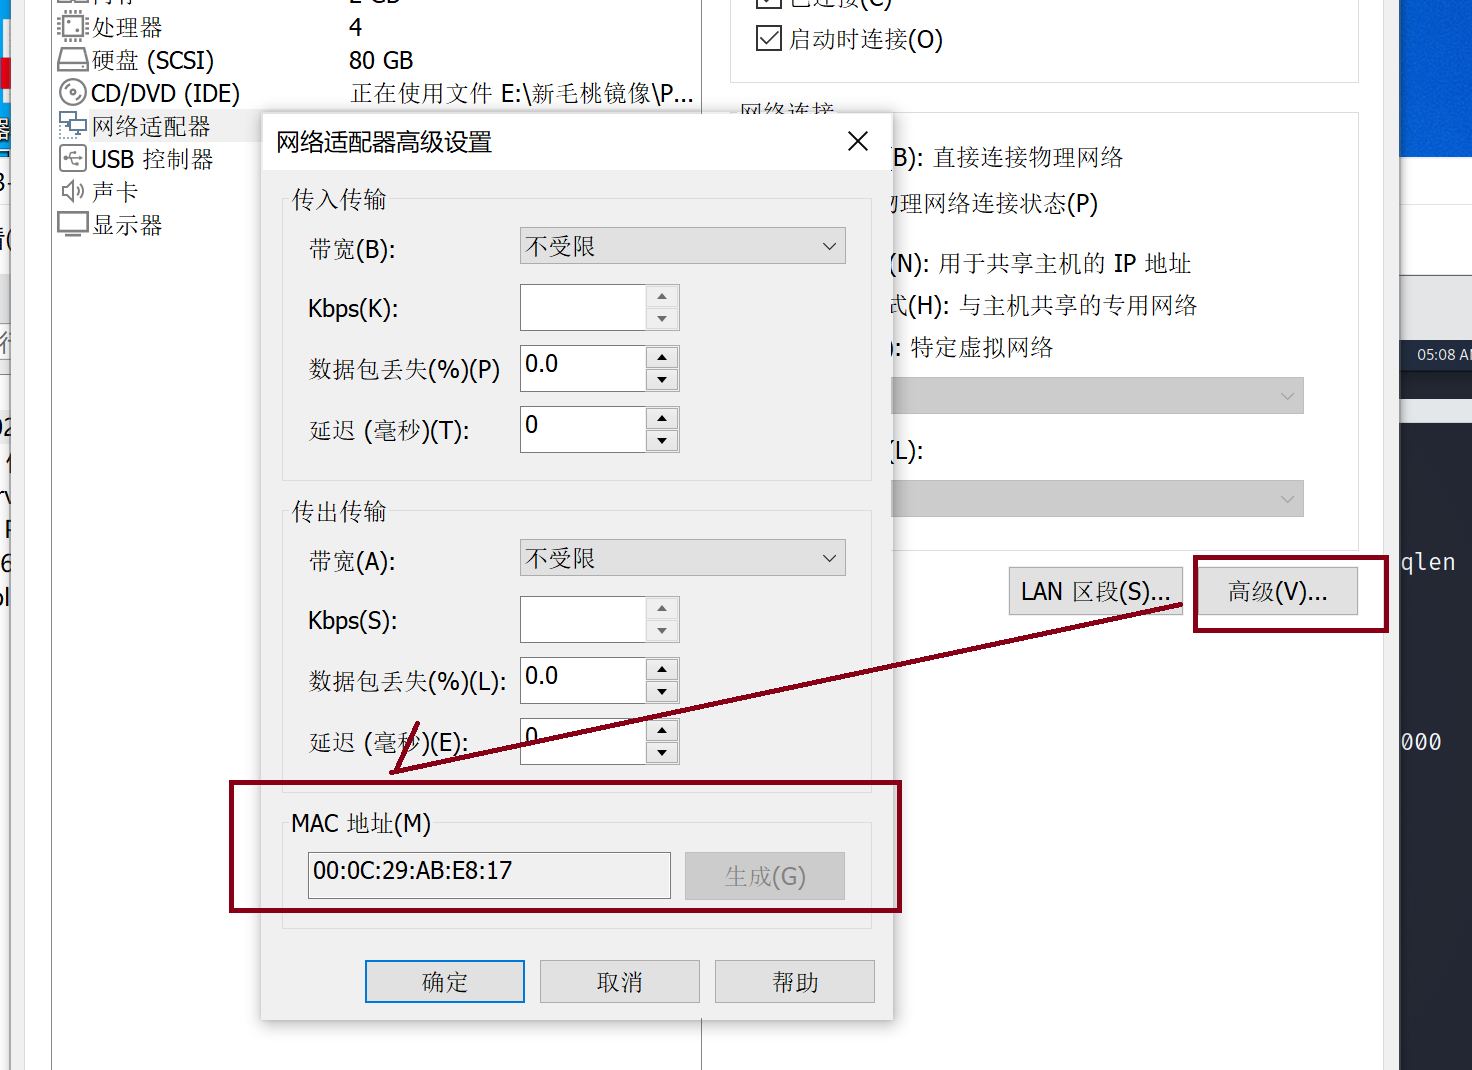
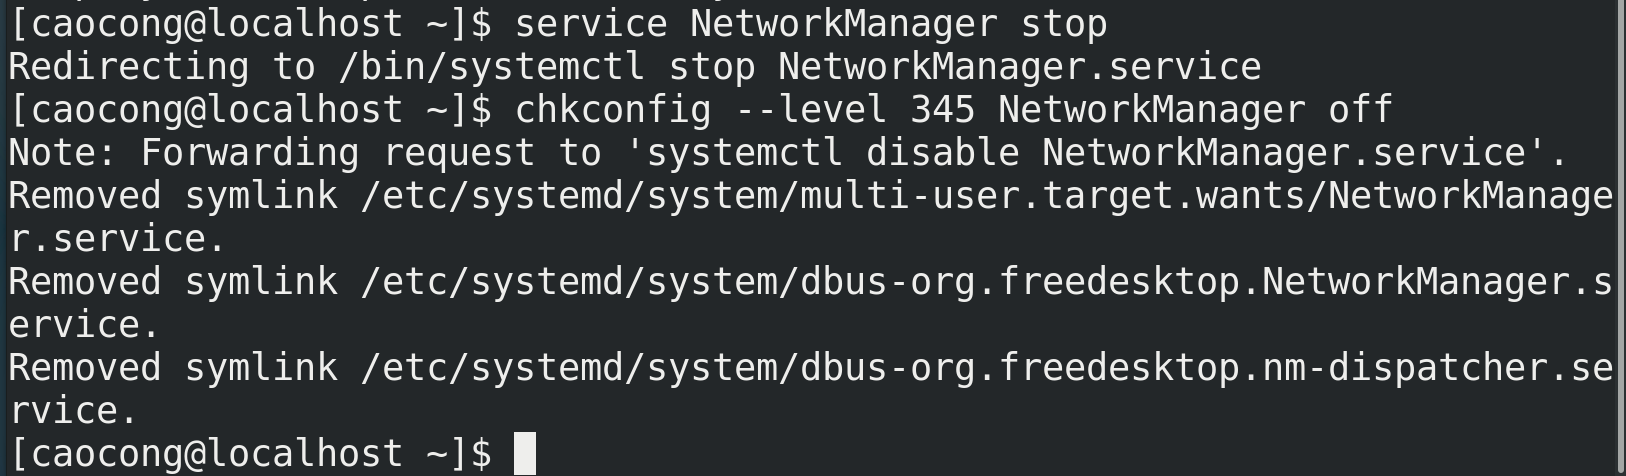
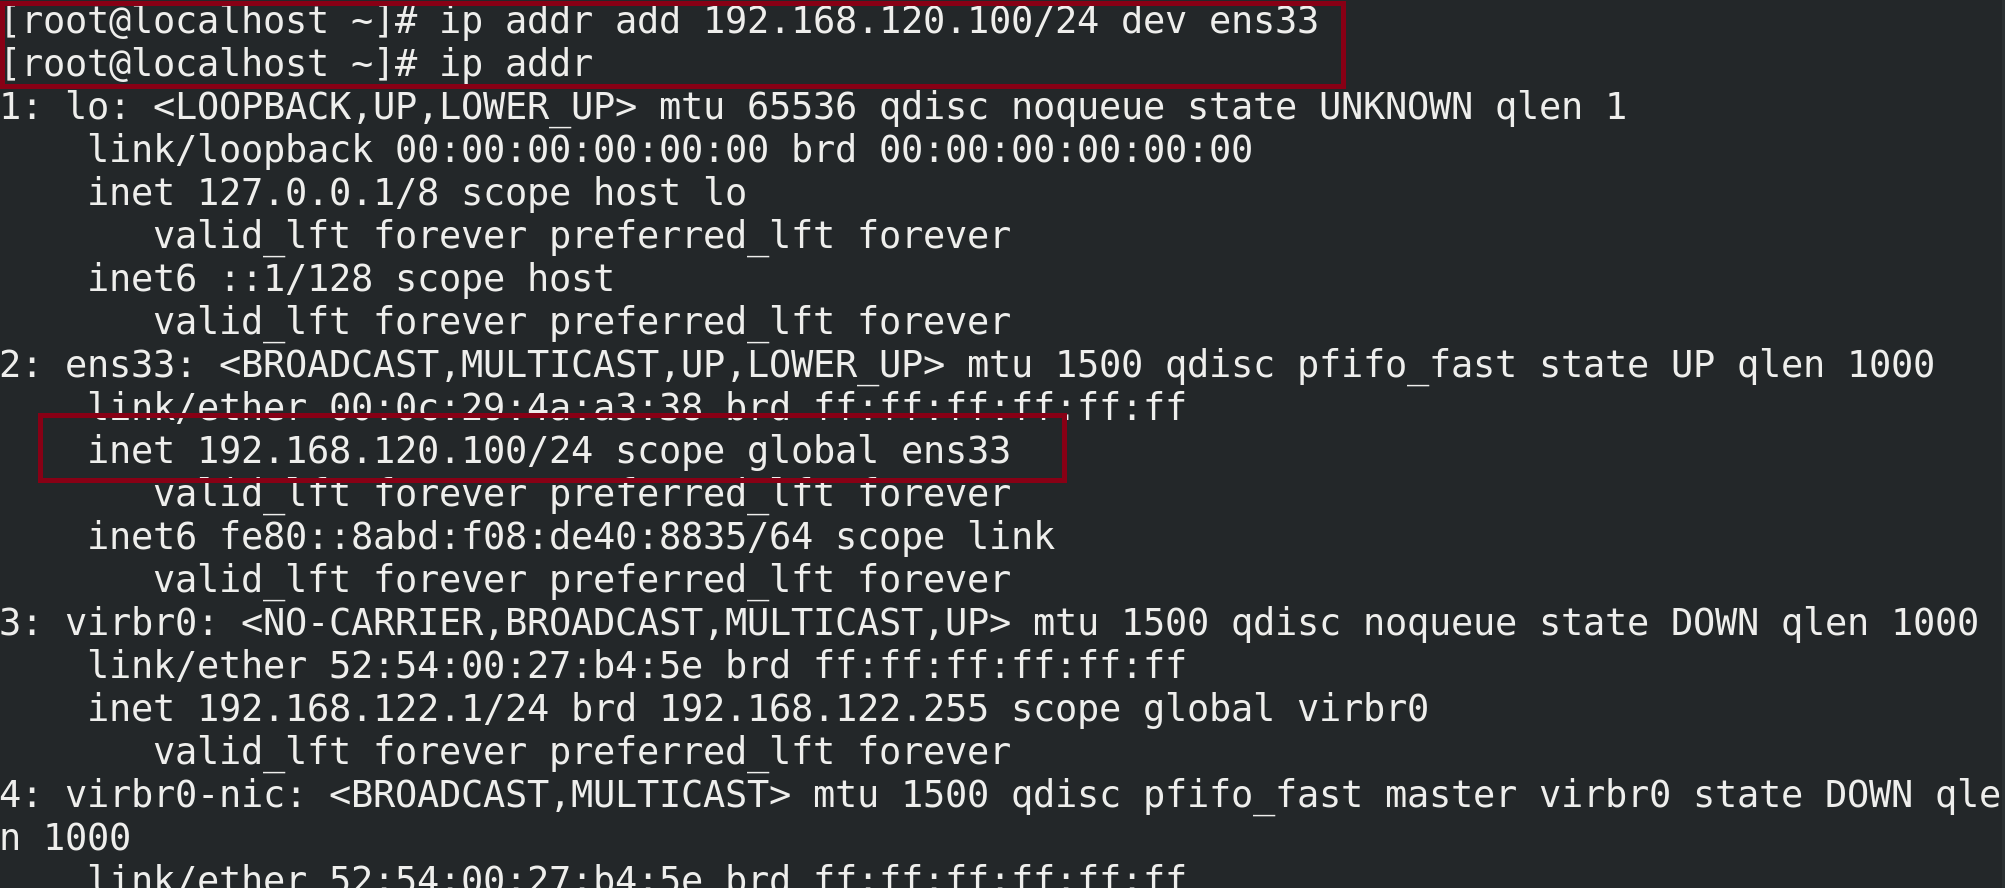
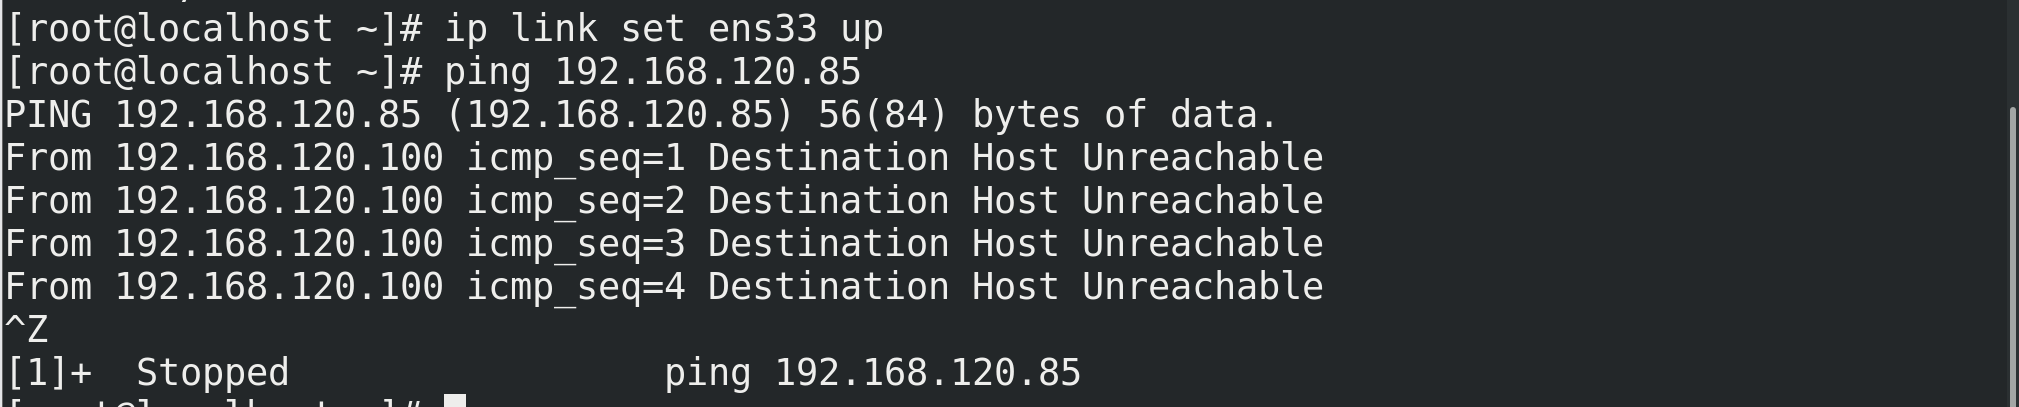
# 1. View network information,
# eth0 represents the first network card and eth1 represents the second network card
# The MAC address of eth can be through the network adapter in the settings
ip addr
ifconfig
# 2. Shut down the NetworkManager service
service NetworkManager stop/start
systemctl status NetworkManager
chkconfig --level 345 NetworkManager off
# 3. Configure network address
# Note: the network port number above Centos7 has been changed to ens33, so dev should be followed by ens33 instead of eth0. It can also be seen from the MAC address
ip addr add/del 192.168.120.100/24 dev eth0
# 4. Because the network manager was just turned off, the state of the network card interface may be down and needs to be adjusted to up
ip link set ens33/eth0 up
# 5. ping the real machine and then closing the firewall can pass -- let's talk about linux closing the firewall
firewall-cmd --state //View firewall status
systemctl stop/start firewalld.service //Turn off and turn on the firewall
systemctl status firewall.service //Check fire protection status
firewall-cmd --reloadl//service iptables restart
# 6. However, you can't access the Internet at this time because there is no gateway and route. You can access the Internet after configuring the gateway and route
ip route add default via 192.168.120.254 dev eth0/ens33
# 7,vim /etc/resolv.conf view DNS
View DNS VIM / etc / resolv conf

3. Configure permanent static IP
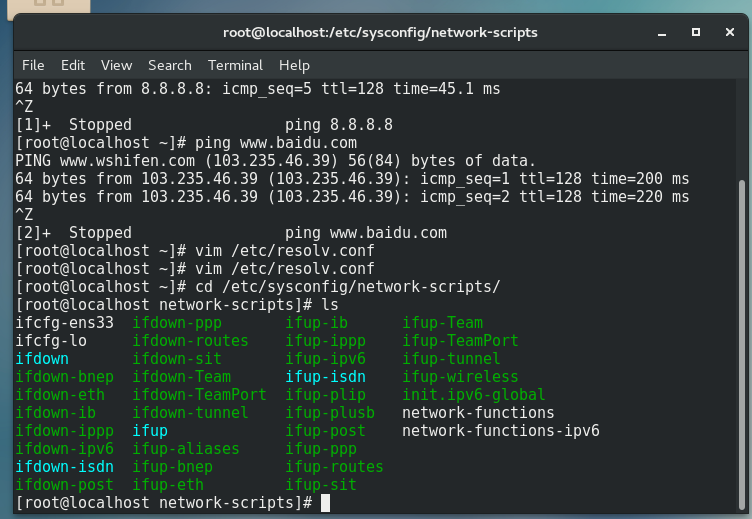
# First, check the network card. Here are ens33 and lo loopback network cards
cd /etc/sysconfig/network-scripts/
# Enter vim mode to configure network card information
vim ifcfg-ens33
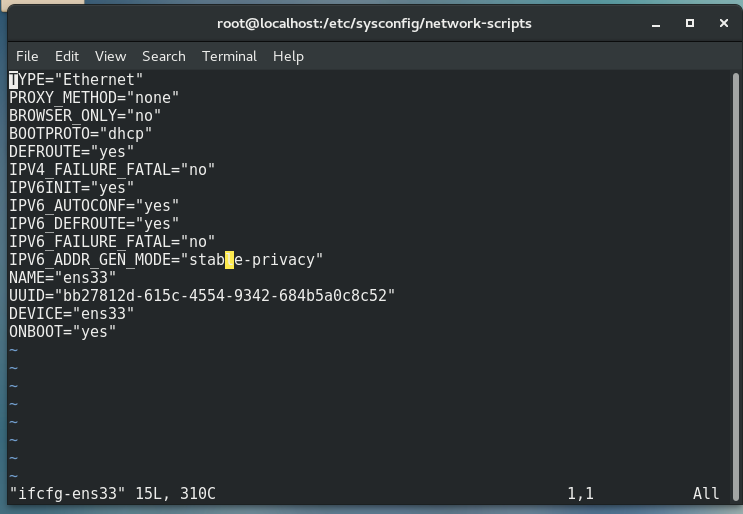
TYPE="Ethernet"  # type
PROXY_METHOD="none"
BROWSER_ONLY="no"
BOOTPROTO="dhcp"   # dhcp can be obtained dynamically and can also be configured static ally
DEFROUTE="yes"
IPV4_FAILURE_FATAL="no"
IPV6INIT="yes"
IPV6_AUTOCONF="yes"
IPV6_DEFROUTE="yes"
IPV6_FAILURE_FATAL="no"
IPV6_ADDR_GEN_MODE="stable-privacy"
NAME="ens33"    # Network card name
UUID="bb27812d-615c-4554-9342-684b5a0c8c52"
DEVICE="ens33"  # Network card device
ONBOOT="yes"    # Allow the network service to manage the file
Experiment: build internal and external networks - for a long time
Equipment: open three virtual machines, one win7 (external network), one CentOS (two network cards, one intranet and one external network), and one Kali (internal network)
1. With IP
win7
——NAT mode
Centos
——Network card 1 ens33 NAT mode
——Network card 2 ens37 vmnet0 mode 172.16.1.254
kali
——eth0 vmnet0 mode 172.16.1.1
ps: remember to turn on the NetworkManager and set the port status to up
2. Equipped with ip route
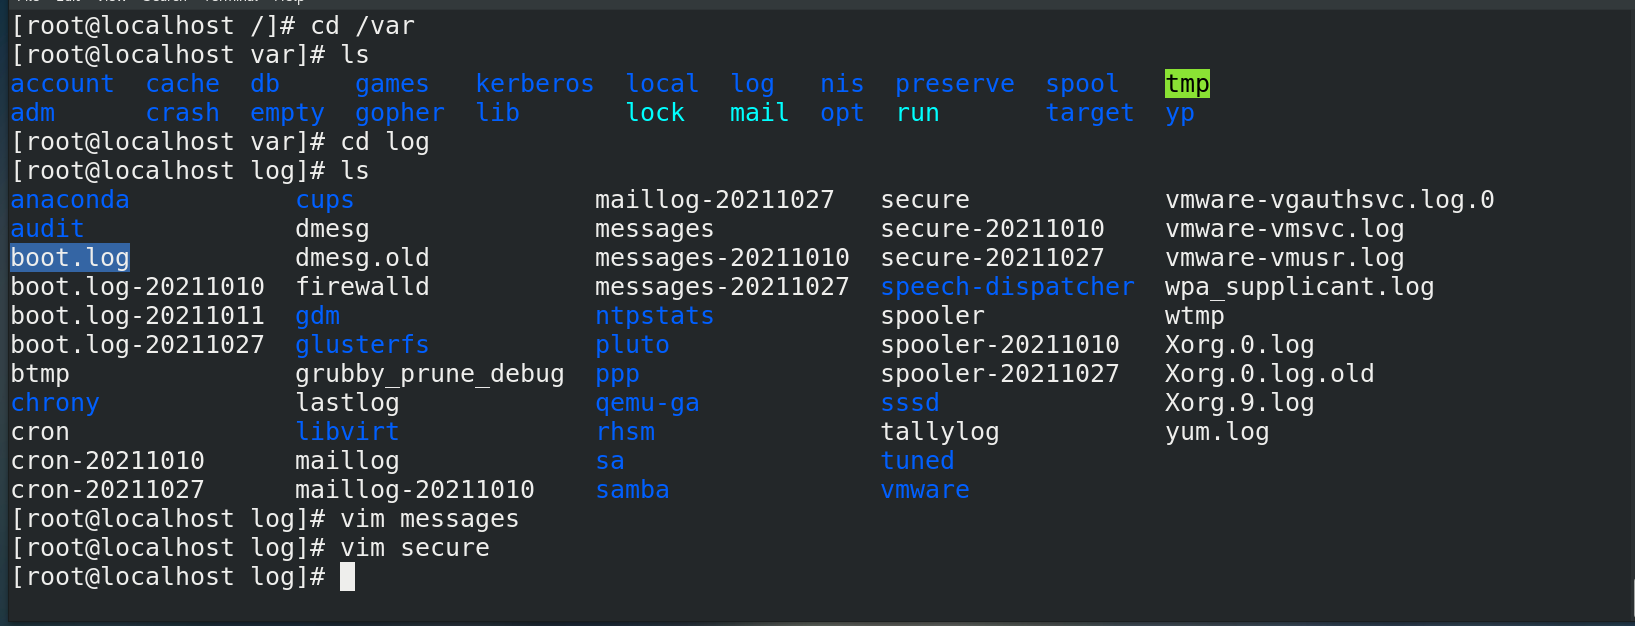
7, Log management
1. Log file - stored in the / var/log directory,
cd /var/log
ls
vim secure  # Enter the vim editor to view the security information. It is found that 192.168.21.141 attempts to log in to the machine
win7 operation

linux operation
Enter vim secure

2. Log classification
system log
Login log
Program log
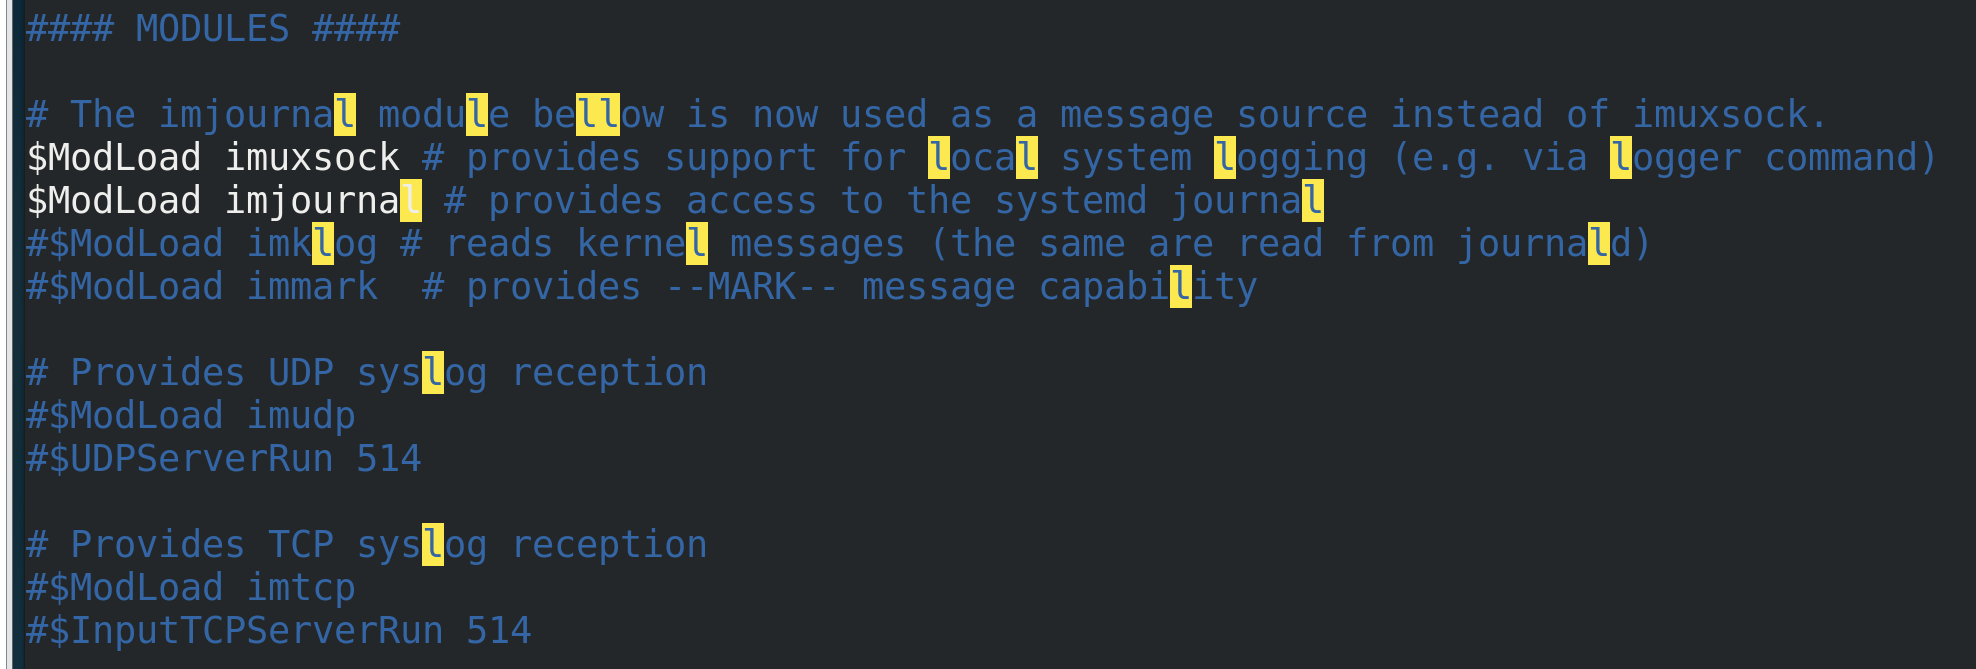
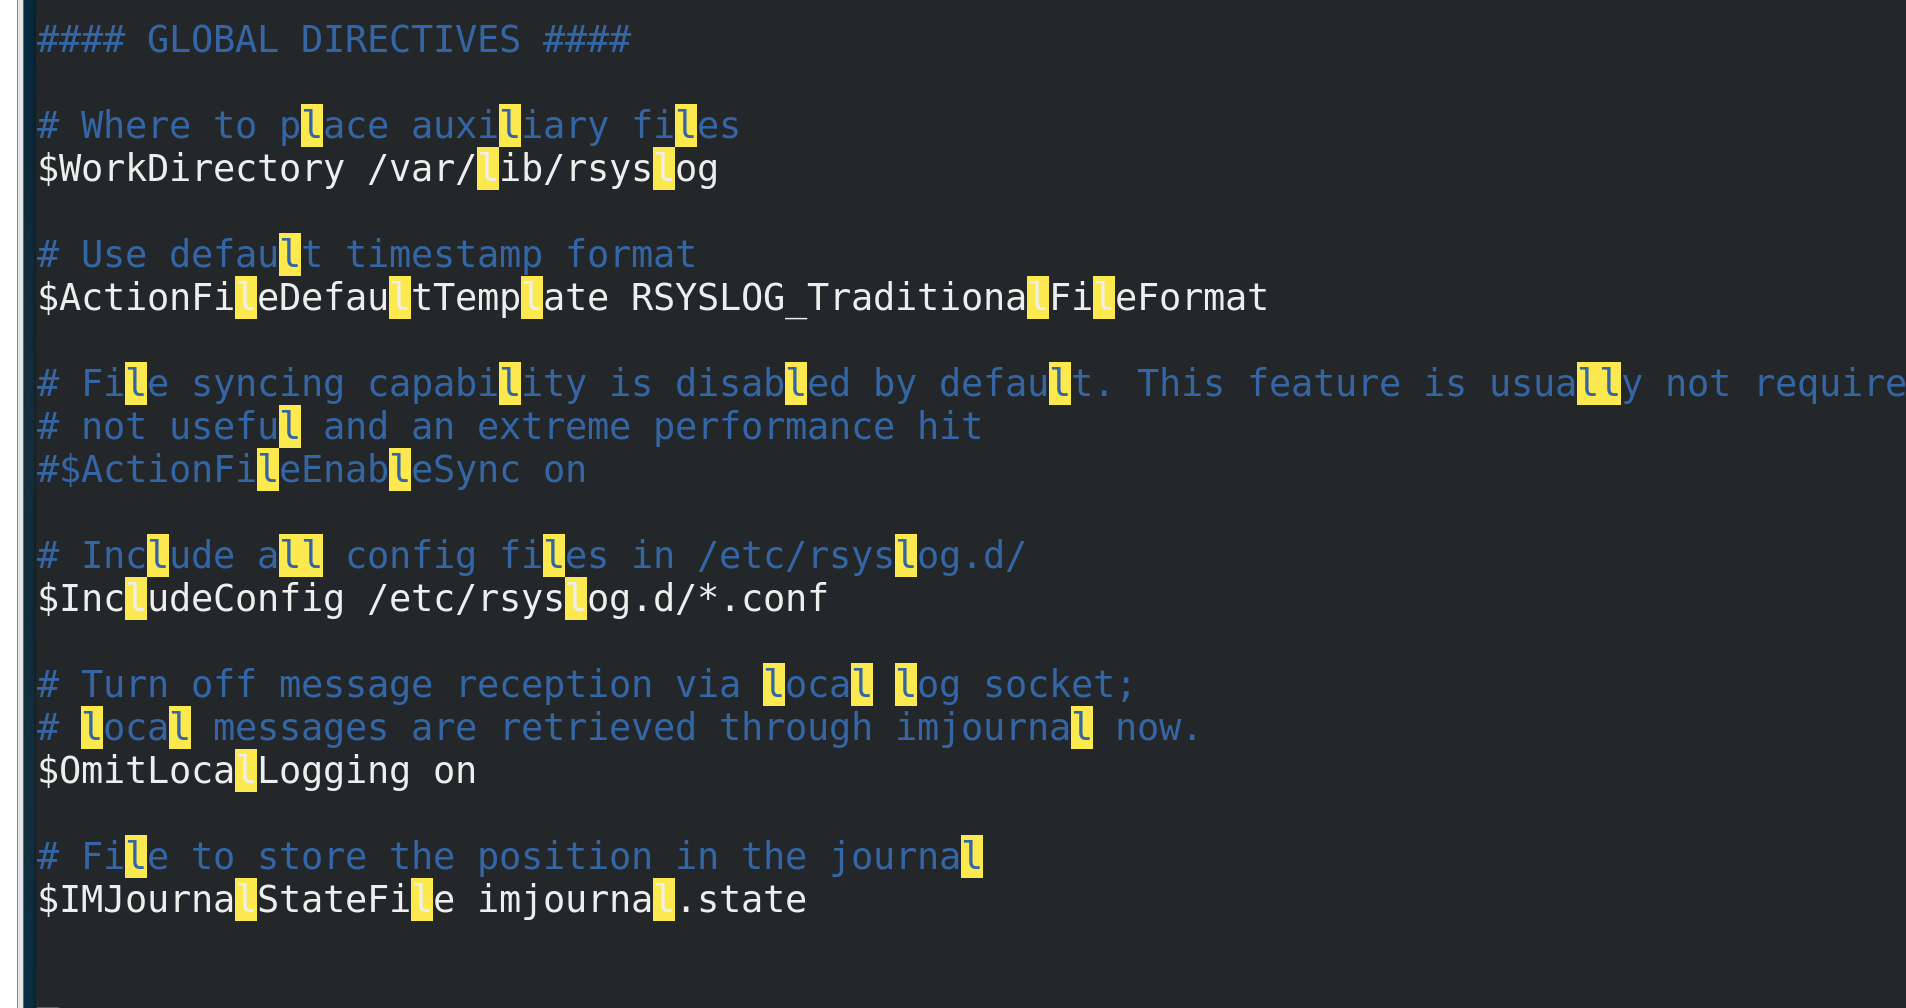
3. Log management service
vim /etc/rsyslog.conf

The file mode is:
service name.Level name
*Represents all documents
Module part
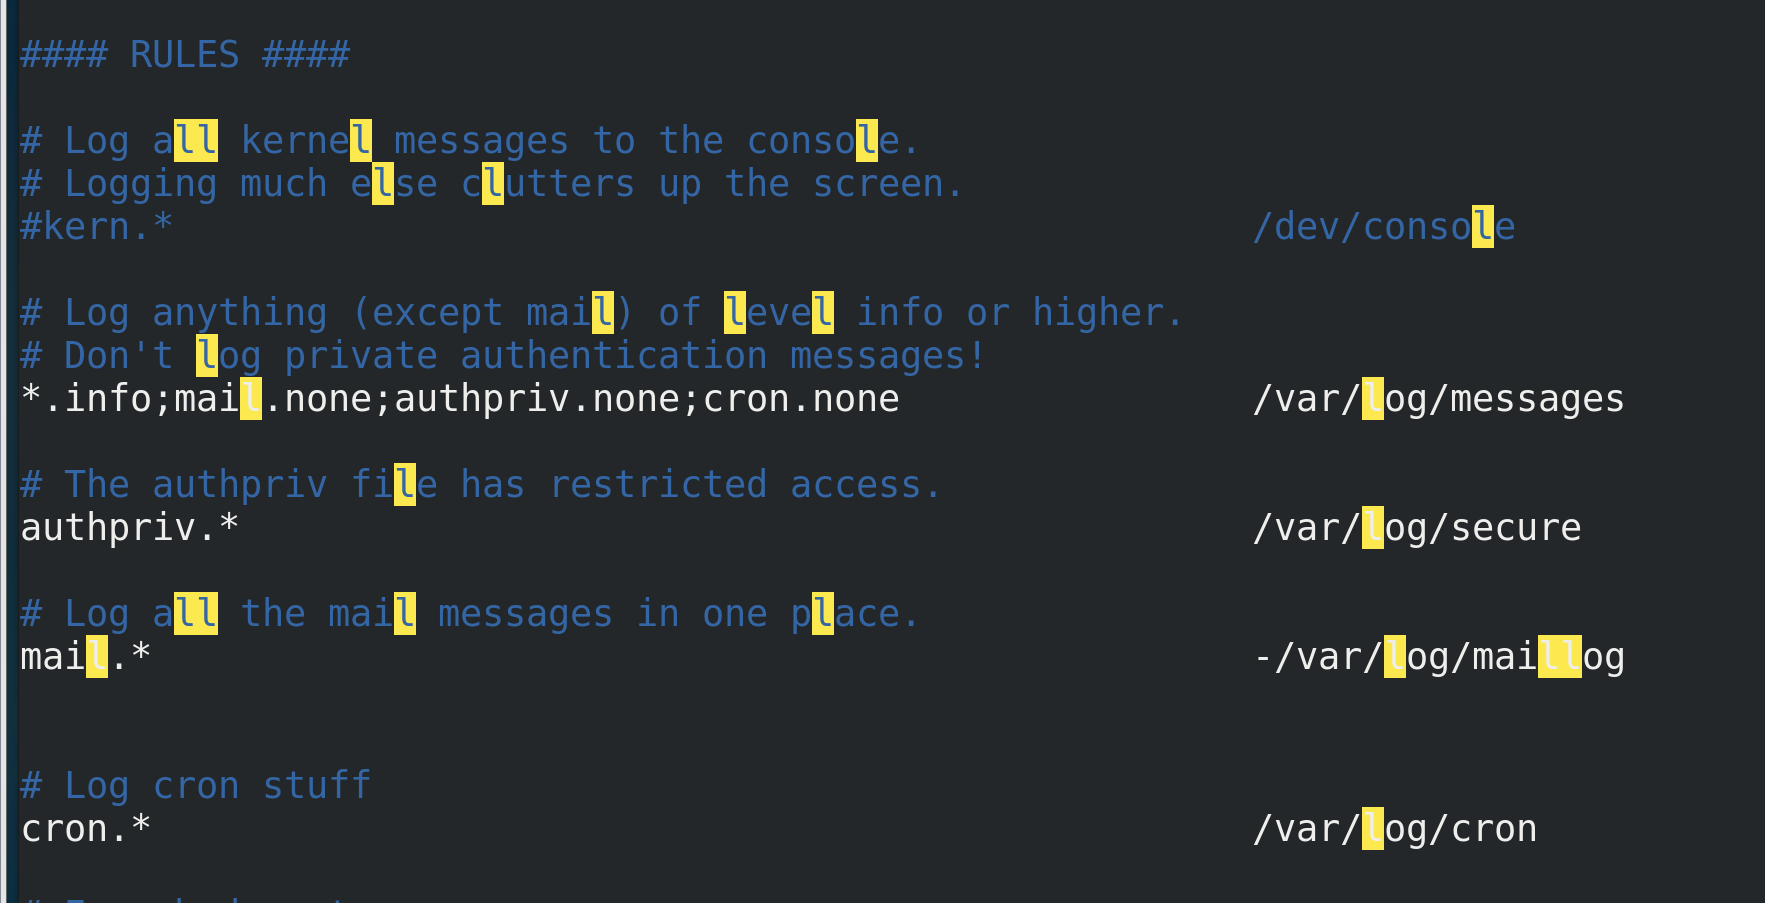
input: man rsyslog.conf View the order of log levels(Not serious to serious)
result(in ascending order):
debug,info, notice, warning,
warn (same as warning), err,
error (same  as  err), crit,
alert, emerg, panic  (same as emerg)
4. Remote backup of logs
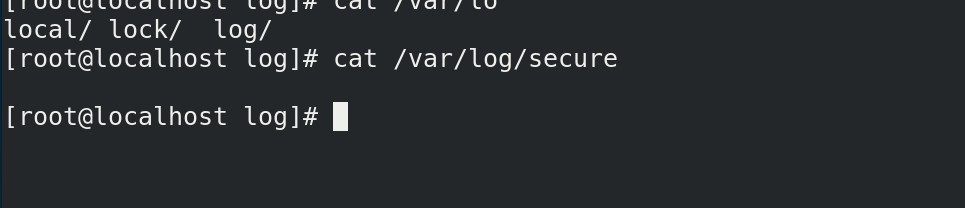
1) Clear log
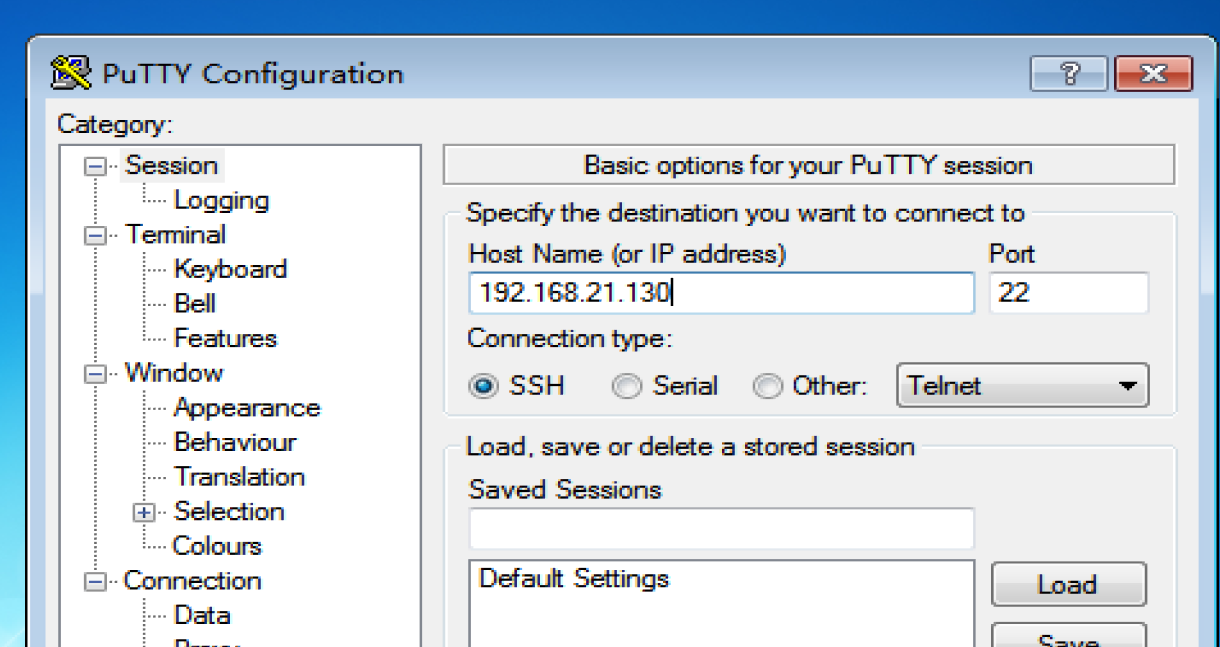
putty remote login linux host
Enter: echo "" > / var / log / secure, and the secure log on the linux host will disappear

2) Experimental complement diagram
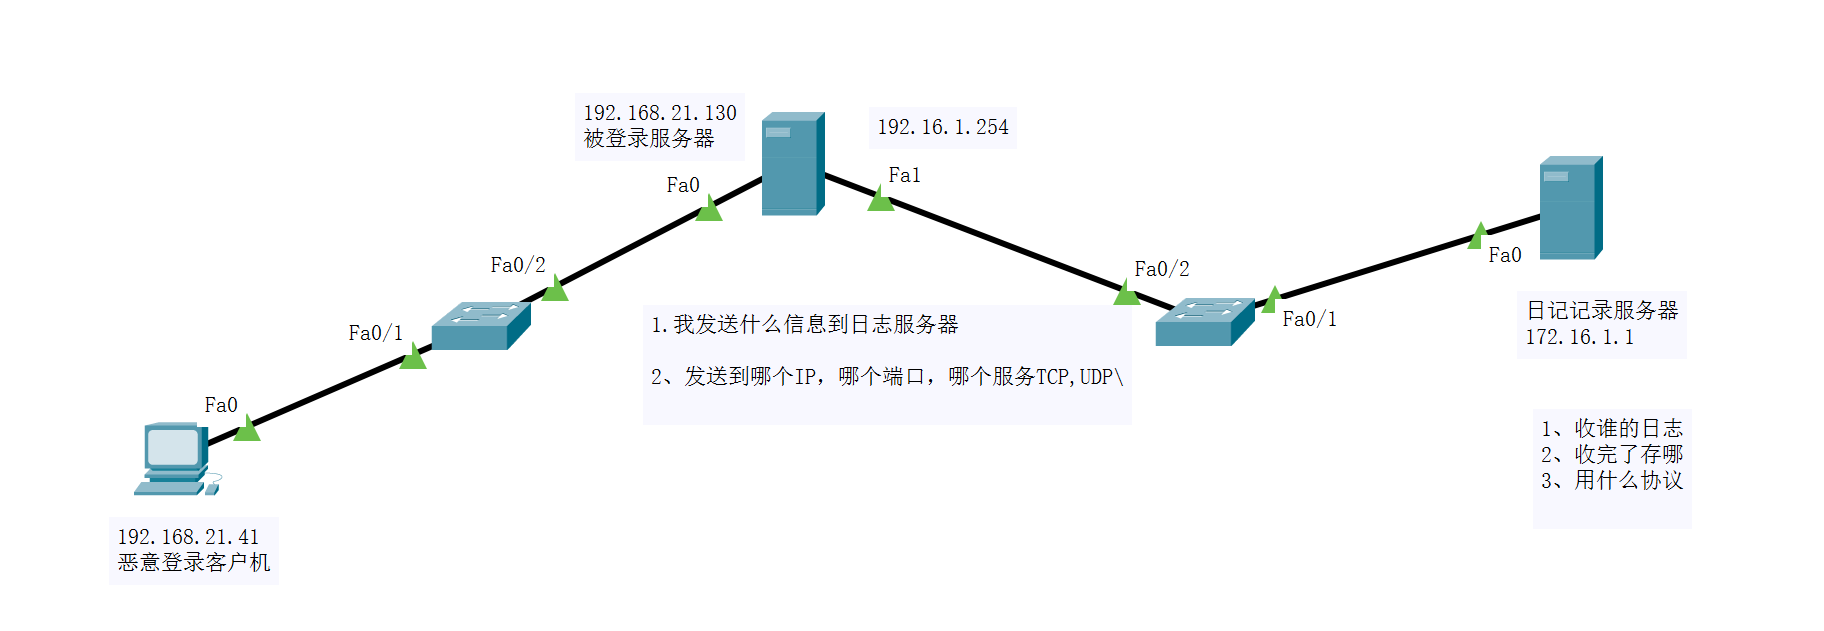
Three virtual machines: win7 attacker, centos attacked party and kali backup server
Centos operation
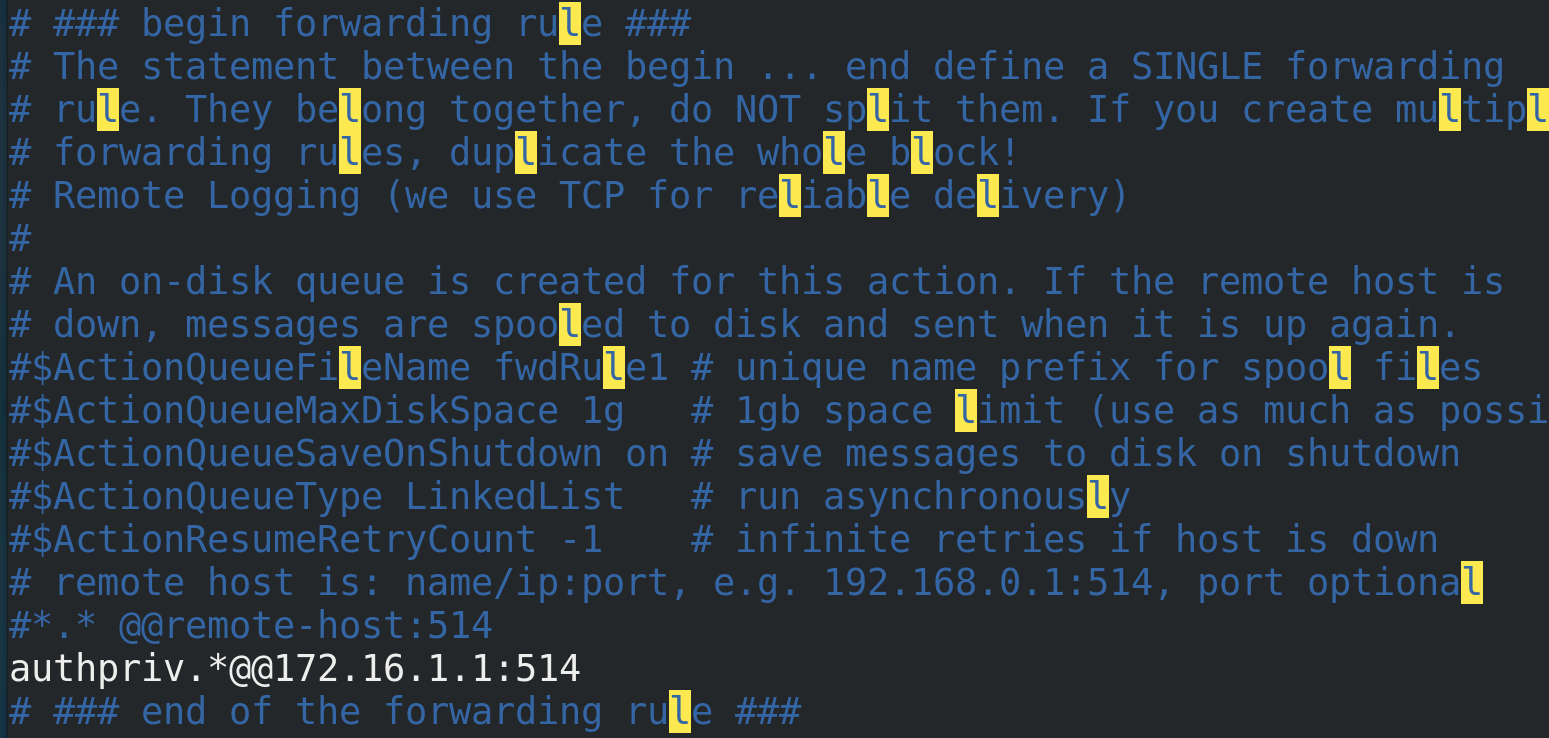
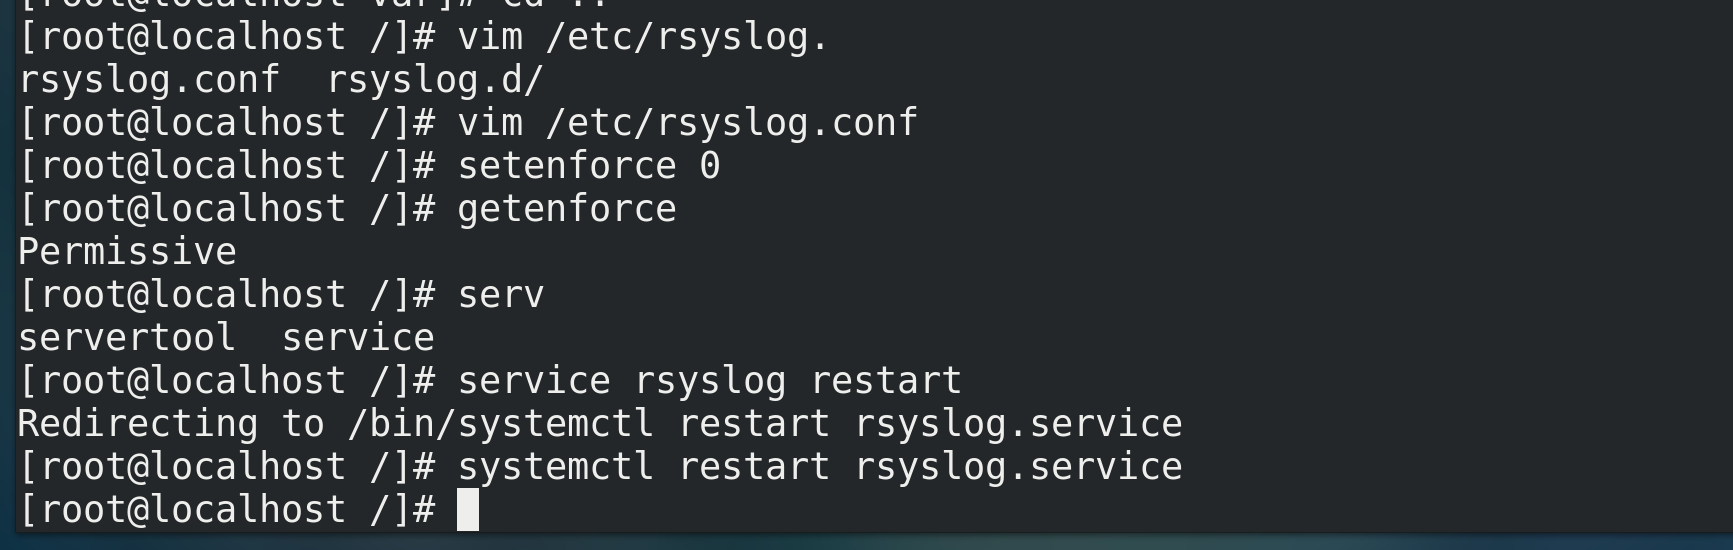
a. First, enter the vim editing mode of forwarding backup
vim /etc/rsys.conf
b. Then enter vim editing mode to write
authpriv.*@@192.16.1.1:514
// authpriv indicates login information
// @@Represents TCP
//Followed by backup IP
c. Turn off firewall command
setenforce 0  //Turn off firewall
getenforce View firewall status
d. Restart rsyslog service
systemctl restart rsyslog.service
Terminal command rendering
Kali backup operation
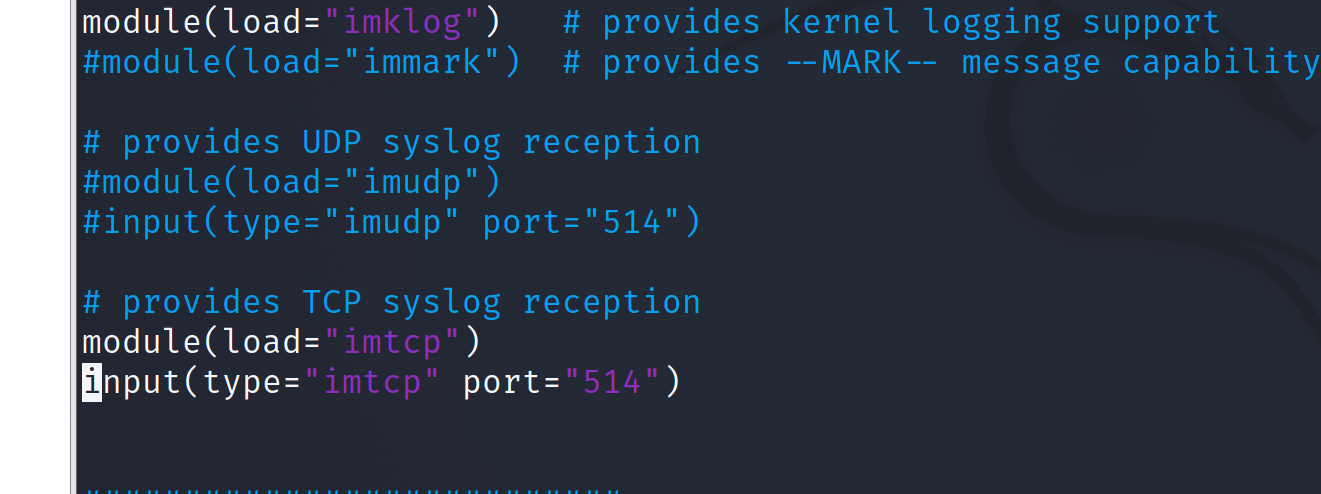
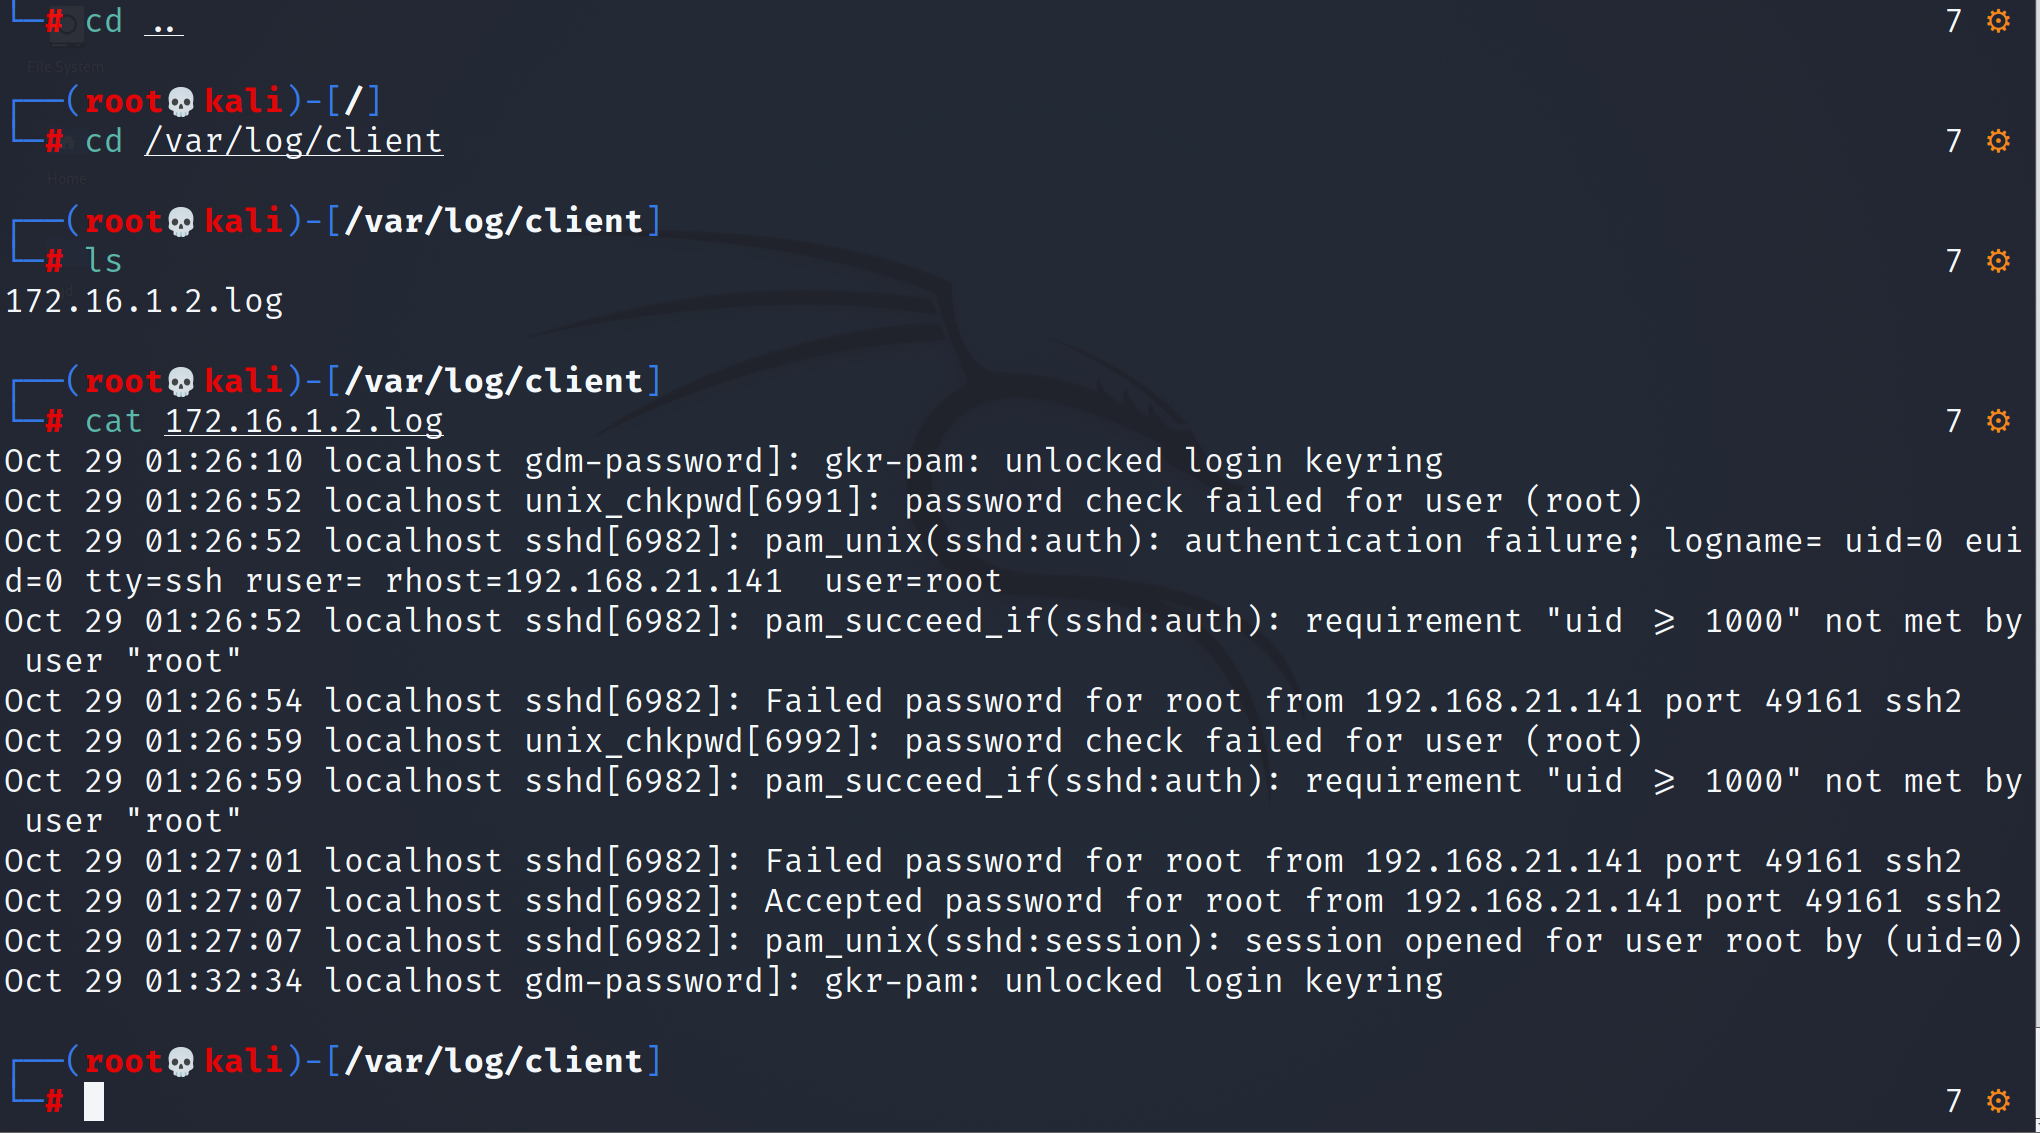
1. Enter the vim editor to record who receives the backup data and where the backup data exists
vim /etc/rsyslo.conf
 open TCP Receiving port, module(type="imtcp")and module(type="imtcp" port="514")Remove comments
 Fill in who receives the data and where to store the data
: fromhost-ip,isequal,"172.16.1.254" /var/log/client/172.16.1.254.log //Finally, the storage location


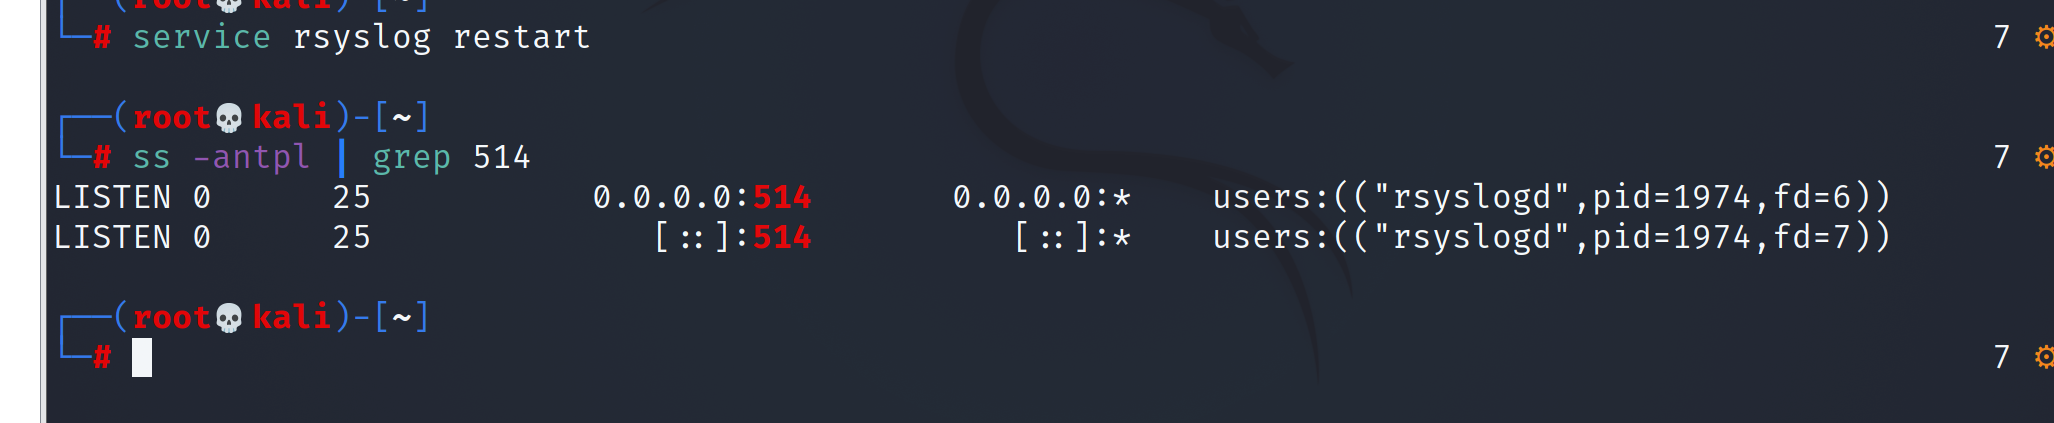
2. Restart the rsyslog service and view port 514
service rsyslog restart
ss -antpl | grep 514  //View 514 open status
3. win7 tried to log in and modify the log
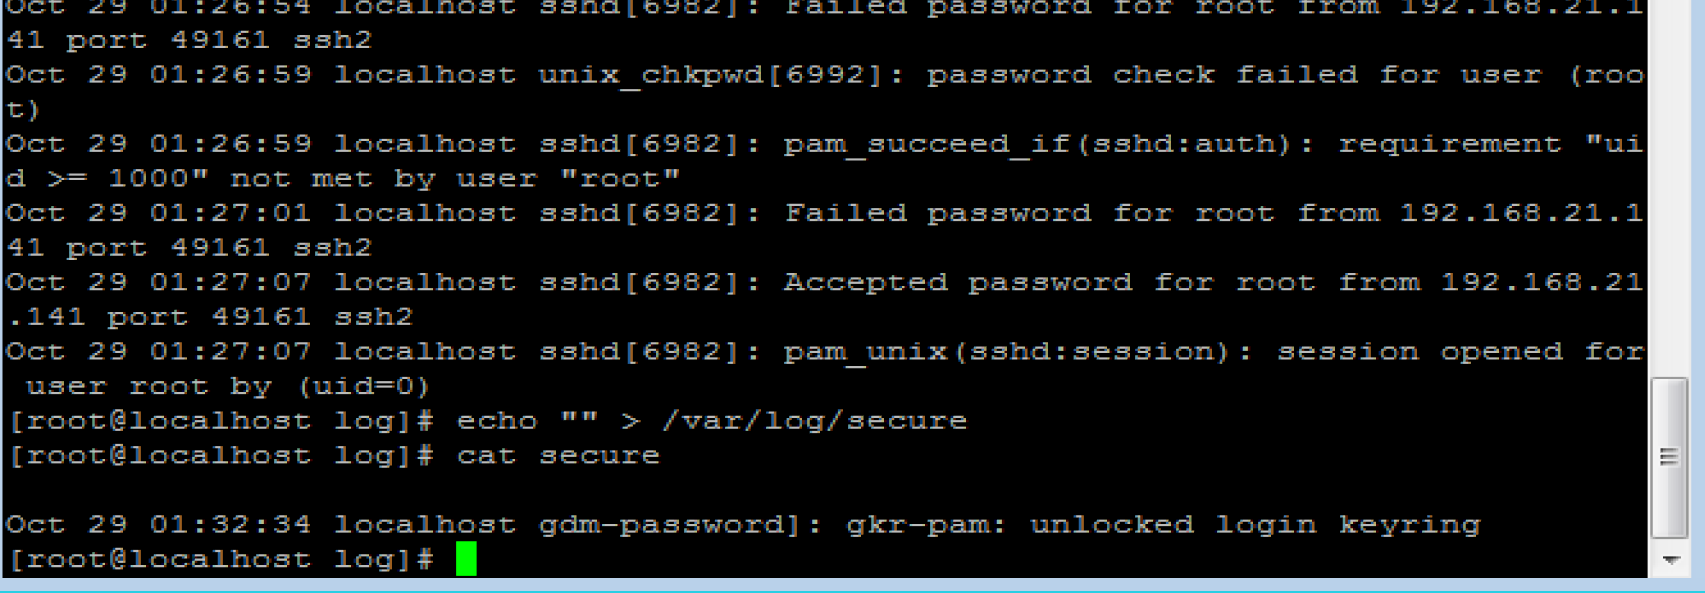
The logs on the backup server have not been tampered with
8, centos opens the jar package, installs burpsuite, and installs antsword
1. Basic command
cd /File path
java -jar [filename]
2. burpsuite
Installing the burpsuite tutorial
Download jar package
Open jar package

3,Install ant sword
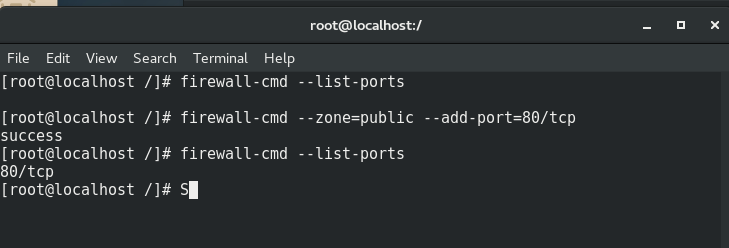
9, Centos open 80 service port number
// View firewall status
systemctl status firewall.service

//View port number status
firewall-cmd --list-ports

//Open port 80
firewall-cmd --zone=public --add-port=80/tcp [permanant]

//Restart service
firewall-cmd --reload
10, Configuring apache server with Centos
10.1 configuring the server
//Install apache
yum install httpd -y
//Open apache
systemctl start httpd
//Open 127.0.0.1
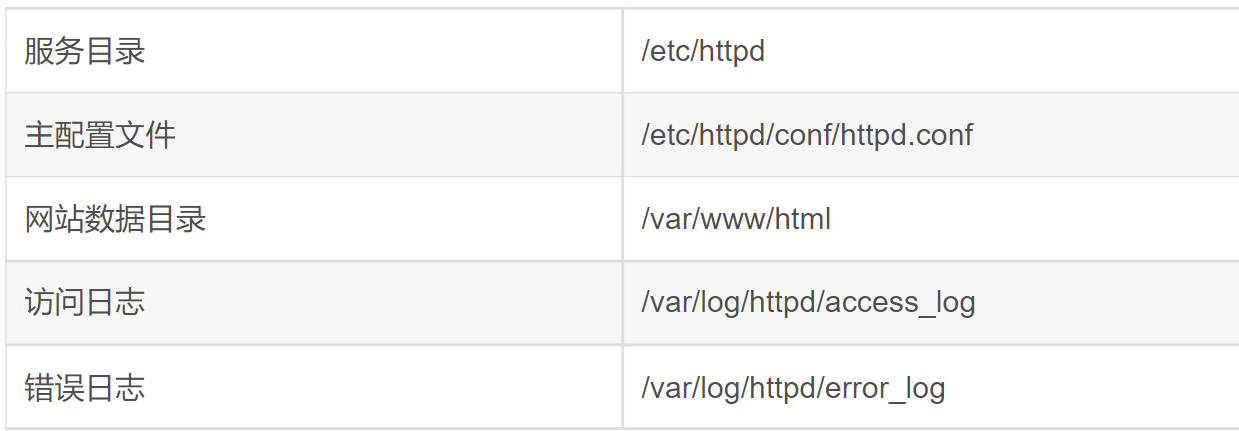
10.2 default page path of Apache
The default web page path is: / var/www/html
The default web page for modifying the configuration is: / etc / httpd / conf / httpd conf
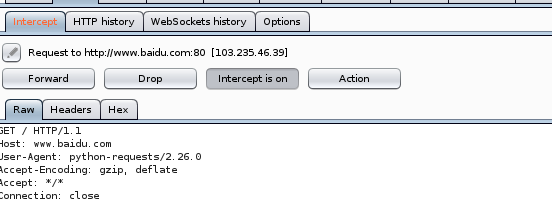
11, Implementing burpsuite proxy with python script
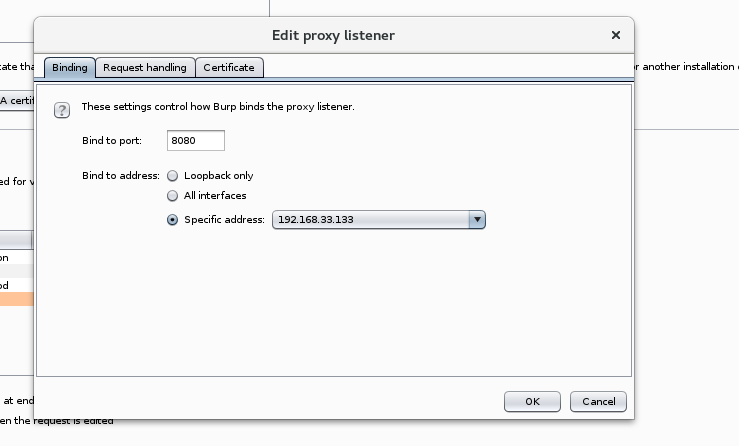
1. Open port!!!!

2. burpsuite edit proxy address
3. Script editing
import requests
/ Native access www.baidu.com
url="http://www.baidu.com"
/ Proxy Internet address
proxise={'http':'http://192.168.33.133:8080'}
r=requests.get(url,proxies=proxise,verify=False)
/Get status code
print(r.status_code)
4. burpsuite packet