1, Docker data volume management
Why use data volumes?
- The performance of docker layered file system is poor, and the life cycle is the same as that of container
- The docker data volume is mount ed to the host, bypassing the hierarchical file system. It has the same performance as the host disk. After the container is deleted, it is still retained. It is only limited to the local disk and cannot be migrated with the container
- Docker provides two types of volumes: bind mount docker and managed volume
- bind mount is to mount directories or files on the host into a container. The use is intuitive, efficient and easy to understand. Use the - v option to specify the path in the form host path:container path
bind mount:
mount the directory or file on the host into the container.
The use is intuitive, efficient and easy to understand.
Specify the real host / data directory to mount to / usr/share/nginx/html in the container. After successful mounting, write the default publishing file to nginx in the container
docker run -d --name demo -v /data:/usr/share/nginx/html nginx
echo www.westos.org > /data/index.html

Enter the demo to check whether the file is mounted and written successfully
docker exec -it demo bash
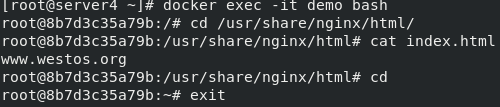
Access the test and delete the test case demo after the test is completed
curl 172.17.0.2

Method 2:
Create a data volume before mounting it
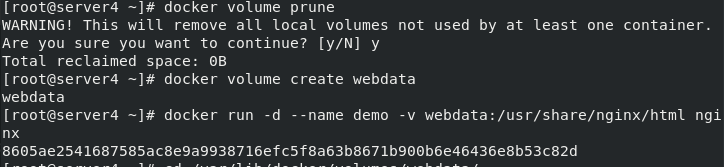
First clean up the data volume, then create the data volume webdata, and pull up the container
docker volume prune #Clear cache
docker volume create webdata
docker run -d --name demo -v webdata:/usr/share/nginx/html nginx
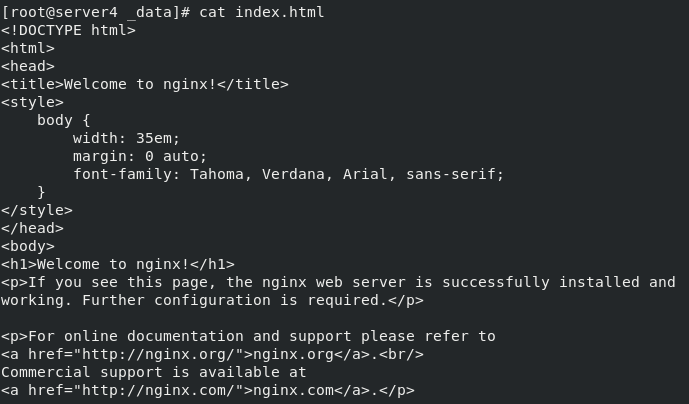
Enter the directory of the data volume to view
cd /var/lib/docker/volumes/webdata/
cd _data/
ls
cat index.html
bind mount is read-write by default. Read only is ro specified here
-If the path specified by the v option does not exist, it will be created automatically during mounting
docker run -it --rm -v /etc/yum.repos.d/dvd.repo:/etc/yum.repos.d/dvd.repo:ro rhel7 bash

2, docker managed volume
bind mount must specify the host file system path, which limits portability.
docker managed volume does not need to specify the mount source. docker automatically creates a data volume directory for the container.
The data volume directories created by default are in / var/lib/docker/volumes.
If you point to an existing directory in the container when mounting, the original data will be copied to volume.
docker run -d --name demo -v /usr/share/nginx/html nginx
docker inspect demo

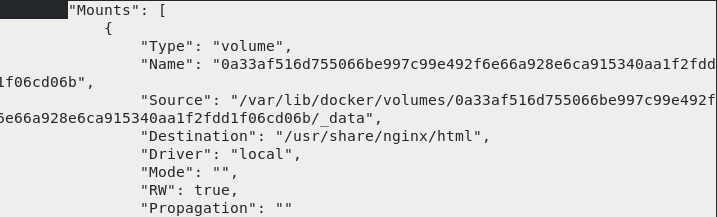
cd /var/lib/docker/volumes/0a33af516d755066be997c99e492f6e66a928e6ca915340aa1f2fdd1f06cd06b/_data

Volume plug-in – console with NFS
Docker Plugin runs on each Docker Host as a Web Service and transmits RPC style JSON data through HTTP protocol to complete communication.
The start and stop of Plugin are not managed by docker. Docker Daemon automatically finds available plug-ins by searching Unix Socket files in the default path.
When the client interacts with Daemon and uses the plug-in to create a data volume, Daemon will find the socket file corresponding to the plug-in at the back end, establish a connection and initiate the corresponding API request, and finally complete the client's request in combination with Daemon's own processing.
Console volume plug-in implementation
Three operation modes are supported: devicemapper, NFS and EBS.
The following experiments use nfs mode.
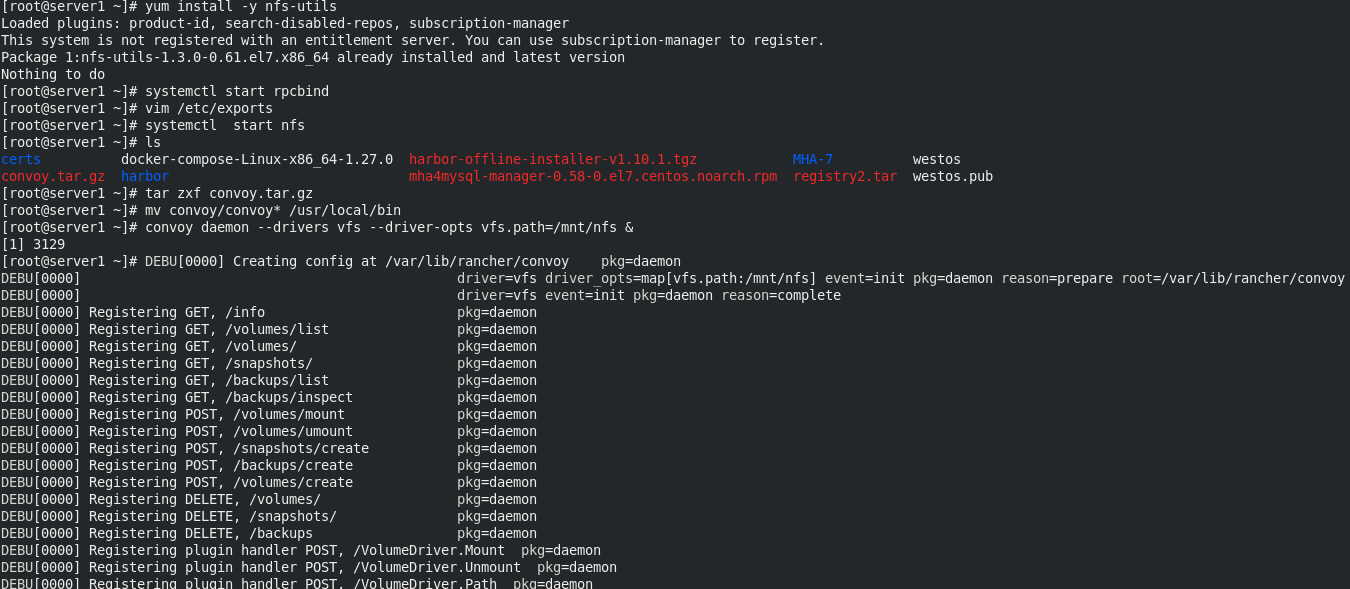
First, Mount NFS storage in advance on all nodes.
Two virtual machines server1 and server2. First, configure nfs for server1 and server2
In server1:
yum install -y nfs-utils
mkdir /mnt/nfs
vim /etc/exports
chmod 777 /mnt/nfs
vim /etc/exports
cat /etc/exports

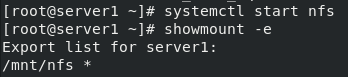
Start the nfs service and view
systemctl start nfs
showmount -e
In server2:
Installing nfs
yum install -y nfs-utils
Create directory and mount
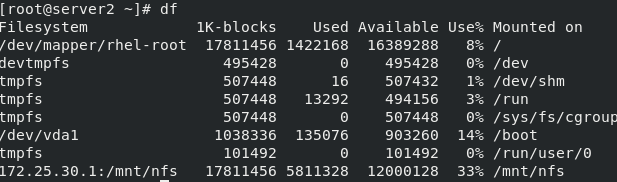
mkdir /mnt/nfs
mount 172.25.30.1:/mnt/nfs /mnt/nfs/
df
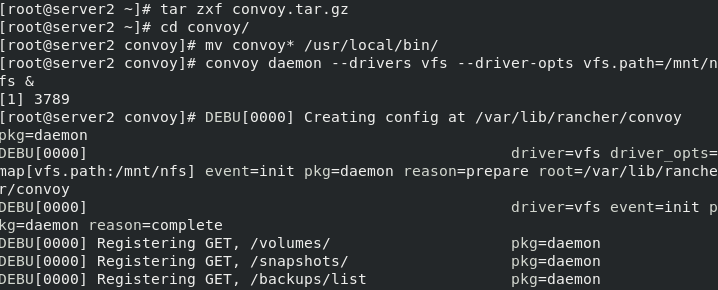
Install and configure the console plug-in, and move the binary file of console to / usr/local/bin for direct calling
tar zxf convoy.tar.gz
cd convoy/
mv convoy* /usr/local/bin/
Start the comfort plug-in and enter the background
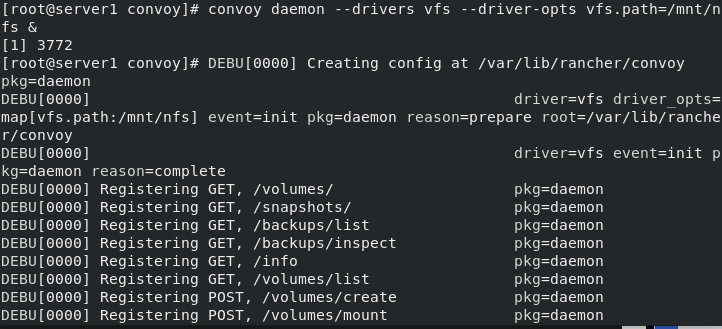
convoy daemon --drivers vfs --driver-opts vfs.path=/mnt/nfs &
View process ps ax

In the directory where the socket file is located, specify the socket file of favor for the docker engine to / etc / docker / plugins / favor spec
cd /var/run/convoy/
mkdir -p /etc/docker/plugins/
echo "unix:///var/run/convoy/convoy.sock" > /etc/docker/plugins/convoy.spec
cat /etc/docker/plugins/convoy.spec

server2 operates the same as server1
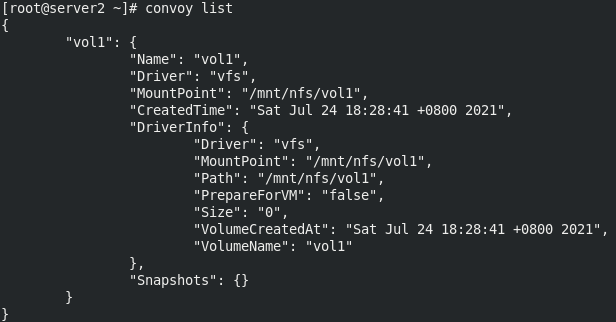
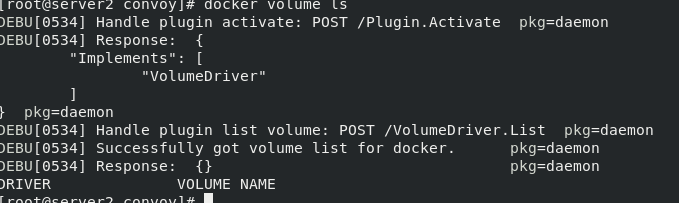
Viewing data volumes
mkdir -p /etc/docker/plugins/
echo "unix:///var/run/convoy/convoy.sock" > /etc/docker/plugins/convoy.spec
docker volume ls
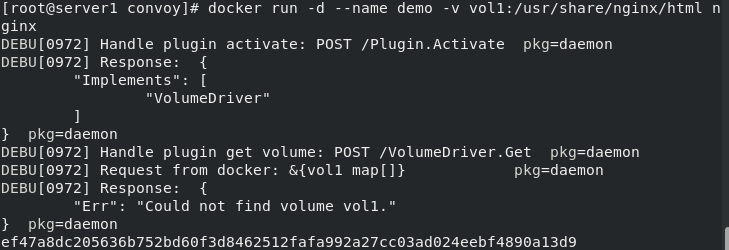
After configuring the nfs file system, use vol1 to pull up the container
server1 mount test using vol1
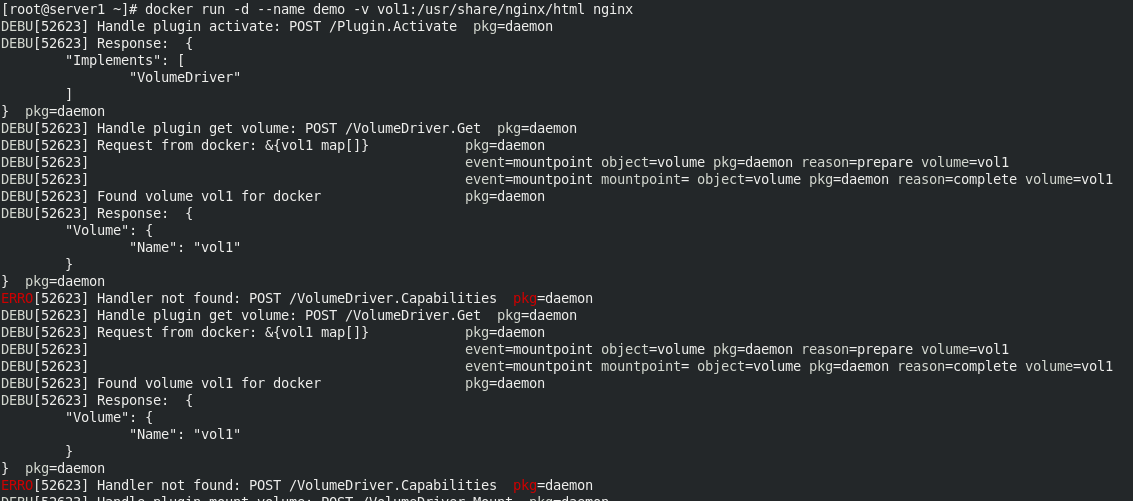
docker run -d --name demo -v vol1:/usr/share/nginx/html nginx
/mnt/nfs will generate the directory vol1 to test and write nginx release files
echo www.westos.org > /mnt/nfs/vol1/index.html
curl 172.17.0.2
docker volume ls

Delete the process, delete the socket pointing file, delete the metadata, and restart docker. If you do not restart, subsequent docker commands will be slow. Delete metadata and restart the service
kill 4680
rm -f /etc/docker/plugins/convoy.spec
convoy delete vol1
docker volume ls
cd /var/lib/docker/volumes/
rm metadata.db
systemctl restart docker
docker volume ls
Comfort volume plug-in
Three operation modes are supported: devicemapper, NFS and EBS. The following experiments use NFS to mount NFS storage in advance on all nodes. Two docker hosts are required, server1 and server2 respectively
In server1
mkdir /mnt/nfs
yum install -y nfs-utils
systemctl start rpcbind
vim /etc/exports

	/mnt/nfs *(rw,no_root_squash)

systemctl  start nfs
tar zxf convoy.tar.gz
mv convoy/convoy* /usr/local/bin
convoy daemon --drivers vfs --driver-opts vfs.path=/mnt/nfs &
mkdir -p /etc/docker/plugins/
echo "unix:///var/run/convoy/convoy.sock" > /etc/docker/plugins/convoy.spec
convoy create vol1
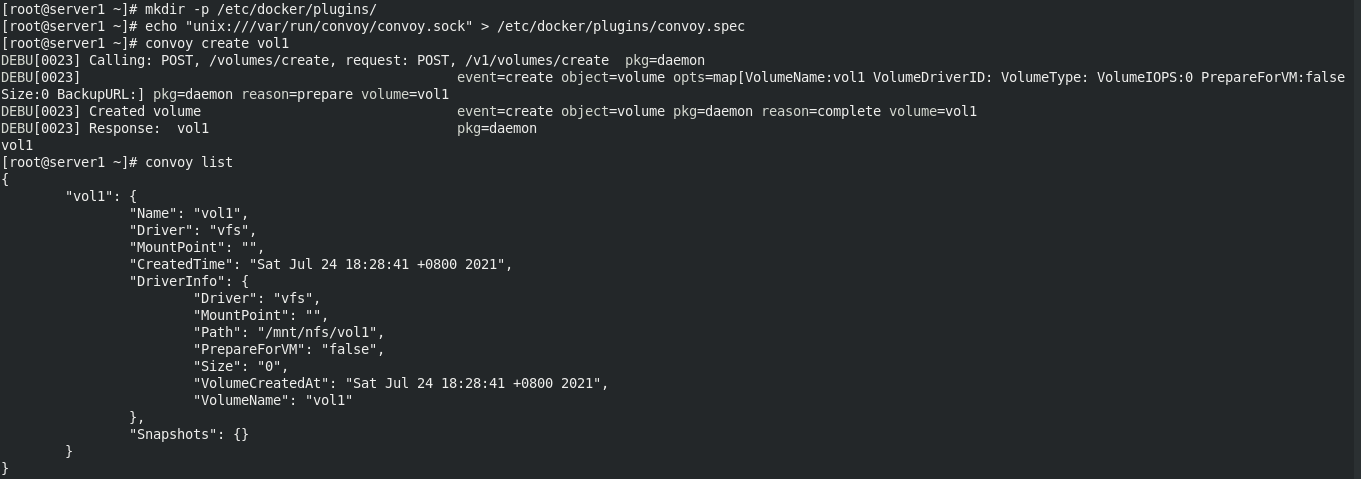 Directory on vol1 volume
docker load -i nginx.tar
docker run -d --name demo -v vol1:/usr/share/nginx/html nginx
View vol1

On server2
Mount the servre1 image and view the directory
mkdir /mnt/nfs
yum install -y nfs-utils
systemctl start rpcbind
systemctl  start nfs
mount 172.25.21.1:/mnt/nfs/ /mnt/nfs/ 	#ip is the ip of server1
tar zxf convoy.tar.gz
mv convoy/convoy* /usr/local/bin
convoy daemon --drivers vfs --driver-opts vfs.path=/mnt/nfs &
mkdir -p /etc/docker/plugins/
echo "unix:///var/run/convoy/convoy.sock" > /etc/docker/plugins/convoy.spec
convoy list