Linux operation and Maintenance Notes (7): smooth upgrade of nginx and 4-tier agent
nginx smooth upgrade
With the increasing number of concurrent visits to websites, nginx web servers are becoming more and more popular. The version of nginx is changing more and more frequently. The new version of nginx has updated many new functions, such as stream four layer proxy function. With the wide application of nginx, the version upgrade must be faster and faster, and online business cannot be stopped. At this time, the upgrade of nginx is an important work of operation and maintenance. Let's take you to understand the smooth upgrade of nginx.
1. nginx smooth upgrade principle
Request allocation method in multi process mode:
Nginx works in the multi process mode by default, that is, after the master process is started, it completes the configuration loading, port binding and other actions, and fork s out a specified number of worker process es. These subprocesses will hold the file descriptor (fd) of the listening port, and accept the connection by adding the listening event on the descriptor.
Reception and processing of signals
After the start of Nginx main process, it will enter the waiting state and respond to various system messages, such as SIGCHLD, SIGHUP, SIGUSR2, etc.
Introduction to Nginx signal
-
Signals supported by the main process
TERM, INT: exit now
QUIT: wait for the work process to finish before exiting
KILL: force process termination
HUP: reload the configuration file, start the working process with the new configuration, and gradually close the old process.
USR1: reopen log file
USR2: start a new main process to realize hot upgrade
WINCH: gradually close the working process -
Signals supported by work process
TERM, INT: exit now
QUIT: wait for the request to be processed before exiting
USR1: reopen log file
2. nginx smooth upgrade experiment (version 1.15.9 upgraded to 1.16.0)
(1) view old version information
[root@localhost ~] nginx -V			#View the configuration function of current nginx
nginx version: nginx/1.15.9
built by gcc 4.8.5 20150623 (Red Hat 4.8.5-36) (GCC)
built with OpenSSL 1.0.2k-fips  26 Jan 2017
TLS SNI support enabled
configure arguments: --prefix=/usr/local/nginx --user=nginx --group=nginx --with-http_stub_status_module --with-http_ssl_module --with-http_flv_module --with-http_gzip_static_module
(2) installation of new version
Note. / do not make install after configure, otherwise the original nginx file will be overwritten.
[root@localhost ~] tar xf nginx-1.16.0.tar.gz -C /usr/src/
[root@localhost ~] cd /usr/src/nginx-1.16.0/
[root@localhost nginx-1.16.0] ./configure --prefix=/usr/local/nginx --user=nginx --group=nginx --with-file-aio --with-http_stub_status_module --with-http_gzip_static_module --with-http_flv_module --with-http_ssl_module --with-pcre && make
(3) back up binary files and replace them with new versions
[root@localhost nginx-1.16.0] cd /usr/local/nginx/sbin
[root@localhost sbin] mv nginx nginx.old
[root@localhost sbin] cp /usr/src/nginx-1.16.0/objs/nginx ./
(4) make sure our configuration file does not report an error
[root@localhost sbin] nginx -t
nginx: the configuration file /usr/local/nginx/conf/nginx.conf syntax is ok
nginx: configuration file /usr/local/nginx/conf/nginx.conf test is successful
If your ngins service allows to restart, in fact, our nginx has finished upgrading, but we have to do a smooth upgrade so we can't restart.
(5) send USR2 signal
Send USR2 signal to the master process. nginx will start a new version of master process and corresponding working process, and handle the request together with the old version.
[root@localhost ~] ps aux | grep nginx
root      10351  0.0  0.1  45864  1128 ?        Ss   16:45   0:00 nginx: master process nginx
nginx     10352  0.0  0.2  48404  2228 ?        S    16:45   0:00 nginx: worker process
root      13249  0.0  0.0 112724   988 pts/1    R+   17:12   0:00 grep --color=auto nginx
[root@localhost ~] kill -USR2 10351
[root@localhost ~] ps aux | grep nginx			#If there is no new process, the upgrade fails and you have to restart it.
root      10351  0.0  0.1  45864  1128 ?        Ss   16:45   0:00 nginx: master process nginx
nginx     10352  0.0  0.2  48404  2228 ?        S    16:45   0:00 nginx: worker process
root      11497  0.0  0.2  45864  1131 ?        Ss   16:47   0:00 nginx: master process nginx
nginx     11498  0.0  0.3  48404  3292 ?        S    16:47   0:00 nginx: worker process
root      13249  0.0  0.0 112724   988 pts/1    R+   17:12   0:00 grep --color=auto nginx
(6) send the why signal
Like the old nginx main process (master) sending which signal, it will gradually close its own working process (the main process will not exit), which is that all requests will be handed over to the new version of nginx for processing.
[root@localhost ~] kill -WHICH 10351
[root@localhost ~] ps aux | grep nginx
root      10351  0.0  0.1  45864  1128 ?        Ss   16:45   0:00 nginx: master process nginx
root      11497  0.0  0.2  45864  1131 ?        Ss   16:47   0:00 nginx: master process nginx
nginx     11498  0.0  0.3  48404  3292 ?        S    16:47   0:00 nginx: worker process
root      13249  0.0  0.0 112724   988 pts/1    R+   17:12   0:00 grep --color=auto nginx
Be careful
If we want to roll back and continue to use the old version at this time, we can send a HUP signal to the old nginx main process, which will restart the working process and still use the old version of the configuration file. Then you can KILL the new version of nginx process, just use QUIT, TERM or KILL.
[root@localhost ~] kill -HUP 10351
(7) send QUIT signal
After upgrading you, we can send a QUIT signal to the old nginx master process. It is the old master process that exits.
[root@localhost ~] kill -QUIT 10351
root      11497  0.0  0.2  45864  1131 ?        Ss   16:47   0:00 nginx: master process nginx
nginx     11498  0.0  0.3  48404  3292 ?        S    16:47   0:00 nginx: worker process
root      13249  0.0  0.0 112724   988 pts/1    R+   17:12   0:00 grep --color=auto nginx
(8) verify nginx version number
[root@localhost ~] nginx -v
nginx version: nginx/1.16.0
4-layer agent of nginx
1. Review of agent on the 7th floor
Let's review nginx's 7-tier reverse proxy first, and then introduce 4-tier proxy.
We review the process of nginx reverse proxy through simple steps -- > 1.5 install lamp -- > 1.3 install nginx -- > configure a PHP web page -- > respectively visit and verify nginx, PHP, httpd -- > Modify nginx configuration file (code below) -- > and then verify the reverse proxy.
location ~* \.php${
	proxy_pass http://192.168.1.5;
}
2. nginx four layer agent
nginx supports four layers of agents since version 1.9.0, but when compiling four layers of agents, you need to add the – with stream module.
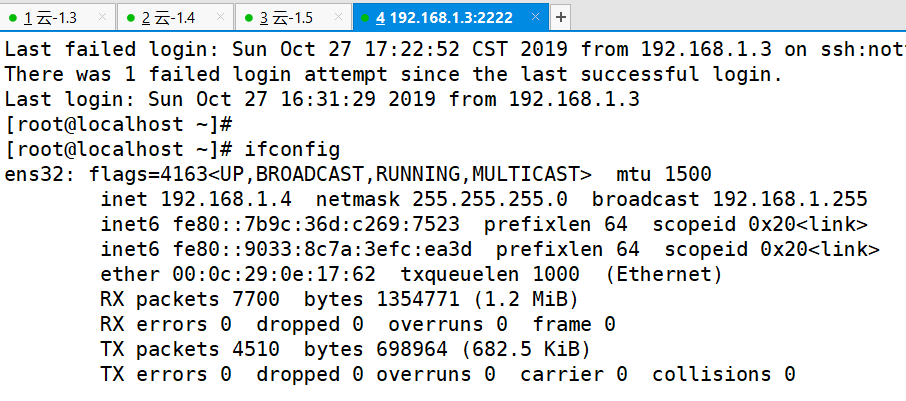
Example: the company's original test database is on the host 192.168.1.3, and now the database is transferred to 192.168.1.4. In order not to change the address everywhere, a four-tier agent tool is needed to forward the original request to port 3306 of 192.168.10.5 to port 3306 of 192.168.10.4. This uses four layers of nginx agents.
When installing, add the module - with stream.
[root@localhost nginx-1.16.0] ./configure --prefix=/usr/local/nginx --user=nginx --group=nginx --with-pcre --with-stream && make && make install
[root@localhost nginx-1.16.0] vim /usr/local/nginx/conf/nginx.conf
#Note that stream and http are at the same level, so write them together
stream {
	server {
	    listen 2222;
	    proxy_pass 192.168.1.4:22;
	}
}
http {
Open another shell
ssh 192.168.1.3:2222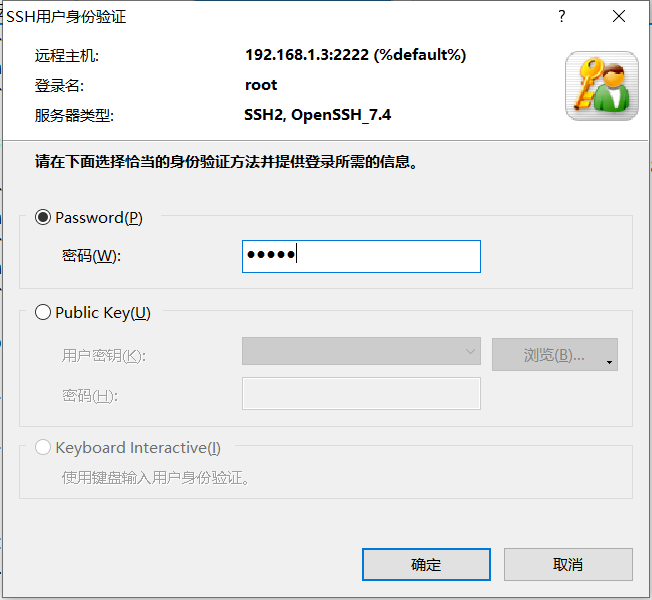
In fact, we are connected to the 1.4 host.