catalogue
1. Install nginx dependent environment
3. Unzip the nginx installation package and parse and compile it
1. Install dependent environment and create server account
2. Unzip the compressed package and compile and install it
3. Modify the configuration file
1. Installation dependent environment
2. Modify the configuration file
3. Configure and optimize FPM module
1, Installing nginx
Because the nginx platform is also built based on nginx, nginx needs to be installed in advance
1. Install nginx dependent environment
yum -y install pcre-devel zlib-devel gcc gcc-c++ make

After the dependent environment installation is completed, you can proceed to the next step
2. Create an nginx account
useradd -M -s /sbin/nologin nginx
3. Unzip the nginx installation package and parse and compile it
These are the three installation packages needed for compilation. If necessary, you can download them yourself
Link: https://pan.baidu.com/s/1ZVfe5n9d7gNCKYM_94Sw-A
Extraction code: 3323
tar zxvf nginx-1.12.0.tar.gz
cd nginx-1.12.0/
#Unzip and move to the folder. The path can be selected by yourself
./configure \
--prefix=/usr/local/nginx \
--user=nginx \
--group=nginx \
--with-http_stub_status_module
#Analyze
make && make install
#Compile and install
After waiting, you can make a connection to facilitate subsequent use
ln -s /usr/local/nginx/sbin/nginx /usr/local/bin/
4. Add configuration file
cd /lib/systemd/system #Enter directory
Add a profile
vim nginx.service
Write the following data into the file
[Unit]
Description=nginx
After=network.target
[Service]
Type=forking
PIDFile=/usr/local/nginx/logs/nginx.pid
ExecStart=/usr/local/nginx/sbin/nginx
ExecReload=/usr/bin/kill -s HUP $MAINPID
ExecStop=/usr/bin/kill -s QUIT $MAINPID
PrivateTmp=true
[Install]
WantedBy=multi-user.target
notes:
[Unit]
Description=nginx                     ####describe
After=network.target                 ####Describe service category
[Service]
Type=forking                                             ###Background operation mode
PIDFile=/usr/local/nginx/logs/nginx.pid                   ###PID file location
ExecStart=/usr/local/nginx/sbin/nginx                     ###Start service
ExecReload=/usr/bin/kill -s HUP $MAINPID             ###According to PID overload configuration
ExecStop=/usr/bin/kill -s QUIT $MAINPID                ###Terminate process according to PID
PrivateTmp=true
[Install]
WantedBy=multi-user.target
5. Start nginx
systemctl start nginx.service
2, Compile and install mysql
1. Install dependent environment and create server account
yum -y install ncurses ncurses-devel bison cmake
useradd -M -s /sbin/nologin mysql
2. Unzip the compressed package and compile and install it
tar zxf mysql-boost-5.7.20.tar.gz
cd mysql-5.7.20/
#Unzip and move to file
cmake \
-DCMAKE_INSTALL_PREFIX=/usr/local/mysql \
-DMYSQL_UNIX_ADDR=/usr/local/mysql/mysql.sock \
-DSYSCONFDIR=/etc \
-DSYSTEMD_PID_DIR=/usr/local/mysql \
-DDEFAULT_CHARSET=utf8  \
-DDEFAULT_COLLATION=utf8_general_ci \
-DWITH_INNOBASE_STORAGE_ENGINE=1 \
-DWITH_ARCHIVE_STORAGE_ENGINE=1 \
-DWITH_BLACKHOLE_STORAGE_ENGINE=1 \
-DWITH_PERFSCHEMA_STORAGE_ENGINE=1 \
-DMYSQL_DATADIR=/usr/local/mysql/data \
-DWITH_BOOST=boost \
-DWITH_SYSTEMD=1
#Parse file
make && make install
#Compile and install
Note:
-DCMAKE_INSTALL_PREFIX=/usr/local/mysql \
#Specify the installation path of mysql
-DMYSQL_UNIX_ADDR=/usr/local/mysql/mysql.sock \
#Specify the storage path of mysql process listening socket file (database connection file)
-DSYSCONFDIR=/etc \
#Specify the storage path of the configuration file
-DSYSTEMD_PID_DIR=/usr/local/mysql \
#Specifies the storage path of the process file
-DDEFAULT_CHARSET=utf8  \
#Specifies the character set encoding used by default, such as utf8
-DDEFAULT_COLLATION=utf8_general_ci \
#Specifies the default character set collation rule to use
-DWITH_INNOBASE_STORAGE_ENGINE=1 \
#Install INNOBASE storage engine
-DWITH_ARCHIVE_STORAGE_ENGINE=1 \
#Installing the ARCHIVE storage engine
-DWITH_BLACKHOLE_STORAGE_ENGINE=1 \
#Installing the BLACKHOLE storage engine
-DWITH_PERFSCHEMA_STORAGE_ENGINE=1 \
#Install FEDERATED storage engine
-DMYSQL_DATADIR=/usr/local/mysql/data \
#Specifies the storage path of the database file
-DWITH_BOOST=boost \
#Specify the path to boost,
-DWITH_SYSTEMD=1
#Generate files for systemctl management
3. Modify the configuration file
After the installation is successful, mysql will generate a file under / usr/local /. You need to change the primary group of the file
chown -R mysql:mysql /usr/local/mysql
Enter the mysql configuration to ask for price and modify the data
vim /etc/my.cnf
Delete the original data and write in the following data
[client]
port = 3306
default-character-set=utf8
socket = /usr/local/mysql/mysql.sock

[mysql]
port = 3306
default-character-set=utf8
socket = /usr/local/mysql/mysql.sock

[mysqld]
user = mysql
basedir = /usr/local/mysql
datadir = /usr/local/mysql/data
port = 3306
character_set_server=utf8
pid-file = /usr/local/mysql/mysqld.pid
socket = /usr/local/mysql/mysql.sock
server-id = 1

sql_mode=NO_ENGINE_SUBSTITUTION,STRICT_TRANS_TABLES,NO_AUTO_CREATE_USER,NO_AUTO_VALUE_ON_ZERO,NO_ZERO_IN_DATE,NO_ZERO_DATE,ERROR_FOR_DIVISION_BY_ZERO,PIPES_AS_CONCAT,ANSI_QUOTES
Notes to the last paragraph:
NO_ENGINE_SUBSTITUTION
 If the required storage engine is disabled or not compiled,Then throw an error. When this value is not set,Replace with the default storage engine,And throw an exception
STRICT_TRANS_TABLES
 In this mode,If a value cannot be inserted into a transaction table,The current operation is interrupted,No restrictions on non transaction tables
NO_AUTO_CREATE_USER
 prohibit:GRANT Create a user with a blank password
NO_AUTO_VALUE_ON_ZERO
mysql The self growing column in can be o Start. By default, the self growth column starts from 1. If you insert data with a value of 0, an error will be reported
NO_ZERO_IN_DATE
mysql Zero date insertion is not allowed in the database,Inserting a zero date throws an error instead of a warning
ERROR_FOR_DIVISION_BY_ZERO
 stay INSERT or UPDATE In the process, if the data is divided by zero, an error is generated instead of a warning. By default, when the data is divided by zero MysQL return NULL
IPES_AS_CONCAT
 take"||"Treat as a concatenation operator of a string rather than an or operator, which is similar to oracle The database is the same,
ANSI QUOTES
 Enable ANSI QUOTES You cannot use double quotation marks to refer to a string after, because it is interpreted as an identifier
Change the primary group of the file to mysql account
chown mysql:mysql /etc/my.cnf
Modify environment variables
echo 'PATH=/usr/local/mysql/bin:/usr/local/mysql/lib:$PATH' >> /etc/profile
echo 'export PATH' >> /etc/profile
source /etc/profile
4. Initialize mysql
cd /usr/local/mysql/ #Move to target directory
Initialize mysql
bin/mysqld \
--initialize-insecure \
--user=mysql \
--basedir=/usr/local/mysql \
--datadir=/usr/local/mysql/data
5. Add startup file
cd usr/lib/systemd/system
After moving to this directory, there will be a mysqld Service file and copy it
cp mysqld.service /lib/systemd/system/
Verify that startup is complete
systemctl enable mysqld.service
#For the following words, it means that the verification has passed
Created symlink from /etc/systemd/system/multi-user.target.wants/mysqld.service to /usr/lib/systemd/system/mysqld.service.
mysql start
systemctl start mysqld.service
After starting mysql, you can directly use Mysql to enter the database or add a password
mysqladmin -u root -p password '123123'
Enter password:   #You will be asked to enter the old password, because it has just been installed successfully and there is no password. Just go to the next step
Enter mysql
mysql -u root -p
After confirming that you can enter, enter quit to exit
3, Install php
1. Installation dependent environment
yum -y install \
libjpeg \
libjpeg-devel \
libpng libpng-devel \
freetype freetype-devel \
libxml2 \
libxml2-devel \
zlib zlib-devel \
curl curl-devel \
openssl openssl-devel
decompression
tar jxf php-7.1.10.tar.bz2
analysis
./configure \
--prefix=/usr/local/php \
--with-mysql-sock=/usr/local/mysql/mysql.sock \
--with-mysqli \
--with-zlib \
--with-curl \
--with-gd \
--with-jpeg-dir \
--with-png-dir \
--with-freetype-dir \
--with-openssl \
--enable-fpm \
--enable-mbstring \
--enable-xml \
--enable-session \
--enable-ftp \
--enable-pdo \
--enable-tokenizer \
--enable-zip
Compile and install
make && make install
2. Modify the configuration file
After compilation, some files will be generated
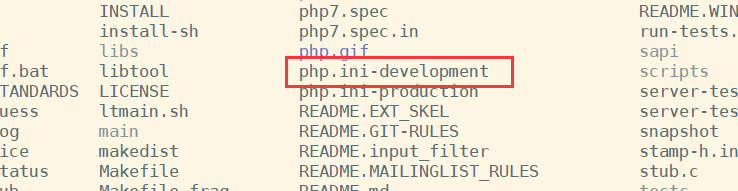
You need to copy the configuration file as shown in the figure
cp php.ini-development /usr/local/php/lib/php.ini
#Copy and rename
Enter the copied file
vim /usr/local/php/lib/php.ini
Line 939 add
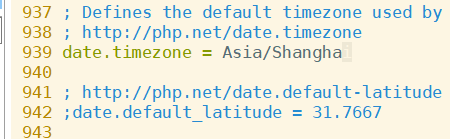
date.timezone = Asia/Shanghai    #The function is to modify the time zone
#After the equal sign is the newly added content, and there is one in front of the line, Delete the symbol
On line 1170, follow the command

mysqli.default_socket = /usr/local/mysql/mysql.sock
#The equal sign is new
After that, save and exit
View installed authentication modules
/usr/local/php/bin/php -m
3. Configure and optimize FPM module
Modify profile
Move to the directory where the configuration file is located, and rename the file to be modified
cd /usr/local/php/etc/
cp php-fpm.conf.default php-fpm.conf
Enter the file to make changes
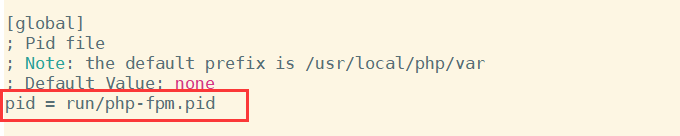
vim php-fpm.conf
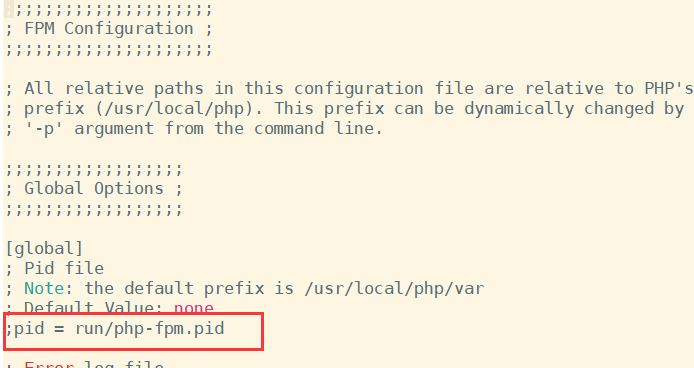
Open the pid line marked in the figure
4. Start php
Move to the directory where the startup file is located
cd php-fpm.d/
Copy and rename the files in the directory
cp www.conf.default www.conf
Open service
/usr/local/php/sbin/php-fpm -c /usr/local/php/lib/php.ini
View the opening status
ss -natp | grep php

After configuration, you can make a soft connection for later use
ln -s /usr/local/php/bin/* /usr/local/bin/
4, nginx enable php
1. Start php service
Enter configuration file
vi /usr/local/nginx/conf/nginx.conf

Find these in the file, at line 65, which may vary depending on the version

After all of them are turned on, modify the configuration of the penultimate line in the directory where the file is located
fastcgi_param SCRIPT_FILENAME /usr/local/nginx/html$fastcgi_script_name;
Check for proper operation
nginx -t
#The following fields are normally turned on
nginx: the configuration file /usr/local/nginx/conf/nginx.conf syntax is ok
nginx: configuration file /usr/local/nginx/conf/nginx.conf test is successful
2. Create a new site
Move to the site directory first
cd /usr/local/nginx/html/
Create a new site file
vim index.php
Add some content to the site file
<?php
phpinfo();
?>
#Just be lazy and write a beginning here
Open service
systemctl restart nginx
3. Test
Use another client browser to access the web site
http://Own IP address / index php
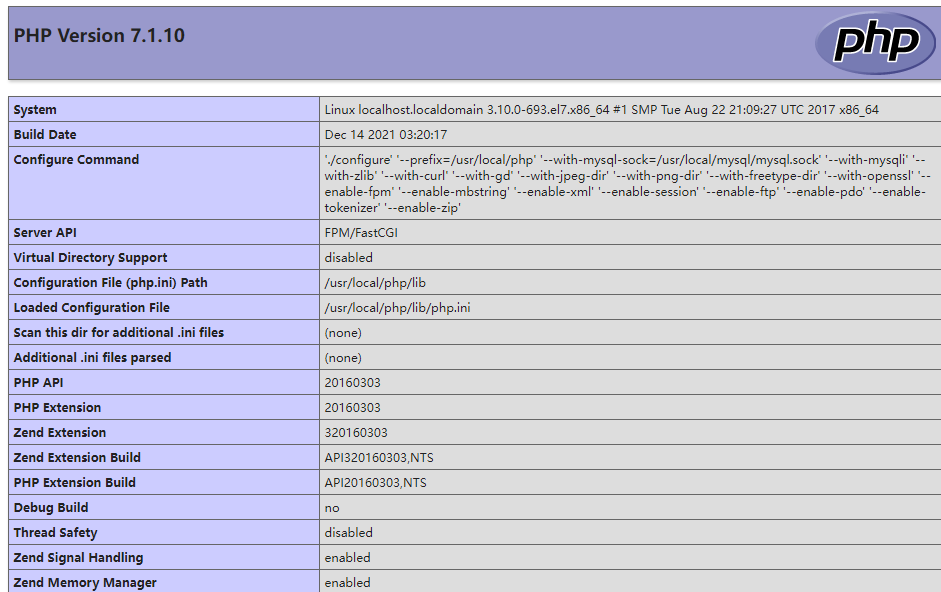
Here, php is built successfully
5, Build BBS forum
1. Enter mysql
mysql -u root -p
Add forum account and password
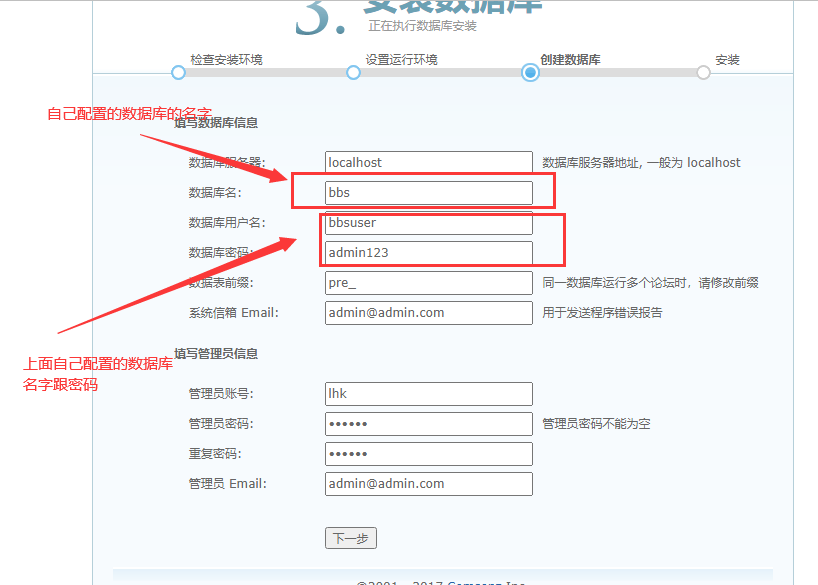
CREATE DATABASE bbs;
GRANT all ON bbs.* TO 'bbsuser'@'%' IDENTIFIED BY 'admin123';
GRANT all ON bbs.* TO 'bbsuser'@'localhost' IDENTIFIED BY 'admin123';
flush privileges;
Note!!! bbsuser It's the account you use to log in to the forum, admin123 Is the password for login
Check whether the creation is successful

Having this library name is a success
Exit mysql and specify the forum file storage location and character type
Unzip the character format package
unzip Discuz_X3.4_SC_UTF8.zip

After decompression, enter the directory and copy the file to the bbs file
cp -r upload/ /usr/local/nginx/html/bbs/
Move to the directory and modify the group permissions and file execution permissions
/usr/local/nginx/html/bbs/

chown -R root:nginx ./config/
chown -R root:nginx ./data/
chown -R root:nginx ./uc_client/
chown -R root:nginx ./uc_server/

chmod -R 777 ./config/
chmod -R 777 ./data/
chmod -R 777 ./uc_client/
chmod -R 777 ./uc_server/
Modify forum profile content
vi /usr/local/nginx/html/index.php
<?php
$link=mysqli_connect('192.168.75.51','bbsuser','admin123');
if($link) echo "<h1>Success!!</h1>";
else echo "Fail!!";
?>
Restart nginx
systemctl restart nginx.service
2. Verification
On the client side, the browser accesses the web page
http://Own server IP address / BBS / install / index php
Enter the installation wizard and click I agree

Then continue to the next step until the login page
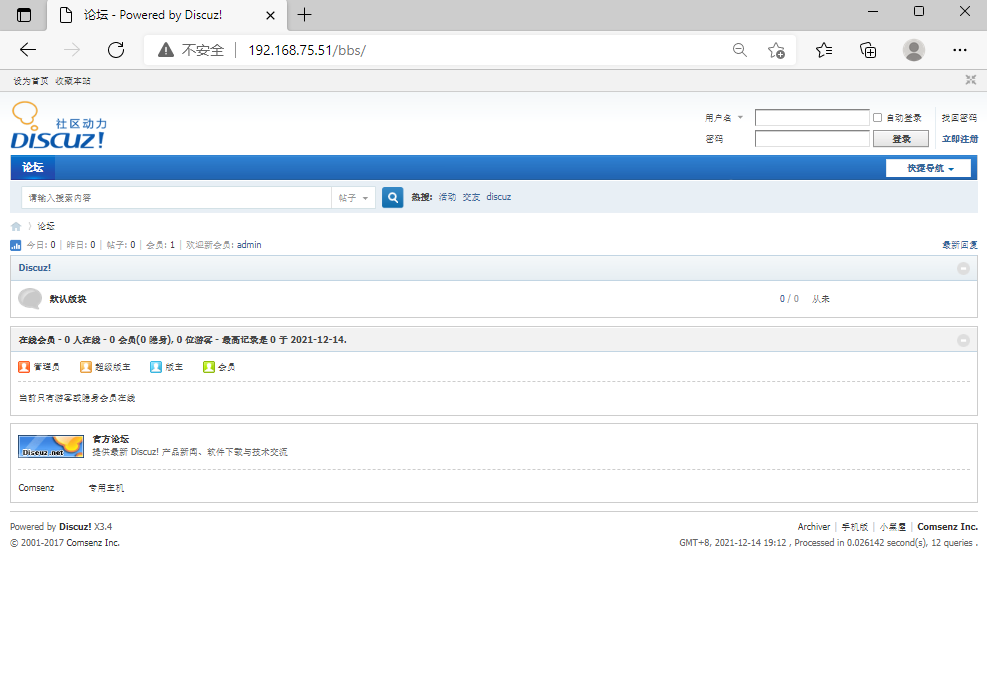
Enter the Forum

Just enter the forum
If you can't get in and error 403 is reported, you can enter the configuration file to modify the website suffix
vim /usr/local/nginx/conf/nginx.conf

Change this to php as shown in the figure to enter the forum
After installation, you can log in to the forum directly by using the following website
http://Own server IP address / BBS / index php