1. Logon overview
1. Login Business Process
- Enter a user name and password on the login page
- Call back-end interface for validation
- After validation, jump to the project home page based on the response status in the background
2. Relevant technical points of login business
- http is stateless
- Record status on client side by cookie
- Logging status on the server side through session
- Maintain state by token
If there is a cross-domain problem between the front end and the server, you need to use the token method to maintain the login status. Instead, use cookie s and session s.
Cross-domain when any of the protocol, domain name, port of a request url is different from the current page url
2. Login-token Principle Analysis
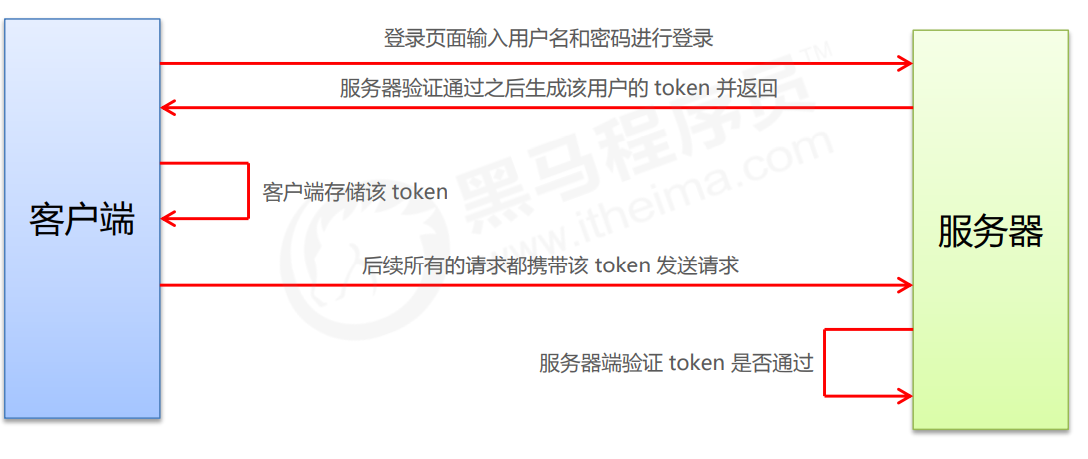
3. Specific implementation of login+exit function
1. Layout of login page
Layout through Element-UI components
- el-form
- el-form-item
- el-input
- el-button
- Font Icon
Specific steps
1. Create a branch first (in development, if you want to develop new features, try to put the new features on a new branch for development, after branch development is complete, merge them on the master main branch)
 2. See how the project works through the gui
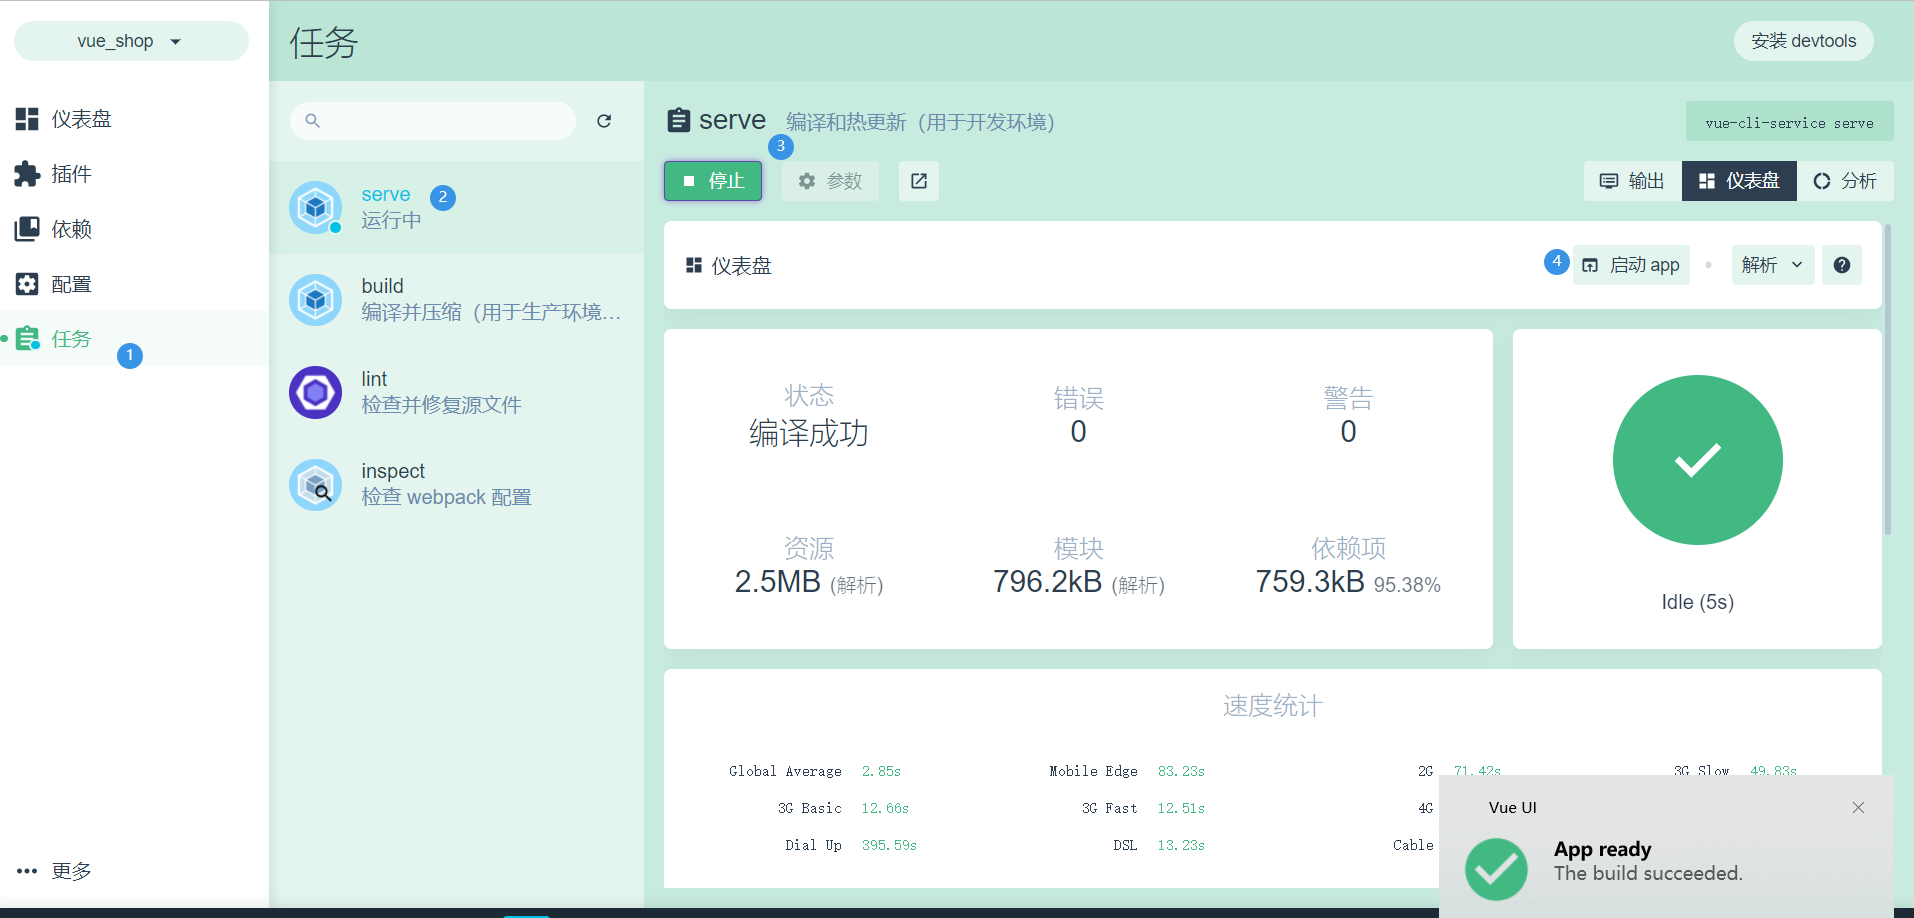
3. Create login components
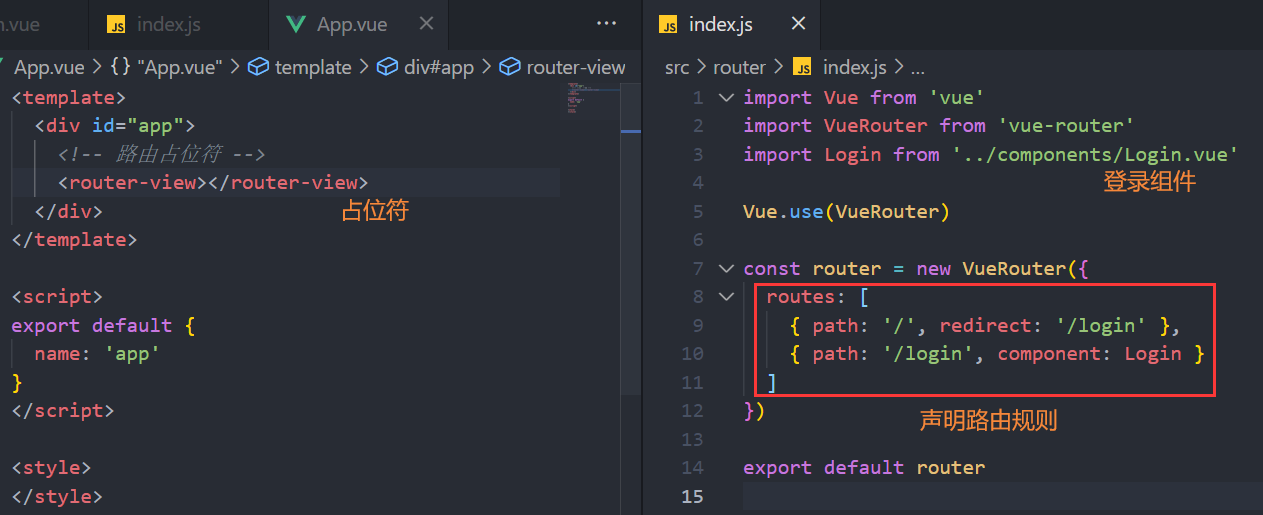
4. Form validation based on Element-UI
 loginFormRules: {
        // Verify user name is legal
        username: [
          { required: true, message: 'Please enter a login name', trigger: 'blur' },
          { min: 3, max: 10, message: 'Length between 3 and 10 characters', trigger: 'blur' }
        ],
        // Verify the password is valid
        password: [
          { required: true, message: 'Please enter your login password', trigger: 'blur' },
          { min: 6, max: 10, message: '6 to 15 characters in length', trigger: 'blur' }
        ]
      }
2. Sign in and reset
- Call login authentication interface through axios
- Keep user's token information after successful login
- Jump to Project Home Page
 methods: {
    // Click the Reset button to reset the login form
    resetLoginForm () {
      // console.log(this);
      this.$refs.loginFormRef.resetFields()
    },
    // Prevalidation of forms
    login () {
      this.$refs.loginFormRef.validate(async (valid) => {
        // console.log(valid)
        if (!valid) return
        const { data: res } = await this.$http.post('login', this.loginForm)
        console.log(res)
        if (res.meta.status !== 200) return this.$message.error('Logon Failure')
        this.$message.success('Login Successful!')
        // 1. Save token after successful login to sessionStorage on client side
        //  API interfaces in 1.1 projects other than login must be logged in before they can be accessed
        //  1.2 token should only take effect during the current site opening, so save the token to session store
        //  1.3 localStorage is a persistent storage mechanism, and sessionStorage is a storage mechanism during a session
        window.sessionStorage.setItem('token', res.data.token)
        // 2. Jump to the background home page by programmatic navigation, route address is/home
        this.$router.push('/home')
      })
    }
  }
The differences between localStorage and sessionStorage are as follows:
LocalStorage lifecycles are permanent and will persist unless localStorage information is actively cleaned up.
Session Storage is only valid for the current session and is cleared after closing the page or browser.
3. Route Navigation Guard controls access rights
If the user is not logged in but accesses a specific page directly through the URL, he or she needs to navigate back to the logon page.
router.beforeEach((to, from, next) => {
  // If you are visiting the login page
  if (to.path === '/login') return next()
  // If you are not visiting the login page, check for token first
  const tokenStr = window.sessionStorage.getItem('token')
  // If there is no token
  if (!tokenStr) return next('/login')
  // If there is a token
  next()
})
4. Exit Function Implementation Principle
Exit based on token is easy, just destroy the local token. This way, subsequent fun doesn't carry a token, and you must log in again to generate a new token before you can access the page
methods: {
    logout () {
      // Empty token
      window.sessionStorage.clear()
      // Jump to the login page
      this.$router.push('/login')
    }
  }
4. Submit login function code
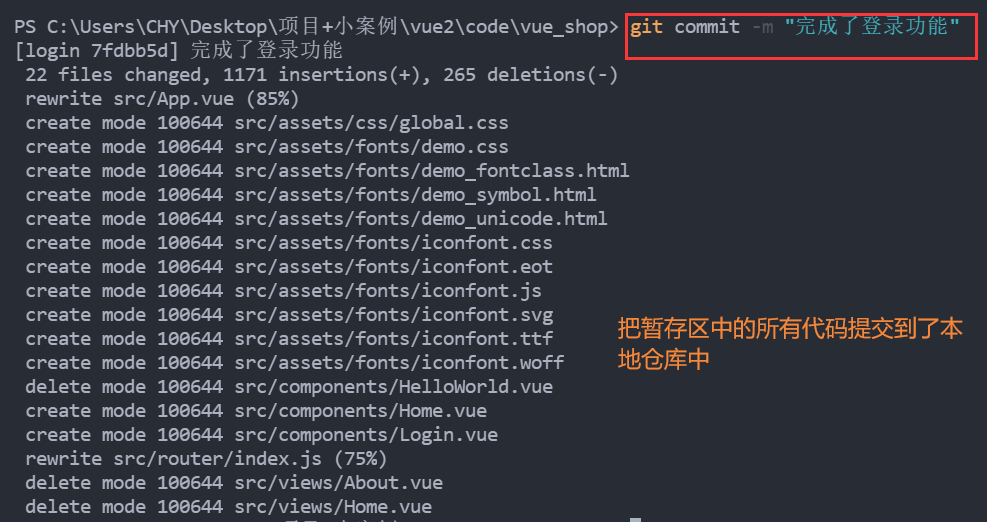
When you have finished writing the login function code, check the source code status in the current project:
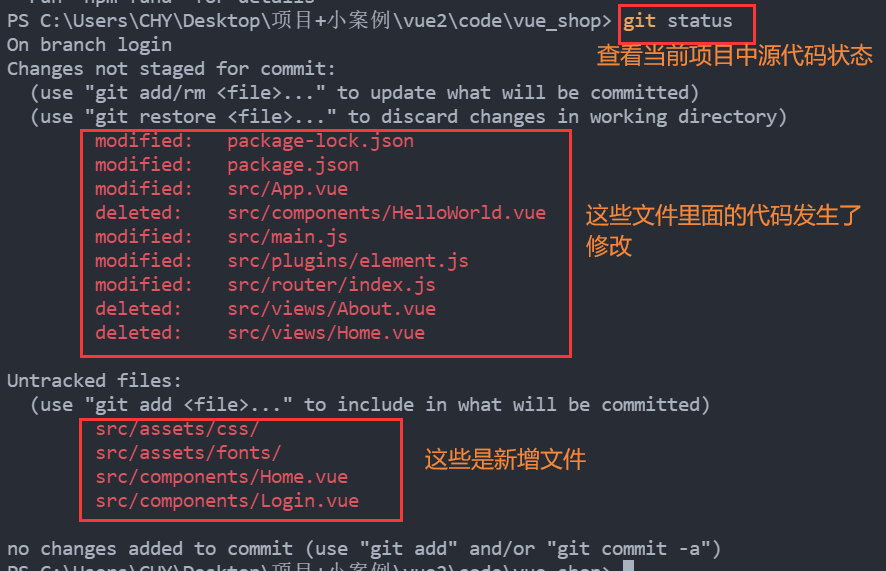
Enter gitt add. Then run git commit-m:
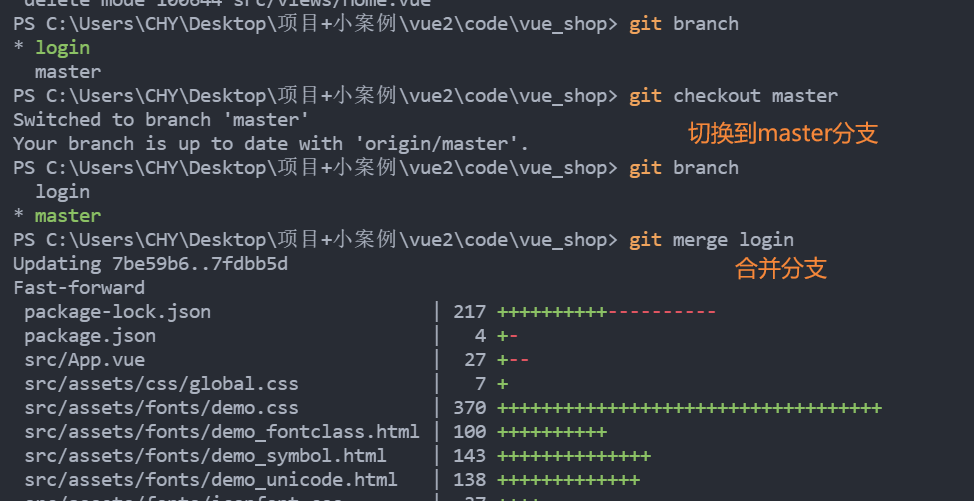
View branch:

Merge code from the login branch into the master main branch:
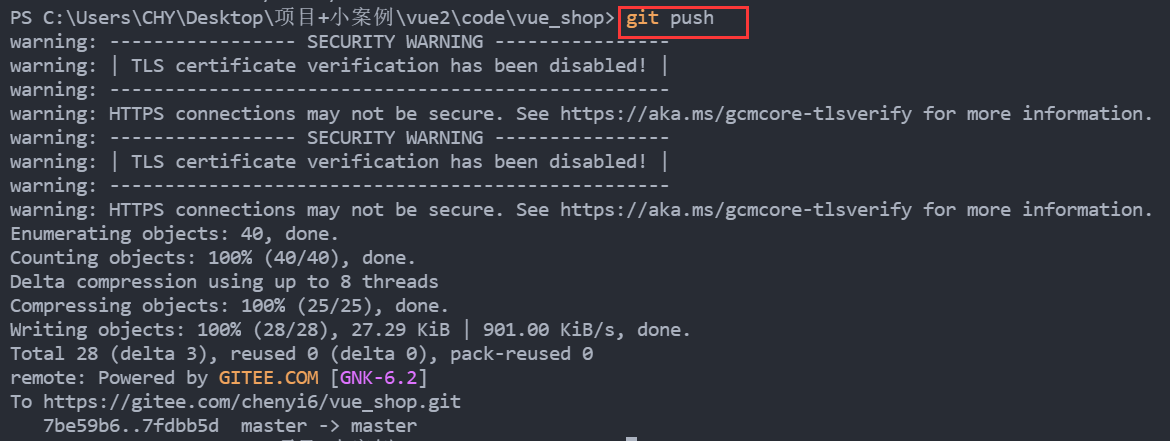
Push the local master branch into the cloud's code cloud:
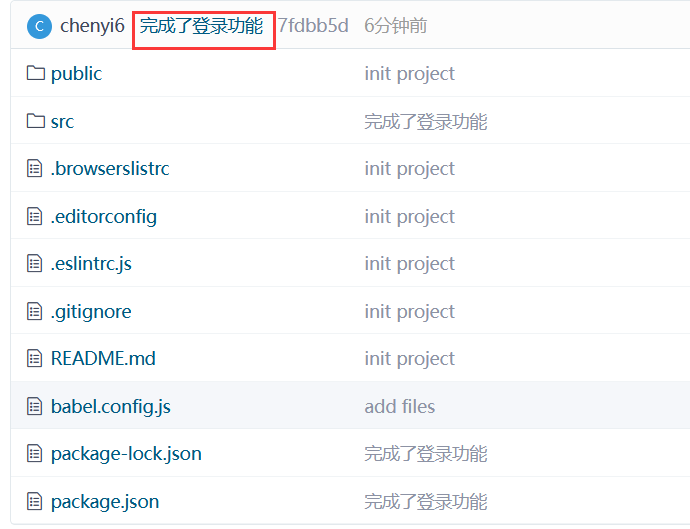
Refresh gitee page:
So what if you want to push your local login branch to the cloud for storage? (There is only one master default branch in the cloud)
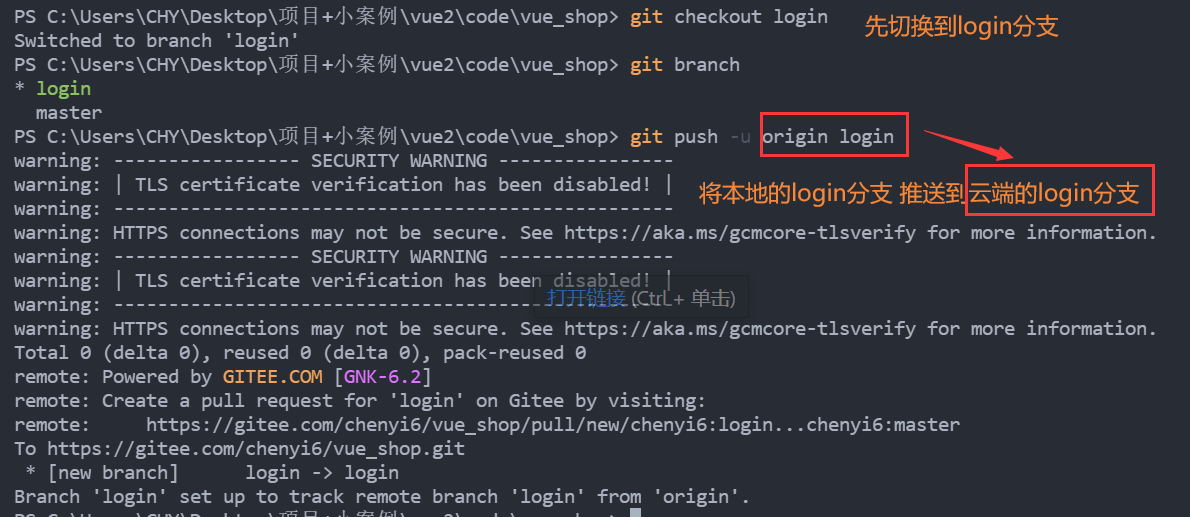 Refresh the gitee page and a login subbranch appears:
